Geely FC. Manual part - 89


  Главная      Geely     Geely FC. Workshop Manual year 2008


поиск по сайту            


содержание   ..   80  81  82  83  84  85  86  87  88  89  90  ..


Geely FC. Manual part - 89


Chair--Rear chair (separating type)

(f) Disassemble the clamp, then disconnect exterior cover of

rear row backrest with gasket.

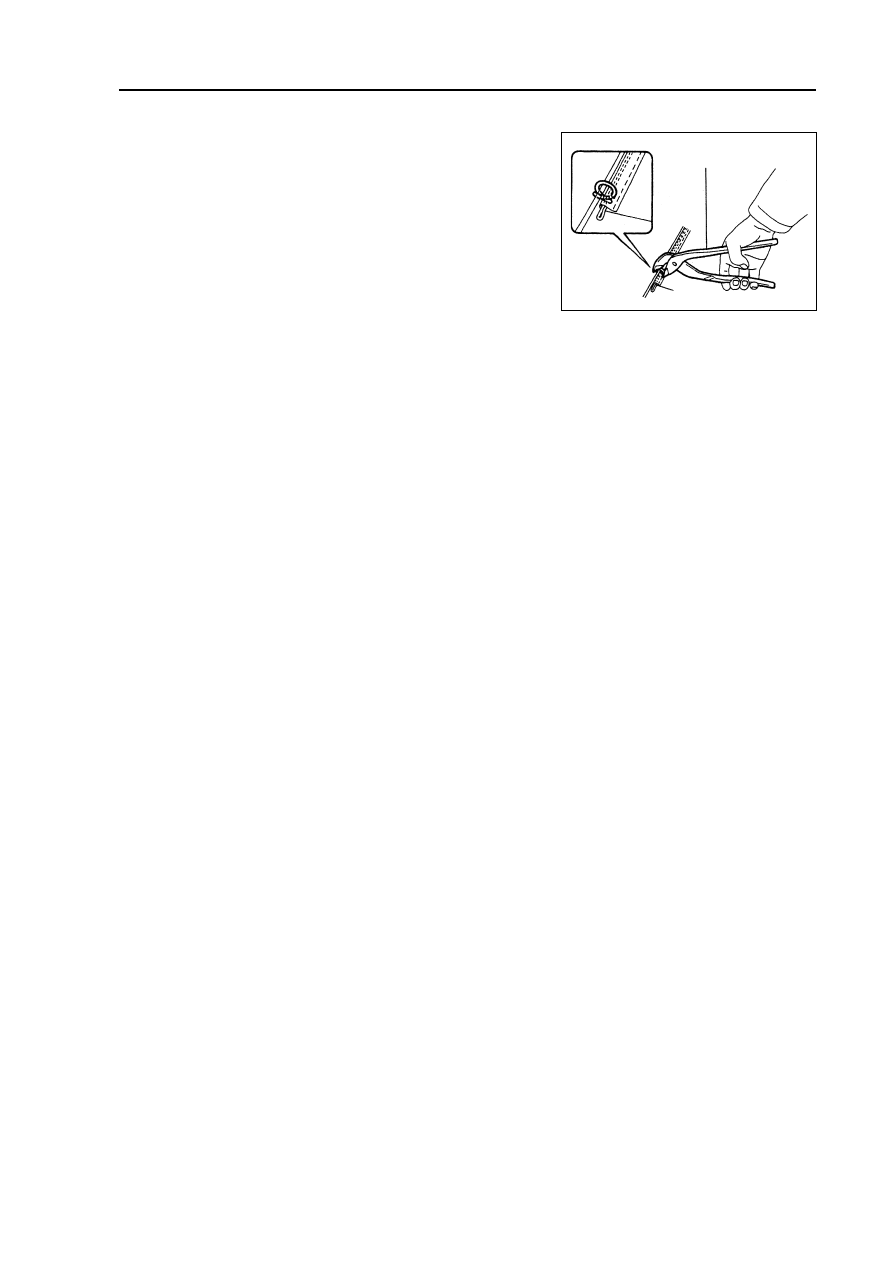
10. Disassemble exterior cover of rear row chair

cushion.

Disassemble the clamp, then disconnect exterior cover of cush-

ion with gasket.

11. Assemble exterior cover of rear row chair cushion.

Use new clamp to assemble exterior cover of rear row chair

Locking loop pliers

 353 

cushion in gasket.

Hint:

z

Do not damage or dirty exterior cover of cushion.

z

When assembling clamp, it is necessary to prevent exterior cover of cushion from crinkling.

12. Assemble exterior cover of rear row chair backrest (big).

Hint:

z

Do not damage or dirty exterior cover of cushion.

z

When assembling clamp, it is necessary to prevent exterior cover of cushion from crinkling.

13. Assemble exterior cover of rear row chair backrest (small).

Use new clamp to assemble exterior cover of rear row chair backrest in gasket.

Hint:

z

Do not damage or dirty exterior cover of cushion.

z

When assembling clamp, it is necessary to prevent exterior cover of cushion from crinkling.

14.Assemble rear backrest central hinge assembly.

Use two bolts to assemble central hinge assembly.

Torque: 20 N

⋅⋅⋅⋅⋅m

15. Assemble rear chair backrest side hinge assembly.

Use two bolts to assemble two side hinge assemblies.

16. Assemble rear row chair left backrest assembly [68010078]

Use the bolt to assemble left backrest assembly.

Torque: 8.0 N

⋅⋅⋅⋅⋅m

17. Assemble rear row chair right backrest assembly [68010079]

Use the bolt to assemble right backrest assembly.

Torque: 8.0 N

⋅⋅⋅⋅⋅m

18. Assemble rear row chair backrest assembly.

Use four bolts to assemble backrest assembly.

Torque: 18 N

⋅⋅⋅⋅⋅m

Rear chair (fixing type)

Overhaul

Hint: When assembling, please work by the sequence

opposite with disassembling sequence, but when it has

items that need to pay special attention, it will add special

specification.

1. Disassemble rear row chair cushion assembly.

Pull rear row chair cushion assembly upwards, then disas-

semble it.

Note: when disassembling, it is necessary to hold the

bracket at two sides of fixing clasp, then pull it upwards

to prevent it from distorting.

2. Disassemble rear row chair backrest assembly

[68010076]

Disassemble three bolts and rear row chair backrest assembly.

3. Disassemble rear chair head pillow assembly

[68010077]

4. Disassemble exterior cover of rear row chair

backrest.

(a) Disassemble head pillow bracket.

(b) Disassemble the clamp, then disconnect exterior cover of

rear row chair backrest with gasket.

5. Disassemble exterior cover of rear row chair cushion.

Disassemble the clamp, then disconnect exterior cover of cush-

ion with gasket.

6. Assemble exterior cover of rear row chair cushion.

Use new clamp to assemble exterior cover of rear row chair

cushion in gasket.

Hint: Do not damage or dirty exterior cover of cushion.

When assembling clamp, it is necessary to prevent exterior

cover of cushion from crinkling.

7. Assemble exterior cover of rear row chair backrest.

Use new clamp to assemble exterior cover of rear row chair

backrest in gasket.

Hint: Do not damage or dirty exterior cover of cushion.

When assembling clamp, it is necessary to prevent exterior

cover of cushion from crinkling.

8. Assemble rear row chair backrest assembly

[68010076]

Torque: 8.0 N·m

Chair--Rear chair (fixing type)

Locking loop pliers

Locking loop pliers

A:

100mm

 354 

Anti-stealing and door lock--Electric door lock control system

Anti-stealing and door lock

Electric door lock control system

Position of parts (only for reference)

Inspection on automobile

1. Basic inspection for electric door locker.

(a) Press middle control switch to locker closing side, and check the all doors should be locked; then

press middle control switch to locker opening side, and check all doors should be opened.

(b) Insert key in door locker and turn it anticlockwise, and check all doors should be locked; then turn the

key clockwise, and check all doors should be opened.

(c) Check the keeping protection function of the key.

Note: When checking the keeping protection function of the key, it is necessary to open elec-

tric window at the side of driver to prevent its function from losing and lock the key in

automobile.

(1) Insert key in ignition switch.

(2) Open the door, and press middle control switch on the door at the side of driver to locker closing

side, at this time, door locker could not close.

(3) Open the door, and press locker button on the door at the side of driver to locker closing side, at

this time, door locker could not close.

(4) After pressing locker button upwards for over two seconds, and locking driver door; when driver

door is closed and key is not used to lock, check whether all doors could open automatically.

 355 

Door control switch of electric
window main switch assembly
(Used for handle operation)

Door control switch of left front
door locker assembly
(Used for key operation)

Door control light switch

Left rear door locker
assembly

Right front door
locker assembly

Right rear door
locker assembly

Anti-stealing and door lock--Electric door lock control system

3. Check panel junction box assembly.

(a) Check 25A DOOR fuse.

(b) Check conformity relay.

(1) Disassemble F, G, H and I joint on instrument junction

box.

(2) Check the voltage and conduction of every terminal of

joint.

(d) Check security function:

(1) When closing all doors, open the driver window to operate door control switch out of automobile.

(2) Take down the key, open driver door, then close the door and lock (not use key). In this situation

above, check that door could not open locker even if door control switch (handle operation) is

pressed to locker opening side out of automobile.

(3) Take down the key, close and use the key to lock driver door. In this situation above, check that

door could not open locker even if door control switch (handle operation) is pressed to locker

opening side out of automobile.

(4) Take down the key, close and use remote control key to lock driver door. In this situation above,

check that door could not open locker even if door control switch (handle operation) is pressed to

locker closing side out of automobile (only applicable for the automobile equipping with remote

control door locker control system).

Hint:

z

In following situation, check whether security has been canceled.

z

Ignition switch is turned to ON.

z

Use key operation to open the driver door locker.

z

After door locker is pressed to opening side by hand, door control switch (handle

operation) is pressed to locker opening side.

z

Use remote control locker control to open the door (only applicable for the automobile

equipping with remote control door locker control system).

2. Electric window main switch assembly

Operate door control switch by hand to check its conduction.

 356 

Position of switch

Terminal connected by avometer

Regulated situation

LOCK

5-1 or 5-3

Conduction

UNLOCK

8-1 or 8-3


содержание   ..   80  81  82  83  84  85  86  87  88  89  90  ..