Geely Emgrand X7. Manual part - 246


  Главная      Geely     Geely Emgrand X7 - Manual


поиск по сайту            


содержание   ..   241  242  243  244  245  246  247  ..


Geely Emgrand X7. Manual part - 246


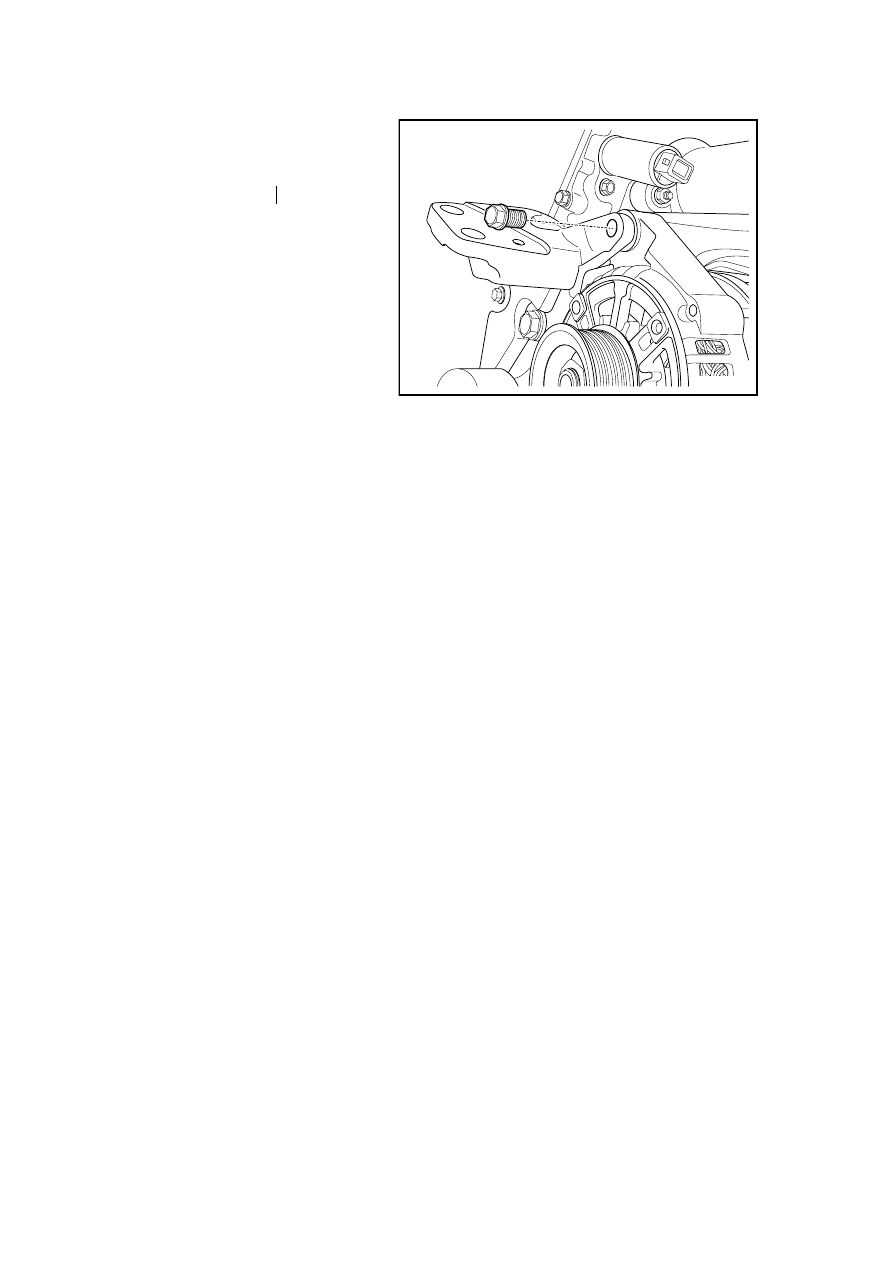
2.  Install connecting bolt of upper 

bracket of electric generator. 

Torque :25Nm(Metric) 18 . 
5lb-ft(English system)


3.  Install drive belt tensioner. 

4.  Install the drive belt. 

5.  Install and tighten the bolt for 

connecting the right engine 
suspension with the engine. 

Torque :45Nm(Metric) 33 . 
3lb-ft(English system) 

6.  Remove the supporting jack. 

7.  Install the generator assembly. 

8.  Install the plastic shield of 

engine. 

9.  Install battery negative cable    . 

NL02-0118b

983

2.13.8.8 Timing chain tensioner replacement 

Dismantlement Procedure 

Warning: Refer to "Warning on Battery Disconnection" in "Warning and Precautions"! 

1.  Disconnect the battery negative 

electrode cable. Refer to 2.11.8.1 
Battery Disconnection. 

2.  Dismantle the plastic shield of 

engine. Refer to 2.13.8.1 
Replacement of Plastic Shield of 
Engine. 

3.  Refer to 2.10.8.3 "Replacement 

of Ignition Coil" to dismantle the 
ignition coil. 

4.  Refer to 2.13.8.2 "Replacement 

of Cylinder Hood Cover" to 
dismantle the cylinder hood 
cover. 

5.  Rotate the crankshaft and make 

sure the cylinder No.1 is at TDC 
position. 

Note: Crankshaft timing mark is 
aligned with the timing chain cast 
scale line "0".
 

FE02-0135b

6.  As shown in the graphic, mark on 

the intake and exhaust sprocket 
timing with a marker and use a 
special tool GL301-022 to fix the 
timing chain and special tool 
GL301-018 to fix the camshaft. 

FE02-0136b

984

7.  Dismantle the  timing chain 

tensioner assembly. 

Note: At this time do not rotate the 
crankshaft in order to prevent the 
timing chain teeth rolling.
 

FE02-0037b

Installation Procedure: 

1.  Press timing chain tensioner pull 

rod to keep the tensioner into 
selft-lock condition as shown in 
figure. 

FE02-0138b

2.  Install the timing chain shroud 

tensioner and tighten the nuts. 

Torque :29N . m(Metric)21 . 
5lb-ft(English system) 

FE02-0039b

Up 

Enter

Pin 

Hook

985

3. Counterclockwise 

rotate 

crankshaft pulley to unlock 
self-locking device of tensioner 
and pop push rod. 

Note: the force should be uniform in 
the rotation process; otherwise, the 
timing chain may cause slip tooth! 

FE02-0140b

4.  Confirm the tensioner unlocked 

and the tensioner guide is firmly 
pressed by the handle. 

Note: If not properly unlocked, use a 
screwdriver to push tensioner in the 
opposite direction to unlock the 
guide. 

5.  Install the cylinder hood cover. 

6.  Install the ignition coil. 

7.  Install the engine hood. 

8.  Connect battery negative cable. 

FE02-0141b

986


содержание   ..   241  242  243  244  245  246  247  ..