Geely Emgrand X7. Manual part - 689


  Главная      Geely     Geely Emgrand X7 - Manual


поиск по сайту            


содержание   ..   684  685  686  687  688  689  690  ..


Geely Emgrand X7. Manual part - 689


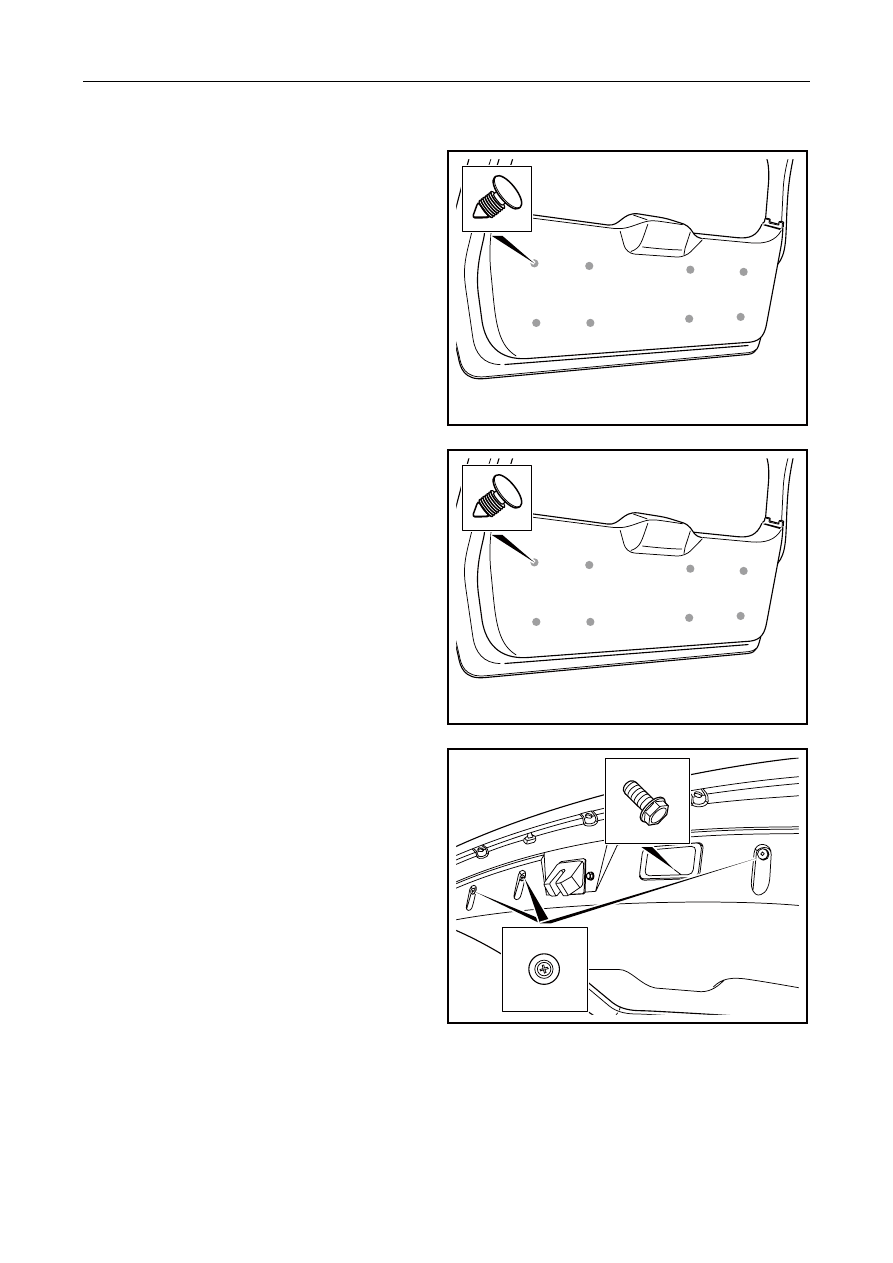
8.   Disengage 8 fixing buckles of the back door 

bottom trim panel. 

9.   Dismantle the internal trim panel of the back 

door. 


NL12-0175b

Installation Procedure: 

Notes: 

Fixed buckle must be replaced by new part. 

1.   Align 8 buckles of back door inner trimming 

plate with mounting holes, and press trimming 
plate buckle. 


NL12-0175b

2.    Install 1 fixing screw and 3 buckles under back 

door trimming plate. 


NL12-0174b


2755


3.    Align 2 buckles on left upper trimming plate of 

back door with mounting hole, press buckle of 
trimming plate. 

4.    Install fixing screw of left upper inner trimming 

plate of back door. 

5.   Install the top right internal trim panel on the 

back door in the same way. 


NL12-0173b

6.   Align 4 buckles of the middle and top internal 

trim panels of the back door to the installation 
holes and press the trim panel to engage the 
buckles. 


NL12-0172b


2756


12.9.1.11 Top cover interior trim plate replacement 

Dismantlement Procedure 

Warning! 

Warning: Refer to "Warning on Battery 
Disconnection" in "Warnings and Precautions". 

1.   Disconnect the battery negative cable. Refer to 

2.11.8.1 Battery Cable 
Disconnection/Connection Procedures

2.  For dismantling of 4-door doorsill inner 

trimming plate, refer to 

12.9.1.1 Replacement of 

left/ right front doorsill inner trimming plate 
assembly. 

3.    For dismantling of front column trimming plate, 

refer to 

12.9.1.2 Replacement of upper trimming 

plate assembly of left/right front vertical column

.

NL12-0176b

4.  For dismantling of middle column trimming 

plate, refer to 

12.9.1.3 Replacement of middle 

column trimming plate

5.   For removal of the rear pillar trim panel, see 

12.9.1.6 Replacement of Rear Pillar Upper Trim 
Panel

6.  For dismantlement of the in-vehicle reading 

lamp, see 

11.3.8.2 Replacement of Roof Lamp 

and Reading Lamps

7.  Dismantle 3 in-vehicle roof safety handles and 

front 2 sunvisors. 

8.    Dismantle the decoration covers on both sides of 

the front right safety handle. 

NL12-0177b


2757


9.   Remove the fixing bolt of the front right safety 

handle and the safety handle. The disassembly of 
the left rear and right rear safety handles is the 
same. 


NL12-0178b

10.  Dismantle trimming cover at fixing bolt of left 

sun shield. 


NL12-0179b

11.  Dismantle fixing screw of left sun shield, and 

then dismantle lower left sun shield. 


NL12-0180b


2758


содержание   ..   684  685  686  687  688  689  690  ..