содержание .. 684 685 686 687 688 ..
Geely Emgrand X7. Manual part - 687
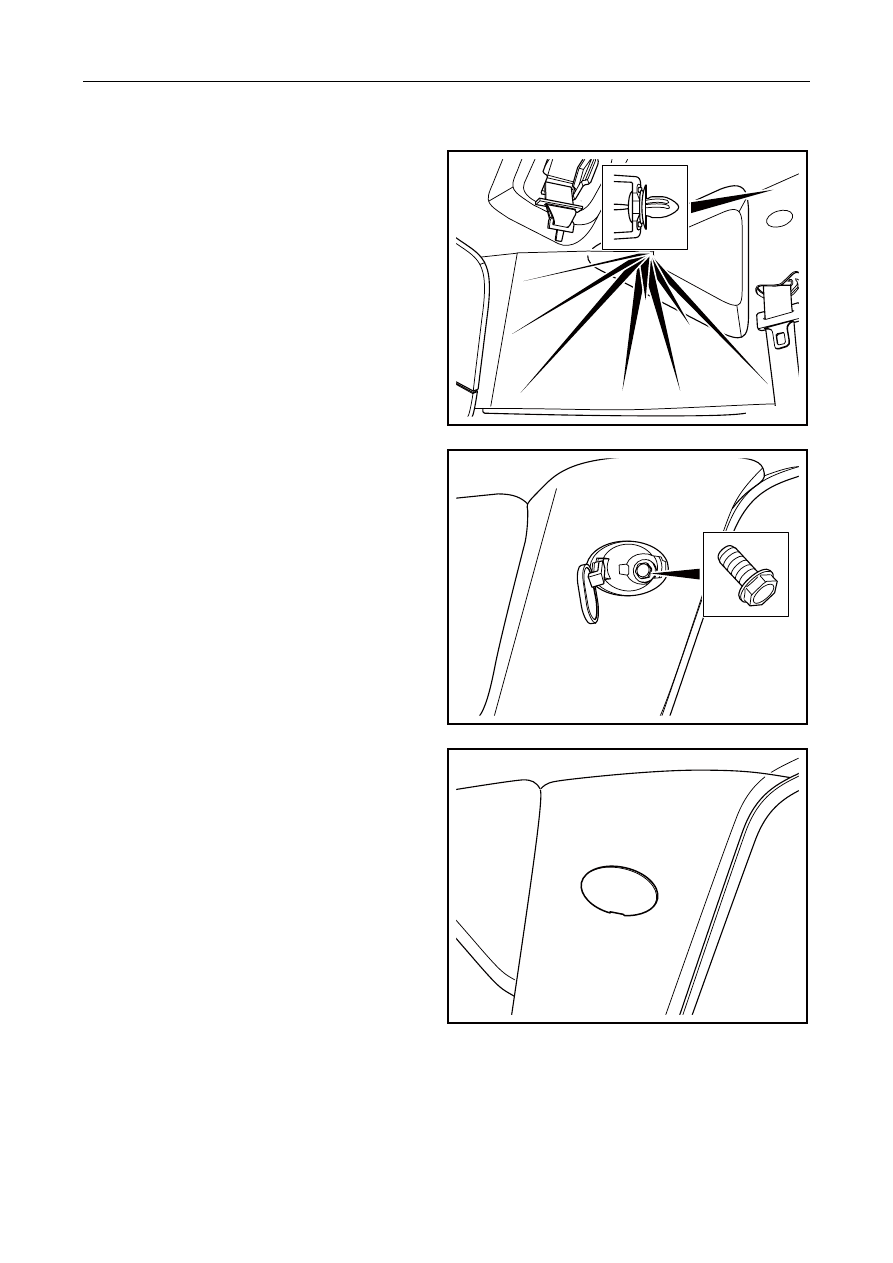
Installation Procedure:
1. Align 9 buckles at the back of rear column upper
trimming plate with mounting hole, and press
trimming plate fixing buckle.
NL12-0163b
2. Install hexagonal fixing bolt of rear column
upper trimming plate.
Torque: 8 Nm (Metric) 5.9 lb-ft (English system)
NL12-0164b
3. Install fixing bolt trimming cover of upper
trimming plate of rear column.
4. Install the rear column lower trim panel.
NL12-0151b
2747