Toyota RAV4 (2022 year). Manual in english - page 29
 

  Index      Toyota     Toyota RAV4 (2022 year). Manual in english


Search            copyright infringement  


Content      ..     27      28      29      30     ..


Toyota RAV4 (2022 year). Manual in english - page 29


469

5-14. Phone operation (Hands-free system for cellular phones)

5

Audio

International phone calls may not 

be made depending on the type of 
Bluetooth

®

 phone you have.

The list should group together 

consecutive entries with the same 

phone number and same call 

type. For example, two calls from 

John’s mobile would be displayed 

as follows: John (2)

Calls can be made using regis-
tered contacts which can be 
selected from a contact list. 
(

P.469)

1

Display the phone top 
screen. (

P.463)

2

Select “Favorites” and select 
the desired contact.

3

Select the desired number.

4

Check that the dialing screen 
is displayed.

Calls can be made by using 
contact data which is transferred 
from a registered cellular phone. 
(

P.481)

Up to 5000 contacts (maximum 
of 4 phone numbers, e-mail 
addresses and addresses per 
contact) can be registered in the 
contact list.

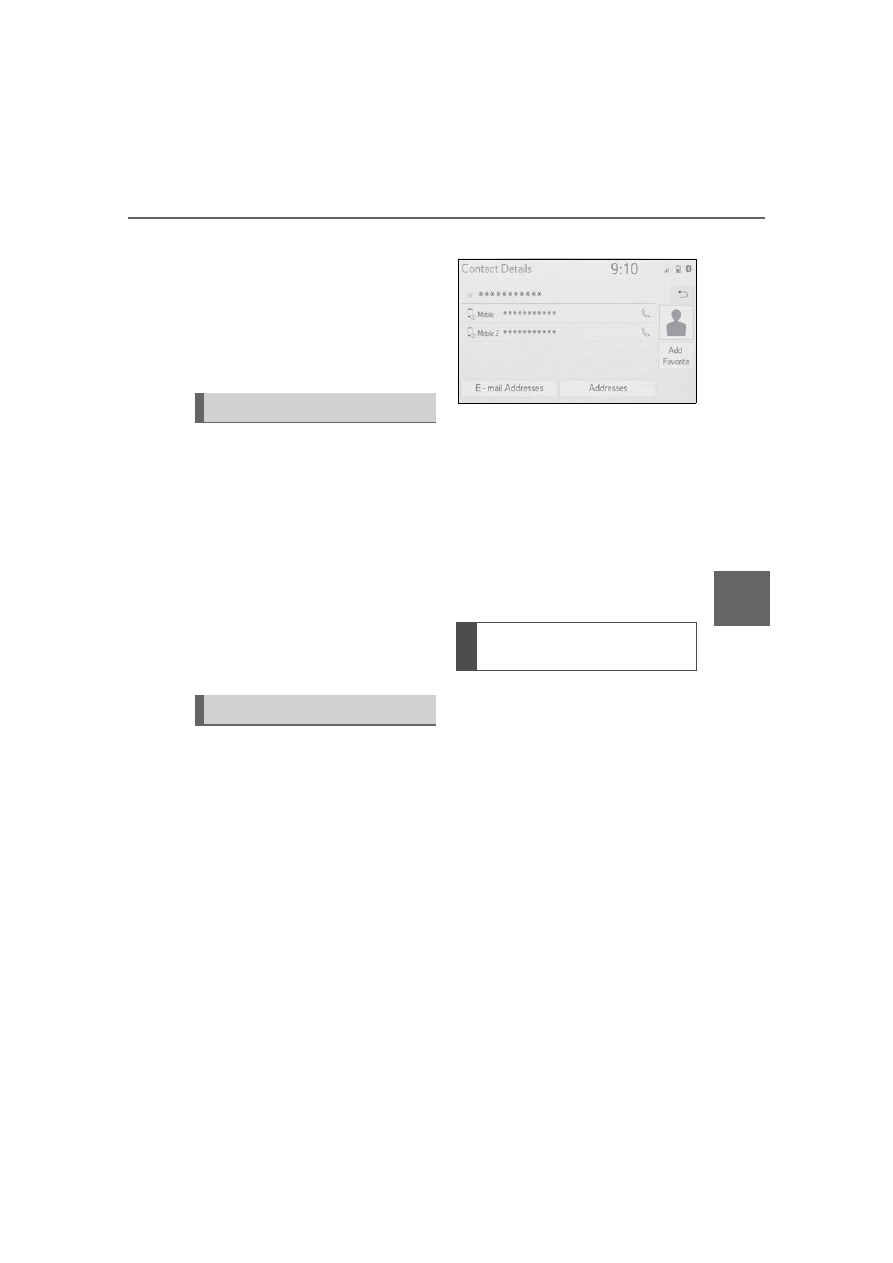
1

Display the phone top 
screen. (

P.463)

2

Select “Contacts” and select 
the desired contact.

3

Select the desired number.

“Add Favorite”/“Remove Favorite”: 

Select to register/remove the con-

tact in the favorites list. (

P.486)

“E-mail Addresses”: Select to dis-

play all registered e-mail addresses 

for the contact.
“Addresses”: Select to display all 

registered addresses for the con-

tact.

4

Check that the dialing screen 
is displayed.

For PBAP compatible 
Bluetooth

®

 phones when 

“Automatic Transfer” is set 
to on (

P.481)

Contacts are transferred auto-
matically.

By favorites list

By contacts list

When the contact list is 
empty

470

5-14. Phone operation (Hands-free system for cellular phones)

For PBAP compatible 
Bluetooth

®

 phones when 

“Automatic Transfer” is set 
to off (

P.481)

1

Select the desired item.

Select to always transfer all 
the contacts from a con-
nected cellular phone auto-
matically.

Select to transfer all the con-
tacts from a connected cellu-
lar phone only once.

Select to cancel transferring.

2

Check that a confirmation 
screen is displayed when the 
operation is complete.

For PBAP incompatible but 
OPP compatible Bluetooth

®


phones

1

Select the desired item.

Select to transfer the con-

tacts from the connected cel-
lular phone.
Transfer the contact data to 
the system using a 
Bluetooth

®

 phone.

Select to add a new contact 
manually.
Follow the steps in “Register-
ing a new contact to the con-
tacts list” from step 

2

(

P.484)

Select to cancel transferring.

If your cellular phone is neither 

PBAP nor OPP compatible, the 

contacts cannot be transferred 
using Bluetooth

®

. But the contacts 

can be transferred from USB 

device. (

P.484)

Depending on the type of 
Bluetooth

®

 phone:

• It may be necessary to perform 

additional steps on the phone 

when transferring contact data.

• The registered image in the con-

tact list may not transfer depend-
ing on the type of Bluetooth

®


phone connected.

1

Display the phone top 
screen. (

P.463)

2

Select “Keypad” and enter 
the phone number.

3

Select 

 or press the 


switch on the steering wheel.

4

Check that the dialing screen 
is displayed.

Depending on the type of 

A

B

C

A

By keypad

B

C

471

5-14. Phone operation (Hands-free system for cellular phones)

5

Audio

Bluetooth

®

 phone being con-

nected, it may be necessary to 

perform additional steps on the 

phone.

1

Display the home screen. 
(

P.380)

2

Select the desired contact.

3

Check that the dialing screen 
is displayed.

Registering a new contact

1

Select and hold the screen 
button to add a contact.

2

Select the desired contact.

3

Select the desired number.

If there is no contact in the con-

tacts list, the contacts cannot be 

registered at the home screen.

The contact cannot be registered 

at the home screen while driving.

1

Select “Answer” or press the 

 switch on the steering 

wheel to talk on the phone.

“Decline”: Select to refuse to 
receive the call.
To adjust the volume of a received 
call: Turn the “POWER VOLUME” 
knob, or use the volume control 
switch on the steering wheel.

The contact image picture can be 

displayed only when the vehicle is 

not moving.

During international phone calls, 

the other party’s name or number 

may not be displayed correctly 

depending on the type of 
Bluetooth

®

 phone you have.

The incoming call display mode 

can be set. (

P.480)

The ringtone that has been set in 

the sound settings screen can be 

heard when there is an incoming 

call. Depending on the type of 

By home screen

Receiving a call using 

the Bluetooth

®

hands-

free system

When a call is received, the 
following screen is dis-
played with a sound.

Incoming calls

472

5-14. Phone operation (Hands-free system for cellular phones)

Bluetooth

®

 phone, both the sys-

tem and Bluetooth

®

 phone may 

ring simultaneously when there is 

an incoming call. (

P.479)

Select to display the keypad 
to send tones. (

P.473)

Select to send tones. This 
button only appears when a 
number that contains a (w) is 
dialed in hands-free mode. 
(

P.473)

Select to adjust your voice 
volume that the other party 
hears from their speaker. 
(

P.473)

Select to mute your voice to 
the other party.

Select to change handset 
modes between hands-free 
and cellular phone.

Select to put a call on hold.

Talking on the 

Bluetooth

®

 hands-free 

system

While talking on the phone, 
the following screen is dis-
played. The operations out-
lined below can be 
performed on this screen.

Call screen operation

A

B

C

D

E

F

473

5-14. Phone operation (Hands-free system for cellular phones)

5

Audio

To cancel this function, select 
“Activate”.

Select to hang up the phone.

Changing from hands-free call to 

cellular phone call is not possible 

while driving.

Only when the vehicle is not mov-

ing, the contact image can be dis-

played.

When cellular phone call is 

changed to hands-free call, the 

hands-free screen will be dis-

played and its functions can be 

operated on the screen.

Changing between cellular phone 

call and hands-free call can be 

performed by operating the cellu-

lar phone directly.

Transferring methods and opera-

tions will be different depending 

on the type of cellular phone you 

have.

For the operation of the cellular 

phone, see the manual that 

comes with it.

By keypad

This operation cannot be per-
formed while driving.

1

Select “0-9”.

2

Enter the desired number.

By selecting “Release 
Tones”

“Release Tones” appear when a 
continuous tone signal(s) con-
taining a (w) is registered in the 
contact list.
This operation can be per-
formed while driving.

1

Select “Release Tones”.

A continuous tone signal is a char-

acter string that consists of num-

bers and the characters “p” or “w”. 

(e.g. 056133w0123p#1)

When the “p” pause tone is used, 

the tone data up until the next 

pause tone will be automatically 

sent after 2 seconds have 

elapsed. When the “w” pause tone 

is used, the tone data up until the 

next pause tone will be automati-

cally sent after a user operation is 

performed.

Release tones can be used when 

automated operation of a phone 

based service such as an answer-

ing machine or bank phone ser-

vice is desired. A phone number 

with continuous tone signals can 

be registered in the contact list.

Tone data after a “w” pause tone 

can be operated by voice com-

mand during a call.

1

Select “Transmit Volume”.

2

Select the desired level for 
the transmit volume.

3

Select 

 to display previ-

ous screen.

The sound quality of the voice 

heard from the other party’s 

speaker may be negatively 

impacted.

“Transmit Volume” is dimmed 

when mute is on.

When there are no calls on 
hold during a call: “Hold” is 
displayed. When selected, the 

Sending tones

G

Transmit volume setting

Switching calls while a 
call is in progress

474

5-14. Phone operation (Hands-free system for cellular phones)

current call is placed on hold.

When there is no current call, 
but there is a call on hold: 
“Activate” is displayed. When 
selected, the system switches 
to the call that was on hold.

When there is another call on 
hold during a call: “Swap 
Calls” is displayed. When 
selected, the current call is 
placed on hold, and the sys-
tem switches to the call that 
was on hold.

This function may not be available 

depending on the type of cellular 

phone.

When a call is interrupted by a 
third party while talking, the 
incoming screen is displayed.

1

Select “Answer” or press the 

 switch on the steering 

wheel to start talking with the 
other party.

To refuse to receive the call: 
Select “Decline”.

Each time “Swap Calls” is 
selected, the party who is on 
hold will be switched.

This function may not be available 

depending on the type of 
Bluetooth

®

 phone.

1

Display the phone top 
screen. (

P.463)

2

Select “Message”.

A confirmation message 
appears when the “Automatic 
Message Transfer” function is 
set to off (

P.487), select 

“Yes”.

3

Check that the message 
screen is displayed.

“Phone”: Select to change to phone 

mode.

The account name is dis-
played on the left side of 

Incoming call waiting

Bluetooth

®

 phone 

message function

Received messages can be 
forwarded from the con-
nected Bluetooth

®

 phone, 

enabling checking and 
replying using the system.
Depending on the type of 
Bluetooth

®

 phone con-

nected, received messages 
may not be transferred to 
the system.
If the phone does not sup-
port the message function, 
this function cannot be 
used. Even when the sup-
ported phone is used, reply 
function may not be used.

Displaying the message 
screen

475

5-14. Phone operation (Hands-free system for cellular phones)

5

Audio

screen.

Account names are the 
names of the accounts that 
exist on the currently con-
nected phone.

The following functions can 
be used on message function:

• Receiving a message 

(

P.475)

• Checking messages 

(

P.475)

• Replying to a message (dicta-

tion reply) (

P.476)

• Replying to a message (quick 

reply) (

P.477)

• Calling the message sender 

(

P.477)

• Message settings (

P.487)

When an e-mail/SMS/MMS is 
received, the incoming message 
screen pops up with sound and 
is ready to be operated on the 
screen.

Select to check the message.

Select to not open the mes-
sage.

Select to call the message 
sender.

Depending on the type of 
Bluetooth

®

 phone used for receiv-

ing messages, or its registration 

status with the system, some 

information may not be displayed.

The pop-up screen is separately 

available for incoming e-mail and 

SMS/MMS messages under the 

following conditions:

E-mail:
• “Incoming E-mail Display” is set to 

“Full Screen”. (

P.480)

• “E-mail Notification Pop-up” is set 

to on. (

P.480)

SMS/MMS:
• “Incoming SMS/MMS Display” is 

set to “Full Screen”. (

P.480)

• “SMS/MMS Notification Pop-up” is 

set to on. (

P.480)

Depending on the type of 
Bluetooth

®

 phone being con-

nected, E-Mail function cannot be 
used via Bluetooth

®

.

1

Display the message screen. 
(

P.474)

2

Select a desired account 
name.

3

Select the desired message 
from the list.

4

Check that the message is 
displayed.

Receiving a message

A

B

C

Checking received mes-
sages

476

5-14. Phone operation (Hands-free system for cellular phones)

Select to call the message 
sender.

Select to have messages 
read out.
To cancel this function, select 
“Stop”.
When “Automatic Message 
Readout” is set to on, mes-
sages will be automatically 
read out. (

P.487)

Select to display the previous 
or next message.

This function can be chosen 
the method to reply mes-
sage with “Dictation” or 
“Quick Message”.

Reading a text message is not 

available while driving.

Depending on the type of 
Bluetooth

®

 phone being con-

nected, this function cannot be 

used.

Depending on the type of 
Bluetooth

®

 phone being con-

nected, it may be necessary to 

perform additional steps on the 

phone.

Messages are displayed in the 
appropriate connected Bluetooth

®


phone’s registered mail address 

folder. Select the desired folder to 

be displayed.

Only received messages on the 
connected Bluetooth

®

 phone can 

be displayed.

The text of the message is not dis-

played while driving.

Turn the “POWER VOLUME” 

knob, or use the volume control 

switch on the steering wheel to 

adjust the message read out vol-

ume.

“Subject:” field is not shown on 

SMS case.

E-mail only: Select “Mark Unread” 

or “Mark Read” to mark mail 

unread or read on the message 

screen.

This function is available when 

“Update Message Read Status on 

Phone” is set to on. (

P.487)

*

: If equipped

1

Display the message screen. 
(

P.474)

2

Select the desired message 
from the list.

3

Select “Reply”.

4

Select “Dictation”.

5

When the “Say Your Mes-
sage” screen is displayed, 
speak message that you 
want to send.

6

Select “Send” to send mes-
sage.

“Cancel”: Select to cancel sending 

the message.
“Retry”: Select to retry speaking 

message that you want to send.

While the message is being 
sent, a sending message 
screen is displayed.

7

Check that a confirmation 
screen is displayed when the 
operation is complete.

If an error message is dis-
played, follow the guidance 
on the screen to try again.

A

B

C

D

Replying to a message 
(dictation reply)

*

477

5-14. Phone operation (Hands-free system for cellular phones)

5

Audio

15 messages have already 
been stored.

1

Display the message screen. 
(

P.474)

2

Select the desired message 
from the list.

3

Select “Reply”.

4

Select “Quick Message”.

5

Select the desired message.

: Select to edit the message. 

(

P.477)

6

Select “Send”.

“Cancel”: Select to cancel sending 

the message.

While the message is being 
sent, a sending message 
screen is displayed.

7

Check that a confirmation 
screen is displayed when the 
operation is complete.

If an error message is dis-
played, follow the guidance 
on the screen to try again.

Depending on the type of 
Bluetooth

®

phone, reply function is 

not available.

Editing quick reply mes-
sages

This operation cannot be per-
formed while driving.

1

Select 

 corresponding to 

the desired message to edit.

2

Select “OK” when editing is 
completed.

To reset the edited quick reply 

messages, select “Default”.

Calls can be made to an e-
mail/SMS/MMS message 
sender’s phone number.
This operation can be per-
formed while driving.

Calling from e-
mail/SMS/MMS message 
display

1

Display the message screen. 
(

P.474)

2

Select the desired message.

3

Select 

, or press the 


switch on the steering wheel.

If there are 2 or more phone 
numbers, select the desired 
number.

4

Check that the dialing screen 
is displayed.

Calling from a number 
within a message

Calls can be made to a number 
identified in a message’s text 
area.
This operation cannot be per-
formed while driving.

1

Display the message screen. 
(

P.474)

2

Select the desired message.

Replying to a message 
(quick reply)

Calling the message 
sender

478

5-14. Phone operation (Hands-free system for cellular phones)

3

Select the text area.

Identified phone numbers 
contained in the message are 
displayed in blue text.

4

Select the desired number.

5

Check that the dialing screen 
is displayed.

A series of numbers may be rec-

ognized as a phone number. Addi-

tionally, some phone numbers 

may not be recognized, such as 

those for other countries.

Calling from the incoming 
message screen

For detail, refer to “Receiving a 
message”. (

P.475)

479

5-15. Phone settings

5

Audio

5-15.Phone settings

1

Press the “MENU” button.

2

Select “Setup”.

3

Select “Phone”.

4

Select the desired item to be 
set.

Connecting a Bluetooth

®


device and editing the 
Bluetooth

®

 device informa-

tion (

P.391, 394)

Sound settings

*

 (

P.479)

Notifications/display set-
tings

*

 (

P.480)

Contact/call history settings

*


(

P.481)

Message settings

*

 (

P.487)

*

: This operation cannot be per-

formed while driving.

The call and ringtone volume 
can be adjusted. A ringtone can 
be selected.

1

Display the phone settings 
screen. (

P.479)

2

Select “Sounds”.

3

Select the desired item to be 
set.

Select to set the desired ring-
tone.

Select “-” or “+” to adjust the 
ringtone volume.

Select “-” or “+” to adjust the 
default volume of the other 
party’s voice.

Setup

Displaying the phone set-
tings screen

Phone settings screen

A

B

C

D

Sounds settings screen

E

A

B

C

480

5-15. Phone settings

Select to set the desired 
incoming e-mail tone.

Select to set the desired 
incoming SMS/MMS tone.

Select “-” or “+” to adjust the 
incoming SMS/MMS tone 
volume.

Select “-” or “+” to adjust the 
incoming e-mail tone volume.

Select “-” or “+” to adjust the 
message readout volume.

Select to reset all setup 
items.

Depending on the type of 
Bluetooth

®

 phone, certain func-

tions may not be available.

1

Display the phone settings 
screen. (

P.479)

2

Select “Notifications/Display”.

3

Select the desired item to be 
set.

Select to change the incom-
ing call display.

“Full Screen”: When a call is 
received, the incoming call screen 
is displayed and can be operated 
on the screen.
“Drop-down”: A message is dis-
played at the top of the screen.

Select to set the SMS/MMS 
notification pop-up on/off.

Select to change the incom-
ing SMS/MMS display.
“Full Screen”: When an 
SMS/MMS message is 
received, the incoming 
SMS/MMS display screen is 
displayed and can be oper-
ated on the screen.
“Drop-down”: When an 
SMS/MMS message is 
received, a message is dis-
played at the top of the 

Notifications/display set-
tings screen

D

E

F

G

H

I

A

B

C

481

5-15. Phone settings

5

Audio

screen.

Select to set the e-mail notifi-
cation pop-up on/off.

Select to change the incom-
ing e-mail display.
“Full Screen”: When an e-
mail is received, the incoming 
e-mail display screen is dis-
played and can be operated 
on the screen.
“Drop-down”: When an e-
mail is received, a message 
is displayed at the top of the 
screen.

Select to set display of the 
contact/history transfer com-
pletion message on/off.

The phone top screen can be 
set to be displayed on the 
multi-information display or 
system screen.

*

Select to reset all setup 
items.

*

: If equipped

Depending on the type of 
Bluetooth

®

 phone, these functions 

may not be available.

Contacts can be transferred 
from a Bluetooth

®

 phone to this 

system. Contacts and favorites 
can be added, edited and 
deleted. Also, the call history 
can be deleted.

1

Display the phone settings 
screen. (

P.479)

2

Select “Contacts/Call His-
tory”.

3

Select the desired item to be 
set.

For PBAP compatible 
Bluetooth

®

 phones: Select to 

change the contact/history 
transfer settings. (

P.482)

Select to update contacts 
from the connected device. 
(

P.483)

Select to sort contacts by the 
first name or last name field.

Select to add contacts to the 
favorites list. (

P.485)

Select to delete favorites 
from the favorites list. 
(

P.486)

Select to clear the call his-

Contacts/Call history set-
tings screen

D

E

F

G

H

A

B

C

D

E

F

482

5-15. Phone settings

tory.

*

Select to add new contacts to 
the contact list.

*

 (

P.484)

Select to edit contacts in the 
contact list.

*

 (

P.485)

Select to delete contacts 
from the contact list.

*


(

P.485)

Select to set the voice tags. 
(

P.486)

Select to reset all setup 
items.

*

: For PBAP compatible Bluetooth

®


phones, this function is available 
when “Automatic Transfer” is set 
to off. (

P.482)

Depending on the type of 
Bluetooth

®

 phone, certain func-

tions may not be available.

Contact data is managed inde-

pendently for every registered 

phone. When one phone is con-

nected, another phone’s regis-

tered data cannot be read.

The automatic contact/history 
function is available for PBAP 
compatible Bluetooth

®

 phones 

only.

1

Select “Automatic Transfer”.

2

Select the desired item to be 
set.

Select to set automatic con-
tact/history transfer on/off. 
When set to on, the phone’s 
contact data and history are 
automatically transferred.

Select to update contacts 
from the connected phone. 
(

P.482)

Select to set the transferred 
contact image display on/off.
Only when the vehicle is not 
moving, the contact image 
can be displayed.

Select to reset all setup 
items.

Updating contacts from 
phone

1

Select “Update Now”.

Contacts are transferred auto-
matically.

2

Check that a confirmation 
screen is displayed when the 
operation is complete.

This operation may be unnec-
essary depending on the type 
of Bluetooth

®

 phone.

If another Bluetooth

®

 device 

Setting automatic con-
tact/history transfer

G

H

I

J

K

A

B

C

D

483

5-15. Phone settings

5

Audio

is connected when transfer-
ring contact data, depending 
on the phone, the connected 
Bluetooth

®

 device may need 

to be disconnected.

Depending on the type of 
Bluetooth

®

 phone being con-

nected, it may be necessary 
to perform additional steps on 
the phone.

Updating the contacts in a 
different way (from the call 
history screen)

*

1

Display the phone top 
screen. (

P.463)

2

Select “History” and select a 
contact not yet registered in 
the contact list.

3

Select “Update Contact”.

4

Select the desired contact.

5

Select a phone type for the 
phone number.

*

: For PBAP compatible Bluetooth

®


phones, this function is available 
when “Automatic Transfer” is set 
to off. (

P.482)

When an Android Auto connection 

is established, this function will be 
unavailable.

*

*

: This function is not made avail-

able in some countries or areas.

When the contact is not regis-
tered

1

Select “Transfer Contacts 
from Device”.

2

Select “From Phone 
(Bluetooth)”.

3

Transfer the contact data to 
the system using a 
Bluetooth

®

 phone.

This operation may be unnec-
essary depending on the type 
of Bluetooth

®

 phone.

To cancel this function, select 
“Cancel”.

4

Check that a confirmation 
screen is displayed when the 
operation is complete.

When the contact is regis-
tered

1

Select “Transfer Contacts 
from Device”.

2

Select “From Phone 
(Bluetooth)”.

3

Select “Replace Contacts” or 
“Add Contact”.

“Replace Contacts”: Select to trans-

fer the contact from the connected 

cellular phone and replace the cur-

rent one.
“Add Contact”: Select to transfer 

the desired contact data from the 

connected cellular phone to add to 

the current one.

Transfer contacts from 
device

From phone (OPP compati-
ble Bluetooth

®

 phones only)

484

5-15. Phone settings

4

Transfer the contact data to 
the system using a 
Bluetooth

®

 phone.

This operation may be unnec-
essary depending on the type 
of Bluetooth

®

 phone.

To cancel this function, select 
“Cancel”.

5

Check that a confirmation 
screen is displayed when the 
operation is complete.

Backed-up contact data 
(“vCard” formatted) can be 
transferred from USB device or 
Bluetooth

®

 phone to this sys-

tem.

1

Connect a USB device. 
(

P.418)

2

Select “Transfer Contacts 
from Device”.

3

Select “From USB”.

4

Select “USB 1” or “USB 2” 
when the multiple USB 
devices are connected. If a 
USB device is connected, 
skip this procedure.

5

Select “Replace Contacts” or 
“Add Contact”. If the contact 
is already registered, skip 
this procedure.

“Replace Contacts”: Select to trans-

fer the contact from the connected 
USB device or Bluetooth

®

 phone 

and replace the current one.
“Add Contact”: Select to transfer 

the desired contact data from the 

connected USB device or 
Bluetooth

®

 phone to add to the cur-

rent one.

6

Select a desired file from 
vCard file list.

7

Check that a confirmation 
screen is displayed when the 
operation is complete.

Depending on the type of 
Bluetooth

®

 phone used and num-

ber of files, it may take time to dis-

play vCard file lists and download 

contacts.

Downloading may not complete 

correctly in the following cases:

• If the engine switch is turned off 

during downloading.

• If the USB device or Bluetooth

®


phone is removed before down-

loading is complete.

New contact data can be regis-
tered.
Up to 4 numbers per person can 
be registered. For PBAP com-
patible Bluetooth

®

 phones, this 

function is available when “Auto-
matic Transfer” is set to off. 
(

P.481)

1

Select “New Contact”.

2

Enter the name and select 
“OK”.

3

Enter the phone number and 
select “OK”.

4

Select the phone type for the 
phone number.

From USB device

Registering a new contact 
to the contacts list


Content      ..     27      28      29      30     ..