Toyota FJ Cruiser (GSJ 10, 15 series). Instruction - part 209


  Index      Toyota     Toyota FJ Cruiser (model GSJ 10, 15 series) - service repair instruction 2007 year


Search            copyright infringement  


Content   ..  207  208  209  210   ..


Toyota FJ Cruiser (GSJ 10, 15 series). Instruction - part 209


ET–66

EXTERIOR  –  OUTSIDE MOULDING

ET

(d) Disengage the 2 claws and remove the front 

bumper cover.

4.

REMOVE REAR BUMPER COVER (See page 

ET-17

)

5.

REMOVE FRONT FENDER MUDGUARD (See page 

ET-83

)

6.

REMOVE QUARTER PANEL MUDGUARD (See page 

ET-83

)

7.

REMOVE FRONT BUMPER SIDE SUPPORT (See 
page 

ET-5

)

8.

REMOVE SIDE STEP SUB-ASSEMBLY (w/ Side Step) 
(See page 

ET-86

)

9.

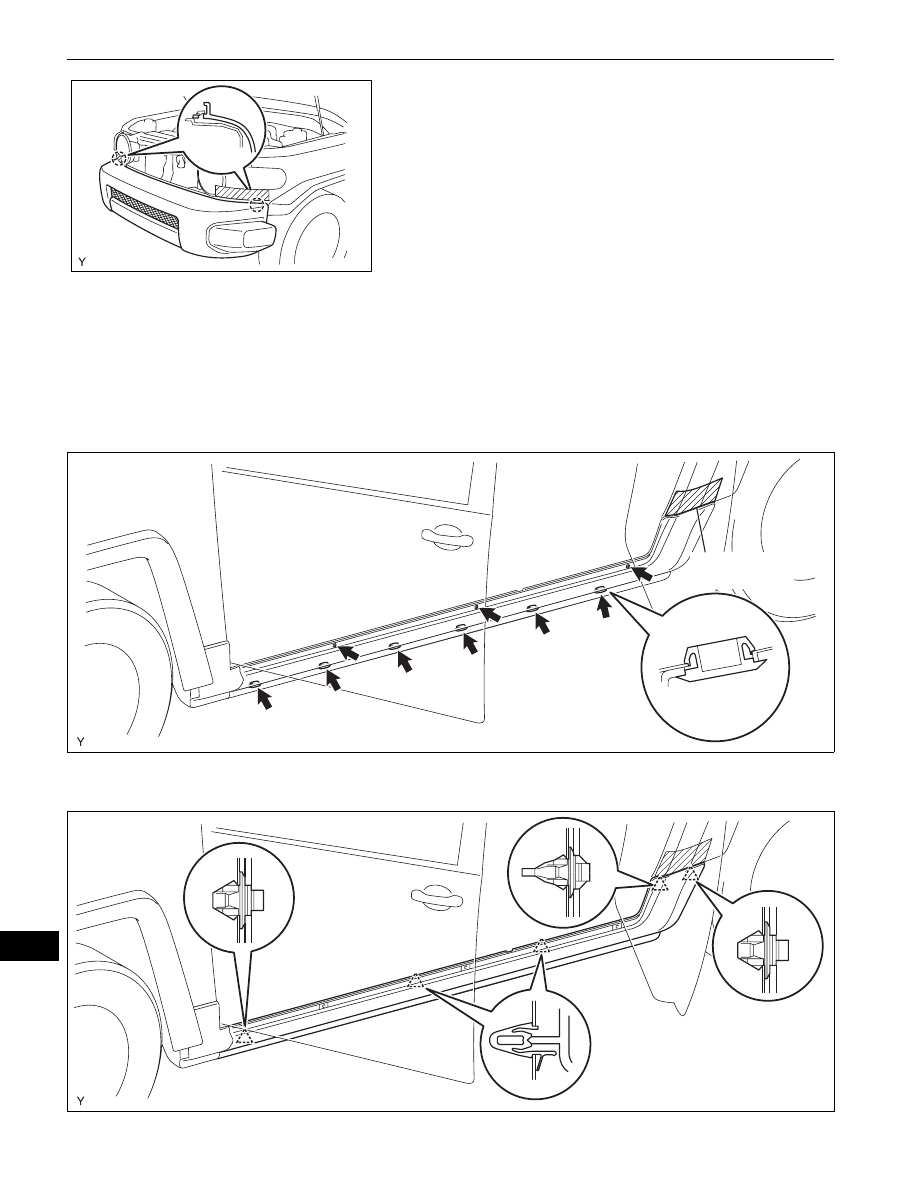
REMOVE ROCKER PANEL MOULDING
(a) Apply protective tape to the quarter panel in the 

area around the rocker panel moulding.

(b) Using a clip remover, remove the 6 retainers.
(c) Remove the 3 screws.

(d) Disengage the 5 clips and remove the rocker panel 

moulding.

B134733

Protective Tape

B135051E01

B135052

EXTERIOR  –  OUTSIDE MOULDING

ET–67

ET

(e) Turn the clips 90

° clockwise and remove them.

10. REMOVE FRONT FENDER MOULDING SUB-

ASSEMBLY
(a) Apply protective tape to the fender panel in the area 

around the front fender moulding.

(b) Using a clip remover, remove the 2 clips.
(c) Remove the 5 screws.

(d) Disengage the 2 clips and remove the front fender 

moulding.

90°

B135058E01

Protective Tape

B135055E01

B135056

B135057

ET–68

EXTERIOR  –  OUTSIDE MOULDING

ET

(e) Turn the clips 90

° clockwise and remove them.

11. REMOVE QUARTER OUTSIDE MOULDING SUB-

ASSEMBLY
(a) Apply protective tape to the quarter panel in the 

area around the quarter outside moulding.

(b) Using a clip remover, remove the clip.
(c) Remove the 8 screws.

(d) Disengage the 2 clips and remove the quarter 

outside moulding.

90°

B135058E01

Protective Tape

B135061E01

B135062

B135063

EXTERIOR  –  OUTSIDE MOULDING

ET–69

ET

(e) Turn the clips 90

° clockwise and remove them.

12. REMOVE FRONT DOOR OUTSIDE MOULDING SUB-

ASSEMBLY
(a) Apply protective tape to the front door panel in the 

area around the front door outside moulding.

(b) Remove the 2 nuts.

(c) Using a moulding remover, disengage the 9 clips 

and remove the front door outside moulding.

(d) Turn the clips 90

° clockwise and remove them.

90°

B135058E01

Protective Tape

B135016E01

Moulding Remover

B135017E01

90°

B135058E01


Content   ..  207  208  209  210   ..