Subaru Legacy (2023 year). Manual in english - page 16
 

  Index      Manuals     Subaru Legacy (2023 year). Manual in english


Search            copyright infringement  


Content      ..     14      15      16      17     ..


Subaru Legacy (2023 year). Manual in english - page 16


(246,1)

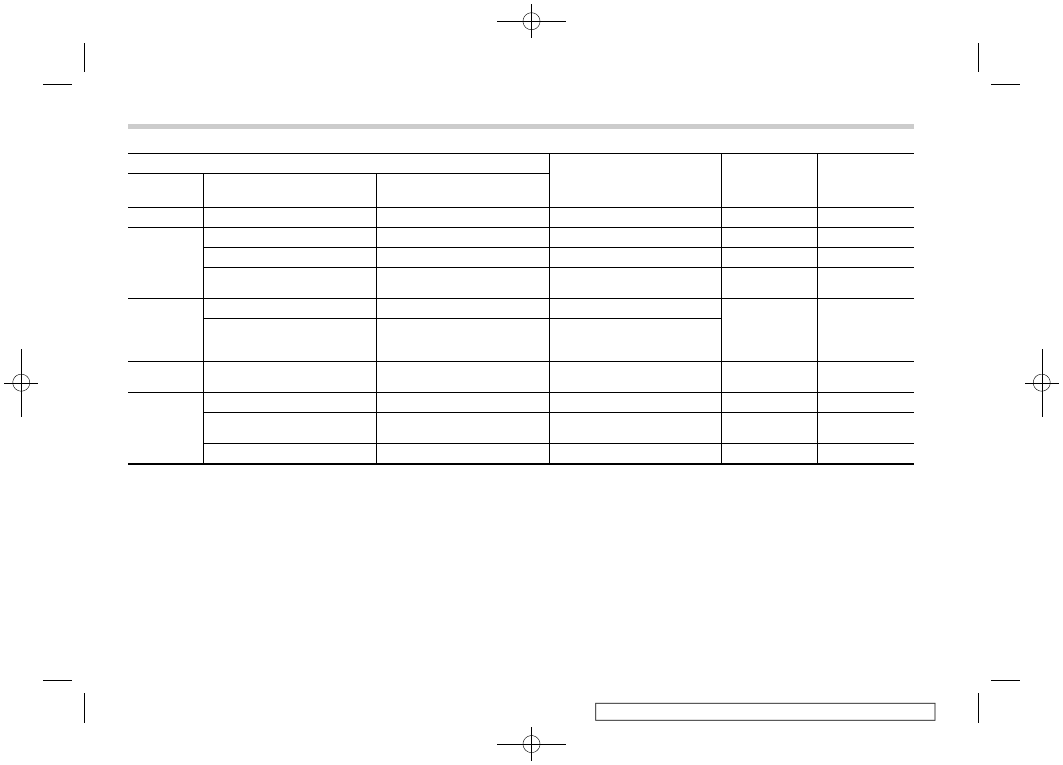
Item

Available settings

Page reference

for the vehicle

system opera-

tion

Page reference

for the setting

procedure

1st menu

2nd menu

3rd menu

X-MODE*

1

ON/OFF

383

249

Vehicle Con-
trol

Vehicle Dynamics Control

ON/OFF

381

249

Auto Vehicle Hold (AVH)

ON/OFF

391

249

Cruise Control Acceleration

Eco/Comfort/Standard/Dy-
namic

*

2

Driving As-
sistance

Pre-Collision Braking

Setting ON/Setting OFF

*

2

Lane Departure

All Functions/Lane Departure
Prevention Function Only/
Warning Buzzer Only/OFF

Auto Start
Stop

ON/OFF

397

249

More Set-
tings

Warning Volume

Min/Mid/Max

*

2

249

Units

km, km/h, Liter/
Miles, MPH, Gallon

175 and 203

249

Auto Start Stop

ON/OFF

397

249

*1: For Outback/Subaru Outback Wilderness
*2: For details about EyeSight system, refer to the Owner’s Manual supplement for the EyeSight system.

Center Information Display (CID)

244

(247,1)

!

Auto Start Stop ON/OFF icon

1)

Auto Start Stop indicator (green)

Touching “

” deactivates the Auto Start

Stop system and turns off the Auto Start
Stop indicator (green) on the screen.
Touching “

” again activates the Auto

Start Stop system and turns on the Auto
Start Stop indicator (green). Refer to “To
turn on/off the Auto Start Stop system”

P397.

!

Auto Vehicle Hold icon

To turn the Auto Vehicle Hold function on
and off, touch the “Auto Vehicle Hold” icon.
When the Auto Vehicle Hold function is
turned off, the Auto Vehicle Hold indicator
light will turn off.
Refer to “To turn on/off the Auto Vehicle
Hold function”

P391.

NOTE

.

When the Auto Vehicle Hold function

is on, the Auto Vehicle Hold indicator
light on the combination meter turns
on. The “Auto Vehicle Hold” indicator
also turns on at the same time.

.

When the Auto Vehicle Hold function

is off, the Auto Vehicle Hold indicator
light on the combination meter turns
off. The “Auto Vehicle Hold” indicator

also turns off at the same time.

!

Vehicle Dynamics Control icon

To turn the Vehicle Dynamics Control on
and off, touch the “Vehicle Dynamics
Control” icon.
When the Vehicle Dynamics Control sys-
tem is turned off during engine operation,
the Vehicle Dynamics Control OFF indica-
tor light on the combination meter illumi-
nates. Refer to “To Turn On/Off the Vehicle
Dynamics Control System”

P381.

The Vehicle Dynamics Control system will
be deactivated. When “Vehicle Dynamics
Control” icon has been touched again to
reactivate the Vehicle Dynamics Control
system, the Vehicle Dynamics Control
OFF indicator light turns off.

– CONTINUED –

Center Information Display (CID)

245

3

Instruments

and

Controls

(248,1)

NOTE

.

When Vehicle Dynamics Control is

on, the Vehicle Dynamics Control OFF
indicator light on the combination me-
ter turns off. The “Vehicle Dynamics
Control” indicator turns on at the same
time.

.

When Vehicle Dynamics Control is

off, the Vehicle Dynamics Control OFF
indicator light on the combination me-
ter turns on. The “Vehicle Dynamics
Control” indicator turns off at the same
time.

!

Display Off

Activation of the display off mode:

1. Touch “Display Off”.

Deactivation of the display off mode:

1. Touch the display or push the tem-
perature control button.

2. Press and hold the volume knob to turn
the screen back on.

!

Vehicle setting icons

1. Press

(HOME).

2. Touch

(Car Settings).

Center Information Display (CID)

246

(249,1)

The setting adjustments to the following items can be manually changed to meet your personal requirements.

Item

Available settings

Page reference

for the vehicle

system opera-

tion

Page reference

for the setting

procedure

1st menu

2nd menu

3rd menu

Car Settings

EyeSight

Pre-Collision Braking

Setting ON/Setting OFF

*

1

Lane Departure

All Functions/Lane Departure
Prevention Function Only/
Warning Buzzer Only/OFF

*

1

Cruise Control Acceleration

Eco/Comfort/Standard/Dy-
namic

*

1

Lead Vehicle Acquisition
Sound

ON/OFF

*

1

249

Lead Vehicle Moving Monitor

ON/OFF

*

1

249

Select Drive on Left/Drive on
Right

Right Lane/Left Lane

*

1

EyeSight Assist Monitor

Red Indicator

ON/OFF

*

1

Yellow Indicator

ON/OFF

Green Indicator

ON/OFF

Keyless Entry System

Hazard Warning Flasher

ON/OFF

138

249

Audible Signal

ON/OFF

132 and 137

249

Defogger

15 minutes/Continuous

270

249

Interior Light

10 seconds/20 seconds/30
seconds/OFF

325

249

– CONTINUED –

Center Information Display (CID)

247

3

Instruments

and

Controls

(250,1)

Item

Available settings

Page reference

for the vehicle

system opera-

tion

Page reference

for the setting

procedure

1st menu

2nd menu

3rd menu

Car Settings

Auto Light Sensor

Light Sensitivity

Min/Low/Mid/Max

257

249

Wiper Link

ON/OFF

258

249

Welcome Lighting

Approaching Time Set

30 seconds/60 seconds/90
seconds/OFF

258

249

Leaving Time Set

30 seconds/60 seconds/90
seconds/OFF

249

One-Touch Lane Changer

ON/OFF

266

249

Auto Door Lock/Unlock

Auto Door Lock

Vehicle Speed/Shift into or out
of PARK/OFF

141

249

Auto Door Unlock

Ignition OFF/Driver Door Open/
Shift into or out of PARK/OFF

249

Rear Seat Reminder

ON/OFF

58

249

Vehicle Dynamics Control

ON/OFF

381

249

Auto Vehicle Hold (AVH)

ON/OFF

391

249

Auto Start Stop

ON/OFF

397

249

X-MODE*

2

ON/OFF

383

249

Warning Volume

Min/Mid/Max

*

1

249

Units

km, km/h, Liter/
Miles, MPH, Gallon

175 and 203

249

*1: For details about EyeSight system, refer to the Owner’s Manual supplement for the EyeSight system.
*2: If equipped

NOTE

Touch

to display the explanation of the items.

Center Information Display (CID)

248

(251,1)

!

How to select items on the screen

!

ON/OFF setting

Example

Touch the changing menu and select ON

or OFF

.

!

Selecting

Example

Touch the preferred setting.

!

How to set items on the screen

!

Brightness/Contrast

Set and adjust the brightness and contrast
of the center information display.

NOTE

“Brightness” can only be adjusted
when “Brightness Dial” is off. Refer to
“General settings”

P239.

1. Touch

(HOME).

2.

?

(Settings)

3.

?

“General”

4.

?

“Display”

5.

?

“Brightness/Contrast”

6. Drag

to adjust the brightness and

contrast.

– CONTINUED –

Center Information Display (CID)

249

3

Instruments

and

Controls

(252,1)

Touch “Default” to revert to the factory
setting.

!

Birthday List

If a birthday or anniversary is approaching,
a message will be displayed when the
ignition switch is turned to the “ON”
position. This function can be set to on or
off by the “Reminder Screen”. For details,
refer to “General settings”

P239.

1. Touch

(HOME).

2.

?

(Settings)

3.

?

“General”

4.

?

“Birthday List”

5.

?

“Add”

6. Enter the name.
7.

?

“Next”

8. Enter the date.
9.

?

“OK”

NOTE

A maximum of 5 birthdays can be
stored.

!

Anniversary List

The procedure for setting an anniversary is
the same as “Birthday List”

P250, except

that in step 4 “Anniversary List” is selected.

!

Driving Statistics

1)

Steering angle

2)

Vehicle posture

3)

Running condition

This screen displays the driving status of
the vehicle and the operation status of the
functions. For functions that are operating,
the indicator will illuminate or flash.

Center Information Display (CID)

250

(253,1)

NOTE

.

The vehicle posture indication may

differ from the actual vehicle posture.

.

F o r O u t b a c k / S u b a r u O u t b a c k

Wilderness, when X-MODE has been
turned on, the screen of the center
information display will be changed to
the X-MODE screen.

.

The vehicle posture angle varies not

only due to the angle of the road
surface, but also due to the vehicle tilt
caused by the occupants, cargo, and
acceleration or deceleration.

!

Maintenance

Maintenance reminders can be set.

Engine Oil setting:

1. Touch

(Maintenance).

2.

?

(Engine Oil)

3. Select “Notification Date” or “Notifica-
tion Distance” of the reminder.
4.

?

“Set”

5.

?

Oil Filter setting:

The setting procedure is the same as
“Engine Oil” setting, but touch the “Oil
Filter” item in step 2.

Tires setting:

The setting procedure is the same as
“Engine Oil” setting, but touch the “Tires”
item in step 2.

Maintenance Schedule setting:

The setting procedure is the same as
“Engine Oil” setting, but touch the “Main-
tenance Schedule” item in step 2.

NOTE

.

Touch “Reset” to reset each setting.

.

Touch “Update” to revert to the

default value.

Center Information Display (CID)

251

3

Instruments

and

Controls

(254,1)

3-9. Clock

For models with a genuine SUBARU
navigation and/or audio system, the clock
can be adjusted using either auto mode or
manual mode.

&

Setting the Clock Manually

!

Dual 7.0-inch display models

1. Turn the ignition switch to the “ON”
position.

2. Press

(HOME).

3. Touch

(Settings).

4.

?

“General”

5.

?

“Clock”

6.

?

“Time Setting”

7.

?

“Manual”

8.

?

or

9.

?

“OK”

NOTE

The clock setting screen can also be
displayed by touching the clock on the
status bar.

!

11.6-inch display models

1. Turn the ignition switch to the “ON”
position.

2. Touch

(HOME).

3.

?

(Settings)

4.

?

“General”

5.

?

“Clock”

6.

?

“Time Setting”

Clock

252

(255,1)

7.

?

“Manual”

8.

?

or

9.

?

“OK”

NOTE

The clock setting screen can also be
displayed by touching the clock on the
status bar.

&

Setting the Clock Automati-
cally

!

Dual 7.0-inch display models

1. Turn the ignition switch to the “ON”
position.

2. Press

(HOME).

3. Touch

(Settings).

4.

?

“General”

5.

?

“Clock”

6.

?

“Time Setting”

7.

?

“Sync With Phone”

The clock will be set and adjusted auto-
matically when a smartphone is connected
via Bluetooth

®

for transferring phonebook

data.
1. Register the smartphone to the audio
system. For details, refer to “Bluetooth
SETTINGS” in the supplemental Owner’s
Manual for the audio/navigation system.
2. Transfer phonebook data to the sys-
tem. For details, refer to “Bluetooth SET-
TINGS” in the supplemental Owner’s
Manual for the audio/navigation system.
The clock will be adjusted automatically.

NOTE

Depending on the model of smart-
phone, the settings of the connected

– CONTINUED –

Clock

253

3

Instruments

and

Controls

(256,1)

smartphone may need to be changed.
(ex: For iOS or other models, notifica-
tion settings may need to be activated.)
For details, check the instructions on
connecting smartphones.

!

11.6-inch display models

1. Turn the ignition switch to the “ON”
position.

2. Touch

(HOME).

3.

?

(Settings)

4.

?

“General”

5.

?

“Clock”

6.

?

“Time Setting”

7. Models with navigation system:

?

“AUTO”

Models with SUBARU STARLINK Safety
and Security without navigation system:

?

“AUTO”

Models without SUBARU STARLINK
Safety and Security or navigation system:

?

“Sync With Phone”

!

Models with navigation system

The clock will be set automatically where a
GPS signal is available.

!

Models with SUBARU STARLINK
Safety and Security without na-
vigation system

The clock will be set automatically where a
DCM (Data Communication Module in
vehicle cellular connection) signal is avail-
able.

!

M o d e l s w i t h o u t S U B A R U
STARLINK Safety and Security
or navigation system

The clock will be set and adjusted auto-
matically when a smartphone is connected
via Bluetooth

®

for transferring phonebook

data.
1. Register the smartphone to the audio
system. For details, refer to “Bluetooth
SETTINGS” in the supplemental Owner’s
Manual for the audio/navigation system.
2. Transfer phonebook data to the sys-
tem. For details, refer to “Bluetooth SET-

TINGS” in the supplemental Owner’s
Manual for the audio/navigation system.
The clock will be adjusted automatically.

NOTE

Depending on the model of smart-
phone, the settings of the connected
smartphone may need to be changed.
(ex: For iOS or other models, notifica-
tion settings may need to be activated.)
For details, check the instructions on
connecting smartphones.

Clock

254

(257,1)

3-10. Valet Mode

When leaving your vehicle with a valet
service, such as at a hotel or restaurant,
you can set the valet mode, which disables
the navigation, audio, and vehicle setting
functions. The display cannot be operated,
preventing the leakage of personal infor-
mation. The valet mode is designed to help
prevent personal information leaks.

&

Activation of Valet Mode

11.6-inch display models

Dual 7.0-inch display models

1. Touch “Valet Mode”.

11.6-inch display models

Dual 7.0-inch display models

2. Enter the passcode.
3. Touch “OK”.

&

Deactivation of Valet Mode

11.6-inch display models

– CONTINUED –

Valet Mode

255

3

Instruments

and

Controls

(258,1)

Dual 7.0-inch display models

1. Touch “Valet Mode” or select OFF
(11.6-inch display models).
Touch “Deactivate” (dual 7.0-inch display
models).
2. Enter the passcode.
3. Touch “OK”.

NOTE

If you enter the passcode incorrectly
three times in a row when setting or
canceling valet mode, a message
prompting you to contact a SUBARU
dealer will be displayed, but it is still
possible to enter the passcode even
after the fourth attempt.
If you have forgotten your passcode,
consult your SUBARU dealer.

3-11. Light Control Switch

CAUTION

.

Use of any lights for a long period

of time while the engine is not
running can cause the battery to
discharge.

.

Before leaving the vehicle, make

sure that the light control switch
is turned to the off position. If the
vehicle is left unattended for a
long time with the light control
switch set to a position other
than the off position, the battery
may be discharged.

Models with “keyless access with
push-button start system”:

The light control switch operates when the
push-button ignition switch is in the “ACC”
or “ON” position.
Regardless of the position of the light
control switch, the illuminated lights are
turned off when the push-button ignition
switch is turned off.

Models without “keyless access with
push-button start system”:

The light control switch operates when the
key is inserted in the ignition switch.

Regardless of the position of the light
control switch, the illuminated lights are
turned off when the key is removed from
the ignition switch.

NOTE

The light control switch can be oper-
ated (except auto on/off headlights),
even under the following conditions.

.

When the push-button ignition

switch is turned off (models with “key-
less access with push-button start
system”)

.

When the key is not inserted into the

ignition switch (models without “key-
less access with push-button start
system”)

If the driver’s door is opened while the
headlights are illuminated under such
conditions, a chirp sound will inform
the driver that the lights are illuminated.

Light Control Switch

256

(259,1)

&

Headlights

Except for Canada models

For Canada models

To turn on the headlights, turn the knob on
the end of the light control switch.

“ ” position (except for Canada mod-
els):

The headlights are all off.
Only when the following conditions are
fulfilled, instrument panel illumination,
headlights, parking lights, front side mar-
ker lights, rear side marker lights, tail lights
and license plate lights are automatically
on or off depending on the level of the
ambient light.

.

The engine is running.

.

The parking brake is fully released.

.

The select lever is in a position other

than the “P” position.

“OFF” position (for Canada models):

The headlights are all off.*

1

*

2

*1: When the light switch is switched to the

“OFF” position while the vehicle is stopped,
the lights turn off. Then the light switch will
automatically return to the “AUTO” position.

*2: The headlights will automatically change to

the AUTO mode when the following condi-
tions are met:

.

The engine is running.

.

The parking brake is fully released.

.

The select lever is in a position other than the

“P” position.

” position:

Instrument panel illumination, headlights,

parking lights, front side marker lights, rear
side marker lights, tail lights and license
plate lights are on.

” position:

Instrument panel illumination, parking
lights, front side marker lights, rear side
marker lights, tail lights and license plate
lights are on.

” position: Auto on/off headlights

When the ignition switch is in the “ON”
position, the instrument panel illumination,
headlights, parking lights, front side mar-
ker lights, rear side marker lights, tail lights
and license plate lights are

automatically

on or off

depending on the level of the

ambient light.

NOTE

.

If the light control switch is in the

“AUTO” position and the headlights do
not turn on when it becomes dark
outside, turn the light switch to the

” position. If this happens, have

your vehicle inspected by your
SUBARU dealer as soon as possible.

.

The light sensitivity of the auto on/

off headlights can be changed by
operating the center information dis-
play. For details, refer to “Car settings”

P226 (11.6-inch display models) or

“Vehicle setting icons”

P246 (dual

– CONTINUED –

Light Control Switch

257

3

Instruments

and

Controls

(260,1)

7.0-inch display models). Also, the
setting can be changed by a SUBARU
dealer. Consult your SUBARU dealer
for details.

!

Auto-on/off wiper-linked headlights

While the light control switch is in the
“AUTO” position, the headlights will auto-
matically turn on when the windshield
wipers operate several times. The head-
lights will automatically turn off approxi-
mately 1 minute after the wiper stops.

The ON/OFF setting of this function can be
changed by operating the center informa-
tion display. For details, refer to “Car
settings”

P226 (11.6-inch display mod-

els) or “Vehicle setting icons”

P246 (dual

7.0-inch display models). Also, the setting
can be changed by a SUBARU dealer.
Consult your SUBARU dealer for details.

!

Welcome lighting function

The welcome lighting function turns on the
low beam headlight for smooth approach-
ing to or exiting from the vehicle at night or
in a dark place.

The function is activated while all of the
following conditions are met.

.

The light control switch is in the “AUTO”

position.

.

It is dark enough to turn on the auto on/

off headlights.

NOTE

If the engine is turned off after turning
off the light switch, the welcome light-
ing function may not operate (for
Canada models).

!

When approaching

While the welcome lighting function is
activated, the low beam headlights will
automatically illuminate when unlocking
the doors (for Outback/Subaru Outback
Wilderness, including the rear gate) by
using the remote keyless entry system.

The low beam headlights will remain
illuminated for 30 seconds*

1

and then turn

off. However, if any of the following
operations is done, the low beam head-
lights will turn off.

.

The doors are locked.

.

The light control switch is turned to a

position other than “AUTO”.

.

The ignition switch is turned to the “ON”

position.

!

When exiting

While the welcome lighting function is
activated, the low beam headlights will
remain illuminated even when either of the

following operation is done.

.

The push-button ignition switch is

turned to the “OFF” status (models with
“keyless access with push-button start
system”).

.

The key is pulled out from the ignition

switch (models without “keyless access
with push-button start system”).

The low beam headlights will turn off under
any of the following conditions.

.

3 minutes have passed since the low

beam headlights were illuminated by the
welcome lighting function.

.

30 seconds have passed since the door

is opened and closed.*

1

.

The light control switch is turned to a

position other than “AUTO”.

.

The locking procedure is performed

twice. When performing the unlocking
procedure after performing the locking
procedure, perform the locking procedure
twice again.

*1: The setting for the period of time in which the

low beam headlights remain on by the
welcome lighting function can be changed
by a SUBARU dealer. Contact your
SUBARU dealer for details. Also, you can
change the setting by operating the center
information display. For details, refer to “Car
settings”

P226 (11.6-inch display models)

Light Control Switch

258

(261,1)

or “Vehicle setting icons”

P246 (dual 7.0-

inch display models).

!

Sensor for the auto on/off head-
lights

The sensor is on the instrument panel as
shown in the illustration.

CAUTION

If any object is placed on or near the
sensor, the sensor may not detect
the level of the ambient light cor-
rectly and the auto on/off headlights
may not operate properly.

&

High/Low Beam Change
(Dimmer)

1)

High beam

2)

Low beam

While the light control switch is in the “

or “

” position in a dark place, the

headlights will turn on.
When the headlights are on high beam, the
high beam indicator light “

” on the

combination meter is also on.

NOTE

While the light control switch is in the

” position and the lever is the high

beam position, the high beam assist
function will be on standby.

&

Headlight Flasher

CAUTION

Do not hold the lever in the flashing
position for more than just a few
seconds.

To flash the headlights, pull the lever
toward you and then release it. The high
beam will stay on for as long as you hold
the lever. The headlight flasher works even
though the lighting switch is in the off
position.

When the headlights are on high beam, the
high beam indicator light “

” on the

combination meter also illuminates.

– CONTINUED –

Light Control Switch

259

3

Instruments

and

Controls


Content      ..     14      15      16      17     ..