Subaru Impreza 3 / Impreza WRX / Impreza WRX STI. Manual - part 751
EB-15
Front Hood
EXTERIOR BODY PANELS
2. Front Hood
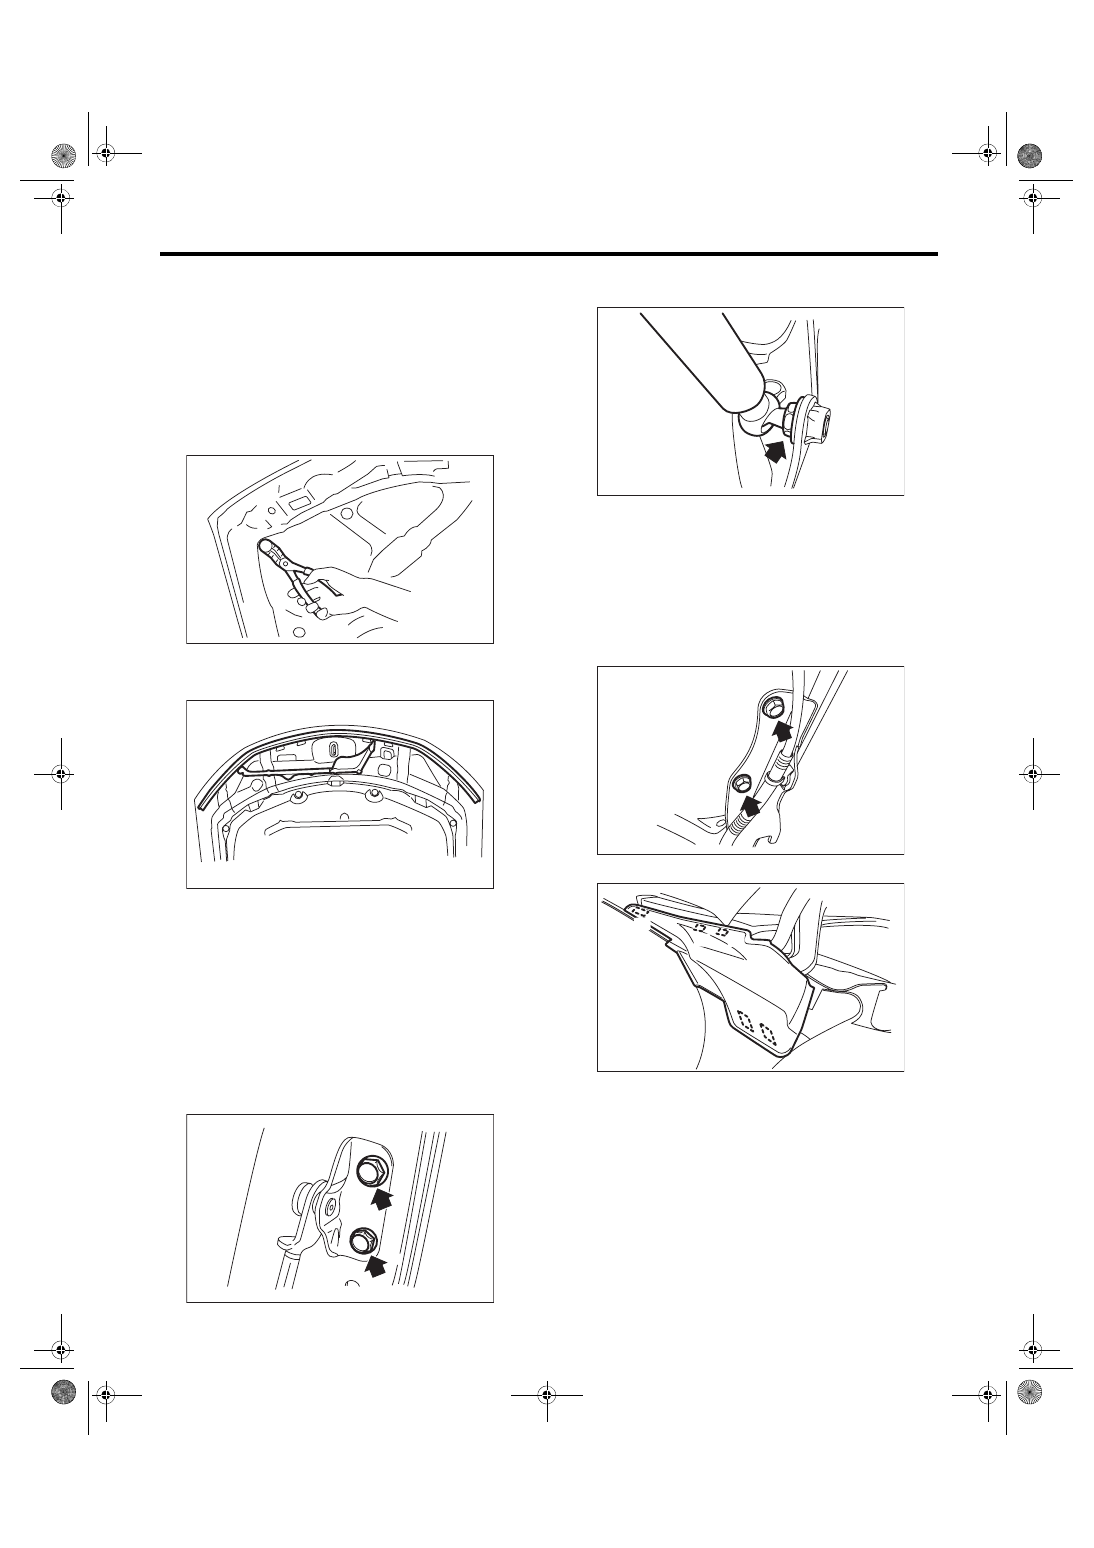
A: REMOVAL
1. FRONT HOOD INSULATOR
CAUTION:
Do not reuse any clips damaged during remov-
al. Always replace with new clips.
Release the clips to remove the front hood insula-
tor.
2. FRONT HOOD SEAL
Remove the seal.
3. FRONT HOOD DAMPER
CAUTION:
• Do not damage piston rods and oil seals.
• Never disassemble cylinders: They contain
gas.
• The front hood panel is heavy. When remov-
ing or installing the damper stay and hood
hinge, be sure to work in a group of two or
more.
1) Remove mounting bolt, and remove the damper
stay.
2) Remove the mounting bolt of front hood damper
stay.
4. FRONT HOOD HINGE
CAUTION:
The front hood panel is heavy. When removing
or installing the damper stay and hood hinge,
be sure to work in a group of two or more.
1) Remove the front hood damper.
2) Remove the bolt, and remove the front hood
panel.
3) Detach the tabs and remove the cowl side panel.
(1) Detach tabs (A), (B), and (C) from the vehi-
cle exterior.
(2) Detach tabs (D) and (E).
EB-00291
EB-00375
EB-00383
EB-00384
EB-00385
EI-02386
(A)
(B)
(C)
(D)
(E)