Seat Toledo (2019 year). Manual in english - page 14
 

  Index      Manuals     Seat Toledo (2019 year). Manual in english


Search            copyright infringement  


Content      ..     12      13      14      15     ..


Seat Toledo (2019 year). Manual in english - page 14


Driver assistance systems

Emergency braking assis-
tance system (Front Assist)*

Topic introduction

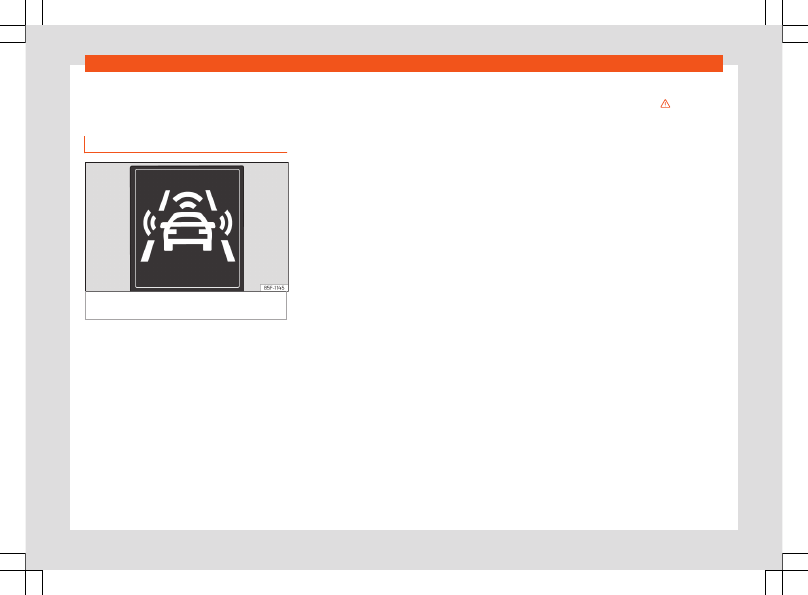
Fig. 223 

On the instrument panel display: ad-

vance warning indications.

The objective of the emergency braking as-
sistance system is to prevent head-on colli-
sions against objects that may be in the vehi-
cle’s path or minimise the consequences of
such impacts.

Within the limitations imposed by the environ-
mental conditions and by the system itself,
the function acts in staggered fashion, de-
pending on how critical the situation is. Initial-
ly it warns the driver, and if the driver’s reac-
tion does not occur or is insufficient, it acti-
vates an independent emergency braking.

The function is intended to prevent collisions
with parked vehicles or vehicles in the same

lane travelling in the same direction. It may
fail to activate in other danger situations.

The Front Assist function is active within a
range of speeds between 4 km/h (2.5 mph)
and 250 km/h (156 mph). Depending on
speed, traffic conditions and driver behaviour,
some of the sub-functions described below
are omitted in order to optimise the system’s
general behaviour.

The Front Assist is a driving assistance
function that can never replace the driv-
er’s attention.

Safety distance warning

If the system detects a situation of danger
because the vehicle is too close to the vehicle
ahead, it will warn the driver by means of an
indication on the instrument panel display

.

The timing of the warning varies depending
on driver behaviour and the traffic situation.

Advance warning

If the system detects a possible collision with
the vehicle in front, it may alert the driver by
means of an audible warning and an indica-
tion on the instrument panel display

››› 

Fig. 223

.

The warning moment varies depending on
the traffic situation and driver behaviour. At

the same time, the vehicle will prepare for a
possible emergency braking 

››› 

.

Critical warning

If the driver fails to react to the pre-warning
(advance warning), the system may actively
intervene in the brakes and generate a brief
jolt to warn the driver of the imminent danger
of a collision.

Automatic braking

If the driver also fails to react to the critical
warning, the system may initiate independent
emergency braking by progressively increas-
ing the braking effect in accordance with how
critical the situation is.

Driver emergency braking assistance sys-
tem

Faced with an imminent collision, the system
may detect that the driver is not braking hard
enough to avoid the collision. In this case, it
will automatically increase the braking effect.

Due to certain driving circumstances and the
limitations of its operation, there are some
cases in which the system cannot prevent a
collision, although it can significantly mini-
mise the consequences by reducing the
speed and the force of the impact.

»

219

Driving

WARNING

Observe the safety warnings 

››› 

 in Con-

trol and warning lamps on page 103

.

WARNING

The Front Assist system cannot change the
laws of physics or replace the driver in
terms of keeping control of the vehicle and
reacting to a possible emergency situation.

WARNING

Following a Front Assist emergency warn-
ing, pay immediate attention to the situa-
tion and try to avoid the collision by brak-
ing or by dodging the obstacle, as applica-
ble.

If the Front Assist does not work as de-

scribed in this chapter (e.g. it repeatedly
intervenes unnecessarily), switch it off.

Adapt your speed and safe distance to

the vehicle in front of you at all times to suit
visibility, weather, road and traffic condi-
tions.

The Front Assist alone cannot avoid acci-

dents and serious injuries.

In complex driving situations, occasional-

ly the Front Assist may issue warnings and
intervene in braking unnecessarily, for ex-
ample at traffic islands.

If the operation of the Front Assist is im-

paired, for example, by dirt or because the
radar sensor has lost its settings, the sys-

tem may issue unnecessary warnings and
intervene inopportunely in the braking.

The Front Assist does not react to animals

or vehicles crossing your path or ap-
proaching head-on down the same lane.

The Front Assist does not react to pedes-

trians walking in the same direction or ap-
proaching head-on down the same lane.

The driver must always be ready to take

over the control of the vehicle.

Note

When the Front Assist is connected, the

indications on the instrument panel screen
may be concealed by warnings from other
functions, such as an incoming call.

When the Front Assist causes a braking,

the brake pedal is “harder”.

Automatic interventions by the Front As-

sist on the brakes may be interrupted by
pressing the clutch, accelerator or moving
the wheel.

The Front Assist may brake the vehicle

until it stops completely. However, the
brake system does not halt the vehicle per-
manently. Use the foot brake!

If the Front Assist does not work as de-

scribed in this chapter (e.g. in intervenes
several times unnecessarily), switch it off.
Have the system checked by a specialised
workshop. SEAT recommends visiting a
SEAT dealership.

Radar sensor

Fig. 224 

On the front bumper: radar sensor.

A radar sensor is installed on the front bump-
er to determine the traffic situation

››› 

Fig. 224 

1

.

The radar sensor's visibility may be impaired
by dirt, mud or snow, or by environmental in-
fluences such as rain or mist. In this case, the
Front Assist does not work. The instrument
panel displays the following message: 

Front

Assist: No sensor vision!

 If necessary

clean the radar sensor 

››› 

.

When the radar sensor begins to operate
properly again, the Front Assist will automati-
cally be available again. The message will
disappear from the instrument panel display.

Front Assist operation may be affected by a
strong radar reverse reflection. This may oc-
cur, for example, in a closed car park or due

220

Driver assistance systems

to the presence of metallic objects (e.g. rails
on the road or sheets used in road works).

The area in front of and around the radar
sensor should not be covered with adhesives,
additional or similar headlights, as this may
negatively affect Front Assist operation.

If the front of the vehicle is not properly re-
paired or structural modifications are made
to it, for example if the suspension is lowered,
Front Assist operation may be affected. SEAT
recommends visiting a SEAT dealership for
this purpose.

CAUTION

If you have the sensation that the radar
sensor is damaged or has lost its settings,
disconnect the Front Assist. This will avoid
possible dangerous situations caused by a
system malfunction. If this occurs have it
adjusted.

The sensor may become damaged or

lose its settings when knocked, for exam-
ple, during a parking manoeuvre. This may
compromise the system's efficacy or dis-
connect it.

Repairs to the radar sensor require spe-

cialist knowledge and special tools. SEAT
recommends visiting a SEAT dealership for
this purpose.

A registration plate or plate holder on the

front that is larger than the space for the
registration plate, or a registration plate

that is curved or warped can cause the ra-
dar to malfunction.

Clean away the snow with a brush and

the ice preferably with a solvent-free de-
icer spray.

Operating the Emergency braking
assistance system (Front Assist)

Fig. 225 

On the screen of the instrument panel

Front Assist switched off message.

The Front Assist is active whenever the igni-
tion is switched on.

When the Front Assist is switched off, so too
are the advance warning function (pre warn-
ing) and the distance warning.

SEAT recommends leaving the Front Assist al-
ways switched on. Exceptions 

››› 

page 222,

Switching the Front Assist off temporarily
in the following situations

.

Switching the Front Assist on and off

With the ignition switched on, the Front Assist
can be switched on and off as follows:

Select the corresponding menu option us-

ing the button for the driver assistance sys-
tems 

››› 

page 27

.

OR:

 switch the system on and off in Easy

Connect using the 



 button 

SETTINGS

 but-

ton and 

Driver assistance button

››› 

page 24

.

When Front Assist is switched off, the instru-
ment panel will inform that it has been
switched off with the following indicator 

››› 

Fig. 225

.

Activating or deactivating the pre-warning
(advance warning)

The pre-warning function (advance warning)
can be switched on or off in the Easy Con-
nect system with the 



 button and the

SETTINGS

 and 

Driver assistance

 function but-

tons 

››› 

page 24

.

The system will store the setting for the next
time the ignition is switched on.

SEAT recommends keeping the pre-warning
function switched on at all times.

Depending on the infotainment system instal-
led in the vehicle, the advance warning func-
tion may be adjusted as follows:

Advance

»

221

Driving

Medium

Delayed

Deactivated

SEAT recommends driving with the function in
“Medium” mode.

Switching distance warning on and off

If the safe distance with regard to the vehicle
in front is exceeded, the relevant warning will
appear on the instrument panel display

. In this case, increase the safe distance.

The distance warning can be switched on
and off in the Easy Connect system using the



 button and the 

SETTINGS

 and

Driver assistance

 function buttons

››› 

page 24

.

The system will store the setting for the next
time the ignition is switched on.

SEAT recommends keeping the distance
warning switched on at all times.

Switching the Front Assist off tem-
porarily in the following situations

In the following situations the Front Assist
should be deactivated due to the system's
limitations:

When the vehicle is to be towed.

If the vehicle is on a test bed.

When the radar sensor is damaged.

If the radar sensor takes a heavy knock, for

example in a rear collision.

If it intervenes several times unnecessarily.

If the radar sensor is covered temporarily

with some kind of accessory, such as an ad-
ditional headlight or the like.

When the vehicle is to be loaded on a lorry,

ferry or train.

System limitations

The Front Assist has certain physical limita-
tions inherent to the system. Thus, in certain
circumstances, some of the system's reac-
tions may be inopportune from the driver's
standpoint. So pay attention in order to inter-
vene if necessary.

The following conditions may cause the
Front Assist not to react or to do so too
late:

In the first few instants of driving after

switching on the ignition, due to the system’s
initial auto-calibration.

On taking tight bends or complex paths.

Pressing the accelerator all the way down.

If the Front Assist is switched off or dam-

aged.

If the ASR has been disconnected or the

ESC activated in 

Sport

 mode manually

››› 

page 201

.

If the ESC is controlling.

If several brake lights of the vehicle or elec-

trically connected trailer are damaged.

If the radar sensor is dirty or covered.

If there are metal objects, e.g. rails on the

road or sheets used in road works.

If the vehicle is reversing.

If the vehicle over-accelerates.

In case of snow or heavy rain.

In case of narrow vehicles, such as motor-

bikes.

Misaligned vehicles.

Vehicles crossing the other's path.

Vehicles approaching in the opposite direc-

tion.

Special loads and accessories of other ve-

hicles that jut out over the sides, backwards
or over the top.

Parking aid

General information

Assorted assistance systems – which vary
depending on the equipment fitted in the car
– will help you when parking or manoeuvring.

222

Driver assistance systems

The 

rear parking aid

 is an audible assistant

that warns about obstacles located 

behind

the vehicle 

››› 

page 224

.

During parking, 

Parking System Plus

 assists

the driver by visually and audibly warning
them about obstacles detected 

in front

 and

behind

 the vehicle 

››› 

page 224

.

WARNING

Always pay attention, also when looking

straight ahead, to traffic and the vehicle
surroundings. The assistance systems are
not a replacement for driver awareness.
When inserting or removing the vehicle
from a parking space, or when performing
similar manoeuvres the driver always as-
sumes the responsibility.

Adapt your speed and driving style at all

times to suit visibility, weather, road and
traffic conditions.

The ultrasound sensors have blind spots

in which obstacles and people are not reg-
istered. Pay special attention to children
and animals.

Always keep visual control of the sur-

roundings: use the mirrors for additional
help.

CAUTION

Parking Aid functions may be negatively af-
fected by different factors that may lead to
damage to the vehicle or its immediate sur-
rounds:

Under certain circumstances, the system

does not detect or display certain objects:

Objects such as chains, trailer draw
bars, fences, posts and thin trees.

Objects that are located above the
sensors, such as protrusions in a wall.

Objects with certain surfaces or struc-
tures, such as wire mesh fences or pow-
der snow.

Certain surfaces of objects and gar-

ments do not reflect the ultrasound sen-
sors' signals. The system cannot detect, at
least correctly, these objects or people
wearing such clothes.

Ultrasound sensor signals may be affec-

ted by external sound sources. In certain
circumstances this may prevent them from
detecting people or objects.

Please note that low obstacles detected

by the system may no longer be registered
by the sensors as the car moves closer, so
the system will not give any further warn-
ing. In certain circumstances, objects such
as high kerbs that could damage the bot-
tom of the vehicle are not detected either.

If the first warning from the Parking Aid is

ignored, the vehicle could suffer considera-
ble damage.

The knocks or damage on the radiator

grille, bumper, wheel arch and vehicle un-
derbody can adjust the orientation of the
sensors. This can affect the parking aid

function. Have the function checked by a
specialised workshop.

Note

In certain situations, the system can give

a warning even though there is no obstacle
in the detected area, e.g:

with rough or cobbled floors or ground
with long grass;

with external ultrasound sources, such
as cleaning vehicles or other vehicles;

In downpours, intense snow or dense
exhaust gases;

if the registration plate (front or rear) is
not properly affixed to the bumper sur-
face;

or in locations such as the brow of a
hill.

In order to guarantee good system oper-

ation, keep the ultrasound sensors clean,
free of snow or ice, and do not cover them
with adhesives or other objects.

If you use high-pressure or vapour equip-

ment to clean the ultrasound sensors, ap-
ply it directly only very briefly and always
from a distance of more than 10 cm.

Retrofitting of accessories to the vehicle,

such as a bicycle rack, may interfere with
the operation of the Parking Aid.

In order to familiarise yourself with the

system, it is advised that you practice park-
ing in an area or car park that is free from

»

223

Driving

traffic. There must be good weather and
light conditions.

The volume and tone of the warnings can

be modified, in addition to the indications

››› 

page 227

.

In vehicles 

without

 a driver information

system, these parameters can be modified
in a SEAT Official Service or in a special-
ised workshop.

Please observe information on towing a

trailer 

››› 

page 227

.

The display on the Easy Connect screen

shows a slight time delay.

Rear parking aid*

The rear Parking Aid assists the driver in park-
ing by means of audible warning sounds.

Description

There are sensors integrated in the rear
bumper. When the sensors detect an obsta-
cle, you are alerted by audible warnings.

Make particularly sure that the sensors are
not covered by adhesives, residues and the
like, as this could affect the system's opera-
tion. Cleaning instructions 

››› 

page 267

.

The approximate measurement range of the
rear sensors is:

side area

0.90 m

central area

1.60 m

As you approach the obstacle, the time inter-
val between the audible warnings will be re-
duced. When you reach around 0.30 m the
warning will be constant: Do not continue to
move forward (or backward) 

››› 

 in General

information on page 223

››› 

 in General

information on page 223

 !

If you maintain separation from the obstacle,
the volume of the warning begins to reduce
after four seconds (does not affect the tone
of the constant warning).

Activating/Deactivating

When engaging reverse gear, the parking aid
is automatically switched on. This is con-
firmed with a short warning.

On disengaging reverse gear, the Parking Aid
system is disconnected immediately.

Parking aid plus*

Fig. 226 

Represented area.

Parking system plus assists you audibly and
visually when parking.

There are sensors integrated in the front and
rear bumpers. When they detect an obstacle,
you are alerted by audible warnings and vis-
ually on the Easy Connect system.

In the event of danger of a frontal collision,
the audible warnings come from the front of
the vehicle, and in the event of the danger of
a rear-end collision they come from the rear.

Make particularly sure that the sensors are
not covered by adhesives, residues and the
like, as this could affect the system's opera-
tion. Cleaning instructions 

››› 

page 267

.

The approximate measurement range of the
sensors is:

1.20 m

A

224

Driver assistance systems

0.90 m
1.60 m
0.90 m

As you approach the obstacle, the time inter-
val between the audible warnings will be re-
duced. When you reach around 0.30 m the
warning will be constant: do not continue to
move forward (or backward)!

If you maintain separation from the obstacle,
the volume of the warning begins to reduce
after four seconds (does not affect the tone
of the constant warning).

Parking aid operation

Fig. 227 

Centre console: parking aid button.

Manual connection of Parking Aid

Press the 

 button 

once

.

B

C

D

Manual disconnection of Parking Aid

Press the 

 button 

again

.

Manual disconnection of Parking Aid dis-
play (the audible sounds remain active)

Press a button on the main menu of the fac-

tory-assembled infotainment system.

OR

 press the 

BACK

 function button.

Automatic connection of Parking Aid

Engage reverse gear or turn the selector

lever to position 

R

.

OR

: If the vehicle approaches an obstacle

that is in its forwards path at a speed below
10 km/h (6 mph) 

››› 

page 225, Automatic

activation

. The obstacle is detected from a

distance of approx. 95 cm if the automatic
connection is activated in the infotainment
system. A reduced display is shown.

Automatic disconnection of Parking Aid

Move the selector lever to position 

P

.

OR

: accelerate to approx. 10 km/h (6 mph)

or faster.

Temporary suppression of sound in Park-
ing Aid

Press the 

 function button.

Change from reduced view to full view

Engage reverse gear or turn the selector

lever to position 

R

.

OR

: press the car icon in reduced view.

If necessary, switch to the rear-assist im-
age (Rear View Camera “RVC”)

Engage reverse gear or turn the selector

lever to position 

R

.

OR

 press the 

RVC

 function button.

A short confirmation signal will be heard and
the button symbol will light up yellow when
the system is switched on.

Automatic activation

Fig. 228 

Miniature indication of automatic ac-

tivation.

When the Plus Parking Aid connects auto-
matically, a miniature of the vehicle and the

»

225

Driving

segments will appear on the left of the dis-
play 

››› 

Fig. 228

.

Automatic activation occurs when slowly ap-
proaching an obstacle located in front of the
vehicle. It only operates every time the speed
is reduced below approximately 10 km/h (6
mph) for the first time.

If the parking aid is switched off using the 

button, the following actions must be carried
out in order for it to automatically switch on:

Switch off the ignition and switch it on

again.

OR

: accelerate above 10 km/h (6 mph) be-

fore reducing speed below this number again.

OR

: place the selector lever in position 

P

and then move it from this position.

OR

: switch on and off the automatic activa-

tion in the Easy Connect system menu.

The automatic activation with parking aid
miniature indication can be switched on and
off from the Easy Connect system menu

››› 

page 24

:

Switch the ignition on.

Select: 



 button > 

Settings

 > 

Parking

and manoeuvring

.

Select the 

Automatic activation

 option.

When the function button check box is activa-
ted 

, the function is on.

If the system has been activated automati-
cally, an audible sound warning will only be
given when obstacles in front are at a dis-
tance of less than 50 cm.

CAUTION

The automatic connection of the Parking
Aid only works when you are driving slowly.
If driving style is not adapted to the circum-
stances, an accident and serious injury or
damage may be caused.

Segments of the visual indication

Fig. 229 

Parking Aid display on the Easy Con-

nect system screen.

The distance of separation from the obstacle
can be estimated using the segments around
the vehicle.

The optical indication of the segments works
as follows:

a white segment is dis-

played when the obstacle is not within
the vehicle's trajectory or the direction of
travel is in the opposite direction to its lo-
cation.

obstacles located in the

vehicle's trajectory and which are more
than 30 cm away from the vehicle are
displayed in yellow.

obstacles that are less than

30 cm away from the vehicle are dis-
played in red.

Moreover, with the SEAT Media System
Plus/Navi System radios, a yellow trail indi-
cates the vehicle's expected journey based
on the steering wheel angle.

Whenever the obstacle is located in the vehi-
cle’s direction of travel, the corresponding
audible warning will sound.

As the vehicle approaches an obstacle, the
segments are displayed closer to the vehicle.
When the penultimate segment is displayed,
this means that the vehicle has reached the
collision zone. In the collision zone, the obsta-
cles are represented in red, including those
out of the path. Do not continue to move for-
ward (or backward) 

››› 

 in General infor-

mation on page 223

››› 

 in General infor-

mation on page 223

 !

White segments:

Yellow segments:

Red segments:

226

Driver assistance systems

Adjusting the display and audible
warnings

The settings for the display and audible
warnings are controlled via the Easy Con-
nect*.

Automatic activation

 on

 – activates the 

Automatic activa-

tion

 option 

››› 

page 225

.

 off

 – deactivates the 

Automatic acti-

vation

 option 

››› 

page 225

.

Front volume*

Volume in the front and rear area.

Front sound settings/sharpness*

Frequency (tone) of the sound in the front
area.

Rear volume*

Volume in the rear area.

Rear sound settings/sharpness*

Frequency (tone) of the sound in the rear
area.

Adjust volume

With the parking aid switched on, the active
audio/video source volume will be reduced to
the intensity of the selected setting.

Error messages

When the Parking Aid is activated or when it is
switched on, if a continuous warning can be
heard for several seconds (additionally, in the
case of Parking system Plus, the LED of the

 button flashes), there is a fault in the sys-

tem.

Parking System Plus*

If there is a fault in a sensor, the symbol 

 is

displayed on the Easy Connect display in
front of/behind the vehicle. If a rear sensor is
faulty, only the obstacles in the areas 

A

 and

B

 are displayed 

››› 

Fig. 226

. If a front sensor

is faulty, only the obstacles in the areas 

C

and 

D

 are displayed.

Have the fault corrected by a specialised
workshop without delay.

Towing bracket

In vehicles equipped with a towing bracket
device from the factory, when the trailer is
connected electrically, the Parking Aid rear
sensors will not be activated when reverse
gear is engaged, when the selector lever is
turned to position 

R

 or when the button 

 is

pressed.

Parking System Plus

The distance to possible obstacles at the rear
of the vehicle will not be displayed on the
screen and nor will it be indicated by means
of audible sound signals.

The Easy Connect system screen will only
display objects detected at the front, and the
vehicle's trajectory will be hidden.

Rear Assist “Rear View Cam-
era”*

Operating and safety warnings

WARNING

The Rear Assist does not make it possible

to precisely calculate the distance from
obstacles (people, vehicles, etc.) and nor
can it overcome the system's own limits,
hence using it may cause serious accidents
and injuries if used negligently or without
due care. The driver should be aware of
his/her surroundings at all times to ensure
safe driving.

The camera lens expands and distorts

the field of vision and displays the objects
on the screen in a different, vague manner.
The perception of distances is also distor-
ted by this effect.

»

227

Driving

Due to the screen resolution or insuffi-

cient light conditions, some items may be
displayed in an unsatisfactory manner or
not at all. Take special care with thin posts,
fences, railings or trees that might not be
displayed on screen and could damage the
vehicle.

The rear assist has blind spots where it is

not possible to represent people or objects
(small children, animals and certain ob-
jects cannot be detected in its field of vi-
sion). Monitor the vehicle's surrounding
area at all times.

Keep the camera lens clean, free of ice

and snow, and do not cover it.

The system is not a replacement for driv-

er awareness. Supervise the parking oper-
ation at all times, as well as the vehicle's
surrounding area. Adapt your speed and
driving style at all times to suit visibility,
weather, road and traffic conditions.

Do not be distracted from the traffic by

looking at the screen.

The images on the rear assist screen are

only two-dimensional. Due to a lack of spa-
tial depth, protruding parts or holes in the
road, for example, are more difficult to de-
tect or may not be seen at all.

Vehicle load modifies the representation

of the orientation lines displayed. The
width represented by the lines diminishes
with vehicle load. Pay special attention to
the vehicle's surroundings when the inside

of the vehicle of the luggage compartment
is carrying a heavy load.

In the following situations, the objects or

other vehicles shown in the navigation sys-
tem display appear to be further away or
closer than they really are: Pay special at-
tention:

On moving from a horizontal plane to a
slope.

On moving from a slope to a horizontal
plane.

If the vehicle is heavily loaded at the
rear.

When the vehicle approaches objects
that are not on the ground surface or
are jutting out from it. These objects
may also be outside the camera's an-
gle of vision when reversing.

Note

It is important to take great care and pay

special attention if you are not yet familiar
with the system.

Rear assist will not be available if the ve-

hicle's rear lid is open.

Instructions for use

Fig. 230 

On the rear bumper: location of the

rear assist camera.

A camera on the rear bumper aids the driver
during reverse parking or manoeuvring

››› 

Fig. 230

. The camera image is viewed to-

gether with orientation lines projected by the
system on the Infotainment system screen.
The bottom of the screen displays part of the
bumper corresponding to the number plate
area that will be used as reference by the
driver.

Rear assist settings

Rear assist offers the user the possibility to
change the image's 

brightness

contrast

 and

colour

 settings.

To change these settings:

Park the vehicle in a safe place.

Apply the parking brake.

228

Driver assistance systems

Switch the ignition on.

If necessary, switch on the Infotainment

system.

Engage reverse gear or turn the selector

lever to position 

R

.

Press the 

 function button displayed on

the right of the image.

Make the desired adjustments on the menu

by pressing the 

/

+

 function buttons or by

moving the corresponding scroll button.

Necessary conditions for parking and ma-
noeuvring with the rear assist

The system should not be used in the follow-
ing cases:

If the image displayed is not very reliable or

is distorted, for example low visibility or dirty
lens.

If the area behind the vehicle is not dis-

played very clearly or is incomplete.

If the vehicle is heavily loaded at the rear.

If the position and installation angle of the

camera have been changed, e.g. after a rear-
end collision. Have the system checked by a
specialised workshop.

Familiarising yourself with the system

To familiarise yourself with the system, the
orientation lines and their function, SEAT rec-
ommends practising parking and manoeu-

vring with the rear assist in a place without
too much traffic or in a car park when there
are good weather and visibility conditions.

Cleaning the camera lens

Keep the camera lens clean and clear of
snow and ice:

Moisten the lens using a normal alcohol-

based glass cleaning product and clean the
lens with a dry cloth.

Remove snow using a small brush.

Use de-icing spray to remove any ice.

CAUTION

Never use abrasive cleaning products to

clean the camera lens.

Do not use hot or warm water to remove

ice or snow from the camera lens. Doing so
could damage the camera.

Parking and manoeuvring with the
rear assist

Fig. 231 

Display on the Infotainment system

screen: guidance lines.

Switching the system on and off

The rear assist will switch on when the igni-

tion is on or the engine running, on engaging
reverse gear (manual gearbox) or on chang-
ing the selector lever to the 

R

 position (auto-

matic gearbox).

The system switches off 8 seconds after

disengaging reverse gear (manual gearbox)
or removing the selector lever from the 

R

 po-

sition (automatic gearbox). The system will
also disconnect immediately after the ignition
is switched off.

In combination with the Parking System Plus

››› 

page 222

, the camera image will cease to

be transmitted immediately when reverse
gear is engaged or when the selector lever is

»

229

Driving

moved from the 

R

 position, and the optical in-

formation provided by the Parking Aid system
will be displayed.

Also in combination with the system, the rear
assist image can also be concealed:

By pressing one of the Infotainment system

buttons on the display.

OR: By pressing the miniature vehicle that

appears on the left of the screen (which
switches to the full-screen mode of the Park-
ing System Plus's optical system).

If you wish to display the rear assist image
again:

Disengage reverse, or change the selector

lever's position, engage reverse again or
move the selector lever to position 

R

.

OR: Press the 

RVC

 function button

1)

Meaning of the orientation lines

››› 

Fig. 231

Side lines:

 extension of the vehicle (the

approximate width of the vehicle plus the
rear view mirrors) on the road surface.

1

End of the side lines:

 the area marked in

green ends approximately 2 m behind the
vehicle on the road surface.

Mid line:

 indicates a distance of approxi-

mately 1 m behind the vehicle on the road
surface.

Horizontal red line:

 indicates a safe dis-

tance of approximately 40 cm at the rear
of the vehicle on the road surface.

Parking manoeuvre

Place the vehicle in front of the parking

space and engage reverse gear (manual
gearbox) or move the selector to the 

R

 posi-

tion (automatic gearbox).

Reverse slowly, and turn the steering wheel

so that the side orientation lines lead towards
the parking space.

Guide the vehicle into the parking space so

that the side orientation lines run parallel to it.

2

3

4

Fatigue detection (break
recommendation)*

Introduction

The Fatigue detection informs the driver when
their driving behaviour shows signs of fatigue.

WARNING

Do not let the comfort afforded by the Fati-
gue detection system tempt you into taking
any risks when driving. Take regular breaks,
sufficient in length when making long jour-
neys.

The driver always assumes the responsi-

bility of driving to their full capacity.

Never drive if you are tired.

The system does not detect the tiredness

of the driver in all circumstances. Consult
the information in the section 

››› 

page 231,

System limitations

.

In some situations, the system may incor-

rectly interpret an intended driving ma-
noeuvre as driver tiredness.

No warning is given in the event of the ef-

fect called microsleep!

1)

WARNING: the 

RVC

 function button will only be

activated and available when the reverse gear is
engaged or the selector lever is set to position 

R

.

230

Driver assistance systems

Please observe the indications on the in-

strument panel and act as is necessary.

Note

Fatigue detection has been developed

for driving on motorways and well paved
roads only.

If there is a fault in the system, have it

checked by a specialised workshop.

Function and operation

Fig. 232 

On the screen of the instrument pan-

el: fatigue detection.

Fatigue detection determines the driving be-
haviour of the driver when starting a journey,
making a calculation of tiredness. This is con-
stantly compared with the current driving be-
haviour. If the system detects that the driver is
tired, an audible warning is given with a

sound and an optic warning is shown with a
symbol and complementary message on the
instrument panel display 

››› 

Fig. 232

. The

message on the instrument panel display is
shown for approximately 5 seconds, and de-
pending on the case, is repeated. The system
stores the last message displayed.

The message on the instrument panel display
can be switched off by pressing the 



button on the windscreen wiper lever or the
button 



 on the multi function steering

wheel 

››› 

page 27

.

The message can be recalled to the instru-
ment panel display using the multifunction
display 

››› 

page 27

.

Conditions of operation

Driving behaviour is only calculated on
speeds above about 65 km/h (40 mph) up to
around 200 km/h (125 mph).

Switching on and off

Fatigue detection can be activated or deacti-
vated in the Easy Connect system with the



 button and the 

SETTINGS

 function button

››› 

page 24

. A mark indicates that the ad-

justment has been activated.

System limitations

The Fatigue detection has certain limitations
inherent to the system. The following condi-

tions can limit the Fatigue detection or pre-
vent it from functioning.

At speeds below 65 km/h (40 mph)

At speeds above 200 km/h (125 mph)

When cornering

On roads in poor condition

In unfavourable weather conditions

When a sporty driving style is employed

In the event of a serious distraction to the

driver

Fatigue detection will be restored when the
vehicle is stopped for more than 15 minutes,
when the ignition is switched off or when the
driver has unbuckled their seat belt and
opened the door.

In the event of slow driving during a long peri-
od of time (below 65 km/h, 40 mph) the sys-
tem automatically re-establishes the tired-
ness calculation. When driving at a faster
speed the driving behaviour will be recalcula-
ted.

231

Driving

Towing bracket device

Driving with a trailer

Technical requirements

If your vehicle has a factory-fitted towing
bracket or is equipped with a selection of
SEAT Original Accessories, it meets all the
relevant technical and legal requirements.

In vehicles with a towing bracket it is possible
to remove the ball joint, situated (together
with the special assembly instructions) in the
housing for the spare wheel in the vehicle
luggage compartment 

››› 

page 78, Vehicle

tool kit*

.

Your vehicle is fitted with a 13-pole power
socket for the electrical connection between
the trailer and the vehicle. If the trailer you are
going to use has a 

7-pin connector

, the cor-

responding adaptor, acquired from the SEAT
Original Accessories Catalogue, can be
used.

If a towing bracket is to be retro-fitted to the
car, it must be done according to the instruc-
tions of the towing bracket manufacturer.

Note

Any queries that may arise can be directed
to an authorised SEAT dealer.

Trailer weight

Trailer weight

The combined vehicle and trailer must be
balanced. To do so use the maximum permit-
ted towing bracket load. An insufficient
weight exerted by the trailer drawbar on the
ball joint of the towing bracket will have a
negative impact upon the response of the ve-
hicle-trailer assembly on the road.

Weight distribution

Distribute loads in the trailer so that heavy
objects are as near to the axle as possible.
Ensure that the objects do not move.

If the towing vehicle is empty and the trailer
loaded then the load distribution is incorrect.
However, if these conditions cannot be avoi-
ded, drive very slowly.

Tyre pressure values

Correct the tyre pressure in your vehicle to
“total load” 

››› 

page 256, Service life of

tyres

.

Trailer weight

Never exceed the authorised trailer weight
under any circumstances 

››› 

page 275,

Technical specifications

.

The trailer weights listed are only applicable
for 

altitudes

 up to 1000 m above sea level.

Due to lower air density, engine power de-
creases depending on the increase in alti-
tude, this also reduces climbing ability, which
requires a reduction of the weight of the vehi-
cle with a trailer by 10% for every 1000 m in-
crease in altitude. The weight of the assembly
is calculated by adding the vehicle weight
(loaded) to the trailer weight (loaded). Al-
ways drive with special care when towing a
trailer.

The towed load and support load information
that is displayed on the towing bracket man-
ufacturers label are only values for the verifi-
cation of the device. The correct figures for
your specific vehicle, which are usually lower
than these figures, are given in the documen-
tation of your vehicle.

WARNING

Exceeding the maximum established load

per axle and the maximum towing bracket
load in addition to the maximum permitted
load or the load of the vehicle + trailer as-
sembly can cause accidents and serious
injuries.

A sliding load can considerably affect

the stability and safety of the vehicle +
trailer assembly, resulting in accidents and
serious injuries.

232

Towing bracket device

Driving with a trailer

Exterior mirrors

Check whether you can see enough of the
road behind the trailer with the standard rear
vision mirrors. If this is not the case, you
should have additional exterior mirrors fitted.
Observe the relevant statutory requirements
of the country you are in.

Headlights

The front part of the vehicle may be raised
when the trailer is connected and the light
may dazzle the rest of the traffic.

Adapt the height of the headlights using the
headlight range adjuster 

››› 

page 121

1)

.

Driving speed

For your own safety do not drive faster than
the maximum permitted speed indicated on
the trailer.

At all times, immediately reduce speed if you
detect the slightest swaying movement of the
trailer. Never try to “return the trailer to a
straight position” by accelerating.

Brakes

Brake in due course! If the trailer has an 

over-

run brake

, apply the brakes gently at first

and then, firmly. This will prevent the jerking
that can be caused by locking of trailer
wheels. Change to a lower gear in good time
before descending a slope in order to take
advantage of the engine brake.

The trailer is incorporated into the vehi-
cle's anti-theft alarm system:

When the vehicle has a factory-fitted anti-

theft alarm and a towing bracket.

When the trailer is electrically connected to

the vehicle via the towing bracket socket.

When the vehicle electrical device and the

towing bracket are operational.

When the vehicle is locked and the vehicle's

anti-theft alarm device is activated.

Once the electrical connection is interrupted
with the vehicle trailer locked, the alarm
sounds.

Always switch off the vehicle anti-theft alarm
device before connecting or disconnecting a
trailer. The vehicle anti-theft alarm device
could cause the alarm to sound 

››› 

page 116,

Anti-theft alarm*

.

Engine overheating

In the event that the coolant temperature
gauge needle moves to the right section of
the scale or to the red area, immediately re-
duce speed. If the control lamp 

 flashes on

the general instrument panel, stop the vehicle
and switch off the engine. Wait several mi-
nutes and check the coolant level in the tank

››› 

page 249

.

Please observe the following indications

››› 

page 248

.

The coolant temperature can be reduced by
switching on the heating.

WARNING

Adjust your speed to suit the road and

traffic conditions.

An electrical installation that is connec-

ted incorrectly or by non-specialised per-
sonnel can prevent the connection of the
current to the trailer and cause faults in the
operation of the electrical system through-
out the entire vehicle, leading to accidents
and serious injury.

All electrical work must be carried out

only by specialised services.

Never directly connect the trailer electri-

cal device to the electrical sockets of the

»

1)

This does not apply for vehicles with Full LED

xenon headlights.

233

Driving

reverse driving lights or other sources of
electrical current.

CAUTION

Avoid corners, and sudden and sharp

braking.

Once the trailing arm has been removed,

place the corresponding cover on the hole
of the fastening point. This prevents dirt
from entering the hole – see the trailer sys-
tem assembly manual.

Note

In the event of frequent journeys with a

trailer, we recommend also having the ve-
hicle inspected in between the service in-
tervals.

When connecting and disconnecting the

trailer, the handbrake must be applied.

For technical reasons, trailers with LED

reverse lights cannot be incorporated into
the vehicle anti-theft alarm system.

Towing bracket device

Introduction

If the vehicle is equipped with a towing brack-
et device from the factory or is a genuine

SEAT accessory, it meets all national techni-
cal and legal requirements for towing.

Your vehicle is fitted with a 13-pin power sock-
et for the electrical connection between the
trailer and the vehicle. If the trailer is equip-
ped with a 

7-pin connector

, you can use the

corresponding adaptor, which is available as
a genuine SEAT accessory.

The towing device has a maximum vertical
load of 

50 kg

.

WARNING

Before driving with the ball-headed bar

fitted, verify its correct assembly and
placement in the clamping bush.

Do not use the ball-headed bar if it is not

correctly placed and fixed in the clamping
bush.

Do not use the towing device for towing if

it is damaged or has missing parts.

Do not modify or adapt the towing device

connection.

Never disengage the ball-headed bar

with the trailer still hitched.

CAUTION

Be careful not to damage the paint on the
bumper when handling the ball-headed
bar.

Description

Fig. 233 

Towing bracket device support for

hitching/ball-headed bar.

The ball-headed bar is detachable. It is loca-
ted in the spare wheel well or in the spare
wheel compartment in the boot 

››› 

page 78,

Vehicle tool kit*

.

Key to 

››› 

Fig. 233

13-pin socket
Safety flange

1

2

234


Content      ..     12      13      14      15     ..