Peugeot 308 SW BL (2013 year). Instruction - part 5
3
63
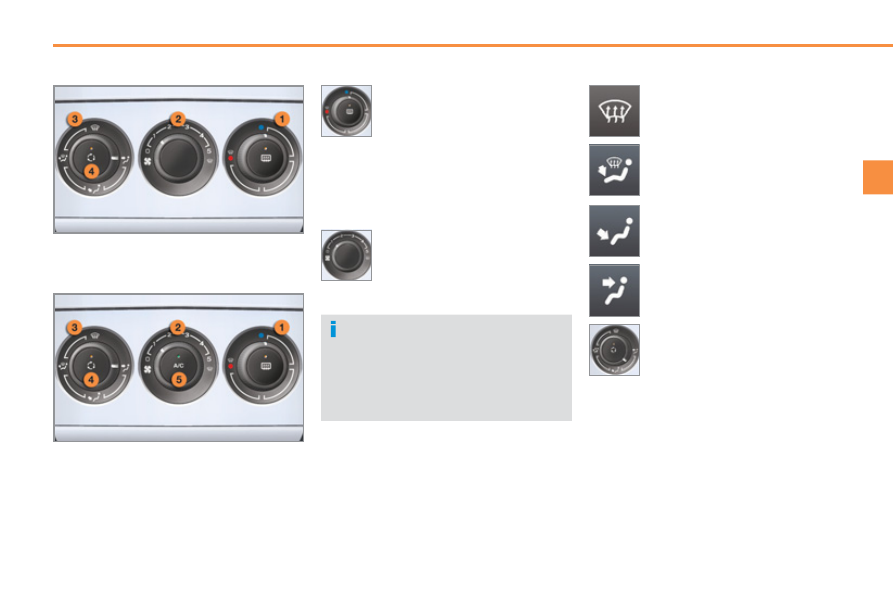
COMFORT
2. Air fl ow adjustment
) Turn the dial from position 1
to position
5 to obtain a
comfortable air fl ow.
Windscreen, side windows
and footwells.
Footwells.
Central and side vents.
)
Turn the dial from blue
(cold) to red (hot) to adjust
the temperature to your re-
quirements.
Windscreen and side windows.
1. Temperature adjustment
The air distribution can be
adapted by placing the dial in
an intermediate position.
The heating / ventilation or air condi-
tioning systems can only operate with
the engine running.
) If you place the air fl ow control
in position 0 (deactivation of the
system), the temperature is no
longer maintained at a comfort-
able level. However, a slight
fl ow of air, due to the movement
of the vehicle, can still be felt.
3. Air distribution adjustment
HEATING / VENTILATION
MANUAL AIR CONDITIONING