Peugeot 308 Dag (2007.5). Instruction - part 11
11
149
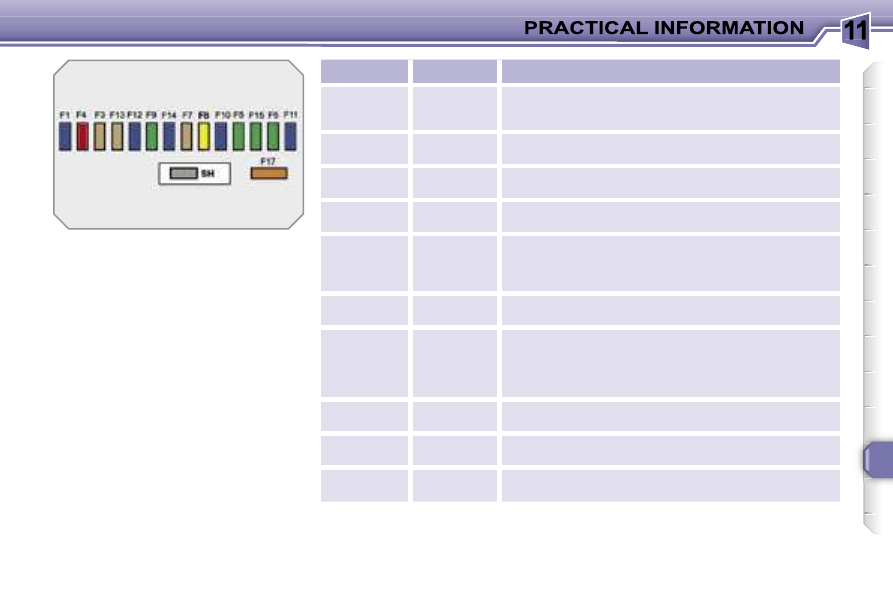
Fuse N°
Rating
Functions
F8
20 A
Audio equipment, audio/telephone, CD changer,
multifunction display, tyre under-inflation detection.
F9
30 A
Front 12 V socket, lighter.
F10
15 A
Steering wheel controls, alarm siren, alarm control
unit.
F11
15 A
Low current ignition switch.
F12
15 A
Instrument panel, seat belt and passenger’s front
air bag warning lights display, air conditioning,
driver’s seat memory unit, driving school module.
F13
5 A
Engine fuse box, air bags, piloted manual gearbox
gear lever.
F14
15 A
Multifunction display, amplifier, hands-free kit, rain/
brightness sensor, parking assistance control unit,
trailer fuse box, lane departure warning system.
F15
30 A
Locking and deadlocking.
F17
40 A
Rear screen and exterior mirrors de-icing.
SH
-
PARC shunt.