Peugeot 207 CC Dag (2010 year). Instruction - part 6
i
DIESEL
ACCESS
76
Quality of the fuel used for
petrol engines
Quality of the fuel used for
Diesel engines
The petrol engines are perfectly com-
patible with E10 type petrol biofuels
(containing 10 % ethanol), conforming
to European standards EN 228 and
EN 15376.
E85 type fuels (containing up to 85 %
ethanol) are reserved exclusively for ve-
hicles marketed for the use of this type
of fuel (BioFlex vehicles). The quality of
the ethanol must comply with European
standard EN 15293.
For Brazil only, special vehicles are
marketed to run on fuels containing up
to 100 % ethanol (E100 type).
The Diesel engines are perfectly com-
patible with biofuels which conform to
current and future European standards
(Diesel fuel which complies with stan-
dard EN 590 mixed with a biofuel which
complies with standard EN 14214)
available at the pumps (containing up
to 7 % Fatty Acid Methyl Ester).
The B30 biofuel can be used in cer-
tain Diesel engines; however, this use
is subject to strict application of the
special servicing conditions. Consult a
PEUGEOT dealer.
The use of any other type of (bio)fuel
(vegetable or animal oils, pure or dilut-
ed, domestic fuel...) is strictly prohibited
(risk of damage to the engine and fuel
system).
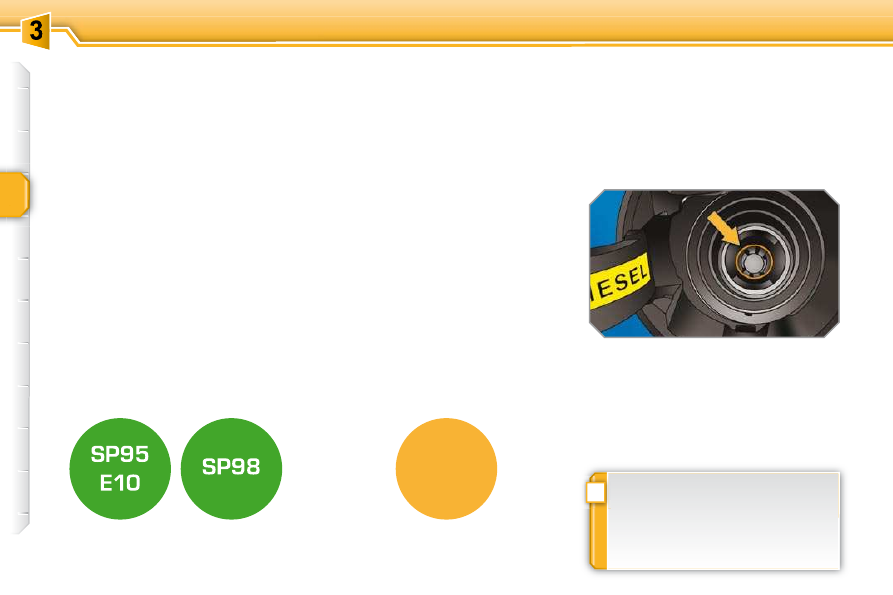
MISFUEL PREVENTION
Mechanical device which prevents fi ll-
ing the tank of a Diesel vehicle with
petrol. It avoids the risk of engine dam-
age that can result from fi lling with the
wrong fuel.
Located in the fi ller neck, the misfuel
prevention device appears when the
fi ller cap is removed.
Operation
When a petrol fi ller nozzle is intoduced
into the fuel fi ller neck of your Diesel
vehicle, it comes into contact with the
fl ap. The system remains closed and
prevents fi lling.
Do not persist but introduce a Diesel
type fi ller nozzle.
The device allows fi lling from a fuel
can.
In order to ensure a good fl ow of fuel,
do not place the nozzle of the fuel
can in direct contact with the fl ap of
the misfuel prevention device.