Freelander Body Repair Manual - part 38


  Index      Land Rover     Freelander Body Repair Manual 1998 year


Search            


Content   ..  36  37  38  39   ..


Freelander Body Repair Manual - part 38


BODY

16

EXTERIOR FITTINGS

Refit

1. Fit fasteners to arch extension.
2. Fit wheel arch extension to studs.
3. Fit scrivets securing extension to wheel arch.
4. Fit road wheel(s) and tighten nuts to correct

torque.

See INFORMATION, Torque wrench

settings.

5. Remove stand(s) and lower vehicle.
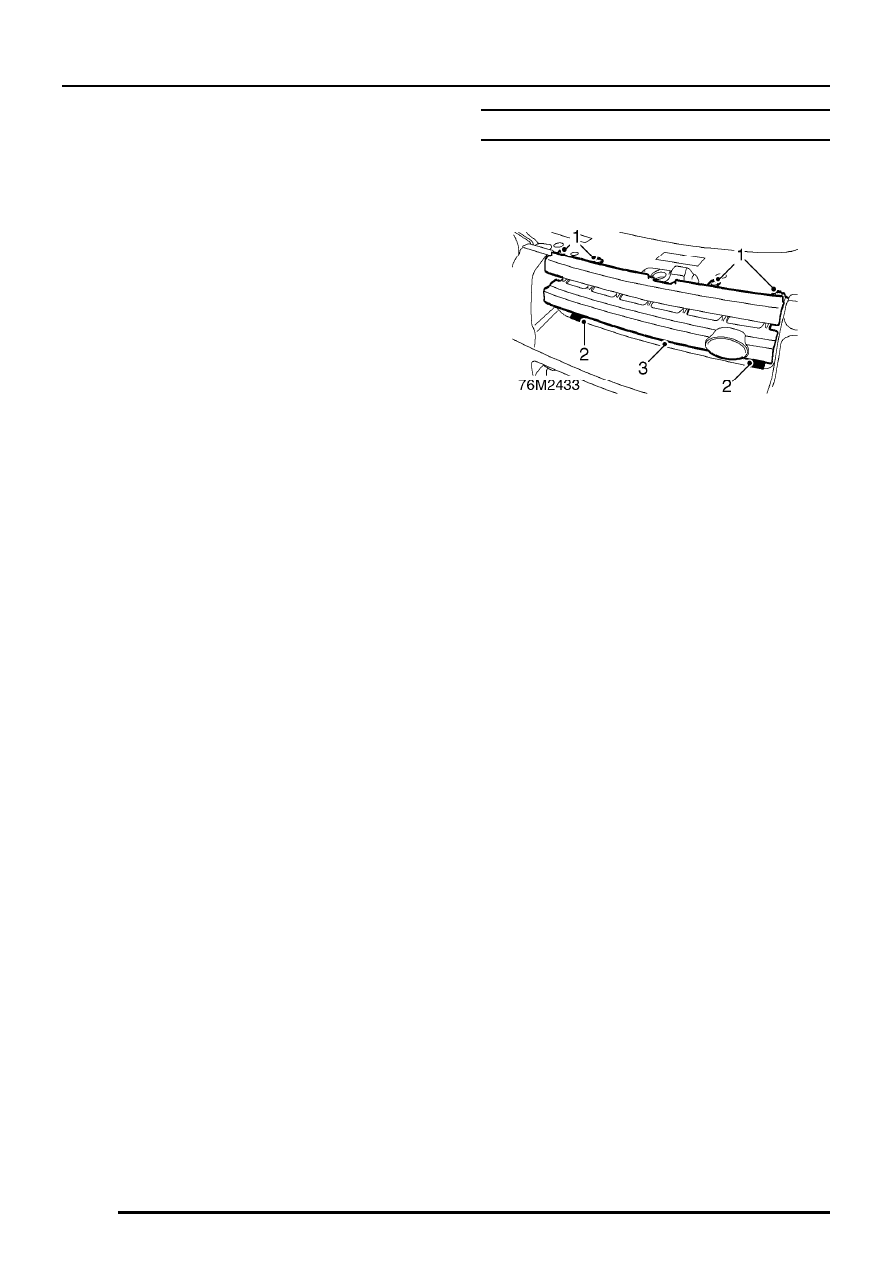
GRILLE - FRONT

Service repair no - 76.55.03

Remove

1. Remove 4 screws from grille.
2. Release 2 catches securing bottom of grille.
3. Remove grille.

Refit

1. Position grille to body, locate with securing

catches.

2. Fit and tighten screws.

BODY

EXTERIOR FITTINGS

17

VENT - REAR QUARTER

Service repair no - 76.81.24

Remove

1. Remove 2 Torx screws securing vent hinge

covers.

2. Remove covers from hinges.
3. Remove 2 screws securing hinges to vent.
4. Remove hinges from vent.
5. Remove nuts from vent and discard sealing

washers.

6. With assistance remove screw securing vent

catch to body.

7. Remove vent.

8. Remove screw securing catch to vent.
9. Remove catch from vent.

10. Remove nut from vent and discard sealing

washers.

Refit

1. Fit nut and NEW sealing washer to vent.
2. Fit catch and tighten screw.
3. With assistance fit vent and tighten catch

screw.

4. Using NEW sealing washers fit nuts and

hinges to vent. Fit and tighten hinge screws to
vent.

5. Fit hinge covers and tighten Torx screws.

BODY

INTERIOR TRIM COMPONENTS

1

SUN VISOR

Service repair no - 76.10.47

Remove

1. Release sun visor from retaining clip.
2. Remove 2 screws securing sun visor.
3. Remove sun visor.

Refit

1. Fit sun visor and secure with screws.
2. Secure sun visor in clip.

FINISHER - ’A’ POST

Service repair no - 76.13.07

Remove

1. Release seal from door aperture.
2. Release 4 clips and remove ’A’ post finisher.
3. Remove clips from finisher.

Refit

1. Fit clips to ’A’ post finisher.
2. Fit finisher to ’A’ post and secure with clips.
3. Fit seal to door aperture.

BODY

2

INTERIOR TRIM COMPONENTS

CASING - REAR QUARTER LOWER - 3 DOOR

Service repair no - 76.13.12

Remove

1. Release rear seat squab and fold seat forward.

2. Release load space lamp from trim casing.
3. Disconnect 2 Lucars and remove load space

lamp.

4. Remove 6 Torx screws securing luggage

compartment carpet retainer.

5. Remove carpet retainer.
6. Release 4 turn buckles securing trim casing.
7. Release and remove trim casing from luggage

compartment.

Refit

1. Position casing in luggage compartment.
2. Fit turn buckles
3. Fit luggage compartment carpet retainer and fit

Torx screws.

4. Position load space lamp to casing, connect

Lucars and secure lamp in casing.

5. Reposition rear seat.


Content   ..  36  37  38  39   ..