Land Rover Discovery. Manual - part 75


  Index      Land Rover     Land Rover Discovery - service 1995-1996 year


Search            


Content   ..  73  74  75  76   ..


Land Rover Discovery. Manual - part 75


19

FUEL SYSTEM

16

REPAIR

ADD: 09/95

RELAY MODULE - ADVANCED EVAPS

Service repair no - 18.30.71

Remove

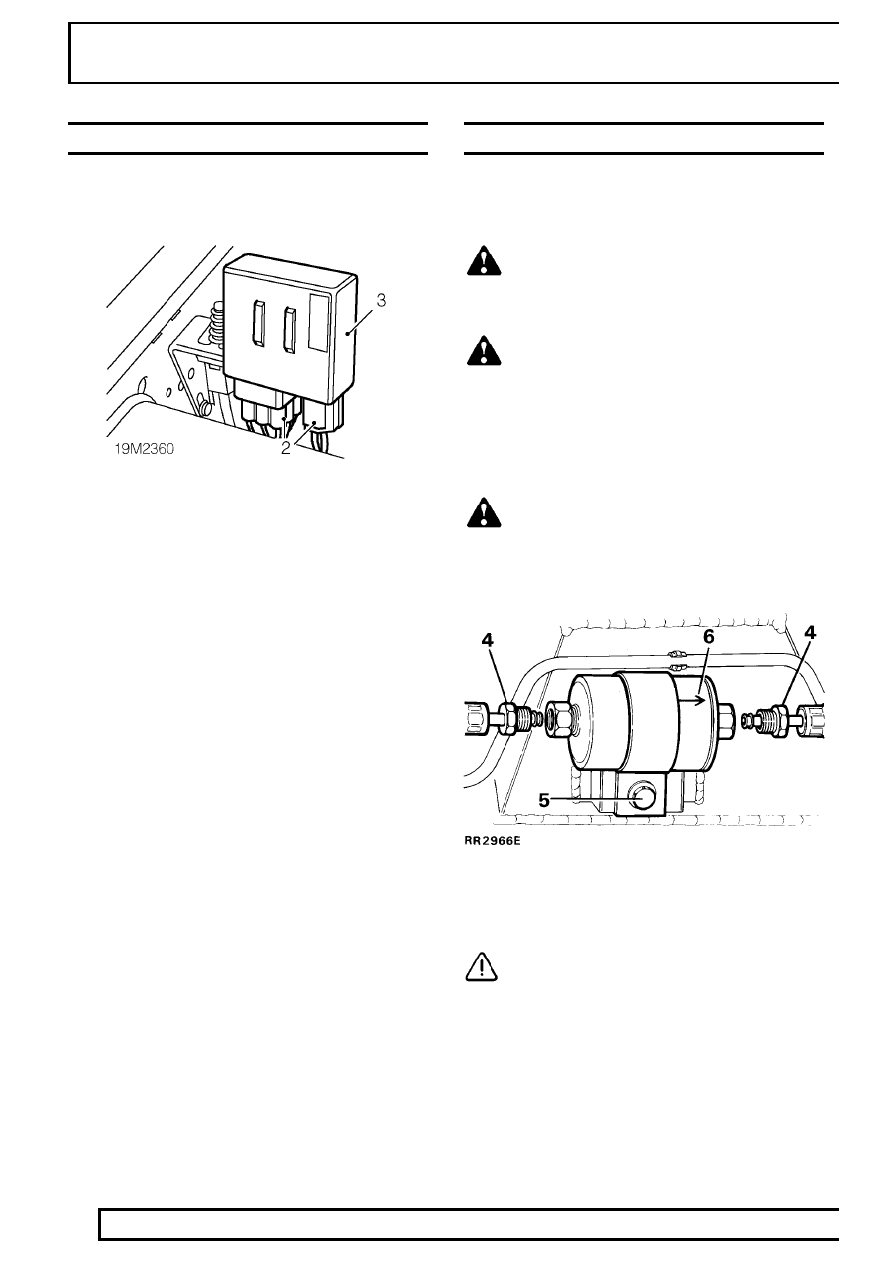
1. Release module from bracket.
2. Disconnect 2 multiplugs from module.
3. Remove module.

Refit

4. Position module, connect multiplugs and secure

to bracket.

FUEL FILTER - ADVANCED EVAPS

Service repair no - 19.25.02

Remove

WARNING: Spilling of fuel is unavoidable
during this operation. Ensure all
necessary precautions are taken to

prevent fire and explosion.

WARNING: Ensure fuel handling
precautions given in section 1 -
Introduction are strictly adhered to when

carrying out following instructions.

1. Depressurise fuel system.

See fuel system -

depressurise - advanced evaps

2. Raise rear of vehicle.

WARNING: Support on safety stands.

3. Clean area around hose connections to prevent

ingress of foreign matter into fuel system. Clamp
inlet and outlet hoses to prevent fuel spillage
when disconnecting hoses.

4. Loosen 2 fuel line unions and disconnect hoses.

Remove and discard ’O’ rings. Plug ends of
hoses to prevent ingress of dirt.

CAUTION: Use two spanners when
loosening or tightening unions.

5. Remove nut and bolt securing fuel filter bracket

to chassis and remove filter from bracket.

SFI

17

REPAIR

ADD: 09/95

Refit

6. Fit a NEW filter to bracket.

NOTE: Ensure direction of flow arrow
stamped on canister is correct.

7. Position filter mounting bracket to chassis and

secure with nut and bolt.

8. Remove plugs from fuel hose ends.
9. Lubricate NEW ’O’ rings with clean fuel and fit to

fuel hoses.

10. Connect fuel hoses to filter and tighten unions to

18 Nm .

CAUTION: Use two spanners when
loosening or tightening unions.

11. Remove stand(s) and lower vehicle.
12. Run the engine to check for any fuel leaks.

FUEL PUMP AND GAUGE SENDER UNIT -
ADVANCED EVAPS

Service repair no - 19.45.03

A plastic fuel tank with a combined fuel pump and
gauge sender unit is fitted. The top flange of the pump
also houses a pressure sensor which is not removable
from the pump. The fuel pump is accessed through a
panel in the load space floor.

WARNING: Ensure that fuel handling
precautions given in 01 - Introduction are
strictly adhered to when carrying out

following instructions.

CAUTION: Before disconnecting any part
of fuel system, it is imperative that all dust,
dirt and debris is removed from around

components to prevent ingress of foreign matter
into fuel system.

Remove

1. Depressurise fuel system.

See fuel system -

depressurise - advanced evaps

2. Disconnect battery negative lead.
3. Check the amount of fuel in the tank. If the tank

is full, drain 2.4 US gallons (9 litres) minimum.
See fuel tank - draining - advanced evaps

4. Remove 6 screws securing tail door tread strip

and remove tread strip.

5. Remove RH luggage compartment side panel.

See CHASSIS AND BODY, Repair, rear
compartment lower trim panels

19

FUEL SYSTEM

18

REPAIR

ADD: 09/95

6. Fold back loadspace carpet and sound

insulation to reveal access panel.

7. Remove 6 screws securing fuel pump access

panel.

8. Remove access panel.

9. Disconnect multiplugs from fuel pump and

pressure sensor.

10. Release vent hose from pressure sensor body.
11. Noting their fitted positions, disconnect both fuel

connections by pressing the black release
latches on each connector and pushing the
connector back down the line. Care must be
taken to catch any excess fuel which may spill
from the fuel lines once removed.

SFI

19

REPAIR

ADD: 09/95

12. Using service tool LRT-19-009 loosen and

remove the metal locking ring.

13. Prise the pump from the tank opening using a

blunt instrument under the edge of the pump
flange. Once clear of the seal, tip the pump to
the right to allow fuel contained in the body of
the pump to drain into the tank.

CAUTION: Do not lift the pump from the
tank using the feed and return stubs.

14. Remove and discard seal.

Refit

15. Fit NEW pump seal to tank opening.
16. Carefully lower pump into tank opening, pressing

firmly on the pump top flange to allow correct
positioning.

NOTE: Ensure location tag on pump top
flange is engaged correctly to tank
opening lip.

17. Fit locking ring and tighten to

35 Nm using

service tool LRT-19-009.

18. Connect both fuel lines to the pump by pushing

the connectors down each line square to the
pump connection until the connectors positively
latch.

19. Connect vent hose to pressure sensor body.
20. Connect multiplugs to fuel pump and pressure

sensor.

21. Reconnect battery negative lead.
22. Refill tank with drained fuel.
23. Run the engine to check for any fuel leaks.
24. Fit access panel and secure with screws.
25. Reposition loadspace sound insulation and

carpet.

26. Fit RH luggage compartment side panel.

See

CHASSIS AND BODY, Repair, rear
compartment lower trim panels

27. Fit tail door tread strip and secure with screws.


Content   ..  73  74  75  76   ..