Defender (1999-2002). Manual - part 136
86
ELECTRICAL
16
REPAIR
LAMP ASSEMBLY - CENTRE HIGH MOUNTED
STOP LIGHT (CHMSL) - FROM 02MY
Service repair no - 86.41.32
Remove
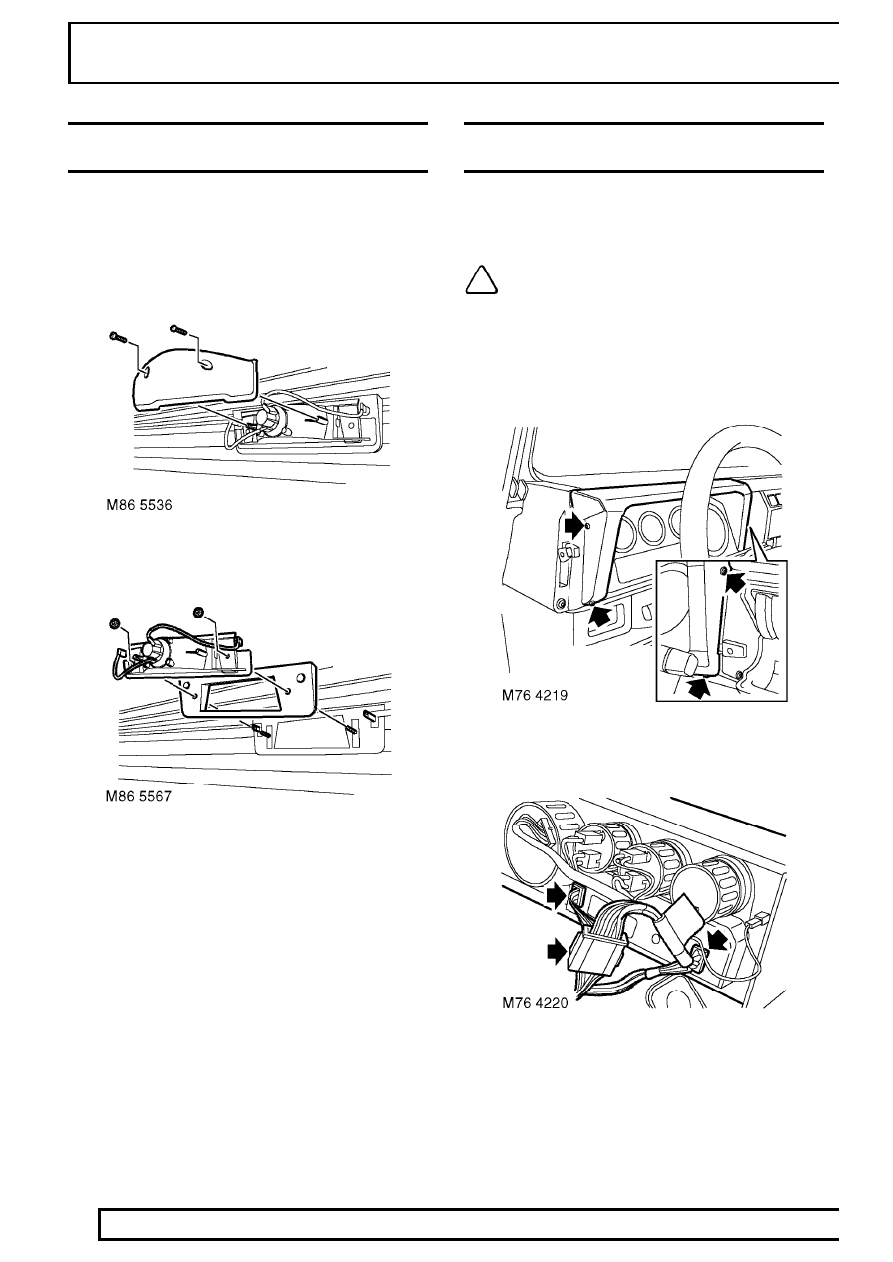
1. Open rear door.
2. Remove 2 screws and cover from CHMSL.
3. Remove insulated cover from Lucar connector,
release catch’s and disconnect Lucar’s taking
care not to damage screen element.
4. Remove nuts securing lamp to rear screen,
withdraw lamp assembly, collect seals and
washers.
5. Remove rubber backing pad, taking care not to
damage screen obscuration band.
Refit
6. Clean obscuration band and fit new backing pad.
7. Fit lamp assembly, seals and washers. Fit nuts
and tighten to 3 Nm (2.2 lbf.ft) .
8. Insulate Lucar connector.
9. Connect Lucars to heated rear screen.
10. Fit cover to CHMSL and secure with screws.
FLASHER UNIT - HAZARD WARNING - FROM
02MY
Service repair no - 86.55.12
Service repair no - 86.55.15
NOTE: This procedure also covers
removal of the Heated Front Screen Timer
Relay, 86.55.15.
Remove
1. Disconnect battery negative lead. See this
Section.
2. Remove 4 screws securing instrument pack and
release pack from fascia.
3. Disconnect 2 multiplugs from warning lamp
panel.
4. Disconnect instrument pack multiplug from main
harness.
5. Remove instrument pack.