Isuzu N-Series. Manual - part 82


  Index      Isuzu     Isuzu N-Series - service repair manual


Search            


Content   ..  80  81  82  83   ..


Isuzu N-Series. Manual - part 82


2-34 CAB AND FRAME

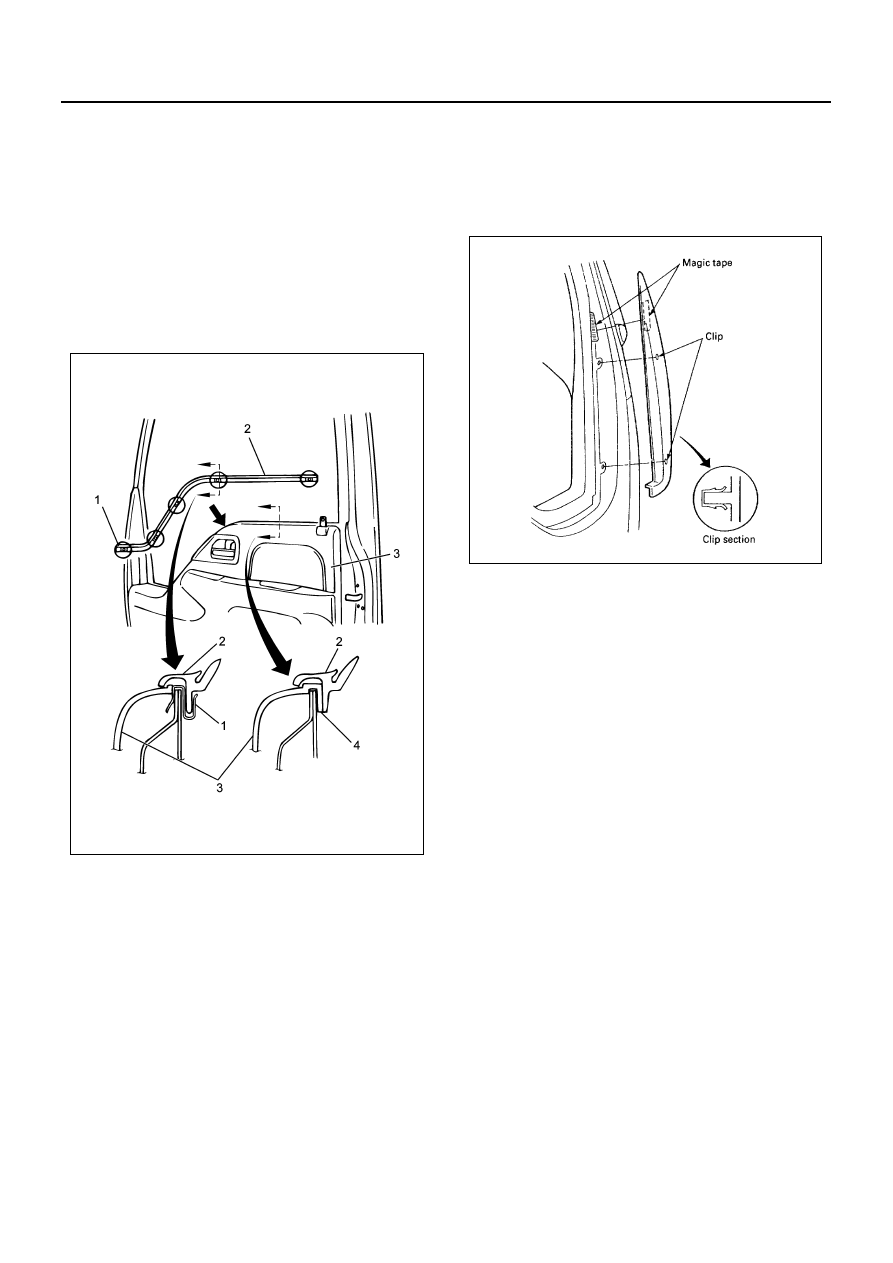
2. To install the inner waist seal (2), align the front

end so that the seal hang over the 4 claws (4) of
upper part of the trim pad (3) and insert the clips in
sequence starting from the front end clip (1). Note
that applying force in transverse direction will
cause deformation.

Caution:
Be extremely careful that the painted surface of pillar
bottom part may be scratched by the cored bar of the
both ends of inner waist seal during removal. If it get
damaged, touch up it with appropriate color to prevent
rust.

Front Pillar Garnish

Removal

1. Front pillar garnish

Peel off the magic tape and pull it toward you. Pull
out the clips at 2 positions.

Installation

For installation, reverse the removal procedure.

N2A0063E

N2A0226E

CAB AND FRAME 2-35

Rear Door Trim Pad

Removal

1. Inside lever bezel

• Remove the mounting screws and draw out the

bezel forward by pulling the inside lever.

2. Window regulator handle

• Draw out the hook and dismount the handle.

3. Arm rest assembly

• Remove the 2 mounting screws.

4. Rear door trim pad

• Remove the clip fitting at 9 positions.

Installation

For installation, reverse the removal procedure taking
the following points into consideration.

Legend

1. Inside lever bezel

3. Arm rest assembly

2. Window regulator handle

4. Rear door trim pad

N2A0190E

N2A0064E

2-36 CAB AND FRAME

1. Install the rear door trim pad by adjusting the trim

pad grip to the mounting hole (1) on the door panel
side so that any float, skewness, harness bite may
not exist.

2. Take care not mistake the tightening direction for

the arm rest assembly (2) mounting screws.

N2A0065E

N2A0066E

CAB AND FRAME 2-37

Door Window Glass, Regulator and Glass Run

Removal

1. Front door trim pad

• Refer to “Front door trim pad” in this Section.

2. Speaker

• Remove the 3 screws and 1 clip and disconnect

the connector.

3. Door pull case bracket
4. Door-out one-way valve
5. Water-proof sheet

• Peel off the water-proof sheet carefully with a

cutter or knife. Take care not to damage it when
peeling it off.

6. Outer waist seal

Legend

1. Glass

7. Speaker connector

2. Glass run

8. Speaker

3. Outer waist seal

9. Window regulator

4. Glass run rear channel

10. Power window motor connector

5. Door-out one way valve

11. Water-proof sheet

6. Door pull case bracket

12. Front door trim pad

N2A0067E

N2A0068E


Content   ..  80  81  82  83   ..