Hyundai Tucson Plug-in Hybrid (2024 year). Manual in english - page 11
 

  Index      Manuals     Hyundai Tucson Plug-in Hybrid (2024 year). Manual in english


Search            copyright infringement  


Content      ..     9      10      11      12     ..


Hyundai Tucson Plug-in Hybrid (2024 year). Manual in english - page 11


Convenience Features

5-94

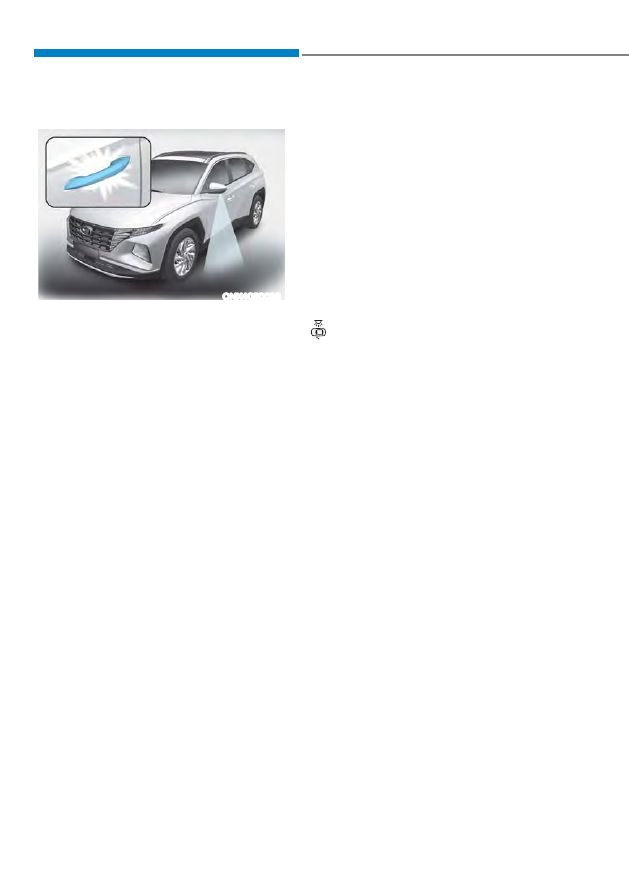
Welcome System

ONX4050038

The welcome system will illuminate the 

vehicle door handles when the driver 

approaches with the smart key.

Door handle lamp

When all the doors (and liftgate) are 

closed and locked, the door handle lamp 

will turn on for approximately 15 seconds 

if any of the below is performed.
1. 

,Iœ&RQYHQLHQFHƟ:HOFRPHPLUURU
OLJKWƟ2QGRRUXQORFNŔLVVHOHFWHGLQ

the User Settings mode on the LCD 

display,

ś

the lamps will turn on when the 

door lock button is pressed on the 

smart key.

ś

the lamps will turn on when the 

button of the outside door handle 

is pressed with the smart key in 

possession.

2. 

,IERWKœ&RQYHQLHQFHƟ:HOFRPH
PLUURUOLJKWƟ2QGRRUXQORFNŔDQG
œ&RQYHQLHQFHƟ:HOFRPHPLUURUOLJKW
Ɵ2QGULYHUDSSURDFKŔLVVHOHFWHGLQ

the User Settings mode on the LCD 

display, the lamps will turn on when 

the vehicle is approached with the 

smart key in possession.

You can activate or deactivate Welcome 

Light function from the User Settings 

mode on the LCD display.

Headlight and position lamp

When the headlight (lamp switch in the 

headlight or AUTO position) is on and 

all doors (and liftgate) are locked and 

closed, the position lamp and headlight 

will come on for 15 seconds when the 

door unlock button is pressed on the 

smart key.
At this time, if you press the door lock 

or unlock button, the position lamp and 

headlight will turn off immediately.

Interior lamp

When the interior lamp switch is in the 

 position and all doors (and liftgate) 

are closed and locked, the room lamp 

will come on for 30 seconds if any of the 

below is performed.


- When the door unlock button is 

pressed on the smart key.


- When you put your hand in the 

outside door handle while carrying the 

smart key.

At this time, if you press the door lock 

or unlock button on the smart key the 

lamps will turn off immediately.

05

5-95

WIPERS AND WASHERS

„

Front windshield wiper/washer

ONX4050042

„

Rear windshield wiper/washer

ONX4050043

A.  Wiper speed control (front)

ś

MIST – Single wipe

ś

OFF – Off

ś

INT – Intermittent wipe 
AUTO* – Auto control wipe

ś

LO– Low wiper speed

ś

HI – High wiper speed

B.  Intermittent control wipe time 

adjustment

C. Wash with brief wipes (front)
D. Rear wiper control*

ś

HI – High wiper speed

ś

LO– Low wiper speed

ś

OFF – Off

E.  Wash with brief wipes (rear)

* : if equipped

Windshield Wipers

Operates as follows when the ignition 

switch is turned ON.
MIST: For a single wiping cycle, move 

the lever down (V) or up (MIST) 

and release it. The wipers will 

operate continuously if the lever 

is held in this position.

OFF : Wipers are not in operation.
INT : Wipers operate intermittently at 

the same wiping intervals. Use 

this mode in light rain or mist. To 

vary the speed setting, turn the 

speed control knob.

LO : The wiper runs at a lower speed.
HI : The wiper runs at a higher speed.

 Information

If there is heavy accumulation of snow 
or ice on the windshield, defrost the 
windshield for about 10 minutes, or until 
the snow and/or ice is removed before 
using the windshield wipers to ensure 
proper operation.

If you do not remove the snow and/or ice 
before using the wiper and washer, it may 
damage the wiper and washer system.

Convenience Features

5-96

AUTO Wiper Control (if equipped)

ONX4EH050002

The rain sensor located on the upper 

end of the windshield glass senses 

the amount of rainfall and controls the 

wiping cycle for the proper interval.
The wiper operation time will be 

automatically controlled depends on 

rainfall.
When the rain stops, the wiper stops.
To vary the sensitivity setting, turn the 

sensitivity control knob.
If the wiper switch is set in AUTO mode 

when the Engine Start/Stop button is in 

the ON position, the wiper will operate 

once to perform a self-check of the 

system. Set the wiper to the OFF position 

when the wiper is not in use.

 WARNING

To avoid personal injury from the 

windshield wipers, when the engine 

is running and the windshield wiper 

switch is placed in the AUTO mode:

ś

Do not touch the upper end of the 

windshield glass facing the rain 

sensor.

ś

Do not wipe the upper end of the 

windshield glass with a damp or wet 

cloth.

ś

Do not put pressure on the 

windshield glass.

NOTICE

ś

When washing the vehicle, set the 

wiper switch in the OFF position to 

stop the auto wiper operation. The 

wiper may operate and be damaged 

if the switch is set in the AUTO mode 

while washing the vehicle.

ś

Do not remove the sensor cover 

located on the upper end of the 

passenger side windshield glass. 

Damage to system components 

could occur and may not be covered 

by your vehicle warranty.

ś

Because of using a photo sensor, 

temporary malfunction could occur 

according to sudden ambient light 

change made by stone and dust 

while driving.

05

5-97

Front Windshield Washers

ONX4050044

In the OFF position, pull the lever gently 

toward you to spray washer fluid on the 

windshield and to run the wipers 1-3 

cycles. The spray and wiper operation 

will continue until you release the lever. If 

the washer does not work, you may need 

to add washer fluid to the washer fluid 

reservoir.

Recirculating air when washer fluid 

is used 

When washer fluid is used, in order to 

reduce any unpleasant scent of the 

washer fluid from entering the cabin, 

recirculation mode and air conditioning 

are automatically activated depending 

on the outside temperature. If you 

select fresh mode while the function is 

operating, the function will resume after 

a certain amount of time. It may not work 

in some conditions such as cold weather 

or engine OFF. 

For more details, refer to “Climate 

Control Additional Features” section in 

this chapter.

 WARNING

When the outside temperature is below 

freezing, ALWAYS warm the windshield 

using the defroster to help prevent 

the washer fluid from freezing on the 

windshield and obscuring your vision 

which could result in an accident and 

serious injury or death.

NOTICE

ś

To prevent possible damage to the 

washer pump, do not operate the 

washer when the fluid reservoir is 

empty.

ś

To prevent possible damage to the 

wipers or windshield, do not operate 

the wipers when the windshield is 

dry.

ś

To prevent damage to the wiper 

arms and other components, do 

not attempt to move the wipers 

manually.

ś

To prevent possible damage to the 

wipers and washer system, use anti-

freezing washer fluids in the winter 

season or cold weather.

Convenience Features

5-98

Rear Window Wiper and Washer

ONX4050043

The rear window wiper and washer 

switch is located at the end of the wiper 

and washer switch lever. Turn the switch 

to the desired position to operate the 

rear wiper and washer.
HI – High wiper speed
LO – Low wiper speed
OFF – Off

ONX4050045

Push the lever away from you to spray 

rear washer fluid and to run the rear 

wipers 1~3 cycles. The spray and wiper 

operation will continue until you release 

the lever.

Auto rear wiper (if equipped)

The rear wiper will operate while the 

vehicle is in reverse with the front wiper 

ON by selecting the function from the 

Settings menu on the LCD display. 

Select:


-

6HWXSƟ8VHU6HWWLQJVƟ&RQYHQLHQFH
Ɵ$XWR5HDU:LSHULQ5

05

5-99

$8720$7,&&/,0$7(&21752/6<67(0

„

Type A

„

Type B

The actual shape of air conditioner may differ from the illustration.

ONX4H050102N/ONX4H050103N

1.  Driver’s temperature control button/

toggle switch

2.  Passenger’s temperature control 

button/toggle switch

3.  AUTO (automatic control) button
4.  Air intake control button
5. OFF button
6.  Front windshield defroster button

7.  A/C (air conditioning) button
8.  Fan speed control button
9.  Mode selection button
10. Multi Air Mode button
11. Rear window defroster button
12. SYNC button
13. Climate control information screen
14. Driver only button

Convenience Features

5-100

Automatic Heating and Air 

Conditioning

The Automatic Climate Control System 

is controlled by setting the desired 

temperature.
1.  Press the AUTO button. (3)

The modes, fan speeds, air intake and 

air-conditioning will be controlled 

automatically by the temperature 

setting you select.

ONX4E050162

You can control the fan speed in three 

stages by pushing the AUTO button 

during automatic operation.


- HIGH : Provide rapid air conditioning 

and heating with maximum fan speed 

setting 


- MEDIUM : Provide air conditioning 

and heating with mid-level fan speed 

setting


- LOW : Fan speed is set to the lowest 

setting range (1 to 3 bars range) 

2.  Turn the temperature control 

Button/knob (1, 2) to the desired 

temperature. If the temperature is 

set to the lowest setting (Lo), the 

air conditioning system will operate 

continuously. After the interior has 

cooled sufficiently, adjust the knob 

to a higher temperature set point 

whenever possible.

ś

To turn the automatic operation off, 

select any button of the following:


- Mode selection button


- Front windshield defroster button 

(Press the button one more time 

to deselect the front windshield 

defroster function. The ‘AUTO’ sign 

will illuminate on the information 

display once again.)


- Fan speed control button


- The selected function will be 

controlled manually while other 

functions operate automatically.

ś

For your convenience and to improve 

the effectiveness of the climate 

control, use the AUTO button and set 

the temperature to 72°F (22°C).

05

5-101

ONX4050072

 Information

Never place anything near the sensor to 
ensure better control of the heating and 
cooling system.

Manual Heating and Air 

Conditioning

The heating and cooling system can be 

controlled manually by pushing buttons 

other than the AUTO button. In this case, 

the system works sequentially according 

to the order of buttons selected. When 

pressing any button except the AUTO 

button while using automatic operation, 

the functions not selected will be 

controlled automatically.
1.  Start the engine.
2.  Set the mode to the desired position. 

For improving the effectiveness of 

heating and cooling, select:


- Heating: 


- Cooling: 

3.  Set the temperature control to the 

desired position.

4.  Set the air intake control to the 

outside (fresh) air position.

5.  Set the fan speed control to the 

desired speed.

6.  If air conditioning is desired, turn the 

air conditioning system on.

7.  Press the AUTO button to convert to 

full automatic control of the system.

When starting the vehicle in cold 

weather using manual temperature 

control, operate the system in the 

following method to improve heating.


- Turn off or lower the blower, right 

after starting the engine.

ś

Allow the engine to warm up during 

this time since the air flow from the 

heater is still cold.


- After a few minutes of engine warm 

up, turn on or set the fan to a higher 

level and adjust the temperature 

setting to hot.

Convenience Features

5-102

Mode selection 

The actual shape of air conditioner may differ from the illustration.

ONX4050118

05

5-103

ONX4050117

The mode selection button controls 

the direction of the air flow through the 

ventilation system.
The air flow outlet direction is cycled as 

follows: 

Face-Level (B, C, E)

Air flow is directed toward the upper 

body and face. Additionally, each outlet 

can be controlled to direct the air 

discharged from the outlet.

Bi-Level (B, C, D, E, F)

Air flow is directed towards the face and 

the floor.

Floor-Level (A, B, D, E, F)

Most of the air flow is directed to the 

floor, with a small amount of the air 

being directed to the windshield and side 

window defrosters.

Floor/Defrost-Level  
(A, B, D, E, F)

Most of the air flow is directed to the 

floor and the windshield with a small 

amount directed to the side window 

defrosters.

Multi air mode (B, C, D, E, F, G)

Gentle breezes come out the outlet 

vents.

Defrost-Level (A, B)

Most of the air flow is directed to the 

windshield with a small amount of air 

directed to the side window defrosters.

Convenience Features

5-104

„

Front 

ONX4050104

„

Rear 

ONX4050105

Instrument panel vents

The instrument panel vent air flow can be 

directed up/down or left/right using the 

vent adjustment lever.
The air flow can also be CLOSED using 

the vent adjustment lever.
Move the lever to   position to close, 

and to   position to open. However, the 

third row air vent cannot be closed.

Temperature control

„

Type A

„

Type B

ONX4H050111

ONX4050115

The temperature setting will increase 

when you toggle up or touch the UP 

arrow on the touchscreen (if equipped).
The temperature setting will decrease 

when you toggle down or touch the 

DOWN arrow on the touchscreen (if 

equipped).

ONX4050122

Adjusting the driver and passenger side 
temperature equally

ś

Press the SYNC button (indicator 

light ON) to adjust the driver and 

passenger side temperature equally.
The passenger side temperature will 

be set to the same temperature as the 

driver side temperature.

ś

Turn the driver side temperature 

control knob. The driver and 

passenger side temperature will be 

adjusted equally.

05

5-105

Adjusting the driver and passenger side 
temperature individually

ś

Press the SYNC button (indicator 

light OFF) again to adjust the driver 

and passenger side temperature 

individually.

Temperature conversion

If the battery terminal (For plug-in 

hybrid vehicle) or battery connector (For 

hybrid vehicle) has been discharged or 

disconnected, the temperature mode 

display will reset to Fahrenheit.
To change the temperature unit from °C 

to °F or °F to °C :


- Instrument cluster or infotainment 

system screen

*RWR6HWXSƟ8QLWƟ7HPSHUDWXUHXQLW

The temperature unit on both the cluster 

LCD display and the climate control 

screen will change.

Air intake control

This is used to select the outside (fresh) 

air position or recirculated air position.
To change the air intake control position, 

push the control button.

Recirculated air position

With the recirculated air 

position selected, air from the 

passenger compartment will 

be drawn through the heating 

system and heated or cooled 

according to the function 

selected.

Outside (fresh) air position

With the outside (fresh) air 

position selected, air enters 

the vehicle from outside 

and is heated or cooled 

according to the function 

selected.

Convenience Features

5-106

 Information

Using the system in the fresh air position is 
recommended.

Prolonged operation of the heater in the 
recirculated air position (without air 
conditioning selected) can cause fogging of 
the windshield and side windows and the 
air within the passenger compartment will 
become stale.

In addition, prolonged use of the air 
conditioning with the recirculated air 
position selected will result in excessively 
dry air in the passenger compartment.

 WARNING

ś

Continued climate control system 

operation in the recirculated air 

position may allow humidity to 

increase inside the vehicle which 

may fog the glass and obscure 

visibility.

ś

Do not sleep in a vehicle with the air 

conditioning or heating system on. It 

may cause serious harm or death due 

to a drop in the oxygen level and/or 

body temperature.

ś

Continued climate control system 

operation in the recirculated air 

position can cause drowsiness 

or sleepiness, and loss of vehicle 

control. Set the air intake control 

to the outside (fresh) air position as 

much as possible while driving.

Fan speed control

ONX4H050107

The fan speed can be set as desired by 

pushing the fan speed control button.
Increased air flow is delivered with 

higher fan speeds.
Pressing the OFF button turns off the fan.

NOTICE

Operating the fan when the ignition 

switch is in the ON position could cause 

the battery to discharge. Operate the 

fan when the engine is running.

05

5-107

Air conditioning

Push the A/C button to turn the air 

conditioning system on (indicator light 

will illuminate).
Push the button again to turn the air 

conditioning system off.

OFF mode 

Push the OFF button to turn the climate 

control system off. However, you can still 

operate the mode and air intake buttons 

as long as the ignition switch is in the ON 

position.

Driver Only 

ONX4H050104

If you press the DRIVER ONLY button  

and the indicator light illuminates, air 

mostly blows in the direction of the 

driver’s seat. 
However, some of the air may come out 

of other seating position ducts to keep 

indoor air pleasant. 
Using the DRIVER ONLY button is a 

convenient feature when there are no 

other passengers in the vehicle and helps 

to reduce energy consumption from the 

climate control system.
When the front windshield defroster 

button is pressed to remove frost, air 

blows from the left and right sides of 

the front windshield even if the DRIVER 

ONLY button has been pressed.

Convenience Features

5-108

Multi Air Mode (if equipped)

The actual shape of air conditioner may differ from the illustration.

ONX4050129

05

5-109

ONX4H050109

When the Multi-Air mode button is 

pressed, air flow is directed to the 

face level and floor level and through 

perforated sections along the instrument 

panel for the driver and passenger.  The 

multi-air mode LED indicator will be 

illuminated.
If the multi air mode button is pressed 

when the air volume is beyond level 4, it 

decreases to Level 3.

OFF

If you press the multi-air button again, 

the indicator will turn OFF and the 

directed air flow will be according to the 

previous setting before multi-air mode 

was enabled.
If you press the MODE selection button, 

the airflow will change based on the 

MODE selected.
 

System Operation

Ventilation

1.  Set the mode to the 

 position.

2.  Set the air intake control to the 

outside (fresh) air position.

3.  Set the temperature control to the 

desired position.

4.  Set the fan speed control to the 

desired speed.

Heating

1.  Set the mode to the 

 position.

2.  Set the air intake control to the 

outside (fresh) air position.

3.  Set the temperature control to the 

desired position.

4.  Set the fan speed control to the 

desired speed.

5.  If dehumidified heating is desired, 

turn the air conditioning system on.

If the windshield fogs up, set the mode 

to the 

 or 

 position.

Operation Tips

ś

To keep dust or unpleasant fumes 

from entering the vehicle through the 

ventilation system, temporarily set the 

air intake control to the recirculated 

air position. Be sure to return the 

control to the fresh air position when 

the irritation has passed to keep fresh 

air in the vehicle. This will help keep 

the driver alert and comfortable.

ś

To prevent interior fog on the 

windshield, set the air intake control 

to the fresh air position and fan speed 

to the desired position, turn on the air 

conditioning system, and adjust the 

temperature control to the desired 

temperature.

Convenience Features

5-110

Air conditioning

HYUNDAI Air Conditioning Systems are 

filled with R-1234yf refrigerant.
1.  Start the engine. Push the air 

conditioning button.

2.  Set the mode to the 

 position.

3.  Set the air intake control to the 

outside air or recirculated air position.

4.  Adjust the fan speed control and 

temperature control to maintain 

maximum comfort.

NOTICE

When using the air conditioning system, 

monitor the temperature gauge closely 

while driving up hills or in heavy traffic 

when outside temperatures are high. 

Air conditioning system operation may 

cause engine overheating. Continue to 

use the fan but turn the air conditioning 

system off if the temperature gauge 

indicates engine overheating.

Air conditioning system operation tips

ś

If the vehicle has been parked in 

direct sunlight during hot weather, 

open the windows for a short time 

to let the hot air inside the vehicle 

escape.

ś

After sufficient cooling has been 

achieved, switch back from the 

recirculated air to the fresh outside air 

position.

ś

To help reduce moisture inside of 

the windows on rainy or humid 

days, decrease the humidity inside 

the vehicle by operating the air 

conditioning system with the windows 

and sunroof closed.

ś

Use the air conditioning system every 

month for a few minutes to ensure 

maximum system performance.

ś

If you operate the air conditioner 

excessively, the difference between 

the temperature of the outside air and 

that of the windshield could cause 

the outer surface of the windshield to 

fog up, causing loss of visibility. In this 

case, set the mode selection button to 

the 

 position and set the fan speed 

control knob to the lowest speed 

setting.

05

5-111

System Maintenance

Cabin air filter

OIK047401L

[A] : Outside air, [B] : Recirculated air
[C] : Cabin air filter, [D] : Blower
[E] : Evaporator core, [F] : Heater core

The cabin air filter is installed behind 

the glove box. It filters the dust or other 

pollutants that enter the vehicle through 

the heating and air conditioning system.
Have the cabin air filter replaced by an 

authorized HYUNDAI dealer according to 

the maintenance schedule. If the vehicle 

is being driven in severe conditions such 

as dusty or rough roads, more frequent 

climate control filter inspections and 

changes are required.
If the air flow rate suddenly decreases, 

the system should be checked at an 

authorized HYUNDAI dealer.

Air Conditioning Performance and 

Maintenance at Your HYUNDAI 

Dealer

When the amount of refrigerant is low, 

the performance of the air conditioning 

is reduced. Overfilling also reduces the 

performance of the air conditioning system.
Therefore, if abnormal operation is found, 

have the system inspected by an authorized 

HYUNDAI dealer.

NOTICE

It is important that the correct type and 

amount of oil and refrigerant is used. 

Otherwise, damage to the compressor 

and abnormal system operation may 

occur. To prevent damage, the air 

conditioning system in your vehicle 

should only be serviced by trained and 

certified technicians.

NOTICE

ś

The refrigerant system should only 

be serviced by trained and certified 

technicians to insure proper and safe 

operation.

ś

The refrigerant system should be 

serviced in a well-ventilated place.

ś

The air conditioning evaporator 

(cooling coil) shall never be repaired 

or replaced with one removed from 

a used or salvaged vehicle and new 

replacement MAC evaporators shall 

be certified (and labeled) as meeting 

SAE Standard J2842.

Convenience Features

5-112

 WARNING

Vehicles equipped with R-1234yf

Since the refrigerant is 

mildly flammable and 

operated at high pressure, 

the air conditioning system 

should only be serviced 

by trained and certified 

technicians. It is important 

that the correct type and 

amount of oil and refrigerant 

are used.

All refrigerants should be reclaimed 

with proper equipment.

Venting refrigerants directly to the 

atmosphere is harmful to individuals 

and environment. Failure to heed these 

warnings can lead to serious injuries.

ONX4050071

Air Conditioning refrigerant label

You can find out which air conditioning 

refrigerant is applied to your vehicle on 

the label located inside of the hood.

„

Example

OTMH090024

Each symbol and specification on the 

air conditioning refrigerant label is 

represented as below:
1.  Classification of refrigerant
2.  Amount of refrigerant
3.  Classification of compressor lubricant
4. Caution
5. Flammable refrigerant
6.  To require registered technician to 

service air conditioning system

05

5-113

WINDSHIELD DEFROSTING AND DEFOGGING

 WARNING

Windshield heating
Do not use the 

 position during 

cooling operation in extremely humid 

weather. The difference between the 

temperature of the outside air and that 

of the windshield could cause the outer 

surface of the windshield to fog up, 

causing loss of visibility could cause 

an accident resulting in serious injury 

or death. In this case, set the mode 

selection button to the 

 position 

and fan speed control knob to a lower 

speed.

ś

For maximum defrost performance, 

set the temperature control to the 

highest temperature setting and 

the fan speed control to the highest 

setting.

ś

If warm air to the floor is desired while 

defrosting or defogging, set the mode 

to the floor-defrost position.

ś

Before driving, clear all snow and ice 

from the windshield, rear window, 

side view mirrors, and all side 

windows.

ś

Clear all snow and ice from the 

hood and air inlet in the cowl grill 

to improve heater and defroster 

efficiency and to reduce the 

probability of fogging up the inside of 

the windshield.

NOTICE

If the engine temperature is still cold 

after starting, then a brief engine warm 

up period may be required for the 

vented air flow to become warm or hot.

Automatic Climate Control 

System

To defog inside windshield

ONX4H050100

„

 Type A

„

 Type B

1.  Select the desired fan speed.
2.  Select the desired temperature.
3.  Press the defroster button (

).

4.  The air-conditioning will turn on 

according to the detected ambient 

temperature, outside (fresh) air 

position and higher fan speed will be 

selected automatically.

If the air-conditioning, outside (fresh) 

air position and higher fan speed are 

not selected automatically, adjust the 

corresponding button or knob manually.
If the 

 position is selected, lower fan 

speed is controlled to higher fan speed.

Convenience Features

5-114

To defrost outside windshield

ONX4H050101

„

 Type A

„

 Type B

1.  Set fan speed to the highest position.
2.  Set temperature to the extreme hot 

(HI) position.

3.  Press the defroster button (

).

4.  The air-conditioning will turn 

on according to the detected 

ambient temperature and outside 

(fresh) air position will be selected 

automatically.

If the 

 position is selected, lower fan 

speed is controlled to higher fan speed.

Auto Defogging System 

on Models with Automatic 

Temperature Control

Auto defogging reduces the possibility of 

fogging up the inside of the windshield 

by automatically sensing the moisture on 

inside the windshield.
The auto defogging system operates 

when the heater or air conditioning is on.

 Information

The auto defogging system may not 
operate normally, when the outside 
temperature is below 14°F (-10°C).

To cancel or set the Auto Defogging 

System, keep the front defroster button 

pressed for 3 seconds. The “ADS OFF” 

symbol will be shown in the climate 

display to inform you that the system 

is deactivated. To re-activate the auto 

defogging system, follow the procedure 

mentioned above and the “ADS OFF” 

symbol will disappear.
If the battery has been disconnected 

or discharged, it resets to the auto 

defogging status.

 Information

For efficiency, do not select recirculated 
air position while the Auto defogging 
system is operating.

NOTICE

Do not remove the sensor cover located 

on the top of the windshield glass.
Damage to system parts could occur 

and may not be covered by your vehicle 

warranty.

05

5-115

Rear Window Defroster

NOTICE

To prevent damage to the rear window 

defroster conducting elements bonded 

to the inside surface of the rear window, 

never use sharp instruments or window 

cleaners containing abrasives to clean 

the window.

The defroster heats the 

window to remove frost, fog 

and thin ice from the interior 

and exterior of the rear 

window, while the engine is 

running.

ś

To activate the rear window defroster, 

press the rear window defroster 

button located in the center control 

panel. The indicator on the rear 

window defroster button illuminates 

when the defroster is ON.

ś

To turn off the defroster, press the rear 

window defroster button again.

 Information

ś

If there is heavy accumulation of snow 
on the rear window, brush it off before 
operating the rear defroster.

ś

The rear window defroster 
automatically turns off after 
approximately 20 minutes or when the 
Engine Start/Stop button is in the OFF 
position.

Side view mirror defroster (if 

equipped)

If your vehicle is equipped with the side 

view mirror defrosters, they will operate 

at the same time you turn on the rear 

window defroster.

Convenience Features

5-116

&/,0$7(&21752/$'',7,21$/)($785(6ǣ,)(48,33('Ǥ

A/C Automatic Drying (if 

equipped) 

A/C Automatic Drying feature dries 

the moisture in the air conditioner and 

reduces air conditioner odor. The blower 

motor automatically operates after 30 

minutes the vehicle  is turned off.

Turning A/C Automatic Drying On or 

off

The A/C Automatic Drying feature can 

be turned on and off by selecting ‘Setup 

Ɵ9HKLFOH6HWWLQJVƟ&OLPDWHƟ&OLPDWH
)HDWXUHVƟ$&$XWRPDWLF'U\LQJŔIURP

the infotainment system. See additional 

information in supplied Infotainment 

Manual.
If the operating condition is satisfied 

after setting the feature, the operating 

condition is displayed on the 

infotainment system screen and the 

blower motor automatically operates. 
When the A/C Automatic Drying feature 

is activated, the air conditioner sets the 

fan speed to the third level, selects Fresh 

mode, and directs the air flow to the 

floor. 

Operating conditions

The A/C Automatic Drying feature 

operates under the following conditions:
The vehicle  is turned off after operating 

the air conditioner for a certain period 

The 12-volt battery level is sufficient The 

outside temperature is above a certain 

level

Non-operating conditions

The A/C Automatic Drying feature stops 

operating under the following conditions:


- The A/C Automatic Drying feature has 

operated for 3 minutes


- The Start/Stop button  is pressed, or 

the vehicle  is on


- The climate control system is 

operated remotely

 Information

ś

The A/C Automatic Drying feature 
reduces air conditioner odors but may 
not remove all odors. 

ś

The A/C Automatic Drying feature does 
not operate if the remaining battery 
level is insufficient to prevent battery 
discharge.

Auto Defogging System 

on Models with Automatic 

Temperature Control

ONX4050046

Auto defogging helps reduce the 

possibility of fogging up the inside of the 

windshield by automatically sensing the 

moisture on inside the windshield.
The auto defogging system operates 

when the heater or air conditioning is on.

 Information

The auto defogging system may not 
operate normally, when the outside 
temperature is below 14 °F (-10 °C).

05

5-117

When the Auto Defogging 

System operates, the indicator 

will illuminate.

If a high amount of humidity is detected 

in the vehicle, the Auto Defogging 

System will be enabled. The following 

steps will be performed automatically:
Step 1) Air conditioning will turn ON.

Step 2) Air intake control will change to 

Fresh mode.

Step 3) Mode will change to defrost to 

direct airflow to the windshield.

Step 4) Fan speed will be set to MAX.
If the air conditioning is off or 

recirculation mode is manually selected 

while Auto Defogging System is ON, the 

Auto Defogging System indicator will 

blink 3 times to signal that the manual 

operation has been canceled.

Turning the Auto Defogging System 

ON or OFF

Climate control system

Press the front windshield defroster 

button for 3 seconds when the Engine 

Start/Stop button is in the ON position. 

When the Auto Defogging System is 

turned off, the ADS OFF symbol will blink 

3 times and ADS OFF will be displayed on 

the climate control information screen.
When the Auto Defogging System is 

turned on, the ADS OFF symbol will blink 

6 times without a signal.

Infotainment system

Auto Defogging System can be turned 

RQDQGRIIE\VHOHFWLQJœ6HWXSƟ
9HKLFOH6HWWLQJVƟ&OLPDWHƟ'HIRJ
'HIURVW2SWLRQVƟ$XWR'HIRJŔIURPWKH

infotainment system screen.

For detailed information, refer to the 

separately supplied infotainment 

system manual.

 Information

ś

When the air conditioning is turned 
on by Auto Defogging System, if you 
try to turn off the air conditioning, the 
indicator will blink 3 times and the air 
conditioning will not be turned off.

ś

To maintain the effectiveness and 
efficiency of the Auto Defogging 
System, do not select Recirculation 
mode while the system is operating.

ś

When Auto Defogging System is 
operating, fan speed adjustment, 
temperature adjustment, and air intake 
control selection are all disabled.

NOTICE

Do not remove the sensor cover located 

on the upper end of the windshield 

glass.
Damage to system parts could occur 

and may not be covered by your vehicle 

warranty.

Auto Dehumidify

To increase cabin air quality and reduce 

windshield misting, recirculation mode 

switches off automatically after about 5 

to 30 minutes, depending on the outside 

temperature, and the air intake will 

change to fresh mode.

Turning Auto Dehumidify ON or OFF

Climate control system

To turn the Auto Dehumidify feature 

on or off, select Face level (

) mode 

and press the air intake control (

button at least five times within three 

seconds. When Auto Dehumidify is 

turned on, the air intake control button 

indicator will blink 6 times. When turned 

off, the indicator will blink 3 times.

Convenience Features

5-118

Infotainment system

Auto Dehumidify can be turned on and 

RIIE\VHOHFWLQJœ6HWXSƟ9HKLFOH6HWWLQJV
Ɵ&OLPDWHƟ$XWRPDWLF9HQWLODWLRQƟ

Auto Dehumidify’ from the infotainment 

system screen.

For detailed information, refer to the 

separately supplied infotainment 

system manual.

Recirculating Air when Washer 

Fluid is Used

Recirculation mode automatically 

activates to reduce any unpleasant scent 

of the washer fluid from entering the 

cabin when the windshield washer is 

used.
When it is shifted to the recirculation 

mode, the unpleasant scent may flow 

into the vehicle.
However, In cold whether to prevent 

the windshield from fogging up, the 

recirculation mode may not be selected.

Automatic Recirc Mode When 

Washer Fluid is Used - ON or OFF

Climate control system

You can choose to turn OFF the 

Automatic Recirc Mode when washer 

fluid is used.  To adjust this feature, 

select Floor level  (

) mode, and then 

while pressing and holding the A/C 

button, press the air intake control (

button four times within 2 seconds.After 

performing the button press sequence 

described above, when the Automatic 

Recirc Mode feature is disabled, you will 

see the air intake control button blink 3 

times (feature OFF).  When the air intake 

control button blinks 6 times, the feature 

is enabled (feature ON).

Infotainment system

Activate upon Washer Fluid Use can be 

WXUQHGRQDQGRIIE\VHOHFWLQJœ6HWXSƟ
9HKLFOH6HWWLQJVƟ&OLPDWHƟ5HFLUFXODWH
$LUƟ$FWLYDWHXSRQ:DVKHU)OXLG8VH

(or Interlocking washer fluid)’ from the 

infotainment system screen.

For detailed information, refer to the 

separately supplied infotainment 

system manual.

Sunroof Inside Air Recirculation 

(if equipped)

When the sunroof is opened, fresh 

mode will be automatically selected. 

At this time, if you press the air intake 

control button, recirculation mode will 

be selected but will change back to fresh 

mode after 3 minutes. When the sunroof 

is closed, the air intake position will 

return to the original position that was 

selected.

Automatic Controls for the 

Driver Based on Climate Control 

System Settings

The temperature of the driver’s seat 

warmer, air ventilated seat and heated 

steering wheel is automatically 

controlled depending on the inside and 

outside temperature of the vehicle when 

the engine is running.
To use these features, it must be 

enabled from the Settings menu in the 

infotainment system screen. Select:


-

6HWXSƟ9HKLFOH6HWWLQJVƟ6HDWƟ
+HDWHG9HQWLODWHG)HDWXUHVƟ+HDWHG
9HQWLODWHG)HDWXUHVƟ$XWR&RQWUROV

That Use Climate Control Settings

For more details on Auto Comfort 

Control, refer to “Seat Warmers” and 

“Air ventilation seats” section in chapter 

3 and “Heated Steering Wheel” section 

in chapter 5.

05

5-119

6725$*(&203$570(17

 WARNING

Never store cigarette lighters, propane 

cylinders, or other flammable/explosive 

materials in the vehicle. These items 

may catch fire and/or explode if the 

vehicle is exposed to hot temperatures 

for extended periods.

 WARNING

ALWAYS keep the storage compartment 

covers closed securely while driving. 

Items inside your vehicle are moving as 

fast as the vehicle. If you have to stop 

or turn quickly, or if there is a crash, the 

items may fly out of the compartment 

and may cause an injury if they strike 

the driver or a passenger.

NOTICE

To avoid possible theft, do not leave 

valuables in the storage compartments.

Center Console Storage

ONX4050047

To open:
Press the button.

Glove Box

ONX4PH052002C

To open:
Pull the lever (1).

 WARNING

ALWAYS close the glove box door after 

use.
An open glove box door can cause 

serious injury to the passenger in an 

accident, even if the passenger is 

wearing a seat belt.

Luggage Tray (if equipped)

ONX4050049

You can place a first aid kit, a reflector 

triangle (front tray), tools, etc. in the box 

for easy access.

ś

Grasp the handle on the top of the 

cover and lift it.

Convenience Features

5-120

INTERIOR FEATURES

Cup Holder

„

Front

ONX4050050

„

Second row

ONX4050051

Cups or small beverages cups may be 

placed in the cup holders.

 WARNING

ś

Avoid abrupt starting and braking 

when the cup holder is in use to 

prevent spilling your drink. If hot 

liquid spills, you could be burned. 

Such a burn to the driver could cause 

loss of vehicle control resulting in an 

accident.

ś

Do not place uncovered or unsecured 

cups, bottles, cans, etc., in the cup 

holder containing hot liquid while 

the vehicle is in motion. Injuries may 

result in the event of a sudden stop 

or collision.

ś

Only use soft cups in the cup holders. 

Hard objects can injure you in an 

accident.

 WARNING

Keep cans or bottles out of direct 

sun light and do not put them in a 

hot vehicle. They may inadvertently 

explode.

NOTICE

ś

Keep your drinks sealed while 

driving to prevent spilling your drink. 

If liquid spills, it may get into the 

vehicle’s electrical/electronic system 

and damage electrical/electronic 

parts.

ś

When cleaning spilled liquids do not 

use hot air to blow out or dry the cup 

holder. This may damage the interior.

05

5-121

Sunvisor

OTM048089

To use the sunvisor, pull it downward.
To use the sunvisor to block the sun 

from the side window, pull it downward, 

release it from the bracket (1) and swing 

it to the side (2) towards the window.
To use the vanity mirror, pull down the 

sunvisor and slide the mirror cover (3).
Adjust the sunvisor forward or backward 

(4) as needed (if equipped). Use the 

ticket holder (5) to hold tickets.
Close the vanity mirror cover securely 

and return the sunvisor to its original 

position after use.

 WARNING

For your safety, do not block your view 

when using the sunvisor.

NOTICE

The tab (5) adjacent to the vanity mirror 

on the sunvisor can be used for toll 

road tickets or self parking tickets. Use 

caution when inserting tickets into the 

ticket holder to avoid damage. Refrain 

from putting several tickets in the ticket 

holder as this could also damage the 

retaining tab.

Power Outlet

„

Front

ONX4050052

„

Rear

ONX4E050167

The power outlet is designed to provide 

power for mobile telephones or other 

devices designed to operate with vehicle 

electrical systems. The devices should 

draw less than 180 watts with the engine 

running.

 WARNING

Avoid electrical shocks. Do not place 

your fingers or foreign objects (pin, etc.) 

into a power outlet or touch the power 

outlet with a wet hand.

Convenience Features

5-122

 CAUTION

To prevent damage to the power 

outlets:

ś

Use the power outlet only when the 

engine is running and remove the 

accessory plug after use. Using the 

accessory plug for prolonged periods 

of time with the engine off could 

cause the battery to discharge.

ś

Only use 12 volts electric accessories 

which are less than 180 watts in 

electric capacity.

ś

Adjust the air-conditioner or heater 

to the lowest operating level when 

using the power outlet.

ś

Close the cover when not in use.

ś

Some electronic devices can 

cause electronic interference 

when plugged into a vehicle’s 

power outlet. These devices may 

cause excessive audio static and 

malfunctions in other electronic 

systems or devices used in your 

vehicle.

ś

Push the plug in as far as it will go. If 

good contact is not made, the plug 

may overheat and the fuse may open.

ś

Plug in battery equipped electrical/

electronic devices with reverse 

current protection. The current 

from the battery may flow into the 

vehicle’s electrical/electronic system 

and cause system malfunction.

USB Charger

„

Front

ONX4050053

„

Rear (if equipped)

ONX4050054

The USB charger is designed to recharge 

batteries of small size electrical devices 

using a USB cable.
The electrical devices can be recharged 

when the Engine Start/Stop button is in 

the ACC or ON (or START) position.
The battery charging state may be 

monitored on the electrical device.

05

5-123

Disconnect the USB cable from the USB 

port after use.

ś

A smart phone or a tablet PC may 

get warmer during the re-charging 

process. It does not indicate any 

malfunction with the charging system.

ś

A smart phone or a tablet PC, which 

adopts a different re-charging 

method, may not be properly re-

charged. In this case, use an exclusive 

charger of your device.

ś

The charging terminal is only to 

recharge a device. Do not use the 

charging terminal either to turn ON 

an audio or to play media In the 

infotainment system.

Wireless Smart Phone Charging 

System (if equipped)

ONX4H050007N

[A] : Indicator light, [B] : Charging pad

On certain models, the vehicle comes 

equipped with a wireless smart phone 

charger.
The system is available when all doors 

are closed, and when the Engine Start/

Stop button is in the ON (or START) 

position.

Convenience Features

5-124

Charging smart phone

The wireless smart phone charging 

system charges only the Qi-enabled 

smart phones ( ). Read the label on 

the smart phone accessory cover or 

visit your smart phone manufacturer’s 

website to check whether your smart 

phone supports the Qi technology.
The wireless charging process starts 

when you put a Qi-enabled smart phone 

on the wireless charging unit.
1.  Remove other items, including the 

smart key, from the wireless charging 

unit. If not, the wireless charging 

process may be interrupted. Place 

the smart phone on the center of the 

charging pad.

2.  The indicator light is orange when the 

smart phone is charging. The indicator 

light will turn blue when phone 

charging is complete.

3.  You can turn ON or OFF the wireless 

charging function from the Settings 

menu on the instrument cluster. 

Select:


-

6HWXSƟ8VHUVHWWLQJVƟ
&RQYHQLHQFHƟ:LUHOHVV&KDUJLQJ

If your smart phone is not charging:


- Slightly change the position of the 

smart phone on the charging pad.


- Make sure the indicator light is 

orange.

The indicator light will blink orange for 10 

seconds if there is a malfunction in the 

wireless charging system.
In this case, temporarily stop the 

charging process, and re-attempt to 

charge your smart phone again.
The system warns you with a message on 

the LCD display if the smart phone is still 

on the wireless charging unit after the 

vehicle is turned OFF and the front door 

is opened.

For some manufacturer’s smart phones, 

the system may not warn you even 

though the smart phone is left on the 

wireless charging unit. This is due to the 

particular characteristic of the smart 

phone and not a malfunction of the 

wireless charging.

 Information

ś

For some manufacturers’ cellular 
phones, the system may not warn you 
even though the cellular phone is left on 
the wireless charging unit. This is due 
to the particular characteristic of the 
cellular phone and not a malfunction of 
the wireless charging.

ś

For flip type smartphones, when 
using wireless charging, place the 
smartphone folded with the device’s 
back placed on the center of the 
wireless charging unit.

05

5-125

NOTICE

ś

The wireless smart phone charging 

system may not support certain 

smart phones, which are not verified 

for the Qi specification ( ).

ś

High speed wireless charging can 

be activated only when the cellular 

phones equipped with a wireless 

charging function is on the charging 

pad.

ś

During wireless charging, the 

internal fan operates to prevent the 

charging pad from becoming hot. 

This may cause fan noise.

ś

When placing your smart phone on 

the charging pad, position the phone 

in the middle of the mat for optimal 

charging performance. If your smart 

phone is off to the side, the charging 

rate may be less and in some cases 

the smart phone may experience 

higher heat conduction.

ś

In some cases, the wireless charging 

may stop temporarily when the 

smart key is used, either when 

starting the vehicle or locking/

unlocking the doors, etc.

ś

When charging certain smart 

phones, the charging indicator may 

not change to blue when the smart 

phone is fully charged.

ś

The wireless charging process may 

temporarily stop, when temperature 

abnormally increases inside the 

wireless smart phone charging 

system. The wireless charging 

process restarts, when temperature 

falls to a certain level.

ś

The wireless charging process may 

temporarily stop when there is 

any metallic item, such as a coin, 

between the wireless smart phone 

charging system and smart phone.

ś

When charging some smart phones 

with a self-protection feature, 

the wireless charging speed may 

decrease and the wireless charging 

may stop.

ś

If the smart phone has a thick cover, 

the wireless charging may not be 

possible.

ś

If the smart phone is not completely 

contacting the charging pad, 

wireless charging may not operate 

properly.

ś

Some magnetic items like credit 

cards, phone cards or rail tickets may 

be damaged if left with the smart 

phone during the charging process.

ś

When any smart phone without 

a wireless charging function or a 

metallic object is placed on the 

charging pad, a small noise may 

sound. This small sound is due to the 

vehicle discerning compatibility of 

the object placed on the charging 

pad. It does not affect your vehicle or 

the smart phone in any way.

ś

If some metallic items such as coins 

and other metallic substances exist 

between the wireless charging 

system and the cell phone, the 

wireless charging process may be 

temporarily interrupted, the metallic 

substances can be hot, and the alarm 

may not work when the cell phone is 

left on the charging pad.

 Information

If the Ignition switch is in the OFF 
position, the charging also stops.


Content      ..     9      10      11      12     ..