Hyundai Ioniq 6 (2024 year). Manual in english - page 4
Driving Your Vehicle
Starting the Vehicle
Information
WARNING
• Always start the vehicle with your foot
on the brake pedal. Do not depress the
•
Always wear appropriate shoes when
accelerator while starting the vehicle.
operating your vehicle. Unsuitable
Do not race the motor while warming it
shoes, such as high heels, ski boots,
up.
sandals, flipflops, etc., may interfere
with your ability to use the brake and
• If ambient temperature is low, the
accelerator pedals.
indicator may remain illuminated
longer than the normal amount of time.
•
Do not start the vehicle with the
accelerator pedal depressed.
The vehicle can move which can lead to
an accident.
NOTICE
To prevent damage to the vehicle:
• If the vehicle turns off while you are in
Information
motion, do not attempt to shift the gear
•
The vehicle will start by pressing the
to the P (Park) position.
Start/Stop button, only when the smart
If traffic and road conditions permit,
key is in the vehicle.
you may put the gear in N (Neutral)
•
The vehicle may not start even if the
while the vehicle is still moving and
smart key is in the vehicle but it is not
press the Start/Stop button in an
near you (for example, in the cargo
attempt to restart the vehicle.
area).
• Do not push or tow your vehicle to start
•
When the Start/Stop button is in the
the vehicle.
ACC or ON position, if any door is open,
the system checks for the smart key.
When the smart key is not in the
NOTICE
vehicle, the
indicator will blink and
To prevent damage to the vehicle:
the warning 'Key not in vehicle' will
come on. When all doors are closed, the
Do not press the Start/Stop button for
chime will also sound for a few
more than 10 seconds except when the
seconds. Keep the smart key in the
stop light fuse is blown.
vehicle when in the ACC position or if
When the stop light fuse is blown, you
the vehicle is in the ready mode (
cannot normally start the vehicle.
indicator on).
Replace the fuse with a new one. If you
are not able to replace the fuse, you can
start the vehicle by pressing and holding
1.
Always carry the smart key with you.
the Start/Stop button for 10 seconds with
2. Make sure the parking brake is applied.
the Start/Stop button in the ACC position.
3. Make sure the gear is in P (Park).
Pressing the brake pedal many times
when the vehicle is not in the ready mode
4. Depress the brake pedal.
(
indicator off) increases the
5. Press the Start/Stop button. If the
possibility of discharging the 12 V battery.
vehicle starts, the
indicator
For your safety always depress the brake
illuminates.
pedal before starting the vehicle.
6-6
6
Turning Off the Vehicle
Information
1. Stop the vehicle and depress the brake
Virtual Engine Sound System (VESS)
pedal fully.
VESS generates virtual engine sound to
2. Shift to P (Park).
make pedestrians to aware. VESS
3. Press the Start/Stop button to the OFF
operates when the vehicle can be driven.
position and apply the parking brake.
When the vehicle in P (parking) gear
status, VESS doesn't work.
4. Make sure the
indicator is turned
off on the instrument cluster.
CAUTION
CAUTION
If the
indicator on the instrument
Always check your surroundings while
cluster is still on, the vehicle is not turned
driving, backing up, or before driving
off and can move when the gear is in any
from a stop because your electric vehicle
position except P (Park).
does not make vehicle sounds.
Remote Start
Emergency starting
Type A
B6000501
B6000701
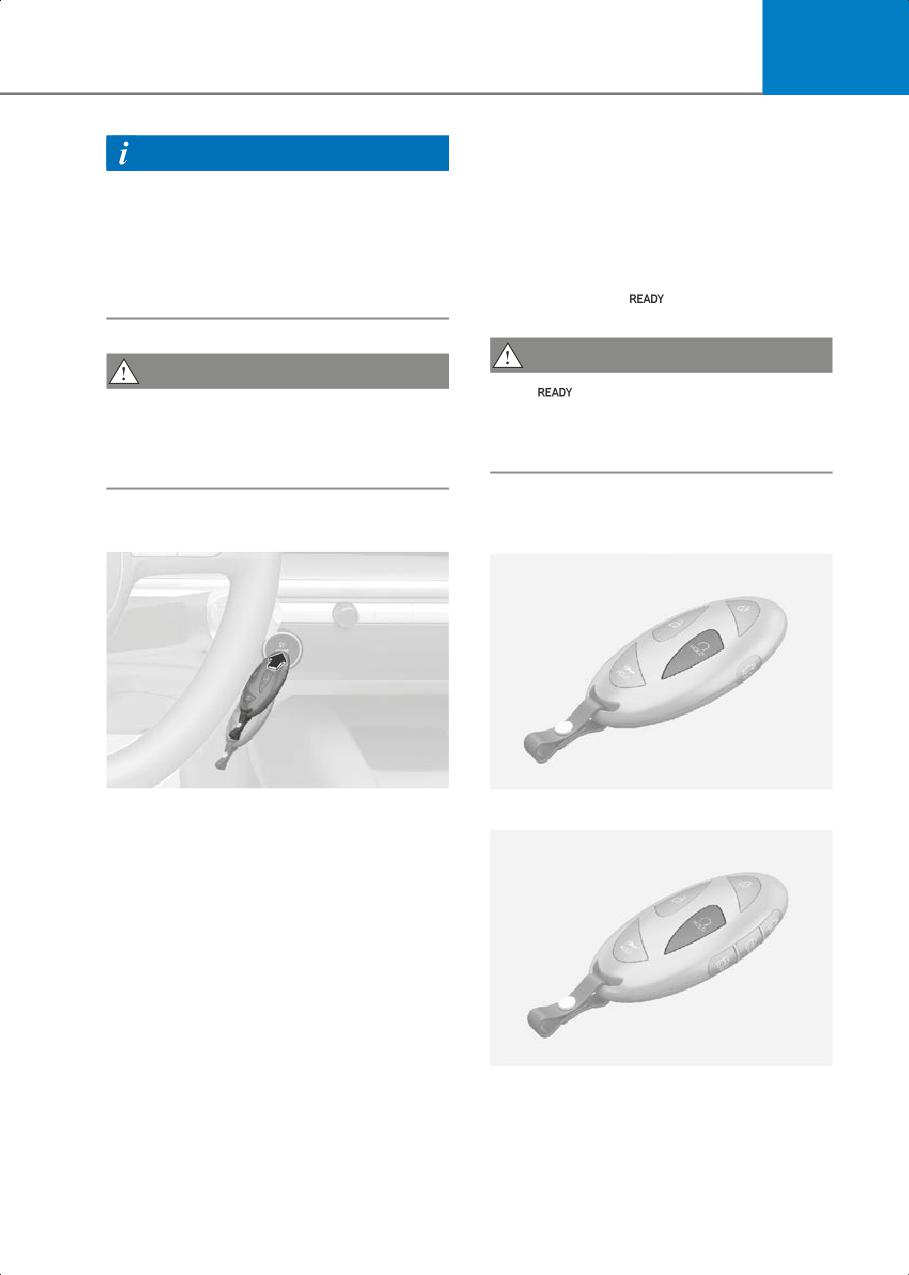
If the smart key battery is weak or the
Type B
smart key does not work correctly, press
the Start/Stop button with the smart key
in the direction of the illustration shown
above.
B6000702
You can start the vehicle using the
Remote Start button of the smart key.
6-7
Driving Your Vehicle
To start the vehicle remotely:
Shift By Wire
1. Press the door lock button within 32 ft.
(10 m) from the vehicle.
2. Press and hold the remote start ()
button within 4 seconds.
To turn off the vehicle:
Press the remote start button () once.
Information
• The vehicle does not remotely start if
the hood or trunk is opened.
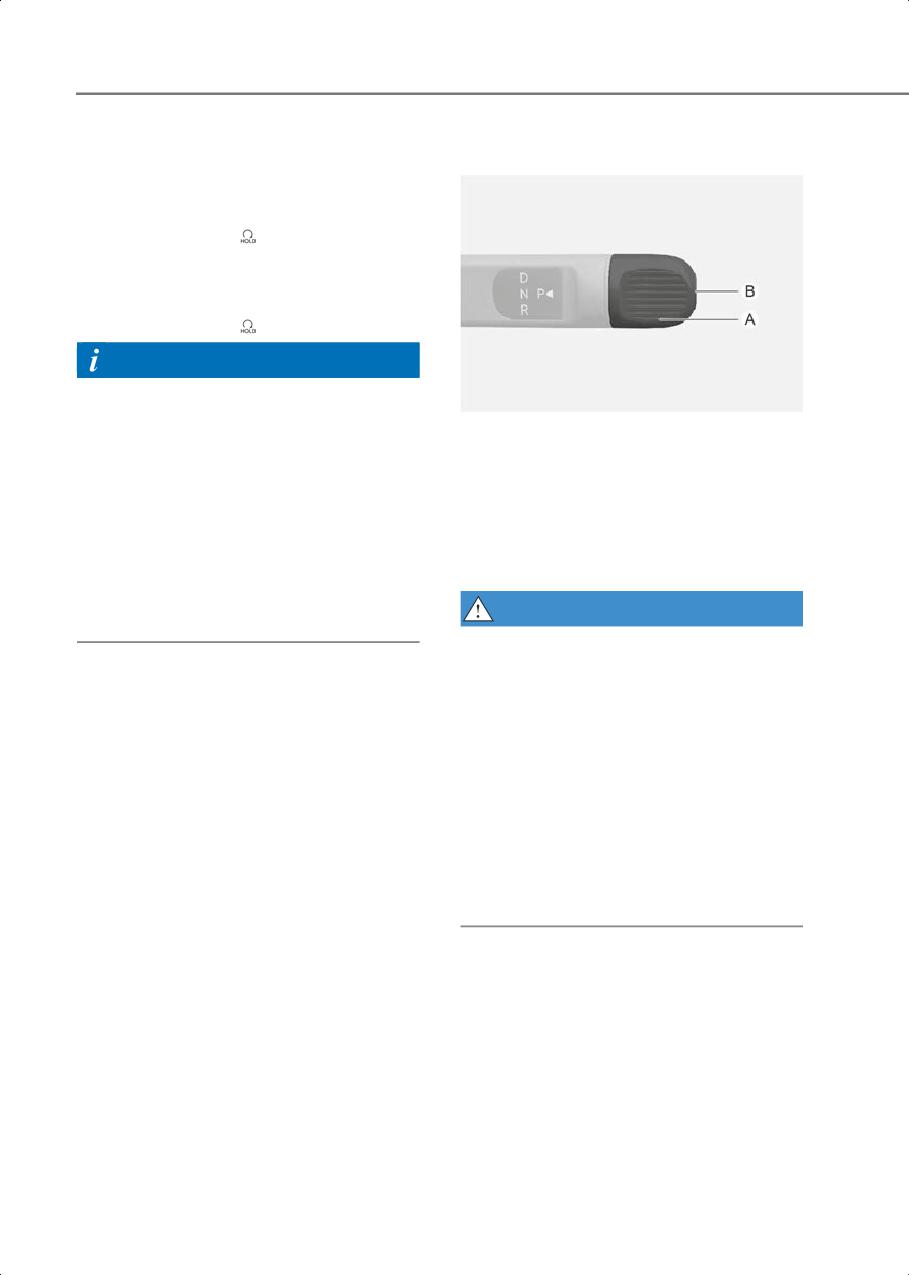
B6013601
[A] Rotary shifter
• The vehicle must be in P (Park) for the
[B] P button
remote start function to start.
• The vehicle displays "Smart Key must
Shift By Wire Operation
be present to keep the vehicle
running" if you get in the vehicle
Depress the brake pedal whenever
without a registered smart key.
rotating the rotary shifter to change gear
or selecting P.
• The vehicle turns off if you do not get in
the vehicle within 10 minutes after
WARNING
remotely starting the vehicle.
To reduce the risk of serious injury or
death:
• ALWAYS check the surrounding areas
near your vehicle for people, especially
children, before shifting a vehicle into D
(Drive) or R (Reverse).
• Before leaving the driver's seat, always
make sure the vehicle is shifted to the P
(Park) position, then apply the parking
brake, then press the Start/Stop button
to the OFF position. Unexpected and
sudden vehicle movement can occur if
these precautions are not followed.
6-8
6
P (Park)
Automatic gear shift to P (Park)
Always come to a complete stop before
The gear is shifted to P (Park)
shifting into P (Park).
automatically for safety reasons under
the following conditions:
• When the vehicle is turned off with the
gear in R (Reverse), D (Drive) or N
(Neutral).
• When the driver’s door is open with the
vehicle on (
indicator on), the gear
in R (Reverse), D (Drive) or N (Neutral),
and the vehicle at a standstill.
• When the driver’s door is open with the
gear in N (Neutral) and the vehicle is
off.
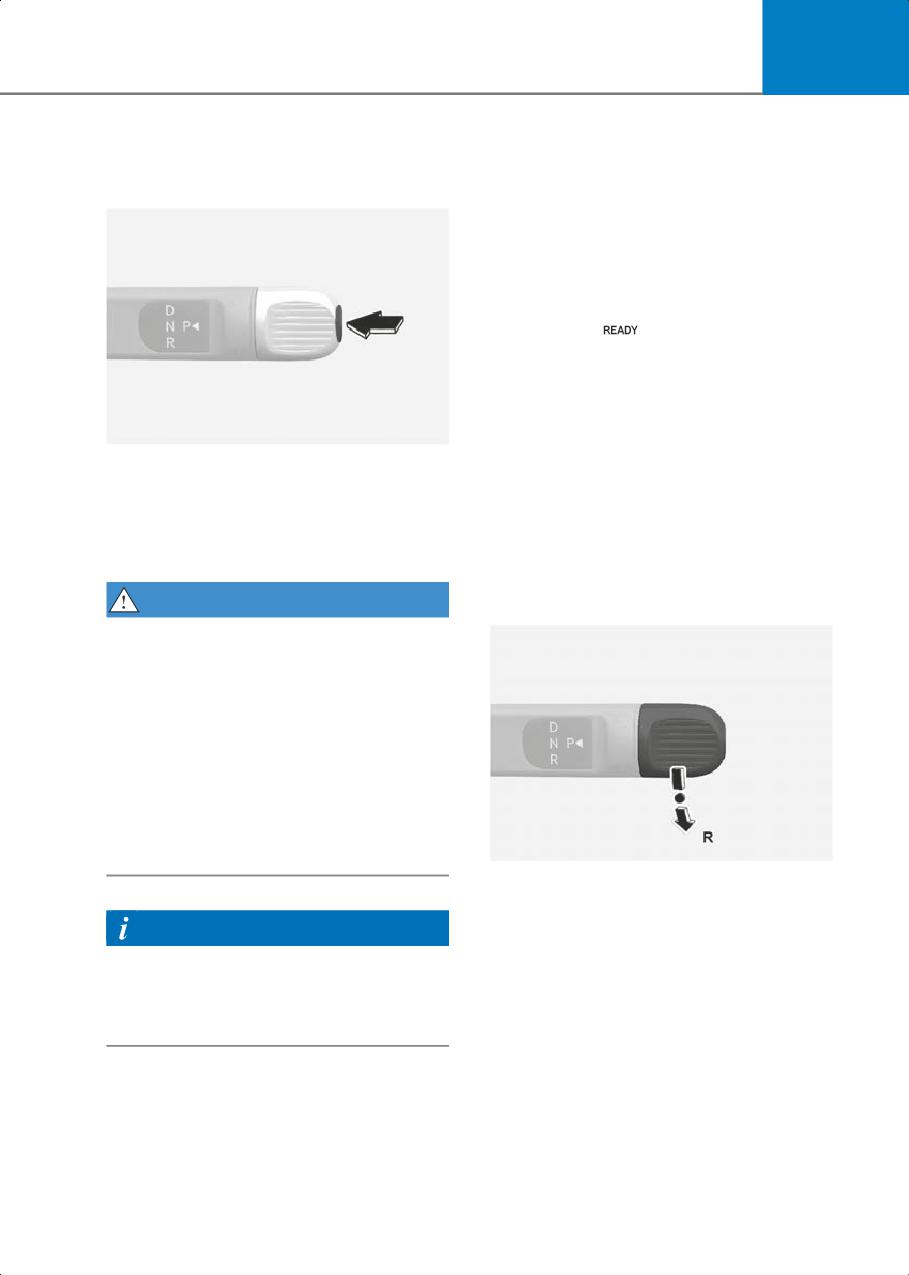
B6013701
In situations the gear must be in P (Park),
To shift the gear to P (Park), press the P
always check if the gear is shifted to P
button while depressing the brake pedal.
(Park) by checking the instrument cluster.
If you turn the vehicle off in R (Reverse), N
(Neutral) or D (Drive), the gear will
automatically shift to P (Park).
R (Reverse)
Use this position to drive the vehicle
WARNING
rearward.
• Shifting into P (Park) while the vehicle is
in motion may cause you to lose control
of the vehicle.
• After the vehicle has stopped, always
make sure the vehicle is in P (Park),
apply the parking brake, and turn the
vehicle off.
• When parking on an incline, shift the
gear to P (Park) and apply the parking
brake to prevent the vehicle from
rolling downhill.
B6013702
To shift the gear to R (Reverse), rotate the
rotary shifter to R (Reverse) while
Information
depressing the brake pedal.
When the vehicle is stopped in the R
For vehicles equipped with the Electronic
(Reverse) position, if you open the
Parking Brake (EPB), EPB is applied
driver’s door, the gear may automatically
automatically when the gear is shifted to
shift to P (Park).
P (Park).
However, if the vehicle is in motion, the
gear may not automatically shift to P
(Park) to prevent gear damage.
6-9
Driving Your Vehicle
To stay in N (Neutral) when vehicle is
NOTICE
OFF
Always come to a complete stop before
shifting into or out of R (Reverse) to
prevent damaging the gear.
1SFTT BOE IPME UIF 0,
N (Neutral)
CVUUPO PO UIF TUFFSJOH
XIFFM UP TUBZ JO /FVUSBM
B6013705
B6013703
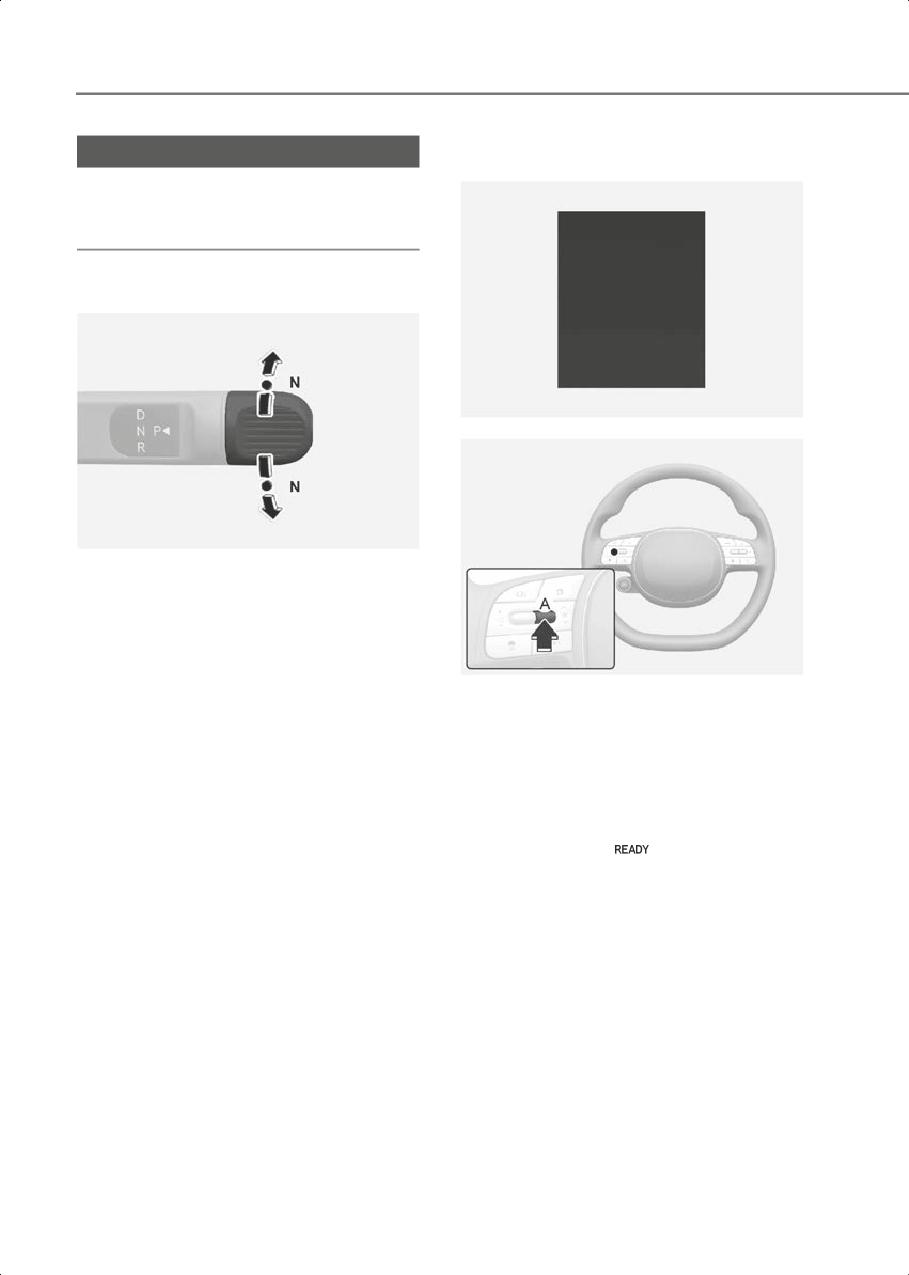
To shift the gear to N (Neutral), rotate the
rotary shifter to N (Neutral) while
depressing the brake pedal.
Always depress the brake pedal when you
are shifting from N (Neutral) to another
B6013706
gear.
[A] OK button
If you turn the vehicle off in N (Neutral),
If you want to stay in N (Neutral) after the
the gear will automatically shift to P
vehicle is in the ACC state, do the
(Park).
following:
However, if you need to stay in N
1. Turn off Auto Hold and release
(Neutral) with the vehicle off, refer to the
Electronic Parking Brake when the
“To stay in N (Neutral) when vehicle is
vehicle is on ( indicator on).
OFF” in the following description.
To rotate the rotary shifter to N (Neutral),
2. Rotate the rotary shifter to N (Neutral)
rotate the rotary shifter once clockwise or
while depressing the brake pedal.
counterclockwise.
3. Take your foot off the brake pedal. The
If the current gear position is in D (Drive),
message "Press and hold OK button on
rotate the rotary shifter
the steering wheel to stay in Neutral"
counterclockwise. When the gear
appears on the cluster display.
position is in R (Reverse), rotate the rotary
4. Press and hold the OK button on the
shifter clockwise.
steering wheel for more than 1 second.
5. When the message "Vehicle will stay in
(N). Change gear to cancel appears on
the cluster display, press the Start/Stop
button while depressing the brake
pedal.
6-10
6
However, if you open the driver’s door
D (Drive)
within 3 minutes in the ACC state, the
This is the normal driving position.
gear automatically shifts to P (Park) and
The regenerative braking system
the Start/Stop button changes to the OFF
automatically activates according to the
position.
road conditions.
NOTICE
• With the gear in N (Neutral) the
Start/Stop button will be in the ACC
position. Note that the doors cannot be
locked in the ACC position or the
battery (12 V) may discharge if left in the
ACC position for a long period.
• Before entering an automatic car wash,
release the Electronic Parking Brake
(EPB) manually. If EPB is applied, it may
damage the vehicle or automatic car
B6013707
wash.
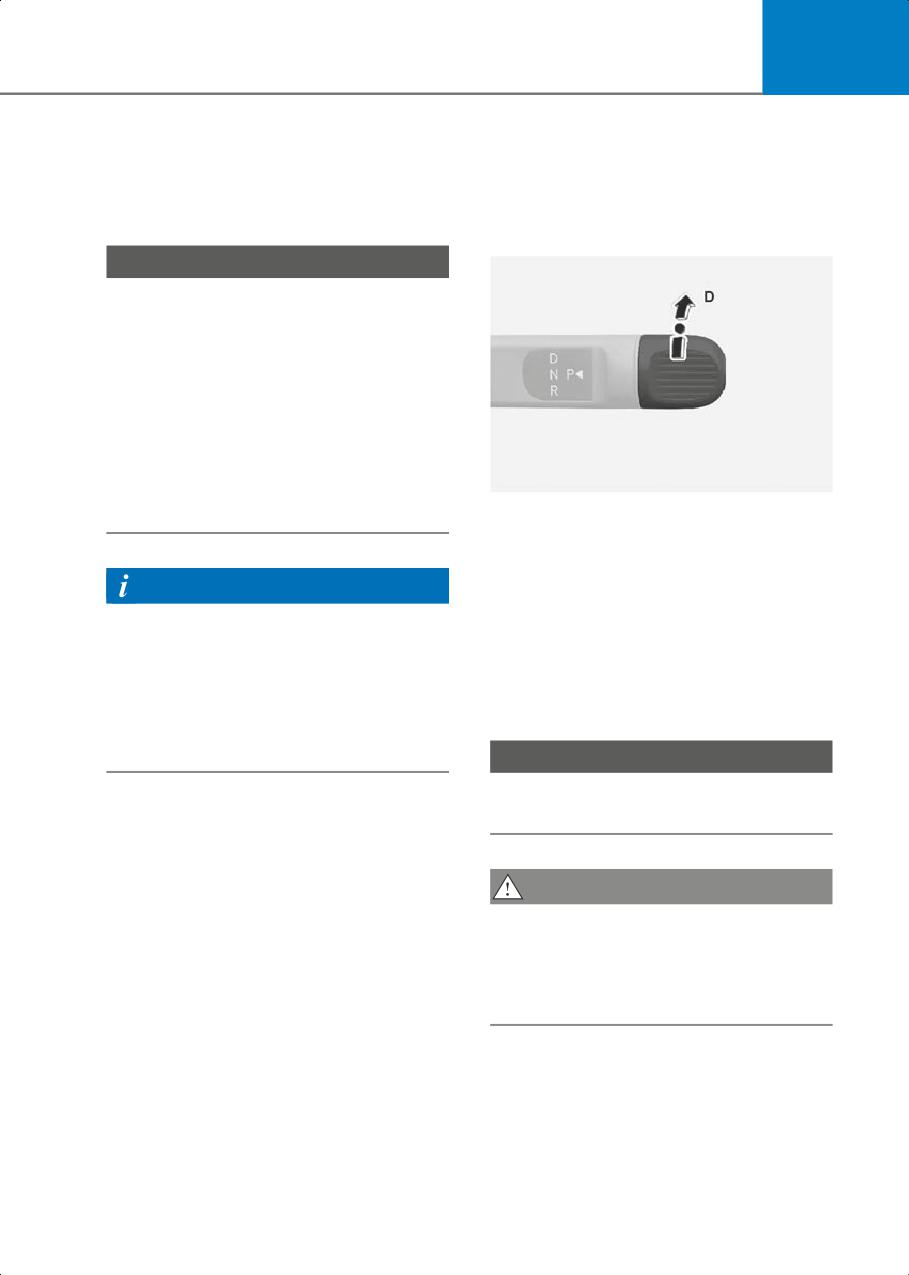
To shift the gear to D (Drive), rotate the
rotary shifter to D (Drive) while
depressing the brake pedal.
Information
When the vehicle is stopped in the D
(Drive) position, if you open the driver's
When the Electronic Parking Brake (EPB)
door, the gear may automatically shift to
is applied, press the EPB switch while
P (Park).
depressing the brake pedal.
However, if the vehicle is in motion, the
The Electronic Parking Brake (EPB) must
gear may not automatically shift to P
be released manually because EPB does
(Park) to prevent gear damage.
not release automatically even though
the gear is shifted to N (Neutral).
NOTICE
Always come to a complete stop before
shifting into D (Drive).
CAUTION
When you drive after stopping on a steep
incline, if you do not depress the
accelerator pedal or brake pedal, the
vehicle may roll backwards resulting in a
collision.
6-11
Driving Your Vehicle
Shift-lock system
Cluster Display Messages
For your safety, your vehicle has a
Information
shift-lock system which prevents shifting
the gear from P (Park) or N (Neutral) into
Press brake pedal to change gear
R (Reverse) or D (Drive) unless the brake
pedal is depressed.
This message is displayed when the brake
pedal is not depressed while shifting out
To shift from P (Park) or N (Neutral) into R
of P (Park).
(Reverse) or D (Drive), from R (Reverse)
into D (Drive) or from D (Drive) into R
Depress the brake pedal and then shift
(Reverse):
the gear.
1. Depress and hold the brake pedal.
2. Start the vehicle.
Shift to P after stopping
3. Shift the gear in R (Reverse) or D
This message is displayed when the gear
(Drive).
is shifted to P (Park) while the vehicle is
moving.
Information
Stop the vehicle before shifting to P
(Park).
The gear cannot be shifted while the
charging cable is connected.
Shifter system malfunction
This message is displayed when the shift
When the battery (12 V) is discharged
gear does not properly operate in the P
You cannot shift gears when the battery is
(Park) position.
discharged.
Have the vehicle inspected by an
Jump start your vehicle (refer to the
authorized HYUNDAI dealer.
"Jump Starting (12 V Battery)" section in
chapter 8) or contact an authorized
Check shifter dial
HYUNDAI dealer.
This message is displayed when there is a
malfunction with the rotary shifter.
Parking
Have the vehicle inspected by an
Always come to a complete stop and
authorized HYUNDAI dealer.
continue to depress the brake pedal. Shift
the gear to P (Park), apply the parking
brake, and press the Start/Stop button to
Check P button
the OFF position. Take the key with you
This message is displayed when there is a
when leaving the vehicle.
problem with the P button.
Have the vehicle inspected by an
authorized HYUNDAI dealer.
Rotary shifter stuck
This message is displayed when the rotary
shifter does not return back to it’s normal
position.
Have the vehicle inspected by an
authorized HYUNDAI dealer.
6-12
6
Good Driving Practices
WARNING
•
Never shift the gear from P (Park) or N
To reduce the risk of SERIOUS INJURY or
(Neutral) to any other position with the
DEATH:
accelerator pedal depressed.
•
ALWAYS wear your seat belt. In a
•
Never shift the gear into P (Park) when
collision, an unbelted occupant is
the vehicle is in moving. Completely
significantly more likely to be seriously
stop before shifting into R (Reverse) or
injured or killed than a properly belted
D (Drive).
occupant.
•
Do not shift the gear to N (Neutral)
•
Avoid high speeds when cornering or
when driving. If the gear is shifted to N
turning.
(Neutral) while driving. Doing so may
increase the risk of an accident.
•
Do not make quick steering wheel
movements, such as sharp lane
Also, shift the gear back to D (Drive)
changes or fast, sharp turns.
while the vehicle is moving may
severely damage the gear.
•
The risk of rollover is greatly increased
if you lose control of your vehicle at
•
Never attempt to select a gear that is
highway speeds.
opposite the direction of the vehicle
motion. Check the gear position before
•
Loss of control often occurs if two or
driving. Stop the vehicle before shifting
more wheels drop off the roadway and
to the desired gear. The vehicle may
the driver over steers to reenter the
turn off, causing a collision.
roadway.
•
Do not drive with your foot resting on
•
In the event your vehicle leaves the
the brake pedal. Even light, but
roadway, do not steer sharply. Instead,
consistent pedal pressure can result in
slow down before pulling back into the
the brakes overheating, brake wear and
travel lanes.
possibly even brake failure.
•
HYUNDAI Vehicle recommends you to
•
Always apply the parking brake when
follow all posted speed limits.
leaving the vehicle. Do not depend on
placing the shift gear in P (Park) to keep
the vehicle from moving.
•
Exercise extreme caution when driving
on a slippery surface. Be especially
careful when braking, accelerating, or
shifting gears. On a slippery surface, an
abrupt change in vehicle speed can
cause the drive wheels to lose traction
and may cause loss of vehicle control
resulting in an accident.
•
Optimum vehicle performance and
economy is obtained by smoothly
depressing and releasing the
accelerator pedal.
6-13
Driving Your Vehicle
• Pull and hold the left paddle shifter
Regenerative Braking
(
) for over 0.5 seconds to keep
System (Paddle Shifter)
raising the regenerative braking
intensity level. Holding the paddle
Regenerative braking system operates
shifter brings the vehicle to stop. (For
the paddle shifter to control the
more information, refer to the "One
regenerative braking intensity of the
Pedal Driving" section in this chapter.)
vehicle. It improves the energy efficiency
• While the smart regeneration system is
of the vehicle and helps the driver to have
turned on, pull and hold the right
a better driving experience.
paddle shifter (
) for over 1 second to
turn off the smart regeneration system.
Information
(For more information, refer to the
The regenerative braking system uses the
"Smart Regeneration System" section
electric motor to engage the brake. The
in this chapter.)
electric motor converts the kinetic energy
generated from decelerating the vehicle
Checking the amount of
to electricity and charges the high voltage
regenerative braking
battery.
Using Regenerative Braking
System
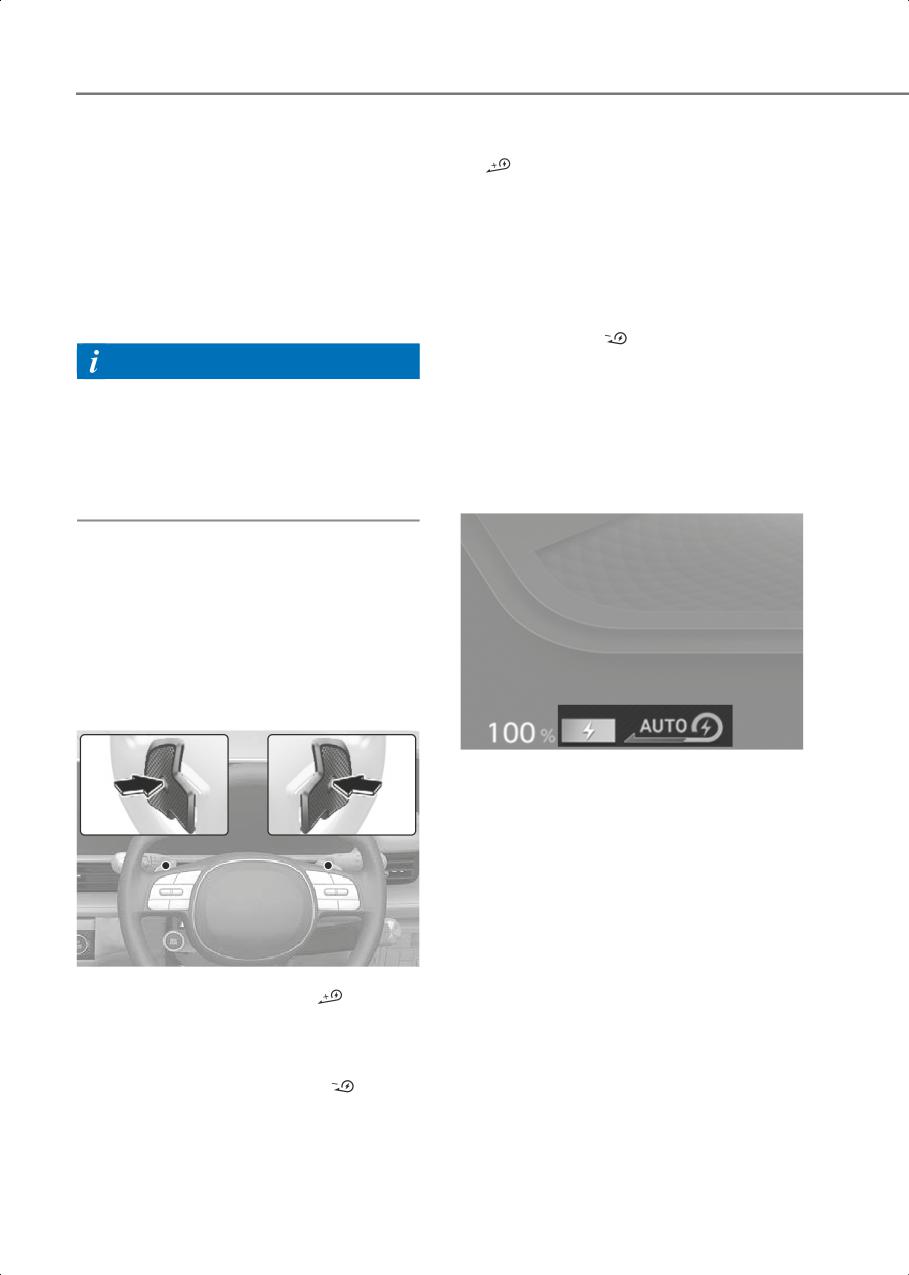
Operating paddle shifter
Operate the paddle shifter as shown
below to use the regenerative braking
system.
B6001902
The selected regenerative braking level
appears on the instrument cluster.
• When the vehicle is turned off and on
again after the regenerative braking
level is in 0, the braking level is changed
to 1.
• When the vehicle is turned off and on
again after the i-PEDAL is on, the
braking level is changed to 3.
B6001901
• Pull the left paddle shifter (
) once to
raise the regenerative braking intensity
level by 1. It will increase decelerating
intensity.
• Pull the right paddle shifter (
) once
to lower the regenerative braking
intensity level by 1. It will decrease
decelerating intensity.
6-14
6
Regenerative Braking System
One Pedal Driving
Limitations
One pedal driving operates the paddle
Regenerative braking intensity cannot be
shifter while coasting to control the
changed using the paddle shifter in the
intensity of regenerative braking. It
following situations when:
assists the driver to stop the vehicle
without depressing the brake.
• The (
) and (
) paddle shifters are
pulled at the same time.
Information
• The vehicle is decelerating by
Coasting is the process of driving a
depressing the brake pedal.
vehicle without the brake pedal and the
• Smart Cruise Control is activated.
accelerator pedal depressed. Coasting
• The regenerative braking is
uses the inertia of driving energy instead
continuously operated with the battery
of the vehicle power.
fully charged
• The SNOW mode is activated
Using one pedal driving
Initial setting of the regenerative braking
Pull and hold the left paddle shifter (
)
level and adjustable range may vary
for over 0.5 seconds while coasting to
according to the selected Drive mode.
enable the one pedal driving mode.
Drive Mode
Adjustable Range
•
Release the paddle shifter when the
vehicle speed is above 1.8 mph (3 km/h)
SNOW
0 to 1
to return to the previously set
regenerative braking level.
ECO
0 to 3
•
If the vehicle speed is below 1.8 mph (3
NORMAL
0 to 3
km/h), the vehicle will keep engaging
the brake although the driver releases
SPORT
0 to 3
the paddle shifter.
For more information, refer to the "All
•
Releasing the paddle shifter after the
Wheel Drive (AWD)" section in this
vehicle comes to a stop will maintain
chapter.
the vehicle stationary.
CAUTION
•
The vehicle may not come to a stop
although the one pedal driving function
is active, depending on the condition of
the vehicle and the road. Check the
surroundings and depress the brake
pedal to decelerate.
•
If the driver depresses the accelerator
pedal while pulling and holding the left
paddle shifter (
) to increase the
braking level, one pedal driving
function operates same as i-PEDAL
function. In this case, the vehicle speed
is no longer controllable through the
paddle shifter.
6-15
Driving Your Vehicle
One pedal driving limitations
Turning on/off the i-PEDAL
In the following conditions, the vehicle
• Turning on i-PEDAL:
may not come to a stop although the one
Pull the left paddle shifter (
) once
pedal driving function is active. Depress
when the regenerative braking level is
the brake pedal to stop the vehicle when:
at 3. i-PEDAL is turned on and the
• Driving on a slope, or when the vehicle
instrument cluster displays the
is repeatedly driven and stopped.
‘i-PEDAL’ message. i-PEDAL is not
available while the smart regeneration
• The vehicle is driving through the end
system is on. Turn off the smart
of the slope.
regeneration system first before using
• Driving on a slippery surface such as an
i-PEDAL.
icy, rainy, or muddy road.
• Turning off i-PEDAL:
• The wheels are not properly aligned.
Pull the right paddle shifter (
) once
• A wheel slip or wheel spin occurs.
while the function is on. Otherwise,
• The weight on board is heavy.
shift the gear to R (Reverse) then to D
• The vehicle is tilted to one side.
(Drive) while the function is on. i-PEDAL
is disabled and regenerative braking
• The tire is worn out.
level is set to 3.
Automatic engagement of EPB
CAUTION
Use one pedal driving function to bring
• Depending on the vehicle and road
the vehicle to a stop and automatically
condition, the vehicle may not come to
engage the Electronic Parking Brake
a stop although the i-PEDAL function is
(EPB).
active. Check surroundings and
After the vehicle is stopped, EPB is
depress the brake pedal to control the
automatically applied when any of the
vehicle speed.
following conditions are satisfied:
• Do not use i-PEDAL on slippery roads.
• The driver’s seatbelt is unfastened and
the driver’s door is open.
i-PEDAL limitations
• The gear shifts to N (Neutral).
In the following conditions, the vehicle
• The hood is open.
may not come to a stop although the
• The trunk is open.
i-PEDAL is properly activated. Depress
•
5 minutes have passed after the vehicle
the brake to stop the vehicle when:
has stopped.
• Driving on a slope, or when the vehicle
• One pedal driving is limited due to
is repeatedly driven and stopped.
other reasons.
• The vehicle is driving through the end
of the slope.
• Driving on a slippery surface such as an
Using i-PEDAL
icy, rainy, or muddy road.
i-PEDAL assists the driver to accelerate,
• The wheels are not properly aligned.
decelerate, and stop the vehicle with only
the accelerator pedal.
• A wheel slip or wheel spin occurs.
• The weight on board is heavy.
• The vehicle is tilted to the side.
• The tire is worn out.
6-16
6
Smart Regeneration
Smart Regeneration System
On/Off
System
Operate the paddle shifter as shown
The smart regeneration system
below to use the smart regeneration
recognizes vehicle-to-vehicle distance,
system.
road gradient, and speed cameras and
• Turning on the smart regeneration
controls the regenerative braking level
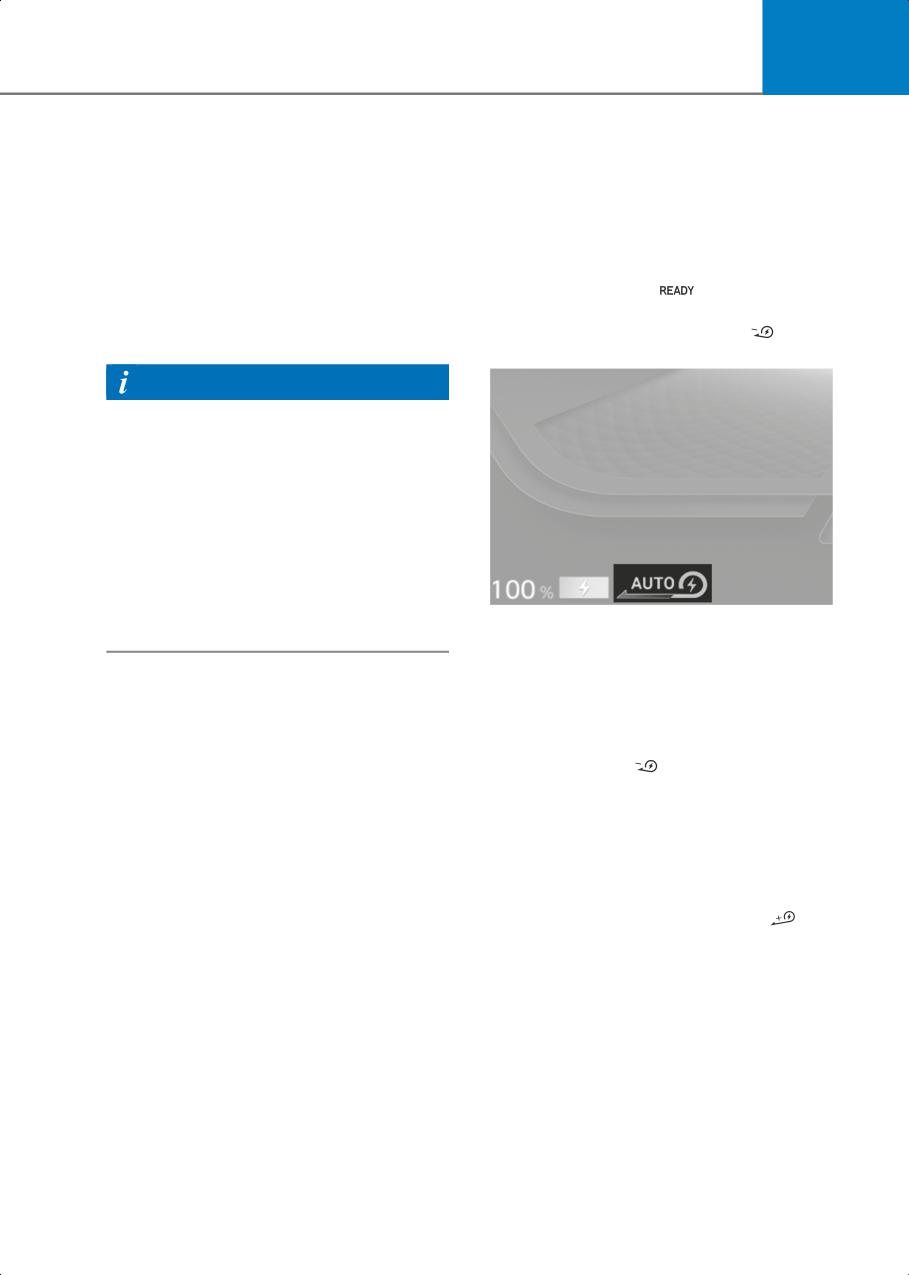
system: While the
indicator is on,
while coasting. It reduces unnecessary
shift the gear to D (Drive), and pull and
depressing of pedals to improve energy
hold the right paddle shifter (
) for
efficiency and driver convenience.
over a second.
Information
•
Coasting is the process of driving a
vehicle without the brake pedal and the
accelerator depressed. Coasting uses
the inertia of driving energy instead of
the vehicle power.
•
The regenerative braking system uses
the electric motor to engage the brake.
The electric motor converts the kinetic
energy generated from decelerating
the vehicle to electricity and charges
B6002301
the high voltage battery.
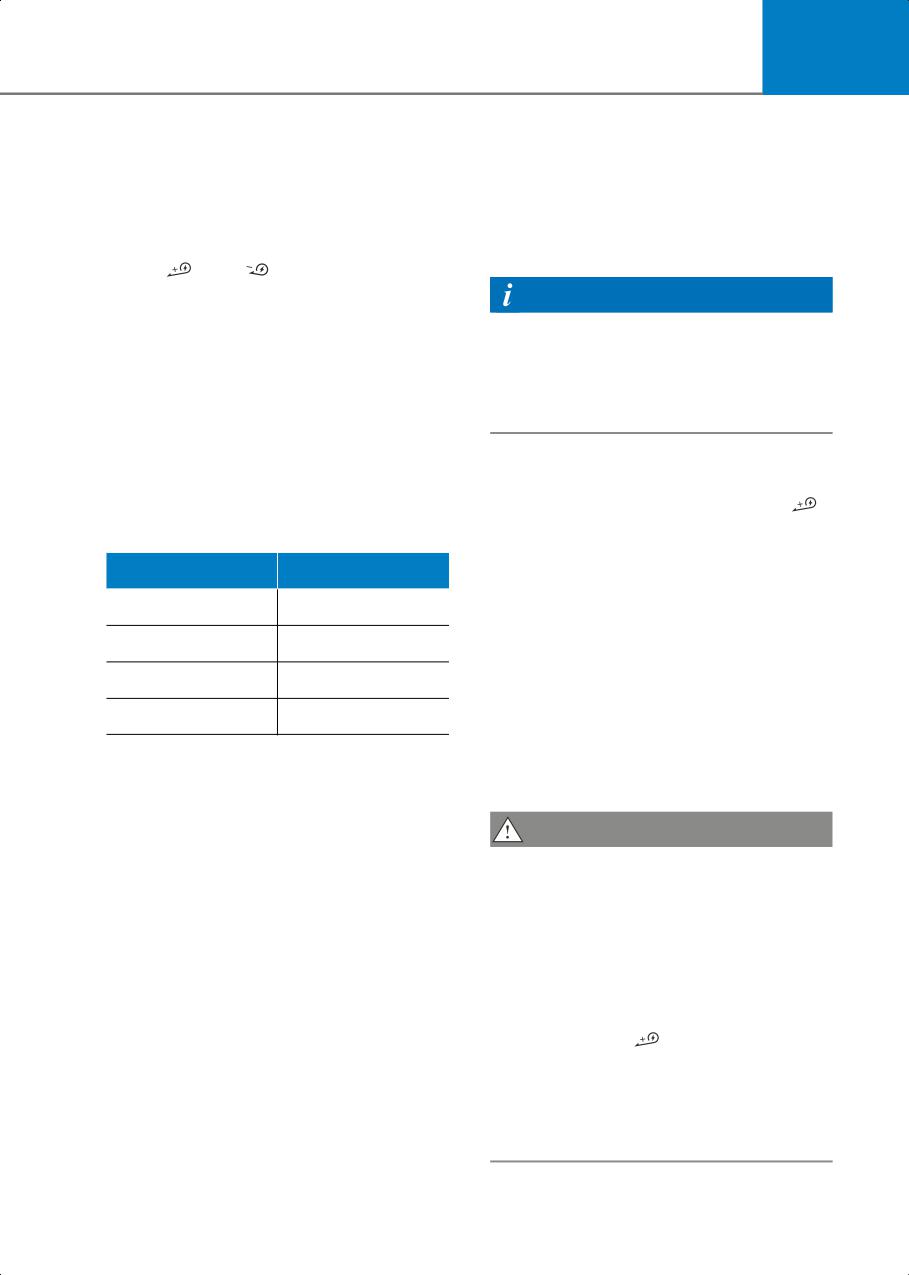
The smart regeneration system turns on
and the regenerative braking level is
displayed as 'AUTO'.
• Turning off the smart regeneration
system: While the smart regeneration
system is on, pull and hold the right
paddle shifter (
) for over a second.
The instrument cluster displays the
regenerative braking level instead of
‘AUTO’, and the smart regeneration
system turns off.
• Using one pedal driving: While the
smart regeneration system is on, pull
and hold the left paddle shifter (
) for
over 0.5 seconds (For more
information, refer to the "One Pedal
Driving" section in this chapter.)
i-PEDAL is not available while the smart
regeneration system is on. Turn off the
smart regeneration system first before
using i-PEDAL.
6-17
Driving Your Vehicle
Smart Regeneration System
Smart Regeneration Level
Operating Condition
Settings
When the regenerative braking level is
displayed as AUTO and the vehicle speed
is above 6 mph (10 km/h), the system
automatically controls the regenerative
braking level under the following
conditions:
• The road gradient changes
• Distance from the vehicle ahead
1
2
reduces or increases
• Speed of the vehicle ahead reduces or
3
increases
B6002501
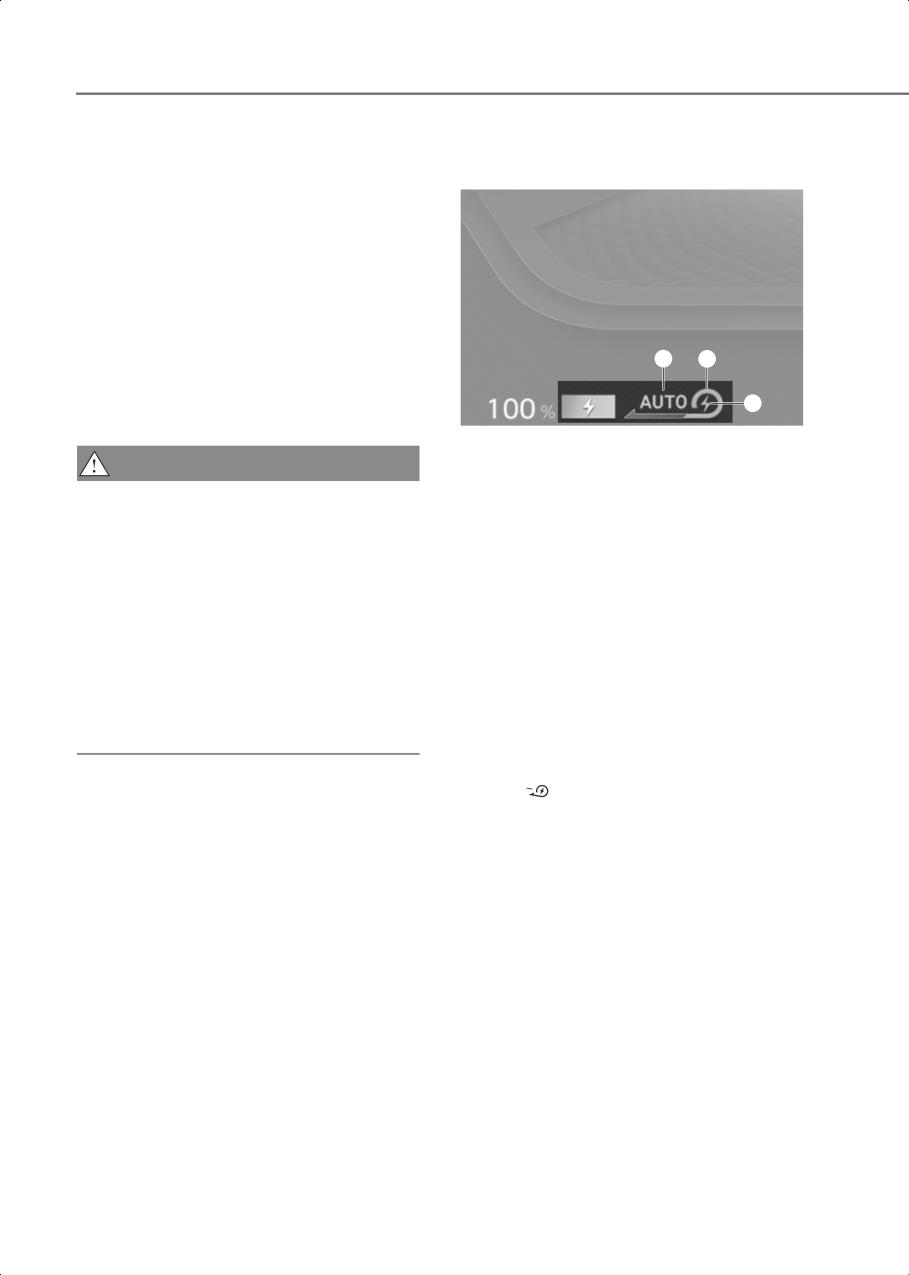
The instrument cluster displays ‘AUTO’ (1)
CAUTION
when the smart regeneration system is
• When the forward safety warning light
on. Depending on the conditions, the
is ON, the smart regeneration system
system adjusts the regenerative braking
does not work properly. Depress the
level (2). The indicator light (3) illuminates
brake pedal for deceleration.
when the vehicle recognizes a vehicle.
• The function that adjusts the
regenerative braking intensity
Smart regeneration default setting
depending on the road gradient is only
The default braking level of the smart
effective when the regenerative
regeneration system can be changed. Set
braking level is 0. Braking intensity
the default braking level to the lowest and
does not significantly change
let the system adjust the braking intensity
depending on the road gradient if the
automatically.
regenerative braking level is 1 or above.
To change the default level of the smart
regeneration system, pull the right paddle
shifter (
) once while the system is on.
6-18
6
Smart regeneration intensity setting
Front Sensors
Regenerative braking intensity of the
smart regeneration system can be
adjusted to match the driver’s
preference. Adjust the braking intensity
makes the decelerating faster or slower.
2
1
2
B6003001
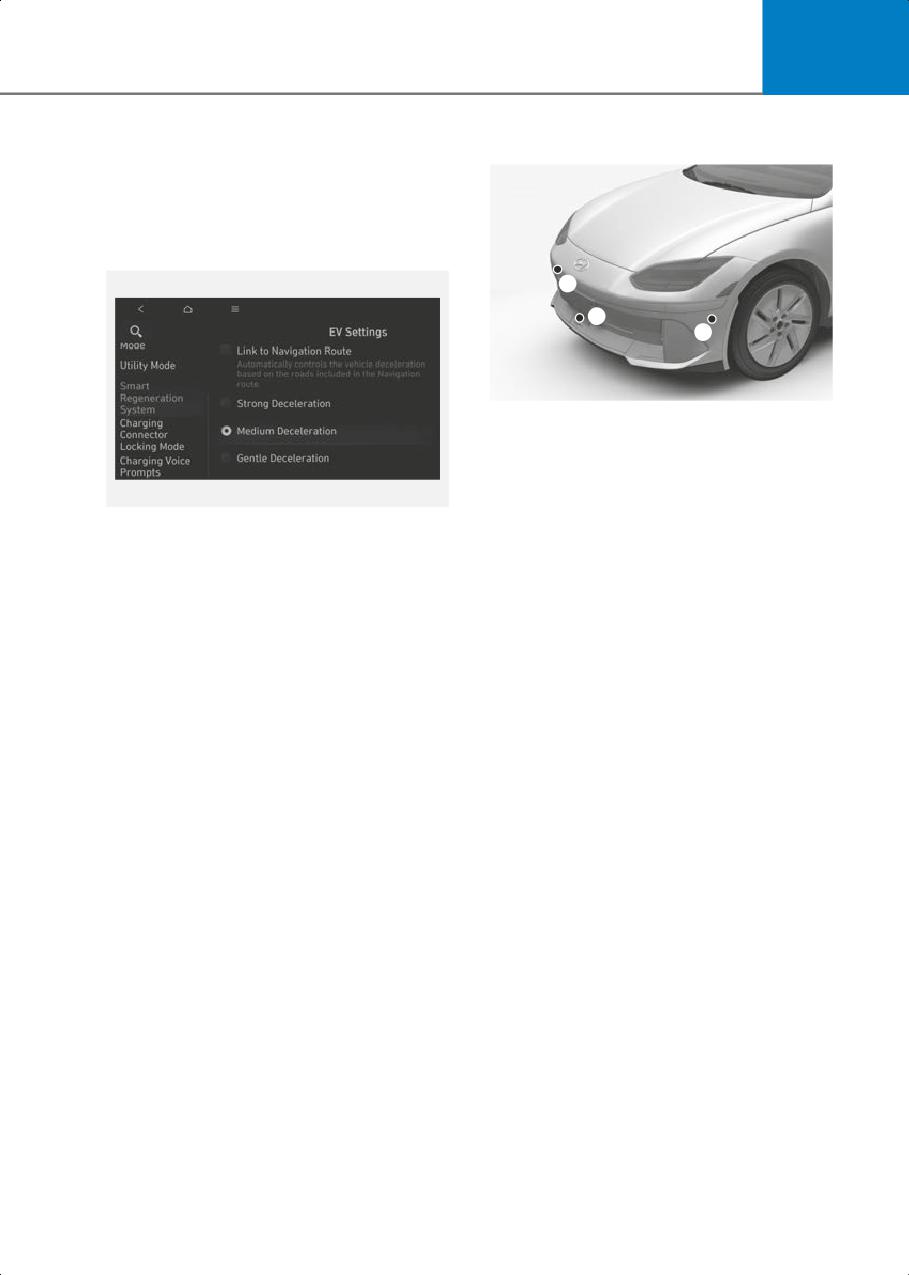
(1) Front radar
(2) Front corner radar
Front sensors recognize the distance
from the vehicle ahead to control the
B6001903
regenerative braking intensity. If the
To adjust the regenerative braking level of
sensor is covered with snow, rain, or other
the smart regeneration system, go to
foreign substances, the performance of
Setup > EV > Smart Regeneration
the sensors may deteriorate, and the
System from the infotainment system.
smart regeneration system may turn off.
Always keep the sensors clean.
Pausing Smart Regeneration
System
The smart regeneration system is
temporarily turned off in the following
conditions. While the system is turned off,
the driver must keep eyes on the road and
depress the brake pedal to decelerate.
• The gear is shifted to N (Neutral), R
(Reverse) or P (Park)
• Smart Cruise Control is ON
• ESC (Electronic Stability Control) is
operating
• ABS is operating
6-19
Driving Your Vehicle
System Check Message
General precautions
•
Always maintain a safe distance from
the vehicles ahead and adjust your
vehicle speed depending on the road
$IFDL 4NBSU
conditions.
3FHFOFSBUJPO 4ZTUFN
•
Always prepare for unexpected
situations and depress the brake pedal
to decelerate when necessary. The
smart regeneration system cannot
react to pedestrians, vehicles making a
sudden stop and vehicles coming from
the opposite lane.
B6003101
•
If the vehicle ahead frequently changes
When the front radar is covered or
the lane, keep your eyes forward to be
blocked, the smart regeneration system
prepared for hazardous situations. In
may be temporarily disabled. The 'Check
this case, the smart regeneration
Smart Regeneration System' warning
system may respond late and may
message may appear, and the
inappropriately respond to vehicle
regenerative braking level is displayed on
movements from the side lanes.
the instrument cluster.
•
The driver must depress the brake
The system operates normally when such
pedal when stopping the vehicle.
foreign material is removed, and the
•
Depress the brake pedal to decelerate
system is turned on by pulling and
in the following conditions when:
holding the right paddle shifter (
) for
over one second.
- The front part of the vehicle is lifted
up because of the cargo loaded on
If the smart regeneration system does not
the rear part of the vehicle.
operate normally after the sensor has
been uncovered or unblocked, have the
- You are operating the steering wheel.
vehicle inspected by an authorized
- You are not driving in the center of
HYUNDAI dealer.
the lane.
- You are driving on a narrow or curved
road.
Smart Regeneration System
•
The smart regeneration system may be
Precautions
temporarily turn off when exposed to
• Always monitor the distance to vehicles
strong electromagnetic waves.
ahead on the road. The smart
•
If the vehicle starts coasting near the
regeneration system is not a substitute
speed camera and engages the brake
for safe driving practices, but a
with the smart regeneration system,
supplemental function only.
the vehicle may not be able to keep the
• Always maintain a safe distance from
speed limit. Always comply with the
the vehicles ahead and adjust your
road and traffic law.
vehicle speed to the road conditions.
The smart regeneration system may not
recognize unexpected and sudden
situations or complex driving
situations.
6-20
6
Sensor precautions
Detecting vehicle
•
Never disassemble the radar or radar
• The front sensors may not detect the
assembly, and never apply any impact
vehicle ahead or may suddenly detect
on it.
the vehicle ahead, such as when the
smart regeneration system responds
•
If there is impact on or near the radar,
slowly, when driving on a hill ends, or
the sensors may be damaged or not be
when driving through a curve. The
properly aligned near the radar, even
regenerative braking intensity may
though a warning message does not
increase and decelerate your vehicle.
appear on the instrument cluster, the
Smart Regeneration System may not
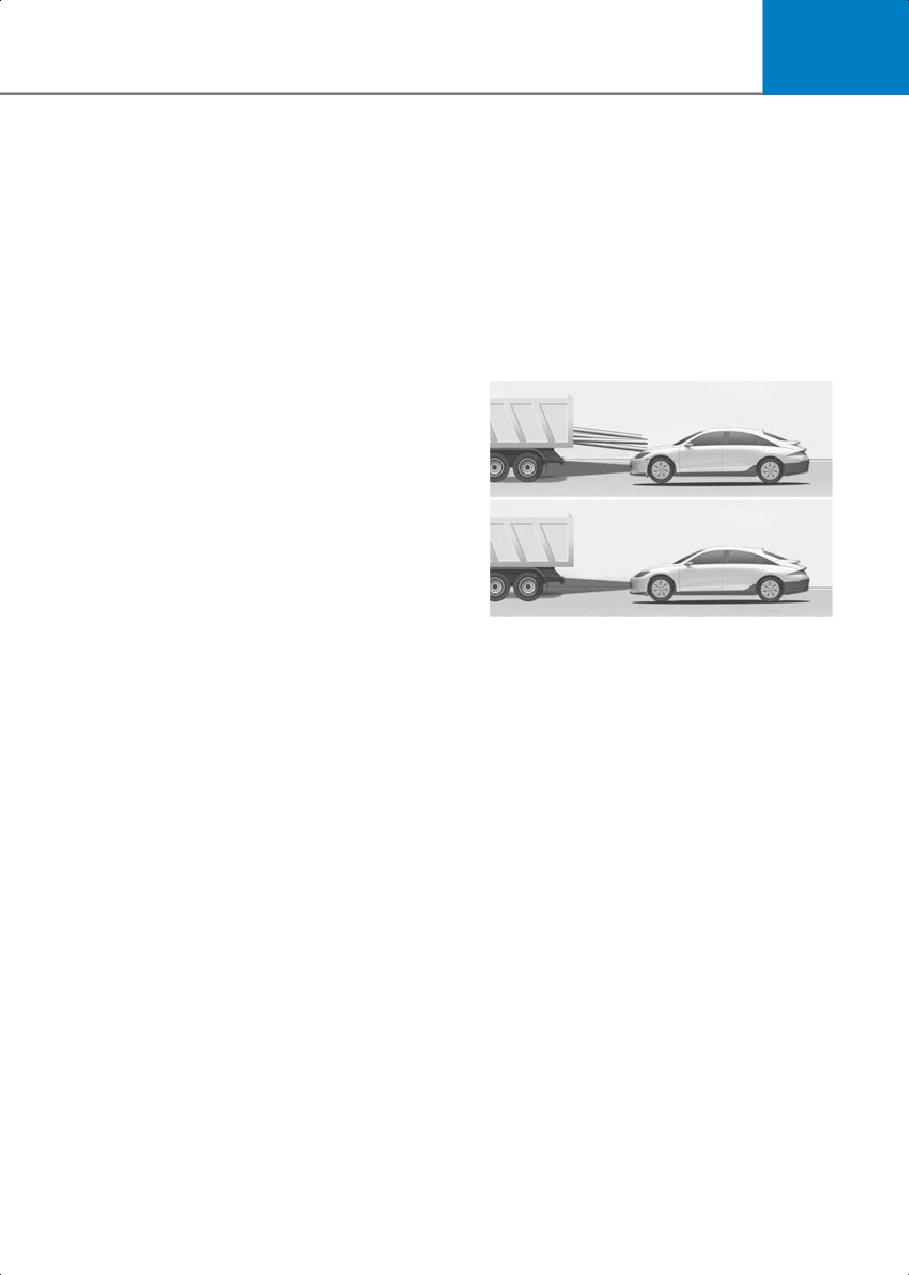
• Some vehicles in your lane may not be
operate properly. Have the vehicle
detected by the sensors:
inspected by an authorized HYUNDAI
dealer.
•
If the radars have been replaced or
repaired, have the vehicle inspected by
an authorized HYUNDAI dealer.
•
Use only genuine parts to repair the
bumper where the radar is located.
•
Do not install a license plate frame or
other objects such as bumper sticker,
film, bumper guard, or bumper wrap
near the radar.
B6003201
•
The Smart Regeneration System may
- Narrow vehicles such as motorcycles
not work properly if the bumper has
or bicycles
been replaced, or the surroundings of
- Vehicles offset to one side
the radar has been damaged or
painted.
- Slow-moving vehicles or sudden
decelerating vehicles
•
Do not spray the sensors or the
surrounding area directly with high
- Vehicles with small rear profile such
pressure water.
as trailers with no loads
• When a vehicle in front of you merges
out of the lane, the front sensors may
not detect the new stopped vehicle that
is now in front of your vehicle.
6-21
Driving Your Vehicle
Driving on curves
Driving on hills
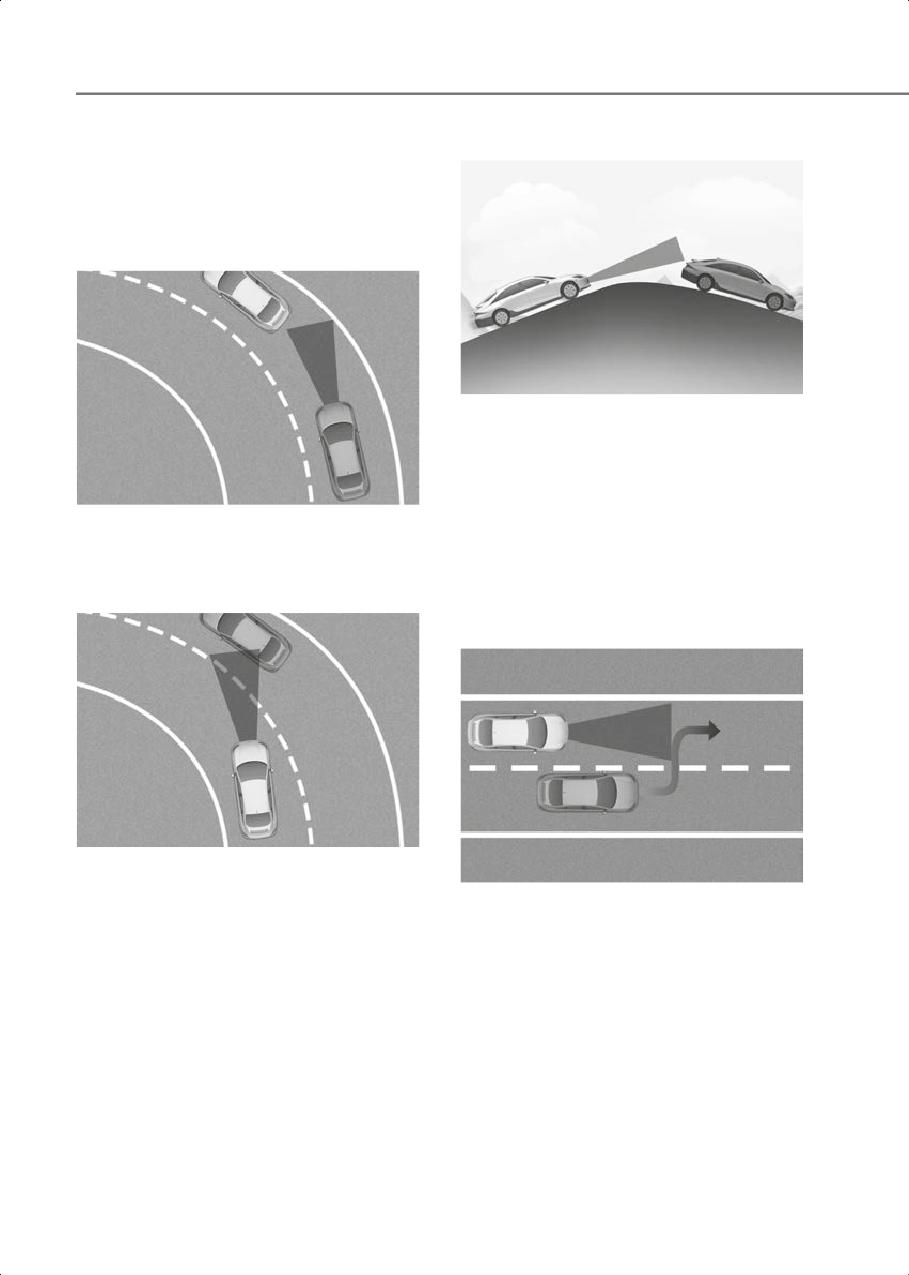
• The front sensors may not detect the
vehicle ahead if you are coasting on a
curve. The regenerative braking
intensity may automatically decrease
and accelerate the vehicle.
B6003204
When coasting uphill or downhill, the
front sensors may not detect the vehicle
ahead or suddenly detect the vehicle
ahead at the end of the incline or at the
B6003202
point where the incline changes. The
regenerative braking intensity is adjusted
• On curves, if a vehicle is detected in an
automatically changing your vehicle
adjacent lane, the regenerative braking
speed. Brake as needed to reduce your
intensity may increase and decelerate
driving speed.
your vehicle.
Changing lanes
B6003203
• If the front sensors suddenly detect the
B6003205
vehicle ahead, the regenerative braking
• When a vehicle moves into your lane
intensity may increase and decelerate
from an adjacent lane, it cannot be
your vehicle.
detected by the sensors until it is in the
sensor's detection range.
• The smart regeneration system may not
immediately detect the vehicle when
your vehicle changes lanes abruptly.
6-22
6
• When descending down a long or steep
Braking System
hill, use the paddle shifter to increase
the regeneration braking level in order
to decrease your speed without using
Power-Assist Brakes
the brake pedal excessively. Applying
Your vehicle has power-assisted brakes
the brakes continuously will cause the
that adjust automatically through normal
brakes to overheat and could result in a
usage.
temporary loss of braking performance.
In the event of a vehicle power failure, the
• Wet brakes may impair the vehicle's
power assist for the brakes will not work.
ability to safely decelerate. Because
You can still stop your vehicle, but it will
wet brakes increase braking distance
require greater force and increased pedal
and cause noise troubles, select 0 step
travel than normal. The stopping
of the regenerative braking system and
distance, however, will be longer than
depress the brake pedal around 10
with power brakes.
times, with keeping the safe distance
from other vehicles, lightly in order to
Information
dry the braking system. Such
procedure may decrease the driving
• When the brake pedal is depressed
distance by restraining the
under certain driving conditions or
regenerative braking system, which is
weather conditions, you may
not a system malfunction. Inspect the
temporarily hear a noise. This is normal
braking system after car wash or
and does not indicate a problem with
driving over wet road conditions.
your brakes.
• While driving on a road with deicing
chemicals, brake noise or abnormal tire
wear may occur due to deicing
NOTICE
chemicals. In a safe traffic condition,
• Do not continue depressing the brake
additionally apply the brakes to remove
pedal if the vehicle is off (
indicator
deicing chemicals on the brake discs
off). The battery may be discharged.
and pads.
• Noise and vibration generated during
braking is normal.
• Under normal operation, electric brake
WARNING
pump noise and motor vibration may
Take the following precautions:
occur temporarily in below cases.
• Do not drive with your foot resting on
- When the pedal is depressed
the brake pedal. This will create
suddenly.
abnormal high brake temperatures,
- When the pedal is repeatedly
excessive brake lining and pad wear,
depressed in short intervals.
and increased stopping distances. So
- When the ABS function is activated
increase the regeneration braking level
while braking.
with the left paddle shifter(
) to
decrease the speed.
6-23
Driving Your Vehicle
Disc Brakes Wear Indicator
Electronic Parking Brake (EPB)
When your brake pads are worn and new
pads are required, you will hear a high
Applying the parking brake
pitched warning sound from your front or
rear brakes. You may hear this sound
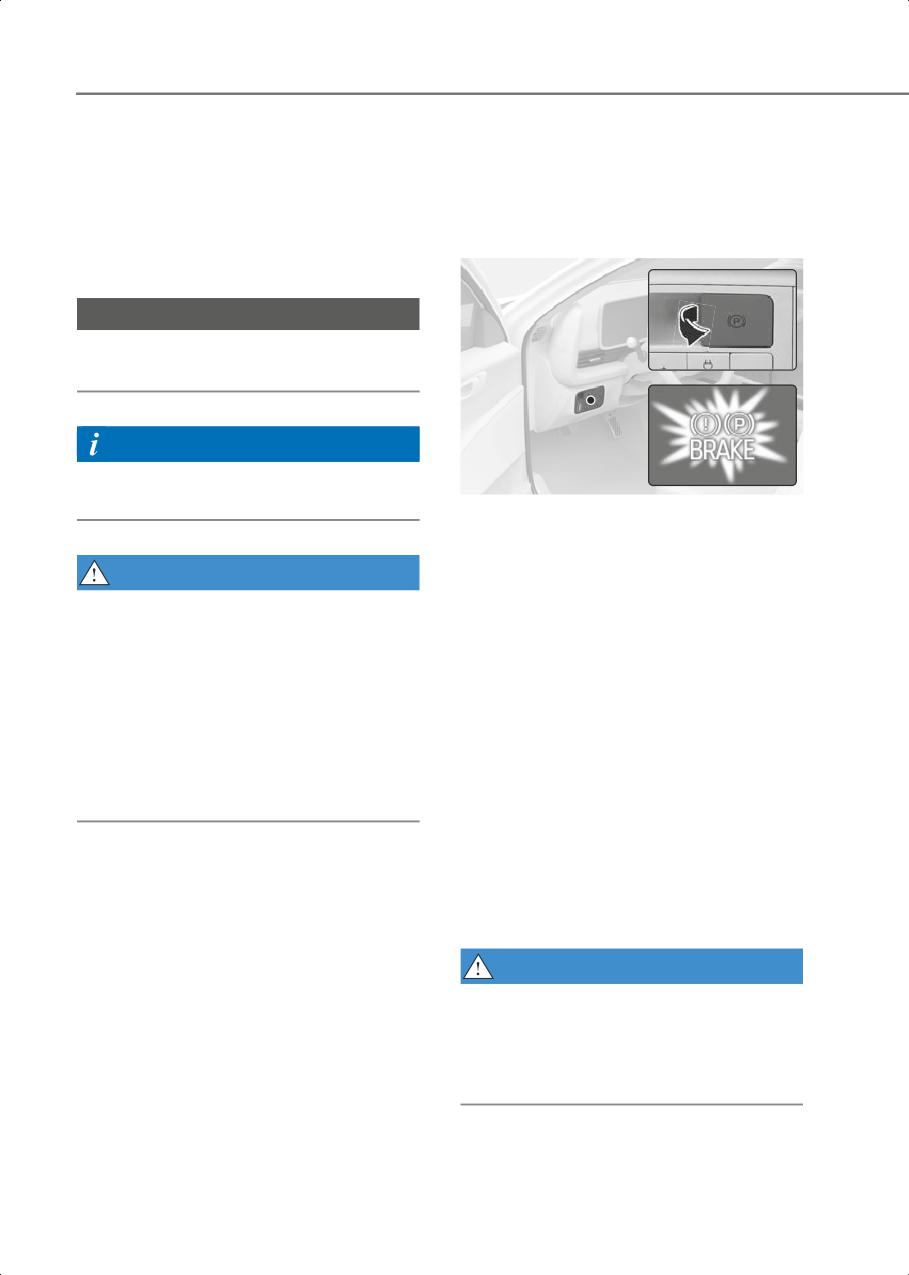
To apply EPB (Electronic Parking Brake):
come and go or it may occur whenever
you depress the brake pedal.
NOTICE
To avoid costly brake repairs, do not
continue to drive with worn brake pads.
Information
Always replace brake pads as complete
front or rear axle sets.
B6003801
1. Depress and hold the brake pedal.
2. Pull up the EPB switch.
WARNING
Make sure the Parking Brake warning light
comes on.
Frequent braking may deform
components and worn the disc brake
EPB (Electronic Parking Brake) may be
causing vibration when braking. Observe
automatically applied when:
the speed limit to prevent brake damage
from excessive braking.
• Requested by other systems.
Brake wear, noise, vibration from
• The driver turns the vehicle off while
excessive braking or deformation of the
Auto Hold is operating.
brakes caused by repeatedly braking in
high speed, racing on tracks, etc. can be
Emergency braking
excluded from warranty coverage.
If there is a problem with the brake pedal
while driving, emergency braking is
possible by pulling up and holding the
EPB switch. Braking is possible only while
you are holding the EPB switch. However,
braking distance will be longer than
normal.
WARNING
To reduce the risk of SERIOUS INJURY or
DEATH, do not operate the EPB while the
vehicle is moving except in an emergency
situation. It could damage the brake
system and lead to an accident.
6-24
6
• Gear in N (Neutral)
Information
With the vehicle on (
indicator on)
During emergency braking, the Parking
depress the brake pedal and shift out of
Brake warning light will illuminate to
N (Neutral) to R (Reverse) or D (Drive).
indicate that the system is operating.
• Satisfy the following conditions
1. Ensure seat belts are fastened and
the doors, hood and trunk are closed.
NOTICE
2. With the vehicle on (
indicator
If you continuously notice a noise or
on), depress the brake pedal and shift
burning smell when the EPB is used for
out of P (Park) to R (Reverse), D
emergency braking, have the system
(Drive) or Manual shift mode.
inspected by an authorized HYUNDAI
3. Depress the accelerator pedal.
dealer.
Make sure the Parking Brake warning light
goes off.
Releasing the parking brake
Information
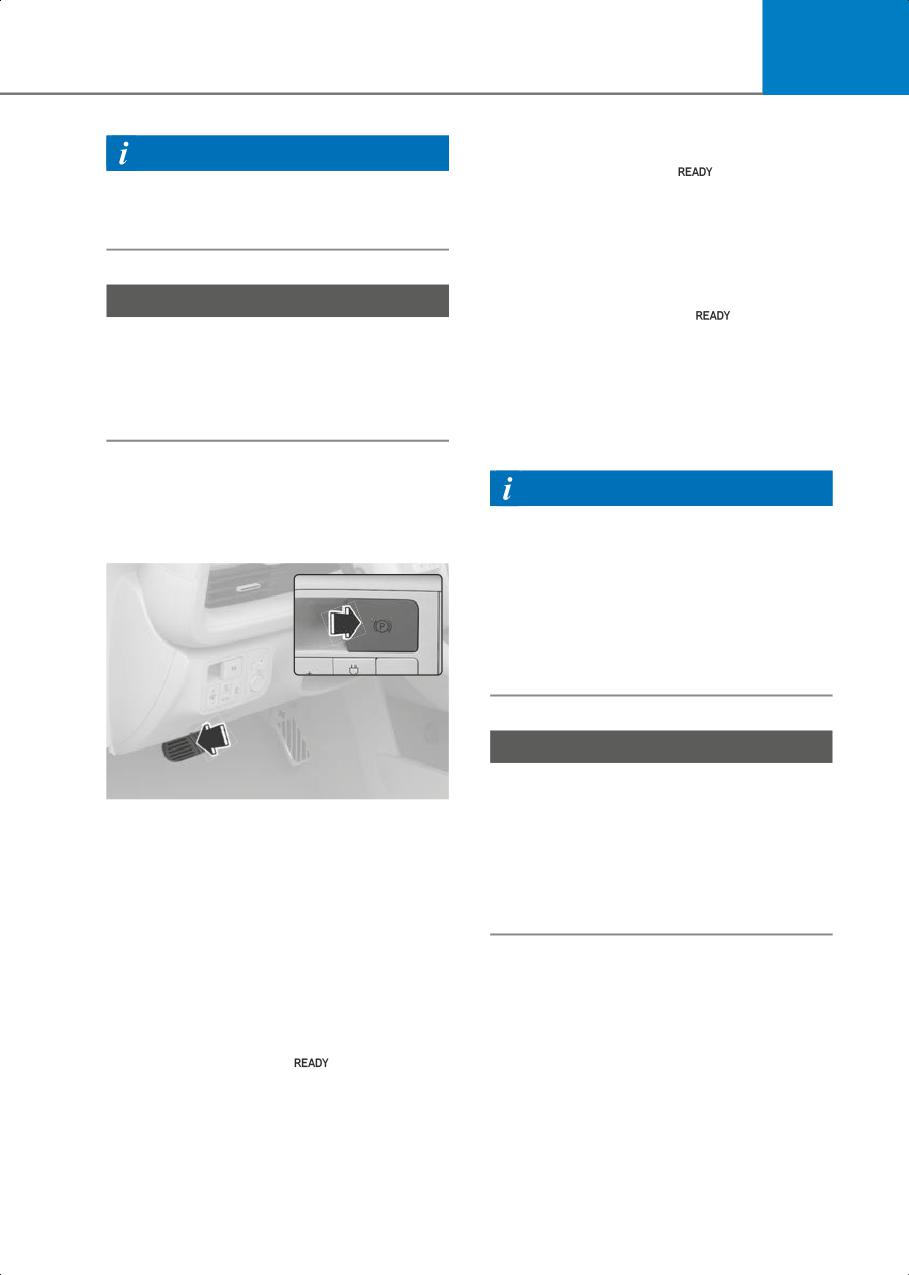
To release EPB (Electronic Parking
• You can engage EPB even though the
Brake):
Start/Stop button is in the OFF position
(only if battery power is available), but
you cannot release it.
• Depress the brake pedal and release
the parking brake manually with the
EPB switch before you drive downhill or
when backing up.
NOTICE
• If the Parking Brake warning light is still
B6003803
on even though the EPB has been
1. Press the Start/Stop button to the ON
released, have the system inspected by
or START position.
an authorized HYUNDAI dealer.
2. Press the EPB switch while depressing
• Do not drive your vehicle with EPB
the brake pedal.
applied. It may cause excessive brake
pad and brake rotor wear.
Make sure the Parking Brake warning light
goes off.
To release EPB (Electronic Parking Brake)
automatically:
• Gear in P (Park)
With the vehicle on (
indicator on)
depress the brake pedal and shift out of
P (Park) to R (Reverse) or D (Drive).
6-25
Driving Your Vehicle
Warning messages
Information
To release EPB, close the doors, hood and
• In winter, the EPB related device may
trunk and fasten the seatbelt
freeze and cannot be released. Do not
use the EPB but park on a flat surface
with the gear in P (Park). Use wheel
chocks under the wheels if necessary.
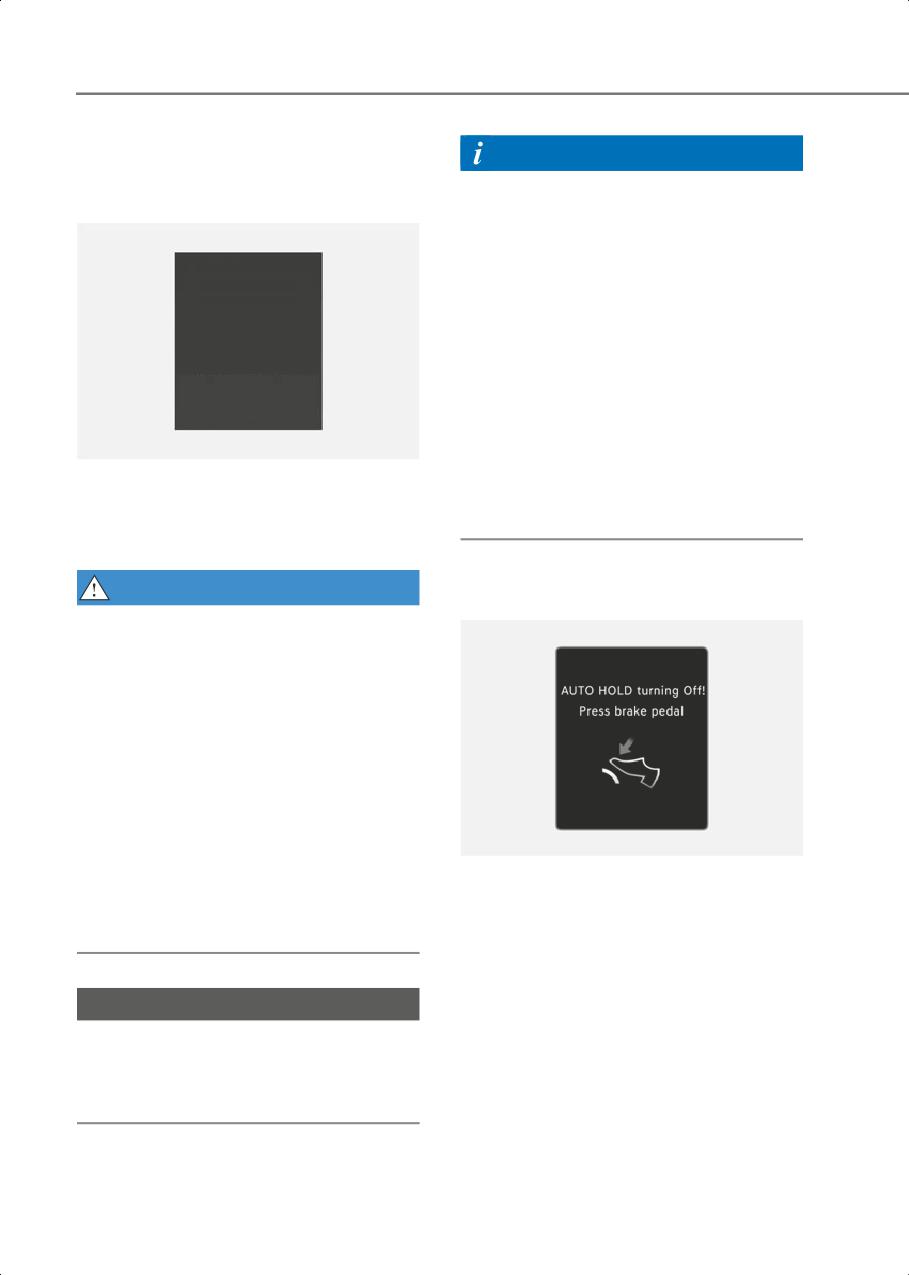
If the EPB applies automatically when
5P SFMFBTF &1#
the gear is shifted to P (Park), turn off
GBTUFO TFBUCFMU BOE
DMPTF EPPS IPPE
the Auto Hold, and press the EPB switch
BOE USVOL
to release the parking brake.
• A clicking sound may be heard while
operating or releasing the EPB. These
conditions are normal and indicate that
EPB is functioning properly.
B6003804
• When leaving your keys with a parking
If the driver's seat belt is unfastened, or
attendant or assistant, be sure to
the hood, trunk, doors are open, and you
inform him/her how to operate the EPB.
try to drive with EPB applied, a warning
sounds and a message appears.
AUTO HOLD turning Off! Press brake
WARNING
pedal
To prevent serious injury or death from
unintended vehicle movement:
• Always come to a complete stop and
continue to depress the brake pedal
before parking, shift the gear into P
(Park), pull up the EPB switch, and press
the Start/Stop button to the OFF
position. Take the key with you when
leaving the vehicle.
• Never allow anyone who is unfamiliar
with the vehicle to touch the EPB
switch.
OIK060067L
When the conversion from Auto Hold to
• Only release EPB when you are seated
EPB is not working properly a warning will
inside the vehicle with your foot firmly
sound and a message will appear.
on the brake pedal.
NOTICE
Driving with the parking brake on may
overheat the braking system and cause
premature wear or damage to brake
parts.
6-26
6
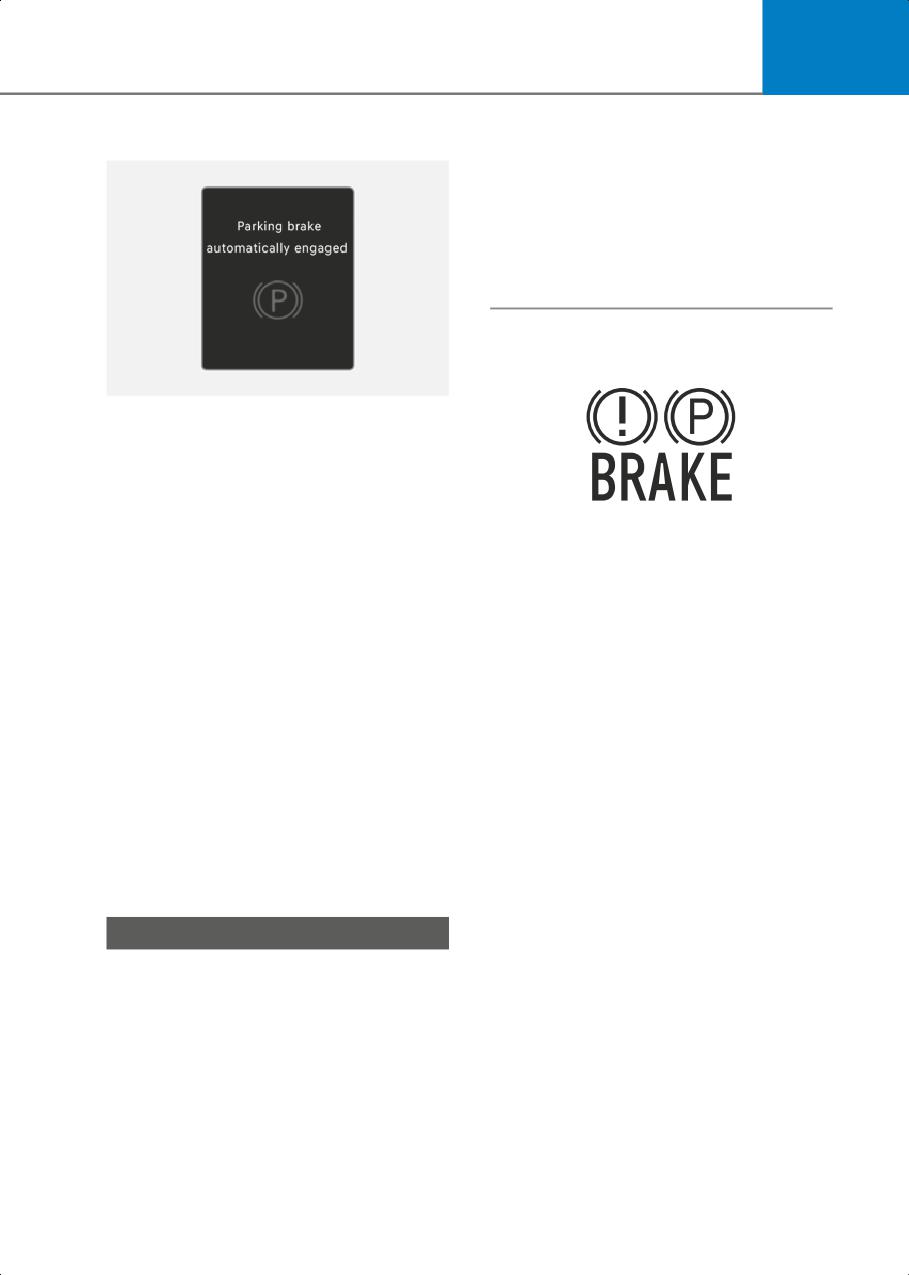
Parking brake automatically engaged
• If the EPB warning light is still on or the
Parking Brake warning light blinks
when the EPB warning light is on, press
the switch, and then pull it up. Repeat
this one more time. If the EPB warning
does not go off, have the system
inspected by an authorized HYUNDAI
dealer.
Parking brake warning light
OIK060069L
When EPB is applied while Auto Hold is
activated, a warning will sound and a
message will appear.
EPB malfunction
WL_BreakWarningLamp
Electronic Parking Brake (EPB) warning
Check the Parking Brake warning light by
light illuminates if the Start/Stop button is
pressing the Start/Stop button to the ON
pressed to the ON position and goes off in
position.
about 3 seconds if the system is operating
This light will be illuminated when the
normally.
parking brake is applied with the
If the EPB warning light remains on,
Start/Stop button in the START or ON
comes on while driving, or does not come
position.
on when the Start/Stop button is pressed
Before driving, be sure the parking brake
to the ON position, this indicates that the
is released and the Parking Brake warning
EPB may have malfunctioned.
light is OFF.
If this occurs, have the system inspected
If the Parking Brake warning light remains
by an authorized HYUNDAI dealer.
on after the parking brake is released
The EPB warning light may illuminate
while the motor is running, there may be
when the ESC indicator comes on to
a malfunction in the brake system.
indicate that ESC is not working properly,
Immediate attention is necessary.
but it does not indicate a malfunction of
If at all possible, cease driving the vehicle
EPB.
immediately. If that is not possible, use
extreme caution while operating the
NOTICE
vehicle and only continue to drive the
• If the Parking Brake warning light does
vehicle until you can reach a safe
not illuminate or blinks after the EPB
location.
switch has been pulled, the EPB may
not be applied.
When the EPB (Electronic Parking
Brake) does not release
If the EPB does not release normally,
contact an authorized HYUNDAI dealer by
loading the vehicle on a flatbed tow truck
and have the system inspected.
6-27
Driving Your Vehicle
Auto Hold
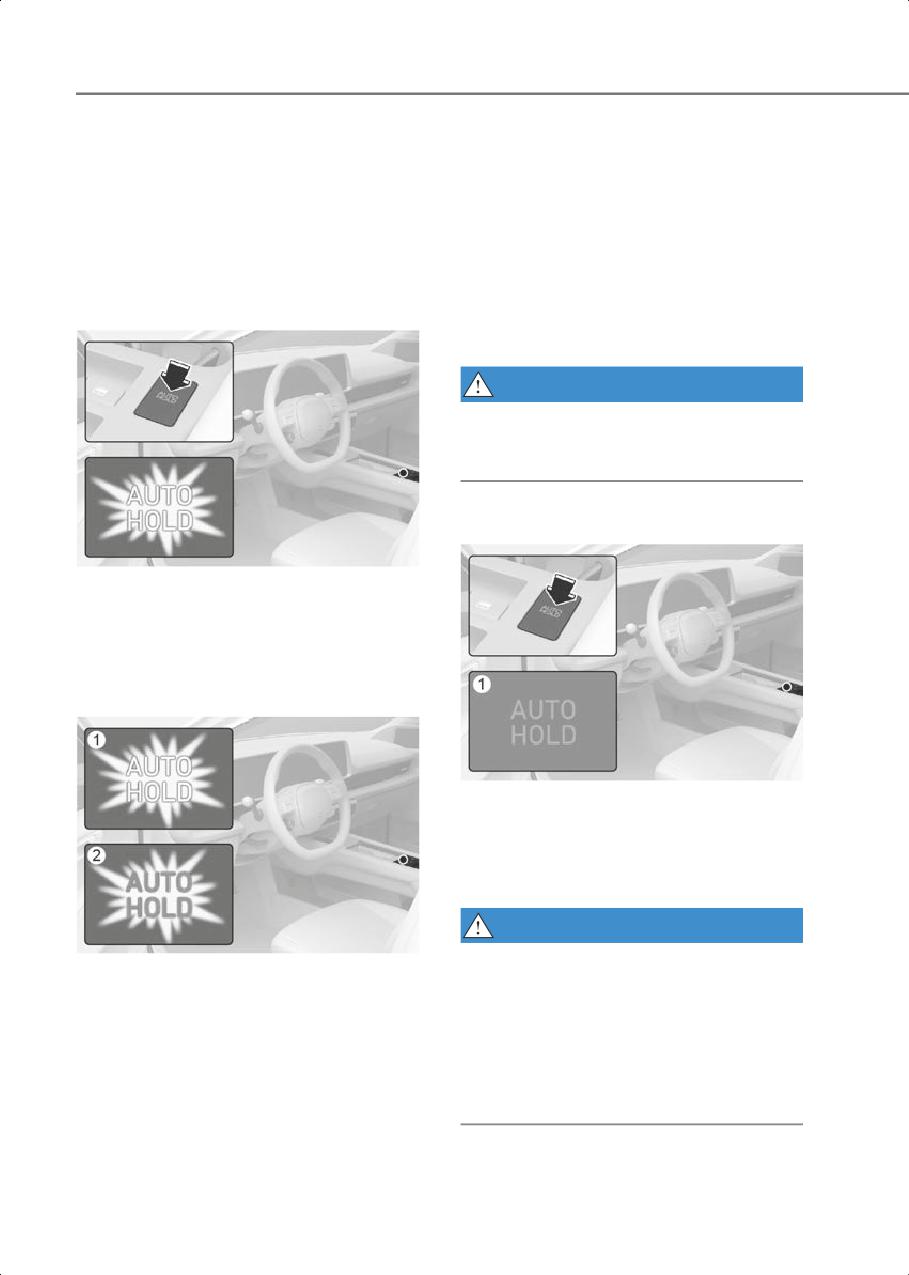
4. If EPB is applied, Auto Hold will be
released.
Auto Hold maintains the vehicle in a
standstill even though the brake pedal is
not depressed after the driver brings the
To release:
vehicle to a complete stop by depressing
If you depress the accelerator pedal with
the brake pedal.
the gear in D (Drive) or Manual shift
mode, the Auto Hold will be released
To apply:
automatically and the vehicle will start to
move. The AUTO HOLD indicator changes
from green to white.
WARNING
Always look around your vehicle before
depressing the accelerator pedal to
release Auto Hold.
To cancel:
B6003901
1. With the driver's door and hood closed,
depress the brake pedal and then press
the AUTO HOLD switch. The white
AUTO HOLD indicator will come on and
the system will be in the standby
position.
B6003903
(1) Off
1. Depress and hold the brake pedal.
2. Press the AUTO HOLD switch.
The AUTO HOLD indicator will turn off.
WARNING
B6003902
To prevent unintended vehicle
(1) White
movement, always depress your foot on
(2) Green
the brake pedal to cancel the Auto Hold
before you:
2. When you stop the vehicle completely
by depressing the brake pedal, Auto
• Drive downhill.
Hold maintains the brake pressure to
• Drive the vehicle in R (Reverse).
hold the vehicle stationary. The
• Park the vehicle.
indicator changes from white to green.
3. The vehicle will remain stationary even
if you release the brake pedal.
6-28
6
Warning messages
Information
• The Auto Hold does not operate when:
Parking brake automatically engaged
- The gear is in P (Park)
- EPB is applied
• For your safety, the Auto Hold
1BSLJOH CSBLF
automatically switches to EPB when:
BVUPNBUJDBMMZ FOHBHFE
- The driver's door is opened
- The tail gate is opened
- The hood is opened
- The vehicle is in a standstill for more
than 10 minutes
- The vehicle is standing on a steep
B6003802
slope
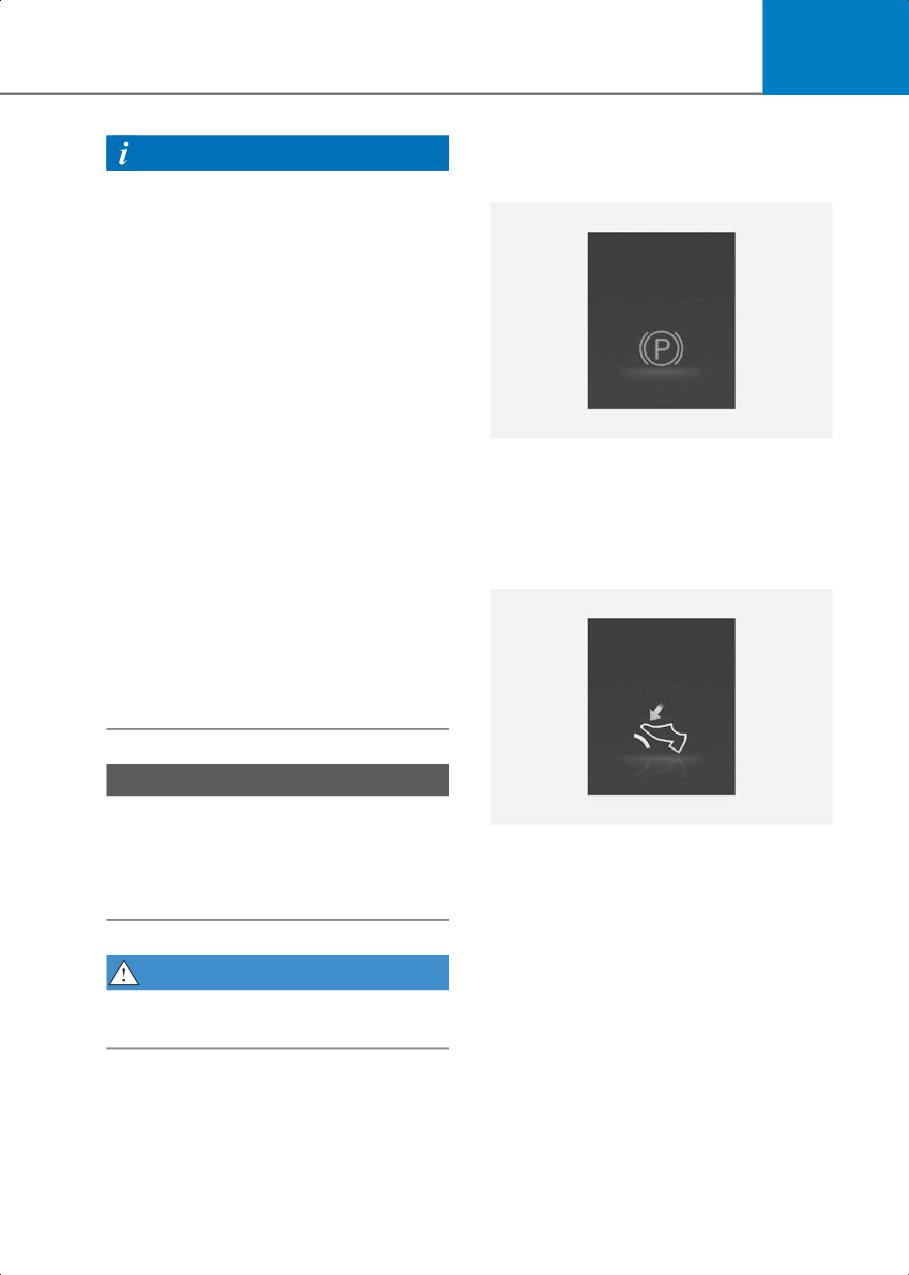
When EPB is applied while Auto Hold is
activated, a warning will sound and a
- The vehicle moved several times
message will appear.
The Parking Brake warning light comes
on, the AUTO HOLD indicator changes
AUTO HOLD turning Off! Press brake
from green to white, and a warning
pedal
sounds and a message appears to
inform you that EPB has been
automatically engaged. Before driving,
depress the brake pedal, check the
"650 )0-% UVSOJOH 0GG
surrounding area and release the
1SFTT CSBLF QFEBM
parking brake manually with the EPB
switch.
NOTICE
If the AUTO HOLD indicator changes to
B6003904
yellow, or the driver's door, hood, or trunk
open detection system malfunctions,
When the conversion from Auto Hold to
Auto Hold does not work properly.
EPB is not working properly a warning will
Contact an authorized HYUNDAI dealer.
sound and a message will appear.
When this message is displayed, Auto
Hold and EPB may not operate. For your
safety, depress the brake pedal.
WARNING
Depress the accelerator pedal slowly
when you start the vehicle.
6-29
Driving Your Vehicle
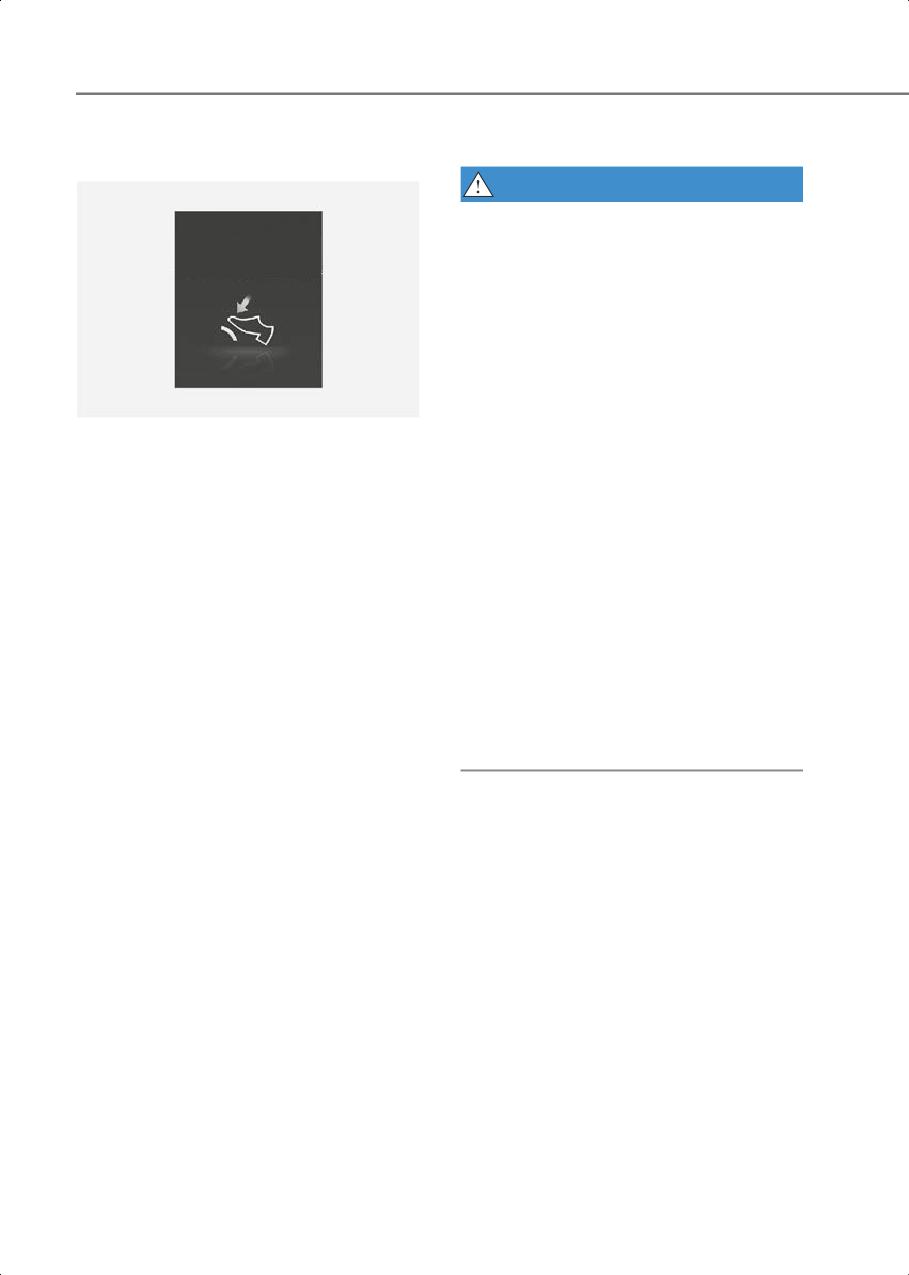
Press brake pedal to deactivate AUTO
Anti-Lock Brake System (ABS)
HOLD
WARNING
Anti-Lock Braking System (ABS) or
Electronic Stability Control (ESC) system
1SFTT CSBLF QFEBM UP
EFBDUJWBUF "650 )0-%
will not prevent accidents due to
improper or dangerous driving
maneuvers. Even though vehicle control
is improved during emergency braking,
always maintain a safe distance between
you and objects ahead of you. Vehicle
speeds should always be reduced during
extreme road conditions. The braking
B6003905
distance for vehicles equipped with ABS
If you did not apply the brake pedal when
or ESC may be longer than for those
you release Auto Hold by pressing the
without these systems in the following
AUTO HOLD switch, a warning will sound
road conditions.
and a message will appear.
Drive your vehicle at reduced speeds
during the following conditions:
Brake Disc Cleaning
• Rough, gravel or snow-covered roads.
Use the Brake Disc Cleaning function if
• On roads where the road surface is
noise is generated when depressing the
pitted or has different surface height.
brake while driving or if the brake disc
• Tire chains are installed on your vehicle.
gets rusty. It helps reduce the noise and
The safety features of ABS or ESC
rust. Regenerative braking is restrained
equipped vehicle should not be tested by
while Brake Disc Cleaning is operated,
high speed driving or cornering. This
which may lower the electric energy
could endanger the safety of yourself or
efficiency. Press and hold the AUTO
others.
HOLD button for over 3 seconds.
• Brake Disc Cleaning starts operating
when the message "Brake disc
ABS is an electronic braking system that
cleaning" is displayed on the
helps prevent a braking skid. ABS allows
instrument cluster.
the driver to steer and brake at the same
• Regenerative braking is restrained
time.
while the brake is depressed about 10
times while driving (it may differ
depending on driving conditions). It
helps reduce the noise and rust.
• Brake Disc Cleaning function will turn
off automatically when the operation is
completed. It can also be turned off
before operation is completed by
turning off the vehicle or pressing the
AUTO HOLD button for over 3 seconds.
6-30
6
Using ABS
WARNING
To obtain the maximum benefit from your
ABS in an emergency situation, do not
If the ABS (
) warning light is on and
attempt to modulate your brake pressure
stays on, you may have a problem with
and do not try to pump your brakes.
the ABS. Your power brakes will work
Depress your brake pedal as hard as
normally. To reduce the risk of serious
possible.
injury or death, contact your authorized
HYUNDAI dealer as soon as possible.
When you apply your brakes under
conditions which may lock the wheels,
you may hear sounds from the brakes, or
feel a corresponding sensation in the
NOTICE
brake pedal. This is normal and it means
your ABS is active.
When you drive on a road having poor
traction, such as an icy road, and apply
ABS does not reduce the time or distance
your brakes continuously, ABS will be
it takes to stop the vehicle.
active continuously and the ABS (
)
Always maintain a safe distance from the
warning light may illuminate. Pull your
vehicle in front of you.
vehicle over to a safe place and turn the
ABS will not prevent a skid that results
vehicle off.
from sudden changes in direction, such
Restart the vehicle. If the ABS warning
as trying to take a corner too fast or
light is off, then your ABS system is
making a sudden lane change. Always
normal.
drive at a safe speed for the road and
weather conditions.
Otherwise, you may have a problem with
your ABS system. Contact an authorized
ABS cannot prevent a loss of stability.
HYUNDAI dealer as soon as possible.
Always steer moderately when braking
hard. Severe or sharp steering wheel
movement can still cause your vehicle to
veer into oncoming traffic or off the road.
Information
On loose or uneven road surfaces,
When you jump start your vehicle
operation of the anti-lock brake system
because of a drained battery, the ABS
may result in a longer stopping distance
(
) warning light may turn on at the
than for vehicles equipped with a
same time. This happens because of the
conventional brake system.
low battery voltage. It does not mean
The ABS (
) warning light will stay on for
your ABS is malfunctioning. Have the
several seconds after the Start/Stop
battery recharged before driving the
button is in the ON position.
vehicle.
During that time, ABS will go through
self-diagnosis and the light will go off if
everything is normal. If the light stays on,
you may have a problem with your ABS.
Contact an authorized HYUNDAI dealer as
soon as possible.
6-31
Driving Your Vehicle
Electronic Stability Control
When operating
(ESC)
WL_ESCOnLamp
When ESC is in operation, the ESC
indicator light blinks:
• When you apply your brakes under
conditions which may lock the wheels,
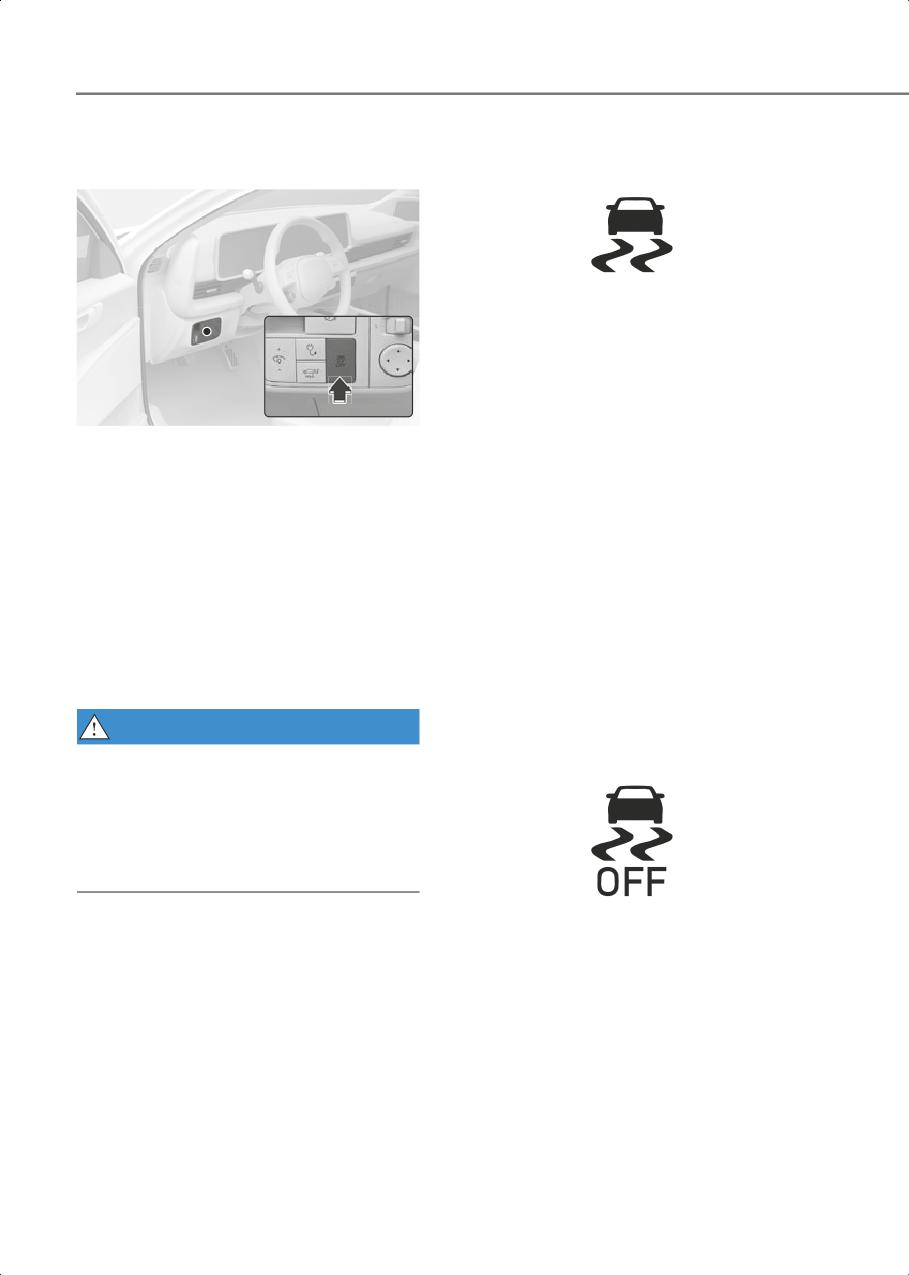
B6004101
you may hear sounds from the brakes,
or feel a corresponding sensation in the
Electronic Stability Control helps to
brake pedal. This is normal and it means
stabilize the vehicle during cornering
your ESC is active.
maneuvers.
• When ESC activates, the vehicle may
ESC checks where you are steering and
not respond to the accelerator as it
where the vehicle is actually going. ESC
does under routine conditions.
applies braking pressure to any one of the
vehicle's brakes and intervenes in the
• If Smart Cruise Control was in use when
electric vehicle control system to assist
ESC activates, Smart Cruise Control
the driver with keeping the vehicle on the
automatically disengages. Smart Cruise
intended path. It is not a substitute for
Control can be reengaged when the
safe driving practices. Always adjust your
road conditions allow. For more
speed and driving to the road conditions.
information, refer to the “Smart Cruise
Control (SCC)” section in chapter 7.
WARNING
ESC OFF condition
Never drive too fast for the road
conditions when cornering. ESC will not
prevent accidents.
Excessive speed in turns, abrupt
maneuvers, and hydroplaning on wet
surfaces can result in severe accidents.
WL_ESCOffLamp
ESC operation
To cancel ESC operation:
• State 1
ESC ON condition
Press the ESC OFF button briefly. The
When the Start/Stop button is in the ON
ESC OFF indicator light and/or message
position, ESC and the ESC OFF indicator
'Traction Control disabled' will
lights illuminate for about 3 seconds.
illuminate. In this state, the traction
After both lights go off, ESC is enabled.
control function of ESC (electric vehicle
control management) is disabled, but
the brake control function of ESC
(braking management) still operates.
6-32
6
• State 2
The ESC indicator light blinks whenever
ESC is operating.
Press and hold the ESC OFF button
continuously for more than 3 seconds.
If the ESC indicator light stays on, your
The ESC OFF indicator light and/or
vehicle may have a malfunction with the
message 'Traction & Stability Control
ESC system. When this warning light
disabled' illuminates and a warning
illuminates, have the vehicle inspected by
chime sounds. In this state, both the
an authorized HYUNDAI dealer as soon as
traction control function of ESC
possible.
(electric vehicle control management)
The ESC OFF indicator light comes on
and the brake control function of ESC
when ESC is turned off.
(braking management) are disabled.
If the Start/Stop button is pressed to
WARNING
the OFF position when ESC is off, ESC
When ESC is blinking, this indicates ESC is
remains off. Upon restarting the
active:
vehicle, ESC will automatically turn on
again.
Drive slowly and NEVER attempt to
accelerate. NEVER turn ESC off while the
When ESC (electric vehicle control) is
ESC indicator light is blinking or you may
deactivated, the vehicle will lose the
lose control of the vehicle resulting in an
traction and stability if the vehicle is
accident.
driven by abrupt steering wheel
control. It is possible that the tire may
make a collision with the connected
parts of the tire. Do not turn off ESC
NOTICE
while driving the vehicle for your safety.
Driving with wheels and tires with
different sizes may cause the ESC system
Indicator lights
to malfunction. Before replacing tires,
ESC indicator light (blinks)
make sure all four tires and wheels are the
same size. Never drive the vehicle with
different sized wheels and tires installed.
WL_ESCOnLamp
ESC OFF indicator light (comes on)
WL_ESCOffLamp
When the Start/Stop button is pressed to
the ON position, the ESC indicator light
illuminates, then goes off if the ESC
system is operating normally.
6-33

Driving Your Vehicle
ESC OFF usage
Vehicle Stability Management
(VSM)
When Driving
Vehicle Stability Management is a
The ESC OFF mode should only be used
function of the Electronic Stability
briefly to help free the vehicle if stuck in
Control (ESC) system. It helps the vehicle
snow or mud, by temporarily stopping
stay stable when accelerating or braking
operation of ESC, to maintain wheel
suddenly on wet, slippery and rough
torque.
roads where traction over the four tires
To turn ESC off while driving, press the
can suddenly become uneven.
ESC OFF button while driving on a flat
road surface.
WARNING
NOTICE
Take the following precautions when
using Vehicle Stability Management:
To prevent damage to the gear:
• ALWAYS check the speed and the
•
Do not allow wheel(s) of one axle to
distance to the vehicle ahead. VSM is
spin excessively while the ESC, ABS,
not a substitute for safe driving
and Parking Brake warning lights are
practices.
displayed. The repairs would not be
• Never drive too fast for the road
covered by the vehicle warranty.
conditions. VSM will not prevent
Reduce motor power and do not spin
accidents. Excessive speed in bad
the wheel(s) excessively while these
weather, on slippery and uneven roads
lights are displayed.
can result in severe accidents.
•
When operating the vehicle on a
dynamometer, make sure ESC is turned
off (ESC OFF light illuminated).
VSM operation
When operating
When you apply your brakes under
Information
conditions which may activate ESC, you
•
Turning ESC off does not affect ABS or
may hear sounds from the brakes, or feel
standard brake system operation.
a corresponding sensation in the brake
•
Select 0 step of the regenerative
pedal. This is normal and it means your
braking system and depress the brake
VSM is active.
pedal around 10 times to efficiently
apply brake disc cleaning.
Information
Brake disc cleaning may decrease the
VSM does not operate when:
driving distance by restraining the
• Driving on a banked road such as
regenerative braking system. After
gradient or incline.
brake disc cleaning, the regenerative
• Driving in reverse.
braking system may be restored.
• The ESC OFF indicator light is on.
If the regenerative braking system is
not restored after the brake disc
• The MDPS (Motor Driven Power
cleaning, have the vehicle inspected by
Steering) warning light (
) is on or
an authorized HYUNDAI dealer.
blinks.
6-34
6
VSM OFF condition
Information
To cancel VSM operation, press the ESC
OFF button. ESC OFF (
) indicator light
• Hill-Start Assist Control does not
will illuminate.
operate when the gear is shifted to P
(Park) or N (Neutral).
To turn on VSM, press the ESC OFF button
again. The ESC OFF indicator light will go
• Hill-Start Assist Control activates even
out.
when the ESC (Electronic Stability
Control) is off. However, it does not
WARNING
activate, when ESC does not operate
normally.
If the ESC (
) indicator light or MDPS (
)
warning light stays illuminated or blinks,
your vehicle may have a malfunction with
Brake Assistant System (BAS)
the VSM system. When the warning light
illuminates have the vehicle inspected by
The Brake Assistant System provides
an authorized HYUNDAI dealer as soon as
additional pressure when the brake pedal
possible.
is momentarily and strongly depressed in
a situation sudden braking is required
while driving.
The Brake Assistant System reduces the
NOTICE
time for ABS(Anti-Lock Brake System)
Driving with wheels and tires with
control to enter and consequently
different sizes may cause the VSM system
reduces the braking distance, by
to malfunction. Before replacing tires,
providing additional pressure up to the
make sure all four tires and wheels are the
point of ABS intervention.
same size. Never drive the vehicle with
different sized tires and wheels installed.
BAS operation
• When the vehicle speed is more than 18
mph (30 km/h) and the ABS control is
Hill-Start Assist Control (HAC)
not entered.
Hill-Start Assist Control helps prevent the
• When the brake pedal is depressed
vehicle from rolling backwards when
strongly over a certain level.
starting a vehicle from a stop on a hill. The
system operates the brakes automatically
• When the friction of the road surface is
for about 2 seconds (maximum of 5
above a certain level.
seconds when the accelerator pedal is
slightly depressed during HAC operation)
and releases the brake after 2 seconds or
when the accelerator pedal is depressed.
WARNING
Always be ready to depress the
accelerator pedal when starting off an
incline. Hill-Start Assist Control activates
only for about 2 seconds (maximum of 5
seconds when the accelerator pedal is
slightly depressed during HAC operation).
6-35
Driving Your Vehicle
BAS operation off
Be aware of wet brakes. The brakes may
get wet if the vehicle is driven through
• The vehicle speed is below 6 mph (10
standing water or if it is washed. Your
km/h).
vehicle will not stop as quickly if the
• The brake pedal is depressed over a
brakes are wet. Wet brakes may cause the
certain conditions.
vehicle to pull to one side.
• The friction of the road surface is below
To dry the brakes, apply the brakes lightly
a certain level.
until the braking action returns to normal.
If the braking action does not return to
WARNING
normal, stop as soon as it is safe to do so
The system may not operate depending
and call an authorized HYUNDAI dealer
on driver's driving habit, the degree to
for assistance.
which the brake pedal is depressed and
DO NOT drive with your foot resting on
the road surface condition.
the brake pedal. Even light, but constant
pedal pressure can result in the brakes
overheating, brake wear, and possibly
Good Braking Practices
even brake failure.
If a tire goes flat while you are driving,
WARNING
apply the brakes gently and keep the
Whenever leaving the vehicle or parking,
vehicle pointed straight ahead while you
always come to a complete stop and
slow down. When you are moving slowly
continue to depress the brake pedal. Shift
enough for it to be safe to do so, pull off
the gear to the P (Park) position, then
the road and stop in a safe location.
apply the parking brake, and press the
Keep your foot firmly on the brake pedal
Start/Stop button to the OFF position.
when the vehicle is stopped to prevent
Vehicles parked with the parking brake
the vehicle from rolling forward.
not applied or not fully engaged may roll
inadvertently and may cause injury to the
driver and others. ALWAYS apply the
parking brake before exiting the vehicle.
6-36

6
• In the event your vehicle leaves the
All Wheel Drive (AWD)
roadway, do not steer sharply. Instead,
if equipped
slow down before pulling back into the
When All Wheel Drive(AWD) is activated,
travel lanes.
driving forces are distributed
appropriately to front and rear wheels. It
could improve driving performance by
NOTICE
maximizing the driving force of vehicles
on severe road conditions such as steep
• Do not drive in water if the level is
hills, unpaved, slippery, etc.
higher than the bottom of the vehicle.
Advantage of electronic AWD
• Check your brake condition once you
are out of mud or water. Depress the
1. Improvement of straight stability
brake pedal several times as you move
2. Improvement of driving performance
slowly until you feel normal braking
on curve
return.
3. Secure stability on severe condition
• Shorten your scheduled maintenance
such as wet and sandy roads.
interval if you drive in off-road
4. Improvement of energy efficiency from
conditions such as sand, mud or water
driving mode automatic control.
(For more information, refer to the
"Maintenance Under Severe Usage and
Information
Low Mileage Conditions" section in
chapter 9.)
AWD vehicles could change the
engagement status of the motor
• Always wash your vehicle thoroughly
according to the situation required. Auto
after off road use, especially the
changing the driving
bottom of the vehicle.
mode(2WD/AWD)helps improve energy
• Be sure to equip the vehicle with four
efficiency and driving stability.
tires of the same size and type.
• Make sure that a full time AWD vehicle
is towed by a flat bed tow truck.
WARNING
To reduce the risk of SERIOUS INJURY or
For safe AWD operation
DEATH:
• Avoid high speeds when cornering or
Before driving
turning.
• Make sure all passengers are wearing
• Do not make quick steering wheel
seat belts.
movements, such as sharp lane
• Sit upright and closer to the steering
changes or fast, sharp turns.
wheel than usual. Adjust the steering
• The risk of a rollover is greatly increased
wheel to a position comfortable for you
if you lose control of your vehicle at
to drive.
highway speeds.
• Loss of control often occurs if two or
more wheels drop off the roadway and
the driver over steers to reenter the
roadway.
6-37

Driving Your Vehicle
Driving on snow-covered or icy roads
• Avoid speeding, rapid acceleration,
sudden brake applications, and sharp
• Start off slowly by applying the
turns to prevent getting stuck.
accelerator pedal gently.
• Use snow tires or tire chains.
NOTICE
• Keep sufficient distance between your
When the vehicle is stuck in snow, sand or
vehicle and the vehicle in front of you.
mud, place a nonslip material under the
• Using regenerative braking helps the
drive wheels to provide traction OR slowly
steering on the downhill. However, it
spin the wheels in forward and reverse
may be difficult to adjust the vehicle
directions which causes a rocking motion
while coasting using regenerative
that may free the vehicle.
braking, so avoid using the third level of
regenerative braking as much as
possible.
Driving up or down hills
• Avoid speeding, rapid acceleration,
• Driving uphill
sudden brake applications, and sharp
- Before starting off, check if it is
turns to prevent skids.
possible to drive uphill.
• It is difficult to start again if the vehicle
- Drive as straight as possible.
stops on an uphill road. Keep your
distance from other vehicles and drive
• Driving downhill
slowly.
- Do not change gear while driving
downhill. Select gear before driving
Information
downhill.
When using Snow Tires, mount them on
- Drive straight as possible.
all four wheels.
WARNING
When using tire chains, install them on
the rear tires.
Exercise extreme caution driving up or
However, driving speed must be below 18
down steep hills. The vehicle may flip over
mph (30 km/h) and minimize the driving
depending on the grade, terrain, water
distance. High-speed or long-term
and mud conditions.
driving with tire chains installed may
malfunction or damage the AWD system.
For more information on Snow Tires and
WARNING
Tire Chains, refer to the "Winter Driving"
section later in this chapter.
Do not drive across the contour of steep
hills. A slight change in the wheel angle
can destabilize the vehicle, or a stable
Driving in sand or mud
vehicle may lose stability if the vehicle
stops its forward motion. Your vehicle
• Maintain slow and constant speed.
may roll over and lead to a serious injury
• Use tire chains driving in mud if
or death.
necessary.
• Keep sufficient distance between your
vehicle and the vehicle in front of you.
• Reduce vehicle speed and always
check the road condition.
6-38
6
Driving through water
Emergency Precautions
• Try to avoid driving in deep standing
water.
Tires
• Do not change gear while driving in
When replacing tires, be sure to equip all
water.
four tires with the same size, type, tread
patterns, brand and load-carrying
CAUTION
capacity.
Always drive slowly in water. If you drive
too fast, water may get into the motor
WARNING
compartment, causing your vehicle to
Do not use tire and wheel with different
suddenly stop.
size and type from the one originally
installed on your vehicle. It can affect the
safety and performance of your vehicle,
Additional driving conditions
which could lead to steering failure or
• Become familiar with the off-road
rollover causing serious injury.
conditions before driving.
• Always pay attention when driving
off-road and avoid dangerous areas.
WARNING
• Drive slowly when driving in heavy
wind.
• Reduce vehicle speed when cornering.
The center of gravity of AWD vehicles is
higher than conventional 2WD vehicles,
making them more likely to roll over
when you rapidly turn corners.
• Always hold the steering wheel firmly
when you are driving off-road.
WARNING
B6005201
Do not grab the inside of the steering
wheel when you are driving off-road. You
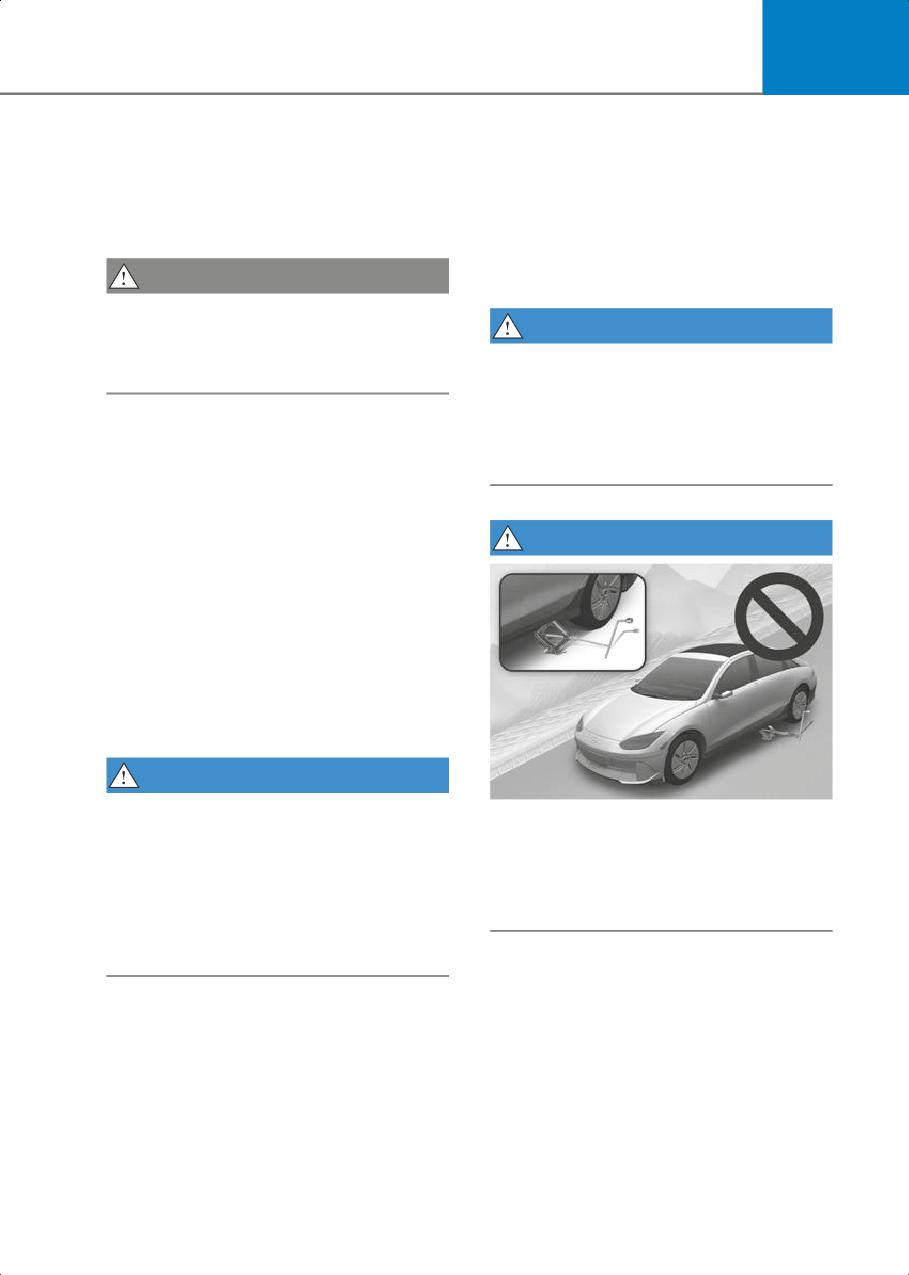
Never start or run the vehicle while an
may hurt your arm by a sudden steering
AWD vehicle is raised on a jack. The
maneuver or from steering wheel
vehicle can slip or roll off of a jack causing
rebound due to an impact with objects on
serious injury or death to you or those
the ground. You could lose control of the
nearby.
steering wheel which may lead to serious
injury or death.
Towing
AWD vehicles must be towed with a
wheel lift and dollies or flatbed
equipment with all the wheels off the
ground. For more information, refer to the
"Towing" section in chapter 8.
6-39
Driving Your Vehicle
Vehicle inspection
Drive Mode Integrated
• If the vehicle needs to be operated on a
Control System (2WD)
vehicle lift do not attempt to stop any of
the four wheels from turning. This could
if equipped
damage the AWD system.
• Never engage the parking brake while
running the vehicle on a car lift. This
Drive Mode
may damage the AWD system.
Dynamometer testing
An AWD vehicle must be tested on a
special four wheel chassis dynamometer.
B6009701
Drive mode may be selected according to
the driver's preference or road condition.
A
B
B6005501
[A] Roll tester (Speedometer)
[B] Temporary free roller
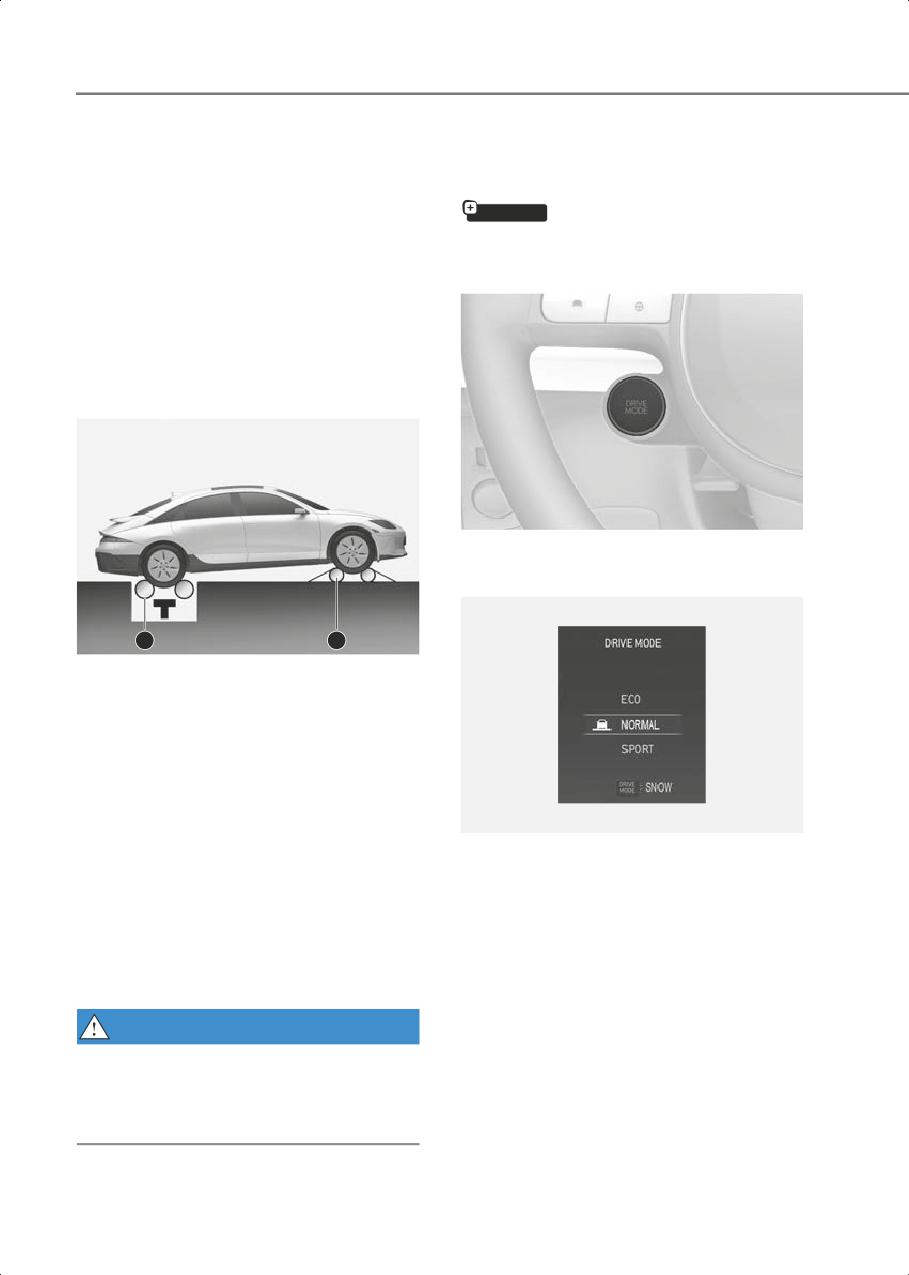
An AWD vehicle should not be tested on a
2WD roll tester. If a 2WD roll tester must
be used, perform the following
procedure:
)PME
1. Check the tire pressures recommended
for your vehicle.
B6009702
2. Place the rear wheels on the roll tester
The mode changes whenever the driver
for a speedometer test as shown in the
pushes the DRIVE MODE button.
illustration.
3. Release the parking brake.
NORMAL mode
4. Place the front wheels on the
Normal mode is a driving mode used
temporary free roller as shown in the
when driving on general roads, city center
illustration.
and highways.
WARNING
ECO mode
Keep away from the front of the vehicle
while the vehicle is in gear on the
ECO mode is a driving mode improving
dynamometer. The vehicle can jump
energy efficiency by controlling motors
forward and cause serious injury or death.
and gear.
6-40
6
Electric energy efficiency varies
SNOW mode
according to the driver's driving habit and
SNOW mode provides safe driving on the
road condition.
snowy roads.
• When ECO mode is selected, the ECO
• Press and hold the drive mode button
indicator illuminates on the instrument
to select SNOW mode.
cluster and the color of the mood lamp
• When SNOW mode is selected, the
is changed.
SNOW indicator will illuminate on the
• When ECO mode is activated:
instrument cluster and the color of the
- The acceleration response may be
mood lamp will change.
slightly reduced if the accelerator
NOTICE
pedal is depressed moderately.
- The air conditioner performance may
• Depress the accelerator pedal softly on
be limited.
the snow and the ice.
The above situations are normal
• Keep the distance from the vehicle in
conditions when ECO mode is
the front.
activated to help improve electric
• Prevent rapid acceleration,
energy efficiency.
deceleration and steering control.
Abrupt driving on the snow may cause
Limitations of ECO mode
the accident.
If the following conditions occur while
ECO mode is operating, the system
operation is limited even though there is
MY DRIVE MODE
no change in the ECO indicator.
In MY DRIVE MODE, you can adjust the
• When coolant temperature is low:
vehicle performance for each function. To
The system will be limited until motor
set MY DRIVE MODE, go to Setup >
performance becomes normal.
Vehicle > Drive mode > CUSTOM > MY
DRIVE MODE in the infotainment system.
• When driving up a hill:
The system will be limited to gain
MY DRIVE MODE
power when driving uphill because
motor torque is restricted.
Maximized/Normal
Power output
/Minimized
SPORT mode
Acceleration
High/Moderate/Lo
SPORT mode is a driving mode improving
sensitivity
w
driving performance by controlling
Steering
NORMAL/SPORT
motors and gear.
In SPORT mode, the electric energy
Press and hold the drive mode button to
efficiency may decrease.
select MY DRIVE MODE. The MY DRIVE
MODE indicator will illuminate on the
• When SPORT mode is selected, the
instrument cluster.
SPORT indicator illuminates on the
instrument cluster and the color of the
• If the controller is replaced or the
mood lamp is changed.
controller software is updated, the
setting of MY DRIVE MODE may be
• Whenever the vehicle is restarted, the
initialized.
drive mode reverts back to NORMAL
mode. If SPORT mode is desired,
re-select SPORT mode.
6-41
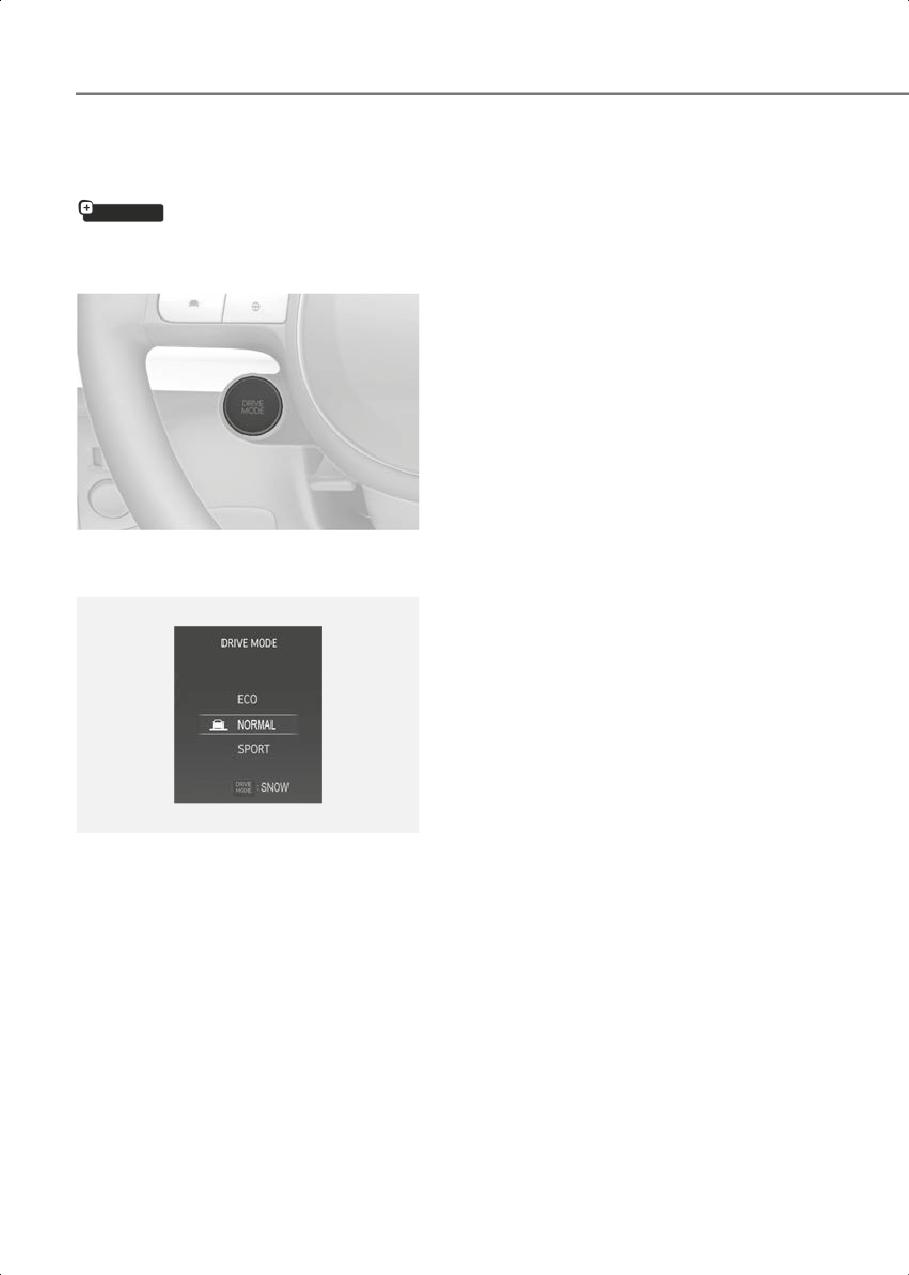
Driving Your Vehicle
ECO mode
Drive Mode Integrated
ECO mode is a driving mode vehicles
Control System (AWD)
could change the engagement status of
if equipped
the motor according to the situation
required. Auto changing the driving
mode(2WD/AWD)helps improve energy
Drive Mode
efficiency.
Electric energy efficiency varies
according to the driver's driving habit and
road condition.
• When ECO mode is selected, the ECO
indicator illuminates on the instrument
cluster and the color of the mood lamp
is changed.
• When ECO mode is activated:
- The acceleration response may be
slightly reduced if the accelerator
pedal is depressed moderately.
B6009701
Drive mode may be selected according to
- The air conditioner performance may
the driver's preference or road condition.
be limited.
- The shift pattern of the gear may
change.
The above situations are normal
conditions when ECO mode is
activated to help improve electric
energy efficiency.
Limitations of ECO mode
)PME
If the following conditions occur while
ECO mode is operating, the system
operation is limited even though there is
B6009702
no change in the ECO indicator.
The mode changes whenever the driver
• When coolant temperature is low:
pushes the DRIVE mode button.
The system will be limited until motor
performance becomes normal.
NORMAL mode
• When driving up a hill:
Normal mode is a driving that provides
The system will be limited to gain
comfortable driving with normal motor
power when driving uphill because
response. The vehicle is driven mainly
motor torque is restricted.
with the rear wheels (2WD), and
automatically converts to AWD according
to the road and driving conditions.
6-42

6
SPORT mode
MY DRIVE MODE
SPORT mode is a driving mode improving
In MY DRIVE MODE, you can adjust the
driving performance by fixing AWD
vehicle performance for each function. To
system and controlling gear.
set MY DRIVE MODE, go to Setup >
Vehicle > Drive mode > CUSTOM > MY
In SPORT mode, the electric energy
DRIVE MODE in the infotainment system.
efficiency may decrease.
• When SPORT mode is selected, the
MY DRIVE MODE
SPORT indicator illuminates on the
instrument cluster and the color of the
Maximized/Normal
Power output
mood lamp is changed.
/Minimized
• Whenever the vehicle is restarted, the
Acceleration
High/Moderate/Lo
drive mode reverts back to NORMAL
sensitivity
w
mode. If SPORT mode is desired,
re-select SPORT mode.
Steering
NORMAL/SPORT
AWD/AUTO
SNOW mode
Driveline
AWD/2WD
SNOW mode is a driving mode improving
driving performance by changing the
Press and hold the drive mode button to
engagement status of the motor
select MY DRIVE MODE. The MY DRIVE
according to the situation required. Auto
MODE indicator will illuminate on the
changing the driving
instrument cluster.
mode(2WD/AWD)helps improve driving
• When driving in 2WD, AWD will operate
stability.
under following conditions:
• Press and hold the drive mode button
- Driving at low speed or stopping
to select SNOW mode.
- Driving on an uphill or slippery road
• When SNOW mode is selected, the
- Malfunction of the rear-wheel motor
SNOW indicator will illuminate on the
instrument cluster and the color of the
• If the controller is replaced or the
mood lamp will change.
controller software is updated, the
setting of MY DRIVE MODE may be
• When SNOW mode is activated, the
initialized.
driving power is distributed to four
wheels automatically, increasing the
stability of the vehicle.
NOTICE
• Depress the accelerator pedal softly on
the snow and the ice.
• Keep the distance from the vehicle in
the front.
• Prevent rapid acceleration,
deceleration and steering control.
Abrupt driving on the snow may cause
the accident.
6-43

Driving Your Vehicle
Drive Modes Characteristic
The characteristic of each components varies depending on which drive mode is
selected.
Drive Mode
SNOW
NORMAL
ECO
SPORT
High electric
Normal driving
Sporty driving
Characteristics
Snow driving
energy efficiency
mode
mode
mode
Press more than
Button activation
Press
Press
Press
1 sec.
Indicator on the
SNOW
NORMAL
ECO
SPORT
cluster
Climate system
ECO(ECO/NORM
NORMAL
NORMAL
NORMAL
control
AL) *1
Speed Limit
-
-
-
-
Regenerative
0-1
0-3
braking level
NORMAL/SPOR
NORMAL/SPO
Brake mode
NORMAL
NORMAL
T *1
RT *1
*1 It is possible to set the driving condition for each drive mode, at the drive mode setting in Infotainment system.
Information
The infotainment system may change after software updates. For more information,
refer to the user`s manual provided in the infotainment system and the quick reference
guide.
6-44
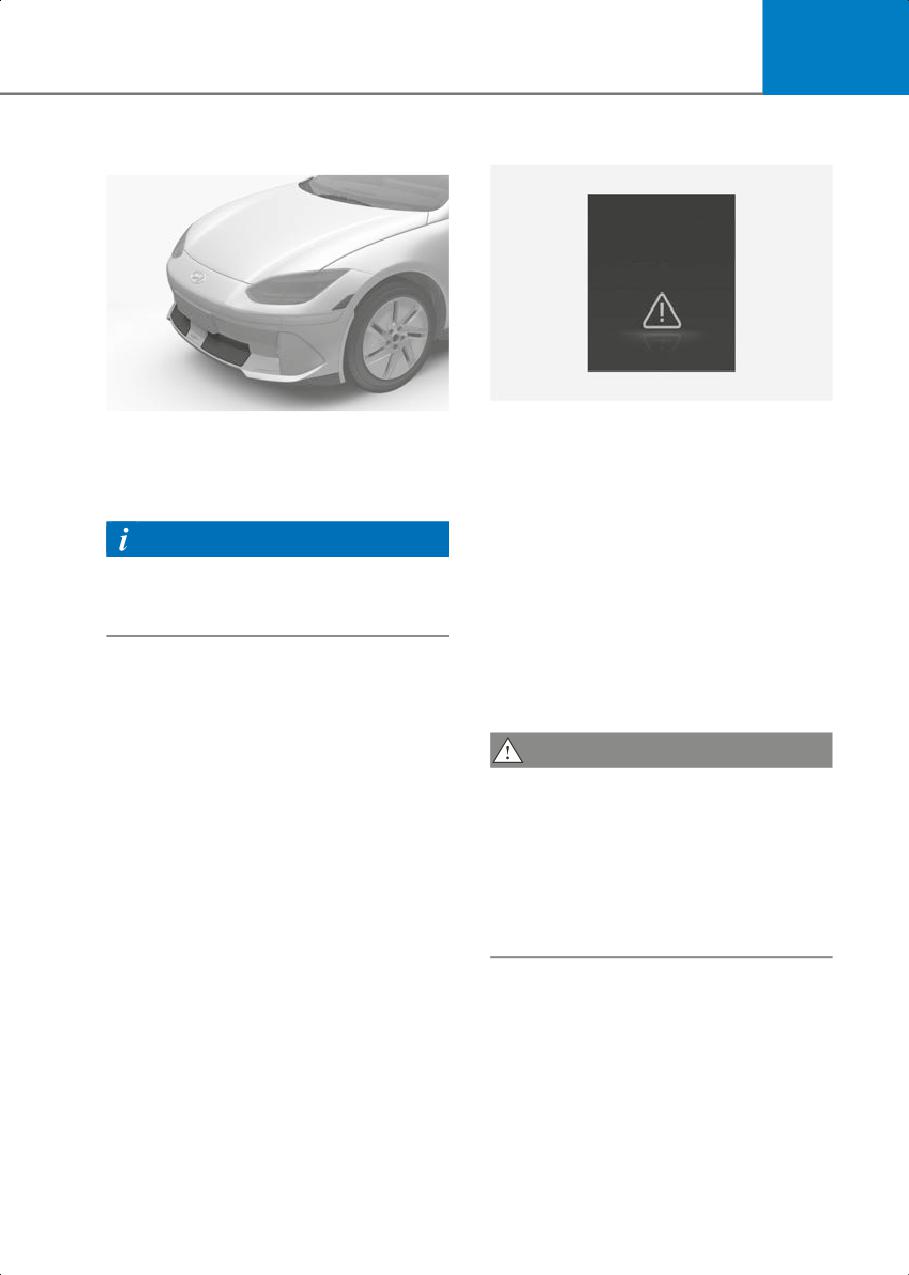
6
Active Air Flap
Malfunction
$IFDL "DUJWF
"JS 'MBQ 4ZTUFN
B6014101
B6014001
The active air flap system may not
Active air flap system controls the air flap
operate normally if the air flap is
below the front bumper to cool the
temporarily opened due to foreign factors
vehicle parts and improve energy
or if the controller is contaminated by
efficiency.
snow or rain, etc.
Information
When "Check the active air flap system"
is popped up on cluster display, stop the
Active air flap system could be activate
vehicle in a safe place and check the
regardless of the vehicle condition.
status of the air flap.
(Parking, driving, charging, etc.)
Start the vehicle after performing the
necessary work like foreign matter
removal and waiting 10 minutes. If the
pop-up remains up, contact an
authorized HYUNDAI dealer.
CAUTION
• Regardless of the pop-up, if the air flaps
aren't in the same position, stop the
vehicle and wait for 10 minutes and
start the vehicle and inspect the air flap.
• The active air flap system is actuated by
motors. Do not disturb actuation or
apply force excessively. It may cause
failure.
6-45

Driving Your Vehicle
Active Sound Design
Special Driving
if equipped
Conditions
• Active Sound Design provides various
virtual driving sounds based on the
driving mode, vehicle speed, and
Hazardous Driving Conditions
accelerator pedal. You can adjust the
When hazardous driving elements are
volume and change the settings for
encountered such as water, snow, ice,
acceleration pedal response and sound
mud and sand, take the following
style.
precautions:
• To change the volume of the Active
• Drive cautiously and maintain a longer
Sound Design in the infotainment
braking distance.
system, select: Setup > Vehicle >
• Avoid abrupt braking or steering.
Active Sound Design, or Setup >
Sound > Active Sound Design.
• When your vehicle is stuck in snow,
mud, or sand, accelerate slowly to
• The volume of the Active Sound Design
avoid unnecessary wheel spin.
is adjusted according to the drive mode
(Eco, Normal, Sport) selected.
• Put sand, rock salt, tire chains or other
non-slip materials under the wheels to
• Any unauthorized replacement of the
provide additional traction while the
vehicle’s speaker and amplifier may
vehicle becomes stuck in ice, snow, or
cause Active Sound Design to
mud.
malfunction.
WARNING
Information
Changing the tire speed suddenly could
The infotainment system may change
cause the tires to skid while driving on
after software updates. For more
slippery surface. Be careful when driving
information, refer to the user's manual
on slippery surfaces.
provided in the infotainment system and
the quick reference guide.
Rocking the Vehicle
If it is necessary to rock the vehicle to free
it from snow, sand, or mud, first turn the
steering wheel right and left to clear the
area around your front wheels. Then, shift
back and forth between R (Reverse) and a
forward gear.
Try to avoid spinning the wheels, and do
not race the vehicle.
To prevent gear wear, wait until the
wheels stop spinning before shifting
gears. Release the accelerator pedal
while shifting, and press lightly on the
accelerator pedal while the vehicle is in
gear. Slowly spinning the wheels in
forward and reverse directions causes a
rocking motion that may free the vehicle.
6-46
6
• Keep your headlights clean and
WARNING
properly aimed. Dirty or improperly
Always turn off the ESC system before
aimed headlights will make it much
rocking the vehicle. If the vehicle is stuck
more difficult to see at night.
and excessive wheel spin occurs, the
• Avoid staring directly at the headlights
temperature in the tires may increase
of oncoming vehicles. You could be
very quickly. If the tires become
temporarily blinded, and it will take
damaged, a tire blow out or tire explosion
several seconds for your eyes to
may occur - you and others may be
readjust to the darkness.
injured. Do not attempt this procedure if
people or objects are near the vehicle.
Driving in the Rain
If you attempt to free the vehicle, the
vehicle may overheat quickly, possibly
Rain and wet roads can make driving
causing a motor compartment fire or
dangerous. When driving in the rain or on
other damage. Try to avoid spinning the
slick pavement:
wheels as much as possible to prevent
•
Slow down and allow extra following
overheating of the tires or the motor. DO
distance. A heavy rainfall makes it
NOT allow the vehicle to spin the wheels
harder to see and increases the
above 35 mph (56 km/h).
distance needed to stop your vehicle.
If you are still stuck after rocking the
•
Turn OFF your Smart Cruise Control.
vehicle a few times, have the vehicle
•
Replace your windshield wiper blades
pulled out by a tow vehicle to avoid motor
when they show signs of streaking or
overheating, possible damage to the
missing areas on the windshield.
transmission, and tire damage. Refer to
the “Towing” section in chapter 8.
•
Make sure your tires have enough
tread. If your tires do not have enough
tread, making a quick stop on wet
pavement may cause a skid and
Smooth Cornering
possibly lead to a collision. Refer to the
Avoid braking or gear changing in
“Tire Replacement” section in Chapter
corners, especially when roads are wet.
9.
Ideally, cornering should be taken under
•
Turn on your headlights to make it
gentle acceleration.
easier for others to see you. Using your
headlights when using your windshield
Driving at Night
wipers is required in some jurisdictions.
Night driving presents more hazards than
•
Driving too fast through large puddles
driving in the daylight. Here are some
may affect your brakes. If you must go
important tips to remember:
through puddles, try to drive through
them slowly.
• Slow down and keep more distance
between you and other vehicles, as it
•
If you believe your brakes are wet,
may be more difficult to see at night,
apply them several times while the
especially in areas where there may not
vehicle is moving slowly.
be any street lights.
• Adjust your mirrors to reduce the glare
from other drivers’ headlights.
6-47
Driving Your Vehicle
Hydroplaning
Highway Driving
If the road is wet enough and you are
going fast enough, your vehicle may have
Tires
little or no contact with the road surface
Adjust the tire inflation pressure, as
and actually ride on the water. The best
specified. Under-inflation may overheat
advice is SLOW DOWN when the road is
or damage the tires.
wet.
Do not install worn-out or damaged tires,
The risk of hydroplaning increases as the
which may reduce traction or fail.
depth of tire tread decreases, For more
information, refer to the “Tire
Information
Replacement” section in chapter 9.
Never over-inflate your tires above the
maximum inflation pressure, as specified
Driving in Flooded Areas
on your tires.
Avoid driving through flooded areas
unless you are sure the water is not
deeper than the bottom of the wheel hub.
Coolant and high voltage battery
If you are not sure, turn around and find a
Driving at higher speeds on the highway
different route. Drive through any water
consumes more electric energy and is
slowly. Allow adequate stopping distance
less efficient than driving at a slower,
because the brake performance can be
more moderate speed. Maintain a
reduced.
moderate speed in order to conserve
After driving through water, dry the
electric energy when driving on the
brakes by gently applying them several
highway.
times while the vehicle is moving slowly.
Be sure to check both the coolant level
and the electric energy level before
driving.
6-48
6
If you mount snow tires on your vehicle,
Winter Driving
make sure to use radial tires of the same
The severe weather conditions of winter
size and load range as the original tires.
quickly wear out tires and cause other
Mount snow tires on all four wheels to
problems. To minimize winter driving
balance your vehicle’s handling in all
problems, you should take the following
weather conditions. The traction
suggestions:
provided by snow tires on dry roads may
not be as high as your vehicle’s original
equipment tires. Check with the tire
Snow or Icy Conditions
dealer for maximum speed
You need to keep sufficient distance
recommendations.
between your vehicle and the vehicle in
front of you.
Information
Apply the brakes gently. Speeding, rapid
Do not install studded tires without first
acceleration, sudden brake applications,
checking local and municipal regulations
and sharp turns are potentially very
for possible restrictions against their use.
hazardous practices. Sudden brake
applications on snowy or icy roads may
cause the vehicle to skid.
Summer tires
To drive your vehicle in deep snow, it may
• Summer tires are used to maximize the
be necessary to install tire chains on your
driving performance on dry roads.
tires.
• If the temperature is below 45 °F (7 °C)
Always carry emergency equipment.
or you are driving on snowy or icy
Some of the items you may want to carry
roads, the summer tires lose their brake
include tire chains, tow straps or chains, a
performance and traction as the tire
flashlight, emergency flares, sand, a
grip weakens significantly.
shovel, jumper cables, a window scraper,
• If the temperature is below 45 °F (7 °C)
gloves, ground cloth, coveralls, a blanket,
or you are driving on snowy or icy
etc.
roads, mount snow tires or all-season
tires of the same size with your
Snow tires
vehicle’s standard tire for safe driving.
Both snow and all-season tires have
WARNING
M+S markings.
• When using the M+S tires, use tires with
Snow tires should be equivalent in size
the same tread produced by the same
and type to the vehicle’s standard tires.
manufacturer for safe driving.
Otherwise, the safety and handling of
your vehicle may be adversely affected.
• When driving with the M+S tires with
the lower maximum allowable speed
than that of the vehicle’s standard
summer tire, be careful not to exceed
the speed allowed for the M+S tires.
6-49
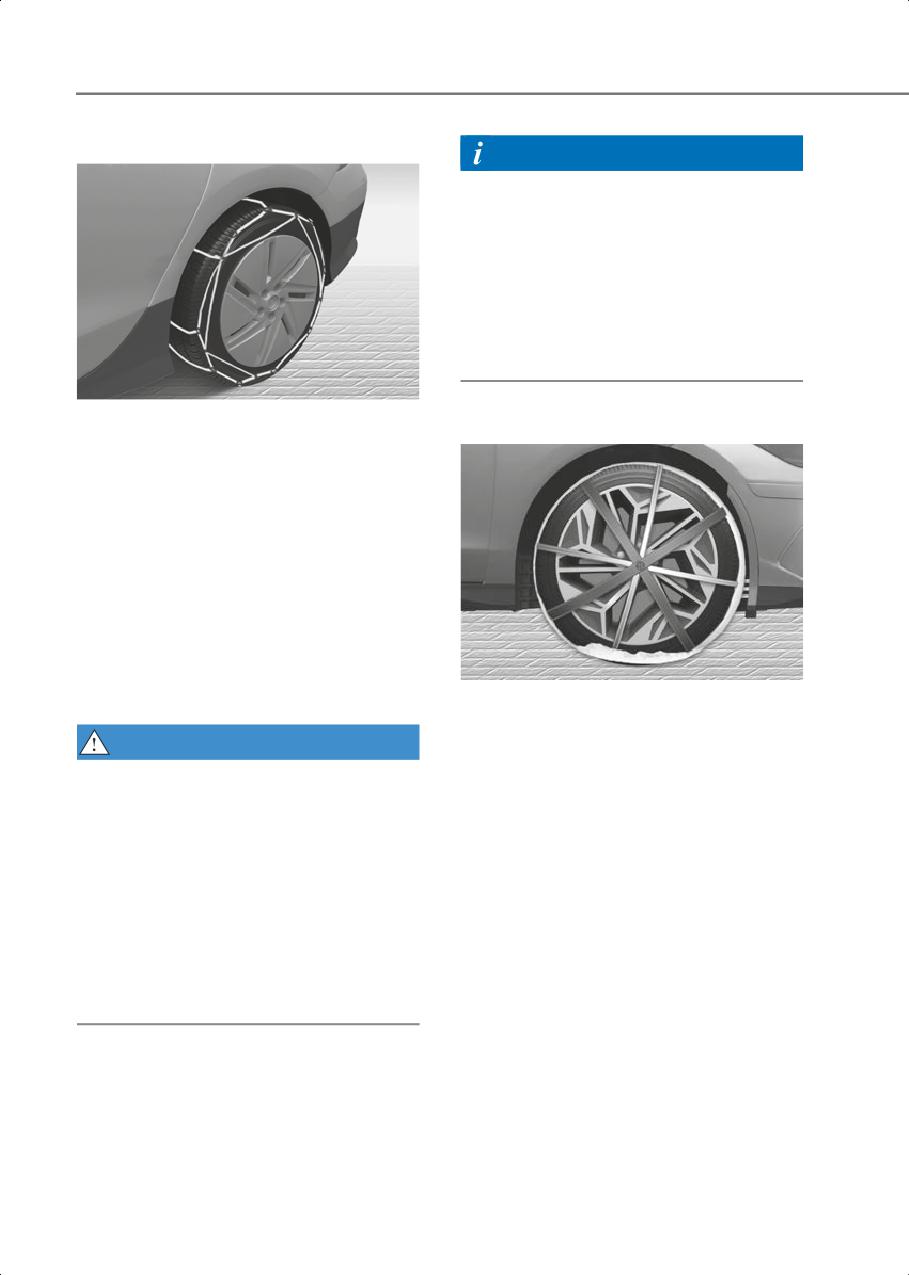
Driving Your Vehicle
Tire chains (Wire chains)
Information
• Install tire chains only in pairs and on
the rear tires. It should be noted that
installing tire chains on the tires will
provide a greater driving force, but will
not prevent side skids.
• Do not install studded tires without first
checking local and municipal
regulations for possible restrictions
against their use.
B6015201
Since the sidewalls of radial tires are
Tire chains (Auto sock)
thinner than other types of tires, they may
be damaged by mounting some types of
tire chains on them. Therefore, the use of
snow tires is recommended instead of tire
chains. If tire chains must be used, use
genuine Hyundai parts and install the tire
chain after reviewing the instructions
provided with the tire chains. Damage to
your vehicle caused by improper tire
chain use is not covered by your vehicle
manufacturer’s warranty.
When using tire chains, install tire chains
B6015202
only on the rear tires.
Since the sidewalls of radial tires are
thinner, they can be damaged by
WARNING
mounting some types of snow chains on
them. Therefore, the use of snow tires is
The use of tire chains may adversely
recommended instead of snow chains.
affect vehicle handling:
Do not mount tire chains on vehicle
• Drive less than 20 mph (30 km/h) or the
equipped with aluminum wheels; snow
chain manufacturer’s recommended
chains may cause damage to the wheels.
speed limit, whichever is lower.
If snow chains must be used, use
• Drive carefully and avoid bumps, holes,
AutoSock (fabric snow chain). Damage to
sharp turns, and other road hazards,
your vehicle caused by improper snow
which may cause the vehicle to
chain use is not covered by your vehicle
bounce.
manufacturer’s warranty.
• Avoid sharp turns or locked wheel
When using tire chains, install tire chains
braking.
only on the rear tires.
6-50
6
• Install tire chains that meet the
CAUTION
specifications of each tire size to
Always check chain installation for proper
prevent damage your vehicle.
mounting after driving about 0.3-0.6 mi.
•
18 in. tires use wire chains less than 0.59
(0.5-1 km) to ensure safe mounting.
in. (15 mm).
Retighten or remount the chains if they
•
20 in. tires use AutoSock (fabric snow
are loose.
chain).
Chain installation
Winter Precautions
When installing tire chains, follow the
manufacturer’s instructions and mount
Use high quality ethylene glycol coolant
them as tightly possible. Drive slowly (less
Your vehicle is delivered with high quality
than 20 mph (30 km/h)) with chains
ethylene glycol coolant in the cooling
installed. If you hear the chains
system. It is the only type of coolant that
contacting the body or chassis, stop and
should be used because it helps prevent
tighten them. If they still make contact,
corrosion in the cooling system,
slow down until the noise stops. Remove
lubricates the water pump, and prevents
the tire chains as soon as you begin
freezing. Be sure to replace or replenish
driving on cleared roads.
your coolant in accordance with the
When mounting snow chains, park the
"Scheduled Maintenance Services"
vehicle on level ground away from traffic.
section in chapter 9.
Turn on the vehicle Hazard Warning
Before winter, have your coolant tested to
Flasher and place a triangular emergency
make sure that its freezing point is
warning device behind the vehicle (if
sufficient for the temperatures
available). Always place the vehicle in P
anticipated during the winter.
(Park), apply the parking brake and turn
off the vehicle before installing snow
Check battery and cables
chains.
Winter temperatures affect battery
NOTICE
performance. Inspect the battery and
cables, as specified in chapter 9. The
When using tire chains:
battery charging level can be inspected
• Wrong size chains or improperly
by an authorized HYUNDAI dealer or in a
installed chains can damage your
service station.
vehicle’s brake lines, suspension, body
and wheels.
To prevent locks from freezing
• Use SAE “S” class or wire chains.
Spray approved de-icing fluid or glycerin
• If you hear noise caused by chains
into key holes. When a lock opening is
contacting the body, retighten the
already covered with ice, spray approved
chain to prevent contact with the
de-icing fluid over the ice to remove it.
vehicle body.
When an internal part of a lock freezes, try
to thaw it with a heated key. Carefully use
• To prevent body damage, retighten the
the heated key to avoid an injury.
chains after driving 0.3-0.6 mi. (0.5-1
km).
• Do not use tire chains on vehicles
equipped with aluminum wheels. If
unavoidable, use a wire type chain.
6-51
Driving Your Vehicle
Use approved window washer anti-freeze
Carry emergency equipment
solution
In accordance with weather conditions,
Add authorized window washer
carry appropriate emergency equipment,
anti-freeze solution, as specified on the
while driving. Some of the items you may
window washer container. Window
want to carry include tire chains, tow
washer anti-freeze solution is available
straps or chains, flashlight, emergency
from an authorized HYUNDAI dealer, and
flares, sand, shovel, jumper cables,
most vehicle accessory outlets. Do not
window scraper, gloves, ground cloth,
use coolant or other types of anti-freeze
coveralls, blanket, etc.
solution, to prevent any damage to the
vehicle paint.
Do not place objects or materials in the
motor compartment
Do not let your parking brake freeze
Putting objects or materials in the motor
Under some conditions, your parking
compartment may cause a motor failure.
brake may freeze in the engaged position.
Such damage is not be covered by the
This is most likely to happen when there is
manufacturer’s warranty.
an accumulation of snow or ice around or
near the rear brakes or the brakes are wet.
When there is the risk that your parking
brake may freeze: temporarily apply the
parking brake with the gear in P (Park),
then block the rear wheels, and then
release the parking brake.
Do not let ice and snow accumulate
underneath
Under some conditions, snow and ice
may build up under the fenders and
interfere with the steering. When driving
in such conditions during the severe
winter, check underneath the vehicle on a
regular basis, to make sure that the front
wheels and the steering components are
not blocked.
6-52
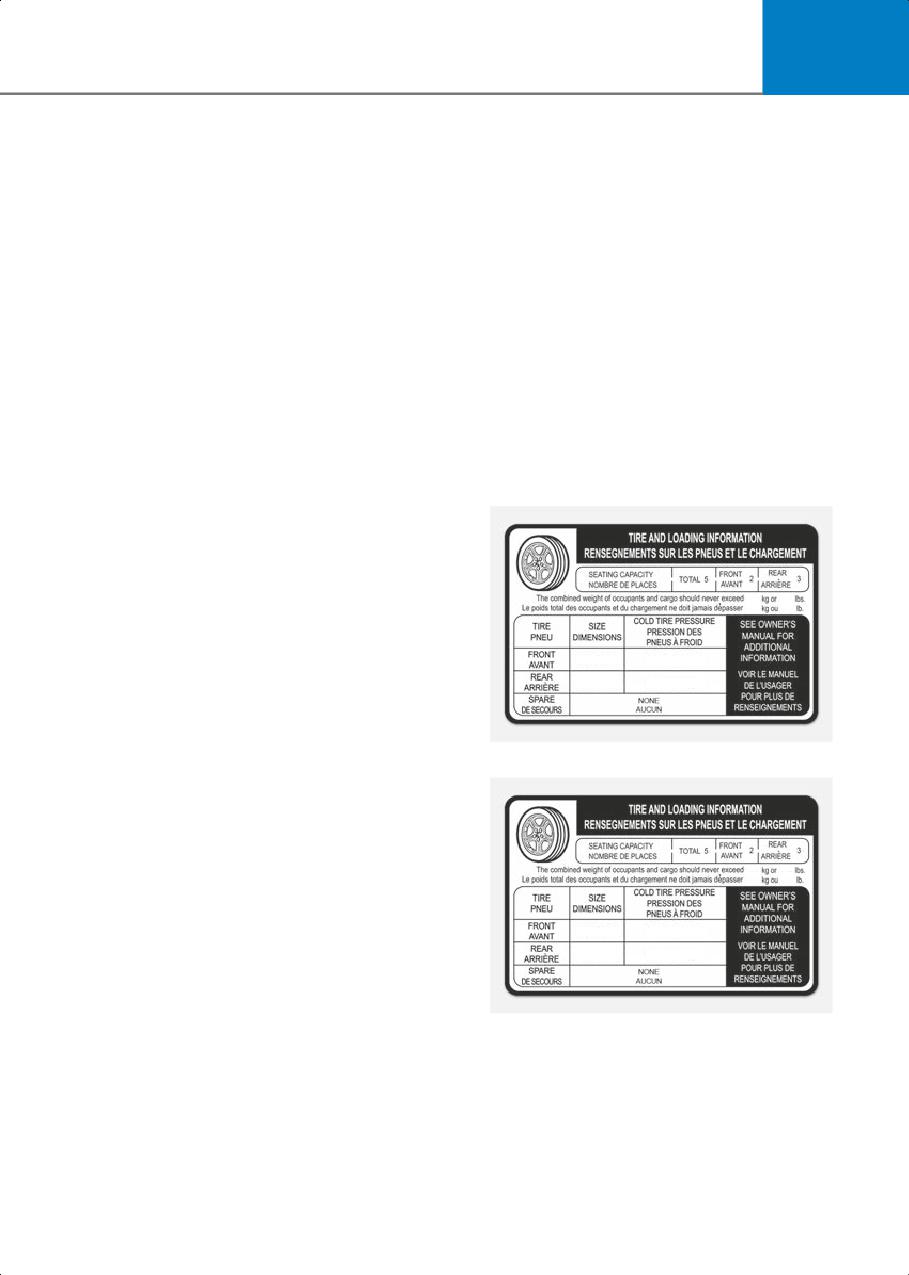
6
GVW (Gross Vehicle Weight)
Vehicle Load Limit
This is the Base Curb Weight plus
Two labels on your driver’s door sill
actual Cargo Weight plus passengers.
show how much weight your vehicle
was designed to carry: the Tire and
GVWR (Gross Vehicle Weight Rating)
Loading Information Label and the
This is the maximum allowable
Certification Label.
weight of the fully loaded vehicle
Before loading your vehicle,
(including all options, equipment,
familiarize yourself with the following
passengers and cargo). The GVWR is
terms for determining your vehicle’s
shown on the Certification Label
weight ratings, from the vehicle’s
located on the driver’s door sill.
specifications and the Certification
Label:
The Loading Information
Base Curb Weight
Label
This is the weight of the vehicle
Type A
including a full tank of fuel and all
standard equipment. It does not
include passengers, cargo, or
optional equipment.
Vehicle Curb Weight
This is the weight of your new vehicle
3
L1B
QTJ
when you picked it up from your
3
L1B
QTJ
dealer plus any aftermarket
equipment.
ONE1061056N
Type B
Cargo Weight
This figure includes all weight added
to the Base Curb Weight, including
cargo and optional equipment.
GAW (Gross Axle Weight)
This is the total weight placed on
3
L1B
QTJ
each axle (front and rear) - including
3
L1B
QTJ
vehicle curb weight and all payload.
GAWR (Gross Axle Weight Rating)
ONE1061057N
This is the maximum allowable
weight that can be carried by a single
axle (front or rear). These numbers
are shown on the Certification Label.
The total load on each axle must
never exceed its GAWR.
6-53
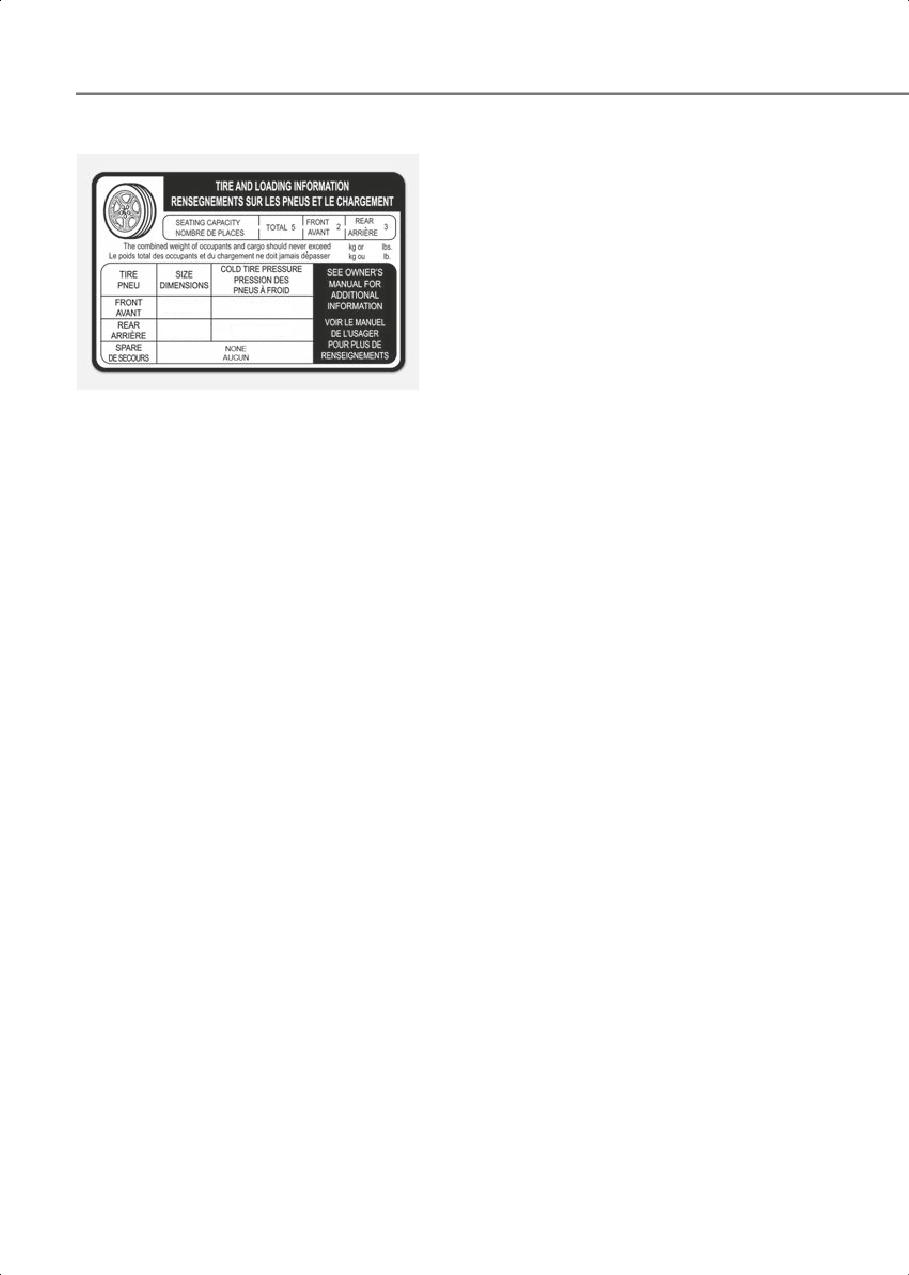
Driving Your Vehicle
Type C
Steps for determining correct load
limit
1. Locate the statement "The
combined weight of occupants and
cargo should never exceed XXX kg
or XXX lbs." on your vehicle's
placard.
3
L1B
QTJ
2.Determine the combined weight of
3
L1B
QTJ
the driver and passengers that will
be riding in your vehicle.
ONE1061058N
3.Subtract the combined weight of
the driver and passengers from XXX
kg or XXX lbs.
Vehicle capacity weight
4.The resulting figure equals the
5 persons: 860 lbs. (390 kg)
available amount of cargo and
Vehicle capacity weight is the
luggage load capacity. For
maximum combined weight of
example, if the "XXX" amount
occupants and cargo. If your vehicle
equals 1400 lbs. and there will be
is equipped with a trailer, the
five 150 lbs. passengers in your
combined weight includes the
vehicle, the amount of available
tongue load.
cargo and luggage load capacity is
650 lbs. (1400 - 750 (5 x 150) = 650
Seating capacity
lbs.)
Total : 5 persons (Front seat : 2
5.Determine the combined weight of
persons, Rear seat : 3 persons)
luggage and cargo being loaded on
Seating capacity is the maximum
the vehicle. That weight may not
number of occupants including a
safely exceed the available cargo
driver, your vehicle may carry.
and luggage load capacity
However, the seating capacity may
calculated in Step 4.
be reduced based upon the weight of
6.If your vehicle will be towing a
all of the occupants, and the weight
trailer, load from your trailer will be
of the cargo being carried or towed.
transferred to your vehicle. Consult
Do not overload the vehicle as there
this manual to determine how this
is a limit to the total weight, or load
reduces the available cargo and
limit including occupants and cargo,
luggage load capacity of your
the vehicle can carry.
vehicle.
Cargo capacity
The cargo capacity of your vehicle
will increase or decrease depending
on the weight and the number of
occupants and the tongue load, if
your vehicle is equipped with a trailer.
6-54
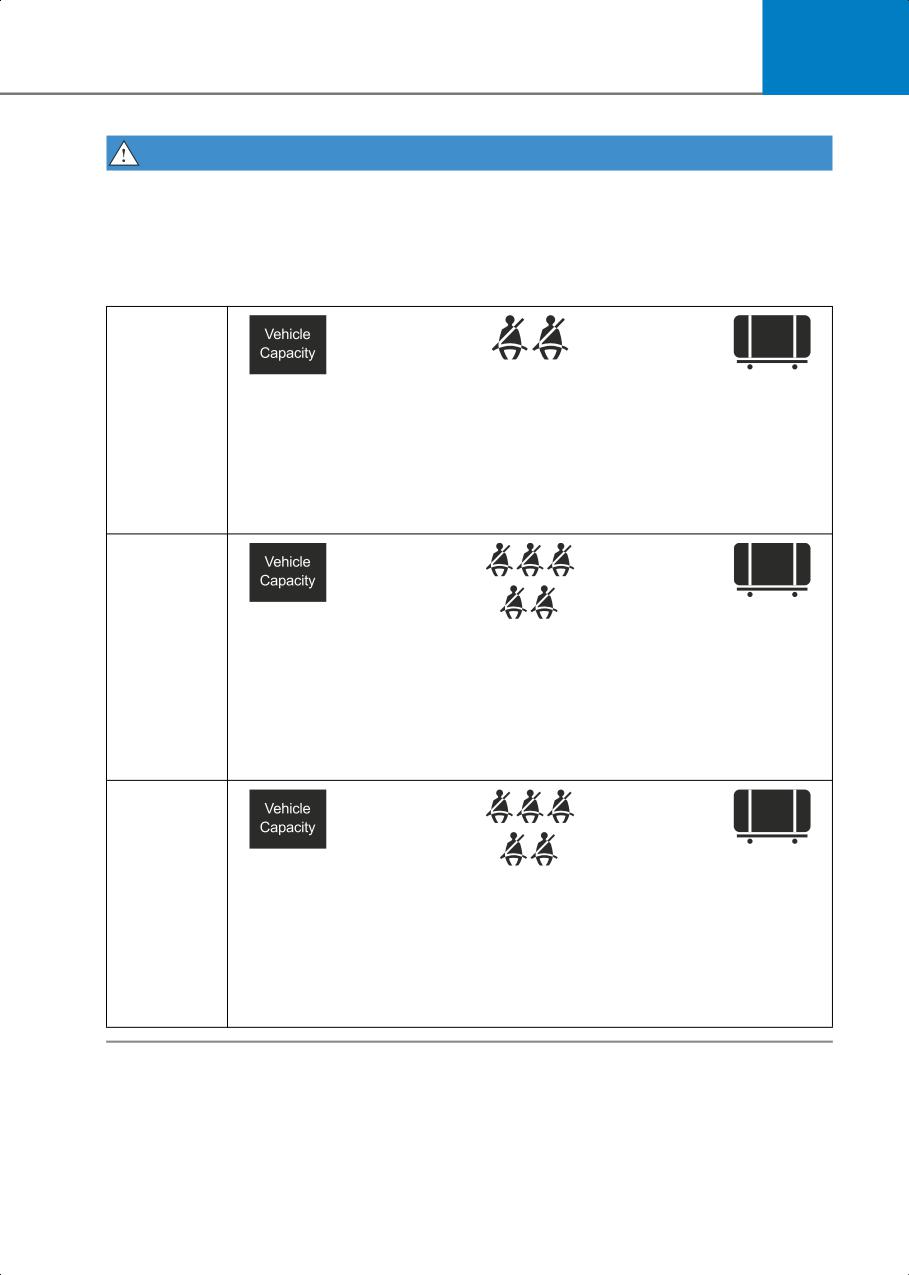
6
WARNING
Do not overload the vehicle as there is a limit to the total weight, or load limit,
including occupants and cargo, the vehicle can carry. Overloading can shorten
the life of the vehicle. If the GVWR or the GAWR is exceeded, parts on the vehicle
can break, and it can change the handling of your vehicle. These could cause
you to lose control and result in an accident.
mark_OLMB083010
mark_Vehicle_Capa
mark_Weight
city
_2Passenger
Cargo
Maximum
Example 1
≥
Weight
+
Weight
Load
(150 lbs. × 2
(1100 lbs.)
(1400 lbs.)
= 300 lbs.)
(499 kg)
(635 kg)
(68 kg × 2 =
136 kg)
mark_Weight
mark_Vehicle_Capa
city
mark_OLMB083010
Cargo
Maximum
Passenger
Weight
Example 2
≥
+
Load
Weight
(650 lbs.)
(1400 lbs.)
(150 lbs. × 5
(295 kg)
(635 kg)
= 750 lbs.)
(68 kg × 5 =
340 kg)
mark_Vehicle_Capa
mark_Weight
city
mark_OLMB083010
Cargo
Maximum
Passenger
Weight
Example 3
≥
+
Load
Weight
(540 lbs.)
(1400 lbs.)
(172 lbs. × 5
(245 kg)
(635 kg)
= 860 lbs.)
(78 kg × 5 =
390 kg)
6-55
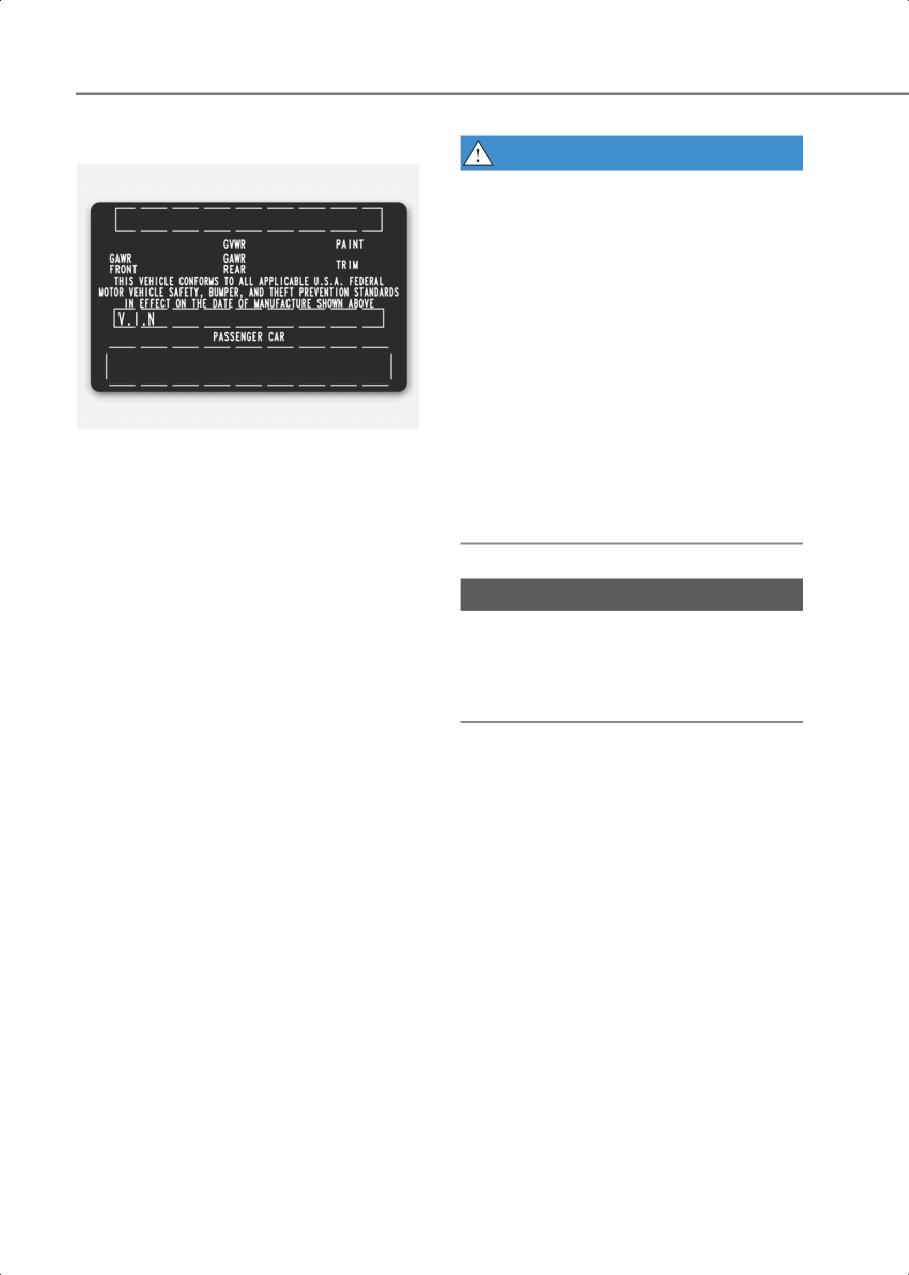
Driving Your Vehicle
Certification label
WARNING
Overloading
• Never exceed the GVWR for your
vehicle, the GAWR for either the
front or rear axle and vehicle
capacity weight. Exceeding these
ratings can affect your vehicle's
handling and braking ability, and
cause an accident.
• Do not overload your vehicle.
Overloading your vehicle can cause
OBH059070
heat buildup in your vehicle's tires
The certification label is located on
and possible tire failure, increased
the driver's door sill at the center
stopping distances and poor
pillar and shows the maximum
vehicle handling-all of which may
allowable weight of the fully loaded
result in a collision.
vehicle. This is called the GVWR
(Gross Vehicle Weight Rating). The
GVWR includes the weight of the
NOTICE
vehicle, all occupants, fuel and cargo.
Overloading your vehicle may cause
This label also tells you the maximum
damage. Repairs would not be
weight that can be supported by the
covered by your warranty. Do not
front and rear axles, called Gross Axle
overload your vehicle.
Weight Rating (GAWR).
The total weight of the vehicle,
including all occupants, accessories,
cargo, and trailer tongue load must
not exceed the Gross Vehicle Weight
Rating (GVWR) or the Gross Axle
Weight Rating (GAWR). To find out
the actual loads on your front and
rear axles, you need to go to a weigh
station and weigh your vehicle. Be
sure to spread out your load equally
on both sides of the centerline.
6-56
6
Trailer Towing
WARNING
If you carry items inside your vehicle
We do not recommend using this vehicle
for trailer towing.
(for example, suitcases, tools,
packages, or anything else), they are
moving as fast as the vehicle. If you
have to stop or turn quickly, or if there
is a crash, the items will keep going
and can cause an injury if they strike
the driver or a passenger.
• Put items in the cargo area of your
vehicle. Try to spread the weight
evenly.
• Do not stack items, like suitcases,
inside the vehicle above the tops of
the seats.
• Do not leave an unsecured child
restraint in your vehicle.
• When you carry something inside
the vehicle, secure it.
6-57
7. Driver Assistance System
Driver Assistance System Notice
7-4
Forward Collision-Avoidance Assist (FCA)
7-4
Forward Collision-Avoidance Assist Settings
7-8
Forward Collision-Avoidance Assist Operation
7-11
Forward Collision-Avoidance Assist Malfunction and Limitations
7-22
Lane Keeping Assist (LKA)
7-30
Lane Keeping Assist Settings
7-30
Lane Keeping Assist Operation
7-31
Lane Keeping Assist Malfunction and Limitations
7-34
Blind-Spot Collision-Avoidance Assist (BCA)
7-36
Blind-Spot Collision-Avoidance Assist settings
7-38
Blind-Spot Collision-Avoidance Assist Operation
7-39
Blind-Spot Collision-Avoidance Assist Malfunction and Limitations
7-42
Safe Exit Warning (SEW)
7-46
Safe Exit Warning Settings
7-47
Safe Exit Warning Operation
7-48
Safe Exit Warning Malfunction and Limitations
7-49
Manual Speed Limit Assist (MSLA)
7-51
Manual Speed Limit Assist Operation
7-51
Intelligent Speed Limit Assist (ISLA)
7-53
7
Intelligent Speed Limit Assist Settings
7-54
Intelligent Speed Limit Assist Operation
7-55
Intelligent Speed Limit Assist Malfunction and Limitations
7-57
Driver Attention Warning (DAW)
7-59
Driver Attention Warning Settings
7-60
Driver Attention Warning Operation
7-61
Driver Attention Warning Malfunction and Limitations
7-62
Blind-Spot View Monitor (BVM)
7-65
Blind-Spot View Monitor Settings
7-66
Blind-Spot View Monitor Operation
7-66
Blind-Spot View Monitor Malfunction
7-67
Smart Cruise Control (SCC)
7-67
Smart Cruise Control Settings
7-68
Smart Cruise Control Operation
7-70
Smart Cruise Control Malfunction and Limitations
7-79
Navigation-based Smart Cruise Control (NSCC)
7-85
Navigation-based Smart Cruise Control Settings
7-85
Navigation-based Smart Cruise Control Operation
7-86
Limitations of Navigation-based Smart Cruise Control
7-87
Lane Following Assist (LFA)
7-90
Lane Following Assist Settings
7-91
Lane Following Assist Operation
7-91
Lane Following Assist Malfunction and Limitations
7-94
Highway Driving Assist (HDA)
7-94
Highway Driving Assist Settings
7-96
Highway Driving Assist Operation
7-97
Highway Driving Assist Malfunction and Limitations
7-103
Rear View Monitor (RVM)
7-105
Rear View Monitor Settings
7-105
Rear View Monitor Operation
7-106
Rear View Monitor Malfunction and Limitations
7-108
Surround View Monitor (SVM)
7-108
Surround View Monitor Settings
7-109
Surround View Monitor Operation
7-110
Surround View Monitor Malfunction and Limitations
7-112
7
Rear Cross-Traffic Collision-Avoidance Assist (RCCA)
7-113
Rear Cross-Traffic Collision-Avoidance Assist Settings
7-114
Rear Cross-Traffic Collision-Avoidance Assist Operation
7-114
Rear Cross-Traffic Collision-Avoidance Assist Malfunction and Limitations
7-118
Forward/Reverse Parking Distance Warning (PDW)
7-122
Forward/Reverse Parking Distance Warning Settings
7-122
Forward/Reverse Parking Distance Warning Operation
7-123
Forward/Reverse Parking Distance Warning Malfunction and Limitations
7-125
Forward/Side/Reverse Parking Distance Warning (PDW)
7-127
Parking Distance Warning Settings
7-127
Parking Distance Warning Operation
7-128
Parking Distance Warning Malfunction and Limitations
7-130
Forward/Side/Reverse Parking Collision-Avoidance Assist (PCA)
7-132
Parking Collision-Avoidance Assist Settings
7-133
Parking Collision-Avoidance Assist Operation
7-134
7. Driver Assistance System
Parking Collision-Avoidance Assist Malfunction and Limitations
7-136
Remote Smart Parking Assist 2 (RSPA 2)
7-140
Remote Smart Parking Assist Settings
7-142
Remote Smart Parking Assist Operation
7-143
Remote Smart Parking Assist Malfunction and Limitations
7-159
Declaration Of Conformity
7-165
Front Radar
7-165
Front Corner Radar/Rear Corner Radar
7-166
7
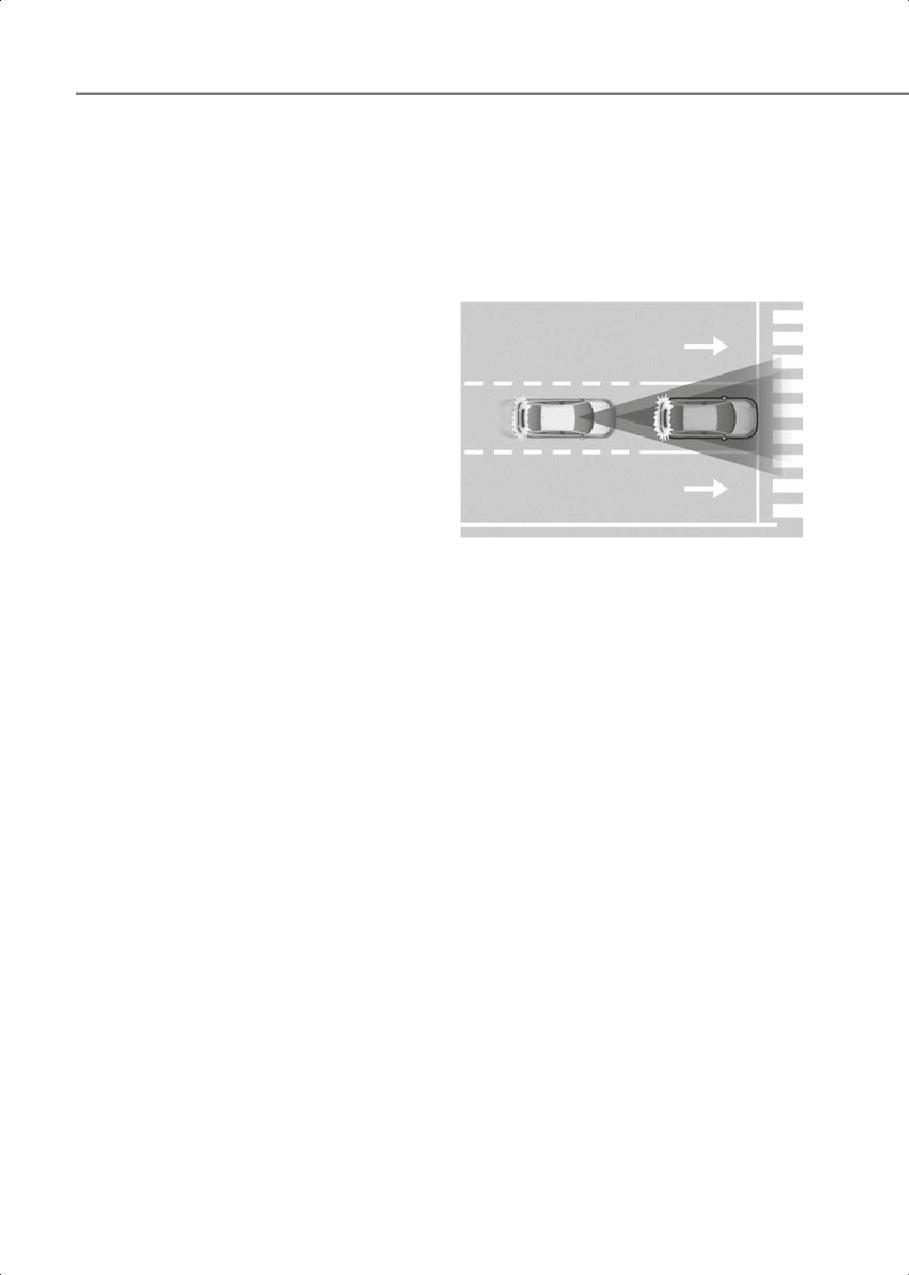
Driver Assistance System
Driver Assistance System
Forward
Notice
Collision-Avoidance
Due to the software update, the
Assist (FCA)
description of each function of the driver
assistance system may differ from the
owner's manual.
Basic function
B7000101
Forward Collision-Avoidance Assist helps
detect a vehicle, a powered-two wheeler,
a pedestrian, or a cyclist ahead on the
road and may warn you of a possible
collision with a warning message on the
instrument cluster and a warning sound.
Also, Forward Collision-Avoidance Assist
may assist with braking your vehicle to
help reduce collision speed or avoid a
collision.
In addition, when driving at high speeds,
Forward Collision-Avoidance Assist will
help detect vehicles in front and adjacent
lanes. If a collision is imminent when
changing lanes, Forward
Collision-Avoidance Assist will apply
emergency braking to help prevent a
collision. (if equipped)
7-4
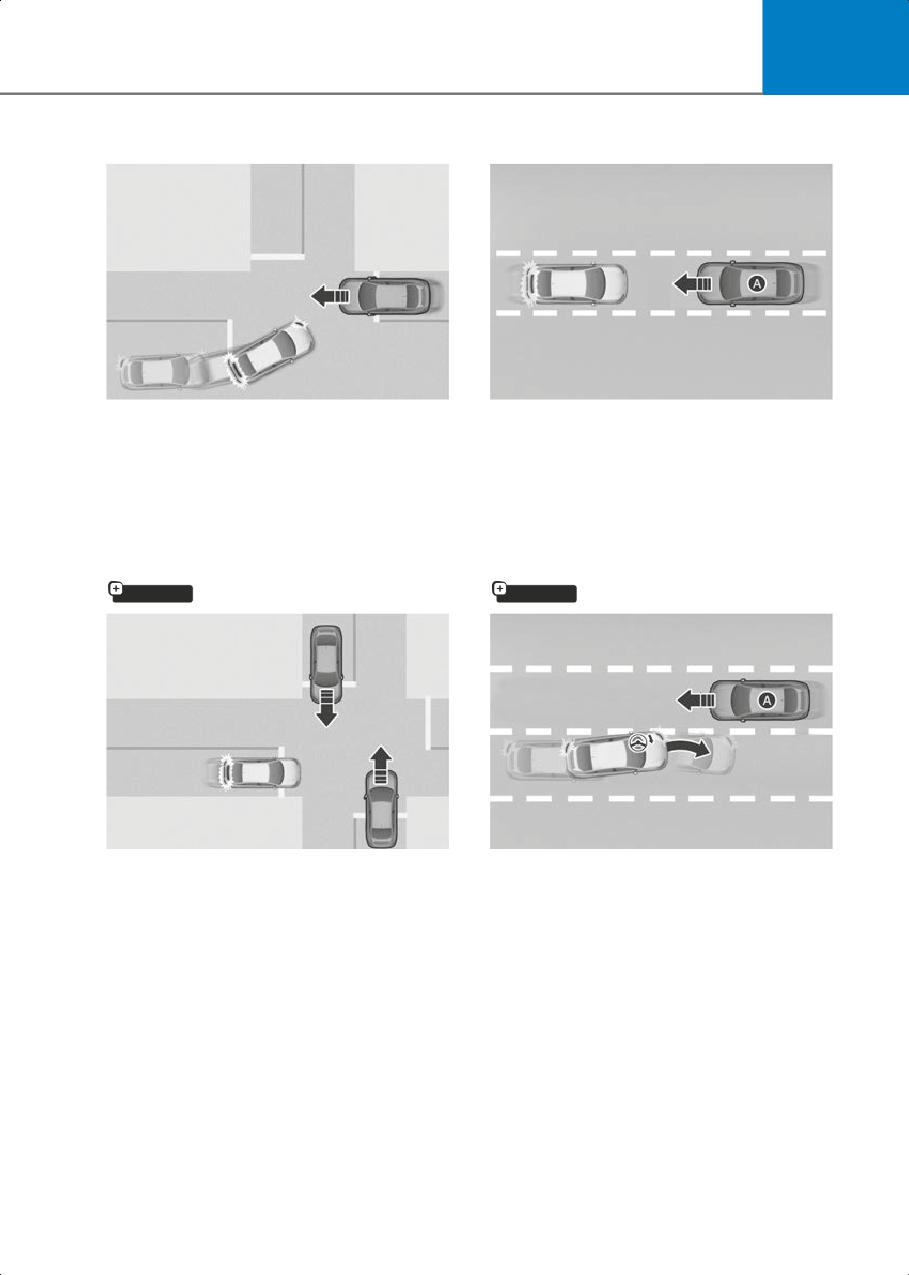
7
Junction Turning function
Direct Oncoming function
B7000102
B7000104
Junction Turning function can help avoid
[A] Oncoming vehicle
a collision with an oncoming vehicle in an
Direct Oncoming function helps reduce
adjacent lane when turning left at a
the speed at the collision when a vehicle
crossroad with the turn signal on by
approaching from the opposite side is
applying emergency braking.
detected.
Junction Crossing function
Lane-Change Oncoming function
if equipped
if equipped
B7000105
Junction Crossing function can help
[A] Oncoming vehicle
avoid a collision with oncoming vehicles
Lane-Change Oncoming function helps
on the left or right side when crossing an
avoid a collision with an oncoming
intersection by applying emergency
vehicle when changing lanes by assisting
braking.
the driver’s steering.
7-5
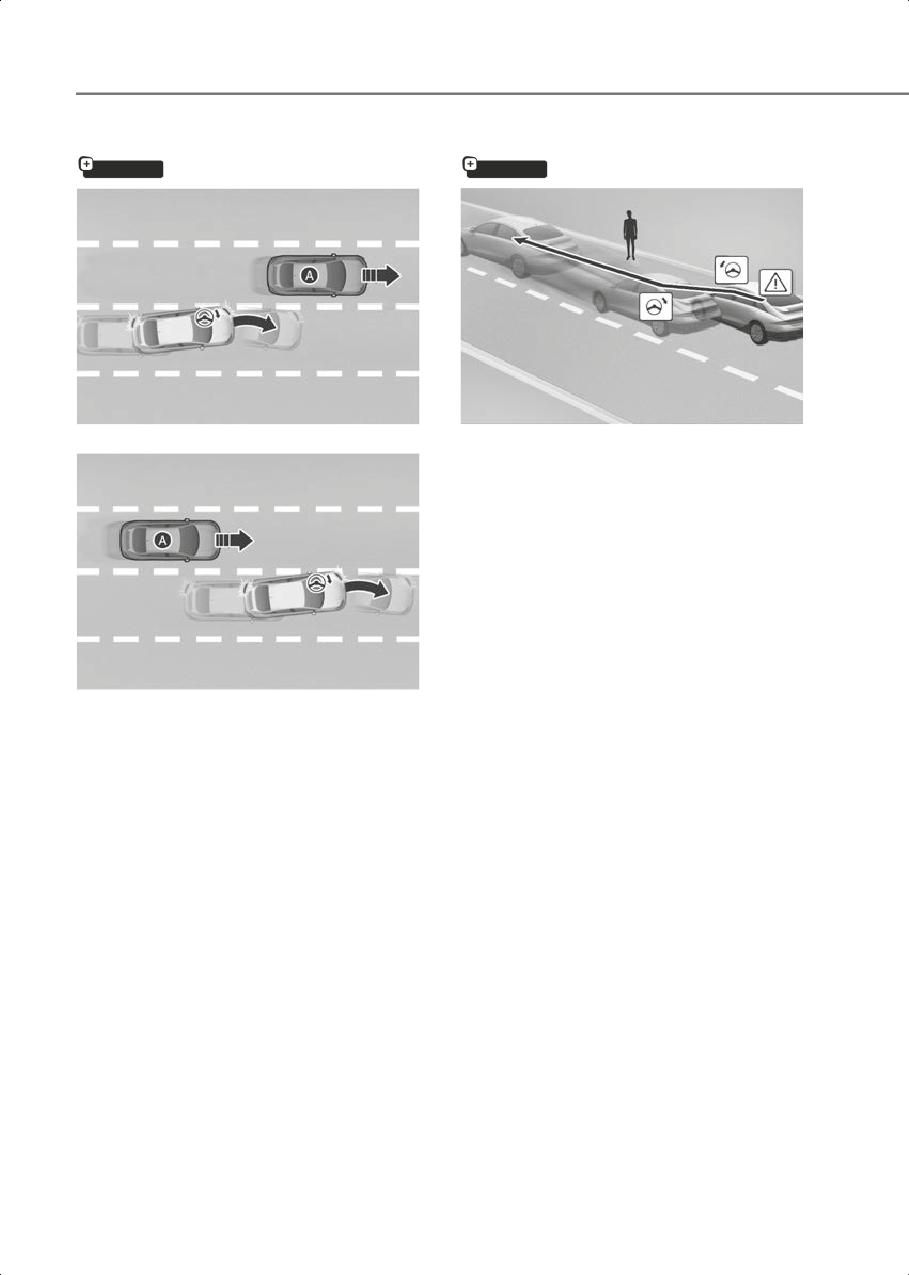
Driver Assistance System
Lane-Change Side function
Evasive Steering Assist function
if equipped
if equipped
B7000106
B7000107
• Driver steering assist
Evasive Steering Assist function helps
avoid a collision with a vehicle,
pedestrian or cyclist ahead in the same
lane. When a risk of collision is
detected, Evasive Steering Assist
function will warn the driver and if the
driver steers to avoid collision it will
assist the driver’s steering.
• Evasive steering assist
Evasive Steering Assist function helps
B7000106_1
avoid a collision with a pedestrian or
[A] Side vehicle
cyclist ahead in the same lane. When a
Lane-Change Side function helps avoid a
risk of collision is detected, Evasive
collision with the vehicle in the next lane
Steering Assist function will warn the
when changing lanes by assisting the
driver and if there is space to avoid
driver’s steering.
collision in the lane, it will assist the
driver’s steering.
7-6
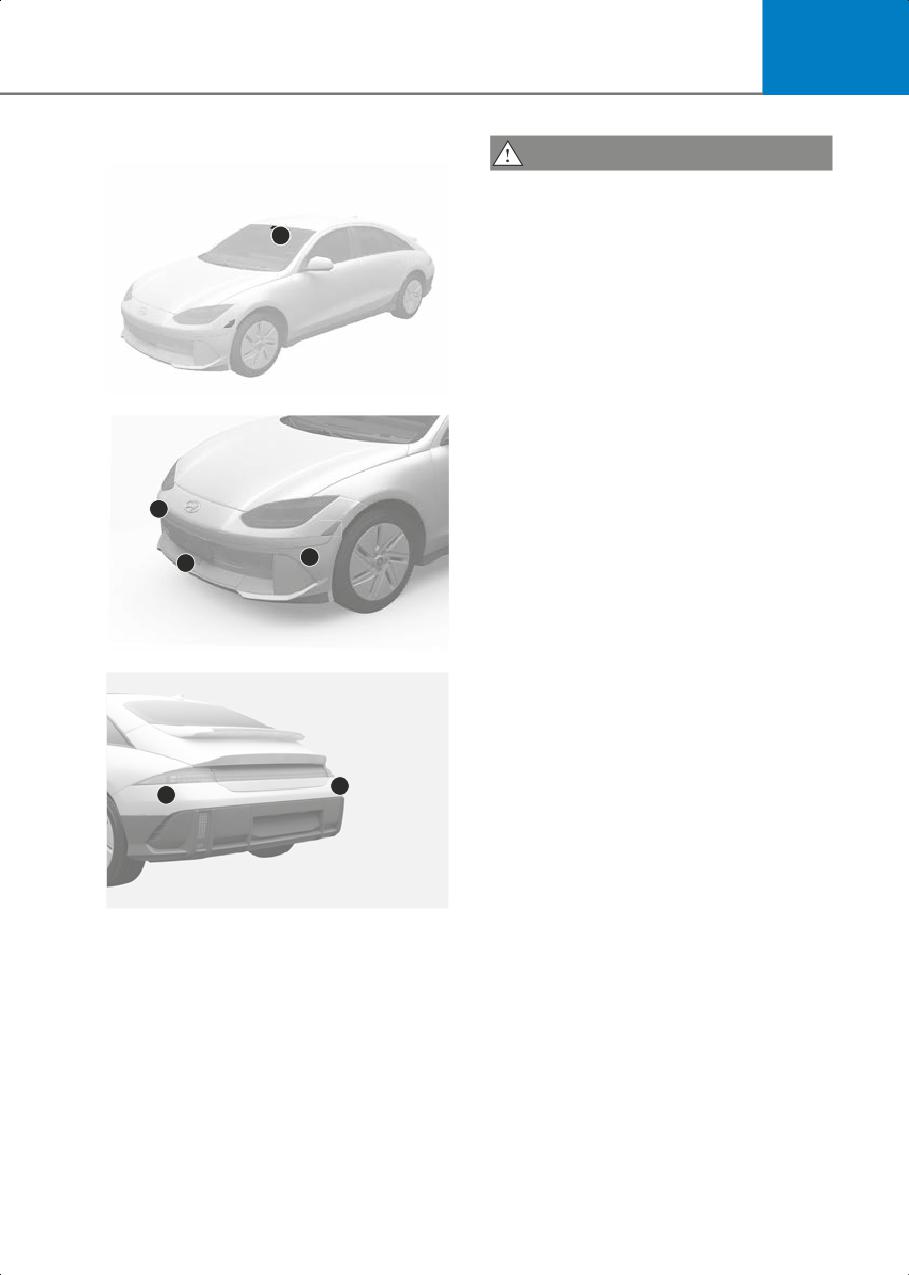
7
Detecting sensor
CAUTION
Take the following precautions to
maintain optimal performance of the
1
detecting sensor:
•
Never disassemble the detecting
sensor or sensor assembly, or cause
any damage to it.
•
If the detecting sensors have been
replaced or repaired, have the vehicle
inspected by an authorized HYUNDAI
dealer.
B7000108
•
Never install any accessories or stickers
on the front windshield, or tint the front
windshield.
•
Exercise extreme caution to keep the
3
front view camera dry.
•
Never place any reflective objects (for
example, white paper, mirror) over the
2
3
dashboard.
•
Do not place any objects near the front
windshield or install any accessories on
the front windshield. It can affect the
B7000109
performance of the defogging and
defrosting function of the climate
control system, which may prevent the
Driver Assistance systems from
operating.
•
Do not apply license plate frame or
4
4
objects, such as a bumper sticker, film
or a bumper guard, near the front radar
cover.
•
Do not change the position of the
license plate. The front radar’s
detection and control performance
B7000110
may be affected.
(1) Front view camera
(2) Front radar
•
Always keep the front radar and cover
clean and free of dirt and debris.
(3) Front corner radar (if equipped)
(4) Rear corner radar (if equipped)
Use only a soft cloth to wash the
vehicle. Do not spray pressurized water
Refer to the picture above for the detailed
directly on the sensor or sensor cover.
location of the detecting sensors.
7-7
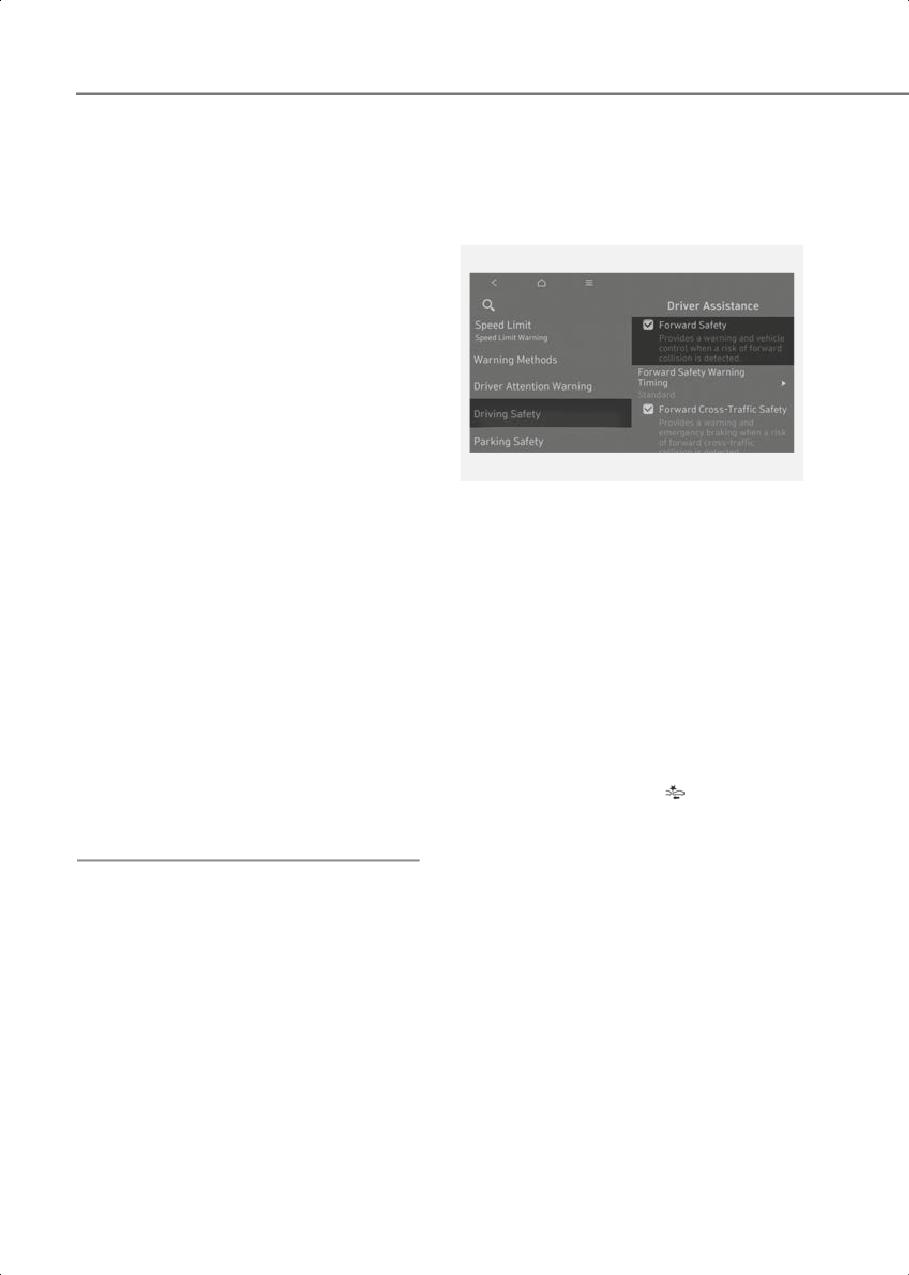
Driver Assistance System
•
If the radar or around the radar has
Forward Collision-Avoidance
been damaged or impacted in any way,
Assist Settings
Forward Collision-Avoidance Assist
may not properly operate even though
a warning message does not appear on
Forward Safety
the instrument cluster. Have the
vehicle inspected by an authorized
HYUNDAI dealer.
•
The performance of the front radar
cover genuine parts have been proven.
Replacing or painting the front radar
cover may result in poor performance
of Forward Collision-Avoidance Assist.
When the parts need to be replaced or
modified, make sure to use genuine
HYUNDAI parts.
•
Vehicles equipped with front corner
B7000201_1
radar and/or rear corner radar
With the vehicle on, select or deselect
- Do not apply license plate frame or
Setup > Vehicle > Driver Assistance >
objects, such as a bumper sticker,
Driving Safety > Forward Safety from the
film or a bumper guard, near the front
Settings menu to set whether to use each
corner radar or rear corner radar.
function.
- The function may not work properly
• If Forward Safety is selected, Forward
when the bumper has been replaced,
Collision-Avoidance Assist will warn the
or the surroundings of the front
driver with a warning message, an
corner radar or rear corner radar has
audible warning depending on the
been damaged or paint has been
collision risk levels. Braking assist will
applied.
be applied depending on the collision
risk levels. If Forward Safety is
- If a trailer, carrier, etc., is installed, it
deselected, Forward Safety will turn
may adversely affect the
off. The warning light (
) will
performance of the rear corner radar
illuminate on the instrument cluster.
or Forward Collision-Avoidance
Assist may not operate properly.
7-8
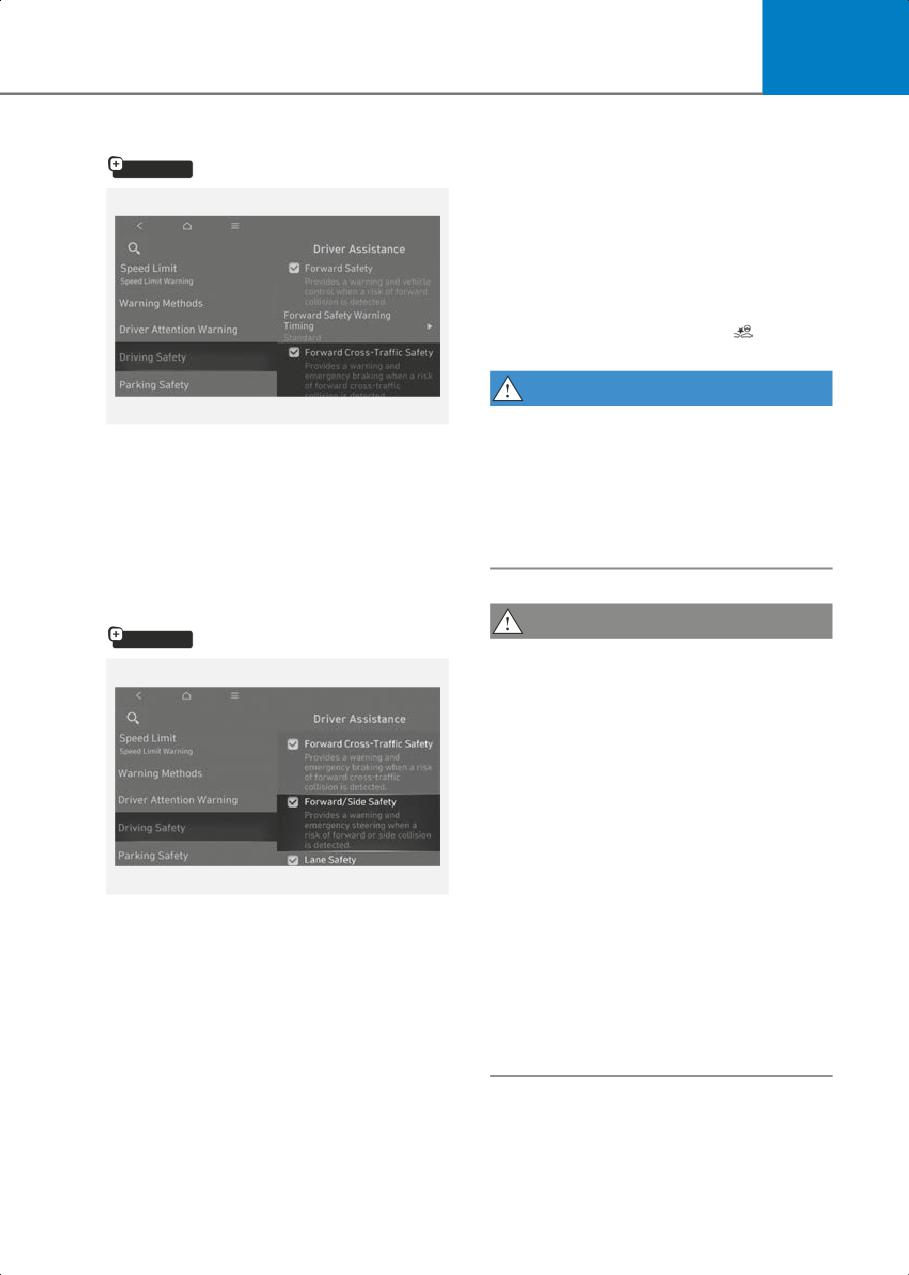
7
Forward Cross-Traffic Safety
• If Forward/Side Safety is selected,
if equipped
Forward Collision-Avoidance Assist will
warn the driver, steering wheel
vibration, a warning message, an
audible warning depending on the
collision risk levels. Steering assist will
be applied depending on the collision
risk levels. If Forward/Side Safety is
deselected, Forward/Side Safety will
turn off. The warning light (
) will
illuminate on the instrument cluster.
WARNING
B7000201_2
When the vehicle is restarted, Forward
Collision-Avoidance Assist will always
With the vehicle on, select Setup >
turn on. However, at all times, and
Vehicle > Driver Assistance > Driving
especially if Forward Safety is
Safety > Forward Cross-Traffic Safety
deselected, the driver should always be
from the Settings menu to turn on
aware of the surroundings and drive
Junction crossing function and deselect
safely.
to turn off the function.
Forward/Side Safety
CAUTION
if equipped
• The setting for Forward Safety include
‘Basic function’ and ‘Junction Turning’,
and 'Direct Oncoming’.
• The setting for Forward-Cross Traffic
Safety includes ‘Junction Crossing’.
• The setting for Forward/Side Safety
includes ‘Lane Change Oncoming’,
‘Lane-Change Side’ and ‘Evasive
Steering Assist’ (if equipped).
• If Forward Safety is deselected,
Junction Crossing function will not
B7000203
operate even when Forward
With the vehicle on, select Setup >
Cross-Traffic Safety and Forward/Side
Vehicle > Driver Assistance > Driving
Safety is selected. (if equipped)
Safety > Forward/Side Safety from the
• Steering wheel vibration can be turned
Settings menu to turn on Lane-Change
on or off. Select or deselect Driver
Oncoming function, Lane-Change Side
Assistance > Warning Methods >
function, Evasive Steering Assist function
Haptic Warning from the Settings
and deselect to turn off the functions.
menu.
7-9
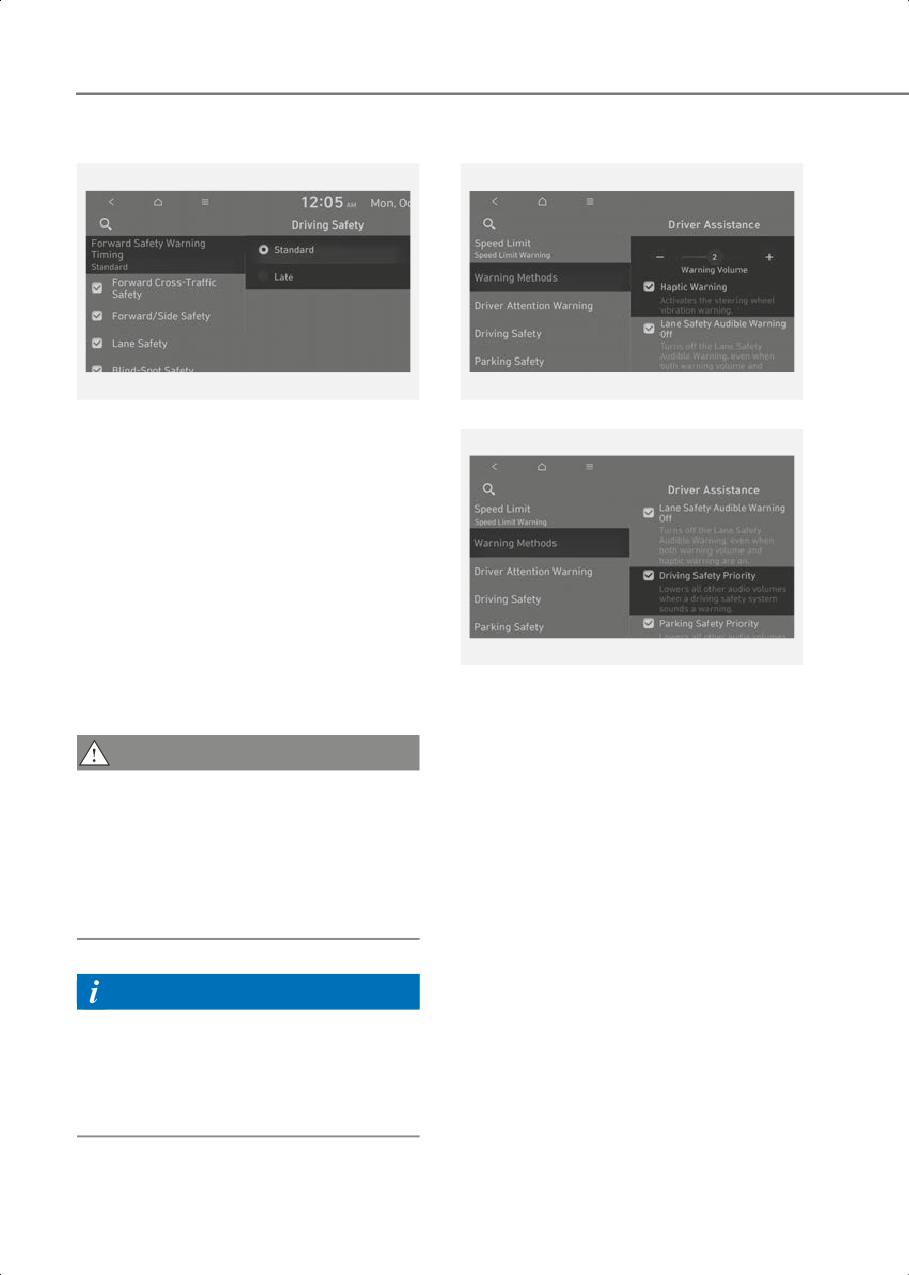
Driver Assistance System
Forward Safety Warning Timing
Warning Methods
B7000204
B7000205
With the vehicle on, select Setup >
Vehicle > Driver Assistance > Driving
Safety > Forward Safety Warning Timing
from the Settings menu to change the
initial warning activation time for Forward
Collision-Avoidance Assist. The warning
time can be set to either Standard or
Late.
• Use Standard in normal driving
conditions. If the Warning Timing
seems sensitive, change it to Late.
B7000205_1
• If Late is selected, Forward
Collision-Avoidance Assist, warns the
With the vehicle on, go to Setup > Vehicle
driver more slowly.
> Driver Assistance > Warning Methods
from the Settings in the infotainment
CAUTION
system to select the following:
• Even though Standard is selected for
• Warning Volume: The Warning Volume
Warning Timing, if a detected vehicle in
can be adjusted.
front suddenly stops, the warning may
If you turn off the Warning Volume, for
seem late.
your safety, the function may warn you
• Select Late for Warning Timing when
with a low volume.
traffic is light and when driving speed is
• Haptic Warning: The steering wheel
slow.
vibration can be set.
• Driving Safety Priority: Your vehicle
lowers all other audio volumes when
Information
the Driver Assistance system warning
sounds.
• If you change the Warning timing, the
Warning timing of other Driver
assistance systems may change.
• If the vehicle is restarted, Warning
timing will maintain the last setting.
7-10
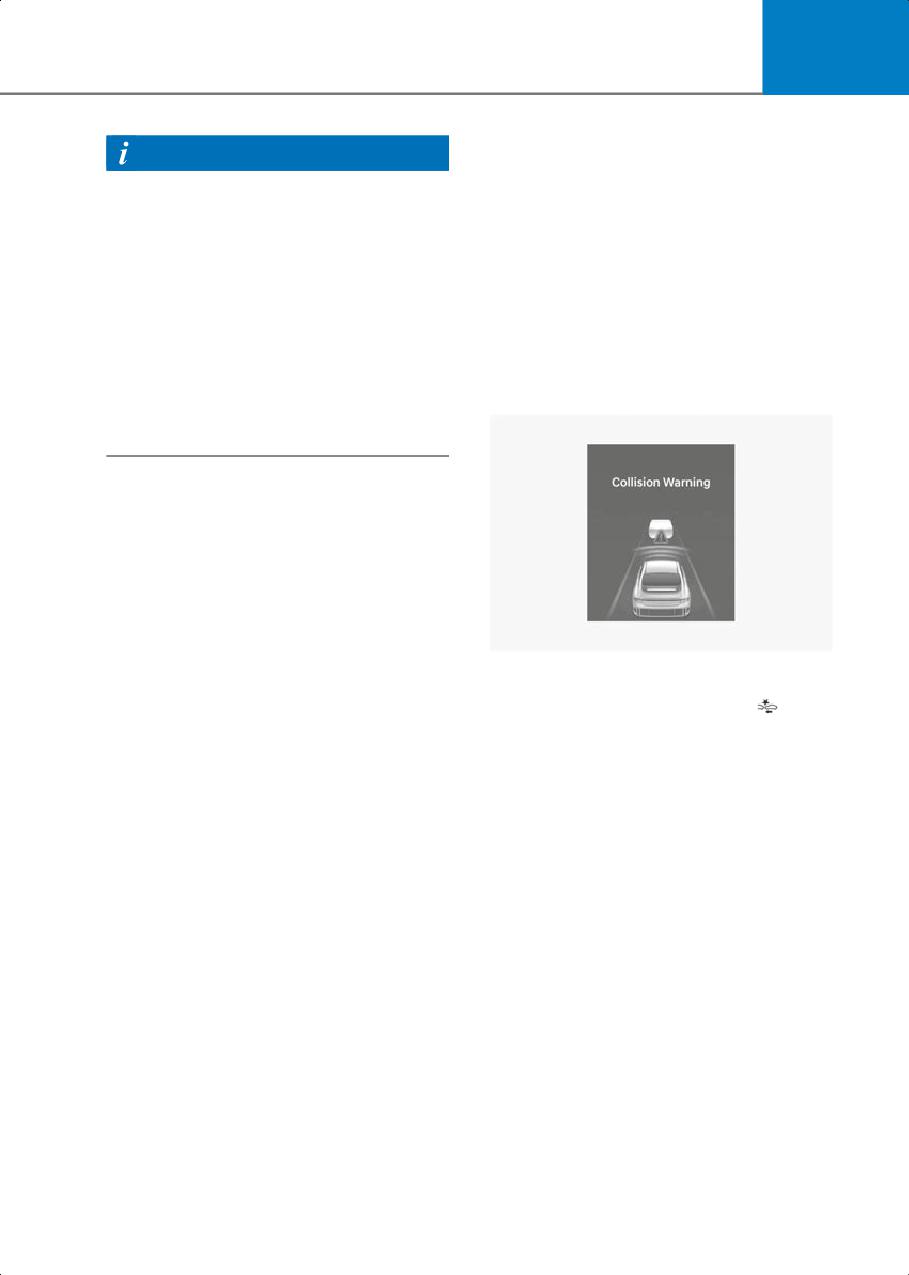
7
Forward Collision-Avoidance
Information
Assist Operation
• If you change the Warning Methods,
Warning Methods of other Driver
Basic function
Assistance systems may change.
The basic function for Forward
• If the vehicle is restarted, Warning
Collision-Avoidance Assist is to warn and
Methods will maintain the last setting.
help control the vehicle depending on the
• There may be no Settings menu
collision risk level: ‘Collision Warning’,
depending on the feature applied to
‘Emergency Braking’ and ‘Stopping
your vehicle.
vehicle and ending brake control’.
• The Warning Volume and Haptic
Warning cannot be turned off at the
Collision Warning
same time. When one of the warning is
turned off, the other is activated.
B7000301
• To warn the driver of a collision,
Forward Safety warning light (
)
blinking, the ‘Collision Warning’
warning message will appear on the
instrument cluster, an audible warning
will sound and the steering wheel will
vibrate.
• If a vehicle or powered two-wheeler is
detected in front, the function will
operate when your vehicle speed is
between about 6-124 mph (10-200
km/h).
• If a pedestrian or cyclist is detected in
front, the function will operate when
your vehicle speed is between about
6-53 mph (10-85 km/h).
7-11
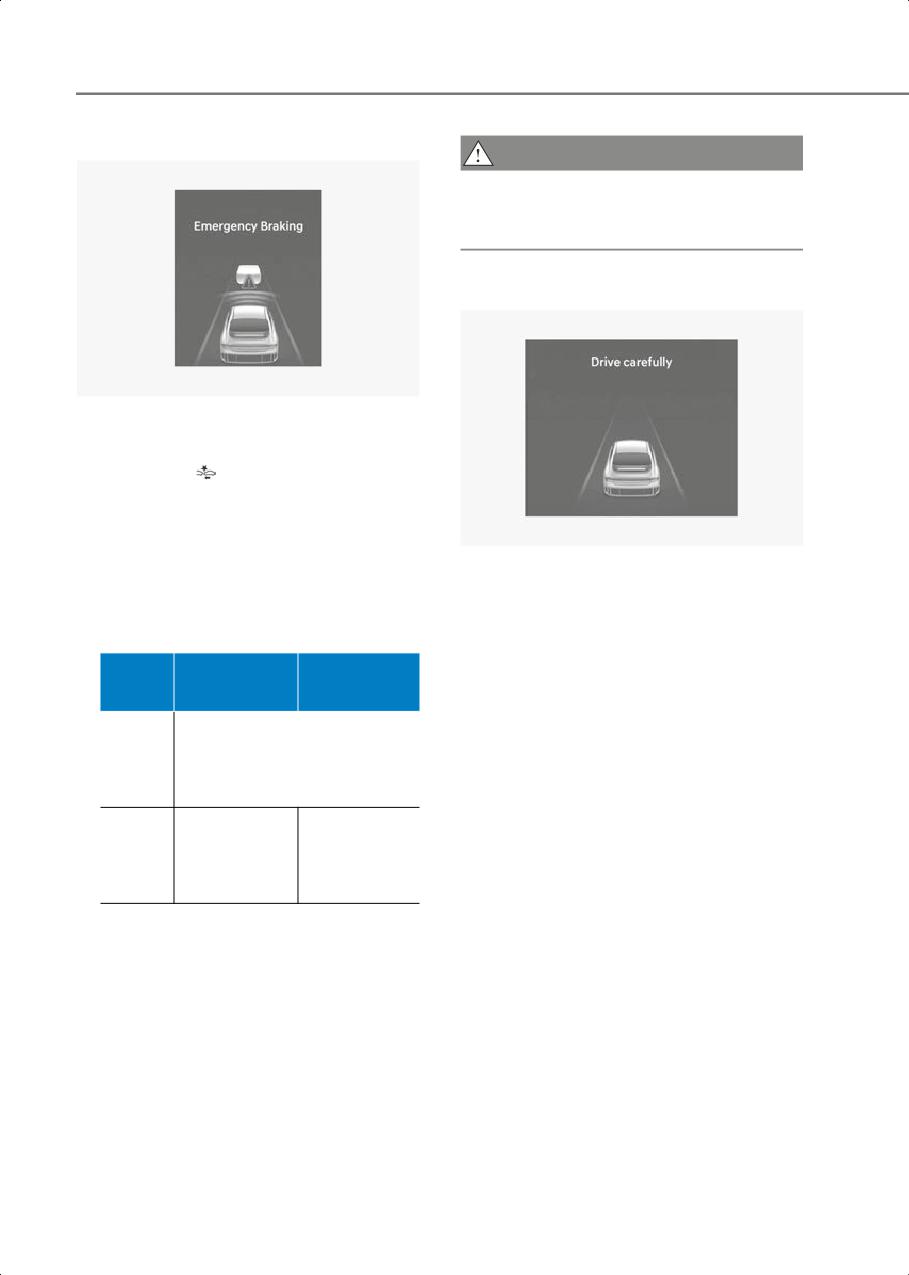
Driver Assistance System
Emergency Braking
CAUTION
The function operation range may
decrease due to the front traffic condition
or the surroundings of the vehicle.
Stopping vehicle and ending brake control
B7000302
To warn the driver that emergency
braking will be assisted, Forward Safety
warning light (
) blinking, the
‘Emergency Braking’ warning message
will appear on the instrument cluster, an
audible warning will sound and the
steering wheel will vibrate.
B7000303
Emergency braking will operate under the
• When the vehicle is stopped due to
following conditions:
emergency braking, the ‘Drive
carefully’ warning message will appear
• Vehicle or powered two-wheeler:
on the instrument cluster.
Driving
Stopped
For your safety, the driver should
vehicle
vehicle
depress the brake pedal immediately
and check the surroundings.
Weak
• Brake control will end after the vehicle
brakin
About 6-124 mph (10-200
is stopped by emergency braking for
g
km/h)
about 2 seconds.
power
Strong
About 6-80
About 6-47
Junction Turning function
brakin
mph (10-130
mph (10-75
g
Junction Turning function will warn and
km/h)
km/h)*
power
help control the vehicle depending on the
collision risk level: ‘Collision Warning’,
*: If Forward Collision-Avoidance Assist
‘Emergency Braking’ and ‘Stopping
judges that avoiding a collision is
vehicle and ending brake control’
difficult even by changing the driving
lane. The function operation range may
decrease due to surroundings of the
vehicle. (if equipped)
• Pedestrian or cyclist:
The function will operate when your
vehicle speed is between about 6-40
mph (10-65 km/h).
7-12
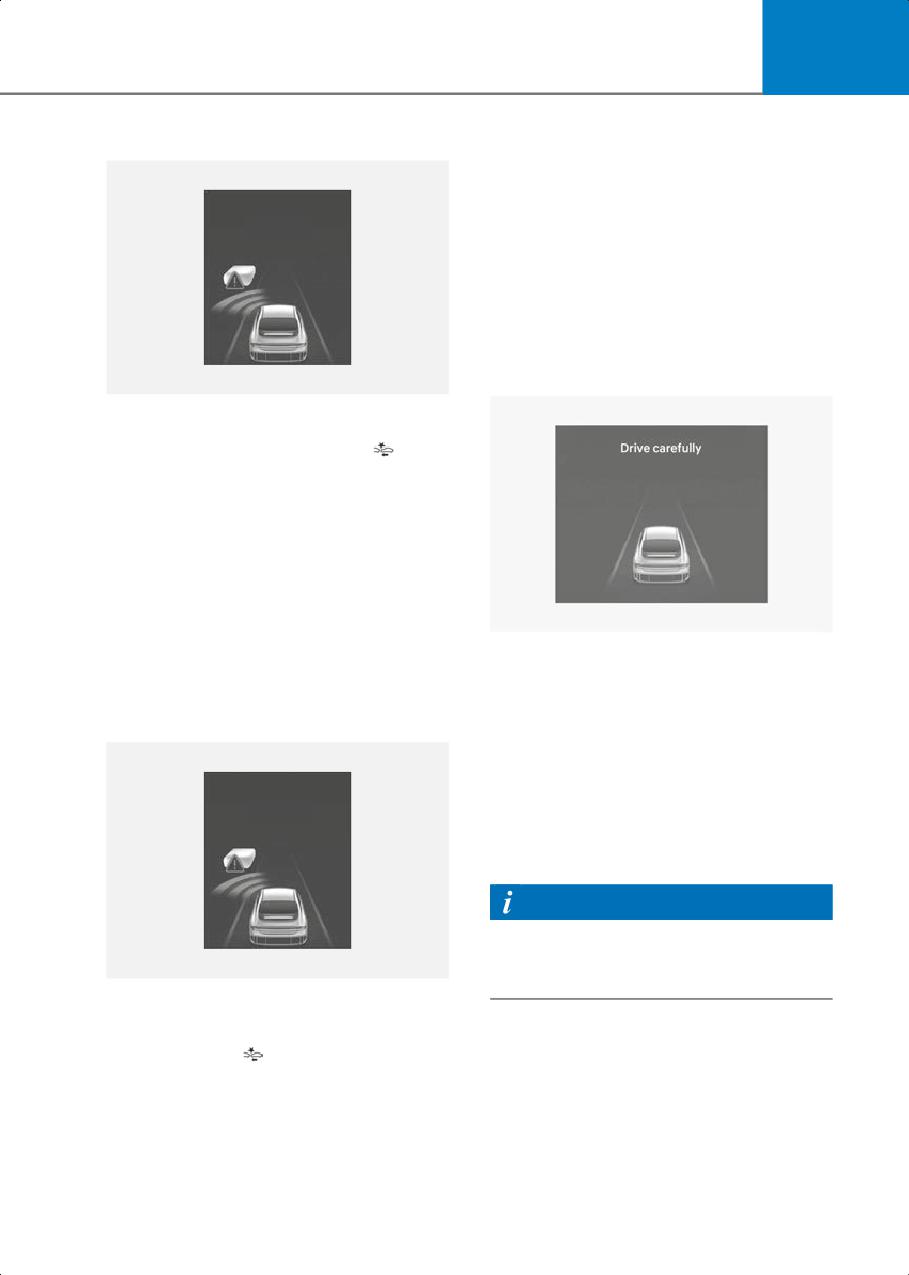
7
Collision Warning
• In emergency braking situation,
braking is assisted with strong braking
power by the function to help prevent
collision with the oncoming vehicle.
$PMMJTJPO 8BSOJOH
• The function will operate when your
vehicle speed is between about 6-19
mph (10-30 km/h) and the oncoming
vehicle or powered two-wheeler speed
is between about 19-44 mph (30-70
km/h).
Stopping vehicle and ending brake control
B7000315_3
• To warn the driver of a collision,
Forward Safety warning light (
)
blinking, the ‘Collision Warning’
warning message will appear on the
instrument cluster, an audible warning
will sound and the steering wheel will
vibrate.
• The function will operate when your
vehicle speed is between about 6-19
mph (10-30 km/h) and the oncoming
B7000303
vehicle or powered two-wheeler speed
is between about 19-44 mph (30-70
• When the vehicle is stopped due to
km/h).
emergency braking, the ‘Drive
carefully’ warning message will appear
Emergency Braking
on the instrument cluster.
For your safety, the driver should
depress the brake pedal immediately
and check the surroundings.
&NFSHFODZ #SBLJOH
• Brake control will end after the vehicle
is stopped by emergency braking for
about 2 seconds.
Information
Press the hazard warning flasher to turn
off the audible warning of the collision
B7000315_1
warning or emergency braking system.
• To warn the driver that emergency
braking will be assisted, Forward Safety
warning light (
) blinking, the
‘Emergency Braking’ warning message
will appear on the instrument cluster,
an audible warning will sound and the
steering wheel will vibrate.
7-13
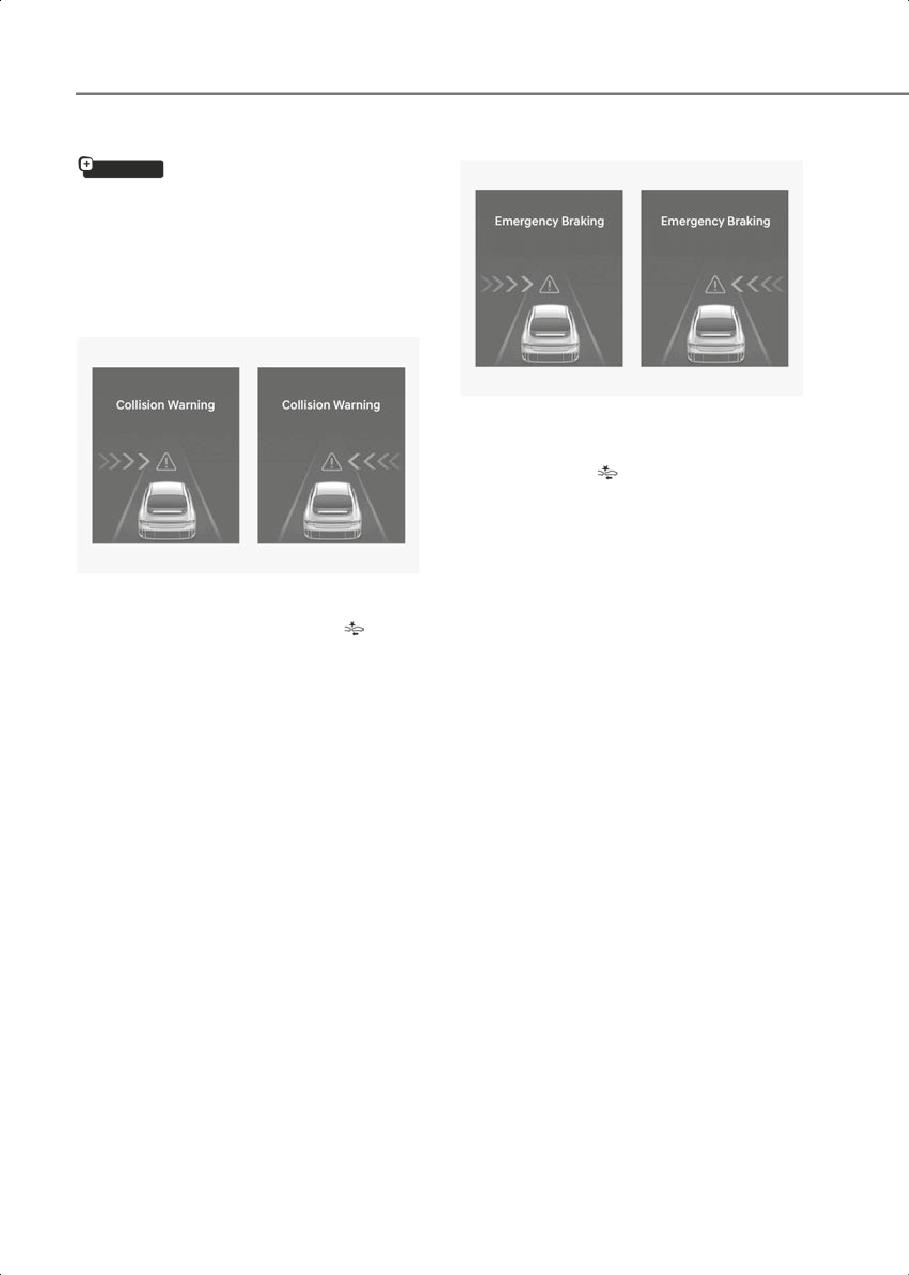
Driver Assistance System
Junction Crossing function
Emergency Braking
if equipped
Junction Crossing function will warn and
control the vehicle depending on collision
risk level: ‘Collision Warning’, ‘Emergency
Braking’ and ‘Stopping vehicle and
ending brake control’
Collision Warning
B7000308
• To warn the driver that emergency
braking will be assisted, Forward Safety
warning light (
) blinking, the
‘Emergency Braking’ warning message
will appear on the instrument cluster,
an audible warning will sound and the
steering wheel will vibrate.
B7000307
• In emergency braking situation,
• To warn the driver of a collision,
braking is assisted with strong braking
Forward Safety warning light (
)
power by the function to help prevent
blinking, the ‘Collision Warning’
collision with the crossing vehicle.
warning message will appear on the
• The function will operate when your
instrument cluster, an audible warning
vehicle speed is between about 6-34
will sound and the steering wheel will
mph (10-55 km/h) and the crossing
vibrate.
vehicle speed is between about 6-25
• The function will operate when your
mph (10-40 km/h).
vehicle speed is between about 6-34
mph (10-55 km/h) and the crossing
vehicle speed is between about 6-37
mph (10-60 km/h).
7-14
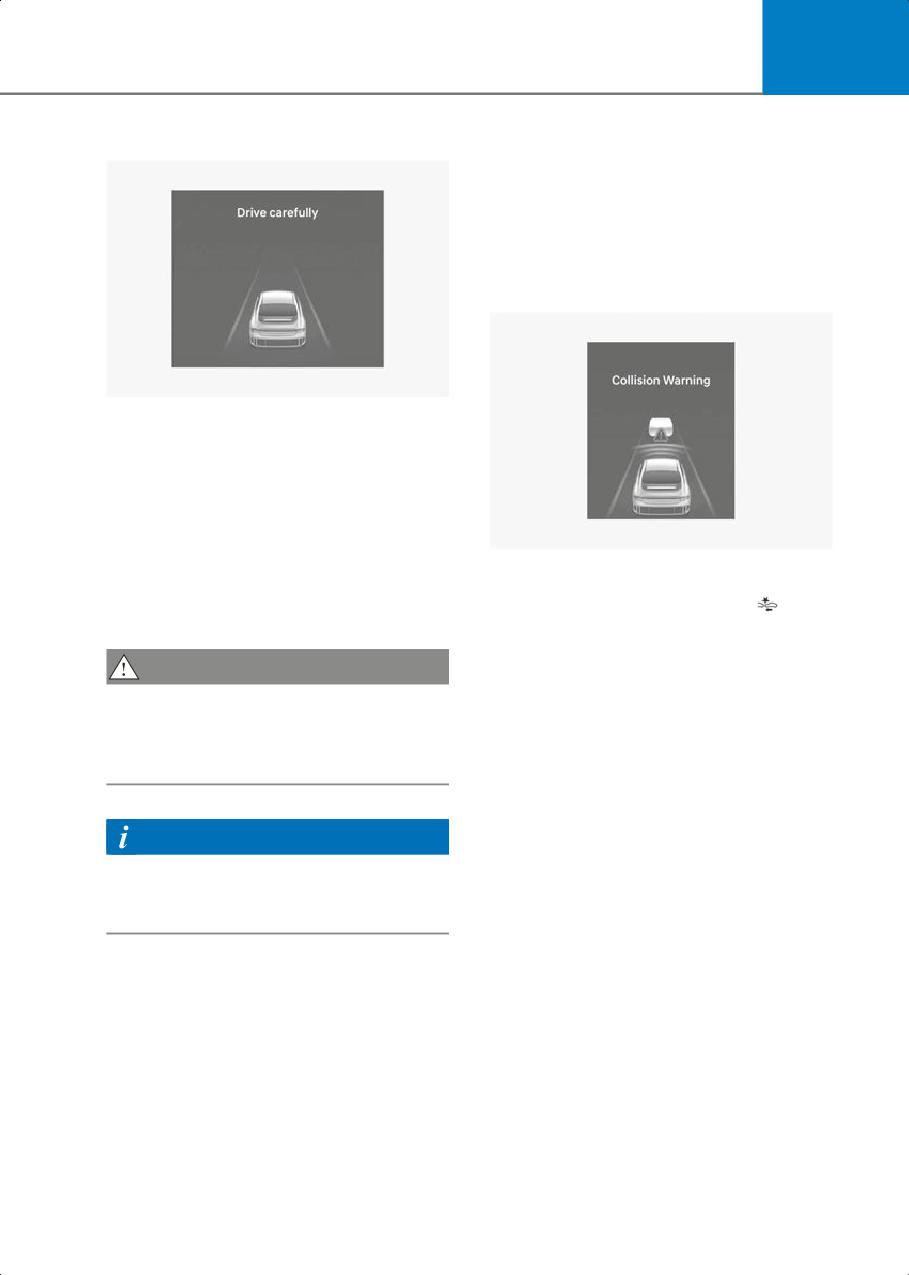
7
Stopping vehicle and ending brake control
Direct Oncoming function
Direct Oncoming function will warn and
control the vehicle depending on the
collision risk level: ‘Collision Warning’,
‘Emergency Braking’ and ‘Stopping
vehicle and ending brake control’.
Collision Warning
B7000303
• When the vehicle is stopped due to
emergency braking, the ‘Drive
carefully’ warning message will appear
on the instrument cluster.
For your safety, the driver should
depress the brake pedal immediately
B7000301
and check the surroundings.
• To warn the driver of a collision,
• Brake control will end after the vehicle
Forward Safety warning light (
)
is stopped by emergency braking for
blinking, the ‘Collision Warning’
about 2 seconds.
warning message will appear on the
instrument cluster, an audible warning
CAUTION
will sound and the steering wheel will
If the collision angle with the crossing
vibrate.
vehicle is beyond a certain range,
• The function will operate when your
Junction Crossing function warning and
vehicle speed is between about 6-80
control may be late or may not operate.
mph (10-130 km/h) and the detected
oncoming vehicle speed is about above
6 mph (10 km/h) and the oncoming
Information
motorcycle speed is about above 16
mph (25 km/h).
Press the hazard warning flasher to turn
off the audible warning of the collision
warning or emergency braking system.
7-15
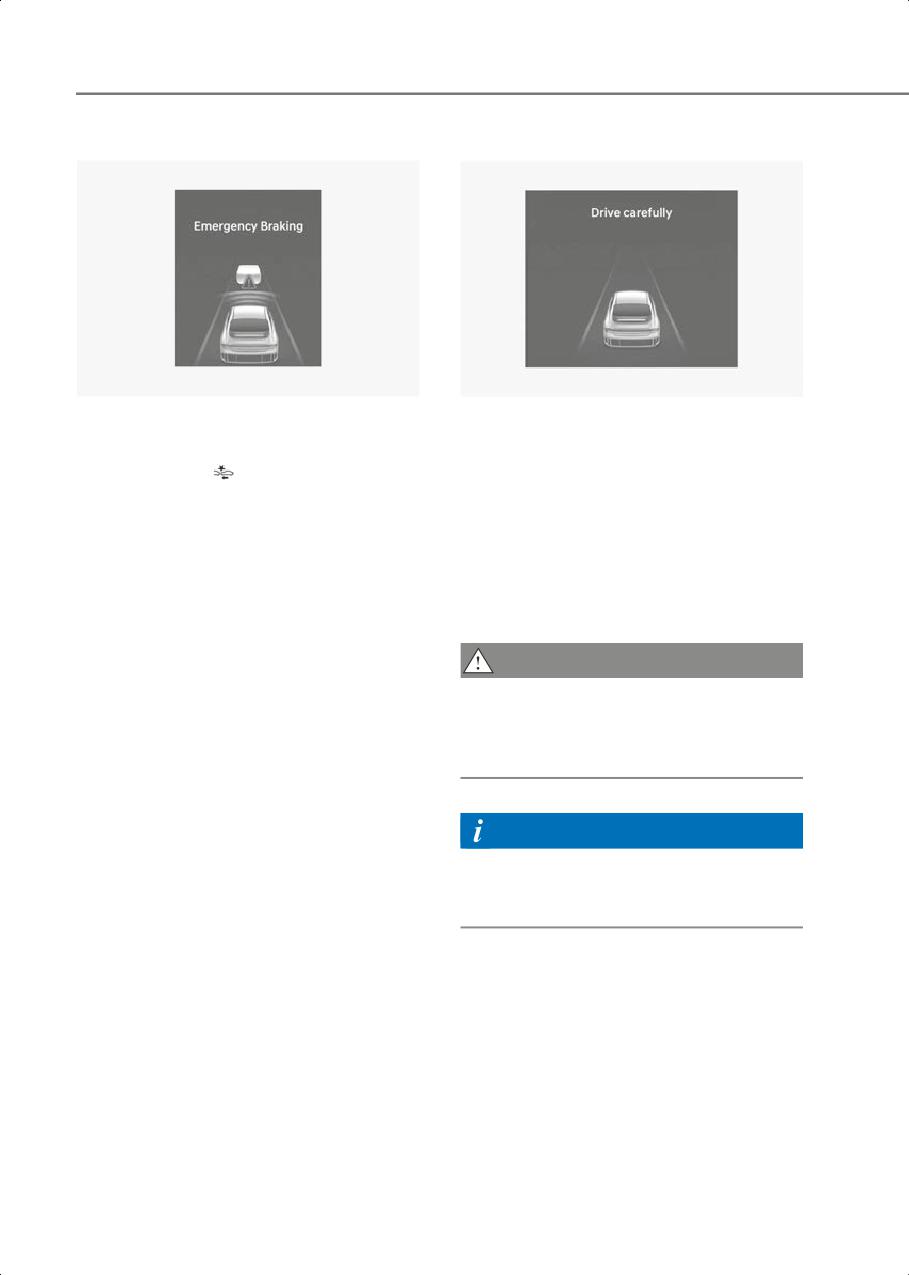
Driver Assistance System
Emergency Braking
Stopping vehicle and ending brake control
B7000302
B7000303
• To warn the driver that emergency
• When the vehicle is stopped due to
braking will be assisted, Forward Safety
emergency braking, the ‘Drive
warning light (
) blinking, the
carefully’ warning message will appear
‘Emergency Braking’ warning message
on the instrument cluster. For your
will appear on the instrument cluster,
safety, the driver should depress the
an audible warning will sound and the
brake pedal immediately and check the
steering wheel will vibrate.
surroundings.
• In emergency braking situation,
• Brake control will end after the vehicle
braking is assisted with strong braking
is stopped by emergency braking for
power by the function to help prevent
about 2 seconds.
collision with the oncoming vehicle.
CAUTION
• The function will operate when your
vehicle speed is between about 19-80
If your vehicle or the oncoming vehicle is
mph (30-130 km/h) and the detected
not driving straight, Direct Oncoming
oncoming vehicle speed is about above
function warning and control may be late
6 mph (10 km/h).
or may not operate.
Information
Press the hazard warning flasher to turn
off the audible warning of the collision
warning or emergency braking system.
7-16
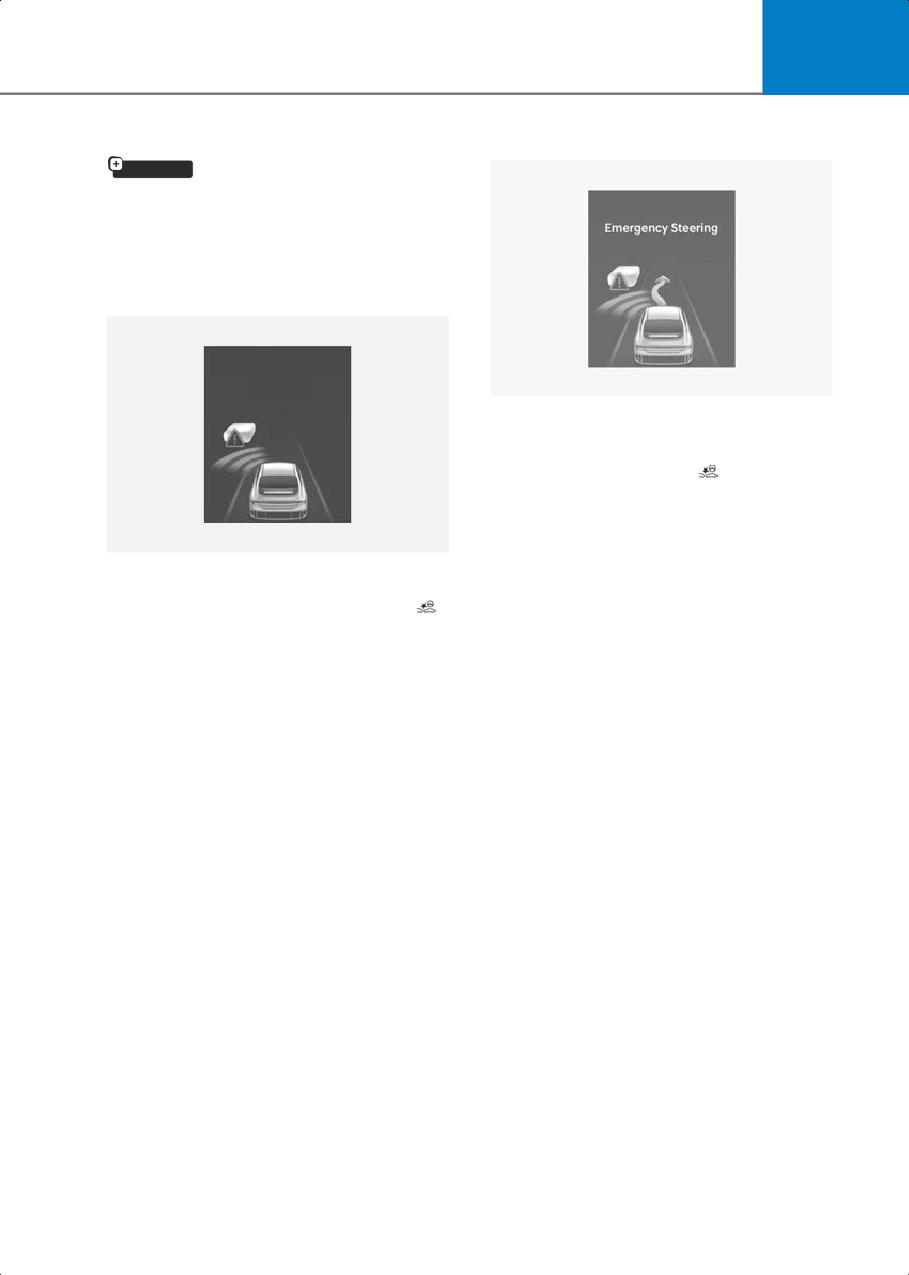
7
Lane-Change Oncoming function
Emergency Steering
if equipped
Lane-Change Oncoming function will
warn and control the vehicle depending
on collision risk level: ‘Collision Warning’
and ‘Emergency Steering’
Collision Warning
$PMMJTJPO 8BSOJOH
B7000314
• To warn the driver that emergency
steering will be assisted, Emergency
Steering warning light (
) blinking, the
‘Emergency Steering’ warning
message will appear on the instrument
cluster, an audible warning will sound
B7000315_3
and the steering wheel will vibrate.
• To warn the driver of a collision,
• In emergency steering situation,
Emergency Steering warning light (
)
steering is assisted by the function to
blinking, the ‘Collision Warning’
help prevent collision with the
warning message will appear on the
oncoming vehicle.
instrument cluster, an audible warning
• The function will operate when your
will sound and the steering wheel will
vehicle speed is between about 25-90
vibrate.
mph (40-145 km/h) and the oncoming
• The function will operate when your
vehicle or powered two-wheeler speed
vehicle speed is between about 25-90
is about above 6 mph (10 km/h) and the
mph (40-145 km/h) and the oncoming
relative speed with your vehicle is
vehicle or powered two-wheeler speed
about below 124 mph (200 km/h).
is about above 6 mph (10 km/h) and the
relative speed with your vehicle is
about below 124 mph (200 km/h).
7-17
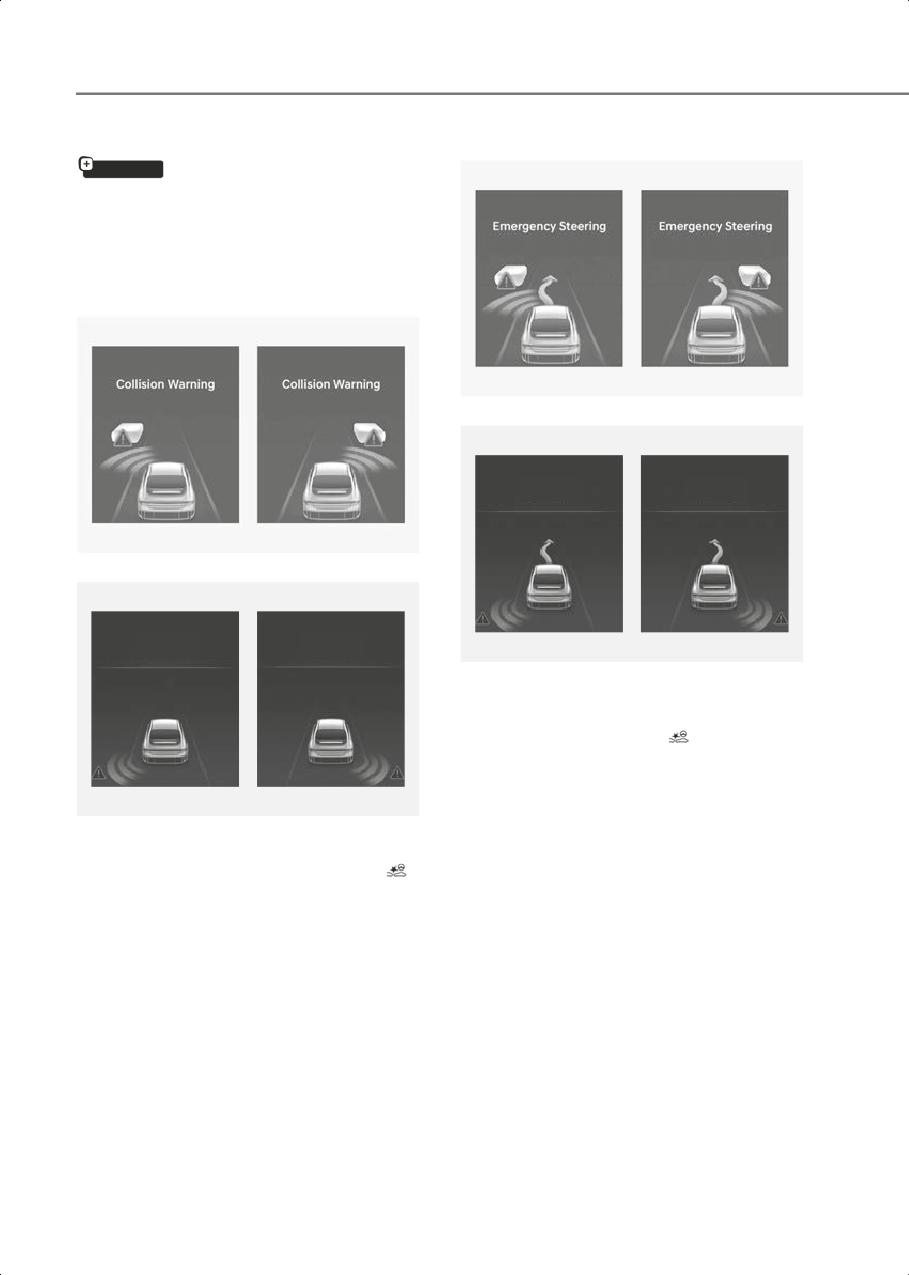
Driver Assistance System
Lane-Change Side function
Emergency Steering
if equipped
Lane-Change Side function will warn and
control the vehicle depending on collision
risk level: ‘Collision Warning’ and
‘Emergency Steering’
Collision Warning
B7000316
&NFSHFODZ 4UFFSJOH
&NFSHFODZ 4UFFSJOH
B7000315
$PMMJTJPO 8BSOJOH
$PMMJTJPO 8BSOJOH
B7000316_1
• To warn the driver that emergency
steering will be assisted, Emergency
Steering warning light (
) blinking, the
‘Emergency Steering’ warning
message will appear on the instrument
cluster, an audible warning will sound
B7000315_2
and the steering wheel will vibrate.
• To warn the driver of a collision,
• In emergency steering situation,
Emergency Steering warning light (
)
steering is assisted by the function to
blinking, the ‘Collision Warning’
help prevent collision with the
warning message will appear on the
front-side vehicle.
instrument cluster, an audible warning
• The function will operate when your
will sound and the steering wheel will
vehicle speed is between about 25-90
vibrate.
mph (40-145 km/h) and front-side
• The function will operate when your
vehicle and powered two-wheeler is
vehicle speed is between about 25-90
driving.
mph (40-145 km/h).
7-18
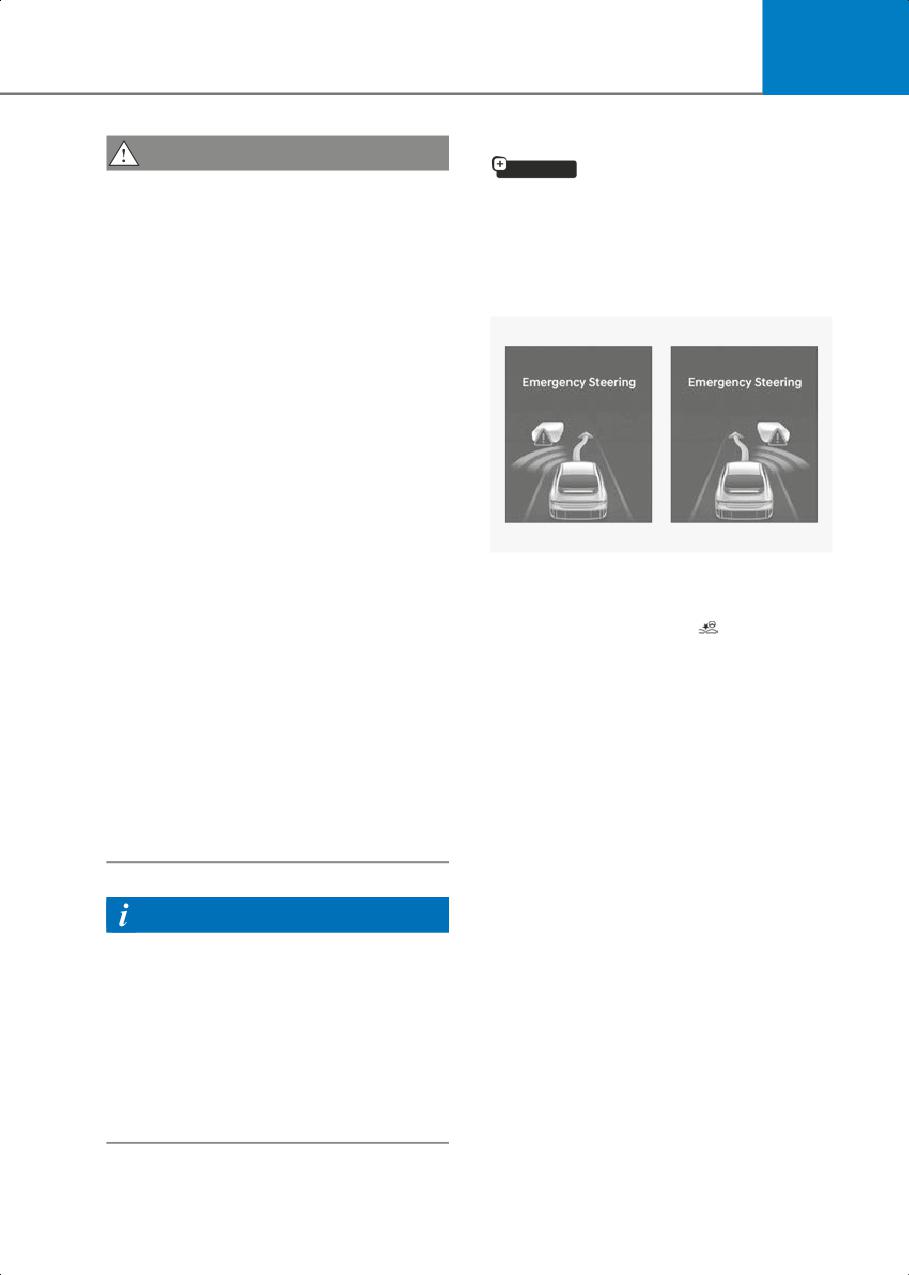
7
Evasive Steering Assist function
CAUTION
if equipped
•
Lane-Change Side function does not
Evasive Steering Assist function will warn
operate if the speed of the side vehicle
and control the vehicle with ‘Emergency
from the front side is 0 mph (0 km/h).
steering’.
•
The detecting range of the front corner
radar and the rear corner radar is
Emergency Steering (Driver steering
determined by a standard road width,
assist)
therefore, on a narrow road,
Lane-Change Side function may detect
other vehicles two lanes over and warn
you. In contrast, on a wide road,
Lane-Change Side function may not be
able to detect a vehicle driving in the
next lane and may not warn you.
•
Collision-avoidance assist will be
canceled under the following
circumstances:
- Your vehicle enters the next lane by a
certain distance
B7000317
- Your vehicle is away from the
• To warn the driver that emergency
collision risk
steering will be assisted, Emergency
Steering warning light (
) blinking, the
- The steering wheel is sharply steered
‘Emergency Steering’ message will
- The brake pedal is depressed
appear on the instrument cluster, an
- Forward Collision-Avoidance Assist is
audible warning will sound and the
operating
steering wheel will vibrate.
•
After Lane-Change Side function
• If there is a risk of collision with a
operation or lane change, you must
vehicle, powered two-wheeler,
drive to the center of the lane.
pedestrian and cyclist in front, the
Lane-Change Side function will not
steering will be assisted to help prevent
operate if the vehicle is not driven in the
collision when the driver steers the
center of the lane.
vehicle to avoid collision.
• The function will operate when your
vehicle speed is between about 25-53
mph (40-85 km/h).
Information
•
When an additional accident is
expected, Lane-Change Side function
will not assist with steering and only
warn the driver of a collision.
•
If the driver’s seat is on the left side,
collision warning will operate when you
turn left, and when it is on the right side,
the system will operate when you turn
right.
7-19
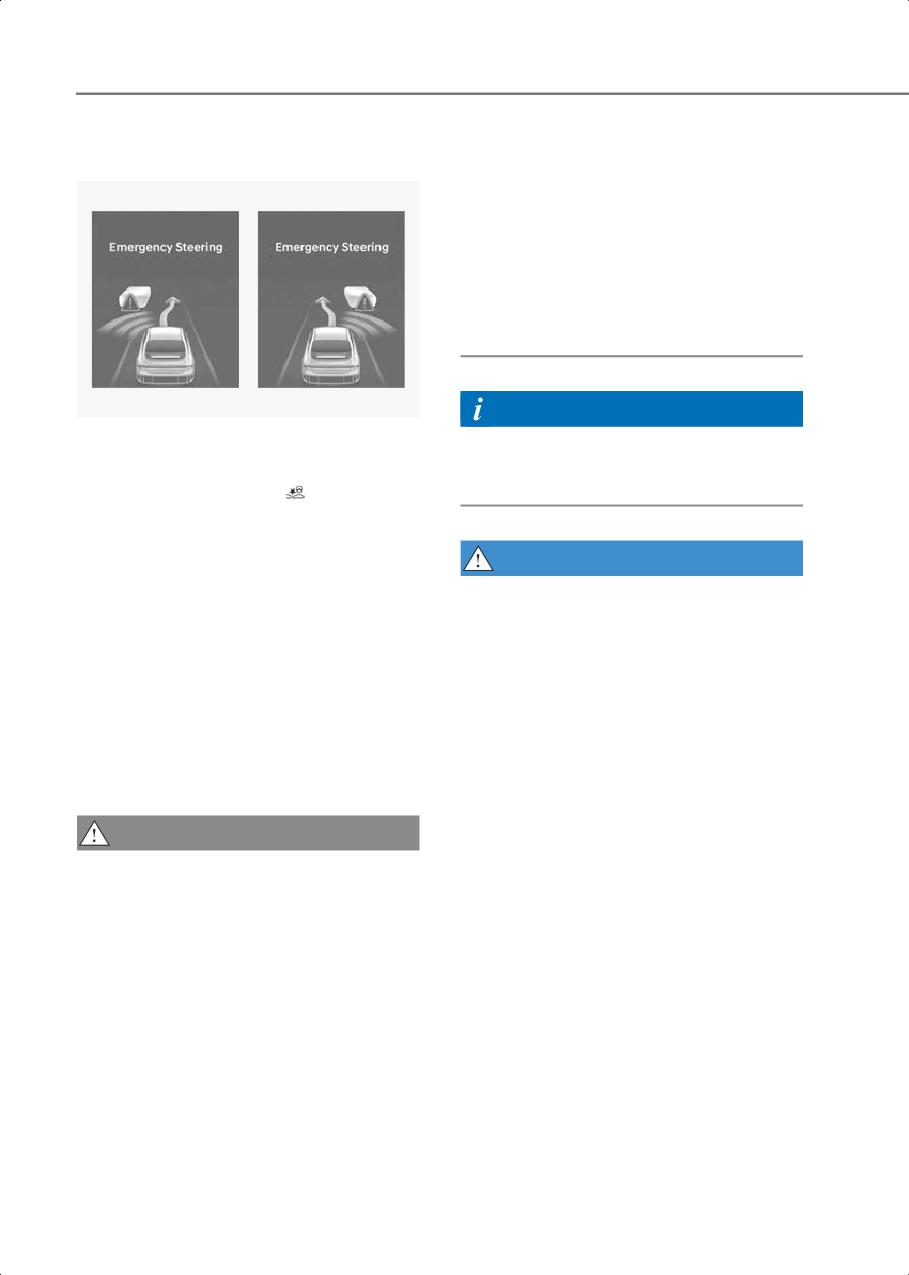
Driver Assistance System
Emergency Steering (Evasive steering
• When steering is assisted to avoid
assist)
collision with a vehicle, powered
two-wheeler, pedestrian and cyclist,
Evasive steering assist will be canceled
if collisions with other objects (vehicles,
powered two-wheeler, pedestrians, or
cyclists) are expected.
• Evasive steering assist may not operate
if space to avoid collision in the driving
lane is insufficient.
Information
B7000317
For more information on warning
•
To warn the driver that emergency
messages, refer to the Collision Warning
steering will be assisted, Emergency
in “Basic function”.
Steering warning light (
) blinking, the
‘Emergency Steering’ message will
appear on the instrument cluster, an
audible warning will sound and the
WARNING
steering wheel will vibrate.
Take the following precautions when
•
If there is high risk of collision with a
using Forward Collision-Avoidance
pedestrian and cyclist in front, and the
Assist:
vehicle speed to operate emergency
braking is within the operation range,
• For your safety, only change the
the steering will be assisted to help
Settings after parking the vehicle at a
prevent collision when there is space to
safe location.
avoid collision in the driving lane.
• Forward Collision-Avoidance Assist
•
The function will operate when your
does not operate in all situations and
vehicle speed is between about 40-47
cannot avoid all collisions.
mph (65-75 km/h).
• The driver has the responsibility to
control the vehicle. Do not solely
CAUTION
depend on Forward
Collision-Avoidance Assist. Rather,
•
The steering wheel may turn
maintain a safe braking distance, and if
automatically when emergency
necessary, depress the brake pedal to
steering is operating.
reduce driving speed or to stop the
•
Emergency steering will automatically
vehicle.
cancel when risk factors disappear. The
• Never deliberately operate Forward
driver must steer the vehicle.
Collision-Avoidance Assist on people,
•
Emergency steering may not operate or
objects, etc. It may cause serious injury
may cancel during operation if the
or death.
steering wheel is held tight or steered in
• Forward Collision-Avoidance Assist
the opposite direction.
may not operate if the driver depresses
the brake pedal to avoid a collision.
7-20

7
•
Depending on the road and driving
•
Forward Collision-Avoidance Assist will
conditions, Forward
operate under certain conditions by
Collision-Avoidance Assist may warn
judging the risk level based on the
the driver late or may not warn the
condition of the oncoming vehicle,
driver.
driving direction, speed and
surroundings.
•
During Forward Collision-Avoidance
Assist operation, the vehicle may stop
•
Forward Collision-Avoidance Assist
suddenly injuring passengers and
may be limited or disabled if the vehicle
shifting loose objects. Always have the
speed is too high or the distance to the
seat belt on and keep loose objects
vehicle ahead is far.
secured.
•
When a collision with a surrounding
•
If any other system’s warning message
vehicle is expected, Lane-Change
is displayed or audible warning is
Oncoming, Lane-Change Side and
generated, Forward
Evasive Steering Assist will not assist
Collision-Avoidance Assist warning
you with steering but only warn the you
message may not be displayed and
of a collision (if equipped).
audible warning may not be generated.
•
You may not hear the warning sound of
Forward Collision-Avoidance Assist if
Information
the surrounding is noisy.
•
In a situation where collision is
•
Forward Collision-Avoidance Assist
imminent, braking may be assisted by
may turn off or may not operate
Forward Collision-Avoidance Assist
properly or may operate unnecessarily
when braking is insufficient by the
depending on the road conditions and
driver.
the surroundings.
•
The images and colors in the
•
Even if there is a problem with Forward
instrument cluster may differ
Collision-Avoidance Assist, the
depending on the instrument cluster
vehicle’s basic braking will function
type or theme selected from the
normally.
settings menu.
•
During emergency braking, braking
control by Forward Collision-Avoidance
Assist will automatically cancel when
the driver excessively depresses the
accelerator pedal or sharply steers the
vehicle.
CAUTION
• Depending on the condition of the
vehicle, two-wheeled vehicle,
pedestrian or cyclist in front and the
surroundings, the speed range for
Forward Collision-Avoidance Assist to
operate may be reduced, and Forward
Collision-Avoidance Assist may be
limited, or may not operate.
7-21
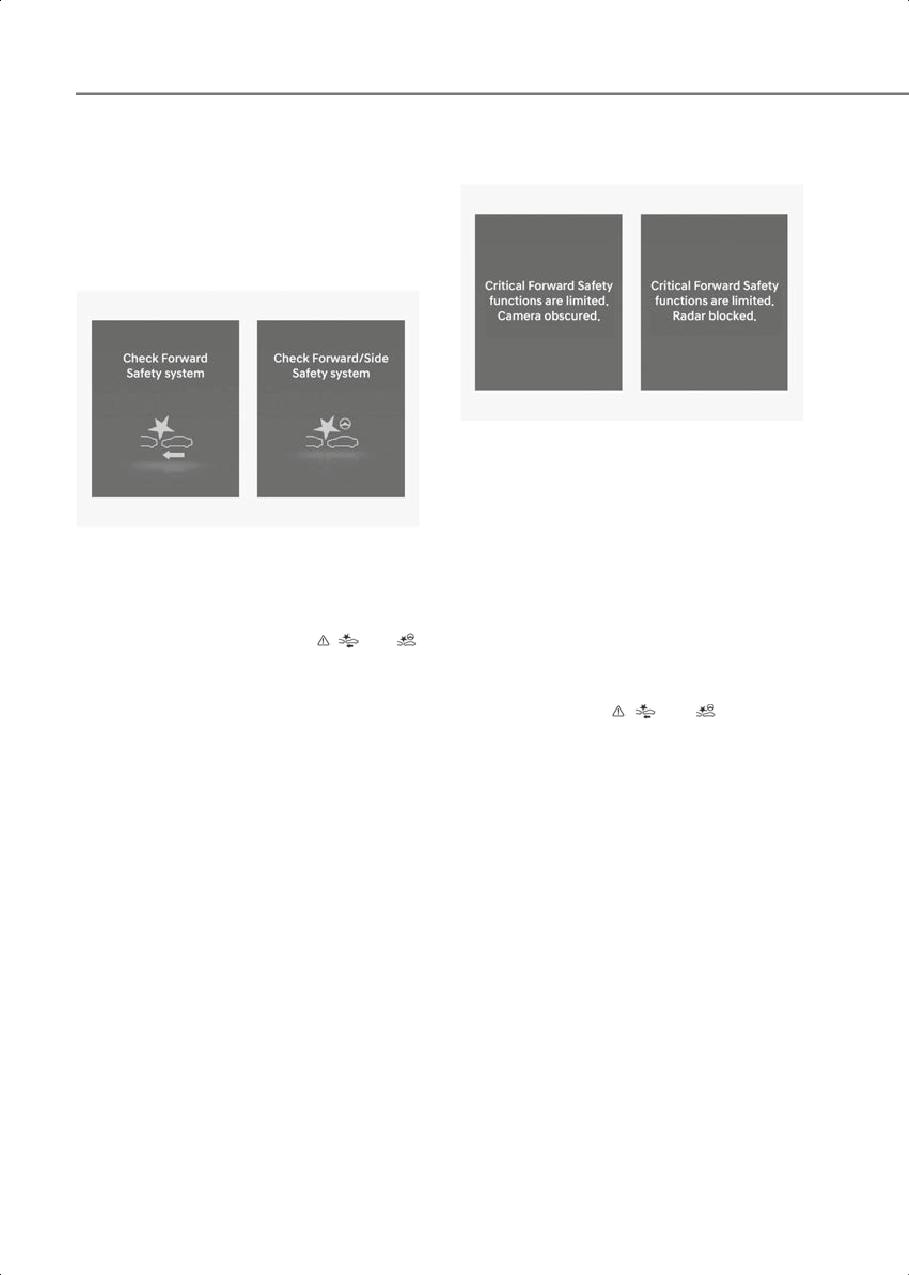
Driver Assistance System
Forward Collision-Avoidance
Forward Collision-Avoidance Assist
disabled
Assist Malfunction and
Limitations
Forward Collision-Avoidance Assist
malfunction
B7000402
When the front windshield where the
front view camera is located, front radar
cover, bumper (if equipped) or sensor is
covered with foreign material, such as
B7000401
snow or rain, it can reduce the detecting
When Forward Collision-Avoidance Assist
performance and temporarily limit or
is not working properly, the ‘Check
disable Forward Collision-Avoidance
Forward Safety system’ and ‘Check
Assist.
Forward/Side Safety system’ warning
If this occurs the ‘Critical Forward Safety
message will appear, and the
,
and
functions disabled. Camera obscured’ or
warning lights will illuminate on the
the ‘Critical Forward Safety functions
instrument cluster. Have the vehicle
disabled. Radar blocked’ warning
inspected by an authorized HYUNDAI
message, and the
,
and warning
dealer.
lights will illuminate on the instrument
cluster.
Forward Collision-Avoidance Assist will
operate properly when snow, rain or
foreign material is removed.
If Forward Collision-Avoidance Assist
does not operate properly after
obstruction (snow, rain, or foreign
material) is removed (including trailer,
carrier, etc., from the rear bumper), have
the vehicle inspected by an authorized
HYUNDAI dealer.
7-22
7
•
An object is placed on the dashboard
WARNING
•
Your vehicle is being towed
• Even though the warning message or
•
The surrounding is very bright
warning light does not appear on the
•
The surrounding is very dark, such as in
instrument cluster, Forward
a tunnel, etc.
Collision-Avoidance Assist may not
properly operate.
•
The brightness changes suddenly, for
example when entering or exiting a
• Forward Collision-Avoidance Assist
tunnel
may not properly operate in an area (for
example, open terrain), where any
•
The brightness outside is low, and the
objects are not detected after turning
headlights are not on or are not bright
ON the vehicle.
•
Driving through steam, smoke or
• If the vehicle is turned off and restarted
shadow
while the camera is blocked or
•
Only part of the vehicle, powered
malfunctioned, the condition is
two-wheeler, pedestrian or cyclist is
maintained. Therefore, Forward
detected
Collision-Avoidance Assist may not
•
The vehicle or powered two-wheeler in
operate properly.
front is a bus, heavy truck, truck with an
unusually shaped cargo, trailer, etc.
Limitations of Forward
•
The vehicle or powered two-wheeler in
Collision-Avoidance Assist
front has no tail lights, tail lights are
located unusually, etc.
Forward Collision-Avoidance Assist may
not operate properly, or it may operate
•
The brightness outside is low, and the
unexpectedly under the following
tail lights are not on or are not bright
circumstances:
•
The rear of the front vehicle is small or
• The detecting sensor or the
the vehicle does not look normal, such
surroundings are contaminated or
as when the vehicle is tilted,
damaged
overturned, or the side of the vehicle is
visible, etc.
• The temperature around the front view
camera is high or low due to
•
The front vehicle’s ground clearance is
surrounding environment
low or high
• The camera lens is contaminated due to
•
A vehicle, powered two-wheeler,
tinted, filmed or coated windshield,
pedestrian or cyclist suddenly cuts in
damaged glass, or sticky foreign
front
material (sticker, bug, etc.) on the glass
•
The bumper around the front radar is
• Moisture is not removed or frozen on
impacted, damaged or the front radar is
the windshield
out of position
• Washer fluid is continuously sprayed, or
•
The temperature around the front radar
the wiper is on
is high or low
• Driving in heavy rain or snow, or thick
•
Driving through a tunnel or iron bridge
fog
•
Driving in vast areas where there are
• The field of view of the front view
few vehicles or structures (for example,
camera is obstructed by sun glare
desert, meadow, suburb, etc.)
• Street light or light from an oncoming
•
Driving near areas containing metal
traffic is reflected on the wet road
substances, such as a construction
surface, such as a puddle on the road
zone, railroad, etc.
7-23

Driver Assistance System
•
A material is near that reflects very well
on the front radar, such as a guardrail,
nearby vehicle, etc.
•
The cyclist in front is on a bicycle made
of material that does not reflect on the
front radar
•
The vehicle or powered two-wheeler in
front is detected late
•
The vehicle or powered two-wheeler in
front is suddenly blocked by an
obstacle
B7000403
•
The vehicle or powered two-wheeler in
The illustration above shows the image
front suddenly changes lane or
the front view camera and front radar are
suddenly reduces speed
capable of detecting as a vehicle,
•
The vehicle or powered two-wheeler in
pedestrian and cyclist.
front is bent out of shape
•
The pedestrian or cyclist in front is
•
The vehicle in front is covered with
moving very quickly
snow
•
The pedestrian or cyclist in front is short
•
You are departing or returning to the
or is posing a low posture
lane
•
The pedestrian or cyclist in front has
•
Unstable driving
impaired mobility
•
You are on a roundabout and the
•
The pedestrian or cyclist in front is
vehicle or powered two-wheeler in
moving intersected with the driving
front is not detected
direction
•
You are continuously driving in a circle
•
There is a group of pedestrians, cyclists
•
The vehicle in front has an unusual
or a large crowd in front
shape
•
The pedestrian or cyclist is wearing
•
The vehicle in front is driving uphill or
clothing that easily blends into the
downhill
background, making it difficult to
detect
•
The pedestrian or cyclist is not fully
detected, for example, if the pedestrian
•
The pedestrian or cyclist is difficult to
is leaning over or is not fully walking
distinguish from the similarly shaped
upright
structure in the surroundings
•
The pedestrian or cyclist is wearing
•
You are driving by a pedestrian, cyclist,
clothing or equipment that makes it
traffic signs, structures, etc., near the
difficult to detect
intersection
•
Driving in a parking lot
•
Driving through a tollbooth,
construction area, unpaved road,
partial paved road, uneven road, speed
bumps, etc.
•
Driving on an incline road, curved road,
etc.
•
Driving through a roadside with trees or
streetlights
7-24
7
• The adverse road conditions cause
•
Your vehicle has started at the same
excessive vehicle vibrations while
time as the vehicle next to you and has
driving
accelerated
• Your vehicle height is low or high due to
•
The vehicle in the next lane moves two
heavy loads, abnormal tire pressure,
lanes away from you, or when the
etc.
vehicle two lanes away moves to the
next lane from you
• Driving through a narrow road where
trees or grass are overgrown
•
A motorcycle or bicycle is detected
• There is interference by
•
A vehicle such as a flat trailer is
electromagnetic waves, such as driving
detected
in an area with strong radio waves or
•
A big vehicle such as a bus or truck is
electrical noise
detected
•
A small moving obstacle such as a
Junction Crossing, Lane-Change
pedestrian, animal, shopping cart or a
Oncoming, Lane-Change Side, Evasive
baby stroller is detected
Steering Assist function
if equipped
•
A vehicle with low height such as a
sports car is detected
•
The temperature around the front
•
The lane is difficult to see due to foreign
corner radar or rear corner radar is high
material, such as rain, snow, dust, sand,
or low
oil and water puddles
•
A trailer or carrier is installed around the
•
The color of the lane marking is not
rear corner radar
distinguishable from the road
•
The front corner radar or rear corner
•
There are markings on the road near the
radar is covered with snow, rain, dirt,
lane or the markings on the road looks
etc.
similar to the lane markings
•
The bumper around the front corner
•
The shadow is on the lane marking by a
radar or rear corner radar is covered
median strip, trees, guardrail, noise
with objects, such as a bumper sticker,
barriers, etc.
bumper guard, bike rack, etc.
•
The lane number increases or
•
The bumper around the front corner
decreases, or the lane markings are
radar or rear corner radar is impacted,
crossing
damaged or the radar is out of position
•
There are more than two lane markings
•
The front corner radar or rear corner
on the road
radar is blocked by other vehicles, walls
or pillars
•
The lane markings are complicated or a
structure substitutes for the lines, such
•
Driving on a highway ramp
as a construction area
•
Driving on a road where the guardrail or
wall is in double structure
•
There are road markings, such as zigzag
lanes, crosswalk markings and road
•
The other vehicle drives very close
signs
behind your vehicle, or the other
vehicle passes by your vehicle in close
•
The lane suddenly disappears, such as
proximity
at the intersection
•
The speed of the other vehicle is very
•
The lane is very wide or narrow
fast so that it passes by your vehicle in a
•
There is a curb or road edges without a
short time
lane
•
Your vehicle passes by the other vehicle
7-25
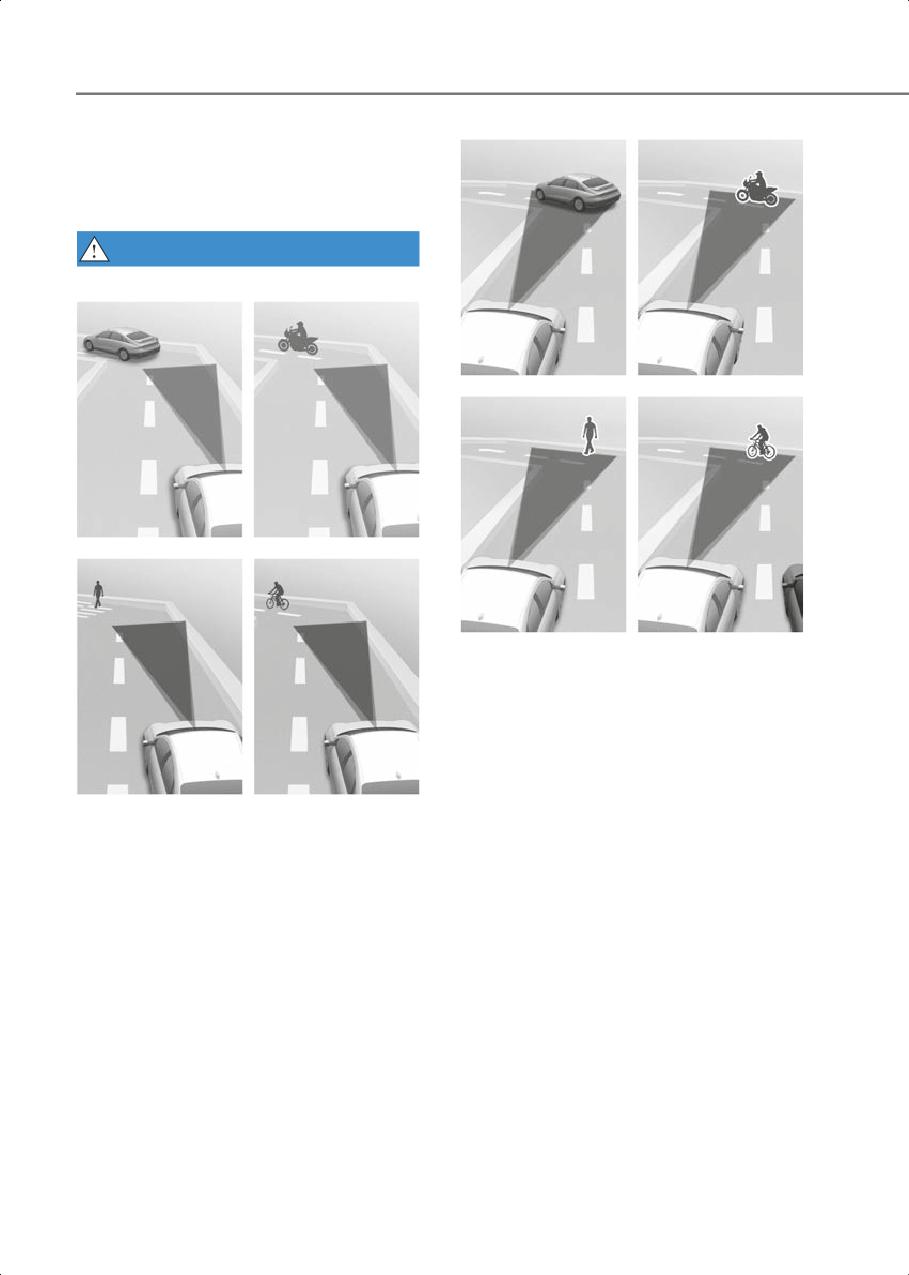
Driver Assistance System
• The vehicle in front is driving with one
side on the lane marking
• The distance to the front vehicle is
extremely short
WARNING
• Driving on a curved road
B7000406
B7000404
B7000407
Forward Collision-Avoidance Assist
may detect a vehicle, powered
two-wheeler, pedestrian or cyclist in
the next lane or outside the lane when
driving on a curved road.
If this occurs, Forward
Collision-Avoidance Assist may
B7000405
unnecessarily warn the driver and
Forward Collision-Avoidance Assist
control the brake or steering wheel (if
may not detect other vehicles, powered
equipped). Always check the traffic
two-wheelers, pedestrians or cyclists in
conditions around the vehicle.
front of you when driving on curved
roads adversely affecting the
performance of the sensors. This may
result in no warning, braking assist or
steering assist (if equipped) when
necessary.
When driving on a curve, you must
maintain a safe braking distance, and if
necessary, steer the vehicle and
depress the brake pedal to reduce your
driving speed in order to maintain a
safe distance.
7-26
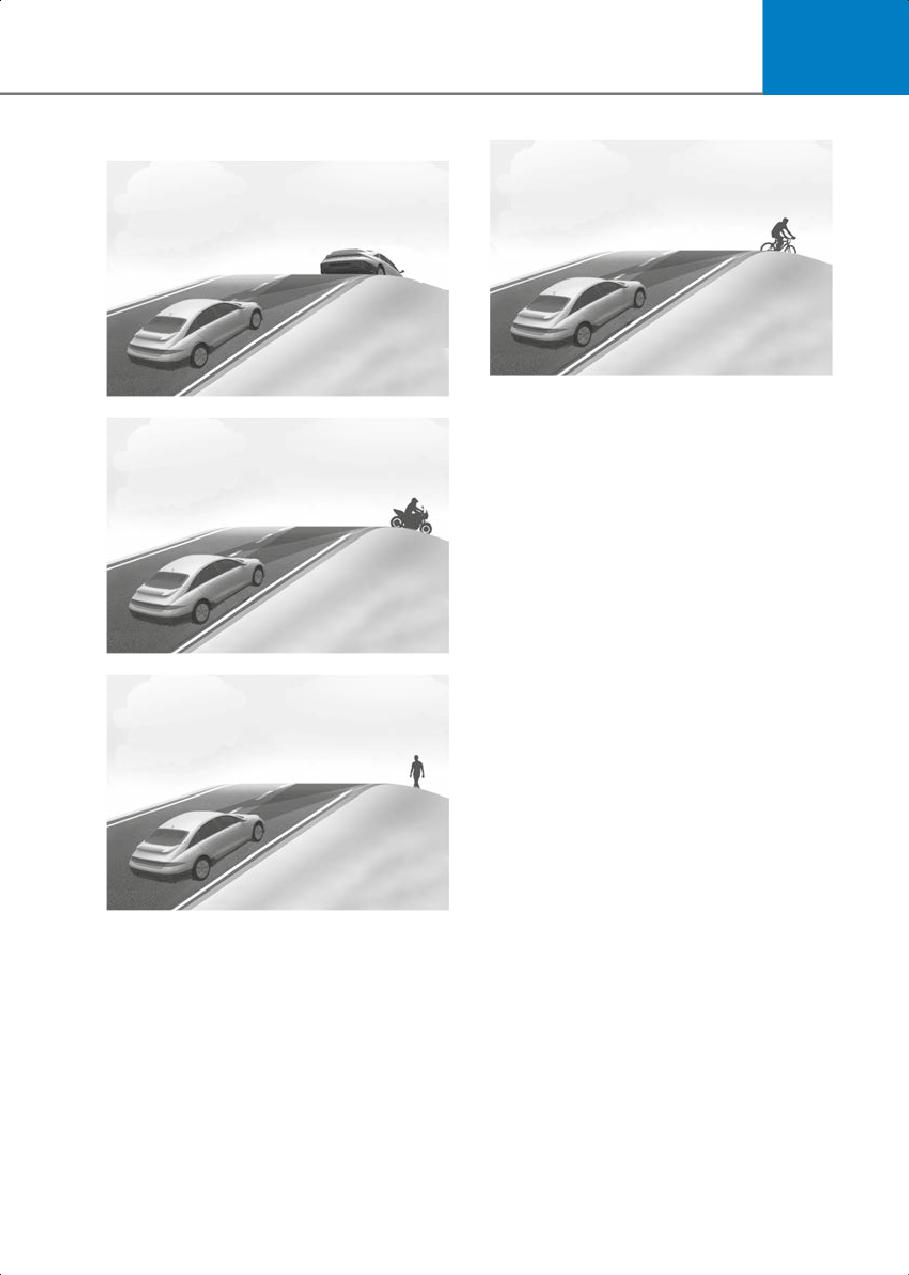
7
• Driving on an inclined road
B7000411
B7000408
Forward Collision-Avoidance Assist
may not detect other vehicles, powered
two-wheelers, pedestrians or cyclists in
front of you while driving uphill or
downhill, adversely affecting the
performance of the sensors.
This may result in unnecessary warning,
braking assist or steering assist (if
equipped) or no warning, braking assist
or steering assist (if equipped) when
necessary.
Also, vehicle speed may rapidly
B7000409
decrease when a vehicle, powered
two-wheeler, pedestrian or cyclist
ahead is suddenly detected.
Always have your eyes on the road
while driving uphill or downhill and if
necessary, steer your vehicle and
depress the brake pedal to reduce your
driving speed in order to maintain a
safe distance.
B7000410
7-27
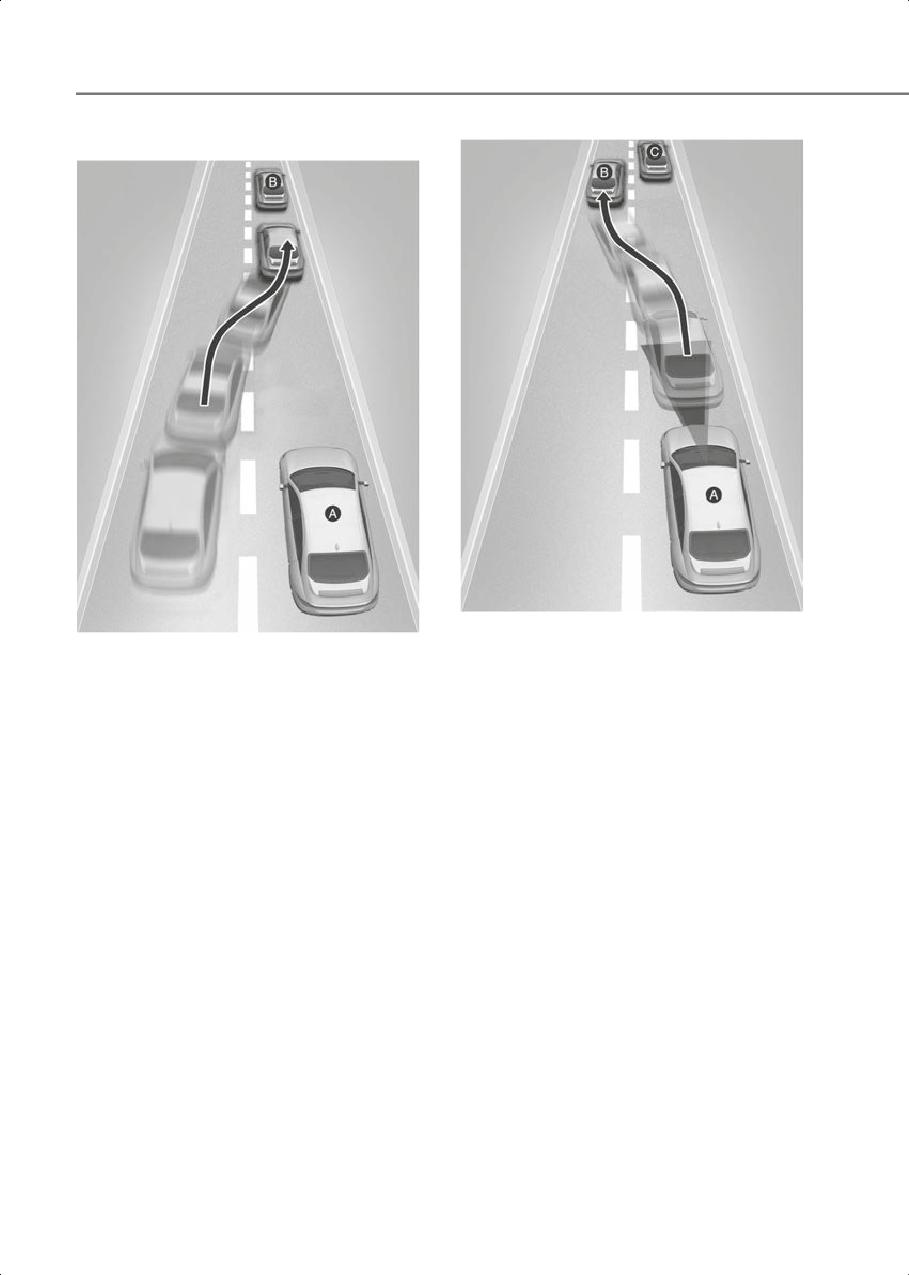
Driver Assistance System
• Changing lanes
B7000413
B7000412
[A] Your vehicle
[B] Lane changing vehicle
[A] Your vehicle
[C] Same lane vehicle
[B] Lane changing vehicle
When a vehicle in front of you merges
When a vehicle moves into your lane
out of the lane, Forward
from an adjacent lane, it cannot be
Collision-Avoidance Assist may not
detected by the sensor until it is in the
immediately detect the vehicle that is
sensor's detection range. Forward
now in front of you. In this case, you
Collision-Avoidance Assist may not
must maintain a safe braking distance,
immediately detect the vehicle when
and if necessary, steer your vehicle and
the vehicle changes lanes abruptly. In
depress the brake pedal to reduce your
this case, you must maintain a safe
driving speed in order to maintain a
braking distance, and if necessary,
safe distance.
steer your vehicle and depress the
brake pedal to reduce your driving
speed in order to maintain a safe
distance.
7-28
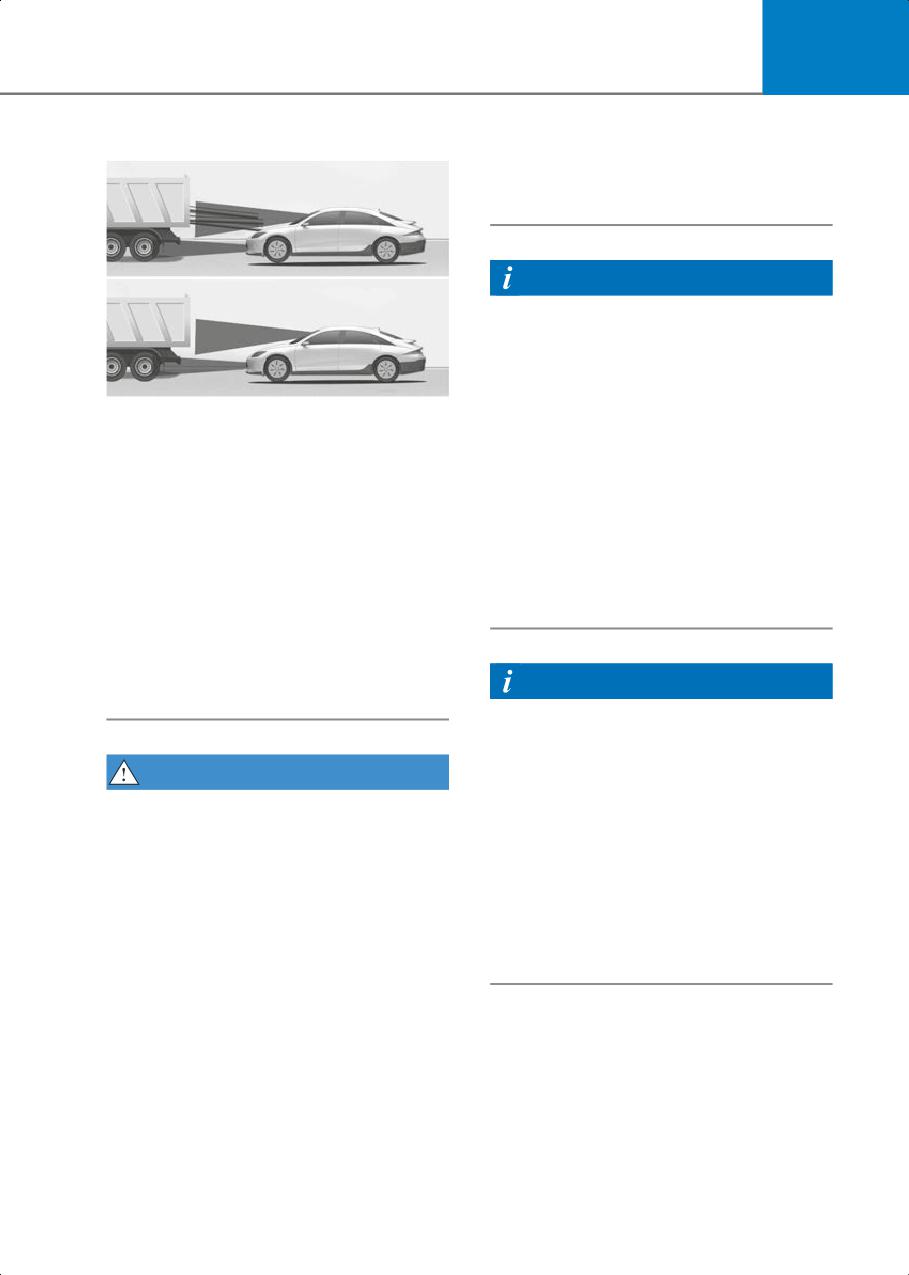
7
• Detecting vehicle
• Forward Collision-Avoidance Assist
may not operate for 15 seconds after
the vehicle is started, or the front view
camera is initialized.
Information
This device complies with Part 15 of the
FCC rules.
Operation is subject to the following three
conditions:
B7000414
1. This device may not cause harmful
If the vehicle in front of you has cargo
interference, and
that extends rearward from the cab, or
2. This device must accept any
when the vehicle in front of you has
interference received, including
higher ground clearance, additional
interference that may cause undesired
special attention is required. Forward
operation.
Collision-Avoidance Assist may not be
3. Changes or modifications not expressly
able to detect the cargo extending from
approved by the party responsible for
the vehicle. In these instances, you
compliance could void the user’s
must maintain a safe braking distance
authority to operate the device.
from the rearmost object, and if
necessary, steer your vehicle and
depress the brake pedal to reduce your
driving speed in order to maintain
Information
distance.
Radio frequency radiation exposure
information:
This equipment complies with FCC
WARNING
radiation exposure limits set forth for an
•
When you are towing a trailer or
uncontrolled environment.
another vehicle, turn off Forward
This equipment should be installed and
Collision-Avoidance Assist for safety
operated with minimum distance of 8 in.
reasons.
(20 cm) between the radiator (antenna)
•
Forward Collision-Avoidance Assist
and your body.
may operate if objects that are similar
This transmitter must not be co-located
in shape or characteristics to vehicles,
or operating in conjunction with any other
powered two-wheelers, pedestrians
antenna or transmitter.
and cyclists are detected.
•
Forward Collision-Avoidance Assist
does not operate on bicycles, or smaller
wheeled objects, such as luggage bags,
shopping carts, or strollers.
•
Forward Collision-Avoidance Assist
may not operate properly if interfered
by strong electromagnetic waves.
7-29
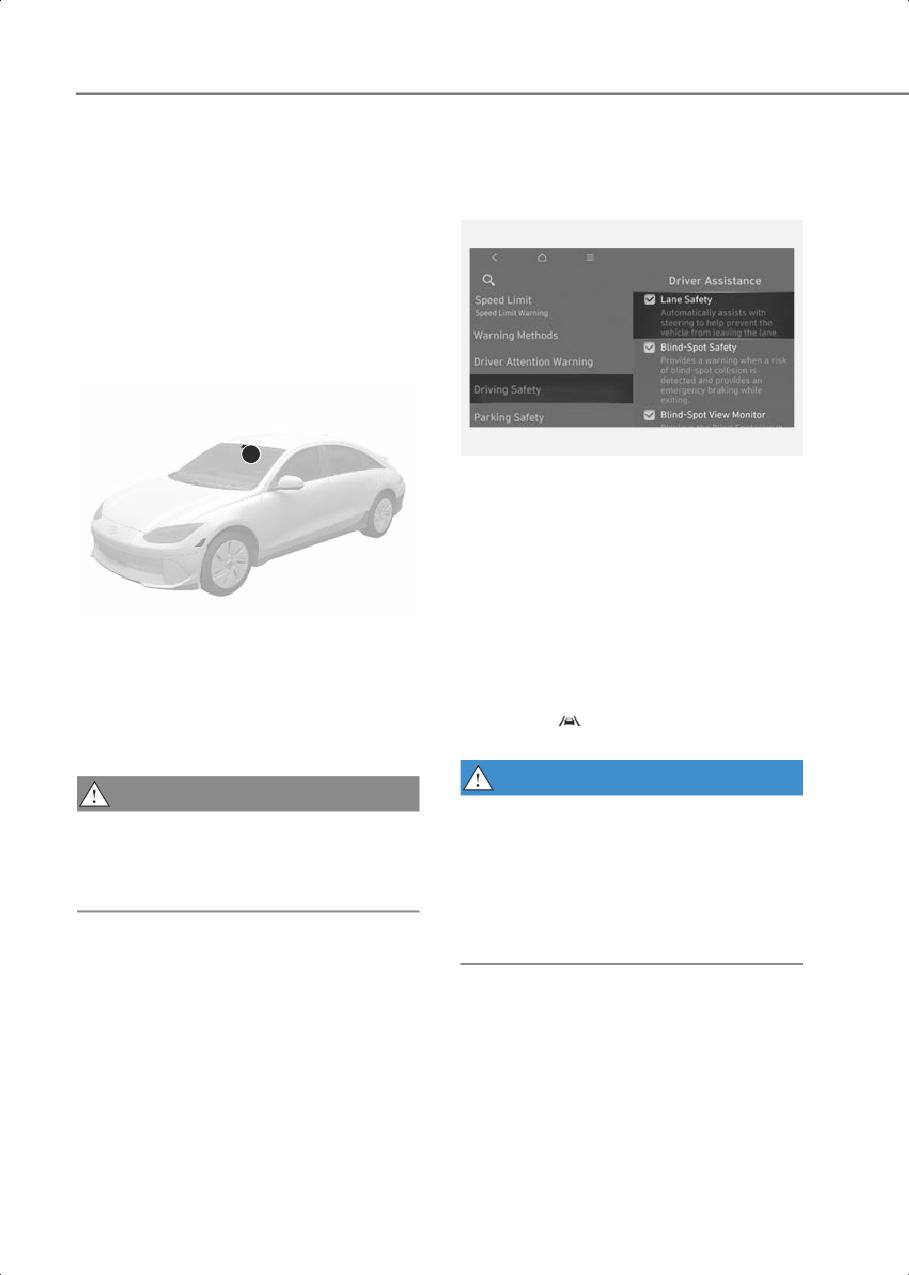
Driver Assistance System
Lane Keeping Assist (LKA)
Lane Keeping Assist Settings
While driving over a certain speed, Lane
Lane Safety
Keeping Assist detects lane markings (or
road edges) and may warn you if your
vehicle leaves the lane without using the
turn signal and may assist with steering to
prevent your vehicle departing from its
travel lane.
Detecting sensor
1
B7001001
With the vehicle on, select Setup >
Vehicle > Driver Assistance > Driving
Safety > Lane Safety from the Settings
menu to set whether to use each
function.
If Lane Safety is selected, Lane Keeping
B7000901
Assist will automatically assist the driver’s
(1) Front view camera
steering when lane departure is detected
to help prevent the vehicle from moving
The front view camera is used as a
out of its lane. If Lane Safety is
detecting sensor to detect lane markings
deselected, Lane keeping Assist will turn
(or road edges).
off and the (
) indicator light will turn off
Refer to the picture above for the detailed
on the instrument cluster.
location of the detecting sensor.
WARNING
CAUTION
• Lane Keeping Assist does not control
For more information on the precautions
the steering wheel when the vehicle is
of the front view camera, refer to the
driven in the middle of the lane.
"Forward Collision-Avoidance Assist
• The driver should always be aware of
(FCA)" section in this chapter.
the surroundings. If Lane Safety is
deselected, Lane Keeping Assist cannot
assist you.
7-30
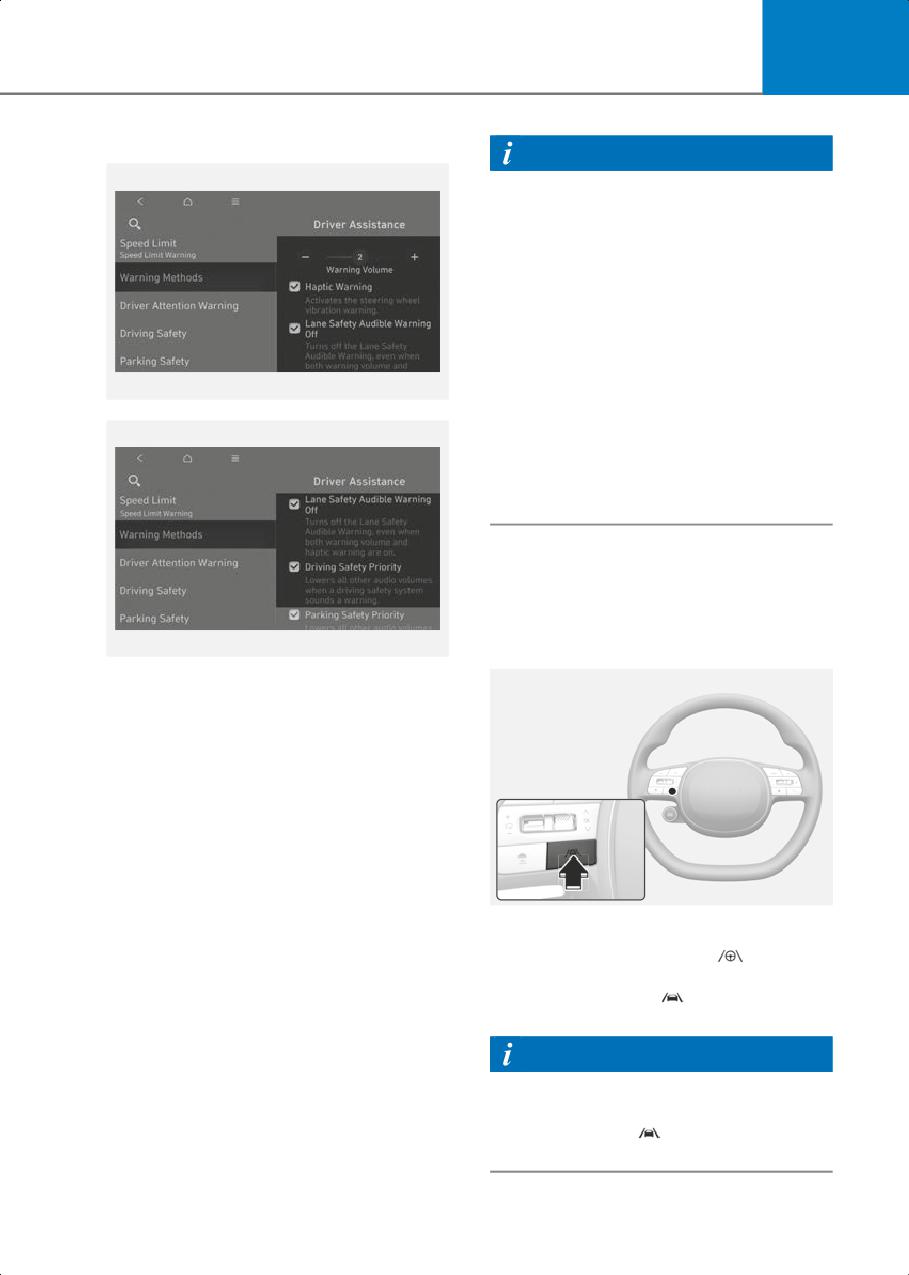
7
Warning Methods
Information
• If you change the Warning Methods,
Warning Methods of other Driver
Assistance systems may change.
• If the vehicle is restarted, Warning
Methods will maintain the last setting.
• There may be no Settings menu
depending on the feature applied to
your vehicle.
• The Warning Volume and Haptic
Warning cannot be turned off at the
B7000205_2
same time. When one of the warning is
turned off, the other is activated.
• Lane Safety Audible Warning Off can
be set when both Warning Volume and
Haptic Warning turn on.
Lane Keeping Assist
Operation
Turning Lane Keeping Assist On/Off
B7000205_3
With the vehicle on, go to Setup > Vehicle
> Driver Assistance > Warning Methods
from the Settings in the infotainment
system to select the following:
• Warning Volume: The Warning Volume
can be adjusted.
If you turn off the Warning Volume, for
your safety, the function may warn you
with a low volume.
• Haptic Warning: The steering wheel
vibration can be set.
B7001101
With the vehicle on, press and hold the
• Lane Safety Audible Warning Off: The
Lane Driving Assist button (
) located
warning volume of Lane Safety does
on the steering wheel to turn on Lane
not sound when Haptic Warning is
Keeping Assist. The (
) indicator light
selected.
will illuminate on the instrument cluster.
• Driving Safety Priority: Your vehicle
lowers all other audio volumes when
Information
the Driver Assistance system warning
sounds.
When the Lane Driving Assist button is
pressed and held, the Lane Safety setting
turns off and the (
) indicator light will
turn off on the instrument cluster.
7-31
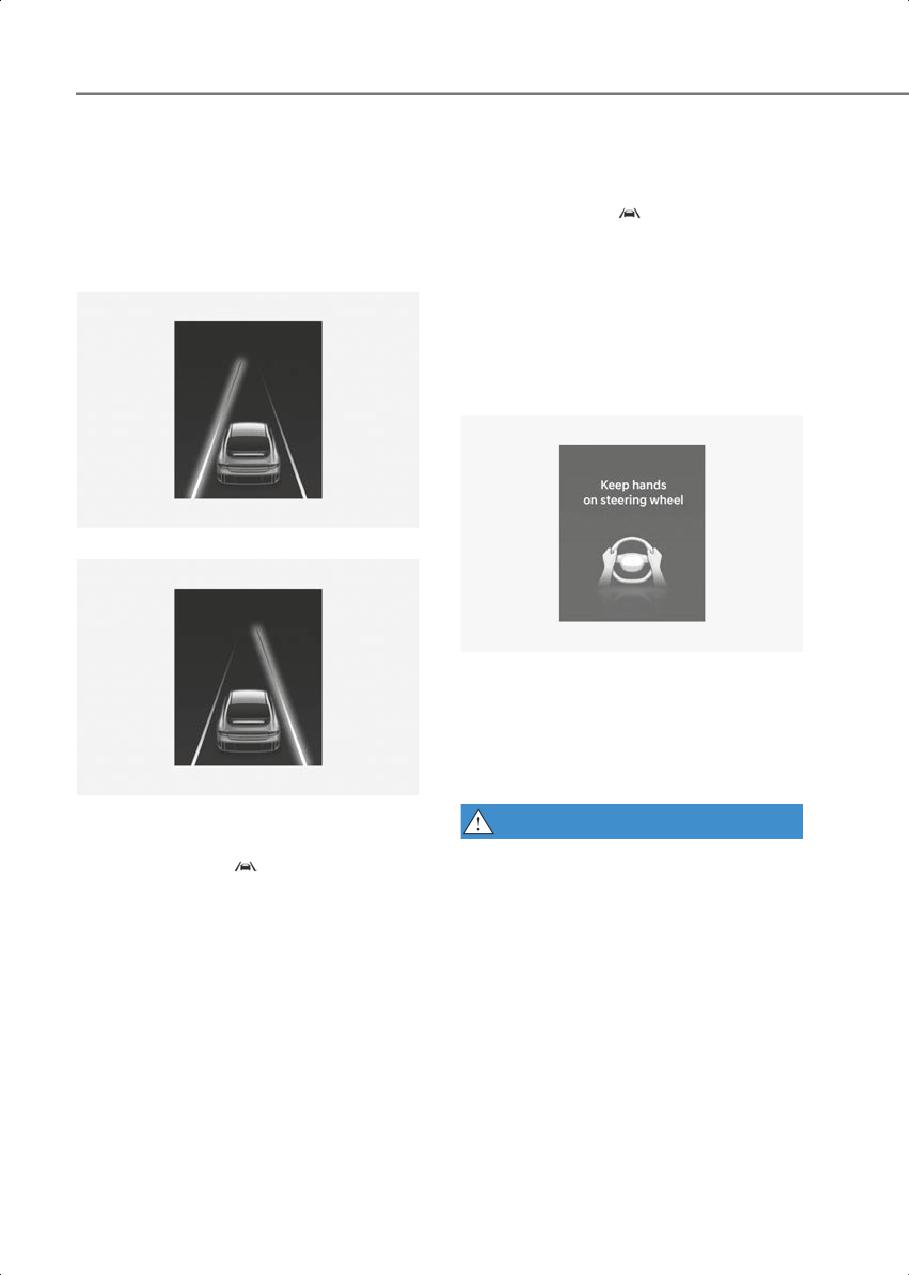
Driver Assistance System
Warning and control
Lane Keeping Assist
Lane Keeping Assist will warn and control
• To warn the driver that the vehicle is
the vehicle with Lane Departure Warning
departing from the projected lane in
and Lane Keeping Assist.
front, the green (
) indicator light will
blink on the cluster, and the steering
Lane Departure Warning
wheel will make adjustments to keep
Left
vehicle inside the lane.
• Lane Keeping Assist will operate when
your vehicle speed is between about
40-120 mph (60-200 km/h).
Hands-off warning
B7001102
Right
B7001104
If the driver takes their hands off the
steering wheel for several seconds, the
'Keep hands on steering wheel' warning
message will appear on the instrument
cluster, and an audible warning will sound
in stages.
B7001103
• To warn the driver that the vehicle is
WARNING
departing from the projected lane in
• The steering wheel may not be assisted
front, the green (
) indicator light will
if the steering wheel is held very tight or
blink on the instrument cluster, the lane
the steering wheel is steered over a
line will blink on the instrument cluster
certain degree.
depending on which direction the
vehicle is veering, and an audible
• Lane Keeping Assist does not operate
warning will sound. Also, the steering
at all times. It is the responsibility of the
wheel will vibrate.
driver to safely steer the vehicle and to
maintain the vehicle in its lane.
• Lane Departure Warning will operate
when your vehicle speed is between
• The hands-off warning message may
about 40-120 mph (60-200 km/h).
appear late depending on road
conditions. Always have your hands on
the steering wheel while driving.
7-32
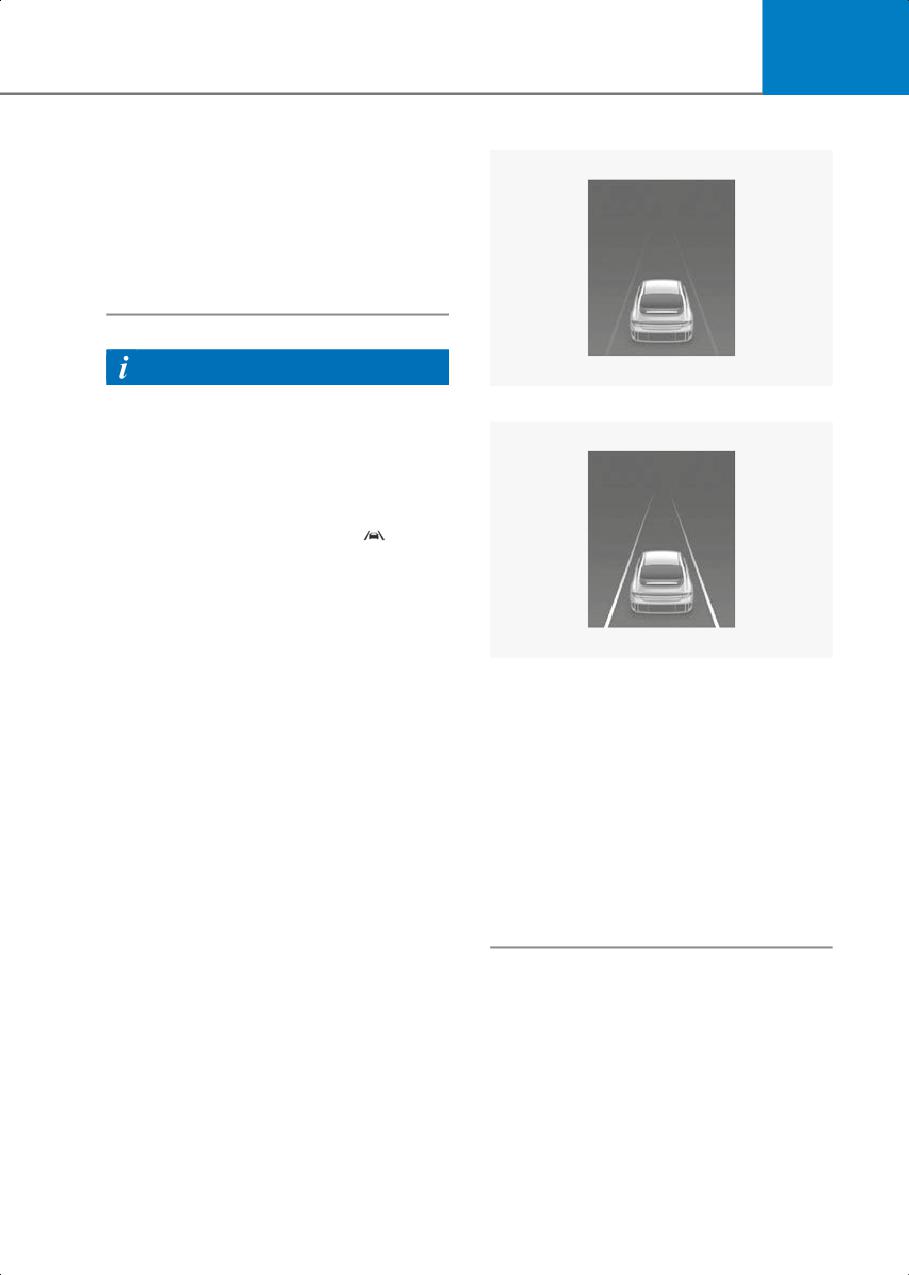
7
• If the steering wheel is held very lightly,
Lane undetected
the hands-off warning message may
appear because Lane Keeping Assist
may not recognize that the driver has
their hands on the steering wheel.
• If you attach objects to the steering
wheel, the hands-off warning may not
work properly.
Information
B7001105
• For more information on instrument
Lane detected
cluster settings, refer to the "Cluster
Display Control" section in chapter 4.
• When lane markings (or road edges) are
detected, the lane lines on the
instrument cluster will change from
grey to white and the green (
)
indicator light will illuminate.
• When the lane markings (or road edges)
are detected and Highway Lane
Change Assist is on, the lane lines on
the instrument cluster may change to
green.
B7001106
• The images and colors in the
instrument cluster may differ
depending on the instrument cluster
type or theme selected from the
instrument cluster.
• Even though the steering is assisted by
Lane Keeping Assist, the driver may
control the steering wheel.
• The steering wheel may feel heavier or
lighter when the steering wheel is
assisted by Lane Keeping Assist than
when it is not.
7-33
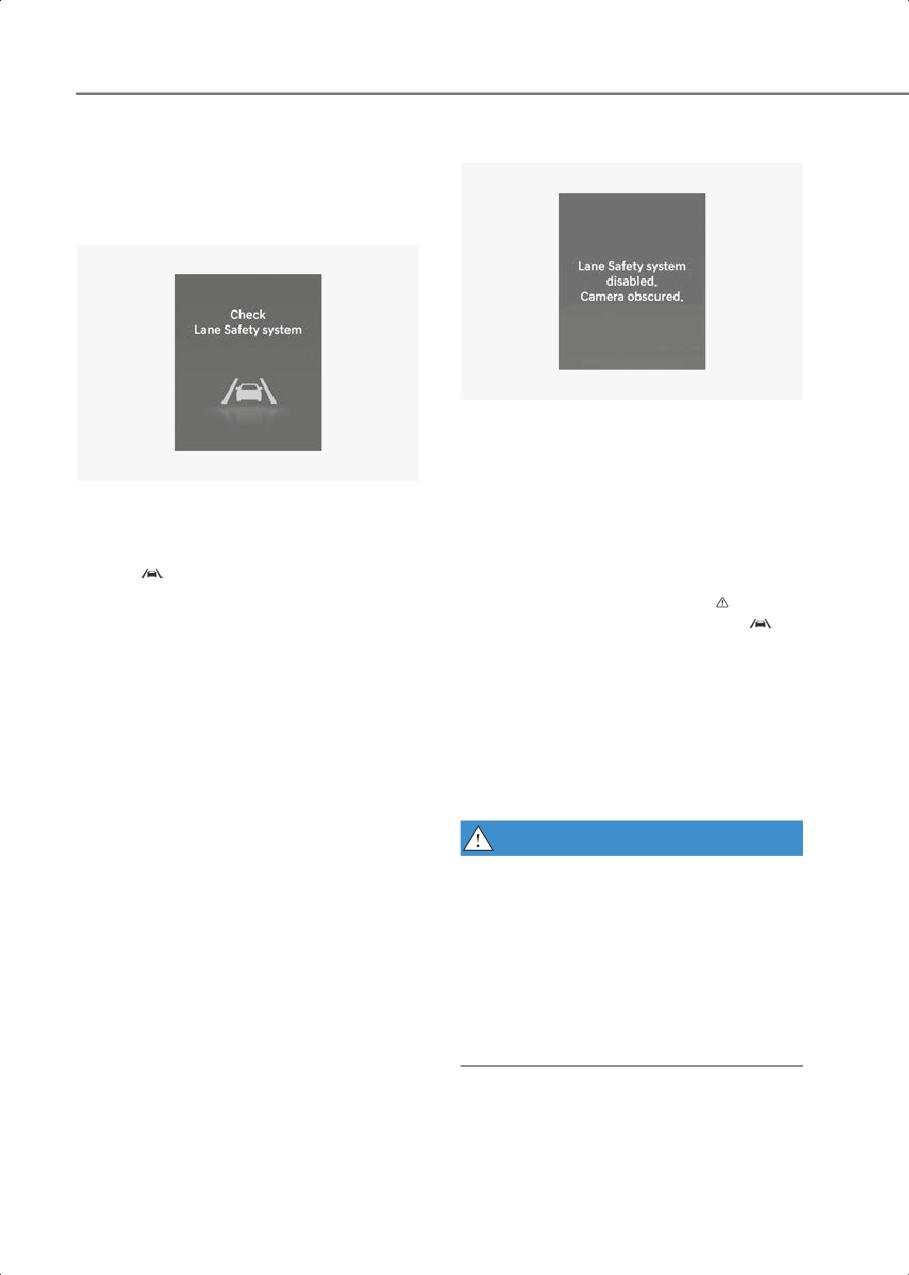
Driver Assistance System
Lane Keeping Assist
Lane Keeping Assist disabled
Malfunction and Limitations
Lane Keeping Assist malfunction
B7001202
When the front windshield where the
front view camera is located, or sensor is
covered with foreign material, such as
B7001201
snow or rain, it can reduce the detecting
When Lane Keeping Assist is not working
performance and temporarily limit or
properly, the 'Check Lane Safety system'
disable Lane Keeping Assist.
warning message will appear and the
If this occurs, the 'Lane Keeping Assist
yellow (
) indicator light will illuminate
system disabled. Camera obscured'
on the instrument cluster. If this occurs,
warning message and master (
) light or
have the vehicle inspected by an
Lane Keeping Assist warning light (
)
authorized HYUNDAI dealer.
will appear on the instrument cluster.
Lane Keeping Assist will operate properly
when snow, rain or foreign material is
removed.
If Lane Keeping Assist does not operate
properly after it is removed, have the
vehicle inspected by an authorized
HYUNDAI dealer.
WARNING
• Even though the warning message or
warning light does not appear on the
instrument cluster, Lane Keeping Assist
may not properly operate.
• If the vehicle is turned off and restarted
while the camera is blocked or
malfunctioned, the condition is
maintained. Therefore, Lane Keeping
Assist may not operate properly.
7-34
7
Limitations of Lane Keeping Assist
Information
Lane Keeping Assist may not operate
properly or may operate unexpectedly
For more information on the limitations of
under the following circumstances:
the front view camera, refer to the
"Forward Collision-Avoidance Assist
•
The lane is contaminated or difficult to
(FCA)" section in this chapter.
detect because:
- The lane markings (or road edge) are
covered with rain, snow, dirt, oil, etc.
WARNING
- The color of the lane marking (or road
edge) is not distinguishable from the
Take the following precautions when
road
using Lane Keeping Assist:
- There are markings (or road edges)
•
The driver has the responsibility to
on the road near the lane or the
safely drive and control the vehicle. Do
markings (or road edges) on the road
not solely rely on Lane Keeping Assist.
look similar to the lane markings (or
•
The operation of Lane Keeping Assist
road edge)
can be cancelled or not work properly
- The lane marking (or road edge) is
depending on road conditions and
indistinct or damaged
surroundings. Always be cautious while
- The shadow is on the lane marking (or
driving.
road edge) by a median strip, trees,
•
Refer to the "Limitations of Lane
guardrail, noise barriers, etc.
Keeping Assist" if the lane is not
•
The lane number increases or
detected properly.
decreases, or the lane markings (or
•
When you are towing a trailer or
road edges) are crossing
another vehicle, turn off Lane Keeping
•
There are more than two lane markings
Assist for safety reasons.
(or road edges) on the road
•
If the vehicle is driven at high speed,
•
The lane markings (or road edges) are
the steering wheel will not be
complicated or a structure substitutes
controlled. The driver must always
for the lines, such as a construction
follow the speed limit when using Lane
area
Keeping Assist.
•
There are road markings, such as zigzag
•
If any other system’s warning message
lanes, crosswalk markings and road
is displayed or audible warning is
signs
generated, Lane Keeping Assist
warning message may not be displayed
•
The lane suddenly disappears, such as
and audible warning may not be
at the intersection
generated.
•
The lane (or road width) is very wide or
•
You may not hear the warning sound of
narrow
Lane Keeping Assist if the surrounding
•
There is a road edge without a lane
is noisy.
•
There is a boundary structure in the
•
If you attach objects to the steering
roadway, such as a tollbooth, sidewalk,
wheel, steering may not be assisted
curb, etc.
properly.
•
The distance to the front vehicle is
•
Lane Keeping Assist may not operate
extremely short or the vehicle in front is
for 15 seconds after the vehicle is
covering the lane marking (or road
started, or the front view camera is
edge)
initialized.
7-35
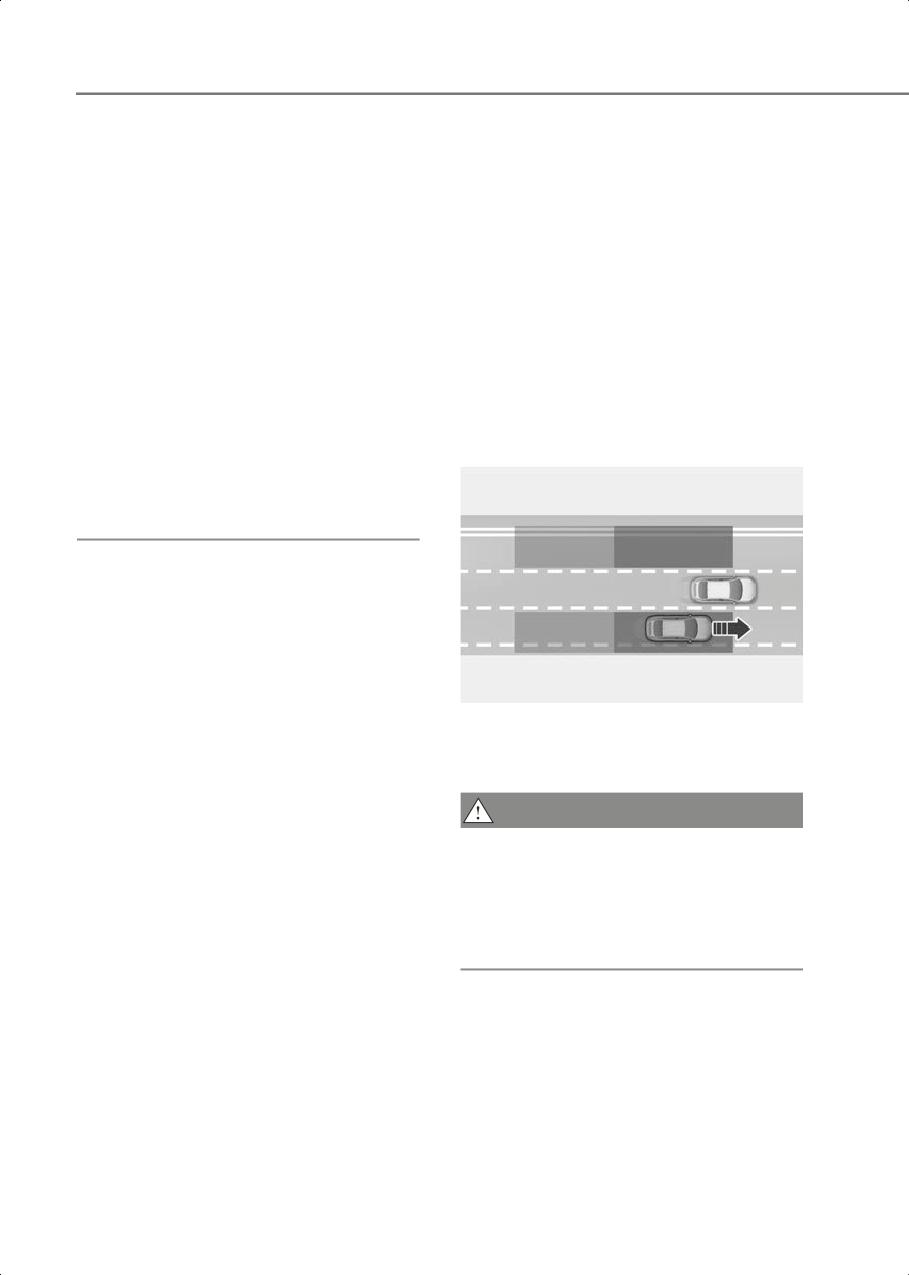
Driver Assistance System
• Lane Keeping Assist will not operate
Blind-Spot
when:
Collision-Avoidance
- The turn signal or hazard warning
flasher is turned on.
Assist (BCA)
- The vehicle is not driven in the center
of the lane when Lane Keeping Assist
Blind-Spot Collision-Avoidance Assist
is turned on or right after changing a
detects approaching vehicles in the
lane.
driver’s blind spot areas and warn you of a
possible collision with a warning light and
- ESC (Electronic Stability Control) or
a warning sound.
VSM (Vehicle Stability Management)
is activated.
If there is a collision risk when exiting a
parallel space, Blind-Spot
- The vehicle is driven on a sharp curve.
Collision-Avoidance Assist may assist
- Vehicle speed is below 35 mph (55
with braking your vehicle to help avoid a
km/h) or above 130 mph (210 km/h).
collision.
- The vehicle makes sudden lane
changes.
- The vehicle brakes suddenly.
B7001301
Blind-Spot Collision-Avoidance Assist
helps detect and informs the driver that a
vehicle is in the blind spot.
CAUTION
The detecting range may vary depending
on the speed of your vehicle. Even if there
is a vehicle in the blind spot area,
Blind-Spot Collision-Avoidance Assist
may not warn you when you pass by at
high speeds.
7-36
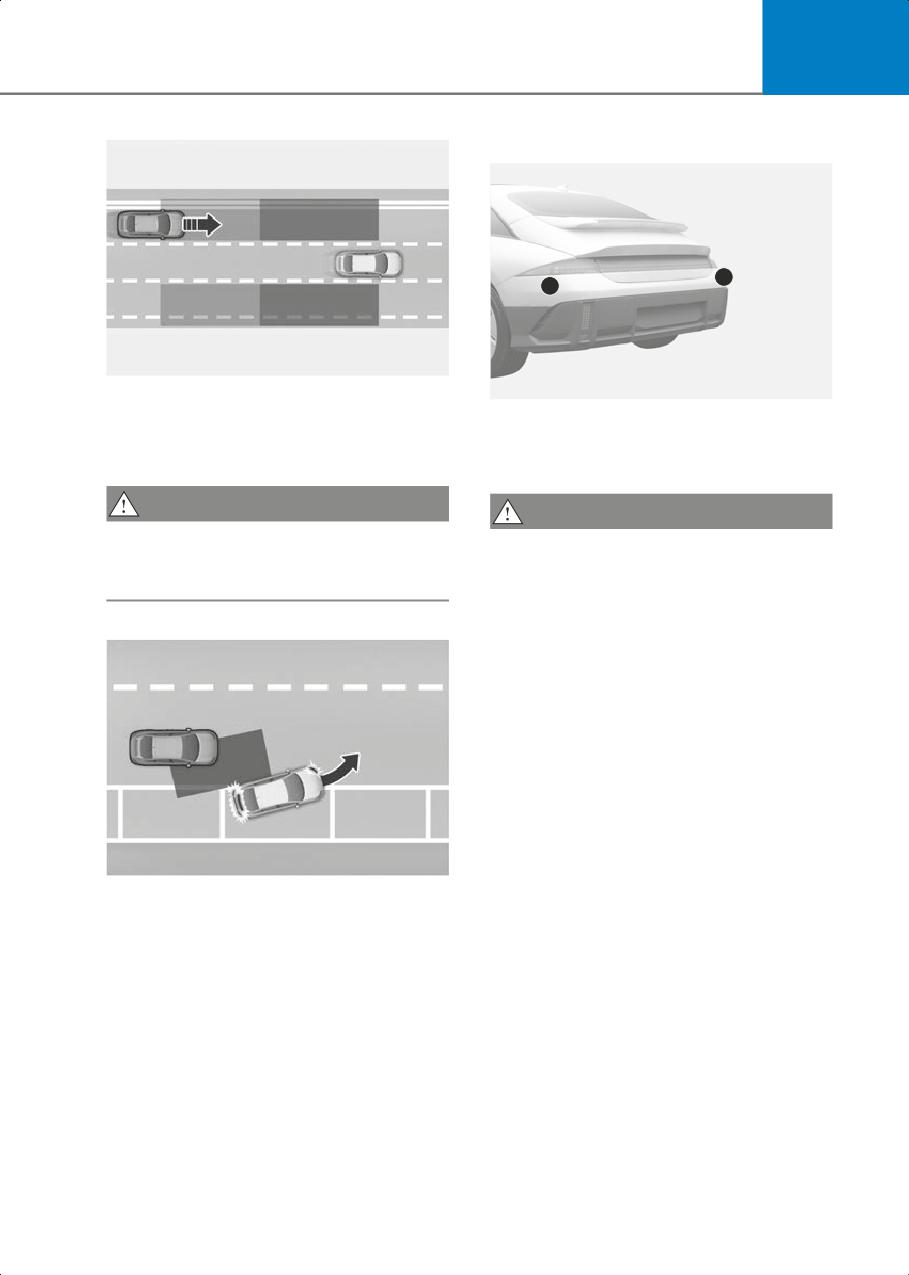
7
Detecting sensor
1
1
B7001302
Blind-Spot Collision-Avoidance Assist
B7001802
helps detect and informs the driver that a
(1) Rear corner radar
vehicle is approaching at high speed from
Refer to the picture above for the detailed
the blind spot area.
location of the detecting sensors.
CAUTION
CAUTION
Warning timing may vary depending on
Take the following precautions to
the speed of the vehicle approaching at
maintain optimal performance of the
high speed.
detecting sensor:
• Never disassemble the detecting
sensor assembly, or cause any damage
to it.
• If the rear corner radar or near the radar
has been damaged or impacted in any
way, even though the warning message
does not appear on the instrument
cluster, Blind-Spot Collision-Avoidance
Assist may not operate properly. Have
the vehicle inspected by an authorized
HYUNDAI dealer.
• If the rear corner radars have been
B7001303
replaced or repaired, have the vehicle
When you are driving forward out of a
inspected by an authorized HYUNDAI
parking space, if Blind-Spot
dealer.
Collision-Avoidance Assist judges that
• Rear bumper genuine parts with rear
there is a collision risk with an
corner radars have proven their
approaching vehicle in the blind spot, it
performance. Replacing or painting the
can help avoid collision by applying the
rear bumper may result in poor
brake.
performance of Blind-Spot
Collision-Avoidance Assist. When the
parts need to be replaced or modified,
make sure to use genuine HYUNDAI
parts.
7-37
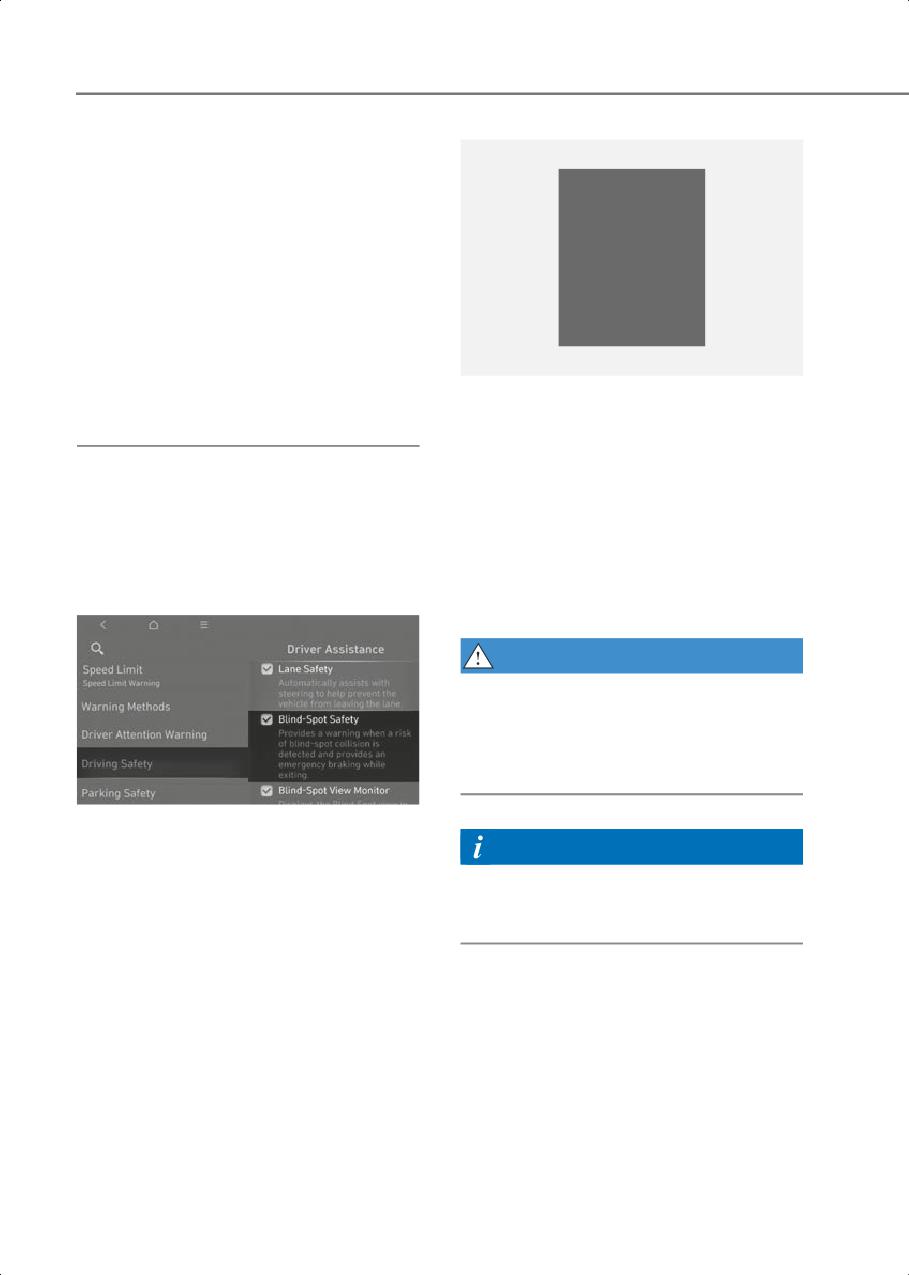
Driver Assistance System
• Do not apply license plate frame or
objects, such as a bumper sticker, film
or a bumper guard near the rear corner
radar.
• Blind-Spot Collision-Avoidance Assist
#MJOE TQPU TBGFUZ
may not work properly if the bumper
TZTUFN JT 0GG
has been replaced, or the surroundings
of the rear corner radar have been
damaged or paint has been applied.
• If a trailer, carrier, etc., is installed, it
may adversely affect the performance
of the rear corner radar or Blind-Spot
OTM070097N
Collision-Avoidance Assist may not
When the vehicle is restarted with
operate.
Blind-Spot Collision-Avoidance Assist off,
the 'Blind-spot safety system is Off’
message will appear on the instrument
Blind-Spot
cluster.
Collision-Avoidance Assist
If you select Blind-Spot Safety, warning
light on the side view mirror will blink for
settings
three seconds. In addition, if the vehicle is
turned on, when Blind-Spot Safety is
Blind-Spot Safety
selected, the warning light on the side
view mirror will blink for three seconds.
WARNING
The driver should always be aware of the
surroundings and drive safely. If
Blind-Spot Safety is deselected,
Blind-Spot Collision-Avoidance Assist
cannot assist you.
B0320EE01
With the vehicle on, select Setup >
Vehicle > Driver Assistance > Driving
Information
Safety > Blind-Spot Safety from the
If the vehicle is restarted, Blind-Spot
settings menu to set whether to use each
Collision-Avoidance Assist will maintain
function.
the last setting.
• If Blind-Spot Safety is selected,
Blind-Spot Collision Avoidance Assist
will warn the driver with a warning
message, an audible warning
depending on the collision risk levels.
Braking assist will be applied for
parking exit depending on the collision
risk levels.
7-38
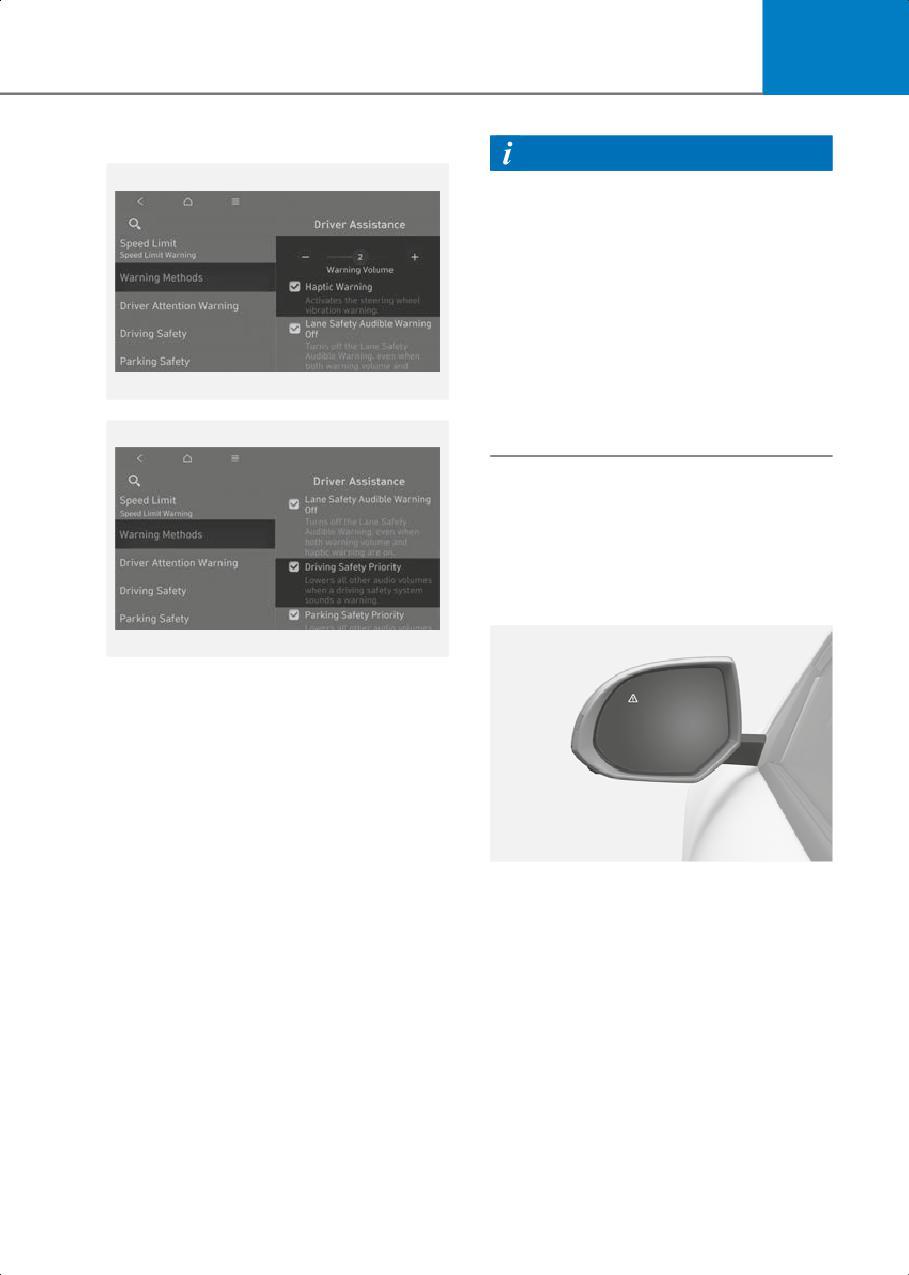
7
Warning Methods
Information
• If you change the Warning Methods,
Warning Methods of other Driver
Assistance systems may change.
• If the vehicle is restarted, Warning
Methods will maintain the last setting.
• There may be no Settings menu
depending on the feature applied to
your vehicle.
• The Warning Volume and Haptic
Warning cannot be turned off at the
B7000205
same time. When one of the warnings is
turned off, the other is activated.
Blind-Spot
Collision-Avoidance Assist
Operation
Collision Warning (while driving)
B7000205_1
With the vehicle on, go to Setup > Vehicle
> Driver Assistance > Warning Methods
from the Settings in the infotainment
system to select the following:
• Warning Volume: The Warning Volume
can be adjusted.
• Haptic Warning: The steering wheel
vibration can be set.
• Driving Safety Priority: Your vehicle
B7001501
lowers all other audio volumes when
• To warn the driver a vehicle is detected,
the Driver Assistance system warning
the warning light on the side view
sounds.
mirror and head-up display (if
equipped) will illuminate.
• Blind-Spot Collision Warning will
operate when your vehicle speed is
above 12 mph (20 km/h) and the speed
of the vehicle in the blind spot area is
above 7 mph (10 km/h).
• Collision warning will operate when the
turn signal is turned on in the direction
of the detected vehicle.
7-39
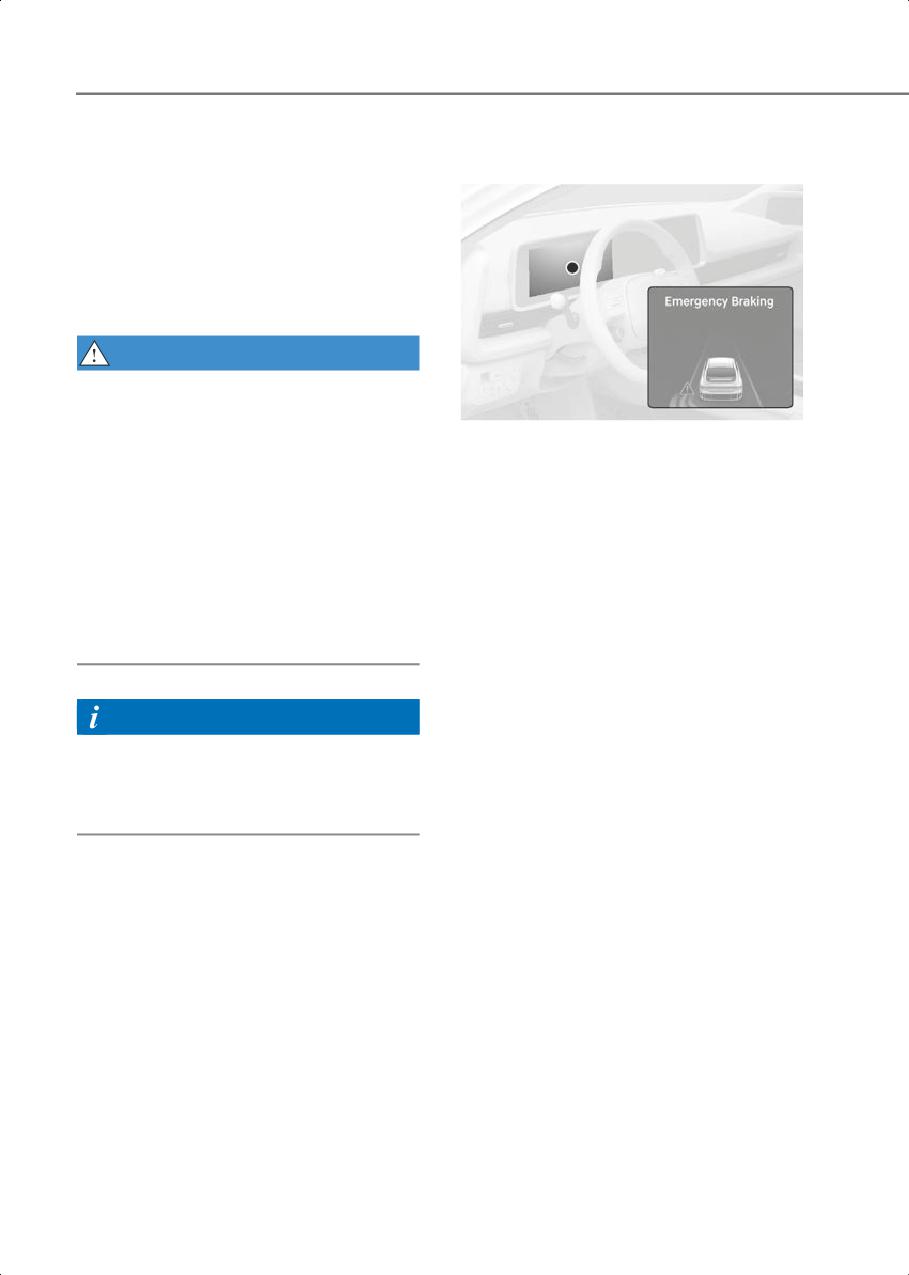
Driver Assistance System
• To warn the driver of a collision, the
Collision-Avoidance Assist (while
warning light on the side view mirror
exiting parallel spot)
and head-up display (if equipped) will
blink. At the same time, an audible
warning will sound.
• When the turn signal is turned off, the
collision warning will be canceled and
Blind-Spot Collision Avoidance Assist
will return to vehicle detection state.
WARNING
• The detecting range of the rear corner
radar is determined by a standard road
width, therefore, on a narrow road,
B7001503
Blind-Spot Collision-Avoidance Assist
• To warn the driver of a collision, the
may detect other vehicles two lanes
warning light on the side view mirror
over and warn you. In contrast, on a
will blink and a warning message will
wide road, Blind-Spot
appear on the instrument cluster. At the
Collision-Avoidance Assist may not be
same time, an audible warning will
able to detect a vehicle driving in the
sound, warning light on the head-up
next lane and may not warn you.
display (if equipped) will blink and the
steering wheel will vibrate.
• When the hazard warning flasher is on,
the collision warning by the turn signal
• Emergency braking will be assisted to
will not operate.
help prevent collision with the vehicle
in the blind spot area.
• Blind-Spot Collision-Avoidance Assist
will operate when your vehicle speed is
Information
below 2 mph (3 km/h) and the speed of
The images and colors in the instrument
the vehicle in the blind spot area is
cluster may differ depending on the
above 3 mph (5 km/h).
instrument cluster type or theme selected
from the settings menu.
7-40
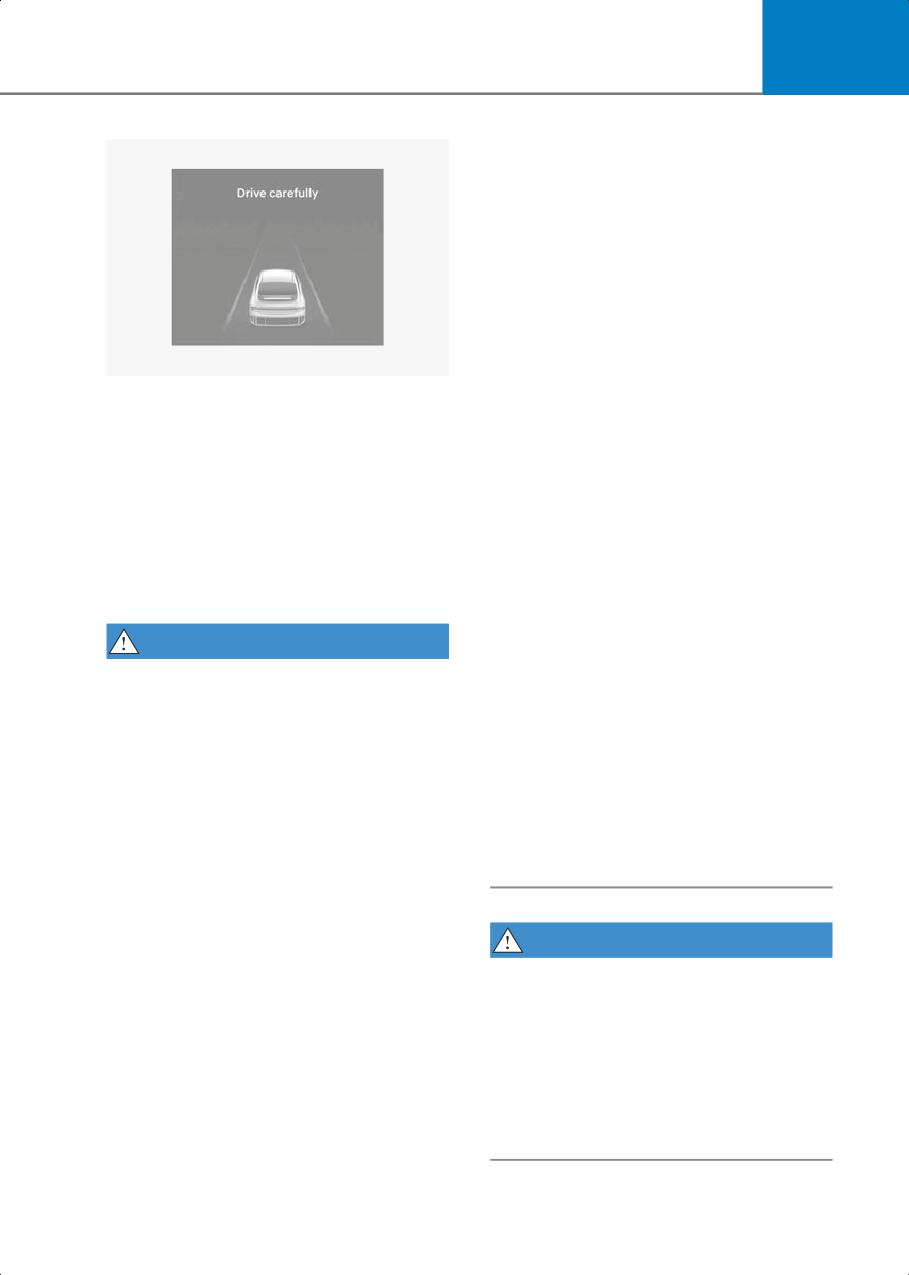
7
•
When Blind-Spot Collision-Avoidance
Assist is operating, braking control by
the function will automatically cancel
when the driver excessively depresses
the accelerator pedal or sharply steers
the vehicle.
•
During Blind-Spot Collision-Avoidance
Assist operation, the vehicle may stop
suddenly injuring passengers and
shifting loose objects. Always have the
seat belt on and keep loose objects
B7001504
secured.
• When the vehicle is stopped due to
•
Even if there is a problem with
emergency braking, the ‘Drive
Blind-Spot Collision-Avoidance Assist,
carefully’ warning message will appear
the vehicle's basic braking will function
on the instrument cluster.
normally.
For your safety, the driver should
•
Blind-Spot Collision-Avoidance Assist
depress the brake pedal immediately
does not operate in all situations and
and check the surroundings.
cannot avoid all collisions.
• Brake control will end after the vehicle
•
Blind-Spot Collision-Avoidance Assist
is stopped by emergency braking for
may warn the driver late or may not
about 2 seconds.
warn the driver depending on the road
and driving conditions.
WARNING
•
Driver should maintain control of the
Take the following precautions when
vehicle at all times. Do not depend on
using Blind-Spot Collision-Avoidance
Blind-Spot Collision-Avoidance Assist.
Assist:
Maintain a safe braking distance, and if
necessary, depress the brake pedal to
• For your safety, only change the
reduce driving speed or to stop the
Settings after parking the vehicle at a
vehicle.
safe location.
•
Never operate Blind-Spot
• If any other system’s warning message
Collision-Avoidance Assist on people,
is displayed or audible warning is
animal, objects, etc. It may cause
generated, Blind-Spot
serious injury or death.
Collision-Avoidance Assist’s warning
message may not be displayed and
audible warning may not be generated.
• You may not hear the warning sound of
WARNING
Blind-Spot Collision-Avoidance Assist if
The brake control may not operate
the surrounding is noisy.
properly depending on the status of ESC
• Blind-Spot Collision-Avoidance Assist
(Electronic Stability Control).
may not operate if the driver applies the
There will only be a warning when:
brake pedal to avoid a collision.
• The ESC (Electronic Stability Control)
warning light is on
• ESC (Electronic Stability Control) is
engaged in a different function
7-41
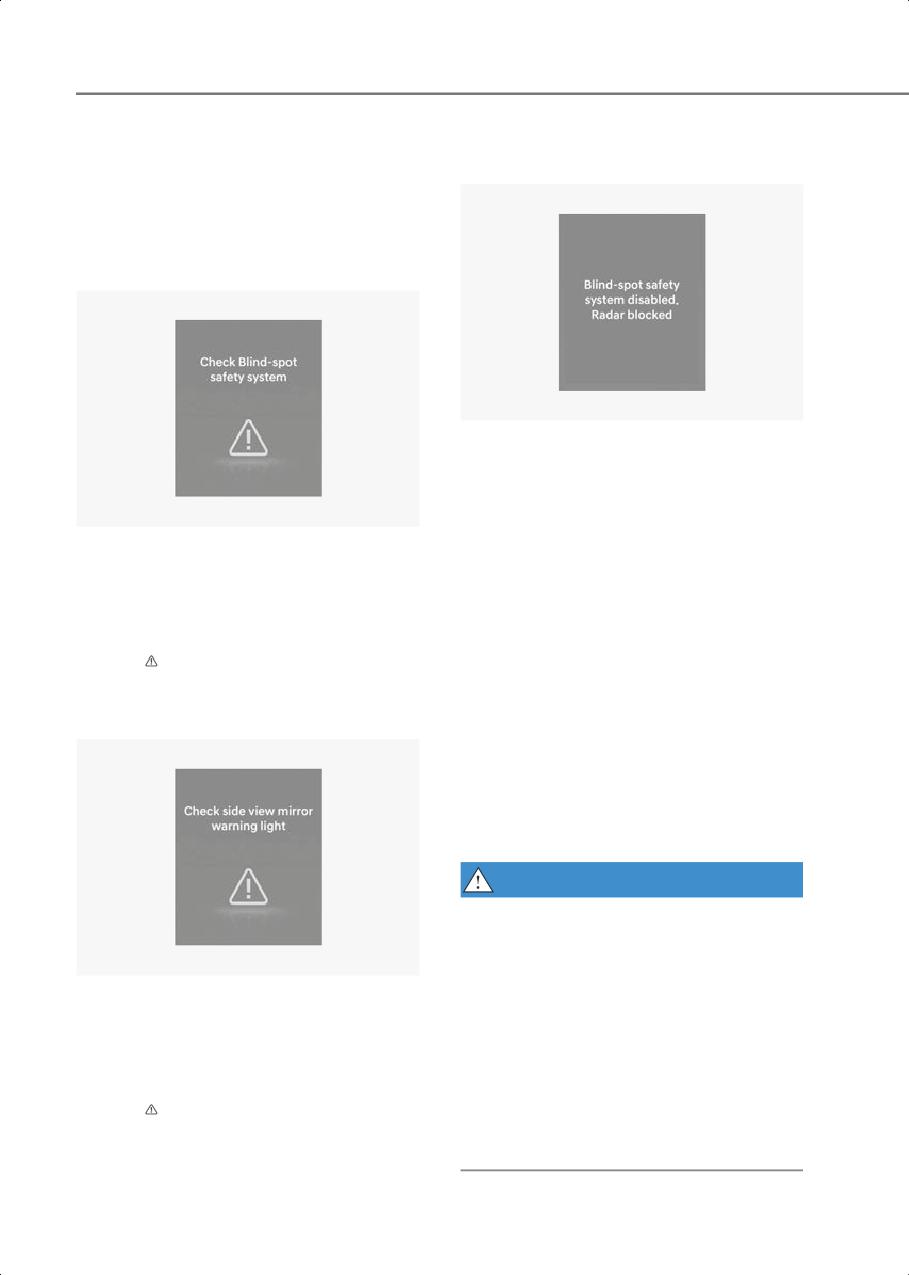
Driver Assistance System
Blind-Spot
Blind-Spot Collision-Avoidance
Assist disabled
Collision-Avoidance Assist
Malfunction and Limitations
Blind-Spot Collision-Avoidance
Assist malfunction
B7001603
When the rear bumper around the rear
corner radar or sensor is covered with
foreign material, such as snow or rain, or
installing a trailer or carrier, it can reduce
B7001601
the detecting performance and
When Blind-Spot Collision-Avoidance
temporarily limit or disable Blind-Spot
Assist is not working properly, the ‘Check
Collision-Avoidance Assist.
Blind-spot safety system' warning
If this occurs, the 'Blind-Spot Safety
message will appear on the instrument
system disabled. Radar blocked'
cluster for several seconds, and the
warning message will appear on the
master (
) warning light will illuminate on
instrument cluster.
the instrument cluster. If this occurs, have
Blind-Spot Collision-Avoidance Assist will
the vehicle inspected by an authorized
operate properly when such foreign
HYUNDAI dealer.
material or trailer, etc., is removed, and
then the vehicle is restarted.
If Blind-Spot Collision-Avoidance Assist
does not operate properly after it is
removed, have the vehicle inspected by
an authorized HYUNDAI dealer.
WARNING
• Even though the warning message
does not appear on the instrument
cluster, Blind-Spot Collision-Avoidance
B7001602
Assist may not properly operate.
When the side view mirror warning light is
• Blind-Spot Collision-Avoidance Assist
not working properly, the 'Check side
may not properly operate in an area (for
view mirror warning light' warning
example, open terrain) where any
message will appear on the instrument
objects are not detected right after the
cluster for several seconds, and the
vehicle is turned on, or when the
master (
) warning light will illuminate on
detecting sensor is blocked with
the instrument cluster. If this occurs, have
foreign material right after the vehicle
the vehicle inspected by an authorized
is turned on.
HYUNDAI dealer.
7-42
7
• The speed of the other vehicle is very
CAUTION
fast that it passes by your vehicle in a
Turn off Blind-Spot Collision-Avoidance
short time
Assist to install or remove a trailer, carrier,
• Your vehicle passes by the other vehicle
or another attachment. Turn on
• Your vehicle changes lane
Blind-Spot Collision-Avoidance Assist
• Your vehicle has started at the same
when finished.
time as the vehicle next to you and has
accelerated
Limitations of Blind-Spot
• The vehicle in the next lane moves two
Collision-Avoidance Assist
lanes away from you, or when the
Blind-Spot Collision-Avoidance Assist
vehicle two lanes away moves to the
may not operate properly, or it may
next lane from you
operate unexpectedly under the
• A trailer, carrier or other attachment is
following circumstances:
installed around the rear corner radar
•
There is inclement weather, such as
• The bumper around the rear corner
heavy snow, heavy rain, etc.
radar is covered with objects, such as a
•
The rear corner radar is covered with
bumper sticker, bumper guard, bike
snow, rain, dirt, etc.
rack, etc.
•
The temperature around the rear corner
• The bumper around the rear corner
radar is high or low
radar is impacted, damaged or the
radar is out of position
•
Driving on a highway ramp
• Your vehicle height is low or high due to
•
The road pavement (or the peripheral
heavy loads, abnormal tire pressure,
ground) abnormally contains metallic
etc.
components (for example, possibly due
to subway construction)
Blind-Spot Collision-Avoidance Assist
may not operate properly, or it may
•
There is a fixed object near the vehicle,
operate unexpectedly when the following
such as sound barriers, guardrails,
objects are detected:
central dividers, entry barriers, street
lamps, signs, tunnels, walls, etc.
• A motorcycle or bicycle is detected
(including double structures)
• A vehicle such as a flat trailer is
•
Driving in vast areas where there are
detected
few vehicles or structures (for example,
• A big vehicle such as a bus or truck is
desert, meadow, suburb, etc.)
detected
•
Driving through a narrow road where
• A moving obstacle such as a
trees or grass are overgrown
pedestrian, animal, shopping cart or a
•
Driving on a wet road surface, such as a
baby stroller is detected
puddle on the road
• A vehicle with low height such as a
•
The other vehicle drives very close
sports car is detected
behind your vehicle, or the other
vehicle passes by your vehicle in close
proximity
7-43
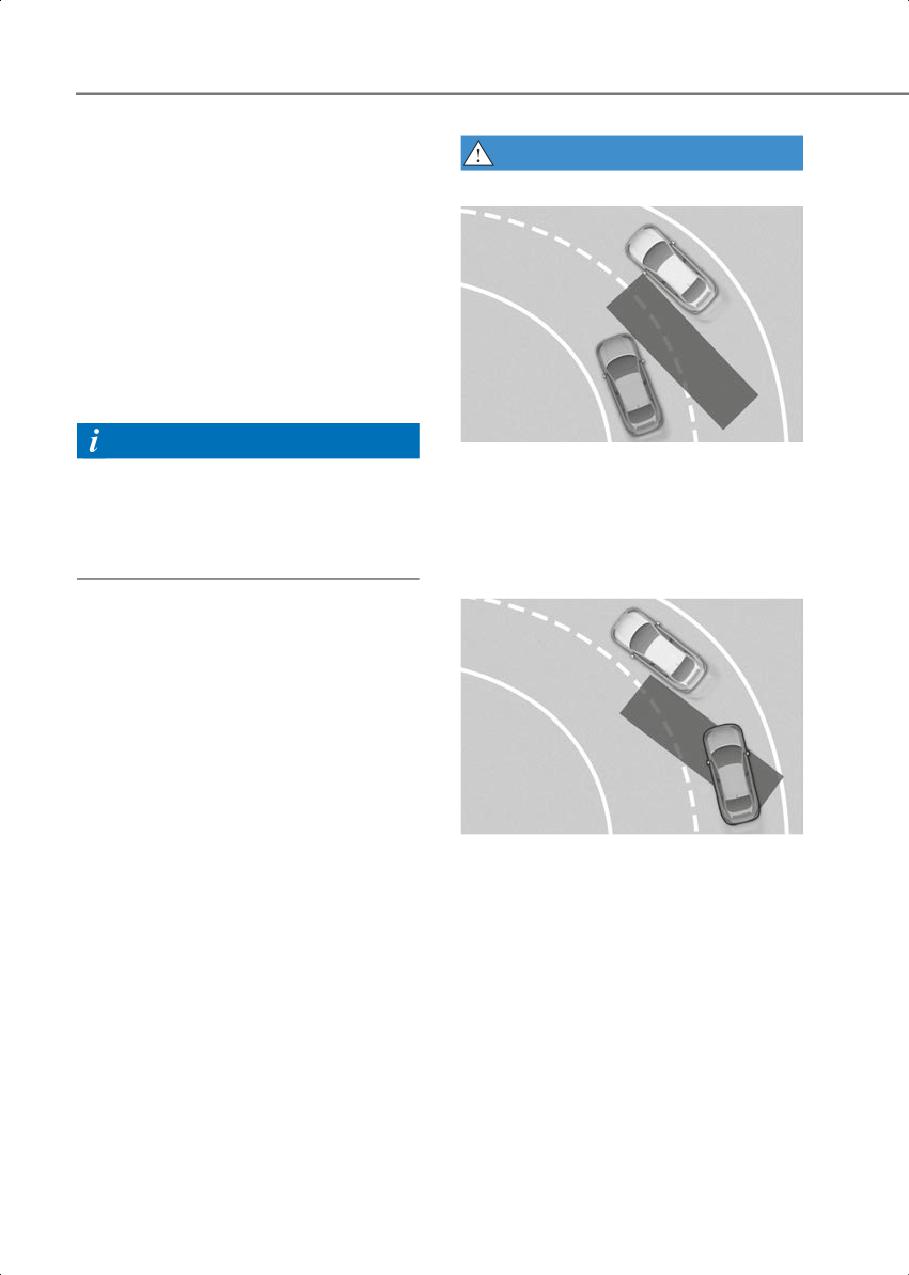
Driver Assistance System
Braking control may not work, driver’s
WARNING
attention is required in the following
circumstances:
• Driving on a curved road
• The vehicle severely vibrates while
driving over a bumpy road, uneven road
or concrete patch
• Driving on a slippery surface due to
snow, water puddle, ice, etc.
• The tire pressure is low or a tire is
damaged
• The braking system has been modified
• The vehicle makes abrupt lane changes
Information
B7001609
Blind-Spot Collision-Avoidance Assist
For more information on the limitations of
may not operate properly when driving
the front view camera, refer to the
on a curved road. The function may not
“Forward Collision-Avoidance Assist
detect the vehicle in the next lane.
(FCA)” and “Lane Keeping Assist (LKA)”
section in this chapter.
Always pay attention to road and
driving conditions while driving.
B7001610
Blind-Spot Collision-Avoidance Assist
may not operate properly when driving
on a curved road. The function may
recognize a vehicle in the same lane.
Always pay attention to road and
driving conditions while driving.
7-44
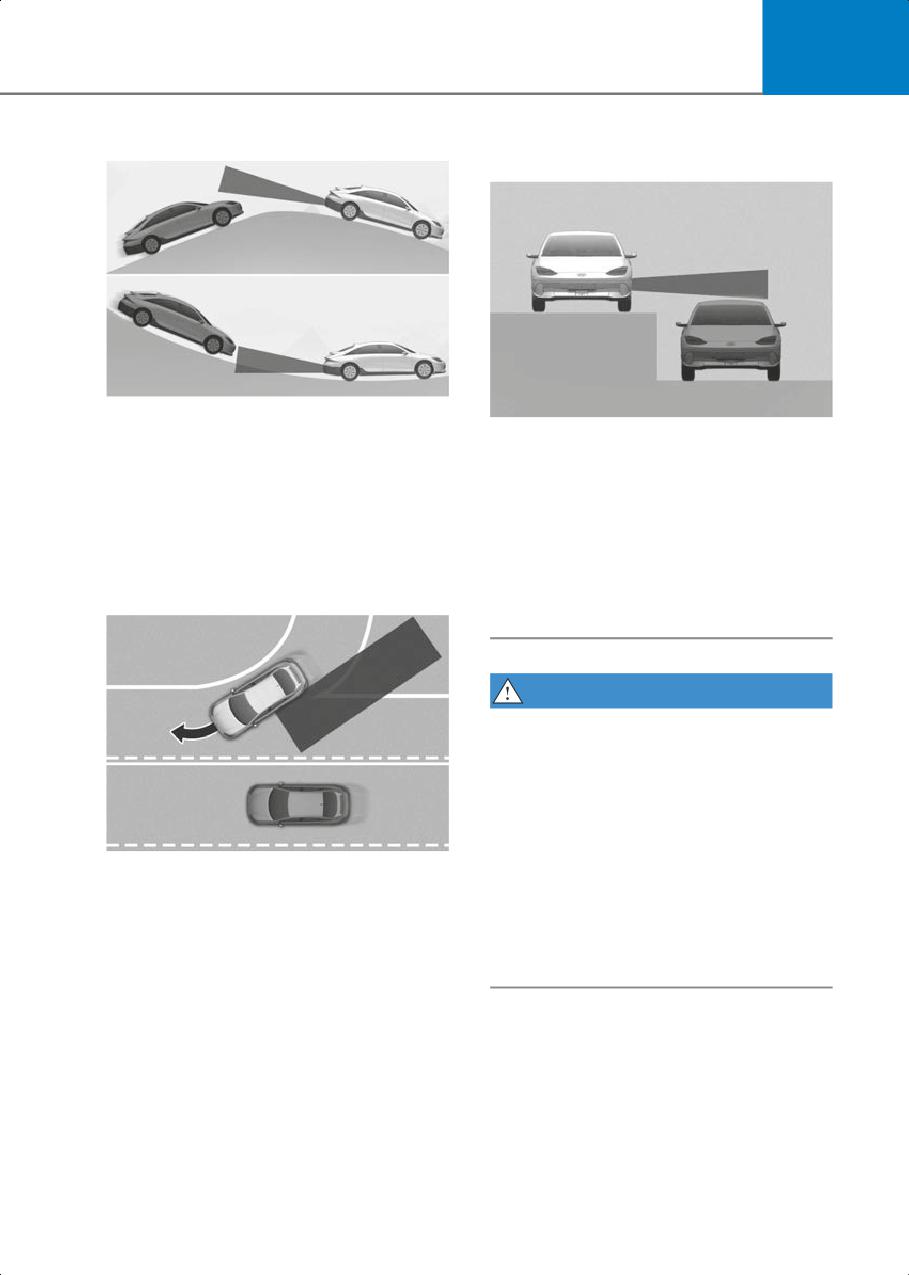
7
• Driving on an inclined road
• Driving where the heights of the lanes
are different
B7001614
Blind-Spot Collision-Avoidance Assist
B7001616
may not operate properly when driving
Blind-Spot Collision-Avoidance Assist
on a slope. The function may not detect
may not operate properly when driving
the vehicle in the next lane or may
where the heights of the lanes are
incorrectly detect the ground or
different. The function may not detect
structure. Always pay attention to road
the vehicle on a road with different lane
and driving conditions while driving.
heights (underpass joining section,
grade separated intersections, etc.).
• Driving where the road is
merging/dividing
Always pay attention to road and
driving conditions while driving.
WARNING
• When you are towing a trailer or
another vehicle, make sure that you
turn off Blind-Spot Collision-Avoidance
Assist.
• Blind-Spot Collision-Avoidance Assist
may not operate properly if interfered
B7001615
by strong electromagnetic waves.
Blind-Spot Collision-Avoidance Assist
• Blind-Spot Collision-Avoidance Assist
may not operate properly when driving
may not operate for 15 seconds after
where the road merges or divides. The
the vehicle is started, or the front view
function may not detect the vehicle in
camera or rear corner radars are
the next lane.
initialized.
Always pay attention to road and
driving conditions while driving.
7-45
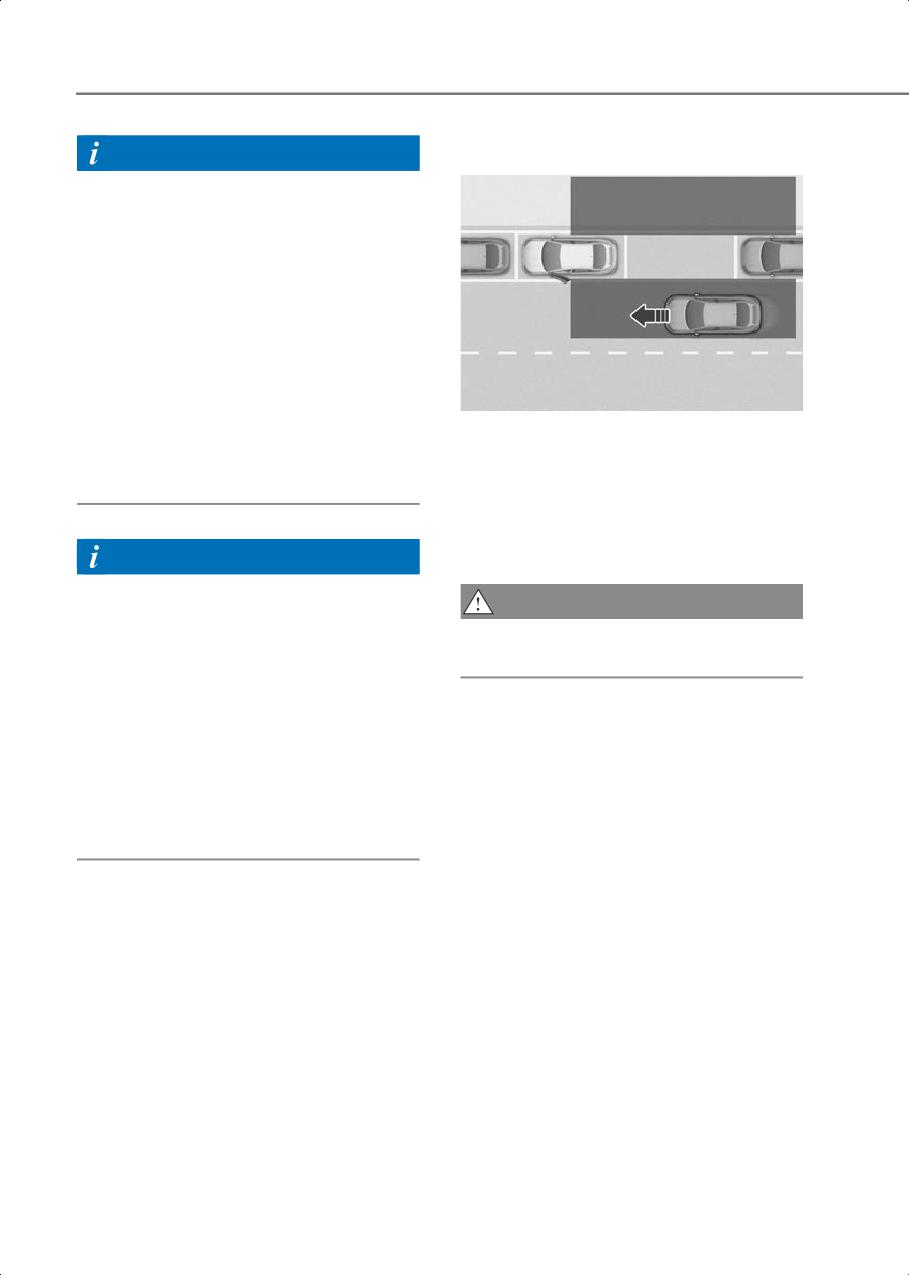
Driver Assistance System
Safe Exit Warning (SEW)
Information
This device complies with Part 15 of the
FCC rules.
Operation is subject to the following three
conditions:
1. This device may not cause harmful
interference, and
2. This device must accept any
interference received, including
interference that may cause undesired
operation.
3. Changes or modifications not expressly
B7001801
approved by the party responsible for
While your vehicle is stopped, and if Safe
compliance could void the user’s
Exit Warning detects a vehicle
authority to operate the device.
approaching the rear corner of your
vehicle and a passenger opens a door,
Safe Exit Warning may warn you with a
warning message and a warning sound to
Information
help avoid a collision.
Radio frequency radiation exposure
CAUTION
information:
This equipment complies with FCC
Warning timing may vary depending on
radiation exposure limits set forth for an
the speed of the approaching vehicle.
uncontrolled environment.
This equipment should be installed and
operated with minimum distance of 8 in.
(20 cm) between the radiator (antenna)
and your body.
This transmitter must not be co-located
or operating in conjunction with any other
antenna or transmitter.
7-46
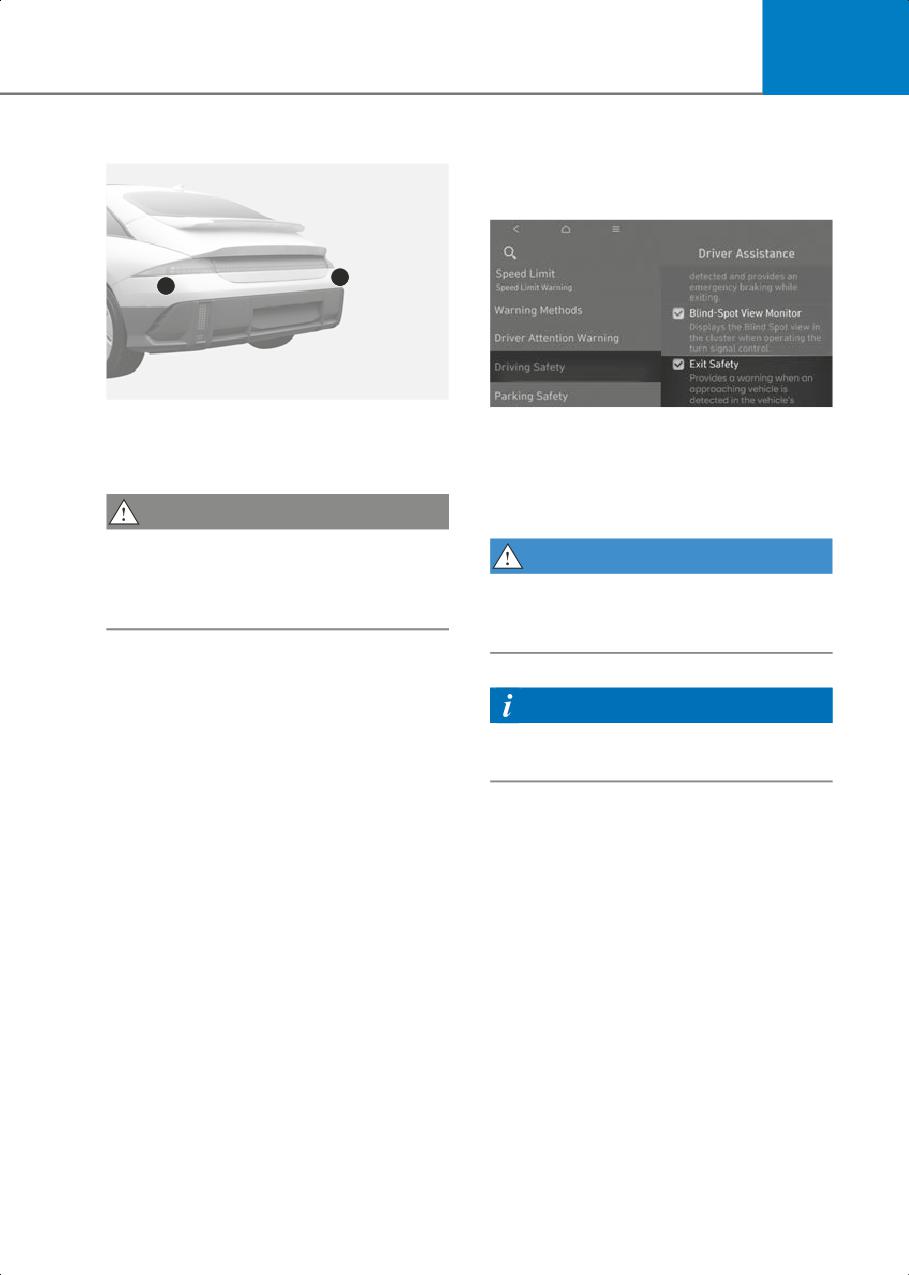
7
Detecting sensor
Safe Exit Warning Settings
Exit Safety
1
1
B7001802
B7001901
(1) Rear corner radar
With the vehicle on, select Setup >
Refer to the picture above for the detailed
Vehicle > Driver Assistance > Driving
location of the detecting sensors.
Safety > Exit Safety from the Settings
menu to turn on Safe Exit Warning and
CAUTION
deselect to turn off the function.
For more information on the precautions
WARNING
of the rear corner radars, refer to the
“Blind-Spot Collision-Avoidance Assist
The driver should always be aware of the
(BCA)” section in this chapter.
surroundings. If Exit Safety is deselected,
Safe Exit Warning cannot assist you.
Information
If the vehicle is restarted, Safe Exit
Warning will maintain the last setting.
7-47