Hyundai Ioniq 5 (2024 year). Manual in english - page 6
Driver Assistance System
Highway Lane Change Assist operating
Information
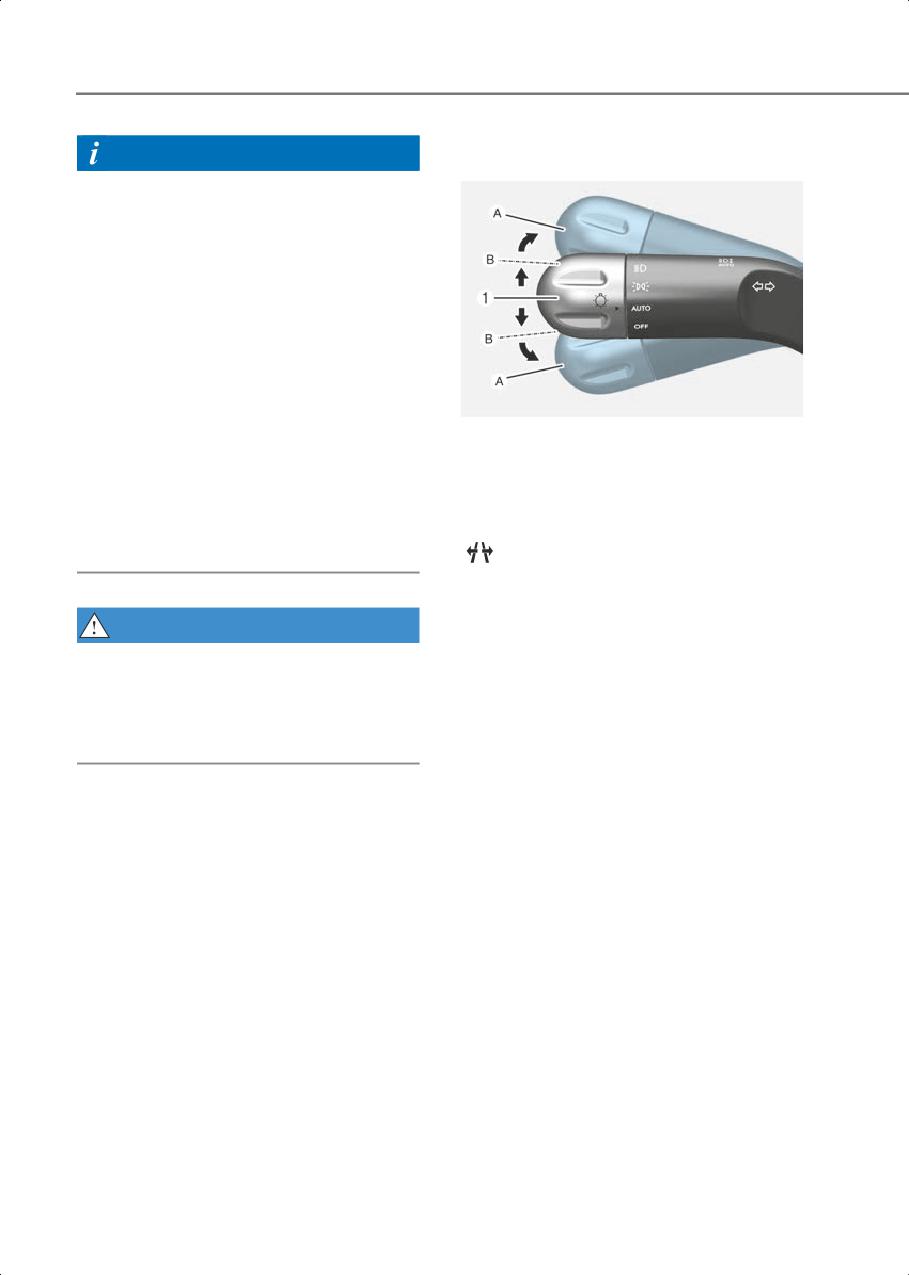
Turn signal lever
• While Lane Change Assist function is
turned on (indicator on), Lane
Following Assist will not cancel even if
the turn signal indicator or hazard
warning flasher is operating.
• Lane Change Assist function turns off
automatically when driven in the
following road conditions:
- One driving lane
- A road with no structure, such as a
medium strip, guardrails, etc.
ONE1072276N
- There is a pedestrian or cyclist on the
(1)
: Center
road ahead
Highway Lane Change Assist function will
• When the function is in the ready state,
operate, when you push the turn signal
and vehicle speed is below 35 mph (55
lever up or down to the A or B position
km/h), the function will change to the
while the function is in the ready state
standby state.
(
indicator is green), and all of the
following conditions are satisfied:
• The driver has his/her hand on the
steering wheel
WARNING
• There is no collision risk in the direction
When Highway Lane Change Assist
of lane change
function turns off while operating,
steering assist will be temporarily
• There is a single dotted lane line in the
canceled. Always be cautious while
direction of lane change
driving.
• There are no Forward
Collision-Avoidance Assist and Blind
Spot Collision-Avoidance Assist
warnings
• The vehicle is driven in the middle of
the lane (should not be driving close to
one side of the lane)
• The road you are driving on, or the road
you are about to change lane is a road
that the function can operate
7-102

7
Highway Lane Change Assist cancel
Information
The function will be canceled when:
• When the turn signal lever is placed at A
•
When the turn signal lever is moved to
When the turn signal lever is placed at A
A and placed in neutral before stepping
position, the Highway Lane Change
on the lane while the Highway Lane
Assist function is performed. After that,
Change Assist function is operating
if the turn signal lever is placed in
•
The turn signal lever is turned on in the
neutral, Highway Lane Change Assist
opposite direction of lane change
function is canceled before stepping on
•
The steering wheel is steered sharply
the lane.
The Highway Lane Change Assist
WARNING
function is not canceled after stepping
on the lane, but when the lane change
•
While Highway Driving Assist is
is completed, it is canceled and the turn
operating, the function will cancel if
signal turns off.
one of the following occurs:
• When the turn signal lever is placed at B
-
Highway Driving Assist is turned off
position for a certain period of time, the
-
Lane Following Assist or Smart Cruise
green arrow will appear. At this time,
Control is turned off or temporarily
even when the lever is released and
canceled
returns to it’s original position (1), lane
-
Hands-off warning message is
change will still be assisted.
displayed on the cluster
While lane change is being made by the
-
The hazard warning flasher is turned
function, the turn signal indicator will
on
blink even when the turn signal lever is
not held, and the turn signal indicator
-
Forward Collision-Avoidance Assist
will turn off when lane change is
or Blind-Spot Collision-Avoidance
complete.
Assist warning message is displayed
-
Possible collision is detected in the
next lane, even though there are no
Highway Lane Change Assist standby
Forward Collision-Avoidance Assist
Highway Lane Change Assist function will
and Blind Spot Collision-Avoidance
be in the standby state when one of the
Assist warning
ready state condition is not satisfied, or
-
The target lane to make a lane
when entering or driving on one of the
change disappears
following roads:
-
The target lane to make a lane
• Road within a certain distance from the
change is not detected
tollgate on the main road of the
-
There is a problem with turn signal
highway
lamps
• The road ahead ends without an
interchange or junction
• Road with sharp curves
• Road with narrow lanes
7-103
Driver Assistance System
- Highway Lane Change Assist
Highway Driving Assist
function is off (The function turns off
Malfunction and Limitation
when the function is turned off from
the settings menu, when the road
changes to a one-way road, when
Highway Driving Assist malfunction
there is a intersection or crosswalk
ahead, when you enter a road with no
structure, such as a medium strip,
guardrail, etc., or when there is a
pedestrian or cyclist on the driving
lane.)
- Your vehicle speed is below 35 mph
(55 km/h)
• While the function is operating, when
the function is canceled, depending on
the driving conditions, the vehicle may
drive to the middle of the driving lane or
OTM070120N
steering assist may stop. Always pay
attention to road and driving conditions
while driving.
• The function may not operate properly
on roads with pedestrians or cyclists,
such as an intersection or crosswalk.
Always pay attention to road and
driving conditions while driving.
Information
OJX1079105L
The images or colors may be displayed
When Highway Driving Assist or Highway
differently depending on the
Lane Change function is not working
specifications of the instrument panel or
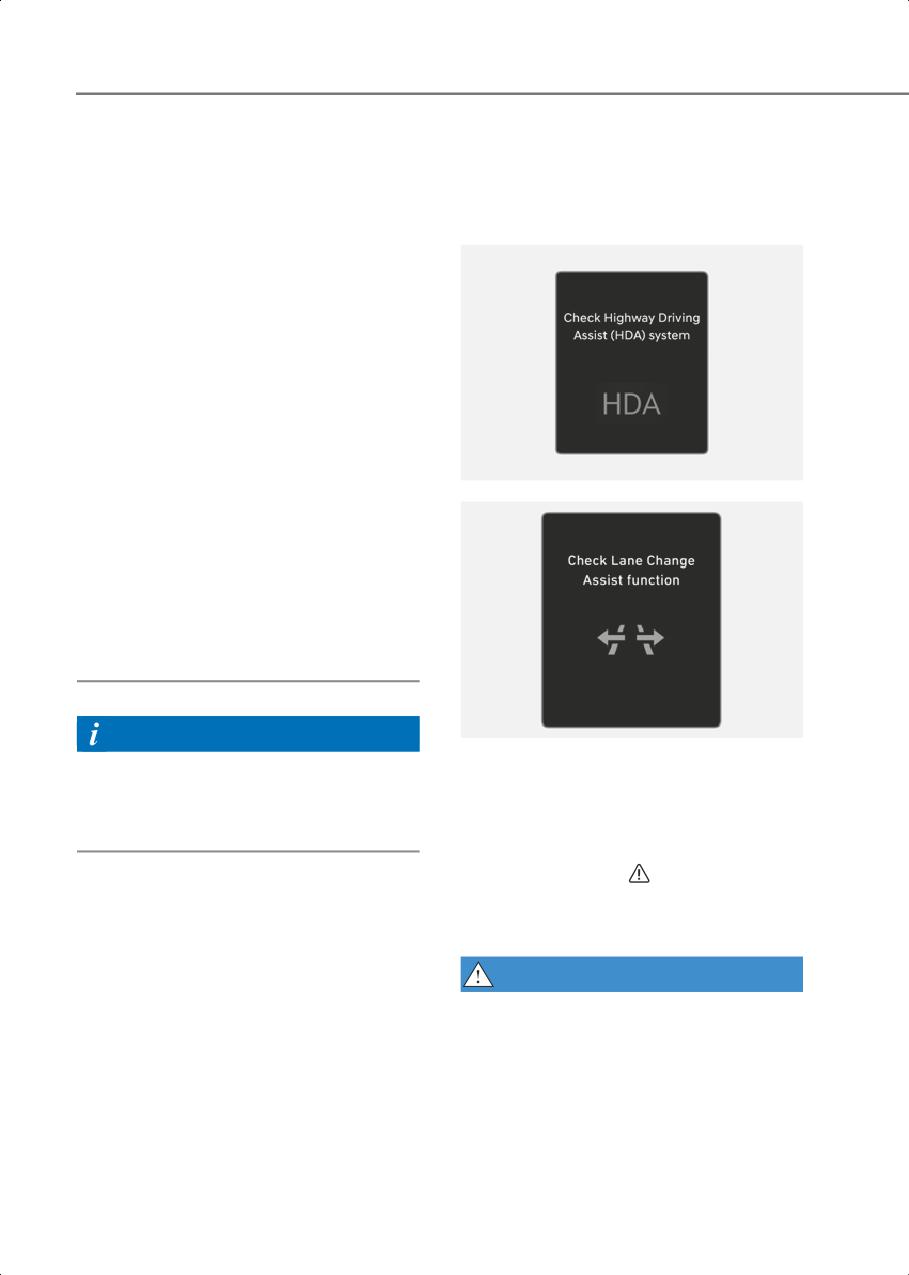
properly, the ‘Check Highway Driving
theme.
Assist (HDA) system’ or ‘Check Lane
Change Assist function’ warning message
will appear, and the
warning light will
illuminate on the cluster. Have the vehicle
be inspected by an authorized HYUNDAI
dealer.
WARNING
• The driver is responsible for controlling
the vehicle for safe driving.
• Always have your hands on the steering
wheel while driving.
7-104
7
•
Highway Driving Assist is a
• If the vehicle is driven at high speed
supplemental function that assists the
above a certain speed at a curve, your
driver in driving the vehicle and is not a
vehicle may drive to one side or may
complete autonomous driving system.
depart from the driving lane.
Always check road conditions, and if
• When you are towing a trailer or
necessary, take appropriate actions to
another vehicle, turn off Highway
drive safely.
Driving Assist for safety reasons.
•
Always have your eyes on the road, and
• The hands-off warning message may
it is the responsibility of the driver to
appear early or late depending on how
avoid violating traffic laws. The vehicle
the steering wheel is held or road
manufacturer is not responsible for any
conditions. Always have your hands on
traffic violation or accidents caused by
the steering wheel while driving.
the driver.
• For your safety, please read the owner's
•
Highway Driving Assist may not be able
manual before using the Highway
to recognize all traffic situations.
Driving Assist.
Highway Driving Assist may not detect
• Highway Driving Assist will not operate
possible collisions due to limitations of
when the vehicle is started, or when the
the function. Always be aware of the
detecting sensors or navigation is being
limitations of the function. Obsatcles
initialized.
(vehicles, motorcycles, bicycles,
pedestrians, unspecified objects,
structures, etc.) that may collide with a
Limitations of Highway Driving
vehicle may not be detected.
Assist
•
Highway Driving Assist will turn off
Highway Driving Assist and Highway Lane
automatically under the following
Change Assist (if equipped) may not
situations:
operate normally, or may not operate
- Driving on roads that Highway
under the following circumstances:
Driving Assist does not operate, such
• The map information and the actual
as a rest area, intersection, junction,
road is different because the navigation
etc.
is not updated
- The navigation does not operate
• The map information and the actual
properly such as when the navigation
road is different because of real-time
is being updated or restarted
GPS data or map information error
•
Highway Driving Assist may
• The infotainment system is overloaded
inadvertently operate or turn off
by simultaneously performing
depending on road conditions
functions such as route search, video
(navigation information) and
playback, voice recognition, etc.
surroundings.
• GPS signals are blocked in areas such as
•
Lane Following Assist function may be
a tunnel
temporarily disabled when the front
view camera cannot detect lanes
• The driver goes off course or the route
properly or the hands-off warning is on.
to the destination is changed or
canceled by resetting the navigation
•
You may not hear the warning sound of
Highway Driving Assist if the
• The vehicle enters a service station or
surrounding is noisy.
rest area
• Android Auto or Car Play is operating
7-105
Driver Assistance System
• The navigation cannot detect the
Rear View Monitor (RVM)
current vehicle position (for example,
if equipped
elevated roads including overpass
adjacent to general roads or nearby
roads exist in a parallel way)
• White single dotted lane line or road
edge cannot be detected
• The road is temporarily controlled due
to construction, etc.
• There is no structure, such as a medium
strip, guardrails, etc., on the road
• There is a changeable lane in the
direction of lane change
ONE1071037N
Information
For more details on the limitations of the
front view camera, front radar, front
corner radar and rear corner radar, refer
to “Forward Collision-Avoidance Assist
(FCA)” section in this chapter.
ONE1071039
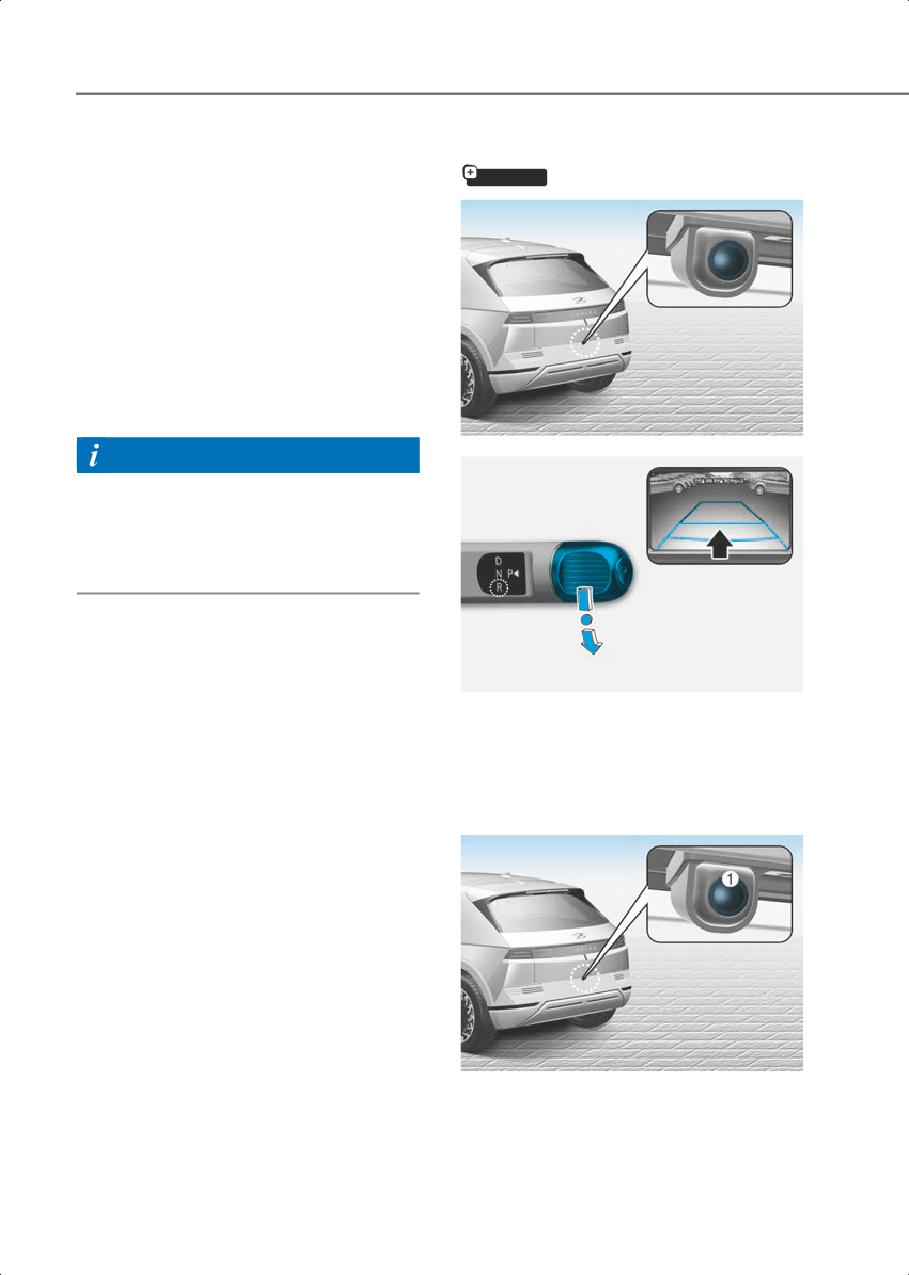
Rear View Monitor shows the area behind
the vehicle to assist you when parking or
backing up.
Detecting sensor
ONE1071038N
(1)
: Rear view camera
Refer to the picture above for the detailed
location of the detecting sensor.
7-106
7
Rear View Monitor Settings
Camera settings
Warning Methods
ONE1071214L
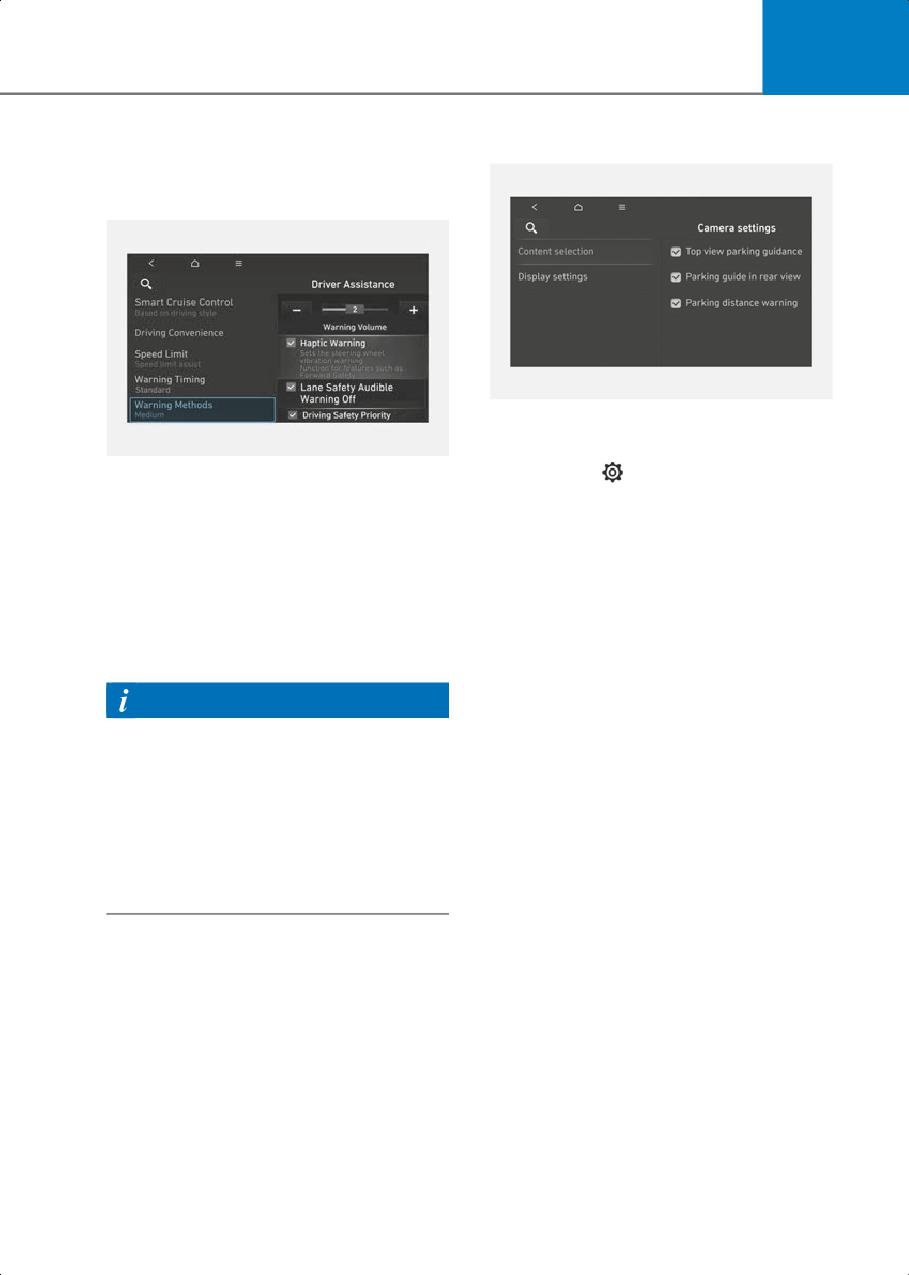
• You can change Rear View Monitor
‘Display Contents’ by touching the
ONE1073352N
setup icon (
) on the screen while Rear
The Warning Methods can be set with the
View Monitor is operating, or selecting
vehicle on.
Driver Assistance > Parking Safety >
Select Set up > Vehicle > Driver
Camera Settings from the Settings
Assistance > Warning Methods from the
menu while the vehicle is on.
Settings menu in the infotainment system
• To use Rear View while Driving, select
to change the following settings:
Camera Settings > Display Contents >
• Parking Safety Priority: Lowers all other
Keeps Rear Camera from the Settings
audio volumes when Rear View Monitor
menu while the vehicle is on.
is active.
• In the Display Contents, you can
change setting for 'Rear View' and in
Information
the Display Settings, you can change
• If you change the Warning Methods, it
the screen's 'Brightness' and 'Contrast'.
can be applied to each function of the
driver assistance system. Please check
and change it in each function.
• If the vehicle is restarted, Warning
methods will maintain the last setting.
• The setting menu may not exist based
on vehicle specification.
7-107
Driver Assistance System
Rear View Monitor Operation
Extended Rear View function
The rear view will maintain showing on
the screen to help you when parking.
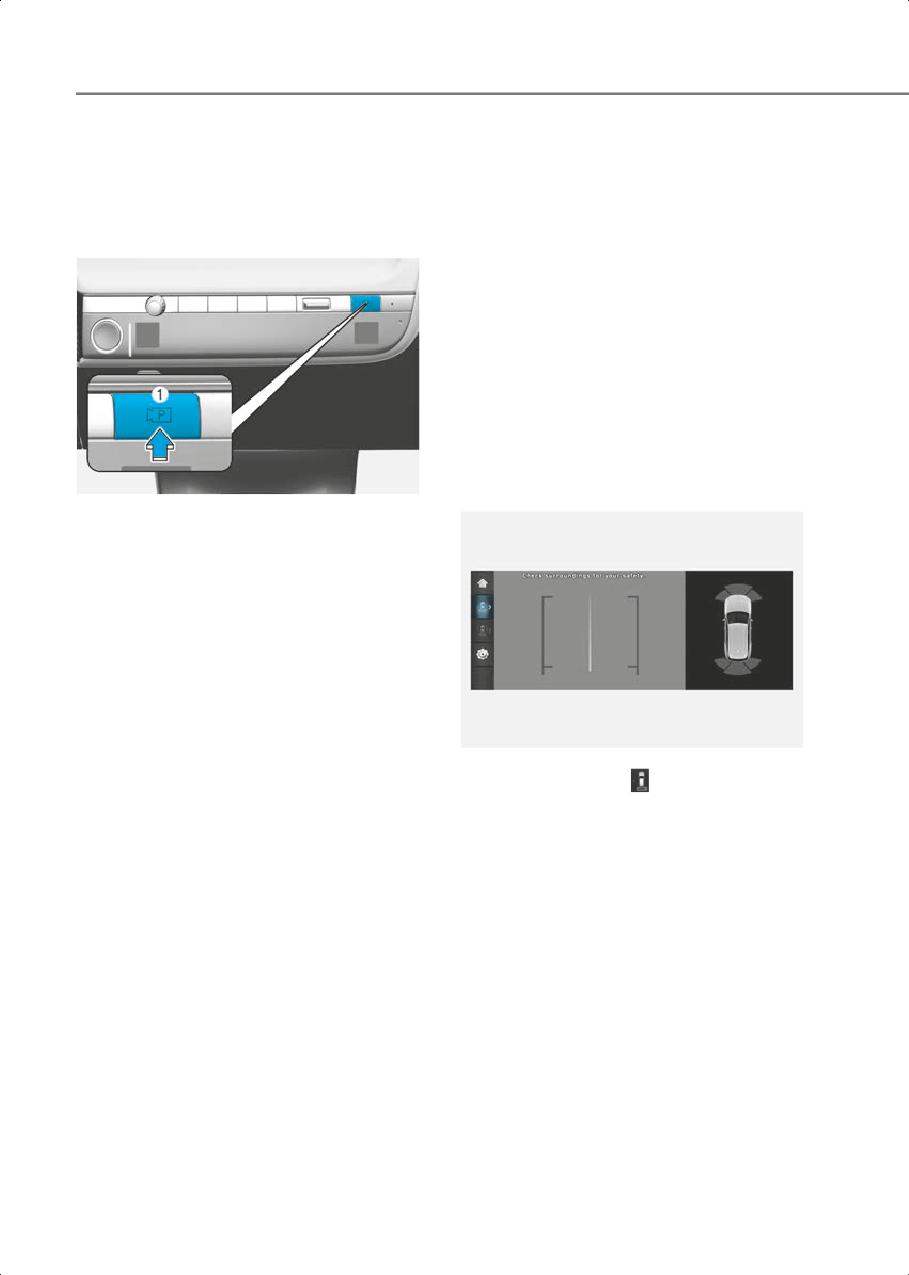
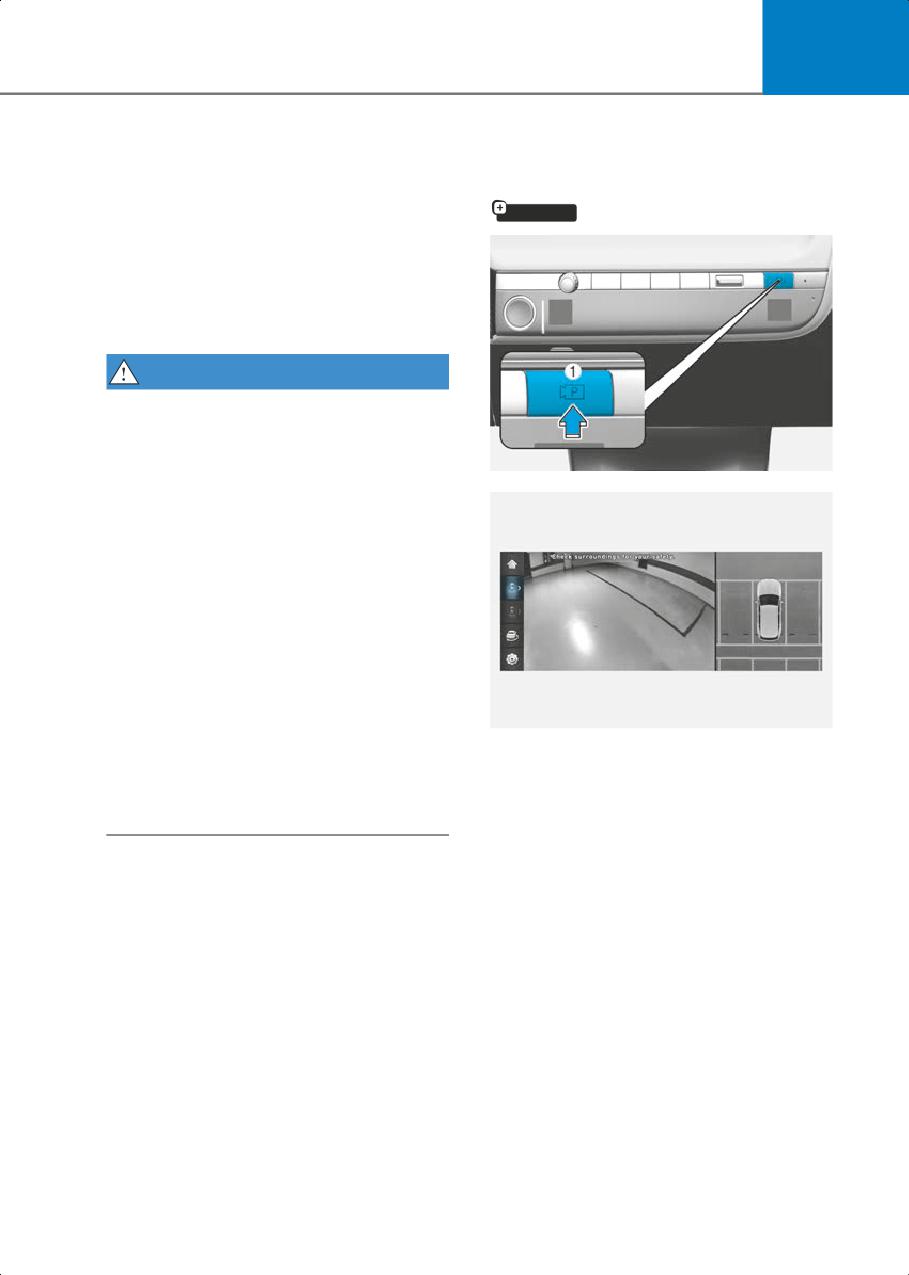
Operating button
Operating conditions
Parking/View button
Shift the gear from R (Reverse) to N
(Neutral) or D (Drive), the rear view will
appear on the screen.
Off conditions
• When vehicle speed is above 6 mph (10
km/h), the rear view will turn off.
• Shift the gear to P (Park), the rear view
will turn off.
Rear top view
ONE1071040
Press the Parking/View button (1) to turn
on Rear View Monitor.
Press the button again to turn off the
function.
Rear view
Operating conditions
• Shift the gear to R (Reverse), the image
will appear on the screen.
ONE1072250L
• Press the Parking/View button (1) while
the gear is in P (Park), the image will
When you touch the icon, the top view
appear on the screen.
is displayed on the screen and shows the
distance from the vehicle in the back of
Off conditions
your vehicle while parking.
• The rear view cannot be turned off
when the gear is in R (Reverse).
• Press the Parking/View button (1) again
while the gear is in P (Park) with the rear
view on the screen, the rear view will
turn off.
• Shift the gear from R (Reverse) to P
(Park), the rear view will turn off.
7-108
7
Rear View Monitor
Surround View Monitor
Malfunction and Limitations
(SVM)
if equipped
Rear View Monitor malfunction
When Rear View Monitor is not working
properly, or the screen flickers, or the
camera image does not display properly,
Have the vehicle be inspected by an
authorized HYUNDAI dealer.
WARNING
• The rear view camera does not cover
the complete area behind the vehicle.
The driver should always check the rear
area directly through the inside and
ONE1071040
outside side view mirror before parking
or backing up.
• The image shown on the screen may
differ from the actual distance of the
object. Make sure to directly check the
vehicle's surroundings for safety.
• Always keep the rear view camera lens
clean. If the lens is covered with foreign
material, it may adversely affect
camera performance and Rear View
Monitor may not operate properly.
However, do not use chemical solvents
OJK070203L
such as strong detergents containing
Surround View Monitor can assist in
high alkaline or volatile organic
parking by allowing the driver to see
solvents (gasoline, acetone, etc.). This
around the vehicle.
may damage the camera lens.
7-109
Driver Assistance System
Detecting sensor
Surround View Monitor
Settings
Camera settings
ONE1071042K
ONE1072252L
• You can change Surround View Monitor
‘Display Contents’ or ‘Display Settings’
by touching the setup icon (
) on the
screen while Surround View Monitor is
operating, or selecting Driver
Assistance > Parking Safety > Camera
Settings from the Settings menu while
ONE1071043N
the vehicle is on.
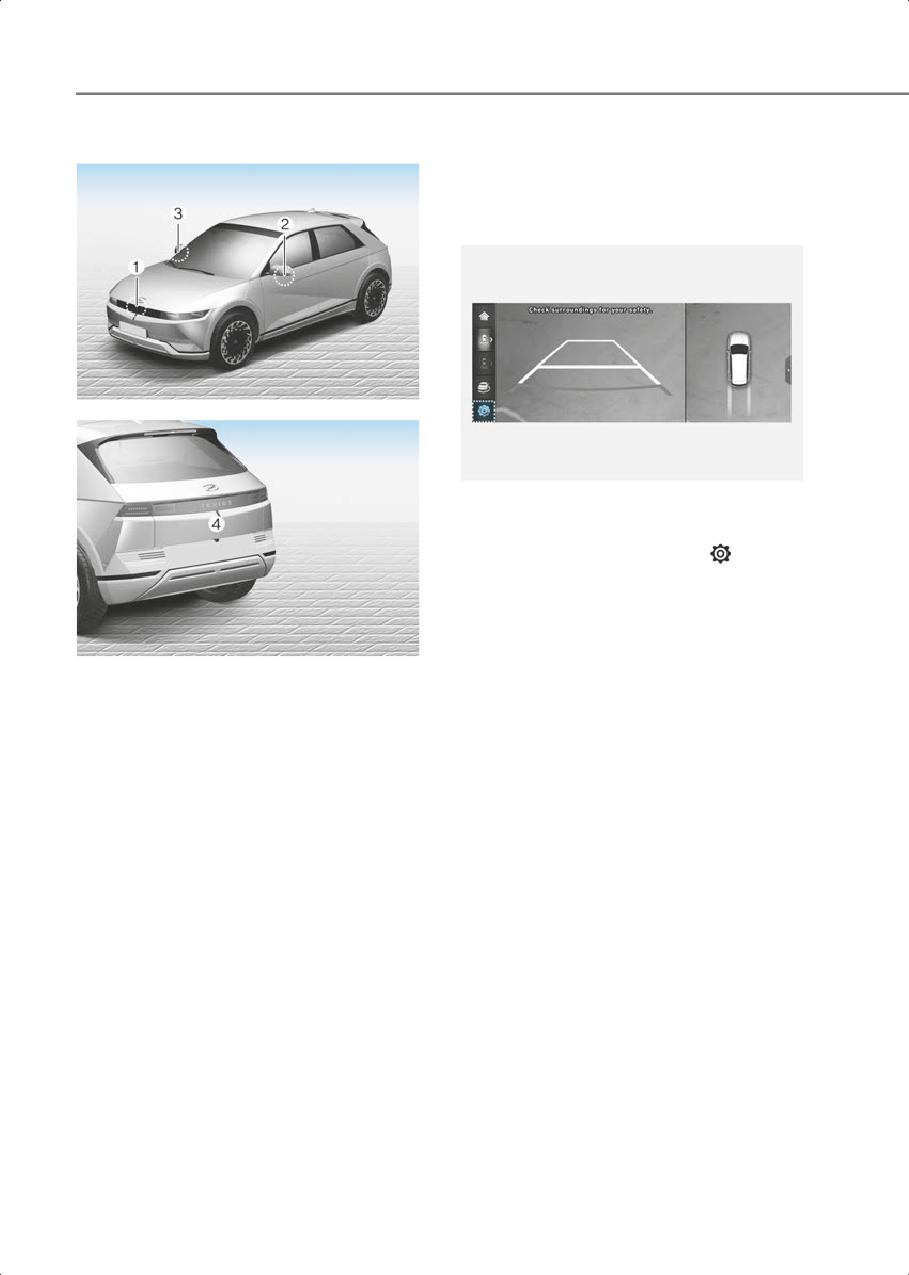
(1)
: Surround-front view camera,
• In the Display Contents, you can
(2) : Surround-side view camera (under
change settings for ‘Top View Parking
the side view mirror)
Guidance’, ‘Rear View Parking
(3) : Surround-side view camera (under
Guidance’ and ‘Parking Distance
the side view mirror)
Warning’.
(4) : Surround-rear view camera
Refer to the picture above for the detailed
location of the detecting sensors.
7-110
7
Top View Parking Guidance
Rear View Parking Guidance
Front top view
ONE1072252L
OJK070127L
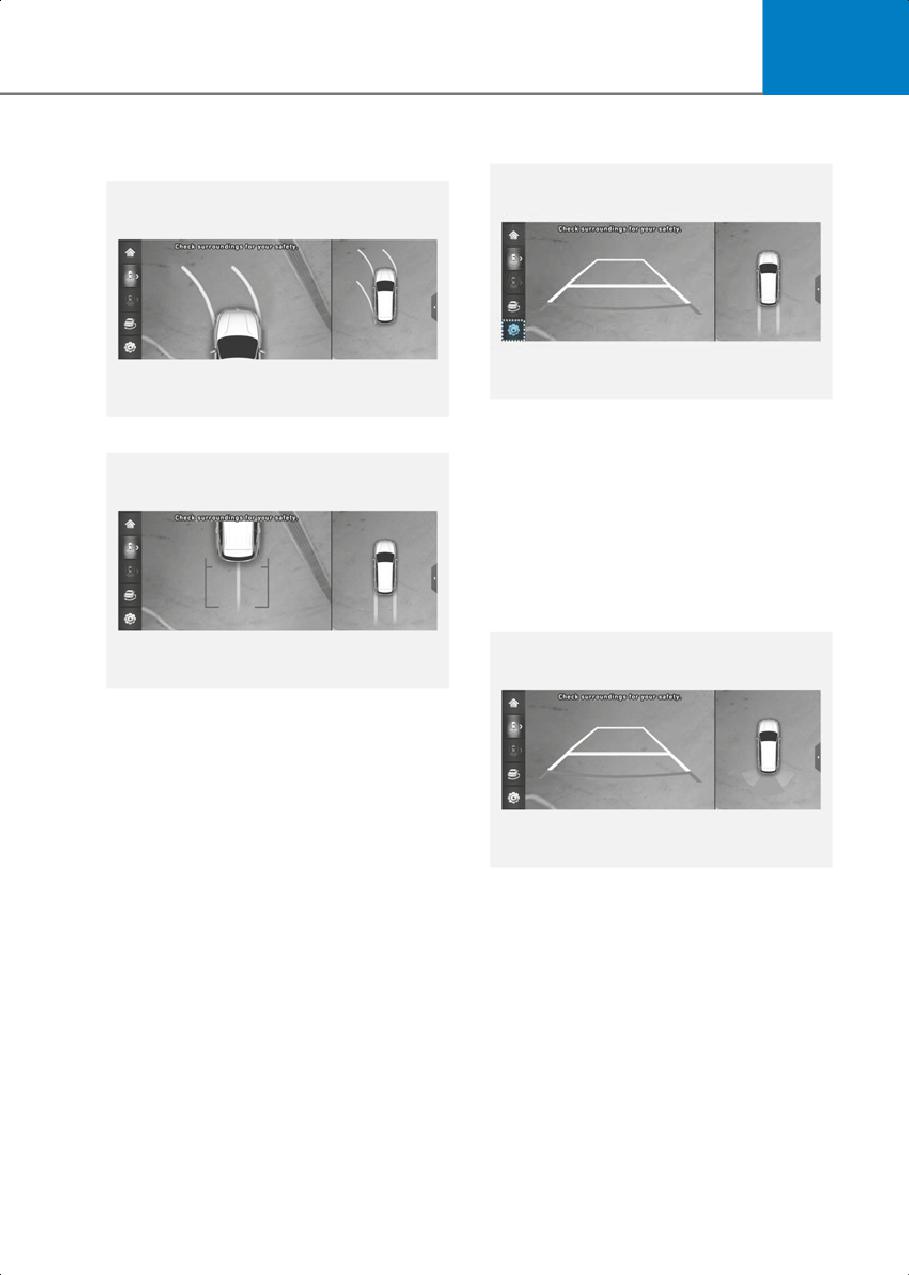
• When the ‘Rear View Parking Guidance’
Rear top view
is selected, parking guidance is
displayed in the rear view.
• The horizontal guideline of the Rear
View Parking Guidance shows the
distance of 1.6 ft. (0.5 m), 3.3 ft. (1 m)
and 7.6 ft. (2.3 m) from the vehicle.
Parking Distance Warning
OJK070128L
• When the ‘Top View Parking Guidance’
is selected, parking guidance is
displayed on the right side of the
Surround View Monitor screen.
• The ‘Top View Parking Guidance’ can be
connected with the front top view
parking guidance or the rear top view
parking guidance.
ONE1072345L
• When the ‘Parking Distance Warning’ is
selected, parking distance warning is
displayed on the right side of the
Surround View Monitor screen.
• The image will be displayed only when
Parking Distance Warning is warning
the driver.
7-111
Driver Assistance System
Warning Methods
Surround View Monitor
Operation
Operating button
ONE1073352N
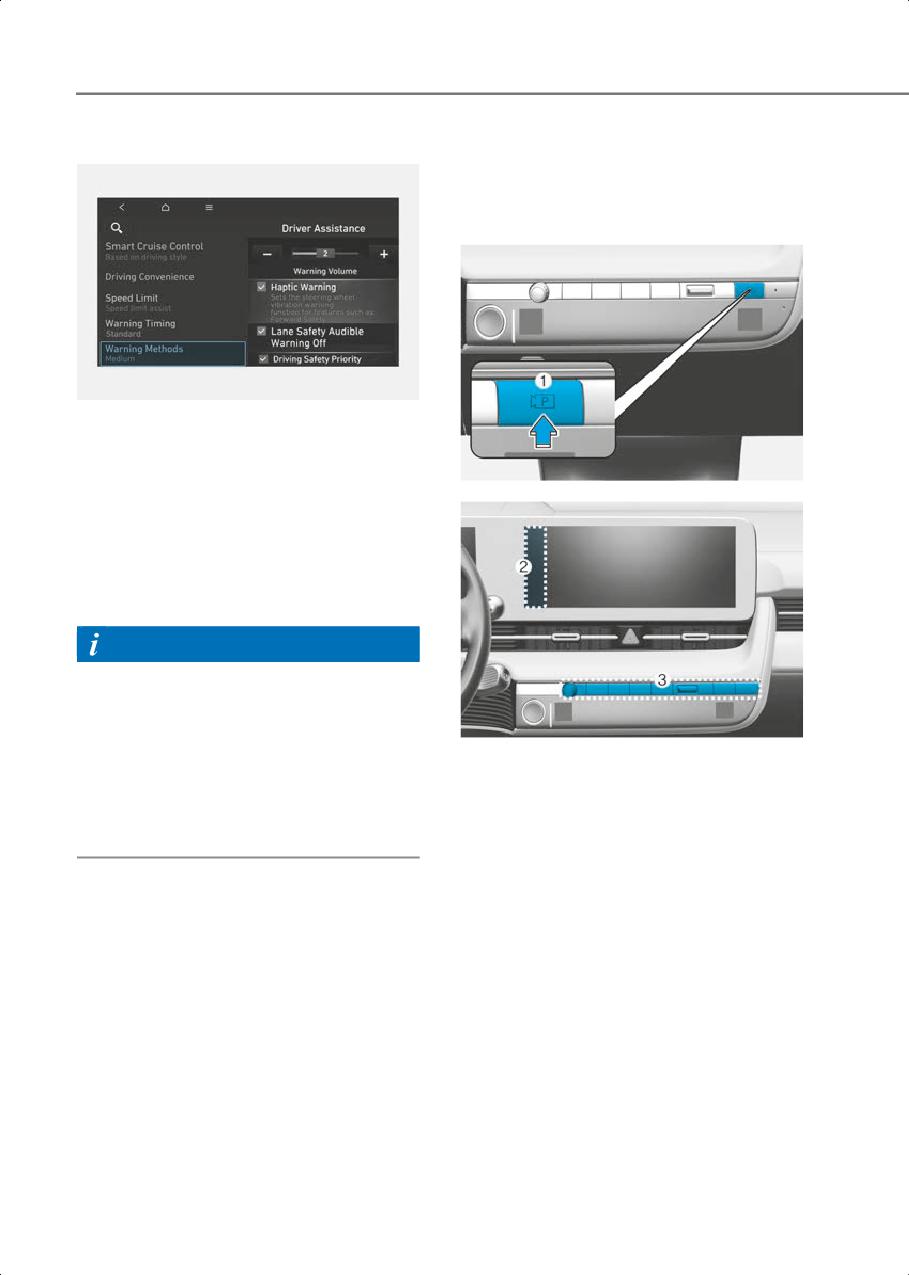
The Warning Methods can be set with the
vehicle on.
Select Set up > Vehicle > Driver
ONE1071040
Assistance > Warning Methods from the
Settings menu in the infotainment system
to change the following settings:
• Parking Safety Priority: Lowers all other
audio volumes when Rear View Monitor
is active.
Information
• If you change the Warning Methods, it
can be applied to each function of the
driver assistance system. Please check
and change it in each function.
ONE1071044
• If the vehicle is restarted, Warning
• Press the Parking/View button (1) to
methods will maintain the last setting.
turn on Surround View Monitor.
• The setting menu may not exist based
Press the button again to turn off the
on vehicle specification.
function.
• Other view modes can be selected by
touching the view icons (2) on the
Surround View Monitor Auto On
Surround View Monitor screen.
With the vehicle on, select Driver
• When one of the infotainment system
Assistance > Parking Safety > Surround
button (3) is pressed without the gear in
View Monitor Auto On from the Settings
R (Reverse), Surround View Monitor will
menu to use the function.
turn off.
7-112
7
Front view
Rear view
The front image is displayed on the screen
The rear image is displayed on the screen
when the gear is in N (Neutral) or D (Drive)
when the gear is in P (Park) to assist in
to assist in parking. The front view has a
parking. The rear view has a top view/rear
top view/front view/side view/3D view.
view/side view/3D view.
Operating conditions
Operating conditions
• When the gear is shifted from R
• Shift the gear to R (Reverse), the image
(Reverse) to N (Neutral) or D (Drive),
will appear on the screen.
the last set mode of front view function
• Press the Parking/View button (1) while
will be selected.
the gear is in P (Park), the image will
• Front view function will operate when
appear on the screen.
the following conditions are satisfied:
Off conditions
- While the infotainment system
screen is being displayed, press the
• The image cannot be turned off when
Parking/View button (1) briefly when
the gear is in R (Reverse).
the gear is in D (Drive) or N (Neutral)
• Shift the gear from R (Reverse) to P
and vehicle speed is below 6 mph (10
(Park), the image will turn off.
km/h).
• Press the Parking/View button (1) again
• Surround View Monitor Auto On
while the gear is in P (Park) with the
function will operate when the
image on the screen.
following conditions are satisfied:
- With Driver Assistance > Parking
Safety > Surround View Monitor
Surround View Monitor
Auto On selected from the Settings
Malfunction and Limitations
menu, the front parking assist view
screen is displayed when Parking
Surround View Monitor malfunction
Distance Warning warns the driver
while driving in D (Drive).
When Surround View Monitor is not
working properly, or the screen flickers,
Off conditions
or the camera image does not display
properly, have the vehicle be inspected
• Press the Parking/View button (1) again,
by an authorized HYUNDAI dealer.
the image will turn off.
• When vehicle speed is above 6 mph (10
Limitations of Surround View
km/h) with the gear in D (Drive),
Monitor
Surround View Monitor will turn off and
the screen will change back to the
• The screen may be displayed
previous infotainment system screen.
abnormally, and an icon will appear at
Although you drive below 6 mph (10
the top left side of the screen under the
km/h) again, Surround View Monitor
following circumstances:
will not turn on.
- The liftgate is opened
• Press one of the infotainment system
- The driver or front passenger door is
button (3), the screen will change to the
opened
infotainment system screen.
- The side view mirror is folded
• Shift the gear to P (Park), the image will
turn off.
7-113
Driver Assistance System
Rear Cross-Traffic
WARNING
•
ALWAYS look around your vehicle to
Collision-Avoidance
make sure there are no objects or
Assist (RCCA)
obstacles before moving the vehicle.
What you see on the screen may differ
if equipped
from the actual vehicle’s location.
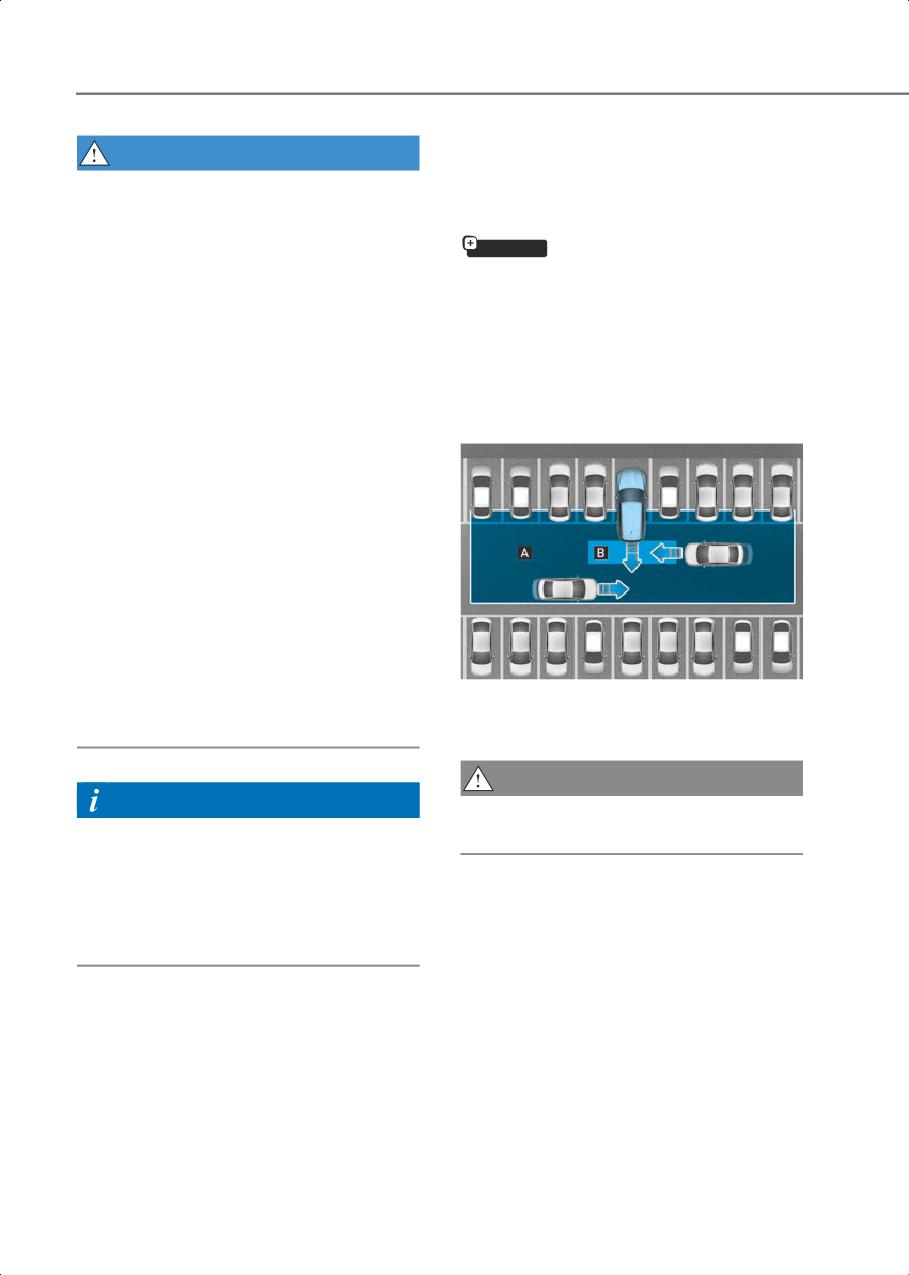
Rear Cross-Traffic Collision-Avoidance
•
The image shown on the screen may
Assist is designed to help detect vehicles
differ from the actual distance of the
approaching from the rear left and right
object. Make sure to directly check the
side while your vehicle is reversing, and
vehicle's surroundings for safety.
warn the driver that a collision is
•
Surround View Monitor is designed to
imminent with a warning message and an
be used on a flat surface. Therefore, if
audible warning. Also, braking is assisted
used on roads with different heights
to help prevent collision.
such as curbs and speed bumps, the
image in the screen my not look
correct.
•
Always keep the camera lens clean. If
the lens is covered with foreign
material, it may adversely affect
camera performance and Surround
View Monitor may not operate
properly. However, do not use
chemical solvents such as strong
detergents containing high alkaline or
volatile organic solvents (gasoline,
OJX1079108
[A] : Rear Cross-Traffic Collision Warning operating
acetone, etc.). This may damage the
range,
camera lens.
[B] : Rear Cross-Traffic Collision-Avoidance Assist
operating range
CAUTION
Information
Warning timing may vary depending on
•
When Rear View while Driving is on, it
vehicle speed of the approaching vehicle.
stays on while driving regardless of
vehicle speed.
•
When Rear View while Driving is on
while backing up, the screen changes
to the rear view.
7-114
7
Detecting sensor
Rear Cross-Traffic
Collision-Avoidance Assist
Settings
Setting features
Rear Cross-Traffic Safety
ONE1071173N
(1)
: Rear corner radar
Refer to the picture above for the detailed
location of the detecting sensors.
Information
For more details on the precautions of the
ONE1071215L
rear corner radar, refer to “Blind-Spot
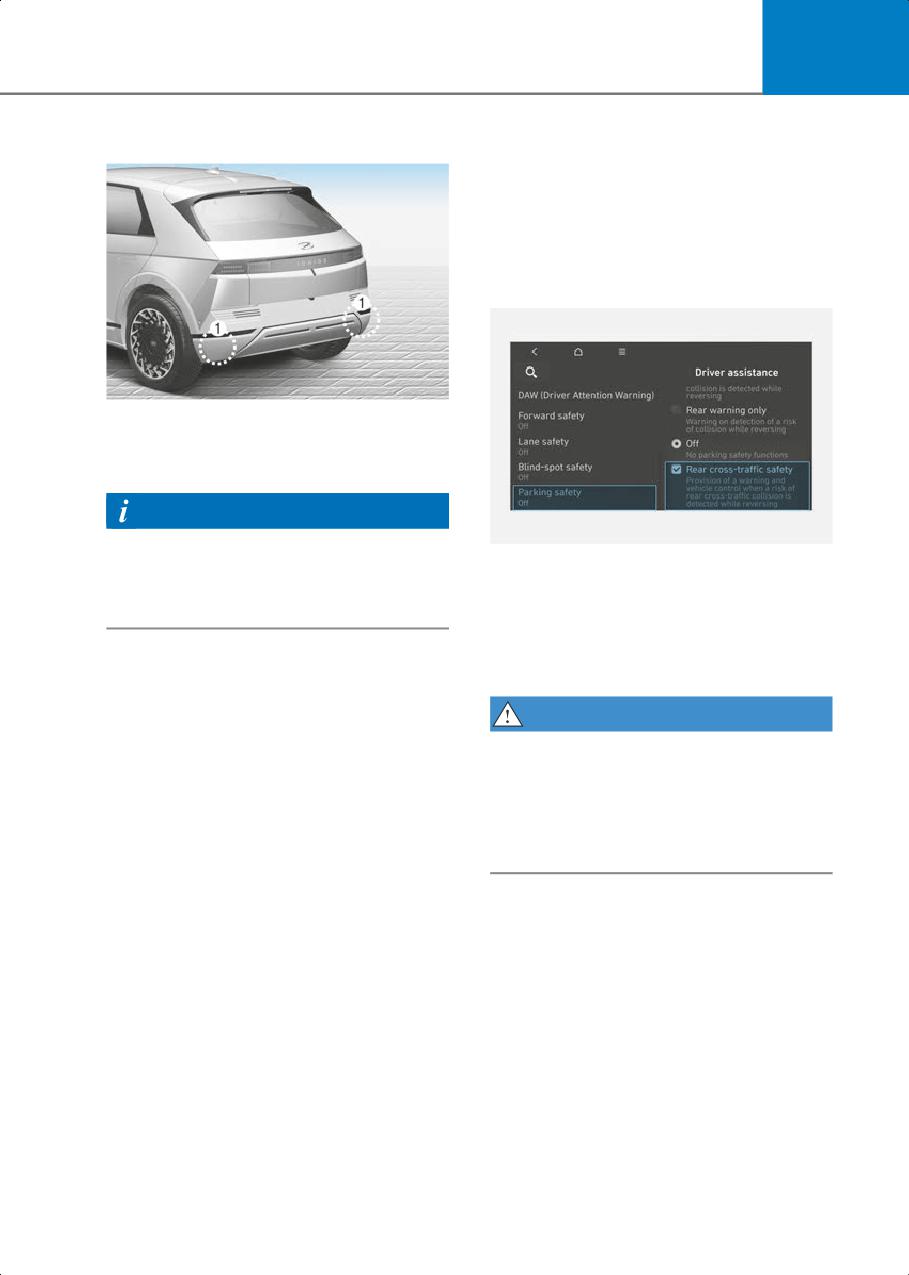
With the vehicle on, select Driver
Collision-Avoidance Assist (BCA)” section
Assistance > Parking Safety > Rear
in this chapter.
Cross-Traffic Safety from the Settings
menu to turn on Rear Cross-Traffic
Collision-Avoidance Assist and deselect
to turn off the function.
WARNING
When the vehicle is restarted, Rear
Cross-Traffic Collision-Avoidance Assist
will always turn on. However, if ‘Off’ is
selected after the vehicle is restarted, the
driver should always be aware of the
surroundings and drive safely.
7-115
Driver Assistance System
Warning Timing
Warning Methods
ONE1073282N
ONE1073352N
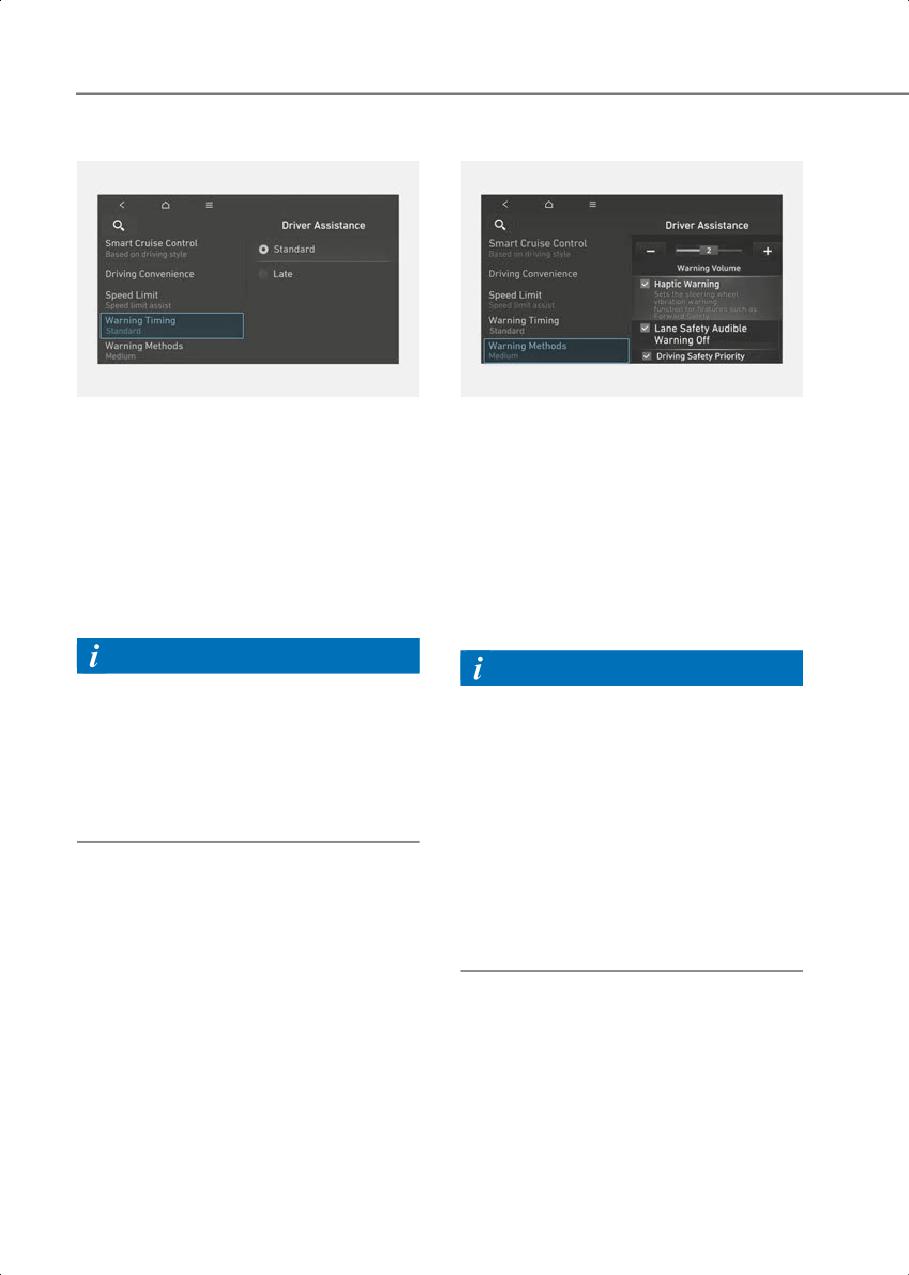
With the vehicle on, select Driver
The Warning Methods can be set with the
Assistance > Warning Timing from the
vehicle on.
Settings menu to change the initial
Select Setup > Vehicle > Driver
warning activation time for Rear
Assistance > Warning Methods from the
Cross-Traffic Collision-Avoidance Assist.
settings menu in the infotainment system
When the vehicle is first delivered,
to change the following settings:
Warning Timing is set to ‘Standard’. If you
• Warning Volume: Adjusts the volume of
change the Warning Timing, the Warning
the warning sound.
Timing of other Driver Assistance systems
• Haptic Warning: Activate the steering
may change.
wheel vibration warning. (if equipped)
Information
Information
• Even though ‘Standard’ is selected for
• If you change the Warning Methods, it
Warning timing, if the front vehicle
can be applied to each function of the
suddenly stops, the initial warning
driver assistance system. Please check
activation time may seem late.
and change it in each function.
• Select ‘Late’ for Warning timing when
• If the vehicle is restarted, Warning
traffic is light and when driving speed is
Methods will maintain the last setting.
slow.
• The setting menu may not exist based
on vehicle specification.
• The Warning Volume and Haptic
Warning cannot be turned off at the
same time. When one of the warning is
turned off the other is activated.
7-116
7
Rear Cross-Traffic
Collision-Avoidance Assist
Operation
Warning and control
Rear Cross-Traffic Collision-Avoidance
Assist will warn and control the vehicle
depending on collision risk level:
‘Collision Warning’, ‘Emergency Braking’
and ‘Stopping vehicle and ending brake
control’.
OJX1079166L
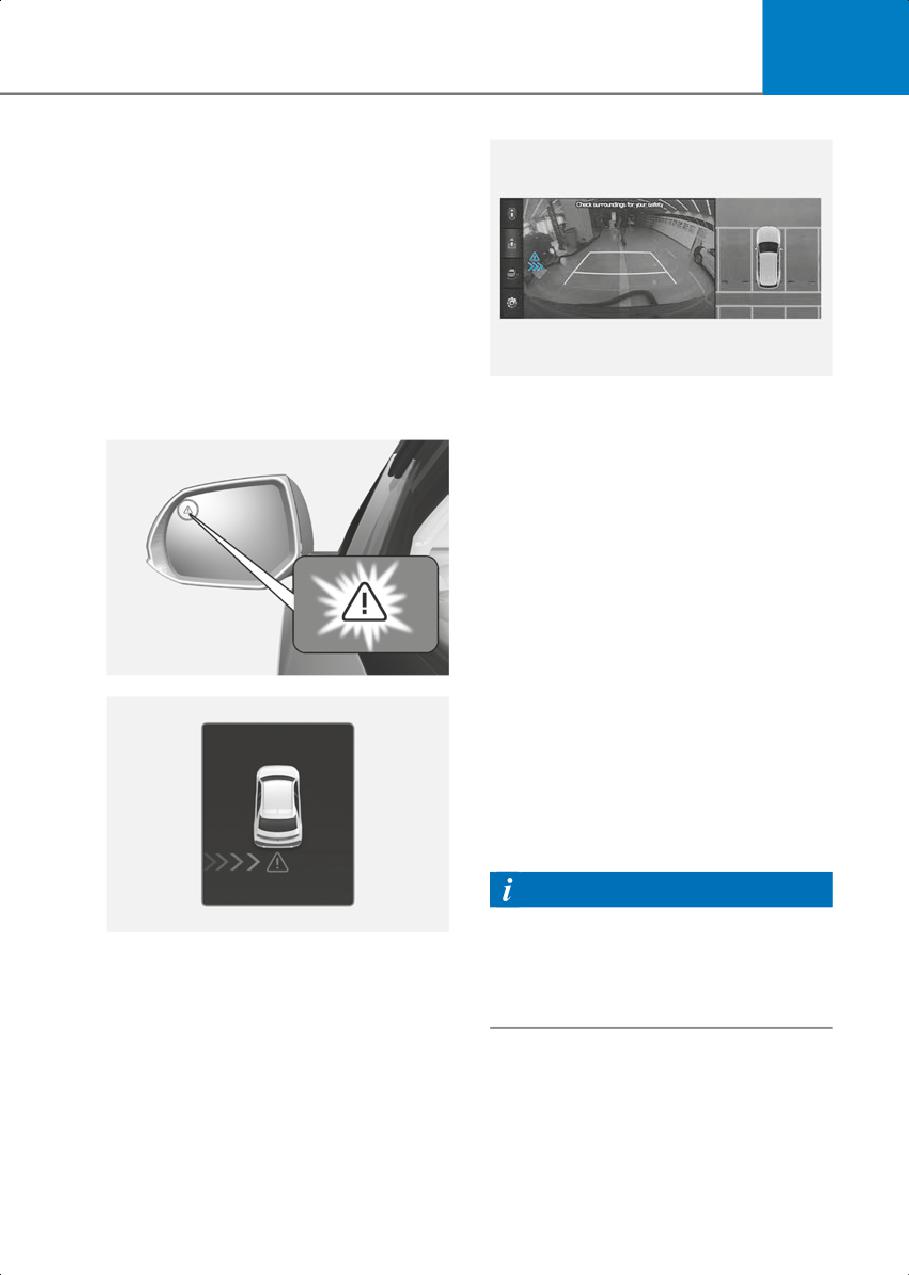
• To warn the driver of an approaching
Collision Warning
vehicle from the rear left/right side of
your vehicle, the warning light on the
side view mirror will blink and a warning
will appear on the cluster. At the same
time, an audible warning will sound. If
the Rear View Monitor is operating, a
warning will also appear on the
infotainment system screen.
• Rear Cross-Traffic Collision-Avoidance
Assist will operate when all the
following conditions are satisfied:
- The gear is shifted to R (Reverse)
ONE1071248K
- Vehicle speed is below 5 mph (8
km/h)
- The approaching vehicle is within
approximately 82 ft. (25 m) from the
left and right side of your vehicle
- The speed of the vehicle approaching
from the left and right is above 3 mph
(5 km/h)
Information
If the operating conditions are satisfied,
ONE1071045
there will be a warning whenever the
vehicle approaches from the left or right
side even though your vehicle speed is 0
mph (0 km/h).
7-117
Driver Assistance System
Emergency Braking
• Rear Cross-Traffic Collision-Avoidance
Assist will operate when all the
following conditions are satisfied:
- The gear is shifted to R (Reverse)
- Vehicle speed is below 5 mph (8
km/h)
- The approaching vehicle is within
approximately 5 ft. (1.5 m) from the
left and right side of your vehicle
- The speed of the vehicle approaching
from the left and right is above 3 mph
ONE1071248K
(5 km/h)
• Emergency braking will be assisted to
help prevent collision with approaching
vehicles from the left and right.
WARNING
Brake control will end when:
• The approaching vehicle is out of the
detecting range
• The approaching vehicle passes behind
your vehicle
ONE1071046L
• The approaching vehicle does not drive
toward your vehicle
• The approaching vehicle speed slows
down
• The driver depresses the brake pedal
with sufficient power
OJK070131
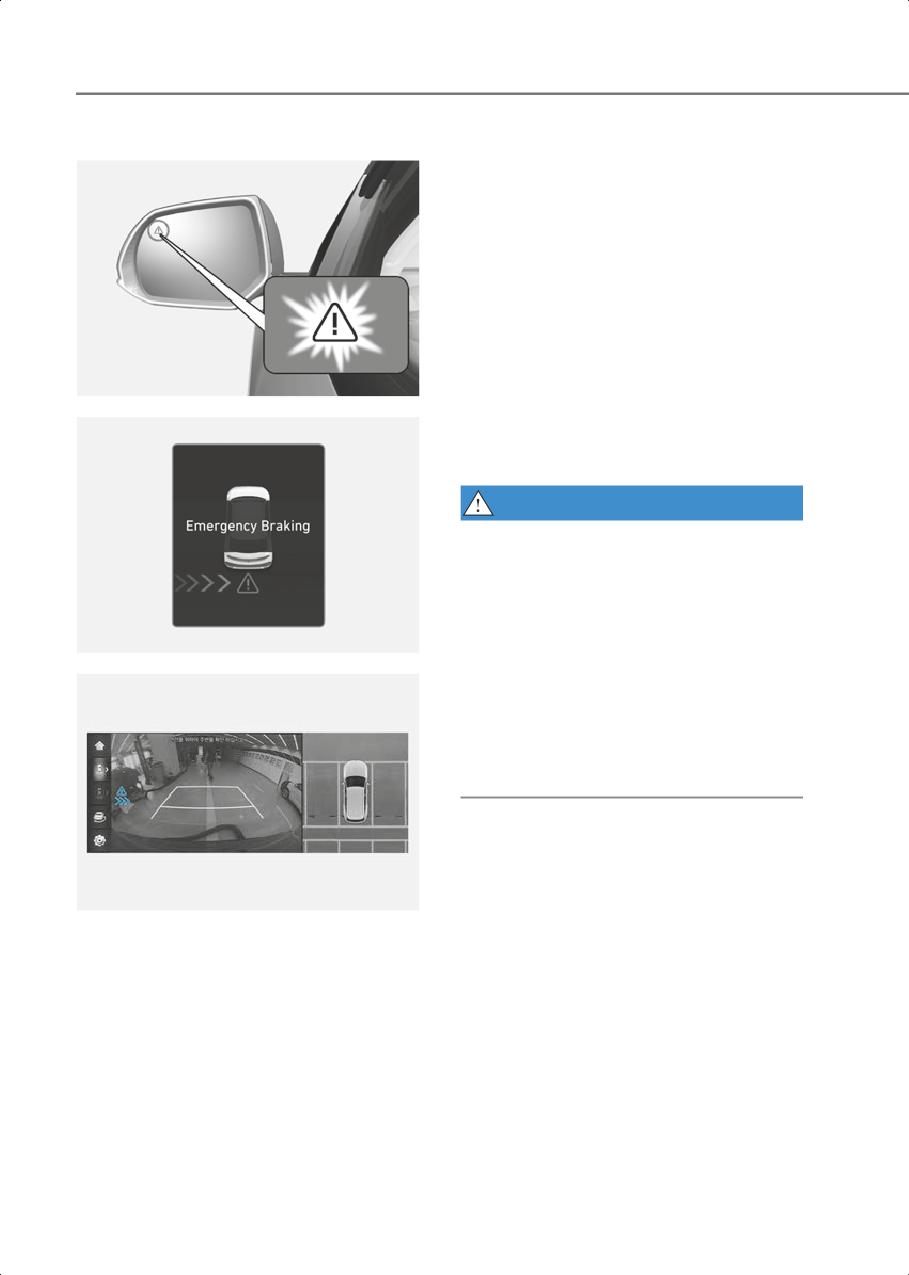
• To warn the driver of an approaching
vehicle from the rear left/right side of
your vehicle, the warning light on the
side view mirror will blink and a warning
message will appear on the cluster. At
the same time, an audible warning will
sound. A warning will also appear on
the infotainment system screen.
7-118

7
Stopping vehicle and ending brake control
•
Rear Cross-Traffic Collision-Avoidance
Assist may not operate if the driver
applies the brake pedal to avoid
collision.
•
During Rear Cross-Traffic
Collision-Avoidance Assist operation,
the vehicle may stop suddenly injuring
passengers and shifting loose objects.
Always have the seat belt on and keep
loose objects secured.
•
Even if there is a problem with Rear
Cross-Traffic Collision-Avoidance
ONE1071185L
Assist, the vehicle’s basic braking will
• When the vehicle is stopped due to
function normally.
emergency braking, the ‘Drive
•
When Rear Cross-Traffic
carefully’ warning message will appear
Collision-Avoidance Assist is operating,
on the cluster.
braking control by the function will
• For your safety, the driver should
automatically cancel when the driver
depress the brake pedal immediately
excessively depresses the accelerator
and check the surroundings.
pedal.
• Brake control will end after the vehicle
•
Rear Cross-Traffic Collision-Avoidance
is stopped by emergency braking for
Assist does not operate in all situations
approximately 2 seconds.
or cannot avoid all collisions.
• During emergency braking, braking
•
Rear Cross-Traffic Collision-Avoidance
control by Rear Cross-Traffic
Assist may warn the driver late or may
Collision-Avoidance Assist will
not warn the driver depending on the
automatically cancel when the driver
road and driving conditions.
excessively depresses the brake pedal.
•
The driver should hold the
responsibility to control the vehicle. Do
WARNING
not solely depend on Rear Cross-Traffic
Take the following precautions when
Collision-Avoidance Assist. Rather,
using Rear Cross-Traffic
maintain a safe braking distance, and if
Collision-Avoidance Assist:
necessary, depress the brake pedal to
reduce driving speed or to stop the
• For your safety, change the Settings
vehicle.
after parking the vehicle at a safe
location.
•
Never deliberately operate Rear
Cross-Traffic Collision-Avoidance
• If any other system’s warning message
Assist on people, animal, objects, etc. It
is displayed or audible warning is
may cause serious injury or death.
generated, Rear Cross-Traffic
Collision-Avoidance Assist’s warning
message may not be displayed and
audible warning may not be generated.
• You may not hear the warning sound of
Rear Cross-Traffic Collision-Avoidance
Assist if the surrounding is noisy.
7-119
Driver Assistance System
Rear Cross-Traffic
CAUTION
Collision-Avoidance Assist
The brake control may not operate
Malfunction and Limitations
properly depending on the status of ESC
(Electronic Stability Control).
Rear Cross-Traffic
There will only be a warning when:
Collision-Avoidance Assist
• The ESC (Electronic Stability Control)
malfunction
warning light is on
• ESC (Electronic Stability Control) is
engaged in a different function
Information
If braking is assisted by Rear Cross-Traffic
Collision-Avoidance Assist, the driver
must immediately depress the brake
pedal and check vehicle surroundings.
• Brake control will end when the driver
OTM070125N
depresses the brake pedal with
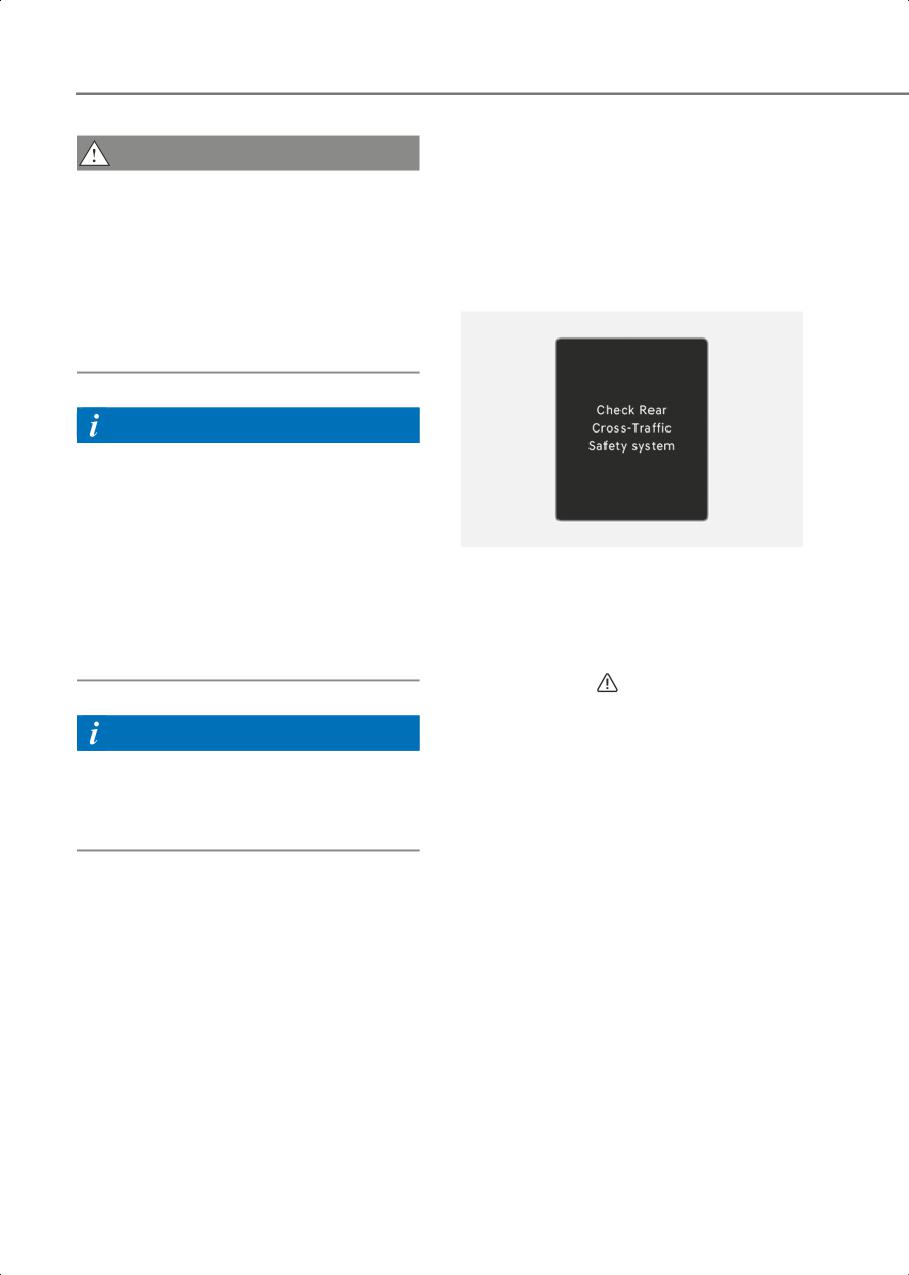
When Rear Cross-Traffic
sufficient power.
Collision-Avoidance Assist is not working
• After shifting the gear to R (Reverse),
properly, the ‘Check Rear Cross-Traffic
braking control will operate once for
Safety system’ warning message will
left and right vehicle approach.
appear on the cluster for several seconds,
and the master (
) warning light will
illuminate on the cluster. If it occurs, have
the vehicle be inspected by an authorized
Information
HYUNDAI dealer.
The images or colors may be displayed
differently depending on the
specifications of the instrument panel or
theme.
7-120
7
Rear Cross-Traffic Collision-Avoidance
Assist will operate properly when such
foreign material or trailer, etc., is
removed.
If Rear Cross-Traffic Collision-Avoidance
Assist does not operate properly after it is
removed, have the vehicle be inspected
by an authorized HYUNDAI dealer.
WARNING
• Even though the warning message
OTM070100N
does not appear on the cluster, Rear
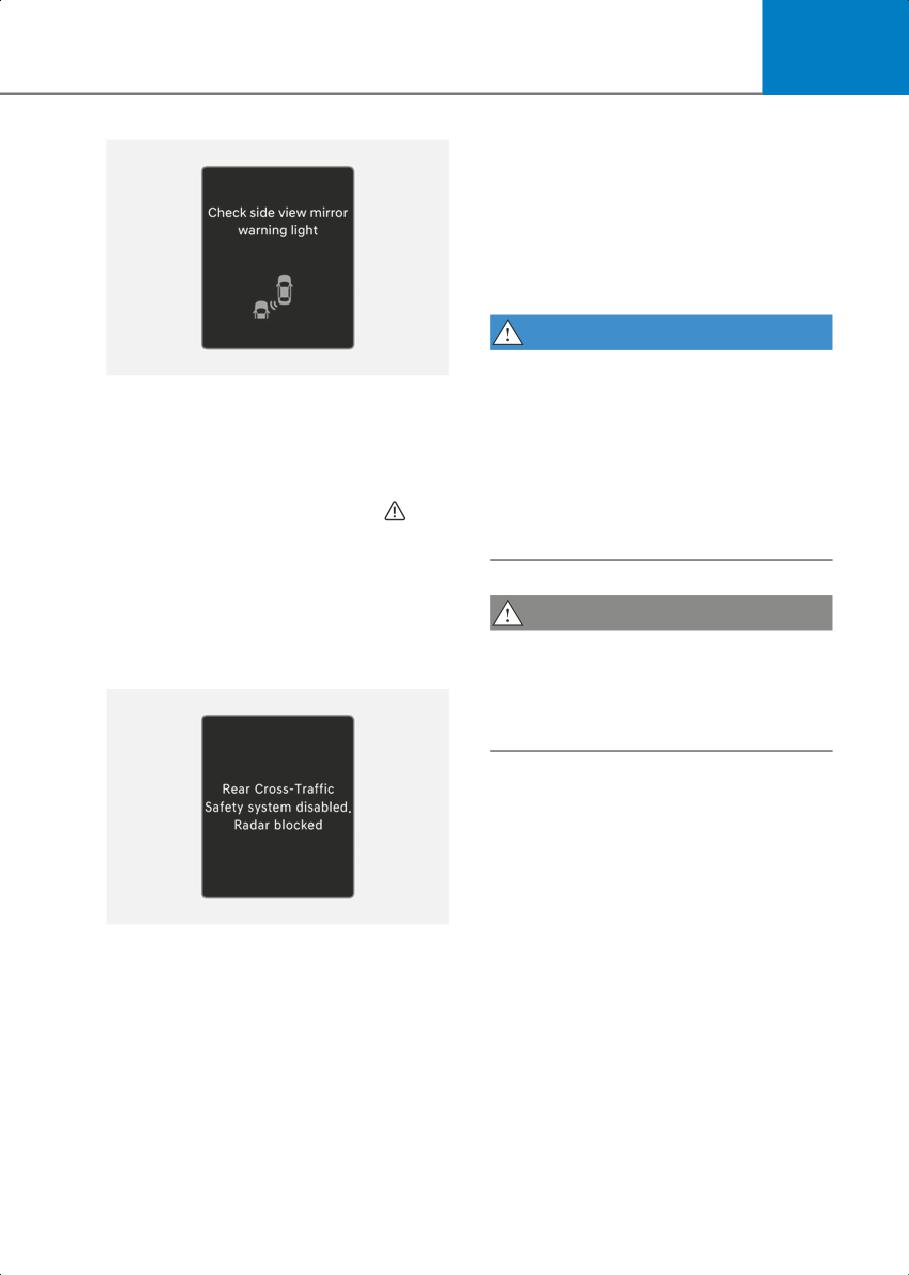
When the side view mirror warning light is
Cross-Traffic Safety system may not
not working properly, the ‘Check side
operate properly.
view mirror warning light’ (or ‘Check
• Rear Cross-Traffic Safety system may
outside mirror warning icon’) warning
not operate properly in an area (for
message will appear on the cluster for
example, open terrain), where any
several seconds, and the master (
)
substance are not detected after
warning light will illuminate on the
turning ON the vehicle.
cluster. If it occurs, have the vehicle be
inspected by an authorized HYUNDAI
dealer.
CAUTION
Rear Cross-Traffic
Turn off Rear Cross-Traffic
Collision-Avoidance Assist disabled
Collision-Avoidance Assist to install or
remove a trailer, carrier, or another
attachment. Turn on Rear Cross-Traffic
Collision-Avoidance Assist when finished.
Limitations of Rear Cross-Traffic
Collision-Avoidance Assist
Rear Cross-Traffic Collision-Avoidance
Assist may not operate properly, or it may
operate unexpectedly under the
following circumstances:
OTM070124N
• Departing from where trees or grass are
When the rear bumper around the
overgrown
rear-side radar or sensor is covered with
• Departing from where roads are wet
foreign material, such as snow or rain, or
• Speed of the approaching vehicle is fast
installing a trailer or carrier, it can reduce
or slow
the detecting performance and
temporarily limit or disable Rear
Cross-Traffic Collision-Avoidance Assist.
If this occurs, the ‘Rear Cross-Traffic
Safety system disabled. Radar blocked’
warning message will appear on the
cluster.
7-121
Driver Assistance System
Braking control may not work, driver’s
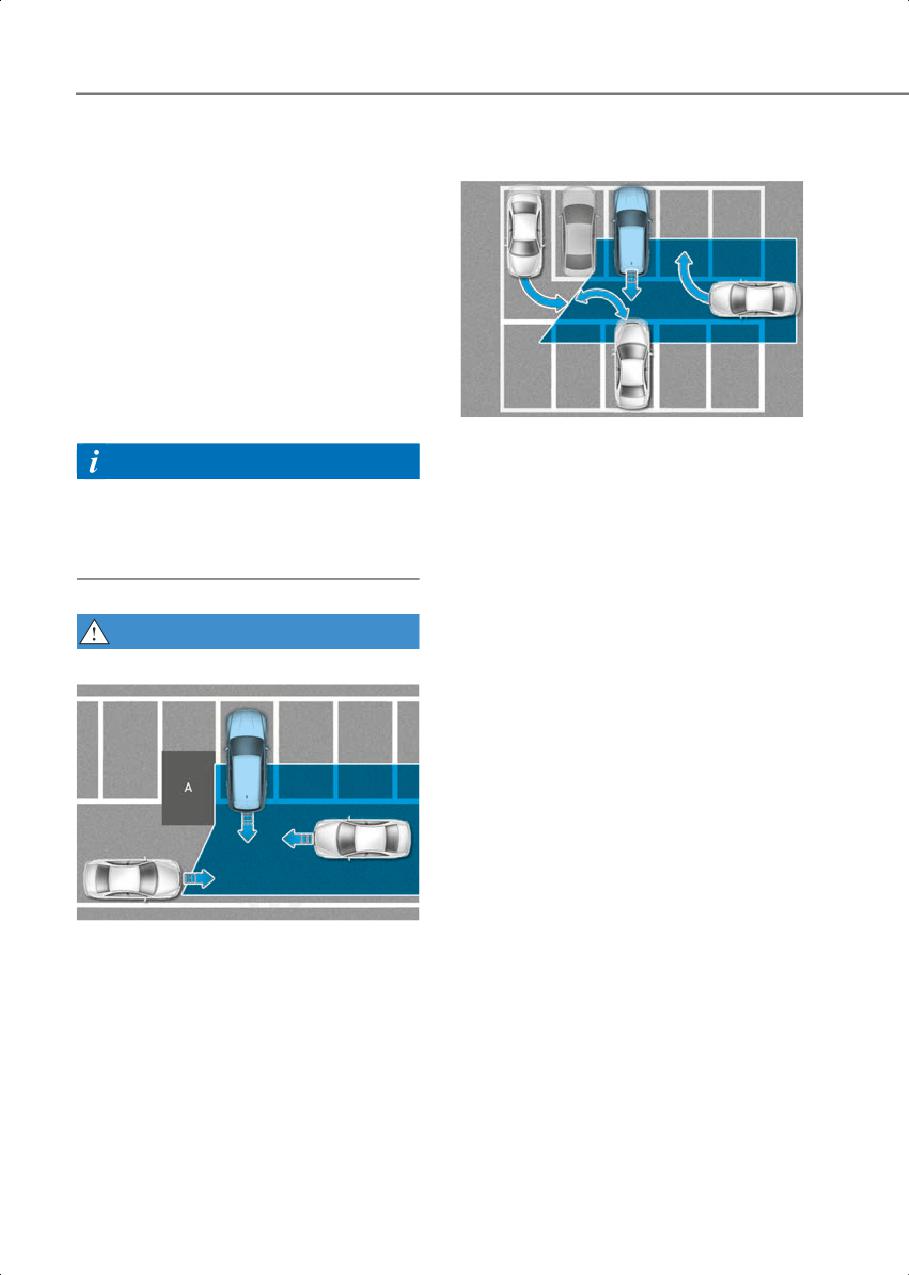
• When the vehicle is in a complex
attention is required in the following
parking environment
circumstances:
• The vehicle severely vibrates while
driving over a bumpy road, uneven road
or concrete patch
• Driving on a slippery surface due to
snow, water puddle, ice, etc.
• The tire pressure is low or a tire is
damaged
• The braking system has been modified
• Remote Smart Parking Assist is
operating (if equipped)
OJX1079112
Rear Cross-Traffic Collision-Avoidance
Information
Assist may detect vehicles which are
parking or pulling out near your vehicle
For more details on the limitations of the
(for example, a vehicle leaving beside
rear corner radar, refer to “Blind-Spot
your vehicle, a vehicle parking or
Collision-Avoidance Assist (BCA)” section
pulling out in the rear area, a vehicle
in this chapter.
approaching your vehicle making a
turn, etc.). If this occurs, the function
may unnecessarily warn the driver and
WARNING
control the brake.
Always check your surroundings while
• Driving near a vehicle or structure
backing up.
OJX1079111
[A] : Structure
Rear Cross-Traffic Collision-Avoidance
Assist may be limited when driving near
a vehicle or structure, and may not
detect the vehicle approaching from
the left or right. If this occurs, the
function may not warn the driver or
control the brakes when necessary.
Always check your surroundings while
backing up.
7-122
7
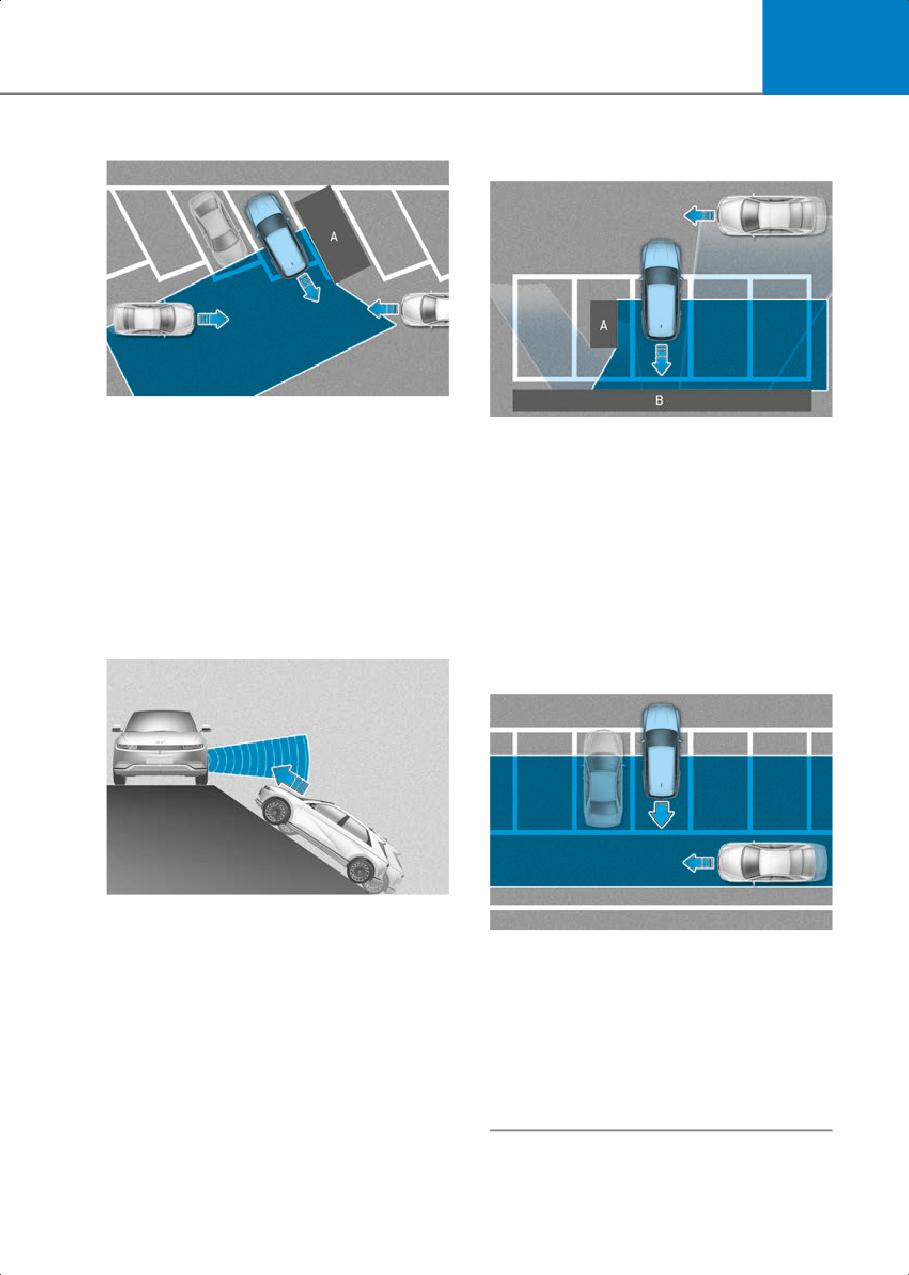
• When the vehicle is parked diagonally
• Pulling into the parking space where
there is a structure
OJX1079113
[A] : Vehicle
OJX1079115
Rear Cross-Traffic Collision-Avoidance
[A] : Structure
[B] : Wall
Assist may be limited when backing up
Rear Cross-Traffic Collision-Avoidance
diagonally, and may not detect the
Assist may detect vehicles passing by in
vehicle approaching from the left or
front of you when parking in reverse
right. If this occurs, the function may
into a parking space with a wall or
not warn the driver or control the
structure in the rear or side area. If this
brakes when necessary.
occurs, the function may unnecessarily
Always check your surroundings while
warn the driver and control the brake.
backing up.
Always check your surroundings while
• When the vehicle is on or near a slope
backing up.
• When the vehicle is parked rearward
ONE1071049JP
Rear Cross-Traffic Collision-Avoidance
OJX1079116
Assist may be limited when the vehicle
Rear Cross-Traffic Collision-Avoidance
is on a uphill or downhill slope, or near
Assist may detect vehicles passing by
it, and may not detect the vehicle
behind you when parking in reverse
approaching from the left or right. If
into a parking space. If this occurs, the
this occurs, the function may not warn
function may unnecessarily warn the
the driver or control the brakes when
driver and control the brake.
necessary.
Always check your surroundings while
Always check your surroundings while
backing up.
backing up.
7-123

Driver Assistance System
WARNING
Information
• When you are towing a trailer or
Radio frequency radiation exposure
another vehicle, turn off Rear
information:
Cross-Traffic Collision-Avoidance
This equipment complies with FCC
Assist for safety reasons.
radiation exposure limits set forth for an
• Rear Cross-Traffic Collision-Avoidance
uncontrolled environment.
Assist may not operate properly if
This equipment should be installed and
interfered by strong electromagnetic
operated with minimum distance of 8 in.
waves.
(20 cm) between the radiator (antenna)
• Rear Cross-Traffic Collision-Avoidance
and your body.
Assist may not operate for 15 seconds
This transmitter must not be co-located
after the vehicle is started, or the rear
or operating in conjunction with any other
corner radars are initialized.
antenna or transmitter.
Information
This device complies with Part 15 of the
FCC rules.
Operation is subject to the following three
conditions:
1. This device may not cause harmful
interference, and
2. This device must accept any
interference received, including
interference that may cause undesired
operation of the device.
3. Changes or modifications not expressly
approved by the party responsible for
compliance could void the user's
authority to operate the device.
7-124
7
Reverse Parking Distance
Reverse Parking Distance
Warning Settings
Warning (PDW)
if equipped
Warning Methods
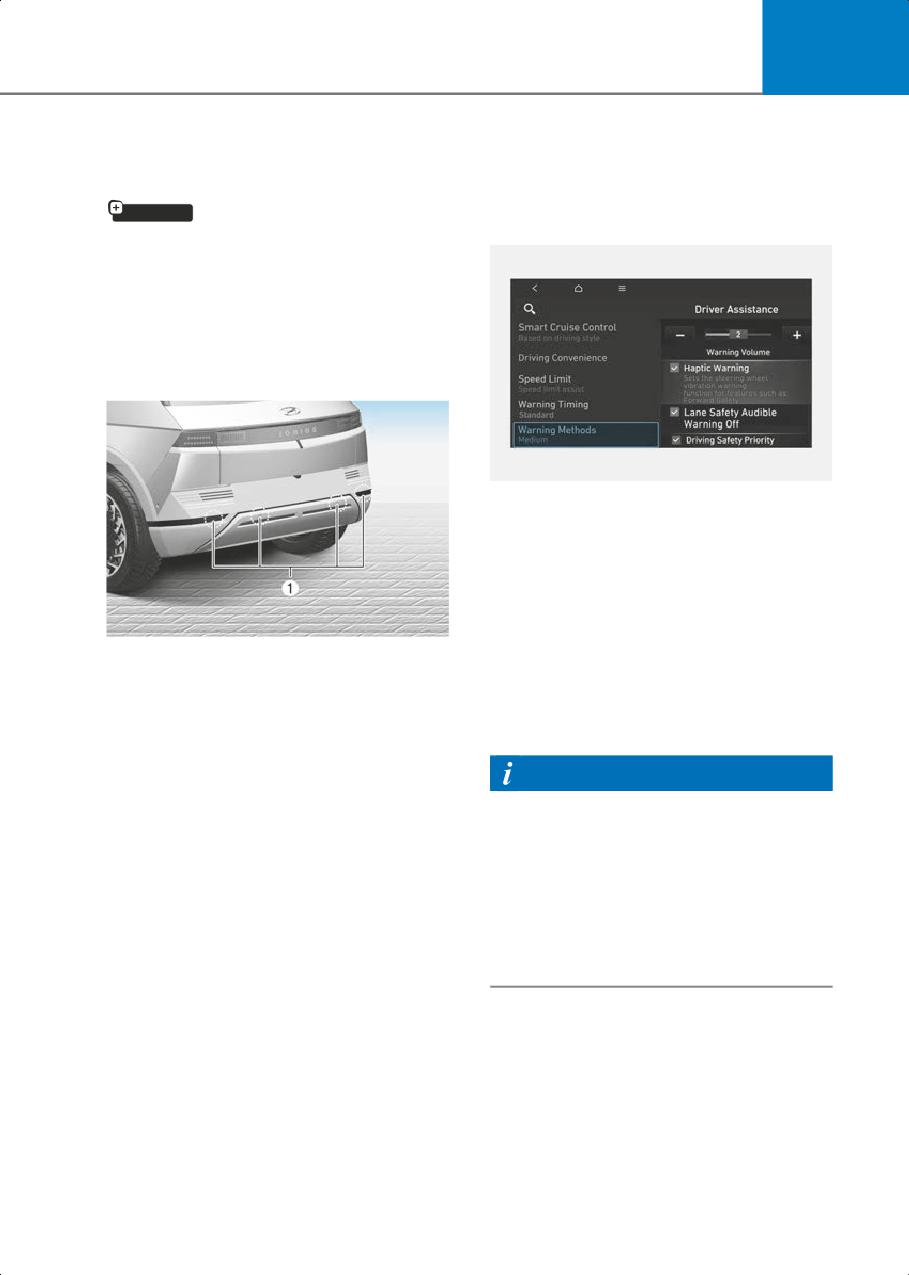
Reverse Parking Distance Warning can
help warn the driver if an obstacle is
detected within a certain distance when
the vehicle is moving in reverse at low
speeds.
Detecting sensor
ONE1073352N
The Warning Methods can be set with the
vehicle on.
Select Setup > Vehicle > Driver
Assistance > Warning Methods from the
settings menu in the infotainment system
to change the following settings:
ONE1071281N
• Warning Volume: Adjusts the volume of
(1)
: Rear ultrasonic sensors
the warning sound.
Refer to the picture above for the detailed
If you turn off the Warning Volume, for
location of the detecting sensors.
your safety, the function may warn you
with a low volume.
Information
• If you change the Warning Methods, it
can be applied to each function of the
driver assistance system. Please check
and change it in each function.
• If the vehicle is restarted, Warning
Methods will maintain the last setting.
• The setting menu may not exist based
on vehicle specification.
7-125
Driver Assistance System
Reverse Parking Distance
Reverse Parking Distance Warning
Warning Operation
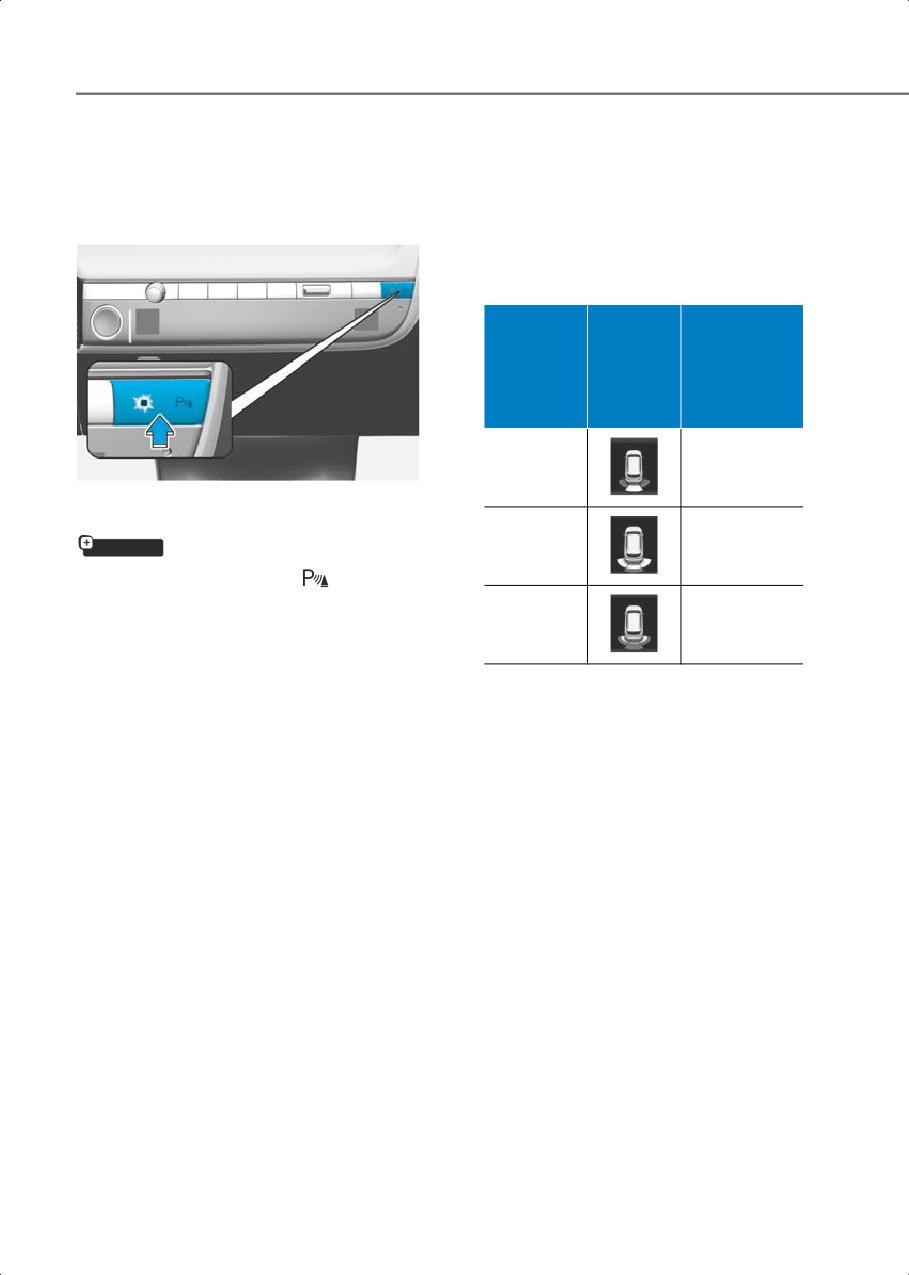
•
Reverse Parking Distance Warning will
operate when the gear is in R (Reverse).
•
Reverse Parking Distance Warning
Operating button
helps detect a person, animal or object
in the rear when the vehicle’s rearward
speed is below 6 mph (10 km/h).
Warning
Distance
indicator
Warning
from
when
sound
object
driving
backward
24 - 48 in.
Buzzer beeps
(60 - 120
intermittently
ONE1071052
cm)
Parking Safety button
12 - 24 in.
Beeps more
if equipped
(30 - 60
frequently
cm)
• Press the Parking Safety (
) button to
turn on Reverse Parking Distance
12 in.
Beeps
Warning. Press the button again to turn
(within 30
continuously
off the function.
cm)
• When Reverse Parking Distance
•
The corresponding indicator will
Warning is off (button indicator light
illuminate whenever each ultrasonic
off), if you shift the gear to R (Reverse),
sensor detects a person, animal or
Reverse Parking Distance Warning will
object in its sensing range. Also an
automatically turn on.
audible warning will sound.
•
When more than two objects are
detected at the same time, the closest
one will be warned with an audible
warning.
•
The shape of the indicator in the
illustration may differ from the actual
vehicle.
7-126
7
Reverse Parking Distance
• Your new vehicle warranty does not
cover any accidents or damage to the
Warning Malfunction and
vehicle due to the malfunction of
Precautions
Reverse Parking Distance Warning.
• Pay close attention when driving near
Reverse Parking Distance Warning
objects, pedestrians, and especially
malfunction
children. Some objects may not be
After starting the vehicle, a beep will
detected by the ultrasonic sensors, due
sound when the gear is shifted to R
to the objects distance, size or material,
(Reverse) to indicate Reverse Parking
all of which can limit the effectiveness
Distance Warning is operating properly.
of the sensor.
However, if one or more of the following
occurs, first check whether the ultrasonic
Limitations of Reverse Parking
sensor is damaged or blocked with
Distance Warning
foreign material. If it still does not work
properly, have the vehicle be inspected
• Reverse Parking Distance Warning may
by an authorized HYUNDAI dealer.
not operate properly when:
• The audible warning does not sound.
- Moisture is frozen to the sensor
• The buzzer sounds intermittently.
- Sensor is covered with foreign
material, such as snow or water
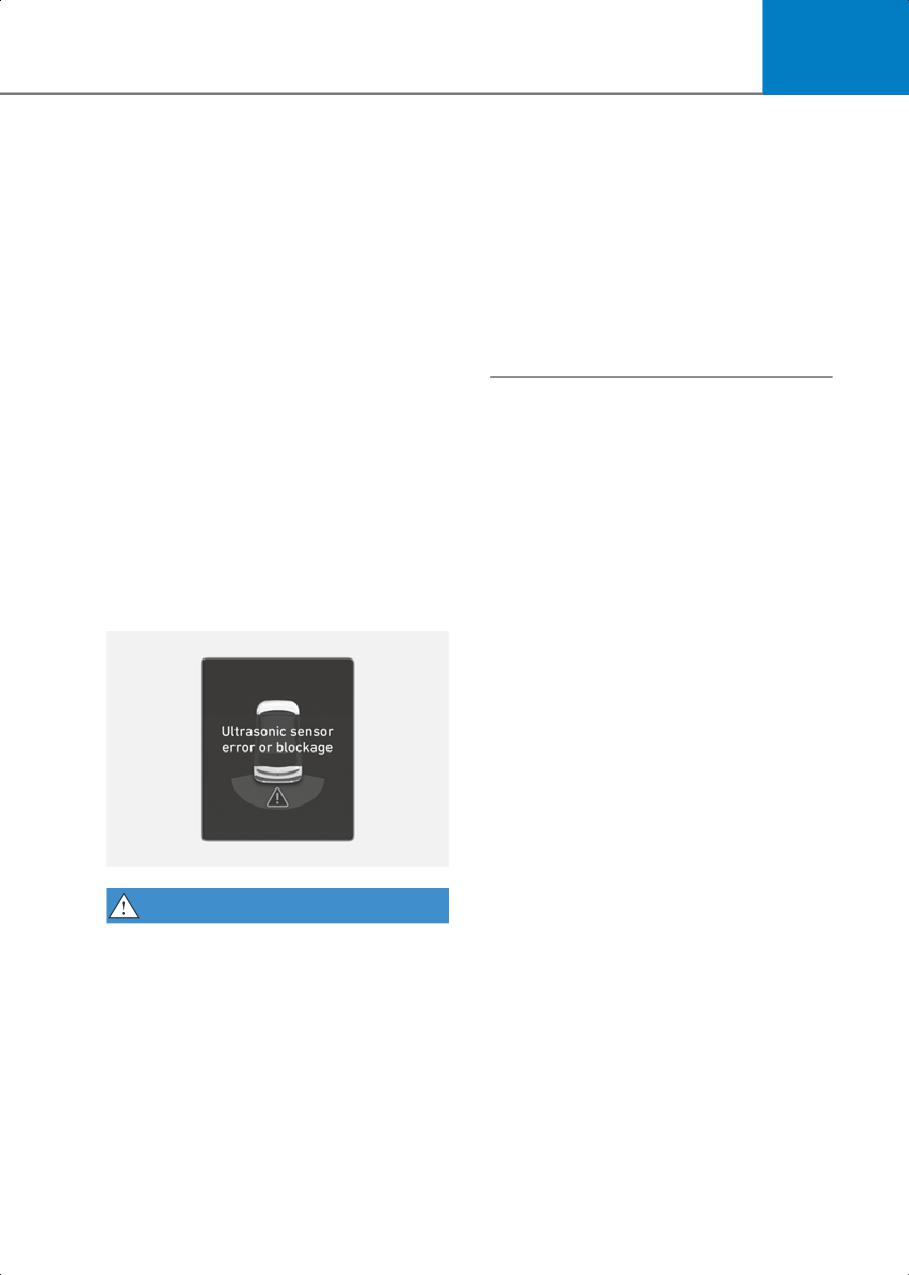
• The ‘Ultrasonic sensor error or
(Reverse Parking Distance Warning
blockage’ warning message appears on
will operate properly when such
the cluster.
foreign material are removed.)
- The weather is extremely hot or cold
The sensor or sensor assembly is
disassembled
- The surface of the sensor is pressed
hard or hit with a hard object
- The surface of the sensor is scratched
with a sharp object
- The sensors or its surrounding area is
directly sprayed with high pressure
washer
ONE1071106L
• Reverse Parking Distance Warning may
WARNING
malfunction when:
- Heavy rain or water spray is present
• Reverse Parking Distance Warning is a
supplemental function. The operation
- Water flows on the surface of the
of Reverse Parking Distance Warning
sensor
can be affected by several factors
- Affected by another vehicle’s sensors
(including environmental conditions). It
- The sensor is covered with snow
is the responsibility of the driver to
always check the rear view before and
- Driving on uneven road, gravel roads
while parking.
or bushes
- Objects that generates ultrasonic
waves are near the sensor
7-127
Driver Assistance System
- License plate is installed in a different
Forward/Reverse Parking
spot from the original location
Distance Warning (PDW)
- The vehicle bumper height or
ultrasonic sensor installation has
if equipped
been modified
Forward/Reverse Parking Distance
- Attaching equipment or accessories
Warning will help warn the driver if an
next to the ultrasonic sensors
obstacle is detected within a certain
•
The following objects may not be
distance when the vehicle is moving
detected:
forward or in reverse at low speeds.
- Sharp or slim objects, such as ropes,
chains or small poles.
Detecting sensor
- Objects, which tend to absorb sensor
frequency, such as clothes, spongy
material or snow.
- Objects smaller than 40 in. (100 cm)
in length and narrower than 6 in. (14
cm) in diameter.
- Pedestrians, animals or objects that
are very close to the ultrasonic
sensors
•
Parking Distance Warning Indicators
may be displayed differently from the
ONE1071050
actual detected location when the
obstacle is located between the
sensors.
•
Parking Distance Warning indicator
may not occur sequentially depending
on vehicle speed or obstacle shape.
•
If Reverse Parking Distance Warning
needs repair, have the vehicle be
inspected by an authorized HYUNDAI
dealer.
ONE1071051N
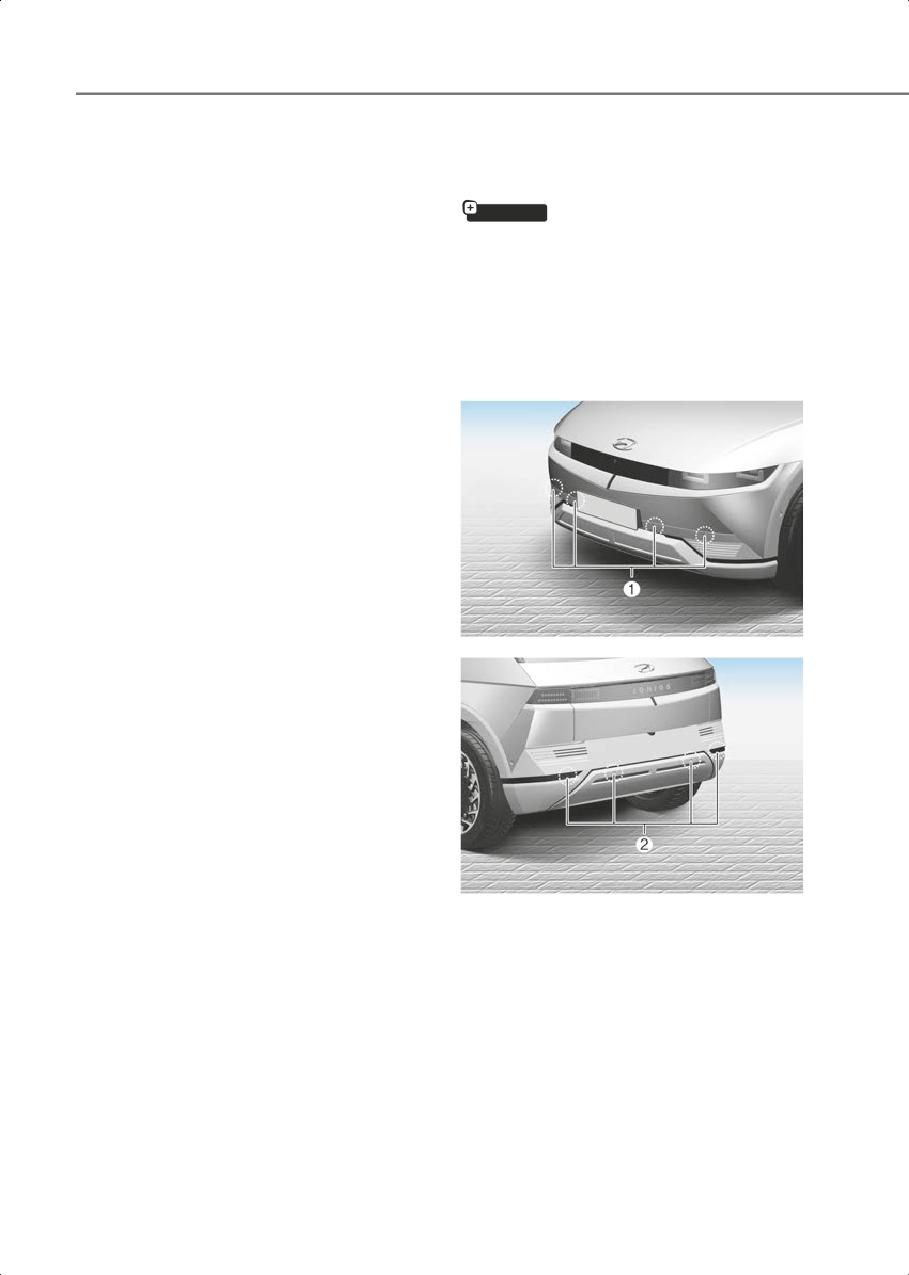
(1)
: Front ultrasonic sensors,
(2) : Rear ultrasonic sensors
Refer to the picture above for the detailed
location of the detecting sensors.
7-128
7
Forward/Reverse Parking
Forward/Reverse Parking
Distance Warning Settings
Distance Warning Operation
Warning Methods
Operating button
ONE1073352N
ONE1071052
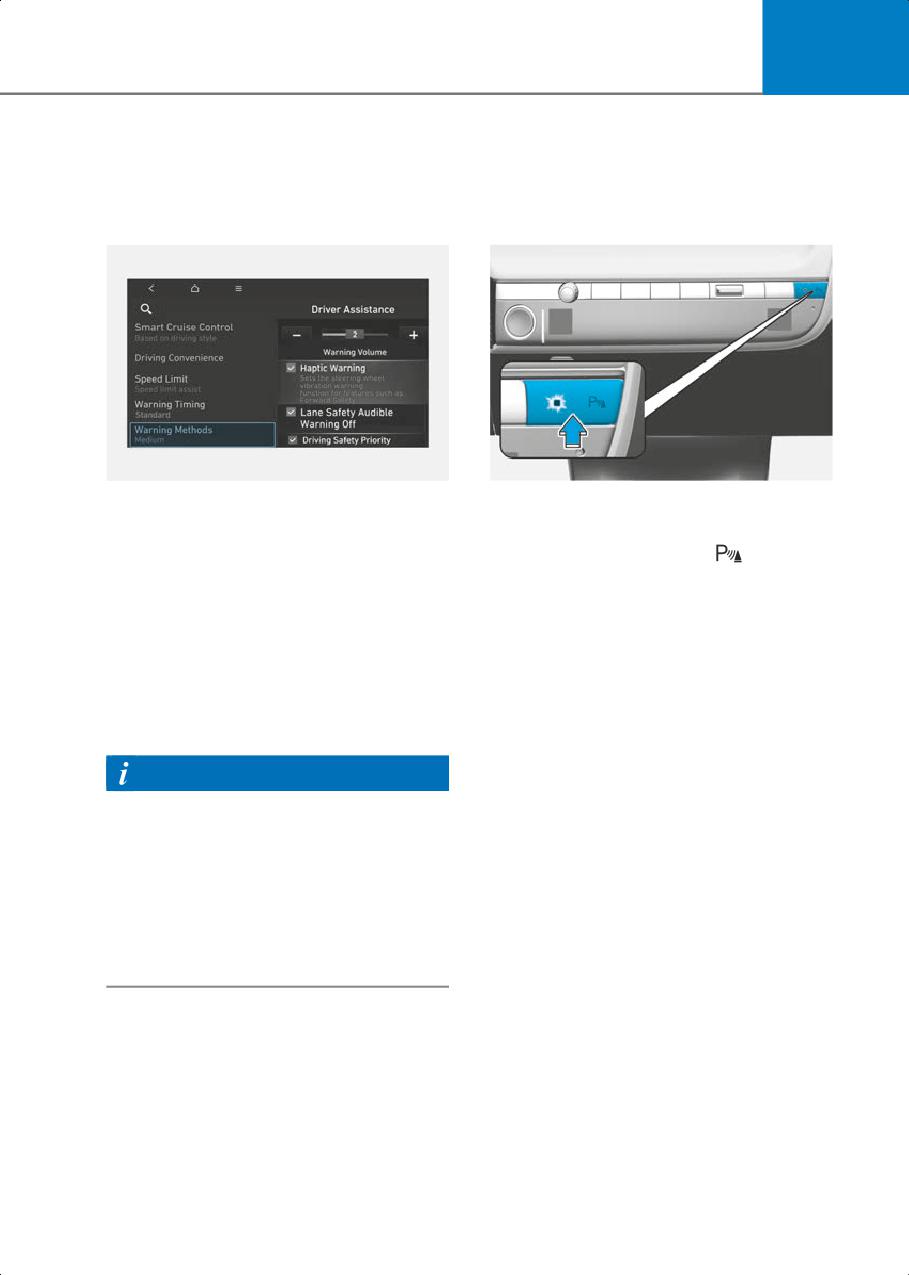
The Warning Methods can be set with the
Parking Safety button
vehicle on.
Select Setup > Vehicle > Driver
• Press the Parking Safety (
) button to
Assistance > Warning Methods from the
turn on Forward/Reverse Parking
settings menu in the infotainment system
Distance Warning. Press the button
to change the following settings:
again to turn off the function.
• Warning Volume: Adjusts the volume of
• When Forward/Reverse Parking
the warning sound.
Distance Warning is off (button
indicator light off), if you shift the gear
If you turn off the Warning Volume, for
to R (Reverse), Forward/Reverse
your safety, the function may warn you
Parking Distance Warning will
with a low volume.
automatically turn on.
Information
• When Forward/Reverse Parking
Distance Warning turns on, the button
• If you change the Warning Methods, it
indicator light will turn on. If vehicle
can be applied to each function of the
speed is above 12 mph (20 km/h),
driver assistance system. Please check
Forward/Reverse Parking Distance
and change it in each function.
Warning will turn off (button indicator
• If the vehicle is restarted, Warning
light off).
Methods will maintain the last setting.
* If equipped with Reverse Parking
• The setting menu may not exist based
Collision-Avoidance Assist or Remote
on vehicle specification.
Smart Parking Assist, Forward/Reverse
Parking Distance Warning will turn off
(button indicator light off) when vehicle
Parking Distance Warning Auto On
speed is above 18 mph (30 km/h).
To use Parking Distance Warning Auto On
function, select Driver Assistance >
Parking Safety > Parking Distance
Warning Auto On from the cluster or
infotainment system Settings menu.
7-129
Driver Assistance System
Forward Parking Distance Warning
Warning
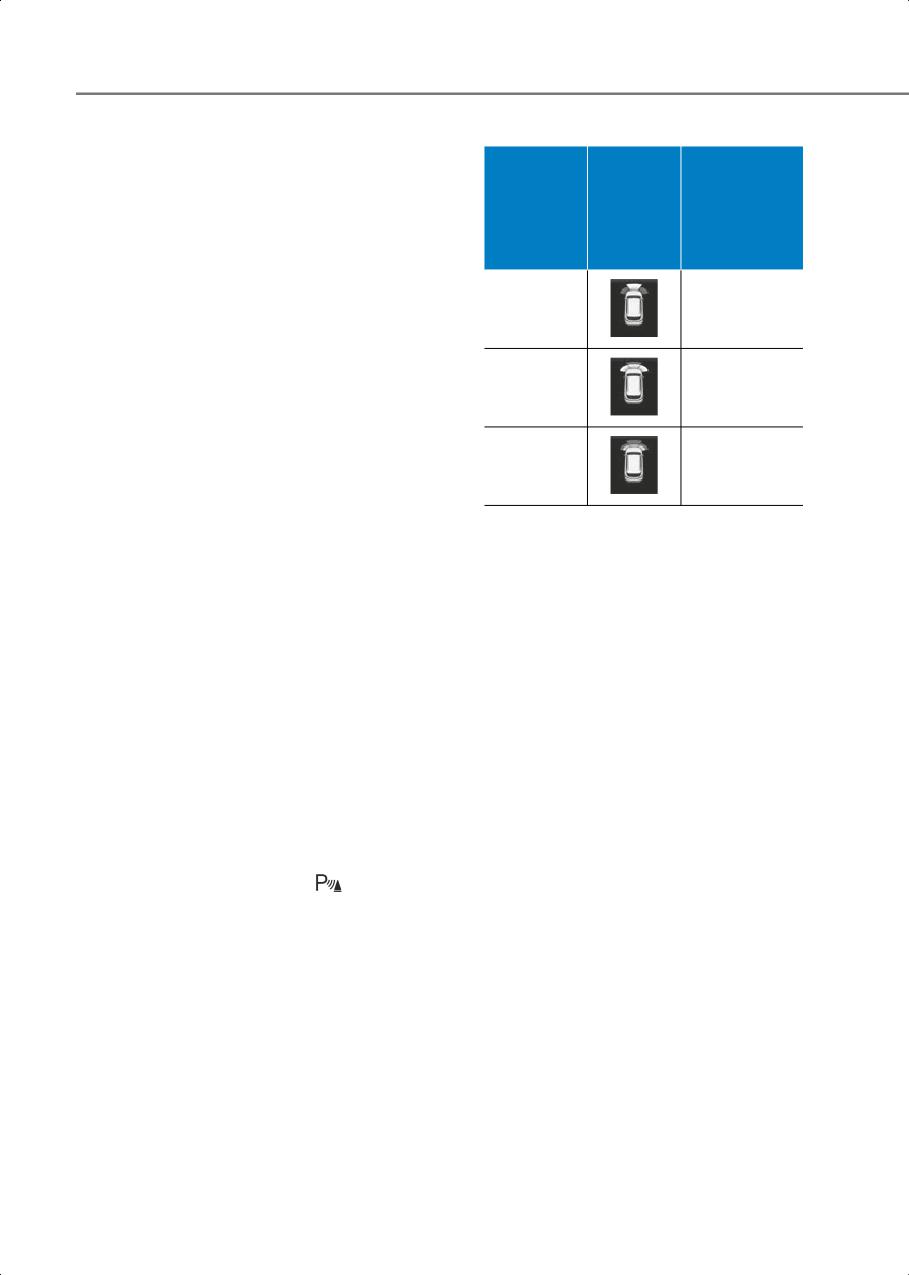
•
Forward Parking Distance Warning will
Distance
indicator
operate when one of the condition is
Warning
from
when
satisfied.
sound
object
driving
- The gear is shifted from R (Reverse)
forward
to D (Drive) with Reverse Parking
Distance Warning on
24 - 40 in.
Buzzer beeps
- The gear is in D (Drive) and the
(60 - 100
intermittently
Parking Safety button indicator light
cm)
is on
12 - 24 in.
- ‘Parking Distance Warning Auto On’
Beeps more
(30 - 60
is selected from the Settings menu
frequently
cm)
and the gear is in D (Drive)
•
Forward Parking Distance Warning
12 in.
Beeps
helps detect a person, animal or object
(within 30
continuously
in front when the vehicle’s forward
cm)
speed is below 6 mph (10 km/h).
• The corresponding indicator will
•
Forward Parking Distance Warning
illuminate whenever each ultrasonic
does not operate when the vehicle's
sensor detects a person, animal or
forward speed is above 6 mph (10
object in its sensing range. Also an
km/h) even when the Parking Safety
audible warning will sound.
button indicator is on. Forward Parking
• When more than two objects are
Distance Warning will operate again
detected at the same time, the closest
when the vehicle's forward speed
one will be warned with an audible
decreases below 6 mph (10 km/h) while
warning.
the Parking Safety button indicator is
on.
• The shape of the indicator in the
illustration may differ from the actual
•
When ‘Parking Distance Warning Auto
vehicle.
On’ is selected, the Parking Safety
button indicator light stays on.
•
When ‘Parking Distance Warning Auto
Reverse Parking Distance Warning
On’ is deselected, and the vehicle’s
• Reverse Parking Distance Warning will
forward speed is above 12 mph (20
operate when the gear is in R (Reverse).
km/h), the Parking Safety (
) button
• Reverse Parking Distance Warning
indicator will turn off. Although you
helps detect a person, animal or object
drive below 6 mph (10 km/h), Forward
in the rear when the vehicle’s rearward
Parking Distance Warning will not turn
speed is below 6 mph (10 km/h).
on.
• When the vehicle’s rearward speed is
* If equipped with Reverse Parking
below 6 mph (10 km/h), both the front
Collision-Avoidance Assist or Remote
and rear ultrasonic sensors will help
Smart Parking Assist, Forward/Reverse
detect objects. However, the front
Parking Distance Warning will turn off
ultrasonic sensors can help detect a
when vehicle speed is above 18 mph
person, animal or object when it is
(30 km/h).
within 24 in. (60 cm) from the sensors.
7-130
7
However, if one or more of the following
Warning
occurs, first check whether the ultrasonic
Distance
indicator
sensor is damaged or blocked with
Warning
from
when
foreign material. If it still does not work
sound
object
driving
properly, have the vehicle be inspected
backward
by an authorized HYUNDAI dealer.
• The audible warning does not sound.
24 - 48 in.
Buzzer beeps
• The buzzer sounds intermittently.
(60 - 120
intermittently
cm)
• The ‘Ultrasonic sensor error or
blockage’ warning message appears on
12 - 24 in.
the cluster.
Beeps more
(30 - 60
frequently
cm)
12 in.
Beeps
(within 30
continuously
cm)
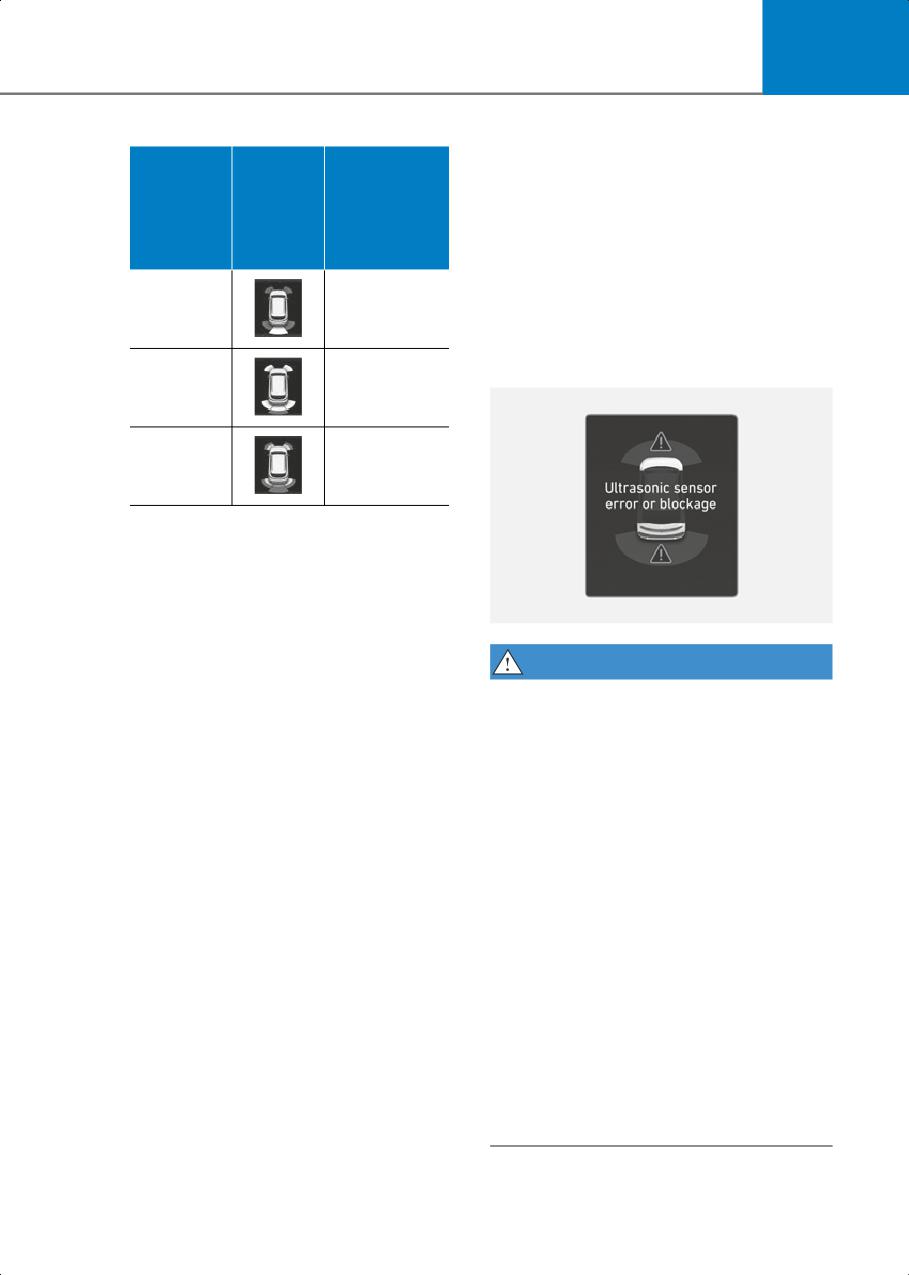
•
The corresponding indicator will
illuminate whenever each ultrasonic
sensor detects a person, animal or
object in its sensing range. Also an
audible warning will sound.
•
When more than two objects are
ONE1071205L
detected at the same time, the closest
WARNING
one will be warned with an audible
warning.
• Forward/Reverse Parking Distance
•
The shape of the indicator in the
Warning is a supplemental function.
illustration may differ from the actual
The operation of Forward/Reverse
vehicle.
Parking Distance Warning can be
affected by several factors (including
environmental conditions). It is the
Forward/Reverse Parking
responsibility of the driver to always
Distance Warning
check the front and rear views before
and while parking.
Malfunction and Precautions
• Your new vehicle warranty does not
cover any accidents or damage to the
Forward/Reverse Parking Distance
vehicle due to the malfunction of
Warning malfunction
Forward/Reverse Parking Distance
After starting the vehicle, a beep will
Warning.
sound when the gear is shifted to R
• Pay close attention when driving near
(Reverse) to indicate Forward/Reverse
objects, pedestrians, and especially
Parking Distance Warning is operating
children. Some objects may not be
properly.
detected by the ultrasonic sensors, due
to the objects distance, size or material,
all of which can limit the effectiveness
of the sensor.
7-131
Driver Assistance System
Limitations of Forward/Reverse
•
The following objects may not be
Parking Distance Warning
detected:
• Forward/Reverse Parking Distance
- Sharp or slim objects, such as ropes,
Warning may not operate properly
chains or small poles.
when:
- Objects, which tend to absorb sensor
- Moisture is frozen to the sensor
frequency, such as clothes, spongy
material or snow.
- Sensor is covered with substance,
such as snow or water
- Objects smaller than 40 in. (100 cm)
(Forward/Reverse Parking Distance
in length and narrower than 6 in. (14
Warning will operate properly when
cm) in diameter.
such substance is removed.)
- Pedestrians, animals or objects that
- The weather is extremely hot or cold
are very close to the ultrasonic
sensors
- The sensor or sensor assembly is
disassembled
•
Parking Distance Warning Indicators
may be displayed differently from the
- The surface of the sensor is pressed
actual detected location when the
hard or hit with a hard object
obstacle is located between the
- The surface of the sensor is scratched
sensors.
with a sharp object
•
Parking Distance Warning indicator
- The sensors or its surrounding area is
may not occur sequentially depending
directly sprayed with high pressure
on vehicle speed or obstacle shape.
washer
•
If Forward/Reverse Parking Distance
• Forward/Reverse Parking Distance
Warning needs repair, have the vehicle
Warning may malfunction when:
be inspected by an authorized
- Heavy rain or water spray is present
HYUNDAI dealer.
- Water flows on the surface of the
sensor
- Affected by another vehicle’s sensors
- The sensor is covered with snow or
ice
- Driving on uneven road, gravel roads
or bushes
- Objects that generates ultrasonic
waves are near the sensor
- License plate is installed in a different
spot from the original location
- The vehicle bumper height or
ultrasonic sensor installation has
been modified
- Attaching equipment or accessories
next to the ultrasonic sensors
7-132
7
Reverse Parking
Reverse Parking
Collision-Avoidance Assist
Collision-Avoidance
Settings
Assist (PCA)
if equipped
Setting features
Reverse Parking Collision-Avoidance
Parking Safety
Assist can warn the driver or assist with
braking to help reduce the possibility of
• With the vehicle on, select or deselect
collision with a pedestrian or an object
Driver Assistance > Parking Safety
when backing up.
from the Settings menu to set whether
or not to use each function.
- If ‘Rear Active Assist’ (or ‘Active rear
Detecting sensor
assist’) is selected, Reverse Parking
Collision-Avoidance Assist will warn
the driver and assist with braking
when a collision with a pedestrian or
an object is imminent.
- If ‘Rear Warning Only’ (or ‘Rear
warning only’) is selected, Reverse
Parking Collision-Avoidance Assist
will warn the driver when a collision
with a pedestrian or an object is
imminent. Braking will not be
assisted.
ONE1071038N
- If ‘Off’ is selected, Reverse Parking
Collision-Avoidance Assist will turn
off.
• If Parking Safety (
) button is pressed
more than 2 seconds, ‘Rear Active
Assist’ or ‘Rear Warning Only’ can be
turned on or off.
- Whenever the vehicle is restarted,
‘Rear Active Assist’ is automatically
selected.
ONE1071051N
(1)
: Rear view camera,
(2) : Rear ultrasonic sensors
Refer to the picture above for the detailed
location of the detecting sensors.
7-133
Driver Assistance System
Warning Timing
Warning Methods
ONE1073282N
ONE1073352N
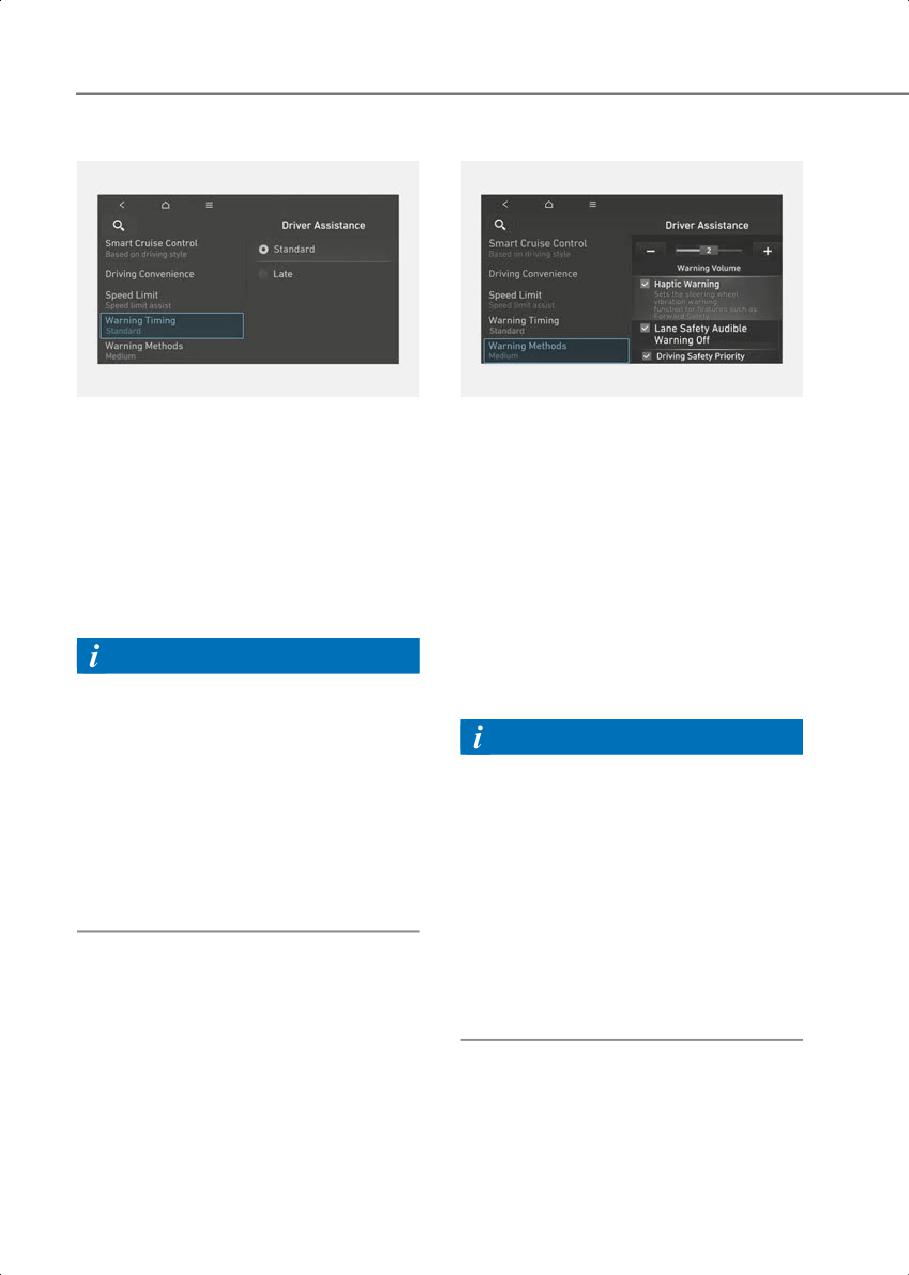
With the vehicle on, select Driver
The Warning Methods can be set with the
Assistance > Warning Timing from the
vehicle on.
Settings menu to change the initial
Select Setup > Vehicle > Driver
warning activation time for Reverse
Assistance > Warning Methods from the
Parking Collision-Avoidance Assist.
settings menu in the infotainment system
When the vehicle is first delivered,
to change the following settings:
Warning Timing is set to ‘Standard’. If you
• Warning Volume: Adjusts the volume of
change the Warning Timing, the Warning
the warning sound.
Timing of other Driver Assistance systems
If you turn off the Warning Volume, for
may change.
your safety, the function may warn you
with a low volume.
Information
• Haptic Warning: Activate the steering
• The setting of the Warning timing and
wheel vibration warning. (if equipped)
Warning methods applies to all
functions of Forward
Information
Collision-Avoidance Assist.
• If you change the Warning Methods, it
• Even though ‘Standard’ is selected for
can be applied to each function of the
Warning timing, if the front vehicle
driver assistance system. Please check
suddenly stops, the initial warning
and change it in each function.
activation time may seem late.
• If the vehicle is restarted, Warning
• Select ‘Late’ for Warning timing when
Methods will maintain the last setting.
traffic is light and when driving speed is
slow.
• The setting menu may not exist based
on vehicle specification.
• The Warning Volume and Haptic
Warning cannot be turned off at the
same time. When one of the warning is
turned off the other is activated.
7-134

7
Reverse Parking
Rear Active Assist
Collision-Avoidance Assist
•
If Reverse Parking Collision-Avoidance
Assist detects a risk of collision with a
Operation
pedestrian or an object, Reverse
Parking Collision-Avoidance Assist will
Operating conditions
warn the driver with an audible warning
If ‘Rear Active Assist’ or ‘Rear Warning
and warning message on the cluster.
Only’ is set from the Settings menu,
When Rear View Monitor is operating, a
Reverse Parking Collision-Avoidance
warning will appear on the
Assist will be in the ready status when the
infotainment system screen.
following conditions are satisfied:
•
If Reverse Parking Collision-Avoidance
• The liftgate is closed
Assist detects an imminent collision
with a pedestrian or an object behind
• The gear is shifted to R (Reverse)
the vehicle, Reverse Parking
• Vehicle speed is below 6 mph (10 km/h)
Collision-Avoidance Assist will assist
• Reverse Parking Collision-Avoidance
you with braking. The driver needs to
Assist components such as the rear
pay attention as the brake assist will
view camera and the rear ultrasonic
end within 5 minutes. The driver must
sensors are in normal conditions
immediately depress the brake pedal
and check vehicle surroundings.
When Reverse Parking
Collision-Avoidance Assist activates, a
•
Brake control will end when:
line appears behind the vehicle image in
- The gear is shifted to P (Park) or D
the instrument cluster.
(Drive).
Reverse Parking Collision-Avoidance
- The driver depresses the brake pedal
Assist operates only once after the gear is
with sufficient power
shifted to R (Reverse). To reactivate
- Braking assist has lasted for
Reverse Parking Collision-Avoidance
approximately 5 minutes, the
Assist, shift the gear from another gear to
Electronic Parking Brake (EPB) is
R (Reverse).
engaged at the brake assist is
released
•
The warning will turn off when:
- The gear is shifted to P (Park), N
(Neutral), or D (Drive)
ONE1071053
7-135
Driver Assistance System
Rear Warning Only
Reverse Parking
Collision-Avoidance Assist disabled
• If Reverse Parking Collision-Avoidance
Assist detects a risk of collision with a
pedestrian or an object, Reverse
Parking Collision-Avoidance Assist will
warn the driver with an audible warning
and warning message on the cluster.
When Rear View Monitor is operating, a
warning will appear on the
infotainment system screen.
• If ‘Rear Warning Only’ is selected,
braking will not be assisted.
• The warning will turn off when the gear
ONE1071037N
is shifted to P (Park), N (Neutral) or D
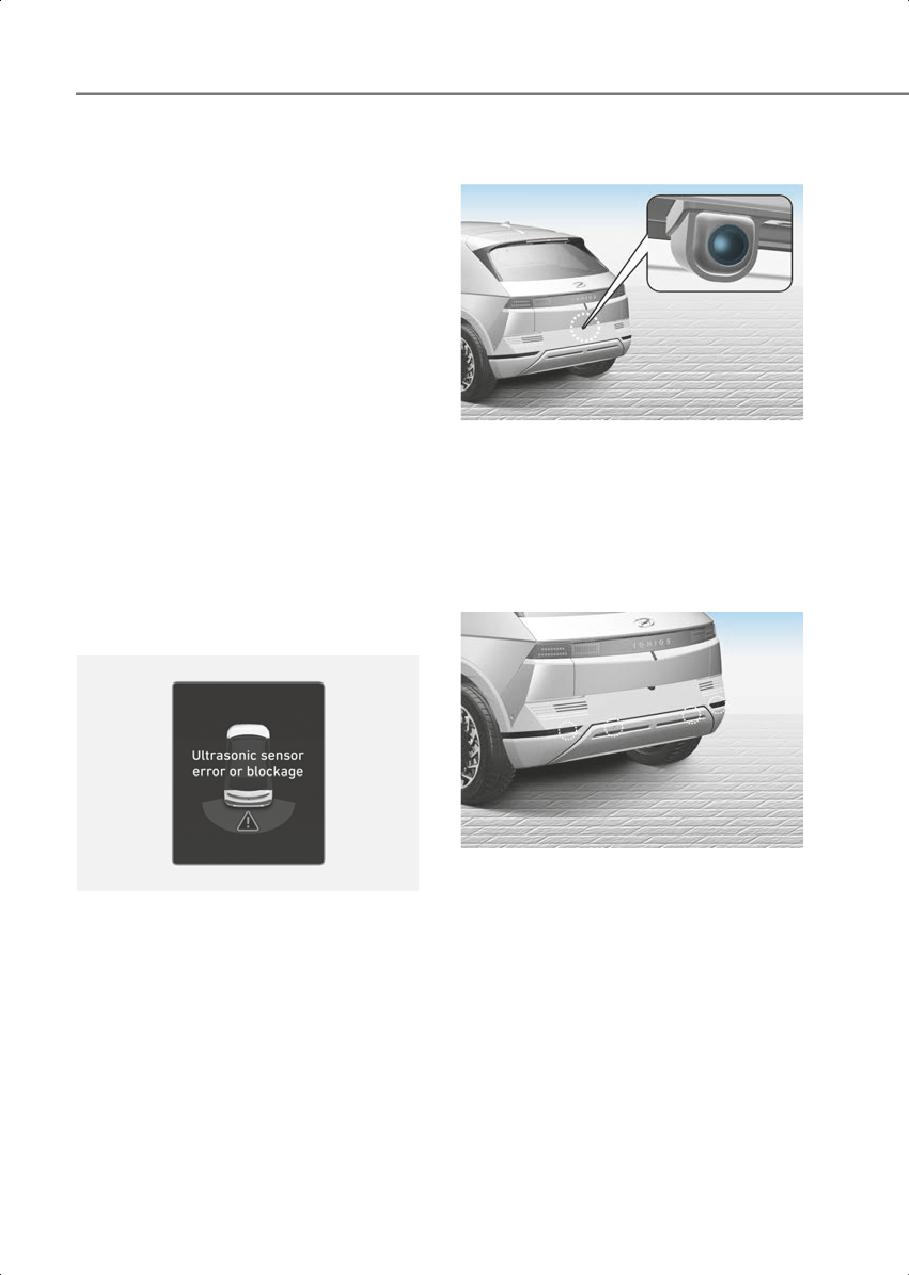
The rear view camera is used as a
(Drive).
detecting sensor to detect pedestrians. If
the camera lens is covered with foreign
Reverse Parking
material, such as snow or rain, it may
adversely affect camera performance and
Collision-Avoidance Assist
Reverse Parking Collision-Avoidance
Malfunction and Limitations
Assist may not operate properly. Always
keep the camera lens clean.
Reverse Parking Collision-
Avoidance Assist malfunction
ONE1071055N
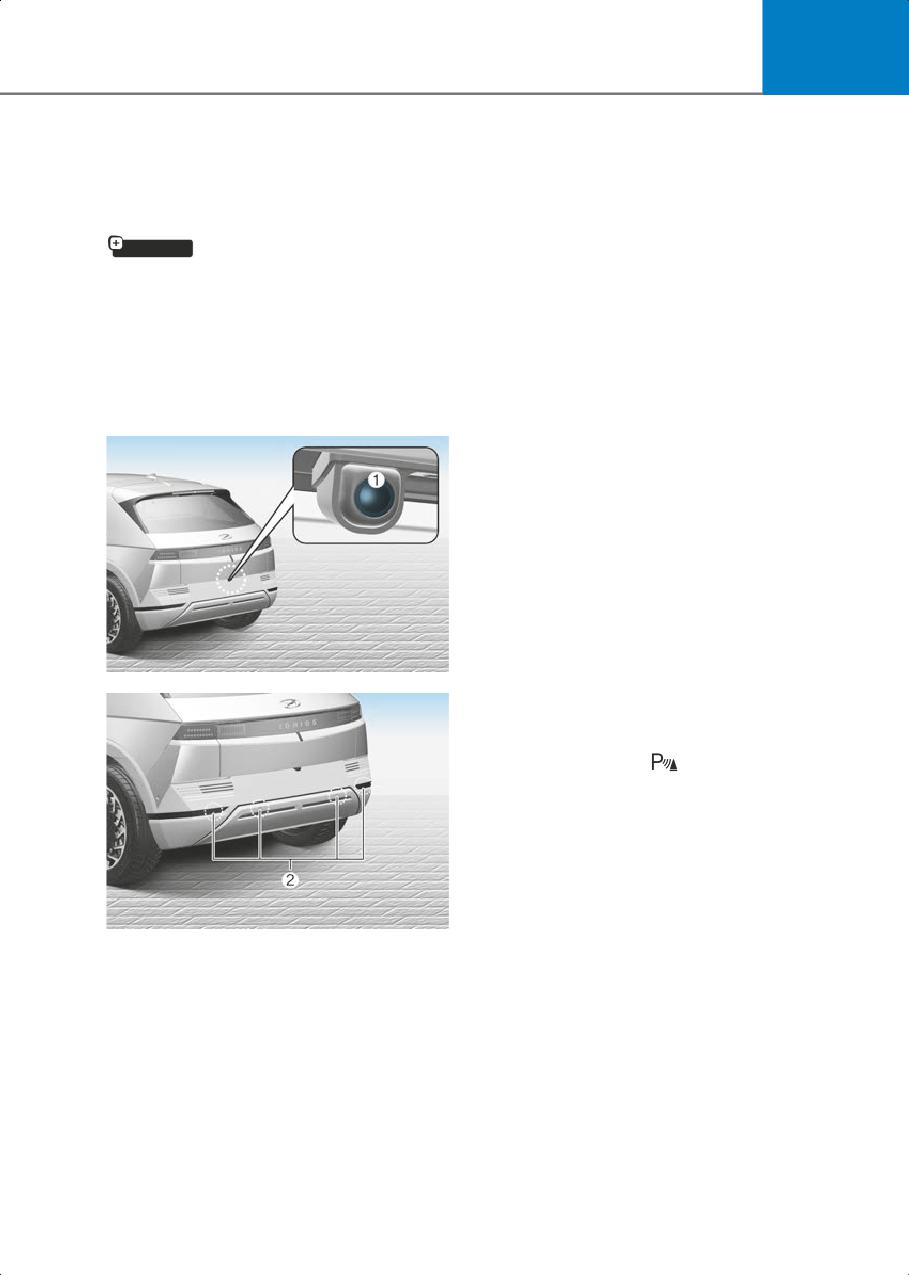
The rear ultrasonic sensors are located
ONE1071106L
inside the rear bumper to detect objects
When Reverse Parking
in the rear area. If the sensors are covered
Collision-Avoidance Assist or other
with foreign material, such as snow or
related functions are not working
rain, it may adversely affect sensor
properly, the ‘Check Parking Safety
performance and Reverse Parking
system’ warning message will appear on
Collision-Avoidance Assist may not
the cluster, and Reverse Parking
operate properly. Always keep the rear
Collision-Avoidance Assist will turn off
bumper clean.
automatically. Have the vehicle be
inspected by an authorized HYUNDAI
dealer.
7-136
7
Rear view camera
Limitations of Reverse Parking
Collision-Avoidance Assist
Reverse Parking Collision-Avoidance
Assist may not assist braking or warn the
driver even if there are pedestrians or
objects under the following
circumstances:
•
Braking system components such as
brake discs, calipers, etc., are modified
•
Wheel alignment has problems or
suspension components are modified
ONE1071056L
•
Accessories are attached to the
Rear ultrasonic sensor
steering wheel, or steering
components are modified
•
The vehicle is installed with a snow
chain, spare tire or different size wheel
•
An object that generates ultrasonic
waves is nearby
•
A wireless device with a transmission
function operates near the ultrasonic
sensors
•
Your vehicle is affected by another
vehicle's Parking Distance Warning
ONE1071106L
•
Any non-factory equipment or
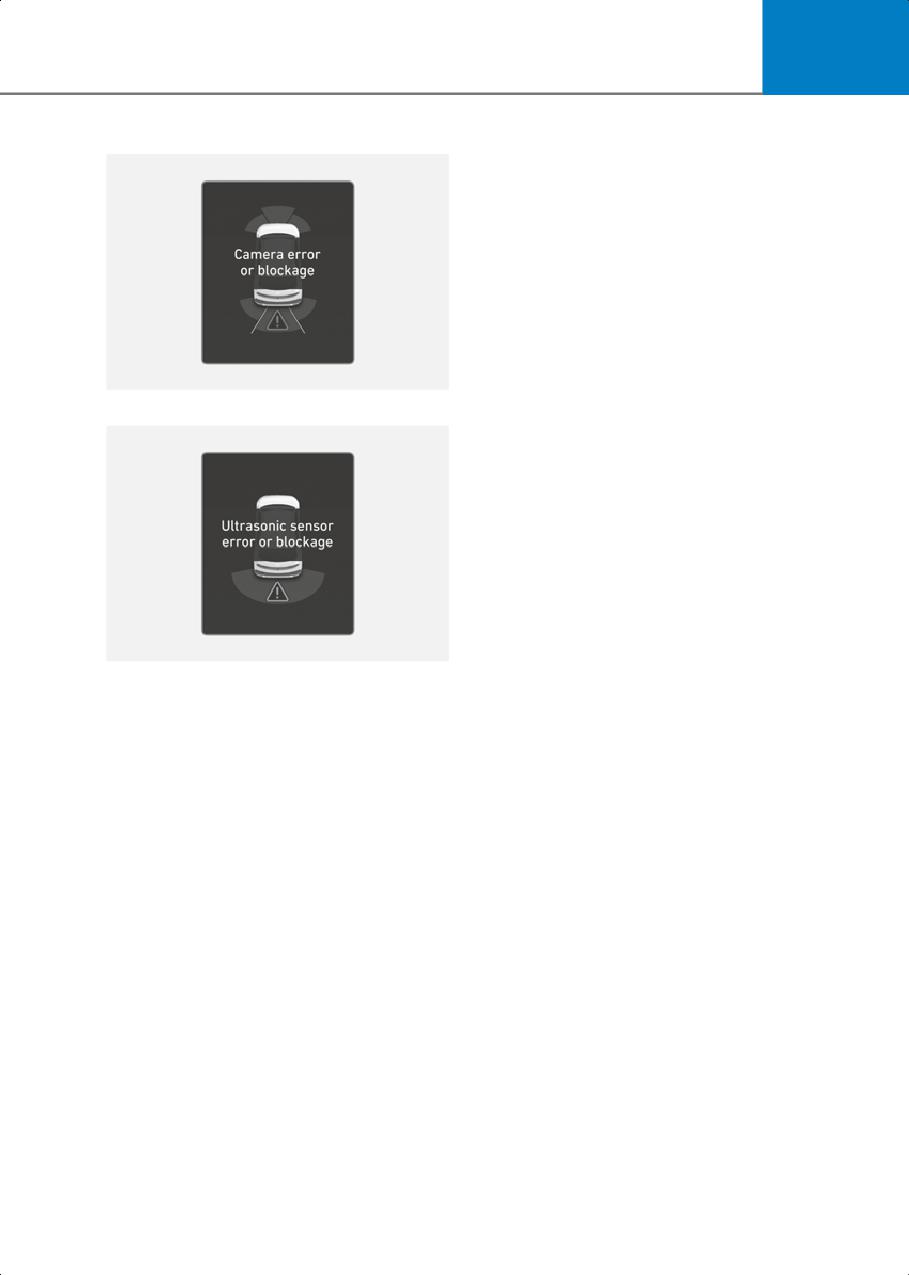
The ‘Camera error or blockage’ or
accessory is installed
‘Ultrasonic sensor error or blockage’
warning message will appear on the
•
Your vehicle is unstable due to an
cluster if the following situations occur:
accident or other causes
• The rear view camera or rear ultrasonic
•
Bumper height or rear ultrasonic sensor
sensor(s) is covered with foreign
installation has been modified
material, such as snow or rain, etc.
•
Rear view camera or rear ultrasonic
• There is inclement weather, such as
sensor(s) is damaged
heavy snow, heavy rain, etc.
•
Rear view camera or the rear ultrasonic
If this occurs, Reverse Parking
sensor(s) is stained with foreign
Collision-Avoidance Assist may turn off or
material, such as snow, dirt, etc.
may not operate properly. Check whether
•
Rear view camera is obscured by a light
the rear view camera and rear ultrasonic
source or by inclement weather, such
sensors are clean.
as heavy rain, fog, snow, etc.
•
The surrounding is very bright or very
dark
•
Outside temperature is very high or
very low
•
The wind is either strong (above 12 mph
(20 km/h)) or blowing perpendicular to
the rear bumper
7-137
Driver Assistance System
•
Objects generating excessive noise,
Reverse Parking Collision-Avoidance
such as vehicle horns, loud motorcycle
Assist may unnecessarily warn the driver
engines or truck air brakes, are near
or assist with braking even if there are no
your vehicle
pedestrians or objects under the
following circumstances:
•
An ultrasonic sensor with similar
frequency is near your vehicle
•
Any non-factory equipment or
accessory is installed
•
There is ground height difference
between the vehicle and the pedestrian
•
Your vehicle is unstable due to an
accident or other causes
•
The image of the pedestrian in the rear
view camera is indistinguishable from
•
Bumper height or rear ultrasonic sensor
the background
installation has been modified
•
The pedestrian is near the rear edge of
•
Your vehicle height is low or high due to
the vehicle
heavy loads, abnormal tire pressure,
etc.
•
The pedestrian is not standing upright
•
Rear view camera or the rear ultrasonic
•
The pedestrian is either very short or
sensor(s) is stained with foreign
very tall for Reverse Parking
material, such as snow, dirt, etc.
Collision-Avoidance Assist to detect
•
The pattern on the road is mistaken for
•
The pedestrian or cyclist is wearing
a pedestrian
clothing that easily blends into the
background, making it difficult to
•
There is shadow or light reflecting on
detect
the ground
•
The pedestrian is wearing clothing that
•
Pedestrians or objects are around the
does not reflect ultrasonic waves well
path of the vehicle
•
Size, thickness, height, or shape of the
•
Objects generating excessive noise,
object does not reflect ultrasonic waves
such as vehicle horns, loud motorcycle
well (for example, pole, bush, curbs,
engines or truck air brakes, are near
carts, edge of a wall, etc.)
your vehicle
•
The pedestrian or the object is moving
•
Your vehicle is backing towards a
narrow passage or parking space
•
The pedestrian or the object is very
close to the rear of the vehicle
•
Your vehicle is backing towards an
uneven road surface, such as an
•
A wall is behind the pedestrian or the
unpaved road, gravel, bump, gradient,
object
etc.
•
The object is not located at the rear
•
A trailer or carrier is installed on the rear
center of your vehicle
of your vehicle
•
The object is not parallel to the rear
•
An ultrasonic sensor with similar
bumper
frequency is near your vehicle
•
The road is slippery or inclined
•
The driver backs up the vehicle
immediately after shifting to R
(Reverse)
•
The driver accelerates or circles the
vehicle
7-138

7
WARNING
CAUTION
Take the following precautions when
•
Noise may be heard when sudden
using Reverse Parking
braking occurs to avoid a collision.
Collision-Avoidance Assist:
•
If any other warning sound such as the
•
Always pay extreme caution while
seat belt warning chime is already
driving. The driver is responsible for
generated, Reverse Parking
controlling the brake for safe driving.
Collision-Avoidance Assist warning
may not sound.
•
Always pay attention to road and traffic
conditions while driving, whether or not
•
Reverse Parking Collision-Avoidance
there is a warning.
Assist may not work properly if the
bumper has been damaged, replaced
•
Always look around your vehicle to
or repaired.
make sure there are no pedestrians or
objects before moving the vehicle.
•
Reverse Parking Collision-Avoidance
Assist may not operate properly if
•
The performance of Reverse Parking
interfered by strong electromagnetic
Collision-Avoidance Assist may vary
waves.
under certain conditions. If vehicle
speed is above 2 mph (4 km/h), Reverse
•
Playing the vehicle audio system at
Parking Collision-Avoidance Assist will
high volume may prevent passengers
provide collision avoidance assist only
from hearing Reverse Parking
when pedestrians are detected. Always
Collision-Avoidance Assist warning
look around and pay attention when
sounds.
backing up your vehicle.
•
Turn off Reverse Parking
•
Some objects may not be detected by
Collision-Avoidance Assist when
the rear ultrasonic sensors due to the
towing a trailer. If towing and moving in
objects distance, size or material, all of
reverse, Reverse Parking
which can limit the effectiveness of the
Collision-Avoidance Assist will activate
sensor.
as it detects the trailer.
•
Reverse Parking Collision-Avoidance
•
The brake control may not operate
Assist may not operate properly or may
properly depending on the status of
operate unnecessarily depending on
ESC (Electronic Stability Control).
the road conditions and the
There will only be a warning when:
surroundings.
- The ESC (Electronic Stability Control)
•
Do not solely rely on Reverse Parking
warning light is on
Collision-Avoidance Assist. Doing so
- ESC (Electronic Stability Control) is
may lead to vehicle damage or injuries.
engaged in a different function
CAUTION
Take the following precautions to
maintain optimal performance of the
detecting sensors:
• Always keep the rear view camera and
rear ultrasonic sensors clean.
7-139
Driver Assistance System
•
Do not use any cleanser containing acid
Remote Smart Parking
or alkaline detergents when cleaning
the rear view camera lens. Use only a
Assist (RSPA)
mild soap or neutral detergent, and
if equipped
rinse thoroughly with water.
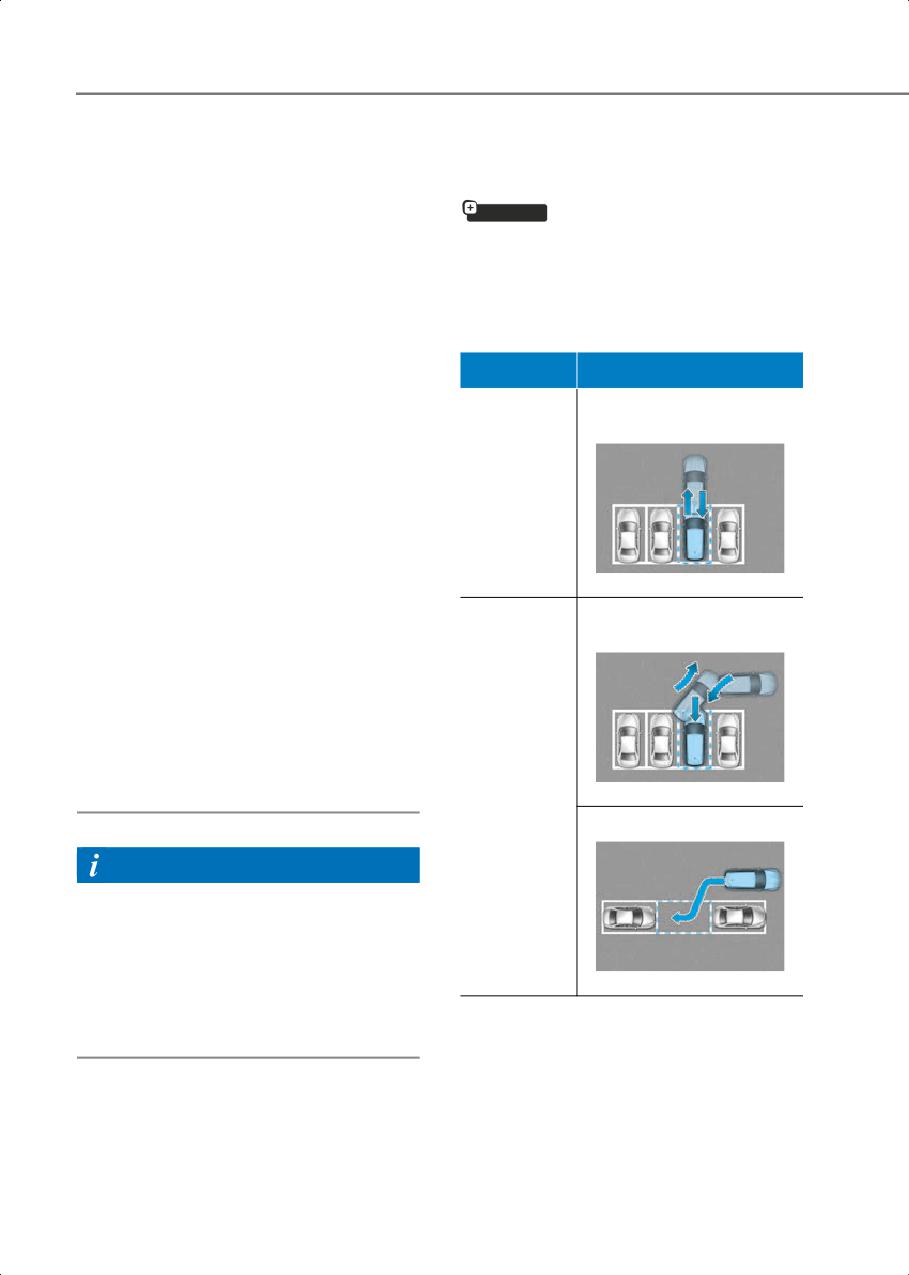
Remote Smart Parking Assist uses vehicle
•
Do not spray the rear view camera or
sensors to help the driver park and exit
the rear ultrasonic sensors or their
parking spaces remotely from outside the
surrounding area directly with a high
vehicle by controlling the steering wheel,
pressure washer. It may cause the rear
vehicle speed and gearshifts.
view camera or the rear ultrasonic
sensors to malfunction.
Function
Description
•
Do not apply objects, such as a bumper
sticker or a bumper guard, near the rear
Remotely moving forward
view camera or rear ultrasonic sensors
or backward
or apply paint to the bumper. Doing so
may adversely affect the performance
Remote
of Reverse Parking Collision-Avoidance
Operation
Assist.
•
Never disassemble or apply impact on
the rear view camera or the rear
ultrasonic sensors components.
OJX1079037
•
Do not apply unnecessary force on the
Perpendicular reverse
rear view camera or the rear ultrasonic
parking
sensors. Reverse Parking
Collision-Avoidance Assist may not
operate properly if the rear view
camera or the rear ultrasonic sensor(s)
is forcibly moved out of proper
alignment. Have the vehicle be
Smart
inspected by an authorized HYUNDAI
Parking or
OJX1079034
dealer.
Remote
Smart
Parallel reverse parking
Parking
Information
Reverse Parking Collision-Avoidance
Assist can detect a pedestrian or an
object when:
• A pedestrian is standing behind the
OJX1079035
vehicle
• A large obstacle, such as a vehicle, is
parked in the rear center of your vehicle
7-140
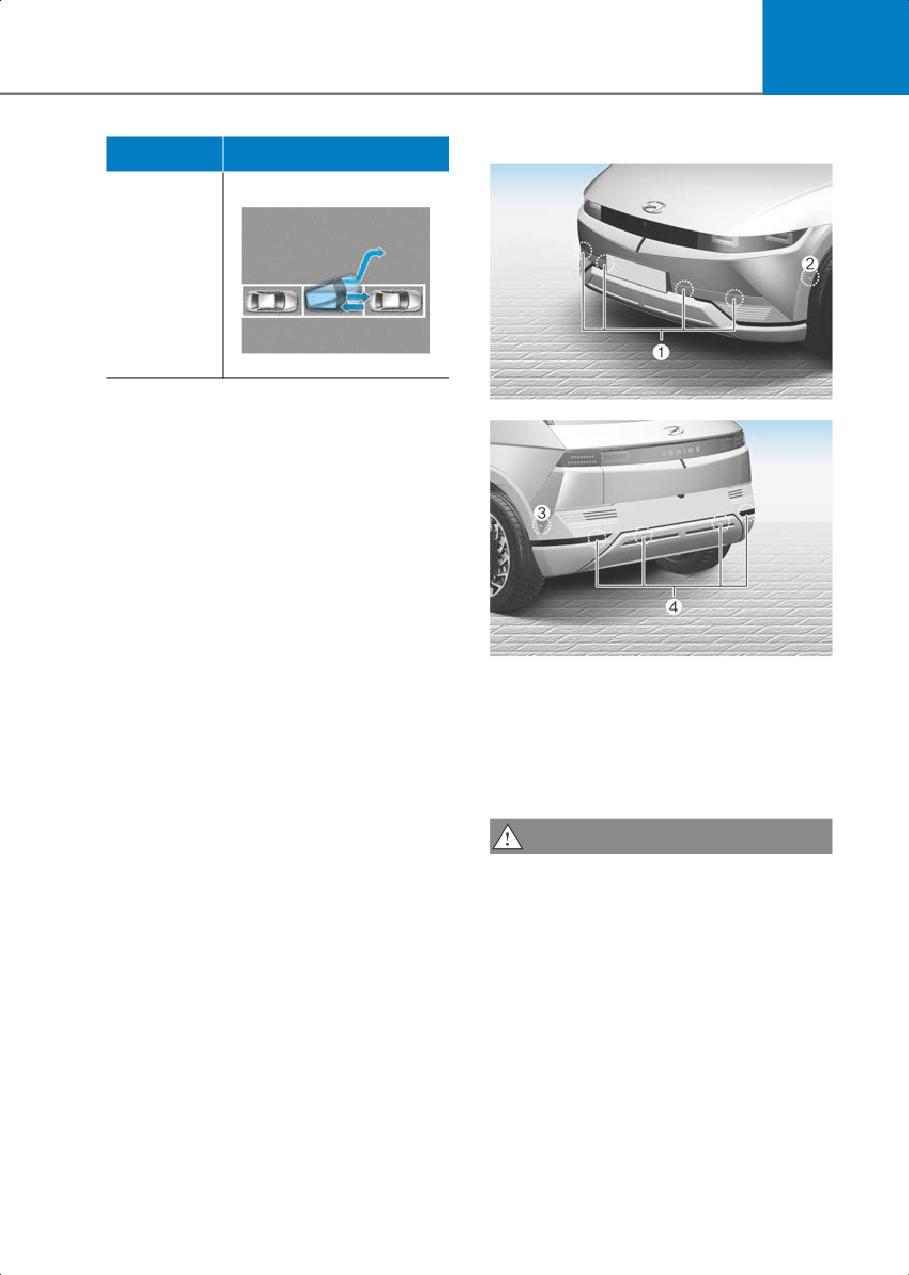
7
Detecting sensors
Function
Description
Parallel forward exit
Smart Exit
OJX1079036
•
Remote Smart Parking and Remote
ONE1071057
Operation function may be operated
from outside the vehicle using the
smart key.
•
Smart Parking and Remote Smart
Parking function may be operated from
inside the vehicle.
•
Smart Parking and Remote Smart
Parking function helps the driver with
perpendicular reverse parking and
parallel reverse parking.
•
Smart Exit function helps the driver
with parallel forward exit.
ONE1071058N
(1)
: Front ultrasonic sensors,
•
When Remote Smart Parking Assist
operates, Parking Distance Warning,
(2) : Front corner ultrasonic sensors,
Rear View monitor and Surround View
(3) : Rear corner ultrasonic sensors,
Monitor will also operate. For more
(4) : Rear ultrasonic sensors
details, refer to “Reverse Parking
Refer to the picture above for the detailed
Distance Warning (PDW)”, “Rear View
location of the detecting sensors.
Monitor (RVM)” and “Surround View
Monitor (SVM)” sections in this chapter.
CAUTION
Take the following precautions to
maintain optimal performance of the
detecting sensors:
• Never disassemble the detecting
sensor or sensor assembly, or cause
any damage to it.
• If the detecting sensors need repair,
have the vehicle be inspected by an
authorized HYUNDAI dealer.
7-141
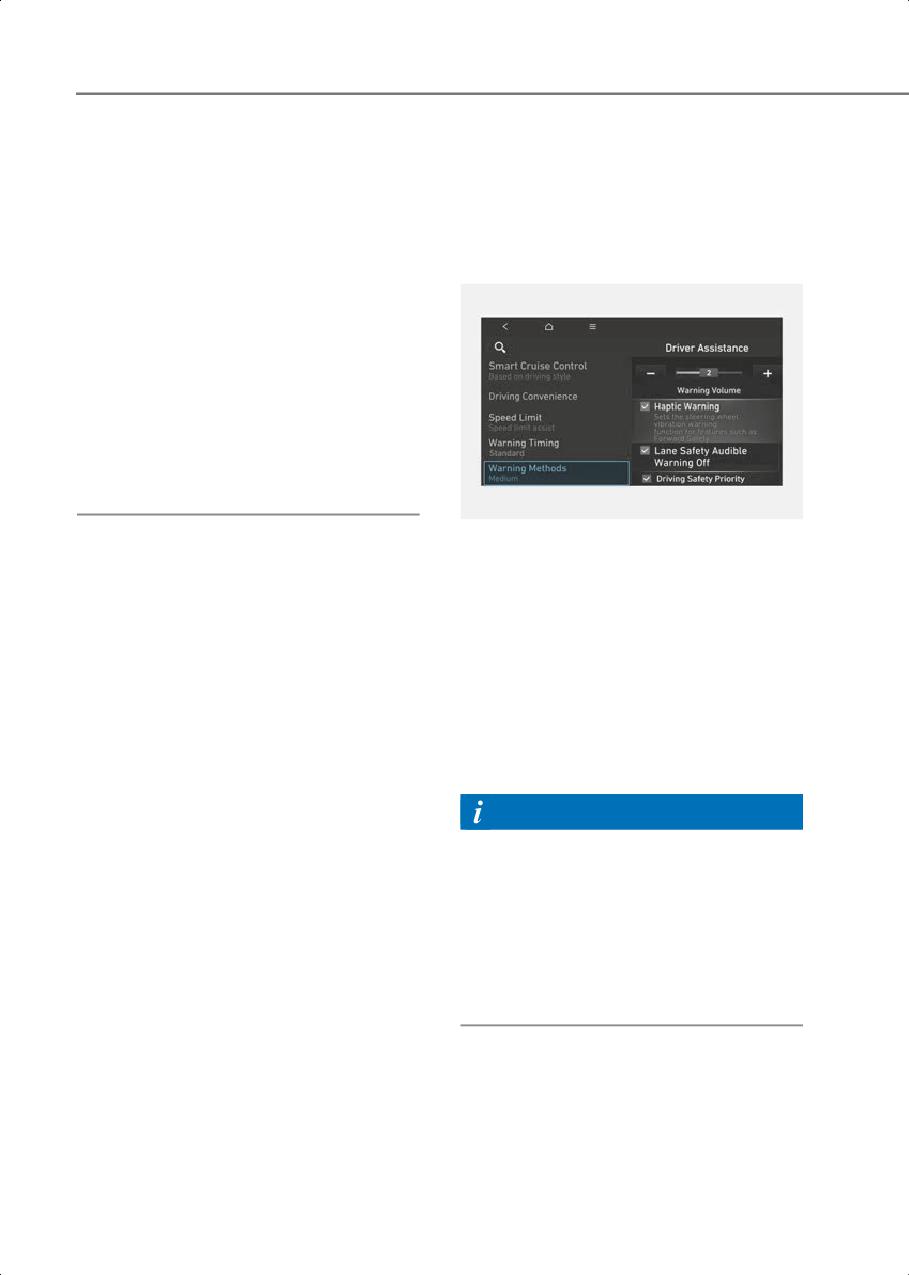
Driver Assistance System
•
Remote Smart Parking Assist may
Remote Smart Parking Assist
malfunction if the vehicle bumper
Settings
height or ultrasonic sensor installation
has been modified or damaged. Any
non-factory installed equipment or
Settings features
accessories may also interfere with the
sensor performance.
Warning Methods
•
When the ultrasonic sensor is frozen or
stained with snow, dirt, or water, the
sensor may not operate until the stains
are removed using a soft cloth.
•
Do not push, scratch or strike the
ultrasonic sensor. Sensor damage
could occur.
•
Do not spray the ultrasonic sensors or
its surrounding area directly with a high
pressure washer.
ONE1073352N
The Warning Methods can be set with the
vehicle on.
Select Setup > Vehicle > Driver
Assistance > Warning Methods from the
settings menu in the infotainment system
to change the following settings:
• Warning Volume: Adjusts the volume of
the warning sound.
If you turn off the Warning Volume, for
your safety, the function may warn you
with a low volume.
Information
• If you change the Warning Methods, it
can be applied to each function of the
driver assistance system. Please check
and change it in each function.
• If the vehicle is restarted, Warning
Methods will maintain the last setting.
• The setting menu may not exist based
on vehicle specification.
7-142
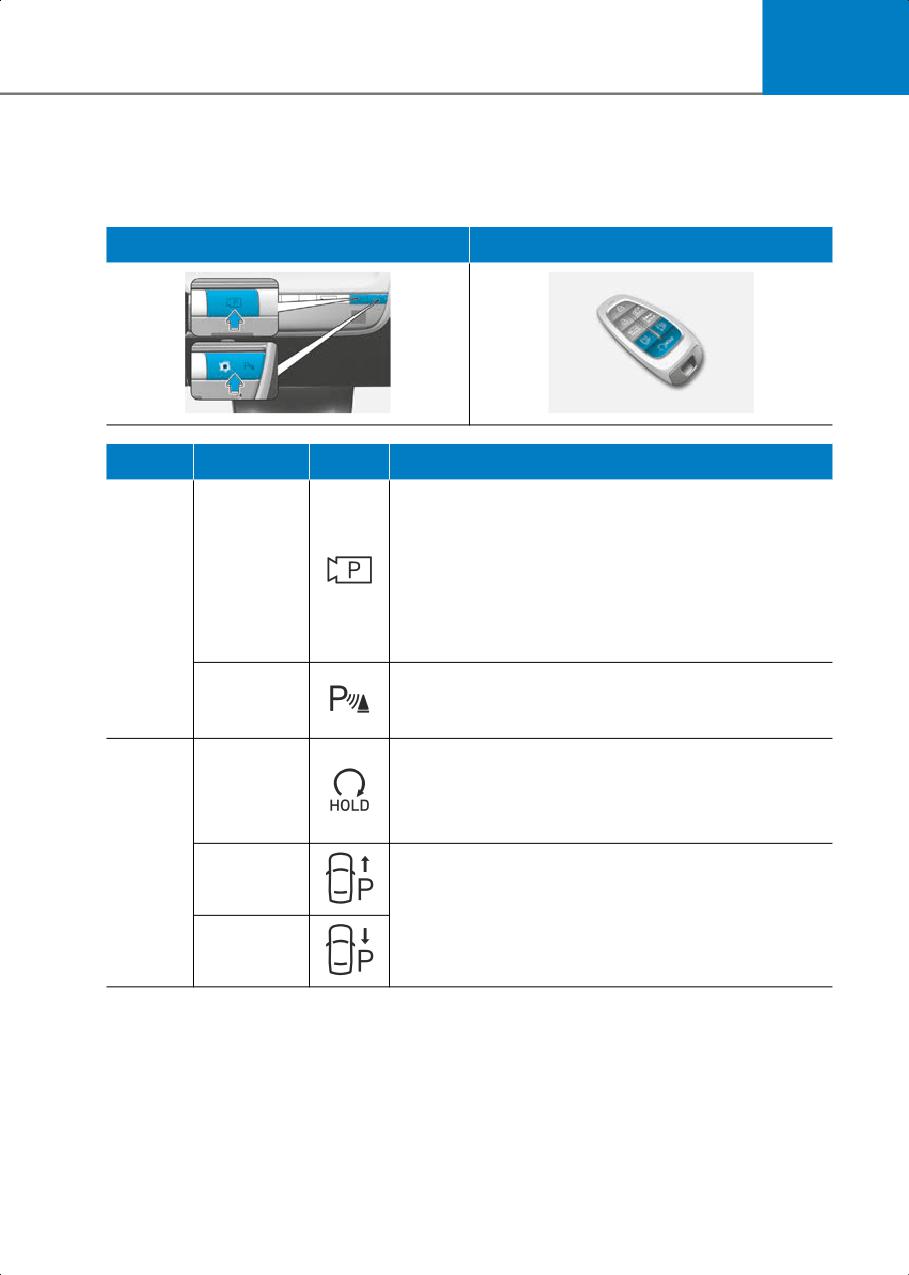
7
Remote Smart Parking Assist Operation
Remote Smart Parking Assist button
Parking/View button, Parking Safety button
Smart key
Location
Name
Symbol
Description
• Press and hold the Parking/View button to turn on
Remote Smart Parking Assist. Also, Forward/Reverse
Parking Distance warning will automatically turn on.
However, functions may differ depending on the
Parking/Vie
situations. Refer to each function's description for
w button
more details in the following pages.
Inside
• Press and hold the Parking/View button while Smart
vehicle
Parking or Smart Exit function is on to operate the
function.
Parking
• Press the Parking Safety button while Remote Smart
Safety
Parking Assist is operating to end Remote Smart
button
Parking Assist operation.
• Press the Remote Start button after the door is locked
with the vehicle off to start the vehicle remotely.
Remote
• Press the Remote Start button while Remote Smart
Start button
Parking or Remote Operation function is operating to
end function operation.
Smart
Forward
• When using Remote Smart Parking function,
key
button
regardless of which direction button is pressed,
parking is supported while the button is pressed.
• When using the Remote Operation function, the
Backward
vehicle moves in the direction of the button while the
button
button is pressed.
7-143
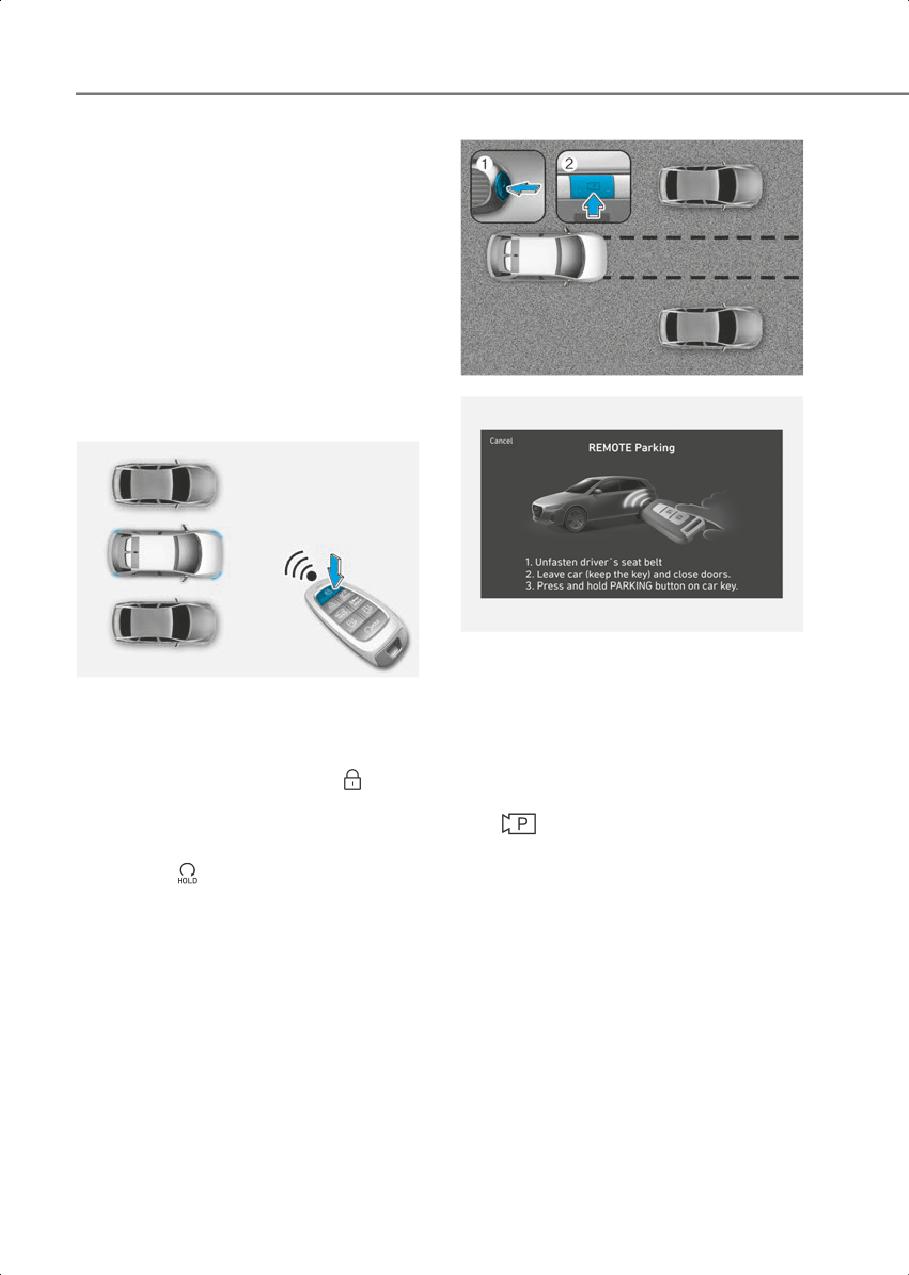
Driver Assistance System
Remote Operation
Operating order
Remote Operation operates in the
following order:
1. Getting ready to remotely move
forward and backward
2. Remotely moving forward and
backward
1. Getting ready to remotely move
forward and backward
ONE1071062
There are two ways to operate Remote
Operation function.
ONE1071217L
Method (2) Using the function with
ONE1071061
vehicle on
Method (1) Using the function with
1) Park the vehicle in front of the space
vehicle off
where you want to use Remote
1) Within a certain range from the
Operation function, and shift the gear
to P (Park).
vehicle press the door lock (
)
button on the smart key and lock all
2) Press and hold the Parking/View
doors.
(
) button to turn on Smart Parking
2) Press and hold the Remote Start
Assist. A message ‘Under Remote
Control’ will appear on the
button (
) within 4 seconds until the
infotainment system screen.
vehicle starts.
3) Get out of the vehicle with the smart
• For more details on remotely starting
key and close all doors.
the vehicle, refer to “Remote Start”
section in chapter 6.
• 'Agree' must be selected on the
infotainment system screen and the
infotainment system has to operate
properly to use Remote Operation
function.
• Method (2) can be used after the
vehicle has been driven above 3 mph
(5 km/h).
7-144
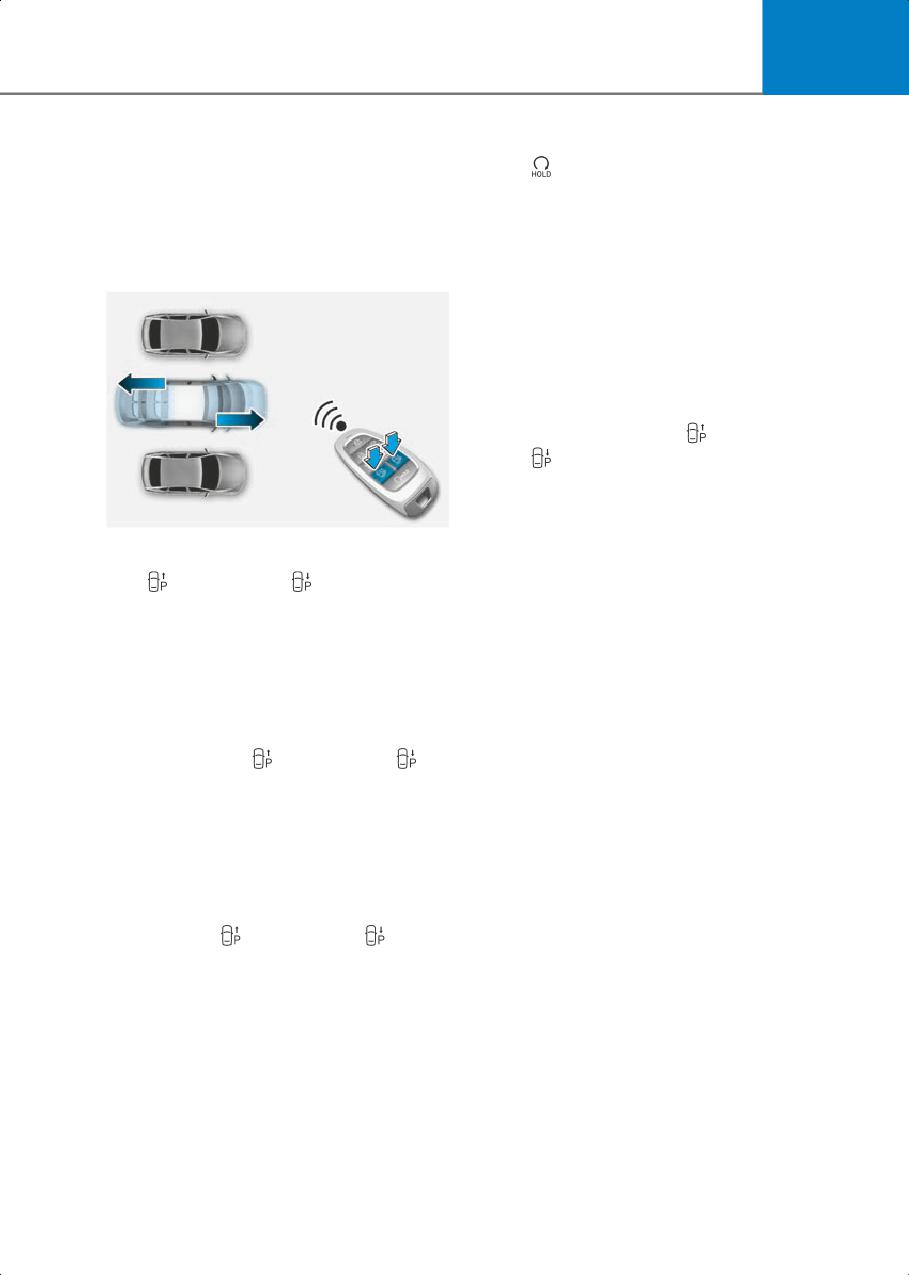
7
• If the function is turned on again after
In addition, when the Remote Start
parallel parking is completed by
(
) button is pressed on the smart
Remote Smart Parking Assist,
key from outside the vehicle, a
Remote Operation function can be
message will appear informing the
used with Method (2).
driver Remote Operation function is
2. Remotely moving forward and
complete and the vehicle will turn off.
backward
•
Check that all smart keys are outside
the vehicle when using Remote
Operation function.
•
Remote Operation function will
operate only when the smart key is
within 13 ft. (4 m) from the vehicle. If
there is no vehicle movement even
when the Forward (
) or Backward
(
) button is pressed on the smart
key, check the distance to the vehicle
and press the button again.
•
The detecting range of the smart key
ONE1071064
may vary depending on the
1) Press and hold one of the Forward
surroundings that are affected by
(
) or Backward (
) button on the
radio waves such as transmission
smart key. Remote Smart Parking
tower, broadcast station, etc.
Assist will automatically control the
•
When remotely moving forward
steering wheel, vehicle speed and
using method (1), it is recognized as
gearshift. The vehicle will move in the
an exit situation, and the vehicle
direction of the button pressed.
moves 13 ft. (4 m) to check for
2) While Remote Operation function is
pedestrians, animals or objects
operating, if you do not hold down
around the vehicle. After
the Forward (
) or Backward (
)
confirmation, the steering wheel is
button, the vehicle will stop and
controlled according to the condition
function control will pause. The
ahead.
function will start operating again
•
When remotely moving forward
when the button is pressed and held
using method (2), it is recognized as a
again.
parking situation, and will
3) When the vehicle reaches the target
immediately control the steering
location, release the smart key
wheel according to the condition
Forward (
) or Backward (
)
ahead to assist with entering the
button.
parking space and aligning the
vehicle. However, performance may
4) When the driver gets in the vehicle
reduce depending on the
with the smart key, a message will
pedestrians, animals, shape of
appear informing the driver Remote
objects, location, etc., around the
Operation function is complete on
vehicle.
the infotainment system screen and
the vehicle will remain on.
•
For moving remotely backward, both
method (1) and (2) aligns the steering
wheel first, and then will only move
the vehicle straight.
7-145
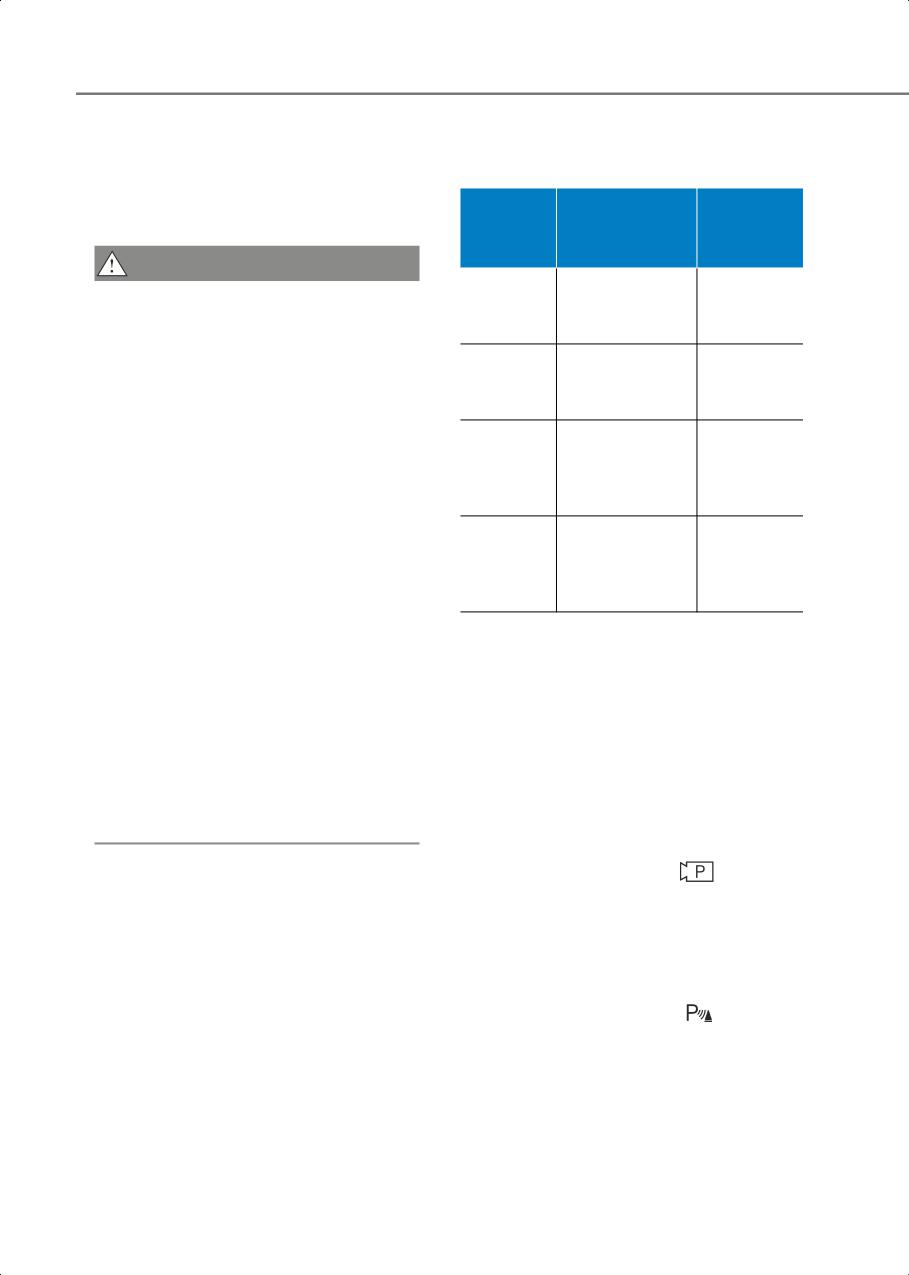
Driver Assistance System
•
When remotely moving forward or
Remote Operation function operation
backward is completed, the vehicle
status
will automatically shift to P (Park) and
engage EPB (Electronic Parking
Hazard
Operation
Brake).
Smart key LED
warning
status
light
CAUTION
Green LED
Under
•
When using Remote Operation
continuously
-
control
function, make sure that all
blinks
passengers have gotten out of the
vehicle.
Red LED
Pause
continuously
Blinks
•
If the vehicle’s battery is discharged
blinks
or Remote Smart Parking Assist
malfunctions when parked in a
Red LED
Blinks 3
narrow parking space, Remote
illuminates for
Off
times and
Operation function will not operate.
4 seconds and
turns off
Always park your vehicle in a space
then turns off
wide enough for you to get in or out
of your vehicle.
Green LED
Blinks 1
illuminates for
•
Please note that depending on the
Complete
time and
4 seconds and
parking space, you may not be able to
turns off
then turns off
exit from the space you have entered
by using Remote Operation function.
* Operation status by the hazard warning
•
After parking, the surrounding may
light may not be applicable based on the
change due to the movement of
regulation of your state.
surrounding vehicles. If this occurs,
* If the smart key is not within the
Remote Operation function may not
operating range from the vehicle
operate.
(approximately 13 ft. (4m)), the smart key
•
Before leaving the vehicle, close
LED will not illuminate or blink. Use the
windows and vision roof, and make
smart key within the operating range.
sure the vehicle is off before locking
the doors.
How to turn off Remote Operation function
while operating
• Press the Parking/View (
) button
while the infotainment system screen
guides the driver using method 2.
• Shift the gear except to P (Park) while
the infotainment system screen guides
the driver using method 2.
• Press the Parking Safety (
) button or
select ‘Cancel’ on the infotainment
system screen.
7-146
7
• Press the Remote Start (
) button on
The function will cancel in the
the smart key while the vehicle is being
following conditions when:
controlled by Remote Operation
•
The steering wheel is steered
function. Remote Operation function
•
The gear is shifted while the vehicle is
will turn off. At this time, the vehicle will
moving
turn off.
•
Operating EPB while the vehicle is
• Get on the vehicle with the smart key.
moving
Remote Operation function will turn
•
The vehicle hood is open
off. At this time, the vehicle will remain
on.
•
The brake pedal or accelerator pedal is
depressed when all the doors are
closed
The function will pause in the
following conditions when:
•
The smart key is outside the vehicle
when the brake pedal is depressed
• There is a pedestrian, animal or object
while the driver's door is open
in the direction the vehicle is moving
•
Rapid acceleration occurs
• The door or liftgate is open
•
Vehicle skid occurs
• The Forward (
) or Backward (
)
•
The wheel is stuck by an obstacle and
button is not continuously pressed
cannot move
• Simultaneously pressing multiple
•
Approximately 3 minutes and 50
buttons on a smart key
seconds has passed after Remote
• The smart key is not operated within 13
Operation function has started to
ft. (4 m) from the vehicle
operate
• Button of another smart key is pressed
•
The slope of the road exceeds the
in addition to the operating smart key
operational range
(Excluding start button)
•
The function is paused for more than 1
• Blind-Spot Collision-Avoidance Assist
minute
or Rear Cross-Traffic
•
The total travel distance of the vehicle
Collision-Avoidance Assist operates
has exceeded 45 ft. (14 m) after Remote
while the vehicle is being controlled in
Operation function operation
the reverse direction.
•
The steering wheel, gearshift, braking,
• The vehicle moves 22 ft. (7 m) while the
and drive controls are not working
smart key is pressed with Remote
properly
Operation function (maximum travel
distance per button press)
•
There is a problem with the smart key or
the smart key battery is low
When Remote Operation function is
paused, the vehicle will stop. If the
•
ABS, TCS or ESC system operates due
condition that made the function to
to slippery road conditions
pause disappears, the function may
•
The alarm of the Theft Alarm System
operate again.
sounds
•
The Charging door opens
•
The EV mode is utility mode
When Remote Operation function is
canceled, the vehicle will automatically
stop, shift the gear to P (Park) and engage
EPB (Electronic Parking Brake).
7-147
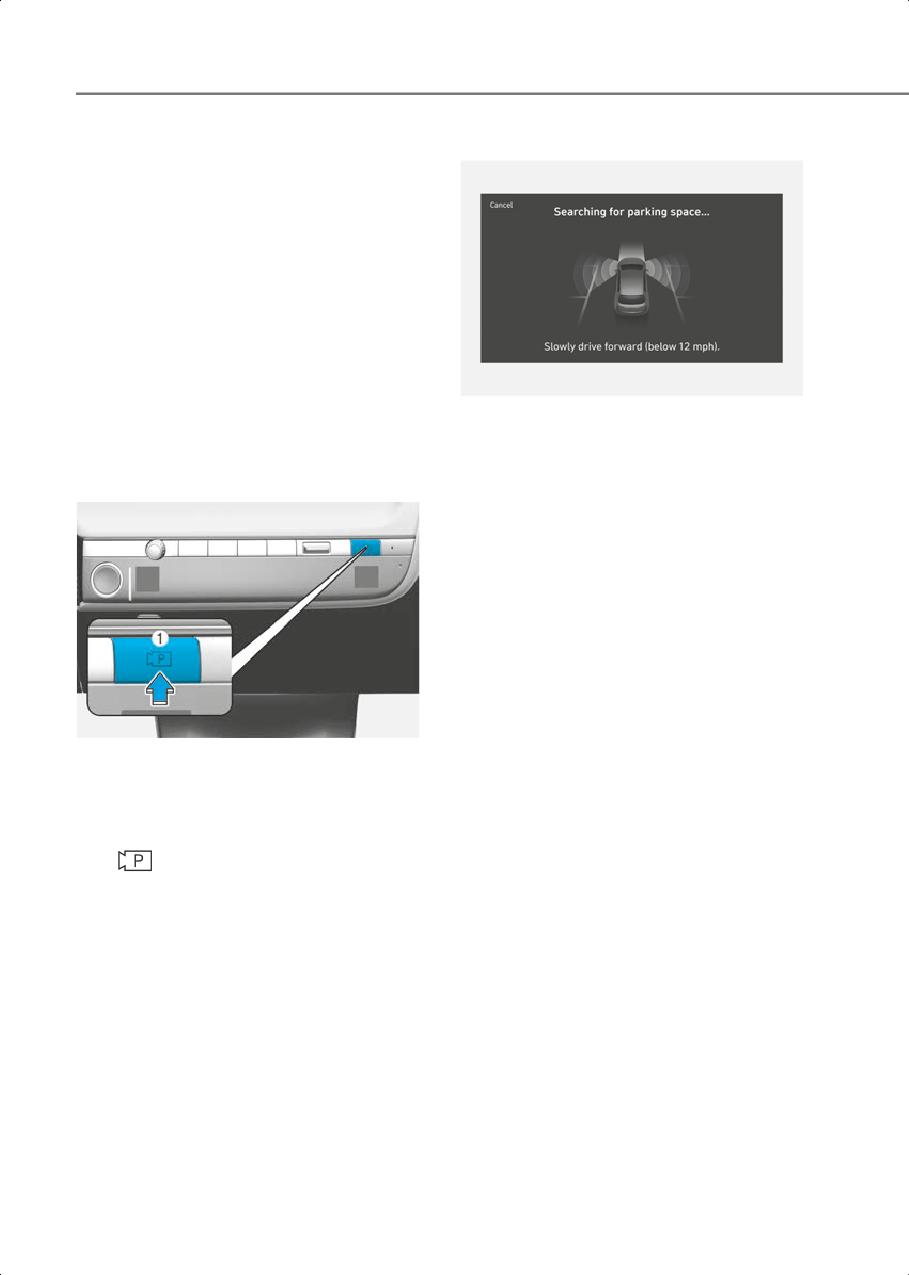
Driver Assistance System
Smart Parking, Remote Smart
2. Searching for parking space
Parking
Operating order
Parking function operates in the following
order:
1. Getting ready for parking
2. Searching for parking space
3. Select parking type and operating
mode
4. Smart Parking
ONE1071229L
5. Remote Smart Parking
1) Slowly drive forward maintaining the
• Parking function includes Smart
distance of approximately 40 in. (100
Parking and Remote Smart Parking.
cm) from the parked vehicles.
1. Getting ready for parking
2) When searching for a parking space
is complete, a message will appear
on the infotainment system screen
with an audible sound to notify the
search is complete.
3) ‘Select Parking Type’ will be
displayed on the infotainment
system screen and the selected
parking space will appear on Top
View screen of Surround View
Monitor.
• Remote Smart Parking Assist
ONE1071040
searches for parking spaces that are
1) With the vehicle turned on, depress
next to parked vehicles, or parking
the brake pedal and shift the gear to
spaces with parked vehicles in front
D (Drive) or N (Neutral).
or rear.
2) Press and hold the Parking/View
• While searching for a parking space,
(
) button to turn on Remote
when vehicle speed is above 12 mph
Smart Parking Assist.
(20 km/h), a message will appear on
• 'Agree' must be selected on the
the infotainment system screen
infotainment system screen and the
informing you to slow down. When
infotainment system has to operate
vehicle speed is above 18 mph (30
properly to use Parking function.
km/h), Parking function will turn off.
• If you drive above 3 mph (5 km/h)
• Searching for a parking space will be
with the vehicle on, you may use the
completed when there is enough
Parking function with the gear shifted
space to move the vehicle in addition
to N (Neutral).
to the parking space.
7-148
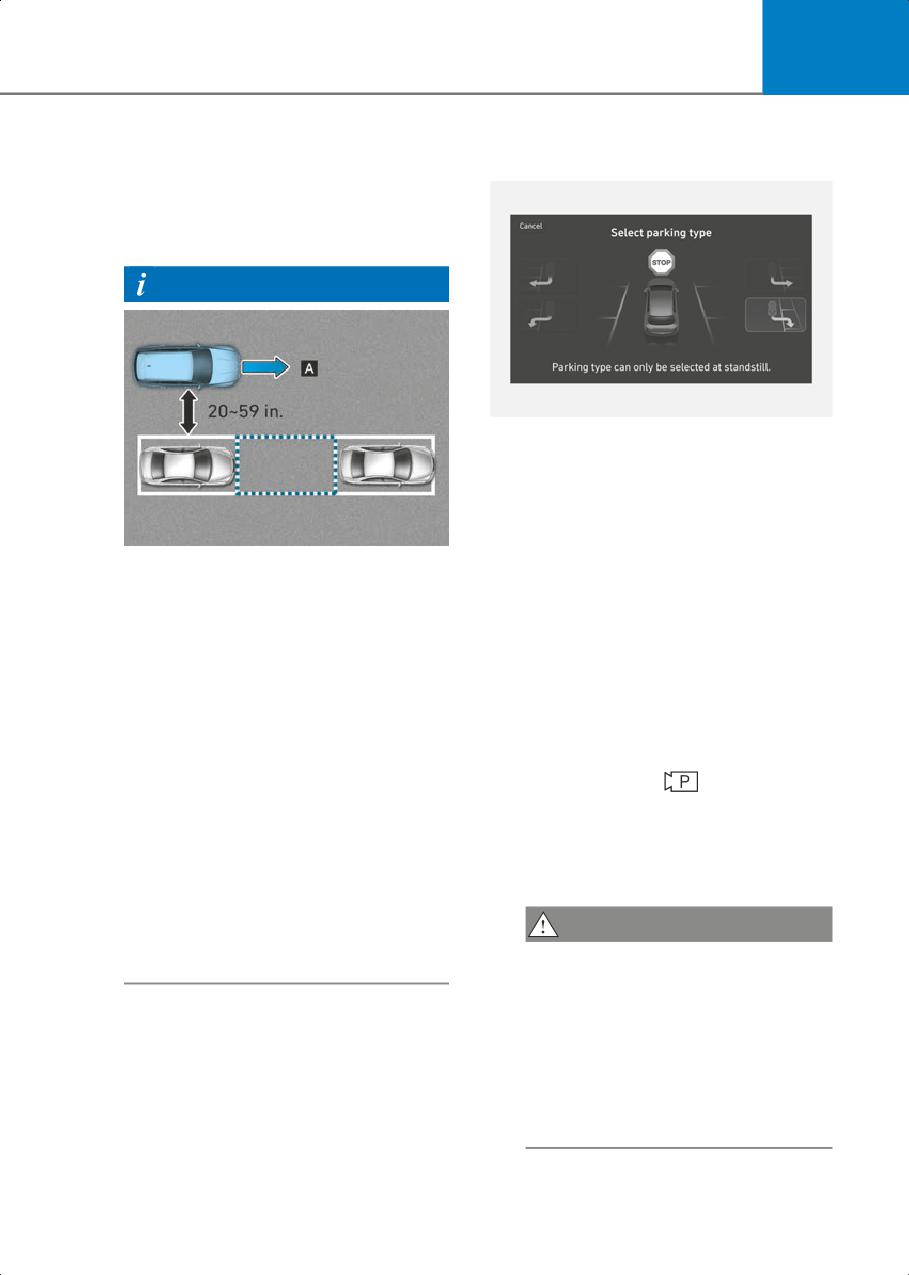
7
• Even if an audible sound is heard to
3. Select parking type and operating
notify that searching for a parking
mode
space is complete, search
completion can be canceled
immediately depending on
surroundings.
Information
ONE1071218L
1) Parking type - Perpendicular reverse
(Left/Right), Parallel reverse
(Left/Right)
With the vehicle stopped by
depressing the brake pedal, touch
OJX1070232N
the infotainment system screen to
[A] : Searching for parking space
select the desired parking type.
• If the distance is below 20 in. (50 cm)
• If you continue to drive without
or over 59 in. (150 cm), Remote Smart
stopping after the parking type
Parking Assist may not be able to
selection screen appears, Remote
search for a parking space.
Smart Parking Assist will return to
• If you do not maintain a certain
the previous stage and search for a
distance from the parked vehicle, the
parking space.
performance to search for a parking
• If Parking function is canceled
space may reduce.
unintentionally by pressing the
• Even if a diagonal parking space is
Parking/View (
) button before
searched as a parking space, parking
the parking type is selected, you
is not assisted properly.
can return to the parking type
• Due to abnormal performance of the
selection stage by pressing and
ultrasonic sensor or the influence of
holding the button again while the
the surroundings, Parking function
vehicle is stopped.
may not be able to search for a
parking space even if there is a
CAUTION
parking space, or may search for a
Before selecting the Parking type, the
space that is not suitable for parking.
driver should check whether the
parking space is suitable.
If the searched parking space by
Remote Smart Parking Assist is
narrow or unsuitable for parking, do
not select the Parking type and move
the vehicle to search for another
parking space.
7-149
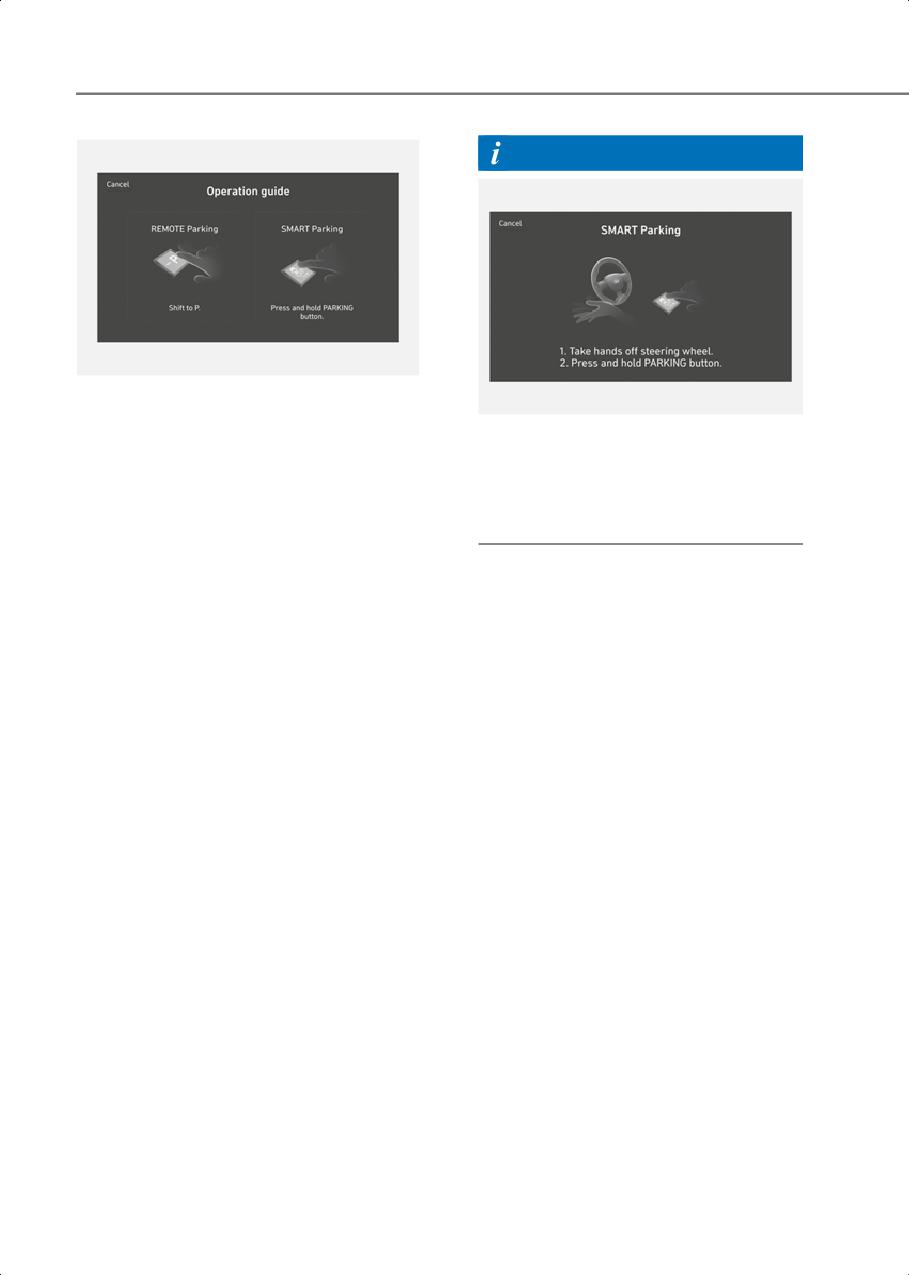
Driver Assistance System
Information
ONE1071219L
2) Operating mode - Remote Parking,
Smart Parking
ONE1071220L
If Remote Smart Parking Assist cannot
After selecting a parking type, the
activate Remote Smart Parking
infotainment system screen will
function, only the Smart Parking guide
guide you with Remote Smart
will be displayed on the infotainment
Parking function and Smart Parking
system screen.
function. Follow the instructions to
operate Remote Smart Parking
Assist.
• Operating instructions will be
displayed on the screen for each
desired function you select.
• Do not take your foot off the brake
pedal during the Parking function
guide. When the vehicle moves,
Remote Smart Parking Assist will
turn off.
7-150
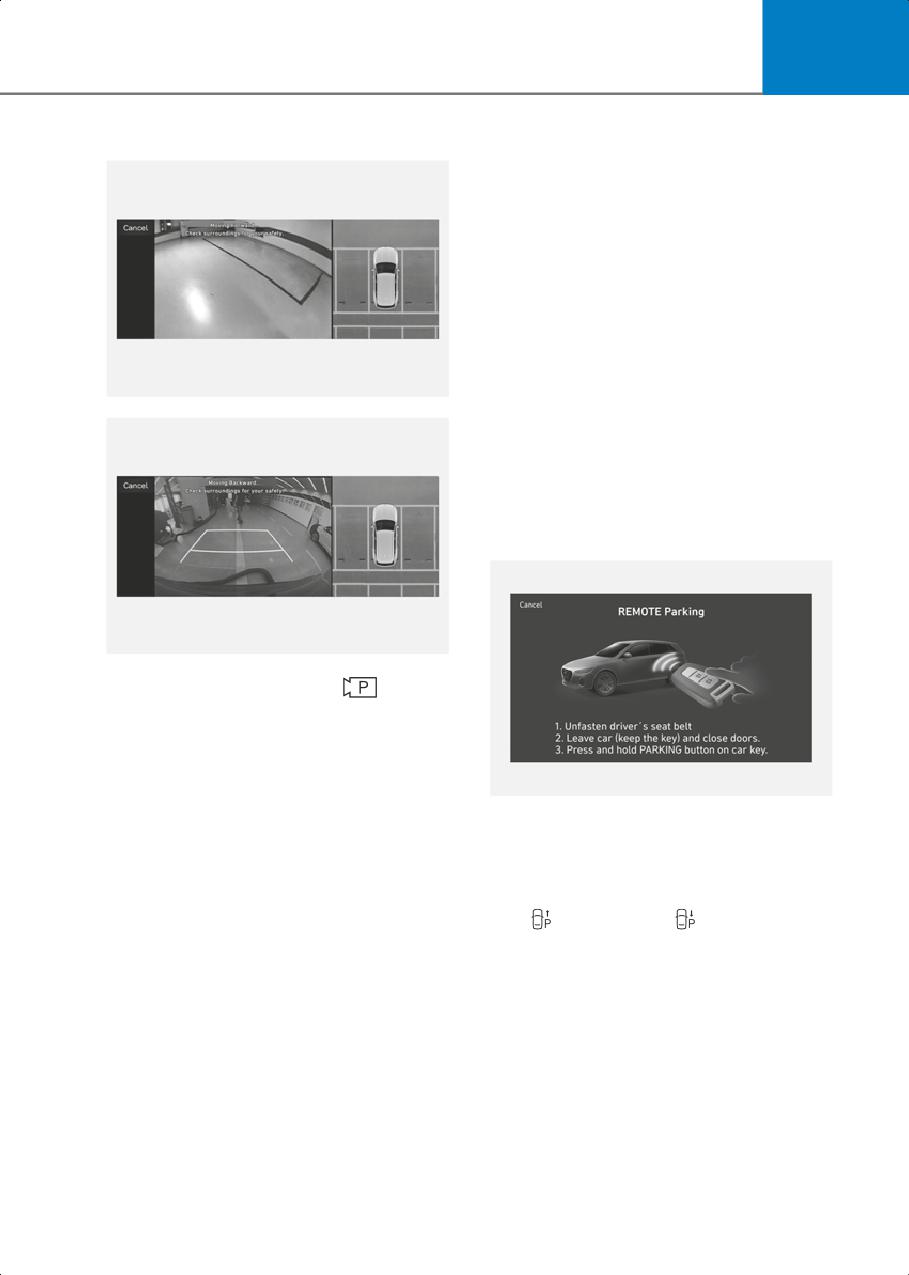
7
4. Smart Parking
• The parking location indicator is
displayed on Surround View Monitor
screen and is displayed until the
vehicle enters the parking space for
the first time by Smart Parking
function.
• Vehicle speed can be adjusted by
depressing the brake pedal while
Smart Parking function is operating.
However, the vehicle does not
accelerate even when the
accelerator pedal is depressed.
OJX1070250N
• Depending on parking environments,
if the vehicle is stopped by a stopper,
parking may be completed.
• If you need to change the vehicle's
position or location, manually
complete parking your vehicle.
5. Remote Smart Parking
OJX1070251N
1) Press the Parking/View (
) button
when the vehicle is stopped by
depressing the brake pedal. When
the brake pedal is released, Remote
Smart Parking Assist will
automatically control the steering
ONE1071217L
wheel, vehicle speed and gearshift.
1) Shift the gear to P (Park), get out of
2) While Smart Parking function is
the vehicle with the smart key, and
operating, if you do not hold down
close all doors.
the Parking/View button, the vehicle
2) Press and hold one of the Forward
will stop and function control will
pause. The function will start
(
) or Backward (
) button on the
operating again when the
smart key. Remote Smart Parking
Parking/View button is pressed and
Assist will automatically control the
held again.
steering wheel, vehicle speed and
gearshift.
3) When the vehicle reaches the target
parking position, a message will
appear on the infotainment system
screen to inform you that parking is
complete.
• Smart Parking function will not
operate if the door is open or the seat
belt is not fastened.
7-151

Driver Assistance System
3) While Remote Smart Parking
CAUTION
function is operating, if you do not
hold down the Forward (
) or
• When using Remote Smart Parking
Backward (
) button, the vehicle will
function, make sure that all passengers
stop and function control will pause.
have gotten out of the vehicle.
The function will start operating
• After ending or turning off Remote
again when the button is pressed and
Smart Parking function, before leaving
held again.
the vehicle, close windows and vision
4) When the vehicle reaches the target
roof, and make sure the vehicle is off
parking position, a message will
before locking the doors.
appear on the infotainment system
screen to inform you that parking is
complete. The vehicle will
How to turn off Parking function
automatically shift to P (Park),
while operating
engage EPB (Electronic Parking
•
Press the Parking/View (
) button in
Brake) and the vehicle will turn off.
the following stage:
•
When operating Remote Smart
- Searching for parking space
Parking function, make sure all smart
- Select parking type
keys are outside of the vehicle.
•
Shift the gear to R (Reverse) in the
•
Remote Smart Parking function will
following stage:
operate only when the smart key is
within 13 ft. (4 m) from the vehicle. If
- Searching for parking space
there is no vehicle movement even
- Select parking type
when the Remote Operation button is
- Select operating mode
pressed on the smart key, check the
distance to the vehicle and press the
•
Press the Parking Safety (
) button or
button again.
select ‘Cancel’ on the infotainment
system screen to turn off Parking
•
The detecting range of the smart key
function.
may vary depending on the
surroundings that are affected by
•
While Smart Parking function is
radio waves such as transmission
operating:
tower, broadcast station, etc.
- If the vehicle is stopped by
•
The parking location indicator is
depressing the brake pedal, and the
displayed on Surround View Monitor
gear is shifted, Parking function will
screen and is displayed until the
turn off. At this time, EPB (Electronic
vehicle enters the parking space for
Parking Brake) will not be engaged.
the first time by Remote Smart
•
While Remote Smart Parking function is
Parking function.
operating:
•
Depending on parking environments,
- Press the Remote Start (
) button on
if the vehicle is stopped by a stopper,
the smart key. Parking function will
parking may be completed.
turn off.
•
If you need to change the vehicle's
- Get on the vehicle with the smart key.
position or location, manually
Parking function will turn off. At this
complete parking your vehicle.
time, the vehicle will remain on.
7-152
7
Parking function operation status
• Smart Parking function
Operation status
Turn signal
The turn signal of the parking direction blinks until the first reverse
Under control
is complete.
• Smart Parking function
Hazard
Operation
Smart key
warning
Turn signal
status
LED
light
Green LED
Under
The turn signal of the parking direction blinks
continuously
-
control
until the first reverse is complete.
blinks
Red LED
Pause
continuously
Blinks
-
blinks
Red LED
illuminates
Blinks 3
Off
for 4 seconds
times and
-
and then
turns off
turns off
Green LED
illuminates
Blinks 1
Complete
for 4 seconds
time and
-
and then
turns off
turns off
* Operation status by the hazard warning light may not be applicable based on the
regulation of your state.
* If the smart key is not within the operating range from the vehicle (approximately 13 ft.
(4 m)), the smart key LED will not illuminate or blink. Use the smart key within the
operating range.
7-153
Driver Assistance System
The function will pause in the
The function will cancel in the
following conditions when:
following conditions when:
• Smart Parking
•
Smart Parking
- There is a pedestrian, animal or
-
The steering wheel is steered
object in the direction the vehicle is
-
The gear is shifted while the vehicle is
moving
moving
- The door or liftgate is open
-
Operating EPB while the vehicle is
- The driver’s seat belt is not fastened
moving
- Blind-Spot Collision-Avoidance
-
The hood is open
Assist or Rear-Cross Traffic
-
The driver opens the door with the
Collision-Avoidance Assist operates
seatbelt unfastened
while the vehicle is being controlled
-
Rapid acceleration occurs
in the reverse direction
-
Vehicle skid occurs
- The Parking/View (
) button is not
-
The wheel is stuck by an obstacle and
continuously pressed
cannot move
- The vehicle is stopped by depressing
-
There are pedestrians, animals or
the brake pedal
objects at the front and rear of the
• Remote Smart Parking
vehicle at the same time
- There is a pedestrian, animal or
-
Approximately 3 minutes and 50
object in the direction the vehicle is
seconds have past after Smart
moving
Parking function has started to
- The door or liftgate is open
operate
- The Forward (
) or Backward (
)
-
The slope of the road exceeds the
button is not continuously pressed
operational range
- Simultaneously pressing multiple
-
The function is paused for more than
buttons on a smart key
1 minute
- The smart key is not operated within
-
The steering wheel, gearshift,
13 ft. (4 m) from the vehicle
braking, and drive controls are not
working properly
- Button of another smart key is
pressed in addition to the operating
-
ABS, TCS or ESC system operates due
smart key
to slippery road conditions
- Blind-Spot Collision-Avoidance
-
The Charging door opens
Assist or Rear-Cross Traffic
-
The EV mode is utility mode
Collision-Avoidance Assist operates
When Smart Parking function is
while the vehicle is being controlled
canceled, the vehicle will automatically
in the reverse direction
stop, shift the gear to P (Park) and
When Parking function is paused, the
engage EPB (Electronic Parking Brake).
vehicle will automatically stop. If the
condition that made the function to
pause disappears, the function may
operate again.
7-154
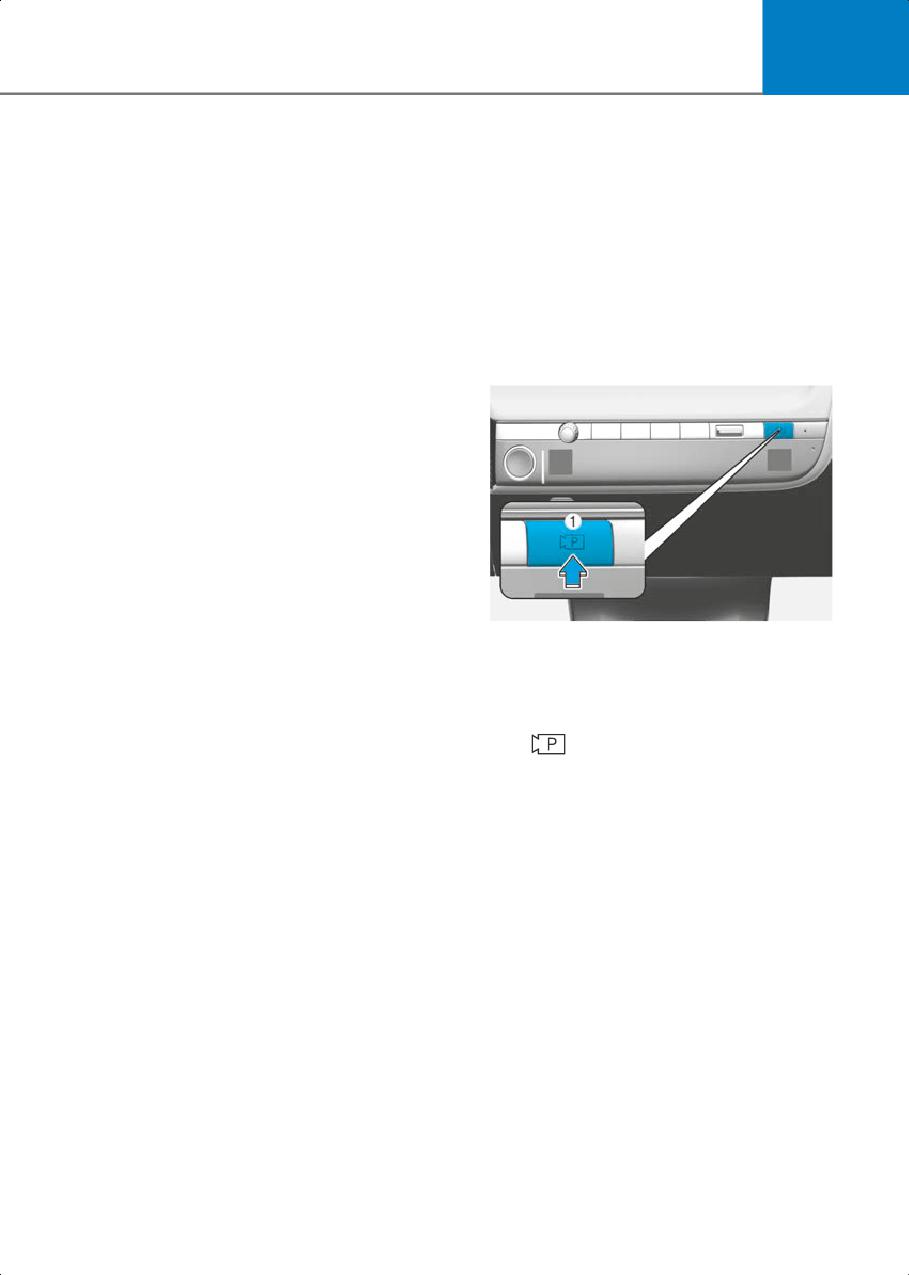
7
• Remote Smart Parking
Smart Exit
-
The steering wheel is steered
Operating order
-
The gear is shifted
Smart Exit function operates in the
-
Operating EPB while the vehicle is
following order:
moving
1. Getting ready for exit
-
The hood is open
2. Checking space
-
The brake pedal or accelerator pedal
3. Select exit direction
is depressed when all the doors are
closed
4. Smart Exit
-
The smart key is outside the vehicle
1. Getting ready for exit
when the brake pedal is depressed
while the driver's door is open.
-
Rapid acceleration occurs
-
Vehicle skid occurs
-
The wheel is stuck by an obstacle and
cannot move
-
There are pedestrians, animals or
objects at the front and rear of the
vehicle at the same time
-
Approximately 3 minutes and 50
seconds have past after Remote
ONE1071040
Smart Parking function has started to
1) With the vehicle turned on, depress
operate
the brake pedal and shift the gear to
-
The slope of the road exceeds the
P (Park) or N (Neutral).
operational range
2) Press and hold the Parking/View
-
The function is paused for more than
(
) button to turn on Remote
1 minute
Smart Parking Assist.
-
The steering wheel, gearshift,
• 'Agree' must be selected on the
braking, and drive controls are not
infotainment system screen and the
working properly
infotainment system has to operate
properly to use Smart Smart Exit
-
There is a problem with the smart key
function.
or the smart key battery is low
• Drive below 3 mph (5 km/h) with the
-
ABS, TCS or ESC system operates due
vehicle on and shift the gear to N
to slippery road conditions
(Neutral), Smart Exit function can be
-
The alarm of the Theft Alarm System
used.
sounds
• If the function is turned on again after
-
The Charging door opens
parallel parking is completed by
-
The EV mode is utility mode
Remote Smart Parking Assist, Smart
When Remote Smart Parking function
Exit function can be used.
is canceled, the vehicle will
automatically stop, shift the gear to P
(Park) and engage EPB (Electronic
Parking Brake).
7-155
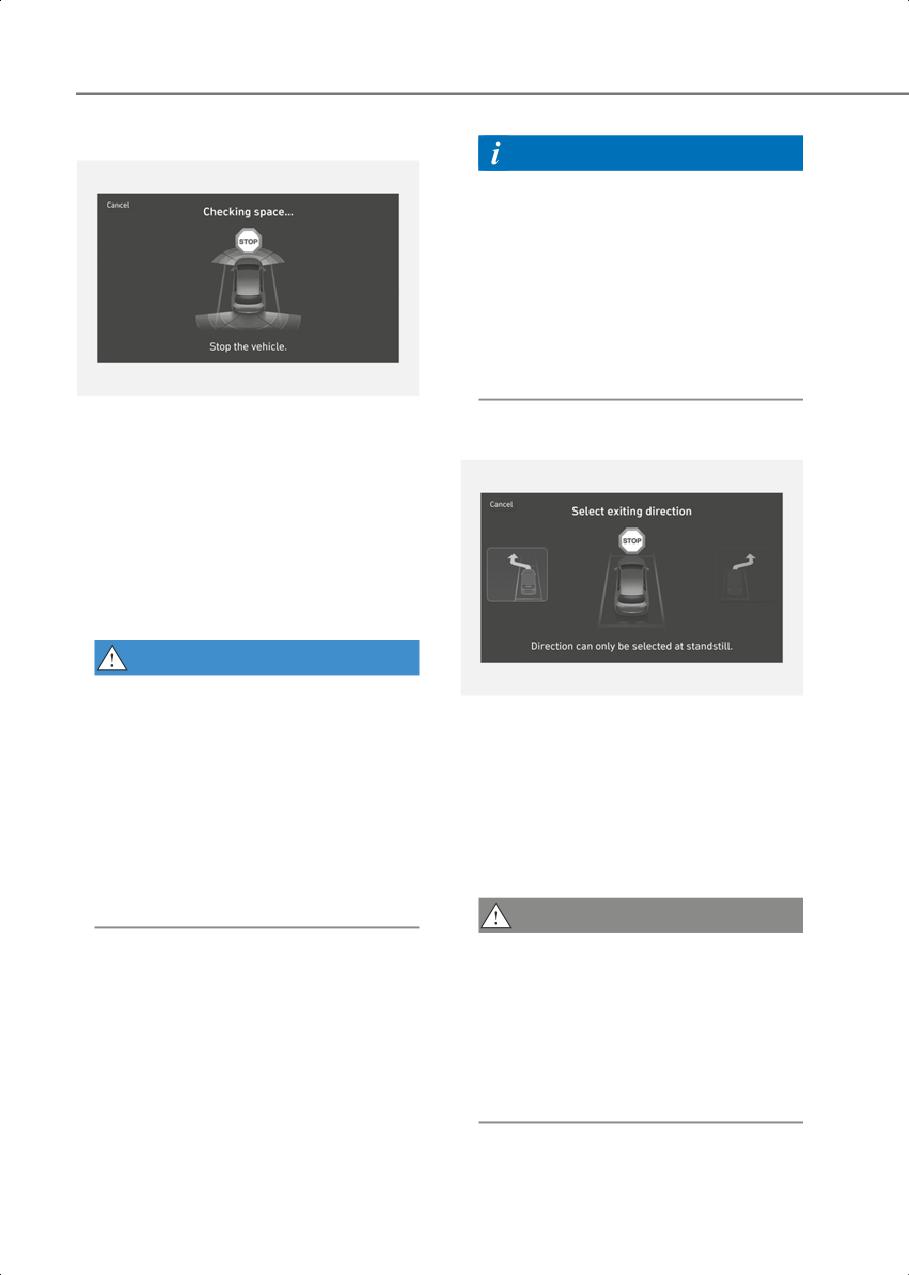
Driver Assistance System
2. Checking space
Information
Due to abnormal performance of the
ultrasonic sensor or the influence of the
surroundings, Parking function may not
be able to search for a parking space
even if there is a parking space, or may
search for a space that is not suitable
for parking.
• The parked vehicle has objects
attached to the bumper such as
bumper guard, trailer hitch, etc.
ONE1071221L
1) When the vehicle is stopped by
3. Select exiting direction
depressing the brake pedal, the
vehicle sensors will detect the
distance from nearby objects and
check for space to exit.
2) When checking for space is
complete, a message will appear on
the infotainment system screen with
an audible sound to notify the search
is complete.
WARNING
• While checking for space, if there is a
ONE1071222L
risk of collision with pedestrian,
1) With the vehicle stopped by
animal or object in the direction of
depressing the brake pedal, the
vehicle exit, for your safety, Smart
infotainment system screen displays
Exit function can be turned off.
the possible directions for parallel
• Even if check for space is completed,
exit.
objects in the blind spot area cannot
2) Touch the infotainment system
be detected by the sensors. The
screen to select the desired exit
driver must directly check the blind
direction.
spot area and continue using the
function.
CAUTION
• Before selecting the Exit Direction,
the driver should check whether the
space for exit is suitable.
• If the searched exit space by Remote
Smart Parking Assist is narrow or
unsuitable (surrounding vehicles are
parked vertically, etc.), do not use the
Smart Exit function.
7-156
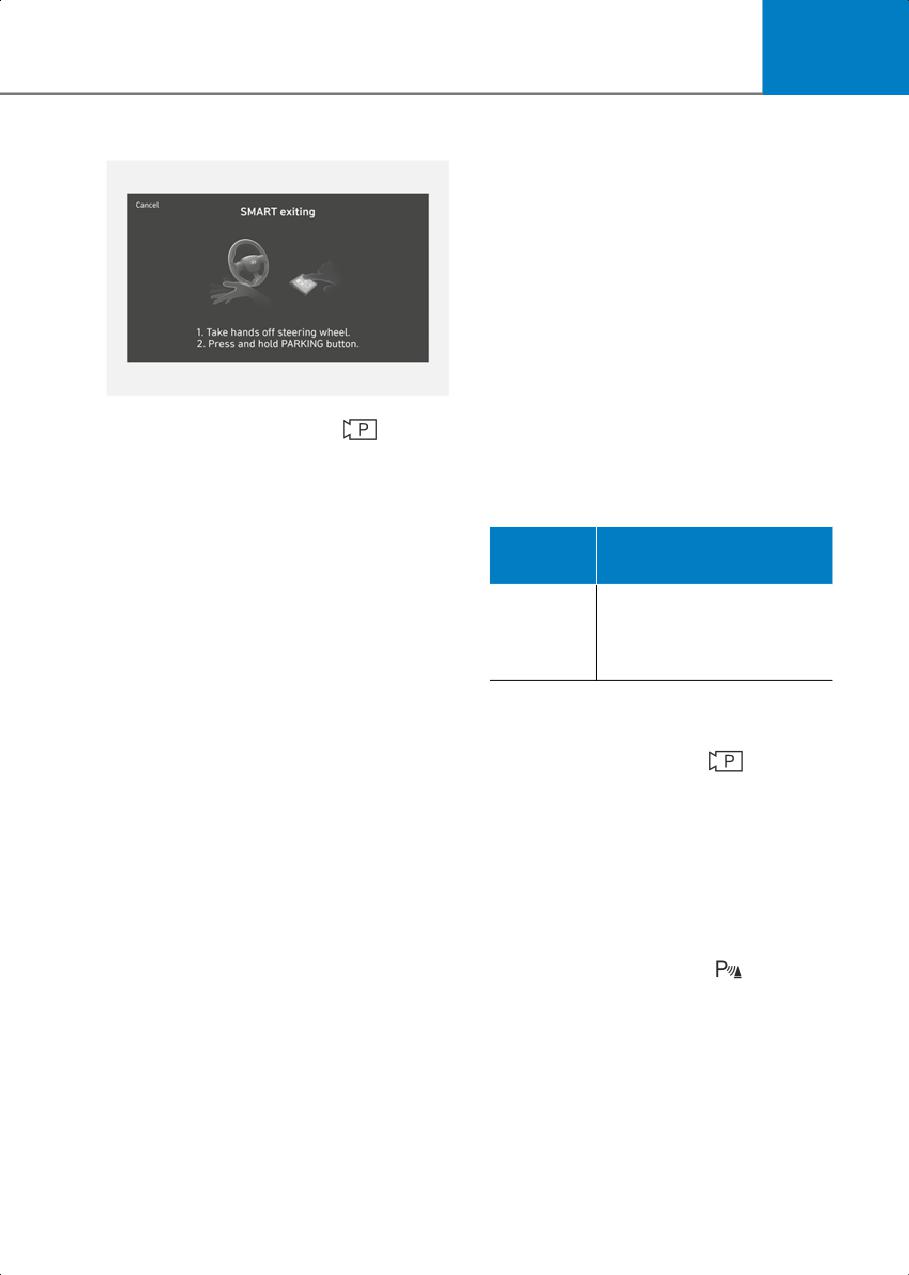
7
4. Smart Exit
• If exit is completed while depressing
the accelerator pedal, you must take
your foot off the accelerator pedal
once for the accelerator pedal to
operate.
• If there is no vehicle operation such
as depressing the brake pedal or
accelerator pedal within 4 seconds
after exit is complete, the vehicle will
automatically shift to P (Park) and
engage EPB (Electronic Parking
Brake).
ONE1071231L
• After Exit function is complete,
1) Press the Parking/View (
) button
always check the surroundings
when the vehicle is stopped by
before driving.
depressing the brake pedal. When
the brake pedal is released, Remote
Smart Exit operation status
Smart Parking Assist will
automatically control the steering
Operation
wheel, vehicle speed and gearshift.
Turn signal
status
2) While Smart Exit function is
operating, if you do not hold down
The turn signal of the exit
the Parking/View button, the vehicle
Under
direction blinks until the
control
exit is complete or Smart
will stop and function control will
Exit is canceled.
pause. The function will start
operating again when the
Parking/View button is pressed and
How to turn off Smart function while
held again.
operating
3) When the vehicle reaches the target
• Press the Parking/View (
) button in
exit location, a message will appear
the following stage:
on the infotainment system screen to
- Checking space
inform you that exit is complete.
- Select exit direction
• Smart Exit function will not operate if
the door is open or the seat belt is not
• Shift the gear to R (Reverse) in the
fastened.
following stage:
• Vehicle speed can be adjusted by
- Checking space
depressing the brake pedal while
- Select exit direction
Smart Exit function is operating.
• Press the Parking Safety (
) button or
However, the vehicle does not
select ‘Cancel’ on the infotainment
accelerate even when the
system screen to turn off Exit function.
accelerator pedal is depressed.
• While Smart Exit function is operating,
• If exit is completed while depressing
if the vehicle is stopped by depressing
the brake pedal, Smart Exit function
the brake pedal, and the gear is shifted,
will complete with the gear in D
Exiting function will turn off. At this
(Drive).
time, EPB (Electronic Parking Brake)
will not be engaged.
7-157
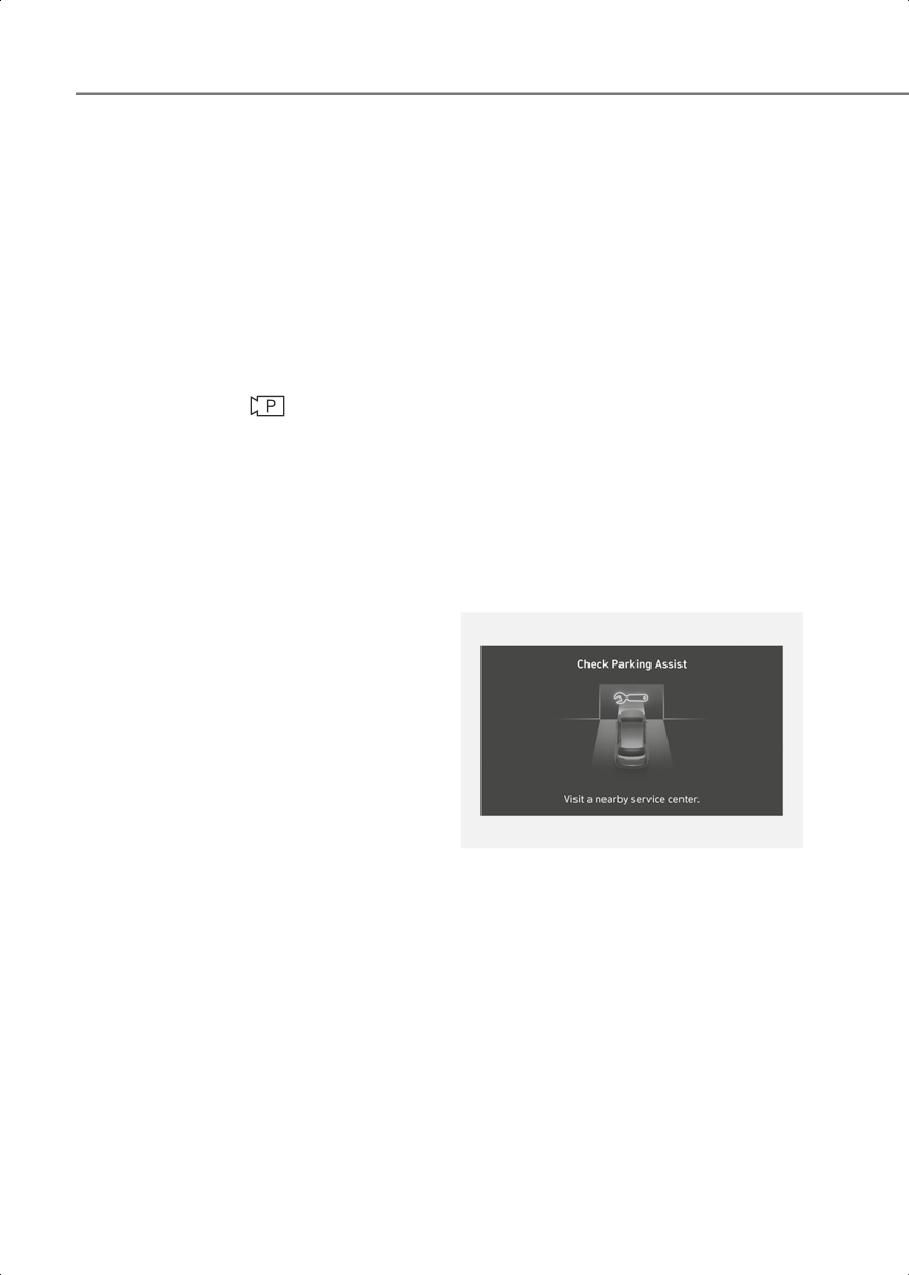
Driver Assistance System
The function will pause in the following
- The function was paused for more
conditions when:
than 1 minute
• There is a pedestrian, animal or object
- The steering wheel, gearshift,
in the direction the vehicle is moving
braking, and drive controls are not
working properly
• The door or liftgate is open
- ABS, TCS or ESC system operates due
• The driver’s seat belt is not fastened
to slippery road conditions
• Blind-Spot Collision-Avoidance Assist
- The Charging door opens
or Rear-Cross Traffic
Collision-Avoidance Assist operates
When Smart Exit function is canceled,
while the vehicle is being controlled in
the vehicle will automatically stop, shift
the reverse direction
the gear to P (Park) and engage EPB
(Electronic Parking Brake).
• The Parking/View (
) button is not
continuously pressed
• The vehicle is stopped by depressing
Remote Smart Parking Assist
the brake pedal
Malfunction and Limitations
When Exit function is paused, the vehicle
will stop. If the condition that made the
Remote Smart Parking Assist
function to pause disappears, the
malfunction
function may operate again.
Remote Smart Parking Assist check
The function will cancel in the following
conditions when:
• Smart Exit
- The steering wheel is steered
- The gear is shifted while the vehicle is
moving
- Operating EPB while the vehicle is
moving
- The hood is open
- The driver opens the door with the
seatbelt unfastened
ONE1071223L
- Rapid acceleration occurs
When Remote Smart Parking Assist is not
working properly, the ‘Check Parking
- Vehicle skid occurs
Assist’ warning message will appear on
- The wheel is stuck by an obstacle and
the infotainment system screen. If the
cannot move
message appears, stop using Remote
- There are pedestrians, animals or
Smart Parking Assist, and have the
objects at the front and rear of the
vehicle be inspected by an authorized
vehicle at the same time
HYUNDAI dealer.
- Approximately 3 minutes and 50
seconds have past after Smart Exit
function has started to operate
- The slope of the road exceeds the
operational range
7-158
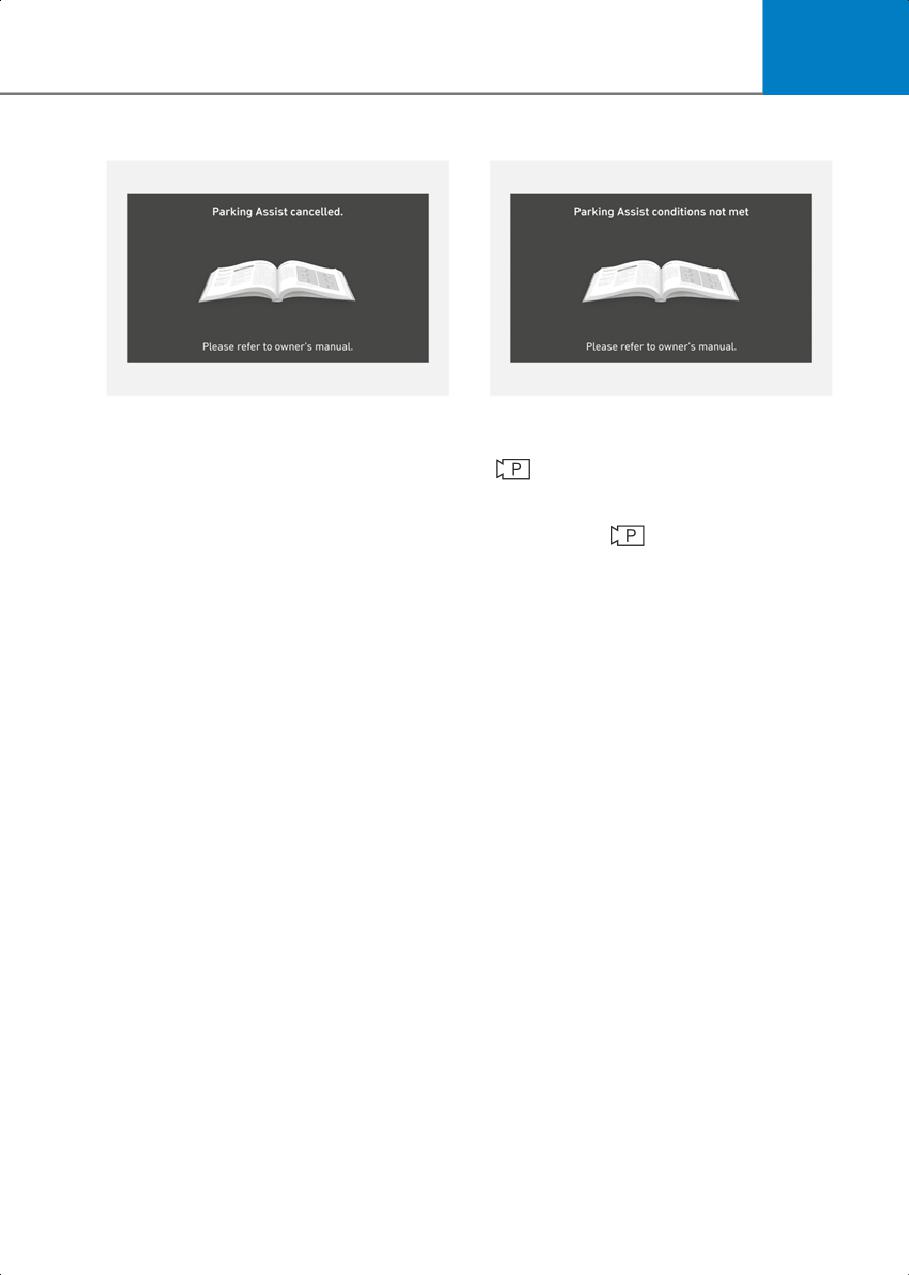
7
Remote Smart Parking Assist canceled
Remote Smart Parking Assist standby
ONE1071228L
ONE1071227L
When Remote Parking Assist is operating,
When ‘Parking Assist Conditions Not Met’
the function can be canceled, and the
message appears, when Parking/View
‘Parking Assist Canceled’ warning
(
) button has been pressed and held,
message may appear regardless of the
Remote Smart Parking Assist is in
parking order. Other messages may
standby. After a while, press and hold the
appear depending on the situations.
Parking/View (
) button again to see if
Follow the instructions provided on the
Remote Smart Parking Assist works.
infotainment system screen while parking
The message appears even when the
your vehicle with Remote Parking Assist.
smart key's battery is low. Check the
Always look around and pay attention
smart key battery level.
when using Remote Smart Parking Assist.
It does not work even when the EV mode
is in the Utility mode. For related
information refer to Utility Mode in
‘Foreword/Electric Vehicle System
Overview’.
Limitations of Remote Smart Parking
Assist
In the following circumstances, Remote
Smart Parking Assist performance to park
or exit the vehicle may be limited, there
may be a risk of collision, or Remote
Smart Parking Assist may turn off. Park or
exit the vehicle manually if necessary.
• Accessories are attached to the
steering wheel, or steering
components are modified
• Braking system components such as
brake discs, calipers, etc., are modified
• Modified drive unit components such
as the motor, transmission, etc.
• Wheel alignment has problems or
suspension components are modified
7-159
Driver Assistance System
•
An object is attached to the steering
•
The performance of the ultrasonic
wheel
sensor is affected by extremely hot or
cold weather
•
The vehicle is installed with a snow
chain, spare tire or different size wheel
•
The ultrasonic sensor is covered with
snow or water
•
Tire pressure is lower or higher than the
standard tire pressure
•
An object that generates ultrasonic
waves is nearby
•
Your vehicle is loaded with cargo longer
or wider than your vehicle or a trailer is
•
A wireless device with a transmission
connected to your vehicle
function operates near the ultrasonic
sensors
•
There is a problem with the wheel
alignment
•
Your vehicle is affected by another
vehicle’s Parking Distance Warning
•
Your vehicle is leaned severely to one
side
•
The sensor is mounted or positioned
incorrectly by an impact to the bumper
•
Your vehicle is equipped with a trailer
hitch
•
When the ultrasonic sensor cannot
detect the following objects:
•
The license plate is installed differently
from the original location
-
Sharp or slim objects, such as ropes,
chains or small poles
•
There is a person, animal or object
above or below the ultrasonic sensor
-
Objects smaller than 40 in. (100 cm)
when Remote Smart Parking Assist is
in length and narrower than 6 in. (14
activated
cm) in diameter
•
The parking space is curved or diagonal
-
Objects which tend to absorb sensor
frequency, such as clothes, spongy
•
There is an obstacle such as a person,
material or snow
animal or object (trash can, bicycle,
motorcycle, shopping cart, narrow
-
A narrow object such as a corner of a
pillar, etc.) near the parking space
square pillar
•
There is a circular pillar or narrow pillar,
-
Person, animal or object near the
or a pillar surrounded by objects such
ultrasonic sensor
as fire extinguisher, etc., near the
parking space
•
The road surface is bumpy (curbstone,
speed bump, etc.)
•
The road is slippery
•
The parking space is near a vehicle with
higher ground clearance or big, such as
a truck, etc.
•
The parking space is Inclined
•
There is heavy wind
•
Operating Remote Smart Parking Assist
on uneven roads, gravel roads, bushes,
etc.
7-160
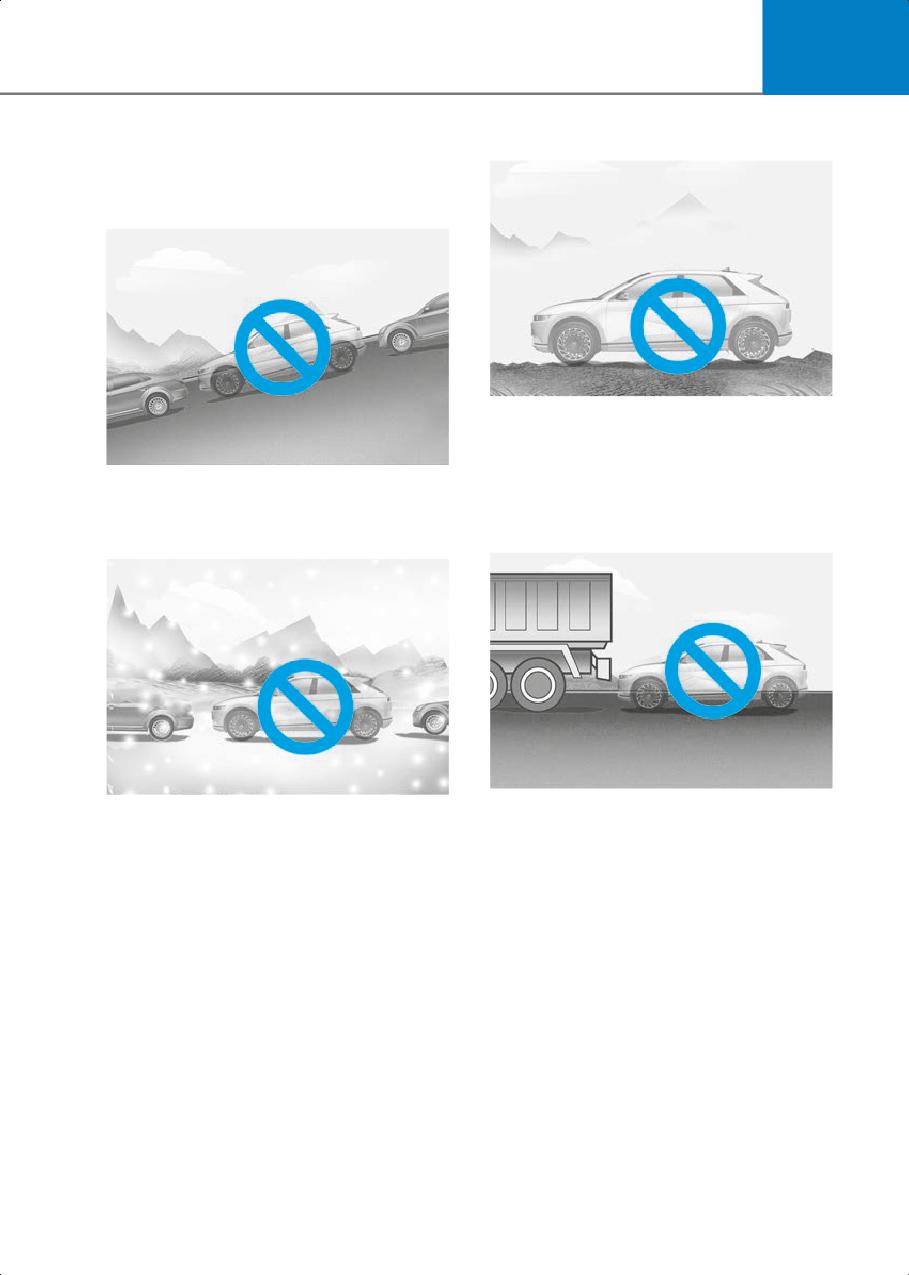
7
Remote Smart Parking Assist may not
• Parking on uneven road
operate properly under the following
circumstances:
• Parking on inclines
ONE1072071L
Remote Smart Parking Assist may
cancel when the vehicle slips, or the
ONE1072070L
vehicle cannot move due to road
conditions such as pebbles or
Park manually when parking on
fragmented stones.
inclines.
• Parking behind a truck
• Parking in snow
ONE1072072L
ONE1072074L
Do not use Remote Smart Parking
Snow may interfere with sensor
Assist around vehicles with higher
operation, or Remote Smart Parking
ground clearance, such as a bus, truck,
Assist may cancel if the road is slippery
etc. It may lead to an accident.
while parking.
7-161
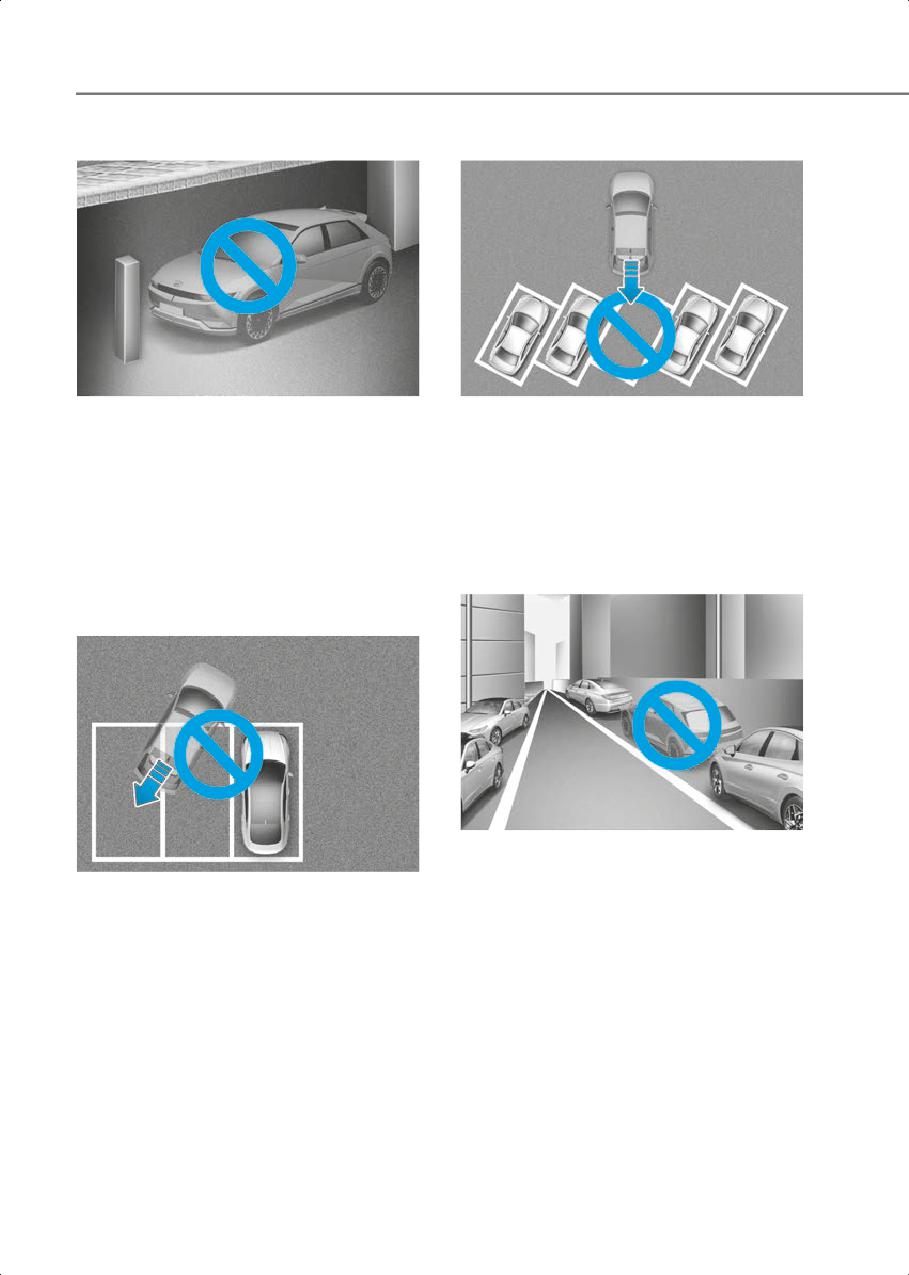
Driver Assistance System
• Parking near a pillar
• Parking diagonal
ONE1072073L
ONE1072347L
Remote Smart Parking Assist
Remote Smart Parking Assist does not
performance may reduce or collision
provide diagonal parking. Even if your
with an obstacle may occur when there
vehicle was able to enter the parking
is a narrow object, circular pillar, square
space, do not use Remote Smart
pillar, or a pillar surrounded by objects
Parking Assist because the function
such as a fire extinguisher, etc., near
cannot operate properly.
the parking space. The driver should
• Leaving a parking space near a wall or
park the vehicle manually.
parking in a narrow space
• Parking in a parking space with a
vehicle on one side only
ONE1072075L
- Remote Smart Parking Assist my not
ONE1072346L
operate properly when leaving a
If Remote Smart Parking Assist is used,
parking space that is narrow and near
when parking in a parking space with a
a wall. Always check for pedestrians,
vehicle only on one side, your vehicle
animals, objects while leaving.
may cross the parking line to avoid the
- For your safety, Remote Smart
parked vehicle.
Parking Assist does not search for
parking spaces at areas with narrow
parking spaces that are narrower
than the minimum space required for
parking.
7-162

7
WARNING
NOTICE
Take the following precautions when
•
If the 3rd stage warning (continuous
using Remote Smart Parking Assist:
beep) of the Forward/Reverse Parking
Distance Warning sounds while
•
The driver is responsible for safe
Remote Smart Parking Assist is
parking and exit when using Remote
operating, it means the obstacle
Smart Parking Assist.
detected is close to your vehicle. At this
•
When using Remote Smart Parking
time, Remote Smart Parking Assist will
Assist, stay out of the way in the
temporarily stop operating. Make sure
direction the vehicle moves for your
there are no pedestrians, animals, or
safety.
objects around your vehicle.
•
Always check surroundings when using
•
Depending on brake operation, the
Remote Smart Parking Assist. You may
stop lights may come on while the
collide with pedestrians, animals, or
vehicle is moving.
objects if they are near the sensor or are
in the sensor’s blind spot area.
•
If the vehicle is remotely started that
has been parked in cold weather for a
•
A collision may occur if a pedestrian,
long time, the operation of Remote
animal, or object suddenly appears
Smart Parking function may be delayed
while Remote Smart Parking Assist is
or canceled depending on vehicle
operating.
condition.
•
Do not use Remote Smart Parking
Assist when under the influence of
alcohol.
•
Do not let children or other people to
use the smart key.
•
If Remote Smart Parking Assist is used
continuously for a long period, it may
adversely affect Remote Smart Parking
Assist performance.
•
Remote Smart Parking Assist may not
operate properly if the vehicle needs
wheel alignment adjustment such as
when the vehicle tilts to one side. Have
the vehicle be inspected by an
authorized HYUNDAI dealer.
•
Noise may be heard when braking
occurs by Remote Smart Parking Assist
or when the brake pedal is depressed
by the driver.
•
Remote Smart Parking Assist may
suddenly apply the brake to avoid
collision.
•
Use Remote Smart Parking Assist only
in a parking space that is large enough
for the vehicle to move safely.
7-163
Driver Assistance System
• For Canada
Declaration Of
Conformity
if equipped
Front Radar
The radio frequency components (front
radar) complies:
• For USA, Micronesia, Dominican
Republic and Honduras
OANATEL520
OANATEL519
7-164

7
Front Corner Radar/Rear
• For Canada
Corner Radar
The radio frequency components (Rear
Corner Radar) complies:
• For USA, Micronesia, Dominican
Republic and Honduras
OANATEL353
OANATEL352
7-165
8. Emergency Situations
Hazard Warning Flasher
8-2
In Case Of An Emergency While Driving
8-2
If the Vehicle Stalls While Driving
8-2
If the Vehicle Stalls at A Crossroad or Crossing
8-2
If You Have a Flat Tire While Driving
8-3
If The Vehicle Will Not Start
8-3
Confirm the EV Battery is not Low on the Charge Gauge
8-3
Jump Starting (12V Battery)
8-4
Tire Pressure Monitoring System (TPMS)
8-7
Check Tire Pressure
8-7
Tire Pressure Monitoring System
8-8
Low Tire Pressure Warning Light
8-9
Low Tire Pressure Position and Tire Pressure Telltale
8-9
TPMS (Tire Pressure Monitoring System) Malfunction Indicator
8-10
Changing a Tire with TPMS
8-10
If You Have A Flat Tire (with Tire Mobility Kit)
8-12
Introduction
8-12
Notes on the Safe Use of the Tire Mobility Kit
8-13
Components of the Tire Mobility Kit
8-14
Using the Tire Mobility Kit When a Tire is Flat
8-15
How to Adjust Tire Pressure
8-18
Towing
8-19
Towing Service
8-19
8
Removable Towing Hook
8-20
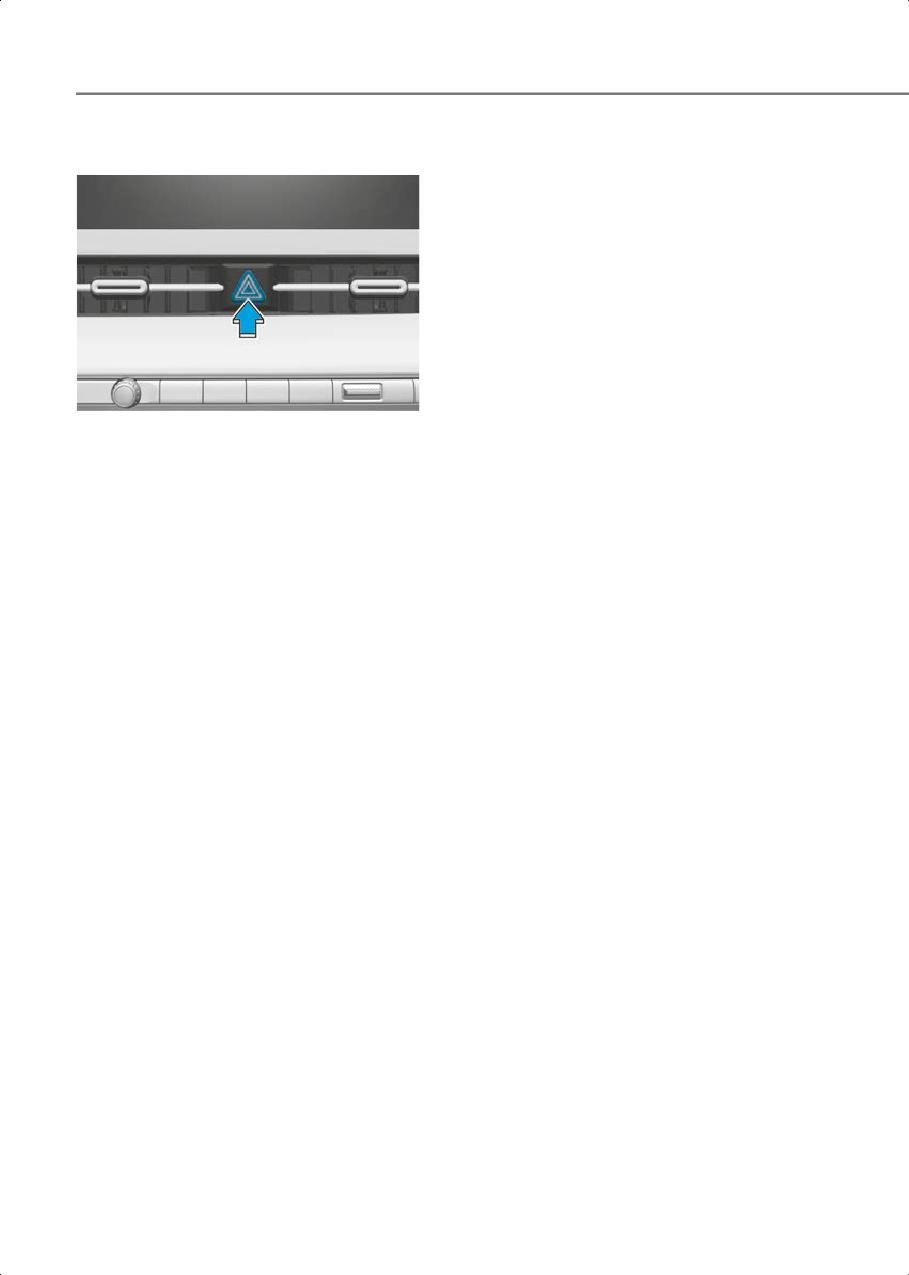
Emergency Situations
Hazard Warning Flasher
In Case Of An Emergency
While Driving
If the Vehicle Stalls While
Driving
• Reduce your speed gradually, keeping
a straight line. Move cautiously off the
road to a safe place.
• Turn on your hazard warning flasher.
• Try to start the vehicle again. If your
ONE1081001
vehicle will not start, contact an
The hazard warning flasher serves as a
authorized HYUNDAI dealer or seek
warning to other drivers to exercise
other qualified assistance.
extreme caution when approaching,
overtaking, or passing your vehicle.
If the Vehicle Stalls at A
It should be used whenever emergency
repairs are being made or when the
Crossroad or Crossing
vehicle is stopped near the edge of a
If the vehicle stalls at a crossroads or
roadway.
crossing, if safe to do so, shift the gear to
To turn the hazard warning flasher on or
N (Neutral) and then push the vehicle to a
off, press the hazard warning flasher
safe location.
button with the Start/Stop button in any
To stay N (Neutral) while the vehicle is off,
position. The hazard warning flasher
refer to ‘To stay in N (Neutral) when
button is located in the center fascia
vehicle is OFF’ in chapter 6.
panel. All turn signal lights will flash
simultaneously.
• The hazard warning flasher operates
regardless of whether your vehicle is
running or not.
• The turn signals do not work when the
hazard flasher is on.
8-2
8
If You Have a Flat Tire While
If The Vehicle Will Not
Driving
Start
If a tire goes flat while you are driving:
• Take your foot off the accelerator pedal
and let the vehicle slow down while
Confirm the EV Battery is not
driving straight ahead. Do not apply the
Low on the Charge Gauge
brakes immediately or attempt to pull
• Be sure the gear is in P (Park). The
off the road as this may cause loss of
vehicle starts only when the gear is in P
vehicle control resulting in an accident.
(Park).
When the vehicle has slowed to such a
speed that it is safe to do so, brake
• Check the 12 V battery connections to
carefully and pull off the road. Drive off
be sure they are clean and tight.
the road as far as possible and park on
• Turn on the interior light. If the light
firm, level ground. If you are on a
dims or goes out when you operate the
divided highway, do not park in the
starter, the 12 V battery is drained.
median area between the two traffic
Do not push or pull the vehicle to start it.
lanes.
This could cause damage to your vehicle.
• When the vehicle is stopped, press the
hazard warning flasher button, shift the
gear to P (Park), apply the parking
brake, and press the Start/Stop button
to the OFF position.
• Have all passengers get out of the
vehicle. Be sure they all get out on the
side of the vehicle that is away from
traffic.
• When you have a flat tire, follow the Tire
Mobility Kit instructions provided later
in this chapter.
8-3

Emergency Situations
Jump Starting (12V
Battery)
btn_HXDFL01D
Jump starting can be dangerous if done
Batteries contain sulfuric acid which is
incorrectly. Follow the jump starting
highly corrosive. Do not allow acid to
procedure in this section to avoid serious
contact your eyes, skin or clothing.
injury or damage to your vehicle. If in
If acid gets into your eyes, flush your eyes
doubt about how to properly jump start
with clean water for at least 15 minutes
your vehicle, have a service technician or
and get immediate medical attention. If
towing service do it for you.
acid gets on your skin, thoroughly wash
WARNING
the area. If you feel pain or a burning
sensation, get medical attention
To prevent SERIOUS INJURY or DEATH to
immediately.
you or bystanders, always follow these
•
When lifting a plastic-cased battery,
precautions when working near or
excessive pressure on the case may
handling the battery:
cause battery acid to leak. Lift with a
battery carrier or with your hands on
opposite corners.
•
Do not attempt to jump start your
btn_HXDFL01E
vehicle if your battery is frozen.
Always read and follow instructions
•
NEVER attempt to recharge the battery
carefully when handling a battery.
when the vehicle’s battery cables are
connected to the battery.
•
The electrical ignition system works
with high voltage.
btn_HXDFL01B
NEVER touch these components with
Wear eye protection designed to protect
the vehicle running or when the
the eyes from acid splashes.
Start/Stop button is in the ON position.
•
The electrical ignition system works
with high voltage. NEVER touch these
components with the (
) indicator
btn_HXDFL01A
ON or when the Start/Stop button is in
Keep all flames, sparks, or smoking
the ON position.
materials away from the battery.
•
Do not allow the (+) and (-) jumper
cables to touch. It may cause sparks.
•
The battery may rupture or explode
btn_HXDFL01F
when you jump start with a low or
frozen battery.
Hydrogen is always present in battery
cells, is highly combustible, and may
•
Do not directly connect the (-) to the
explode if ignited.
jump cable. Connect the (-) to the one
of the metallic parts located far from
the jump cable in the vehicle. The direct
(-) connection to the jump cable may
cause an explosion.
btn_HXDFL01C
Keep batteries out of reach of children.
8-4
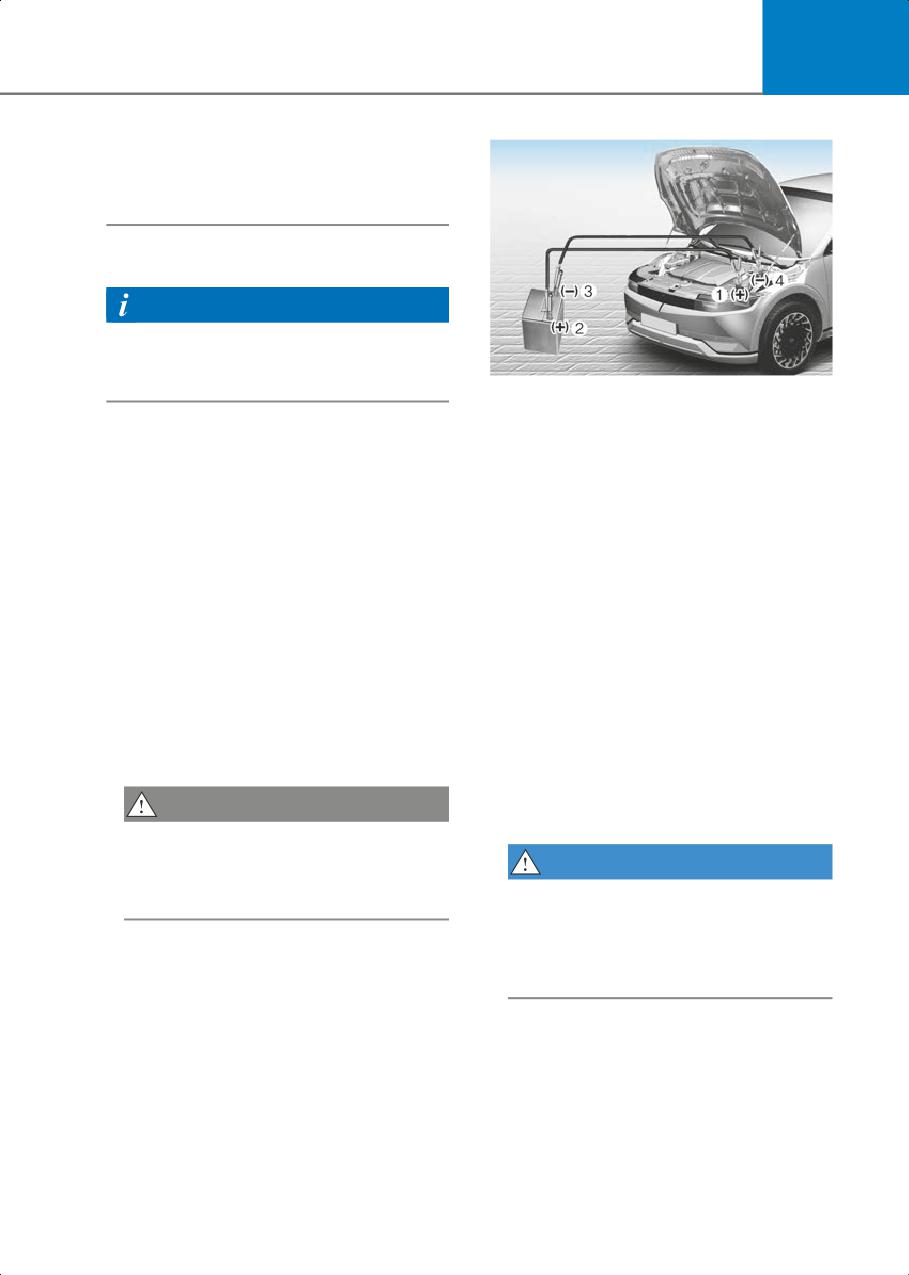
8
• Be sure to use only 12 V battery to jump
start. Using batteries with other
voltages to jump start can damage the
battery or even provoke an explosion.
Jump starting procedure
Information
When you jump start your vehicle, use the
jumper terminal in the motor
compartment.
ONE1081003
7. Connect the jumper cables in the exact
sequence shown in the illustration. First
1. Position the vehicles close enough that
connect one jumper cable to the red,
the jumper cables will reach, but do not
positive (+) jumper terminal of your
allow the vehicle body parts to contact.
vehicle (1).
2. Avoid fans or any moving parts in the
8.Connect the other end of the jumper
motor compartment at all times, even
cable to the red, positive (+)
when the vehicles are turned off.
battery/jumper terminal of the
3. Turn off all electrical devices such as
assisting vehicle (2).
radios, lights, air conditioning, etc. Put
9. Connect the second jumper cable to
the vehicles in P (Park) and set the
the black, negative (-) battery/jumper
parking brake. Turn both vehicles OFF.
terminal of the assisting vehicle (3).
4. Open the hood.
10.Connect the other end of the second
5. Remove the battery cover located
jumper cable to the black, negative (-)
inside of the front trunk.
chassis ground of your vehicle (4).
6.Remove the motor compartment fuse
Do not allow the jumper cables to
box cover.
contact anything except the correct
battery or jumper terminals or the
CAUTION
correct ground. Do not lean over the
battery when making connections.
Before jump starting, make sure to
correctly identify the positive (+) and
WARNING
negative (-) terminals to avoid reverse
polarity connections.
Do not connect the jumper cable to the
negative (-) jumper terminal of the
discharged battery. A spark could
cause the battery to explode and lead
to a personal injury or vehicle damage.
11.Start the assisting vehicle and let it run
at approximately for a few minutes.
Then start your vehicle.
8-5
Emergency Situations
12.Keep your vehicle operating for at least
NOTICE
30 minutes at idle or driving to assure
your battery receives enough charge to
To prevent damage to your vehicle:
be able to start on its own after the
• Only use a 12 V power supply (battery or
vehicle is shut off. A completely
jumper system) to jump start your
discharged battery may require as long
vehicle.
as 60 minutes runtime to fully recharge
it. If the vehicle is run for less, battery
• Do not attempt to jump start your
may not restart.
vehicle by push-starting.
If your vehicle will not start after a few
• Always be sure that the battery cover
attempts, it probably requires service. In
and cable are tightened after finishing
this event please seek qualified
jump start your vehicle. Otherwise is
assistance. If the cause of your battery
may cause damage to the relevant
discharging is not apparent, have your
parts, noise trouble, or entrance of
vehicle checked by an authorized
foreign substances.
HYUNDAI dealer.
Disconnect the jumper cables in the exact
reverse order you connected them:
CAUTION
1. Disconnect the jumper cable from the
While jump starting your vehicle, avoid
black, negative (-) chassis ground of
the positive (+) and negative (-) cables to
your vehicle (4).
come in contact. A spark could cause
2. Disconnect the other end of the jumper
personal injury.
cable from the black, negative (-)
battery/chassis ground of the assisting
vehicle (3).
3. Disconnect the second jumper cable
from the red, positive (+)
battery/jumper terminal of the
assisting vehicle (2).
4. Disconnect the other end of the jumper
cable from the red, positive (+) jumper
terminal of your vehicle (1).
Information
btn_AM-BATT
An inappropriately disposed battery can
be harmful to the environment and
human health. Dispose of the battery
according to your local law(s) or
regulations.
8-6
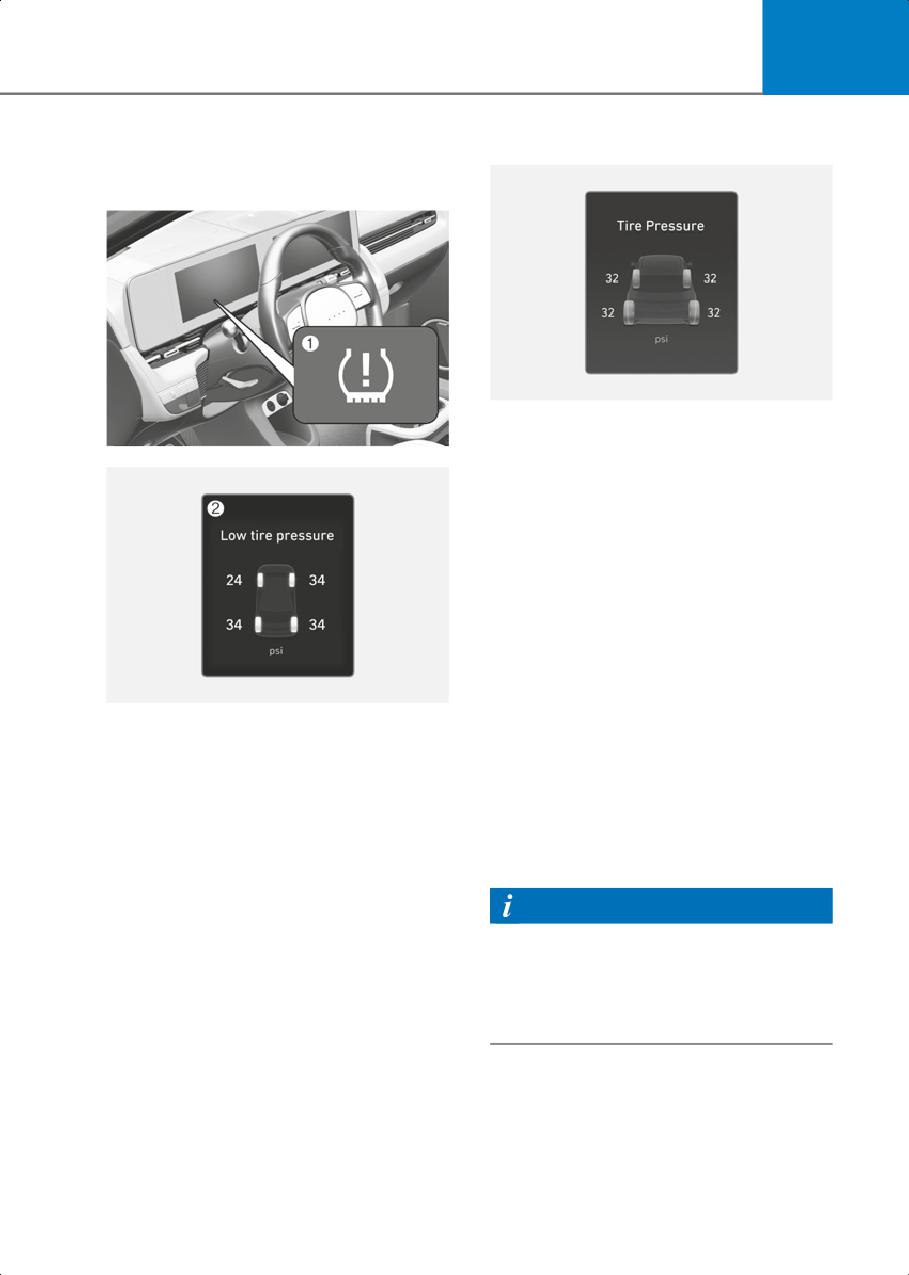
8
Tire Pressure Monitoring
Check Tire Pressure
System (TPMS)
ONE1041010L
• You can check the tire pressure in the
ONE1081004
Utility view on the cluster display.
Refer to the “View Modes” section in
chapter 4.
• Tire pressure is displayed after a few
minutes of driving after initial vehicle
start up.
• If tire pressure is not displayed when
the vehicle is stopped, ‘Drive to display’
message will appear. After driving,
check the tire pressure.
• The displayed tire pressure values may
ONE1081005L
differ from those measured with a tire
(1) Low Tire Pressure Telltale/TPMS
pressure gauge.
Malfunction Indicator
• You can change the tire pressure unit
(2) Low Tire Pressure Position Telltale and
from the Settings menu in the
Tire Pressure Telltale (Shown on the
infotainment system screen.
cluster display)
Select:
- Setup > General Settings > Unit >
Tire Air Pressure Unit > psi/kPa/bar
Information
The infotainment system may change
after software updates. For more
information, refer to the user’s manual
provided in the infotainment system and
the quick reference guide.
8-7
Emergency Situations
Tire Pressure Monitoring
Your vehicle has also been equipped with
a TPMS malfunction indicator to indicate
System
when the system is not operating
properly. The TPMS malfunction indicator
WARNING
is combined with the low tire pressure
Over-inflation or under-inflation can
telltale. When the system detects a
reduce tire life, adversely affect vehicle
malfunction, the telltale will flash for
handling, and lead to sudden tire failure
approximately one minute and then
that may cause loss of vehicle control
remain continuously illuminated. This
resulting in an accident.
sequence will continue upon subsequent
vehicle start-ups as long as the
malfunction exists.
Each tire, including the spare (if
When the malfunction indicator is
provided), should be checked monthly
illuminated, the system may not be able
when cold and inflated to the inflation
to detect or signal low tire pressure as
pressure recommended by the vehicle
intended. TPMS malfunctions may occur
manufacturer on the vehicle placard or
for a variety of reasons, including the
tire inflation pressure label. (If your
installation of replacement or alternate
vehicle has tires of a different size than
tires or wheels on the vehicle that prevent
the size indicated on the vehicle placard
the TPMS from functioning properly.
or tire inflation pressure label, you should
determine the proper tire inflation
Always check the TPMS malfunction
pressure for those tires.)
telltale after replacing one or more tires or
wheels on your vehicle to ensure that the
As an added safety feature, your vehicle
replacement or alternate tires and wheels
has been equipped with a tire pressure
allow the TPMS to continue to function
monitoring system (TPMS) that
properly.
illuminates a low tire pressure telltale
when one or more of your tires is
NOTICE
significantly under-inflated. Accordingly,
when the low tire pressure telltale
If any of the below happens, have the
illuminates, you should stop and check
system checked by an authorized
your tires as soon as possible, and inflate
HYUNDAI dealer.
them to the proper pressure. Driving on a
1. The Low Tire Pressure Telltale/ TPMS
significantly under-inflated tire causes
Malfunction Indicator does not
the tire to overheat and can lead to tire
illuminate for 3 seconds when the
failure.
Start/Stop button is pressed to the ON
Under-inflation also reduces energy
position or when the vehicle is running.
efficiency and tire tread life, and may
2. The TPMS Malfunction Indicator
affect the vehicle’s handling and stopping
remains illuminated after blinking for
ability.
approximately 1 minute.
Please note that the TPMS is not a
3. The Low Tire Pressure Position Telltale
substitute for proper tire maintenance,
remains illuminated.
and it is the driver’s responsibility to
maintain correct tire pressure, even if
under-inflation has not reached the level
to trigger illumination of the TPMS low
tire pressure telltale.
8-8
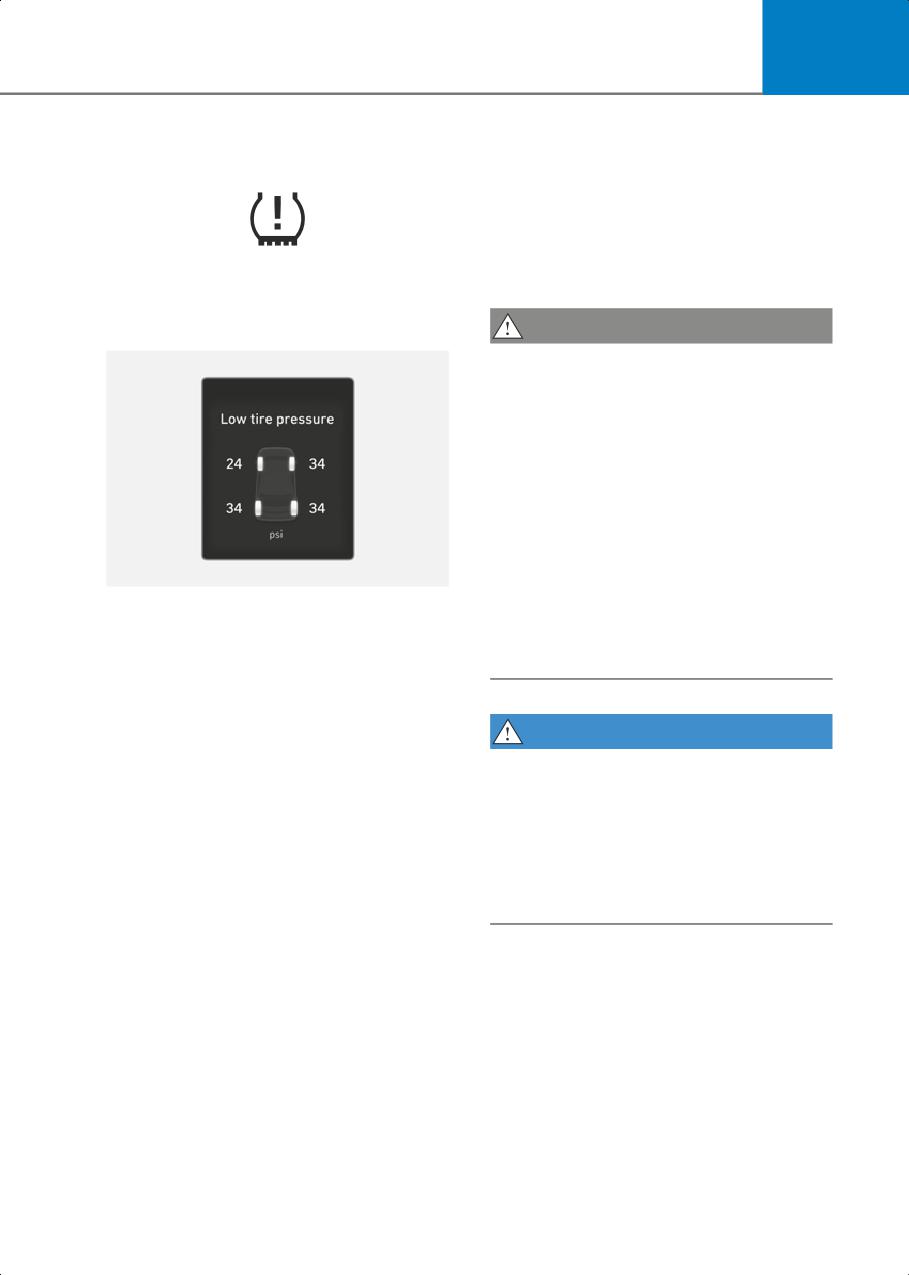
8
Low Tire Pressure Warning
The Low Tire Pressure Telltale will remain
on and the TPMS Malfunction Indicator
Light
may blink for one minute and then remain
illuminated (when the vehicle is driven
approximately 10 minutes at speed above
15.5 mph (25 km/h)) until you have the low
btn_WTL-215
pressure tire repaired and replaced on the
vehicle.
Low Tire Pressure Position
and Tire Pressure Telltale
CAUTION
In winter or cold weather, the Low Tire
Pressure Telltale may be illuminated if the
tire pressure was adjusted to the
recommended tire inflation pressure in
warm weather. It does not mean your
TPMS is malfunctioning because the
decreased temperature leads to a
proportional lowering of tire pressure.
When you drive your vehicle from a warm
area to a cold area or from a cold area to a
warm area, or the outside temperature is
ONE1081021L
greatly higher or lower, you should check
When the tire pressure monitoring
the tire inflation pressure and adjust the
system warning indicators are illuminated
tires to the recommended tire inflation
and a warning message displayed on the
pressure.
cluster display, one or more of your tires is
significantly under-inflated. The Low Tire
Pressure Position Telltale will indicate
which tire is significantly underinflated by
WARNING
illuminating the corresponding parking
Low pressure damage
light.
Significantly low tire pressure makes the
If either telltale illuminates, immediately
vehicle unstable and can contribute to
reduce your speed, avoid hard cornering
loss of vehicle control and increased
and anticipate increased stopping
braking distances.
distances. You should stop and check
Continued driving on low pressure tires
your tires as soon as possible. Inflate the
can cause the tires to overheat and fail.
tires to the proper pressure as indicated
on the vehicle’s placard or tire inflation
pressure label located on the driver’s side
center pillar outer panel.
If you cannot reach a service station or if
the tire cannot hold the newly added air,
replace the low pressure tire with the
spare tire.
8-9
Emergency Situations
TPMS (Tire Pressure
Changing a Tire with TPMS
Monitoring System)
If you have a flat tire, the Low Tire
Malfunction Indicator
Pressure and Position telltales will come
on. Have the flat tire repaired by an
authorized HYUNDAI dealer as soon as
possible or replace the flat tire with the
btn_WTL-215
spare tire.
The TPMS Malfunction Indicator will
NOTICE
illuminate after it blinks for approximately
one minute when there is a problem with
It is recommended that you do not use a
the Tire Pressure Monitoring System.
puncture-repairing agent not approved
Have the system checked by an
by an authorized HYUNDAI dealer or the
authorized HYUNDAI dealer as soon as
equivalent specified for your vehicle to
possible.
repair and/or inflate a low pressure tire.
Tire sealant not approved by an
NOTICE
authorized HYUNDAI dealer or the
equivalent specified for your vehicle may
If there is a malfunction with the TPMS,
damage the tire pressure sensor.
the Low Tire Pressure Position Telltale will
not be displayed even though the vehicle
has an under-inflated tire.
The spare tire (if equipped) does not
come with a tire pressure monitoring
sensor. When the low pressure tire or the
NOTICE
flat tire is replaced with the spare tire, the
Low Tire Pressure Telltale will remain on.
The TPMS Malfunction Indicator may
Also, the TPMS Malfunction Indicator will
illuminate after blinking for one minute if
illuminate after blinking for one minute if
the vehicle is near electric power supply
the vehicle is driven at speed above 15.5
cables or radio transmitters such as police
mph (25 km/h) for approximately 10
stations, government and public offices,
minutes.
broadcasting stations, military
Once the original wheel equipped with a
installations, airports, transmitting
tire pressure monitoring sensor is
towers, etc.
reinflated to the recommended pressure
Additionally, the TPMS Malfunction
and reinstalled on the vehicle, the Low
Indicator may illuminate if snow chains
Tire Pressure Telltale and TPMS
are used or electronic devices such as
Malfunction Indicator will go off within a
computers, chargers, remote starters,
few minutes of driving.
navigation, etc. This may interfere with
If the indicators do not extinguish after a
normal operation of the TPMS.
few minutes, consult an authorized
HYUNDAI dealer.
Each wheel is equipped with a tire
pressure sensor mounted inside the tire
behind the valve stem (except for the
spare tire). You must use TPMS specific
wheels. It is recommended that you
always have your tires serviced by an
authorized HYUNDAI dealer.
8-10
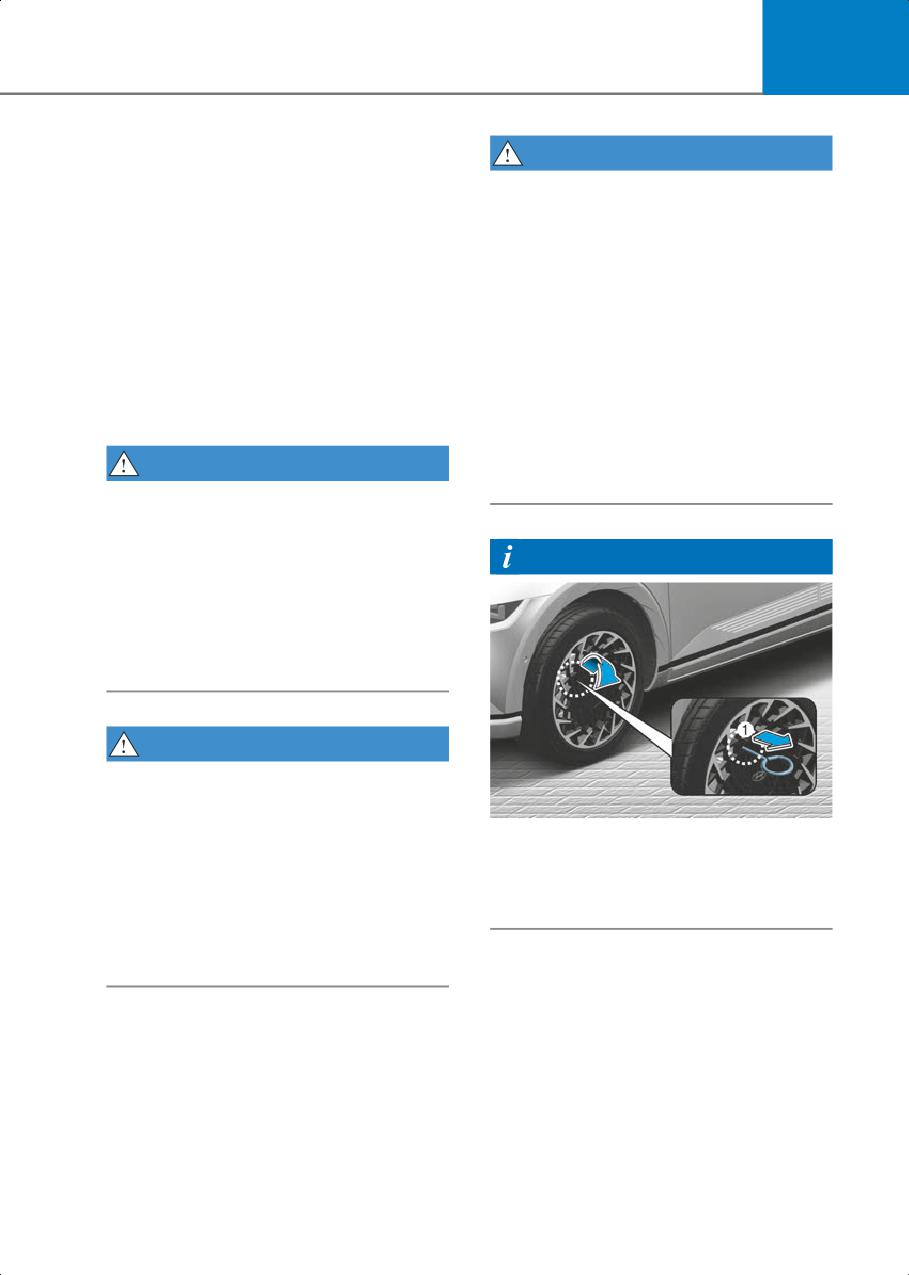
8
You may not be able to identify a tire with
WARNING
low pressure by simply looking at it.
Always use a good quality tire pressure
This device complies with Part 15 of the
gauge to measure. Please note that a tire
FCC rules.
that is hot (from being driven) will have a
Operation is subject to the following three
higher pressure measurement than a tire
conditions:
that is cold.
1. This device may not cause harmful
A cold tire means the vehicle has been
interference.
sitting for 3 hours and driven for less than
1 mile (1.6 km) in that 3 hour period.
2. This device must accept any
interference received, including
Allow the tire to cool before measuring
interference that may cause undesired
the inflation pressure. Always be sure the
operation of the device.
tire is cold before inflating to the
3. Changes or modifications not expressly
recommended pressure.
approved by the party responsible for
WARNING
compliance could void the user’s
authority to operate the device.
• The TPMS cannot alert you to severe
and sudden tire damage caused by
external factors such as nails or road
debris.
Information
• If you feel any vehicle instability,
immediately take your foot off the
accelerator, apply the brakes gradually
with light force, and slowly move to a
safe position off the road.
WARNING
Tampering with, modifying, or disabling
the Tire Pressure Monitoring System
(TPMS) components may interfere with
ONE1081026
the system’s ability to warn the driver of
For 20 inches wheel, take out the remover
low tire pressure conditions and/or TPMS
tool (1) in the Tire Mobility Kit. Insert the
malfunctions. Tampering with,
tool to the hole and pull out the wheel
modifying, or disabling the Tire Pressure
cover.
Monitoring System (TPMS) components
may void the warranty for that portion of
the vehicle.
8-11
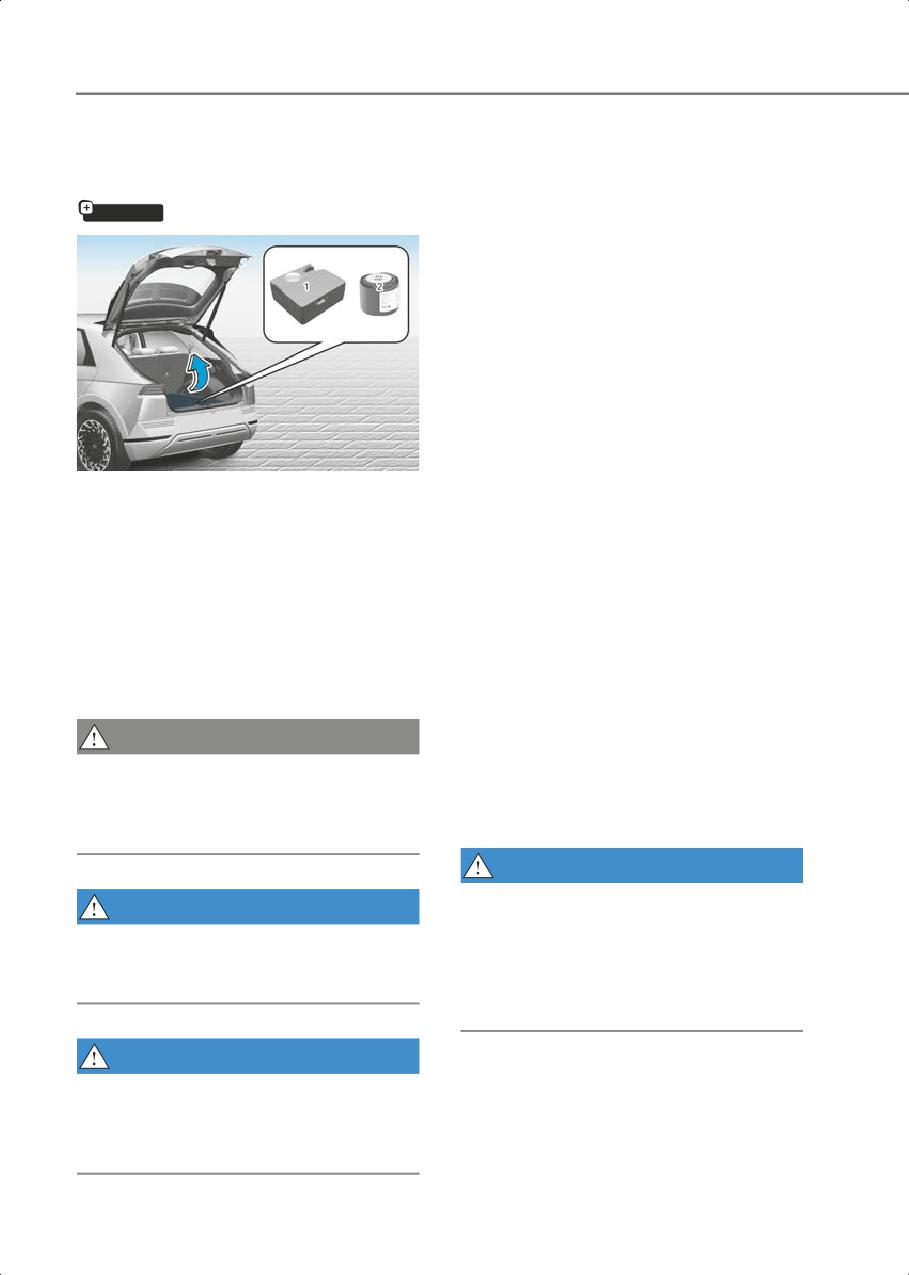
Emergency Situations
If You Have A Flat Tire
Introduction
With the Tire Mobility Kit you stay mobile
(with Tire Mobility Kit)
even after experiencing a tire puncture.
if equipped
The compressor and sealing compound
system effectively and comfortably seals
most punctures in a passenger car tire
caused by nails or similar objects and
reinflates the tire.
After you ensure that the tire is properly
sealed you can drive cautiously on the tire
(distance up to 120 miles (200 km)) at a
max. speed of 50 mph (80 km/h) in order
to reach a service station or tire dealer for
the tire replacement.
It is possible that some tires, especially
ONE1081029
with larger punctures or damage to the
For safe operation, carefully read and
sidewall, cannot be sealed completely.
follow the instructions in this manual
Air pressure loss in the tire may adversely
before use.
affect tire performance.
(1) Compressor
For this reason, you should avoid abrupt
(2) Sealant bottle
steering or other driving maneuvers,
The tire mobility kit is a temporary fix to
especially if the vehicle is heavily loaded
the tire, have the tire inspected by an
or if a trailer is in use.
authorized HYUNDAI dealer or the sealant
The Tire Mobility Kit is not designed or
provided with the Tire Mobility Kit must
intended as a permanent tire repair
be used for only one flat tire.
method and is to be used for one tire only.
CAUTION
This instruction shows you step by step
how to temporarily seal the puncture
When two or more tires are flat, do not
simply and reliably.
use the tire mobility kit because the
Read the section “Notes on the safe use
sealant provided with the Tire Mobility Kit
of the Tire Mobility Kit”.
must be used for only one flat tire.
WARNING
Do not use the TMK if a tire is severely
WARNING
damaged by driving run flat or with
Do not use the Tire Mobility Kit to repair
insufficient air pressure.
punctures in the tire walls. This can result
Only punctured areas located within the
in an accident due to tire failure.
tread region of the tire can be sealed
using the TMK.
WARNING
Have your tire repaired as soon as
possible. The tire may lose air pressure at
any time after inflating with the Tire
Mobility Kit.
8-12
8
Notes on the Safe Use of the
•
In case of skin contact with the sealant,
wash the area thoroughly with plenty of
Tire Mobility Kit
water. If the irritation persists, seek
•
Park your car at the side of the road so
medical attention.
that you can work with the Tire Mobility
•
In case of eye contact with the sealant,
Kit away from moving traffic.
flush your eyes for at least 15 minutes. If
•
To be sure your vehicle will not move,
the irritation persists, seek medical
even when you’re on fairly level ground,
attention.
always set your parking brake.
•
In case of swallowing the sealant, rinse
•
Only use the Tire Mobility Kit for
the mouth and drink plenty of water.
sealing/inflation passenger car tires.
However, never give anything to an
Only punctured areas located within
unconscious person and seek medical
the tread region of the tire can be
attention immediately.
sealed using the tire mobility kit.
•
Long time exposure to the sealant may
•
Do not use on motorcycles, bicycles or
cause damage to bodily tissue such as
any other type of tires.
kidney, etc.
•
When the tire and wheel are damaged,
do not use Tire Mobility Kit for your
safety.
•
Use of the Tire Mobility Kit may not be
effective for tire damage larger than
approximately 0.16 in (4 mm).
•
If the tire cannot be made roadworthy
with the Tire Mobility Kit, contact an
authorized HYUNDAI dealer.
•
Do not use the Tire Mobility Kit if a tire
is severely damaged by driving run flat
or with insufficient air pressure.
•
Do not remove any foreign objects such
as nails or screws that have penetrated
the tire.
•
Provided the car is outdoors, leave the
Vehicle is ON (
indicator ON).
Otherwise operating the compressor
may eventually drain the car battery.
•
Never leave the Tire Mobility Kit
unattended while it is being used.
•
Do not leave the compressor running
for more than 10 min. at a time or it may
overheat.
•
Do not use the Tire Mobility Kit if the
ambient temperature is below -22°F
(-30°C).
8-13
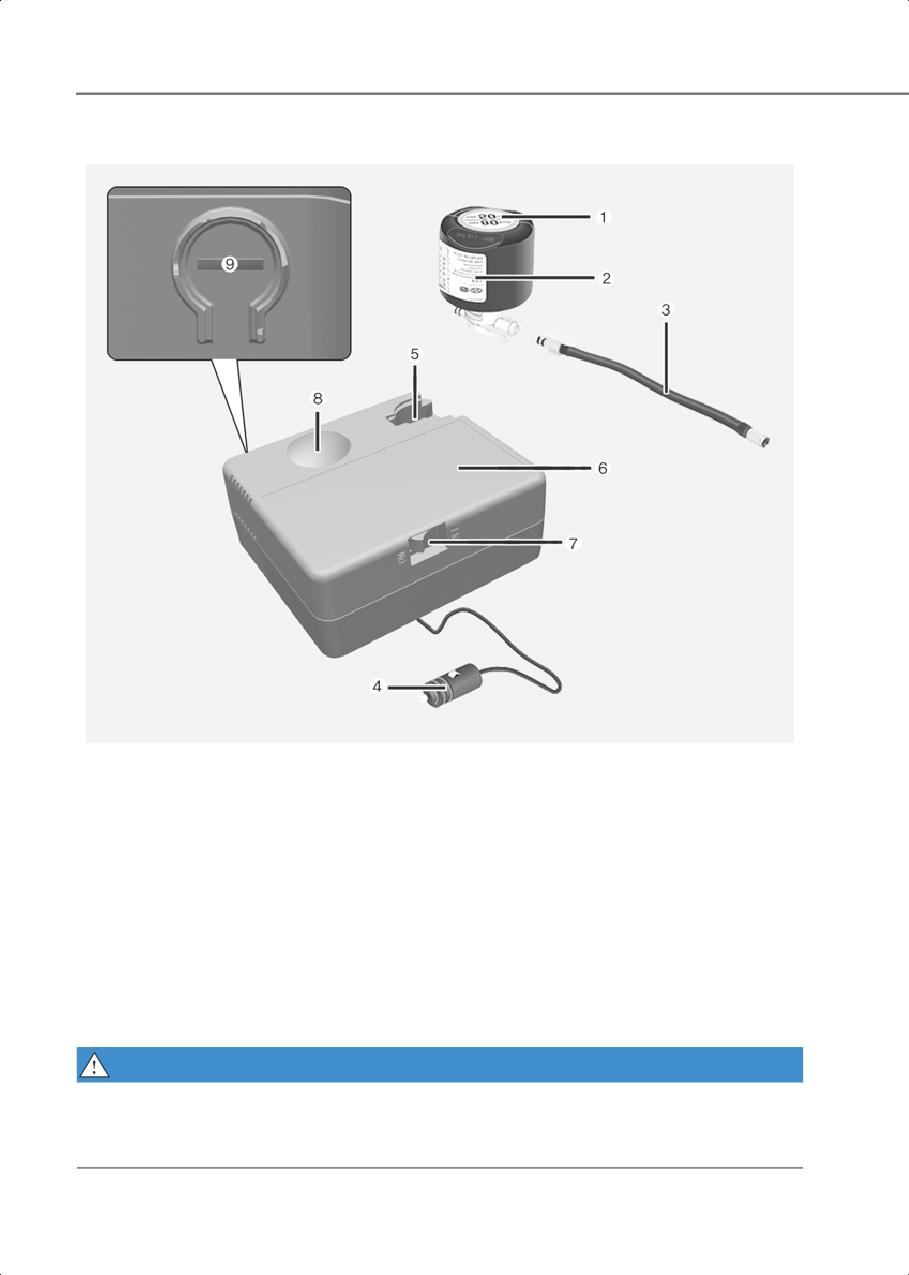
Emergency Situations
Components of the Tire Mobility Kit
ONE1081030
(1) Speed-restriction label
(2) Sealant bottle and label with speed restriction
(3) Filling hose
(4) Connectors and cable for the power outlet direct connection
(5) Holder for the sealant bottle
(6) Compressor
(7) ON/OFF switch
(8) Pressure gauge for displaying the tire inflation pressure
(9) Button for reducing the tire inflation pressure
Connectors, cable and connection hose are stored in the compressor housing.
Strictly follow the specified sequence, otherwise the sealant may escape under high
pressure.
WARNING
Expired sealant
Do not use the Tire sealant after the sealant has expired (for example, the expiration date
on the sealant container). This can increase the risk of tire failure.
8-14
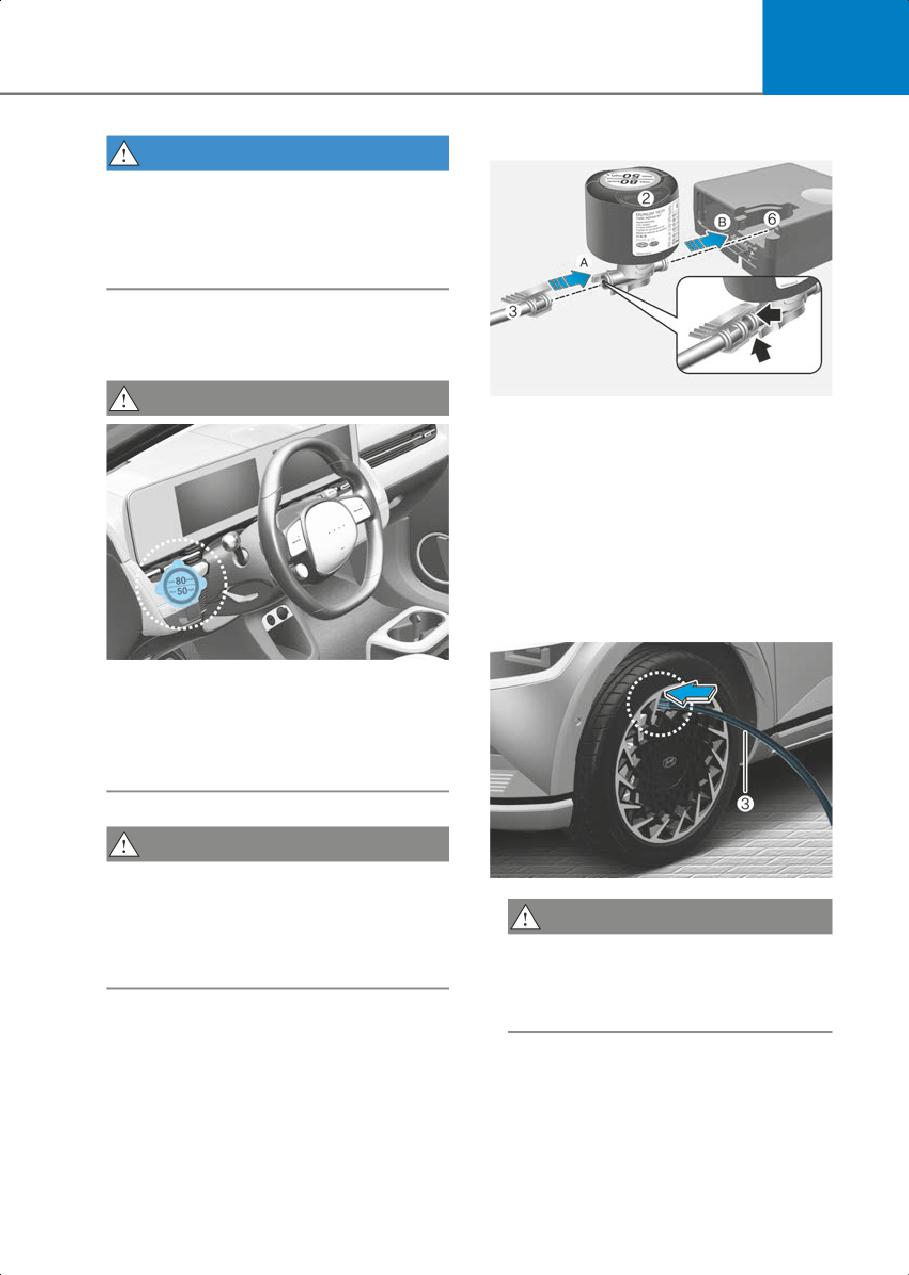
8
1. Shake the sealant bottle (2).
WARNING
Sealant
• Keep out of reach of children.
• Avoid contact with eyes.
• Do not swallow.
Using the Tire Mobility Kit
When a Tire is Flat
CAUTION
ONE1081031
2. Connect the filling hose (3) to the
sealant bottle (2) in the direction of (A)
and connect the sealant bottle to the
compressor (6) in the direction of (B).
3. Ensure that the compressor is switched
OFF.
4. Unscrew the valve cap from the valve of
the defective wheel and screw the
filling hose (3) of the sealant bottle onto
the valve.
ONE1081008
Detach the speed restriction label (1) from
the sealant bottle (2), and place it in a
highly visible place inside the vehicle
such as on the steering wheel to remind
the driver not to drive too fast.
CAUTION
If only the tire pressure needs to be
ONE1081009
adjusted, refer to “How to Adjust Tire
Pressure” in this chapter.
CAUTION
Before using the Tire Mobility Kit, be fully
Securely install the sealant filling hose
aware of the explanation on the sealant.
to the valve. If not, sealant may flow
backward, possibly clogging the filling
hose.
8-15
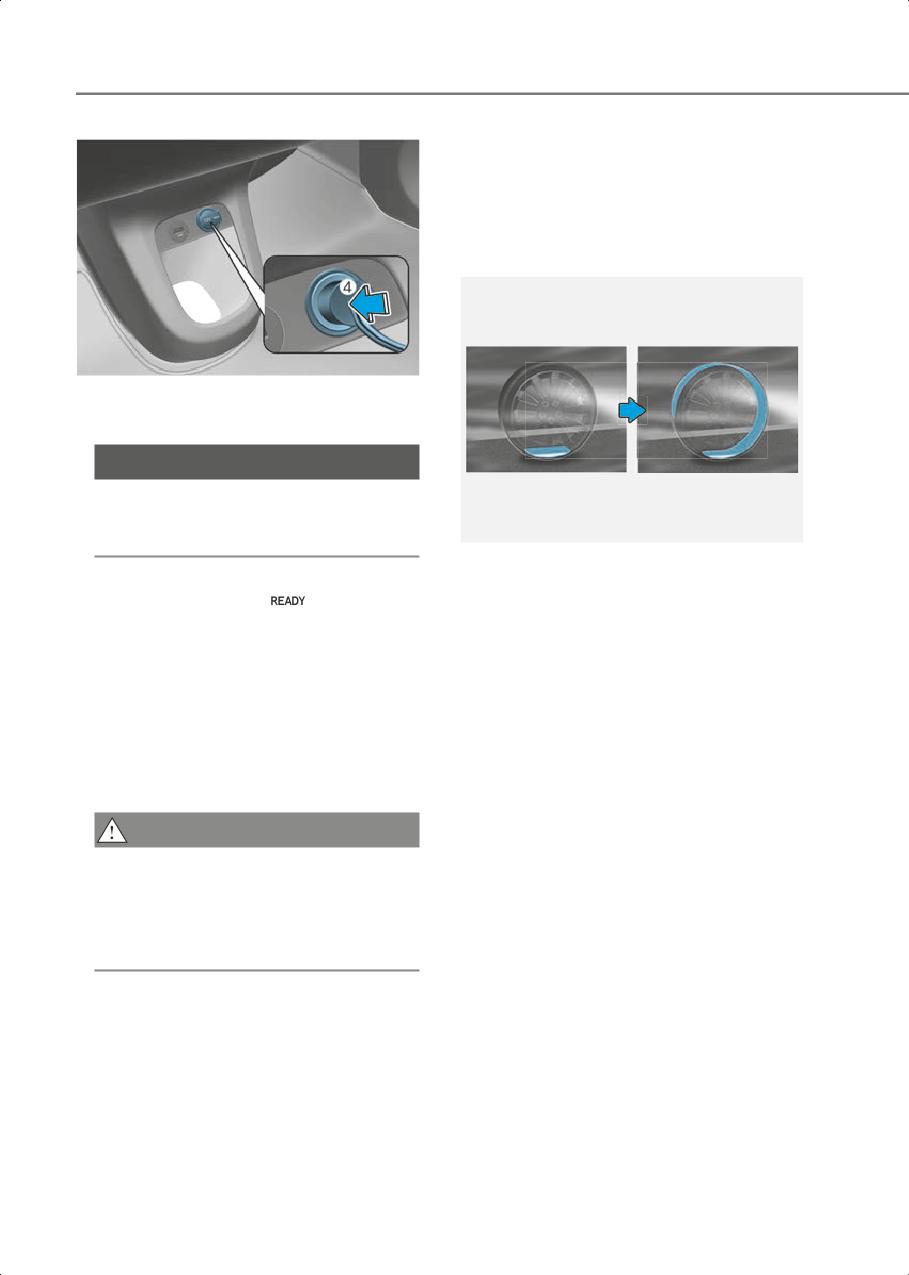
Emergency Situations
7. Switch off the compressor.
8. Detach the hoses from the sealant
bottle connector and from the tire
valve.
Return the Tire Mobility Kit to its
storage location in the vehicle.
ONE1081010
5. Plug the compressor power cord (4)
into the vehicle power outlet.
NOTICE
Only use the front passenger side
power outlet when connecting the
power cord.
OLMF064106
9. Immediately drive approximately 4~6
miles (7~10 km or, about 10min) to
6.With the vehicle ON (
indicator
evenly distribute the sealant in the tire.
ON), switch on the compressor and let
it run for approximately 5~7 minutes to
Do not exceed a speed of 50 mph (80
fill the sealant up to proper pressure.
km/h). If possible, do not fall below a
(refer to the Tires And Wheels, chapter
speed of 12 mph (20 km/h).
2). The inflation pressure of the tire
While driving, if you experience any
after filling is unimportant and will be
unusual vibration, ride disturbance or
checked/corrected later.
noise, reduce your speed and drive with
Be careful not to overinflate the tire and
caution until you can safely pull off of
stay away from the tire when filling it.
the side of the road.
Call for road side service or towing.
CAUTION
Tire pressure
Do not attempt to drive your vehicle if
the tire pressure is below 29 psi (200
kPa). This could result in an accident
due to sudden tire failure.
8-16
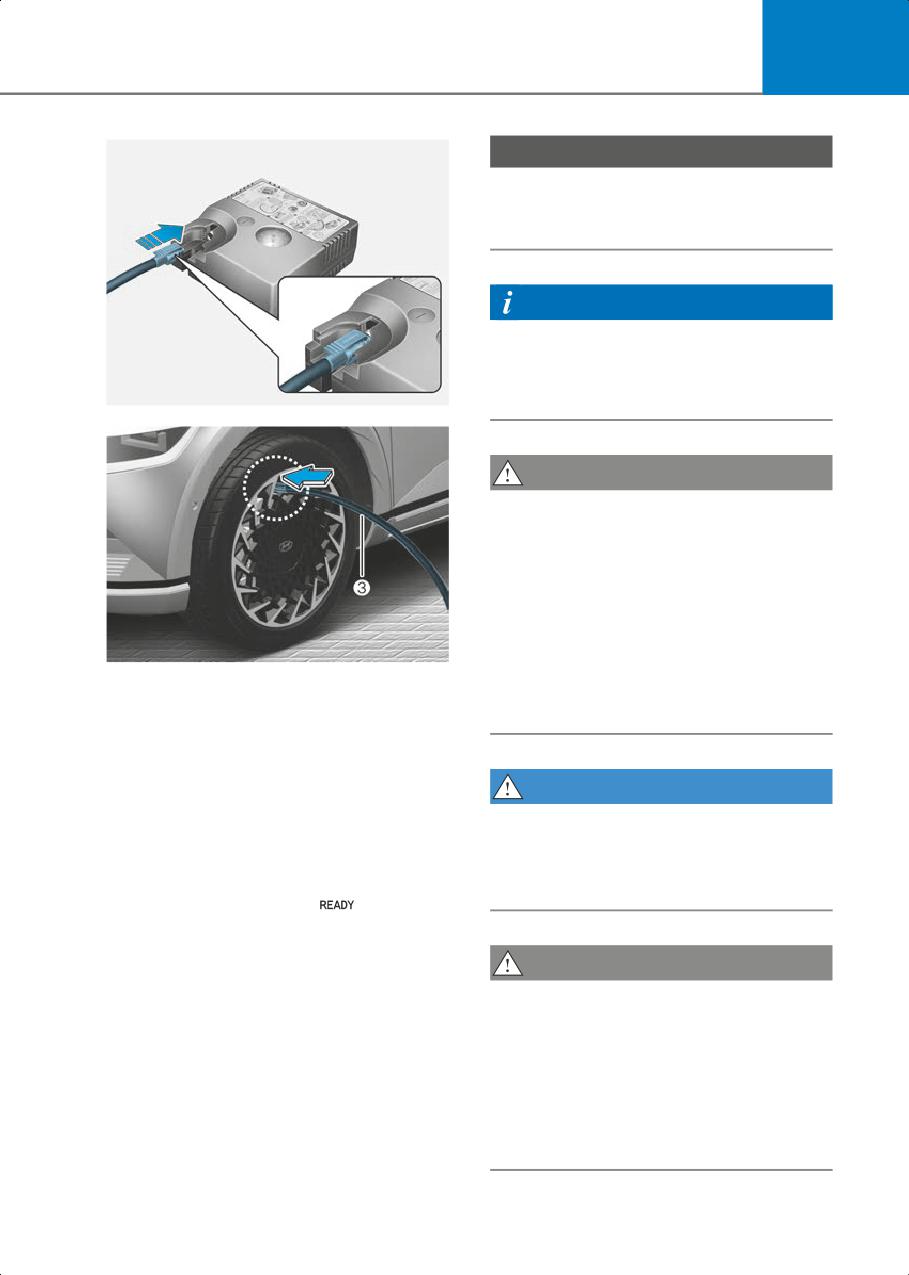
8
NOTICE
Do not let the compressor run for more
than 10 minutes, otherwise the device will
overheat and may be damaged.
Information
The pressure gauge may show higher
than actual reading when the compressor
is running. To get an accurate tire reading,
the compressor needs to be turned off.
OIGH067043
CAUTION
If the inflation pressure is not maintained,
drive the vehicle a second time, refer to
step 9.
Then repeat steps 10 to 13.
Use of the TMK may be ineffectual for tire
damage larger than approximately 0.16 in
(4 mm).
ONE1081009
Contact an authorized HYUNDAI dealer if
10.After driving approximately 4~6 miles
the tire cannot be made roadworthy with
(7~10 km or about 10 min), stop at a
the Tire Mobility Kit.
safety location.
11.Connect the filling hose (3) of the
compressor directly to the tire valve.
WARNING
12.Plug the compressor power cord into
The tire inflation pressure must be at least
the vehicle power outlet.
32 psi (220 kPa). If it is not, do not
13.Adjust the tire inflation pressure to the
continue driving.
recommended tire inflation.
Call for road side service or towing.
With the Vehicle is ON (
indicator
ON) proceed as follows.
• To increase the inflation pressure :
CAUTION
Switch on the compressor. To check
the current inflation pressure setting,
Tire pressure sensor (if equipped with
briefly switch off the compressor.
TPMS)
• To reduce the inflation pressure:
The sealant on the tire pressure sensor
Press the button (9) on the
and wheel should be removed when you
compressor.
replace the tire with a new one and
inspect the tire pressure sensors. Have
you get this done at an authorized
HYUNDAI dealer.
8-17
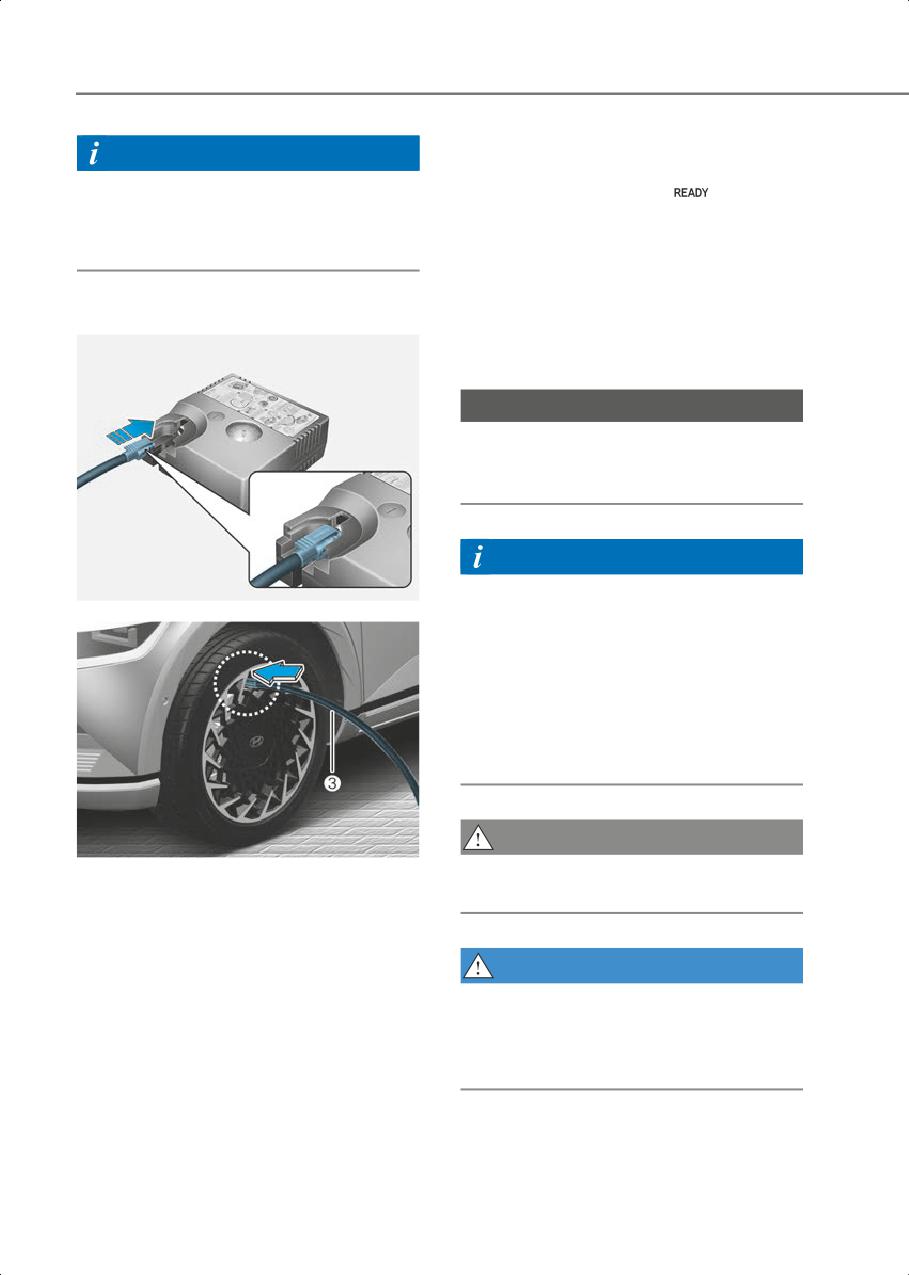
Emergency Situations
4. Adjust the tire inflation pressure to the
Information
recommended tire inflation.
When reinstalling the repaired or
With the Vehicle is ON (
indicator
replaced tire and wheel on the vehicle,
ON), proceed as follows.
tighten the wheel lug nut to 79~94 lbf·ft
• To increase the inflation pressure :
(11~13 kgf·m).
Switch on the compressor. To check
the current inflation pressure setting,
briefly switch off the compressor.
How to Adjust Tire Pressure
• To reduce the inflation pressure:
Press the button (9) on the
compressor.
NOTICE
Do not let the compressor run for more
than 10 minutes, otherwise the device will
overheat and may be damaged.
Information
• The pressure gauge may show higher
OIGH067043
than actual reading when the
compressor is running. To get an
accurate tire reading, the compressor
needs to be turned off.
• When reinstalling the repaired or
replaced tire and wheel on the vehicle,
tighten the wheel lug nut to 79~94 lbf·ft
(11~13kgf·m).
CAUTION
ONE1081009
Do not use the sealant when the tire
1. Park your vehicle in a safe location.
pressure only needs to be adjusted.
2. Connect the filling hose (3) of the
compressor directly to the tire valve.
3. Plug the compressor power cord into
WARNING
the vehicle power outlet.
The tire inflation pressure must be at least
32 psi (220 kPa). If it is not, do not
continue driving.
Call for road side service or towing.
8-18
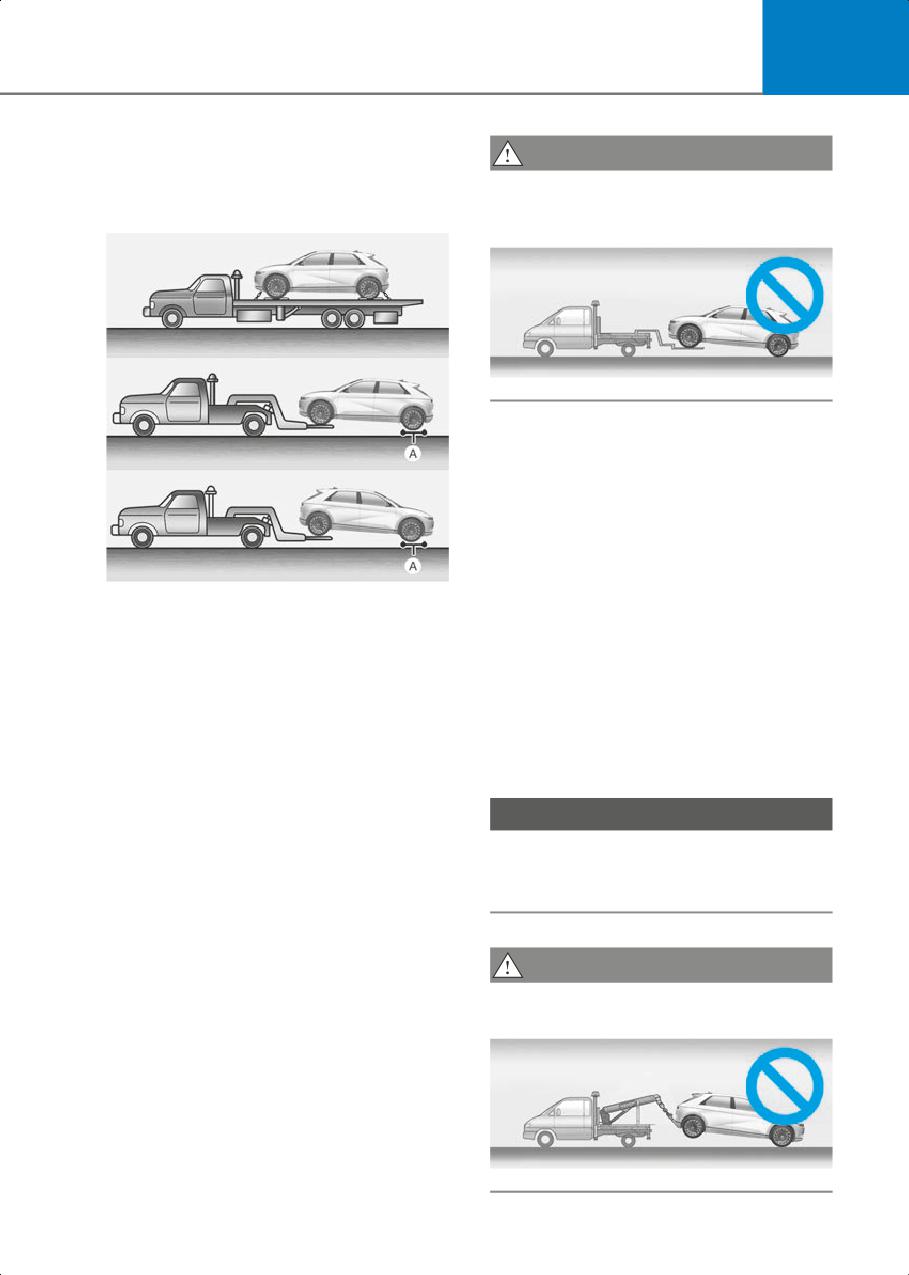
8
Towing
CAUTION
Do not tow the vehicle with the rear
wheels on the ground as this may cause
Towing Service
damage to the vehicle.
ONE1081015JP
For AWD vehicles, it must be towed with
a wheel lift and dollies or flatbed
equipment with all the wheels off the
ground.
Precautions when moving a short
distance before towing a vehicle
ONE1081011JP
[A] : Dollies
Move short distances within 33 feet (10 m)
If emergency towing is necessary, have it
at a speed of 3 mph (5 km/h) or less only
done by an authorized HYUNDAI dealer or
when loading on a tow truck or if the
a commercial tow-truck service.
vehicle needs to be repositioned.
Proper lifting and towing procedures are
At this time, the gear must be in the N
necessary to prevent damage to the
(Neutral) position and the parking brake
vehicle. The use of wheel dollies or
must be released. If it is impossible to
flatbed is recommended.
operate the gear and parking brake, move
the vehicle with the rear wheel lifted.
For 2WD vehicles, it is acceptable to tow
the vehicle with the front wheels on the
NOTICE
ground (without dollies) and the rear
wheels off the ground.
Do not lift the vehicle by the tow fitting or
If any of the loaded wheels or suspension
body and chassis parts. Otherwise the
components are damaged or the vehicle
vehicle may be damaged.
is being towed with the rear wheels on the
ground, use a towing dolly under the rear
wheels.
CAUTION
When being towed by a commercial tow
Do not tow with sling-type equipment.
truck and wheel dollies are not used, the
Use wheel lift or flatbed equipment.
rear of the vehicle should always be lifted,
not the front.
ONE1081014
8-19
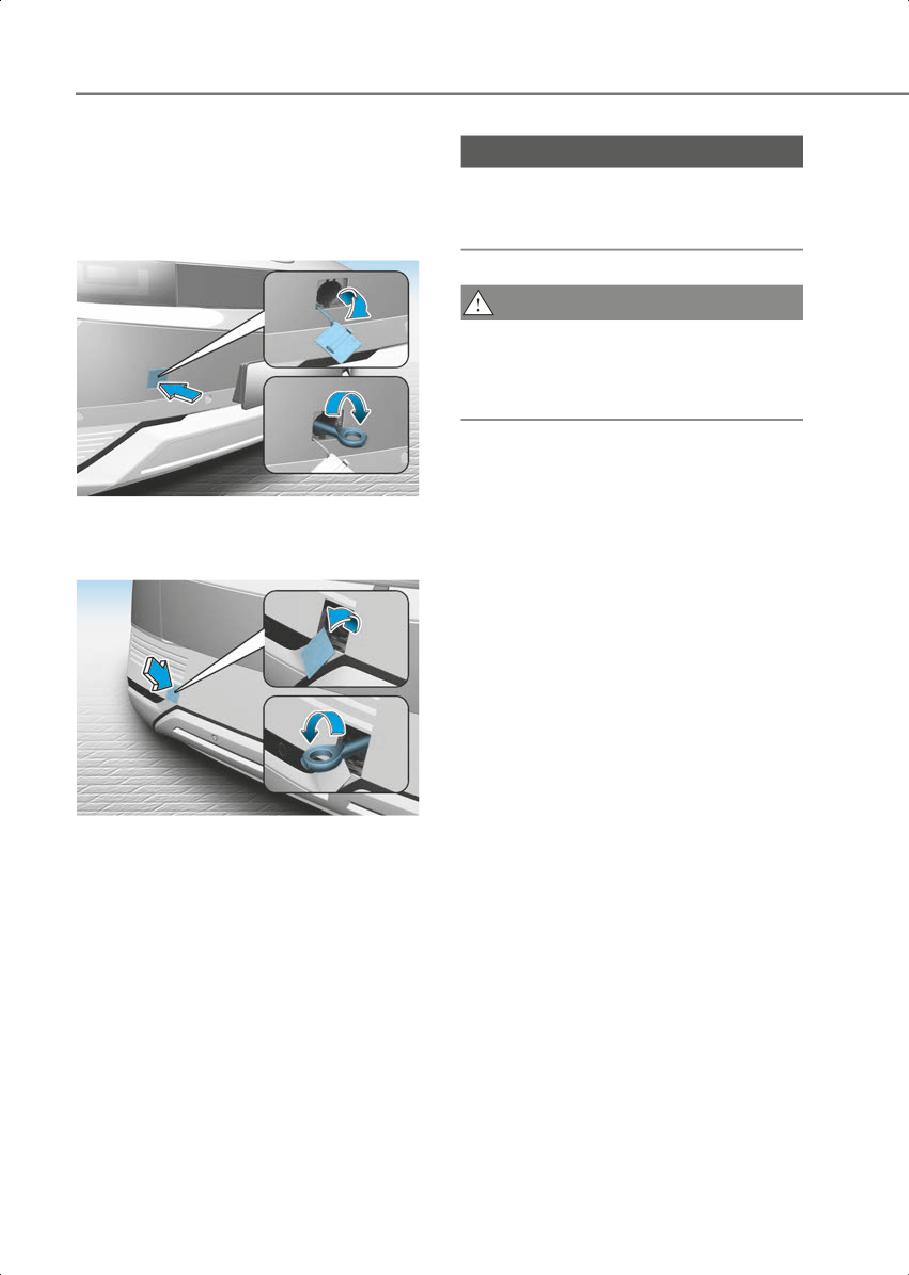
Emergency Situations
Removable Towing Hook
NOTICE
1. Open the liftgate, and remove the
Failure to properly tighten the towing
towing hook from the tool case.
hook may result in vehicle damage and
2. Remove the hole cover.
deformation of related parts.
Front
CAUTION
Make sure the towing hook is tighten
properly. If not, during towing the towing
hook may be thrown off the vehicle
resulting in serious injury or accident.
ONE1081016
• Push the lower part of the bumper
hole cover.
Rear
ONE1081017
• Push the upper part of the bumper
hole cover.
• Pull the lower part of the bumper hole
cover.
3. Install the towing hook by turning it
clockwise into the hole until it is fully
secured.
4. Remove the towing hook and install the
cover after use.
8-20
9. Maintenance
Motor Compartment
9-3
Maintenance Services
9-4
Owner’s Responsibility
9-4
Owner Maintenance Precautions
9-4
Owner Maintenance
9-5
Owner Maintenance Schedule
9-5
Scheduled Maintenance Services
9-7
Normal Maintenance Schedule
9-8
Normal Maintenance Schedule
9-9
Maintenance Under Severe Usage and Low Mileage Conditions
9-10
Explanation Of Scheduled Maintenance Items
9-11
Cooling System
9-11
Coolant
9-11
Gear Fluid
9-11
Brake Hoses and Lines
9-11
Brake Fluid
9-11
Brake Discs, Pads, Calipers and Rotors
9-11
Suspension Mounting Bolts
9-11
Steering Gear Box, Linkage & Boots/Lower Arm Ball Joint
9-11
Drive Shafts and Boots
9-11
Air Conditioning Refrigerant
9-11
Coolant
9-12
Brake Fluid
9-13
Checking the Brake Fluid Level
9-13
Gear Fluid
9-14
Washer Fluid
9-14
9
Checking the Washer Fluid Level
9-14
Cabin Air Filter
9-15
Filter Inspection
9-15
Filter Replacement
9-15
Wiper Blades
9-16
Blade Inspection
9-16
Blade Replacement
9-17
Battery (12 V)
9-19
For Best Battery Service
9-20
Battery Capacity Label
9-21
Battery Recharging
9-21
Reset Items
9-22
Tires And Wheels
9-22
Tire Care
9-23
Recommended Cold Tire Inflation Pressures
9-23
Check Tire Inflation Pressure
9-24
Tire Rotation
9-24
Wheel Alignment and Tire Balance
9-25
Tire Replacement
9-25
Wheel Replacement
9-26
Tire Traction
9-26
Tire Maintenance
9-26
Tire Sidewall Labeling
9-26
Tire Terminology and Definitions
9-29
All Season Tires
9-32
Summer Tires
9-32
Snow Tires
9-33
Radial-Ply Tires
9-33
Low Aspect Ratio Tires
9-34
Fuses
9-35
Instrument Panel Fuse Replacement
9-36
Motor Compartment Panel Fuse Replacement
9-37
Fuse/Relay Panel Description
9-38
Light Bulbs
9-47
Headlight, Parking Lamp, Turn Signal Lamp, Daytime Running Light (DRL)
Replacement
9-48
9
Side Repeater Lamp Replacement
9-49
Rear Combination Lamp Replacement
9-50
High Mounted Stop Lamp Replacement
9-51
License Plate Lamp Replacement
9-51
Front Trunk Lamp Replacement
9-51
Interior Light Replacement
9-52
Appearance Care
9-53
Exterior Care
9-53
Interior Care
9-58
California Perchlorate Notice
9-60
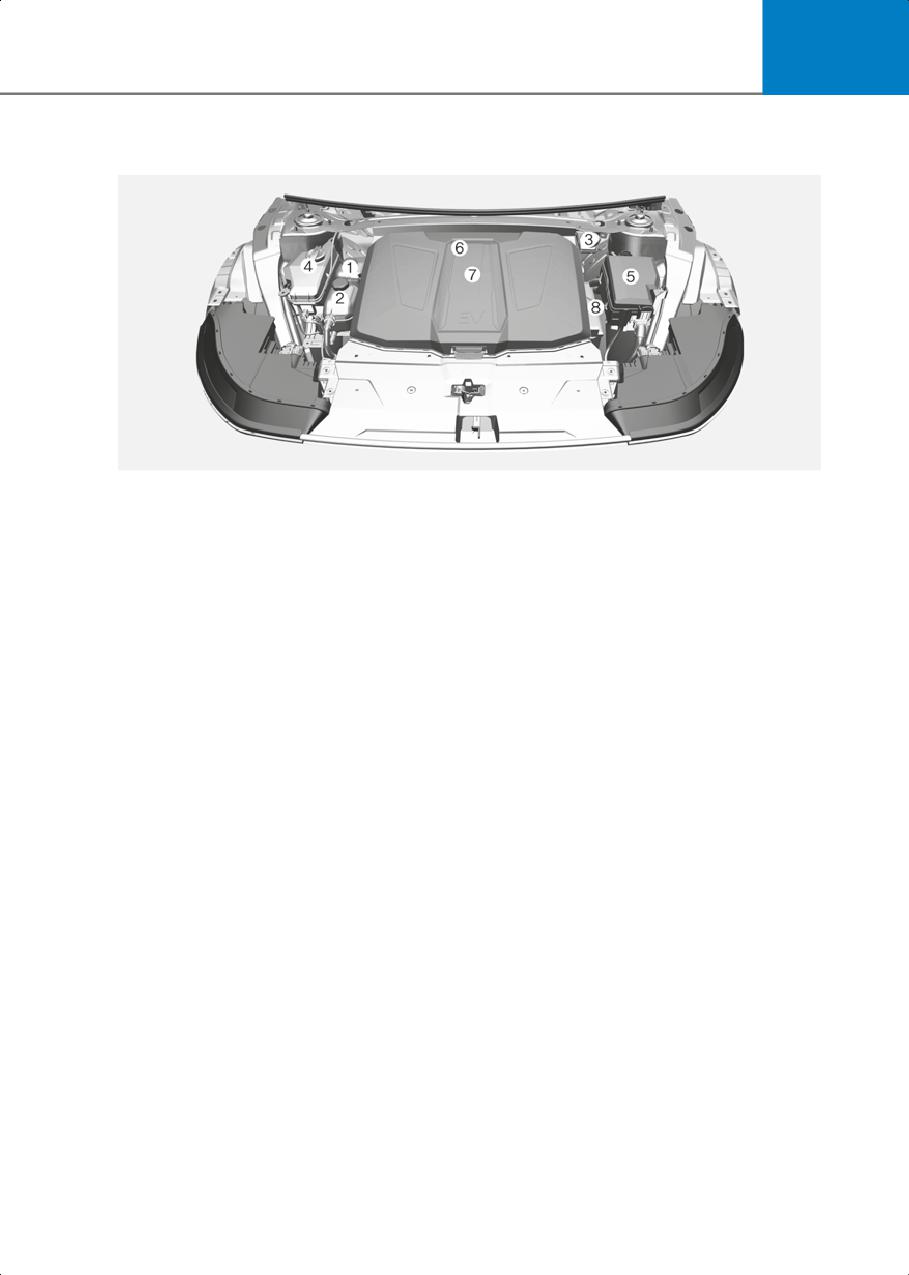
9
Motor Compartment
ONE1091001
The actual motor compartment in the vehicle may differ from the illustration.
(1) Coolant reservoir
(2) Low Conductivity Coolant
(3) Brake fluid reservoir
(4) Windshield washer fluid reservoir
(5) Fuse box
(6) Climate control system air filter
(7) Front trunk
(8) Battery (12 V)
9-3
Maintenance
Maintenance Services
Owner Maintenance
Precautions
You should exercise the utmost care to
Inadequate, incomplete or insufficient
prevent damage to your vehicle and
servicing may result in operational
injury to yourself whenever performing
problems with your vehicle that could
any maintenance or inspection
lead to vehicle damage, an accident, or
procedures.
personal injury. This chapter provides
Have your vehicle maintained and
instructions only for the maintenance
repaired by an authorized HYUNDAI
items that are easy to perform.
dealer. An authorized HYUNDAI dealer
Your vehicle should not be modified in
meets HYUNDAI’s high service quality
any way. Such modifications may
standards and receives technical support
adversely affect the performance, safety
from HYUNDAI in order to provide you
or durability of your vehicle and may, in
with a high level of service satisfaction.
addition, violate conditions of the limited
warranties covering the vehicle.
Owner’s Responsibility
Certain modifications may also be in
Maintenance service and record
violation of regulations established by the
retention are the owner’s responsibility.
U.S. Department of Transportation and
other federal or state agencies.
You should retain documents that show
proper maintenance has been performed
NOTICE
on your vehicle in accordance with the
scheduled maintenance service charts
Improper owner maintenance during the
shown on the following pages. You need
warranty period may affect warranty
this information to establish your
coverage. For details, read the separate
compliance with the servicing and
Owner’s Handbook & Warranty
maintenance requirements of your
Information booklet provided with the
vehicle warranties.
vehicle. If you’re unsure about any service
Detailed warranty information is provided
or maintenance procedure, have it done
in your Owner’s Handbook & Warranty
by an authorized HYUNDAI dealer.
Information booklet.
Repairs and adjustments required as a
result of improper maintenance or a lack
of required maintenance are not covered.
9-4

9
The following lists are vehicle checks and
Owner Maintenance
inspections that should be performed by
the owner or an authorized HYUNDAI
WARNING
dealer at the frequencies indicated to
Performing maintenance work on a
help ensure safe, dependable operation
vehicle can be dangerous. If you lack
of your vehicle.
sufficient knowledge and experience or
Any adverse conditions should be
the proper tools and equipment to do the
brought to the attention of your dealer as
work, have it done by an authorized
soon as possible.
HYUNDAI dealer. ALWAYS follow these
These Owner Maintenance vehicle
precautions for performing maintenance
checks are generally not covered by
work:
warranties and you may be charged for
• Park your vehicle on level ground. Shift
labor, parts and lubricants used.
the vehicle to P (Park), apply the
The electric control system in the vehicle
parking brake, and press the Start/Stop
may cause malfunction or other negative
button to the OFF position.
impact on the artificial heart and the
• Block the tires (front and back) to
artificial internal organs. Be sure to
prevent the vehicle from moving.
inquire the impact of the electric control
Remove loose clothing or jewelry that
system on the artificial organs from the
can become entangled in moving parts.
medical product corporation.
• Keep flames, sparks, or smoking
materials away from the battery and
Owner Maintenance Schedule
motor related parts.
When you stop for charging:
• Check the coolant level in the coolant
WARNING
reservoir.
Make sure to turn the Start/Stop button to
• Check the windshield washer fluid
the ‘OFF’ position to shut down the
level.
vehicle before performing maintenance
• Check for low or under-inflated tires.
work on the vehicle.
WARNING
Be careful when checking your coolant
level if the motor compartment is hot.
This may result in coolant being blown
out of the opening and cause serious
burns and other injuries.
9-5
Maintenance
While operating your vehicle:
At least twice a year: (for example,
every Spring and Autumn)
• Check for vibrations in the steering
wheel. Notice if there is any increased
• Check radiator, heater and air
steering effort or looseness in the
conditioning hoses for leaks or
steering wheel, or change in its
damage.
straight-ahead position.
• Check windshield washer spray and
• Notice if your vehicle constantly turns
wiper operation. Clean wiper blades
slightly or “pulls” to one side when
with a clean cloth dampened with
traveling on smooth, level road.
washer fluid.
• When stopping, listen and check for
• Check headlight alignment.
unusual sounds, pulling to one side,
• Check the seat belts for wear and
increased brake pedal travel or
function.
“hard-to-push” brake pedal.
• If any slipping or changes in the
At least once a year:
operation of your gear shift occurs,
check the shift gear fluid level.
• Clean body and door drain holes.
• Check the shift gear P (Park) function.
• Lubricate door hinges and hood hinges.
• Check the parking brake.
• Lubricate door and hood locks and
latches.
• Check for fluid leaks under your vehicle
(water dripping from the air
• Lubricate door rubber weather strips.
conditioning system during or after use
• Check the air conditioning system.
is normal).
• Inspect and lubricate shift gear linkage
and controls.
At least monthly:
• Clean the battery (12V) and terminals.
• Check coolant level in the coolant
• Check the brake fluid level.
reservoir.
• Check the operation of all exterior
lights, including the stoplights, turn
signals and hazard warning flashers.
• Check the inflation pressures of all tires
including the spare for tires that are
worn, show uneven wear, or are
damaged.
• Check for loose wheel lug nuts.
9-6
9
Scheduled Maintenance Services
Follow Normal Maintenance Schedule if the vehicle is usually operated where none of the
following conditions apply. If any of the following conditions apply, you must follow the
Maintenance Under Severe Usage Conditions.
• Repeated driving short distance of less than 5 miles (8 km) in normal temperature or
less than 10 miles (16 km) in freezing temperature
• Driving on rough, dusty, muddy, unpaved, graveled or salt-spread roads
• Driving in areas using salt or other corrosive materials or in very cold weather
• Driving in heavy dust condition
• Driving in heavy traffic area with the ambient temperature higher than 90 ºF (32 ºC)
while consuming more than 50% of electric energy.
• Driving on uphill, downhill, or mountain roads repeatedly
• Towing a trailer, or using a camper or roof rack
• Driving as a patrol car, taxi, other commercial use or vehicle towing
• Frequently driving under high speed or rapid acceleration/deceleration
• Frequently driving in stop-and-go conditions
If your vehicle is operated under the above conditions, you should inspect, replace or
refill more frequently than the following Normal Maintenance Schedule. After the periods
or distance shown in the chart, continue to follow the prescribed maintenance intervals.
9-7
Maintenance
Normal Maintenance Schedule
The following maintenance services must be performed to ensure good vehicle
performance.
Keep receipts for all vehicle services to protect your warranty. Where both mileage and
time are shown, the frequency of service is determined by whichever occurs first.
Months
12
24
36
48
60
72
84
96
108
120
132
144
156
MAINTENANCE
Miles×1,000
8
16
24
32
40
48
56
64
72
80
88
96
104
INTERVALS
Km×1,000
13
26
39
52
65
78
91
104
117
130
143
156
169
MAINTENANCE
ITEM
Cooling system
12V auxiliary battery condition
Brake lines, hoses, and
connections
Disc brakes and pads
I
I
I
I
I
I
I
I
I
I
I
I
I
Brake pedal
Steering gear rack, linkage,
and boots
Air conditioning compressor,
air conditioner refrigerant and
performance
I : Inspect and if necessary, adjust, correct, clean or replace.
R : Replace or change.
9-8
9
Normal Maintenance Schedule
Months
12
24
36
48
60
72
84
96
108
120
132
144
156
MAINTENANCE
Miles×1,000
8
16
24
32
40
48
56
64
72
80
88
96
104
INTERVALS
Km×1,000
13
26
39
52
65
78
91
104
117
130
143
156
169
MAINTENANCE
ITEM
Drive shafts and boots
I
I
I
I
I
I
Replace Climate Control Air
Filter (For Evaporator and
I
R
I
R
I
R
I
R
I
R
I
R
I
Blower Unit)
Gear fluid
I
I
I
Rotate Tires (Includes Tire
Pressure and Tread Wear
Rotate every 8,000 miles (13,000 km) or 12 months
Inspection)
Standard
At first, replace 120,000 miles (200,000 km) or 120 months.
After that, replace every 24,000 miles (40,000 km) or 24
month.
Coolant *1
Low
Replace every 35,000 miles (60,000 km) or 36 months *2
Conductivity
Inspect every 8,000 miles (13,000 km) or 12 months,
Brake fluid
Replace every 48,000 miles (78,000 km) or 48 months
*1 Consult an authorized HYUNDAI dealer, when replacing or adding coolant.
*2 For your convenience, it can be replaced prior to it’s interval when you do maintenance of other items.
I : Inspect and if necessary, adjust, correct, clean or replace.
R : Replace or change.
9-9

Maintenance
Maintenance Under Severe Usage and Low Mileage Conditions
The following items must be serviced more frequently on cars mainly used under severe
driving conditions.
Refer to the chart below for the appropriate maintenance intervals.
R : Replace
I : Inspect and if necessary, adjust, correct, clean or replace
Maintenance
Driving
Maintenance item
Maintenance intervals
operation
condition
Every 80,000 miles
Gear fluid
R
A, B, E, F, H, J
(120,000 km)
Steering gear rack,
Inspect more frequently
I
B, C, D, E, F
linkage and boots
depending on the condition
Front suspension ball
Inspect more frequently
I
B, C, D, E, F
joints
depending on the condition
Disc brakes and pads,
Inspect more frequently
B, C, D, E, F, G,
I
calipers and rotors
depending on the condition
H, I, J
Inspect more frequently
B, C, D, E, F, G,
Driveshaft and boots
I
depending on the condition
H, I
Replace more frequently
Climate control air filter
R
B, D, F
depending on the condition
Severe driving conditions
A. Repeatedly driving short distance of less than 5 miles (8 km) in normal temperature or
less than 10 miles (16 km) in freezing temperature
B. Driving on rough, dusty, muddy, unpaved, graveled or salt spread roads
C. Driving in areas using salt or other corrosive materials or in very cold weather
D. Driving in heavy dust condition
E. Driving in heavy traffic area with the ambient temperature higher than 90 ºF (32 ºC)
while consuming more than 50% of electric energy.
F. Driving on uphill, downhill, or mountain roads repeatedly
G. Towing a trailer, or using a camper or roof rack
H. Driving as a patrol car, taxi, other commercial use or vehicle towing
I. Frequently driving under high speed or rapid acceleration/deceleration
J. Frequently driving in stop-and-go conditions
9-10
9
Explanation Of Scheduled
Suspension Mounting Bolts
Check the suspension connections for
Maintenance Items
looseness or damage. Retighten to the
specified torque.
Cooling System
Check cooling system components, such
Steering Gear Box, Linkage &
as radiator, coolant reservoir, hoses and
Boots/Lower Arm Ball Joint
connections for leakage and damage.
With the vehicle stopped and the vehicle
Replace any damaged parts.
off, check for excessive free-play in the
steering wheel. Check the linkage for
bends or damage. Check the dust boots
Coolant
and ball joints for deterioration, cracks, or
The coolant should be changed at the
damage.
intervals specified in the maintenance
Replace any damaged parts.
schedule.
Drive Shafts and Boots
Gear Fluid
Check the drive shafts, boots and clamps
The gear fluid should be inspected
for cracks, deterioration, or damage.
according to the intervals specified in the
Replace any damaged parts and, if
maintenance schedule.
necessary, repack the grease.
Brake Hoses and Lines
Air Conditioning Refrigerant
Visually check for proper installation,
Check the air conditioning lines and
chafing, cracks, deterioration and any
connections for leakage and damage.
leakage. Replace any deteriorated or
damaged parts immediately.
Brake Fluid
Check the brake fluid level in the brake
fluid reservoir. The level should be
between the MIN and the MAX marks on
the side of the reservoir. Use only
hydraulic brake fluid conforming to DOT 4
specification.
Brake Discs, Pads, Calipers
and Rotors
Check the pads, the discs, and the rotors
for any excessive wear-out. Inspect
calipers for any fluid leakage.
9-11
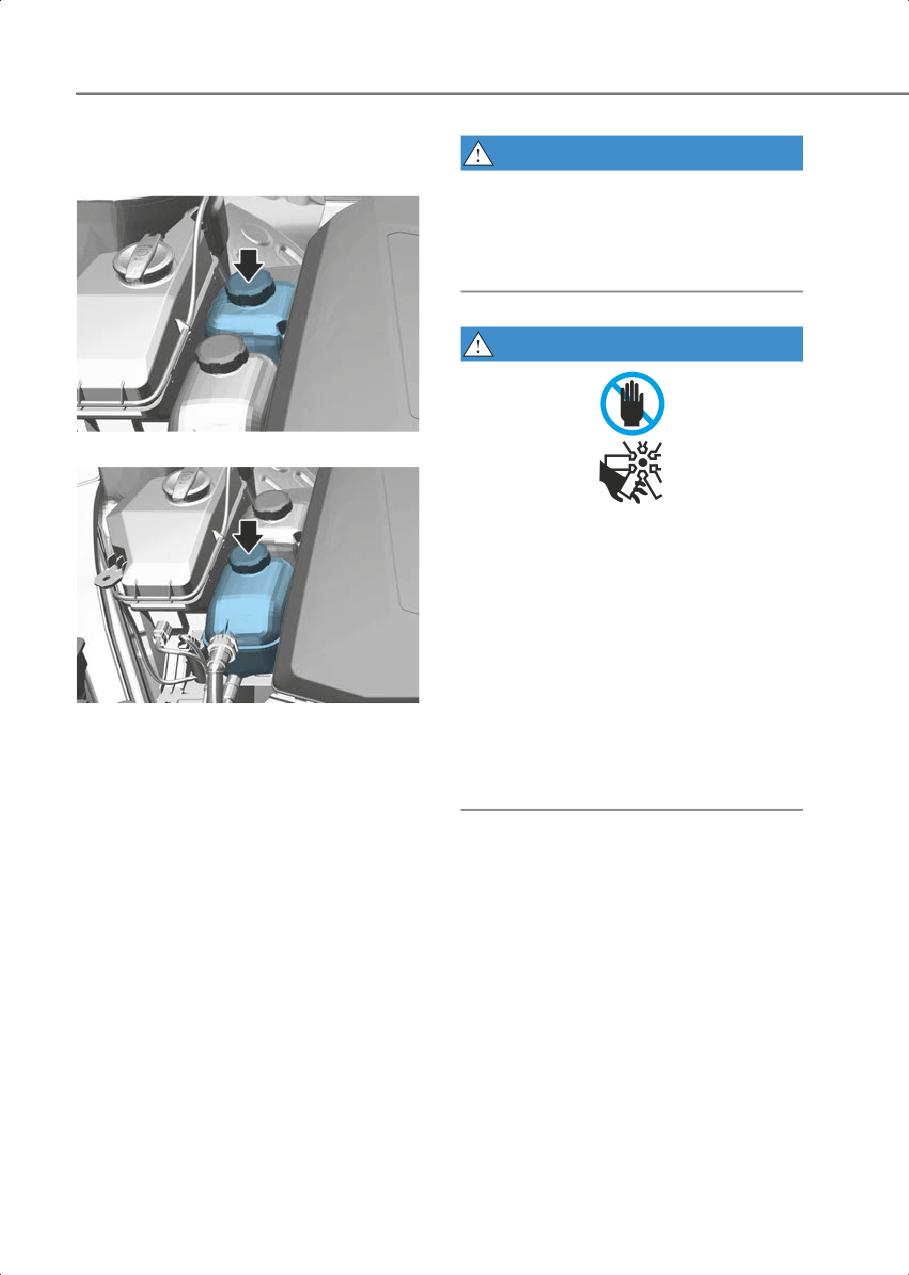
Maintenance
Coolant
WARNING
Standard coolant
Since specific coolant water (Blue color,
Low conductivity) is applied for electric
vehicles, replenishment of other
antifreeze or water may cause problems
to the vehicle.
WARNING
ONE1091002
Low conductivity coolant
btn_OLMB073108
The electric motor for the cooling fan may
continue to operate or start up when the
vehicle is not running and can cause
serious injury. Keep hands, clothing and
tools away from the rotating fan blades of
the cooling fan.
The electric motor for the cooling fan is
controlled by vehicle coolant
ONE1091003
temperature, refrigerant pressure and
Check the condition and connections of
vehicle speed. As the vehicle coolant
all cooling system hoses and heater
temperature decreases, the electric
hoses. Replace any swollen or
motor will automatically shut off. This is a
deteriorated hoses.
normal condition.
The coolant level should be filled between
the MAX or F and the MIN or L marks on
the side of the coolant reservoir when the
parts in the motor compartment is cool.
If the coolant is low, have the vehicle
inspected by an authorized HYUNDAI
dealer.
Use only designated coolant water for
electric vehicles, adding other types of
water or antifreeze can damage the
vehicle.
9-12
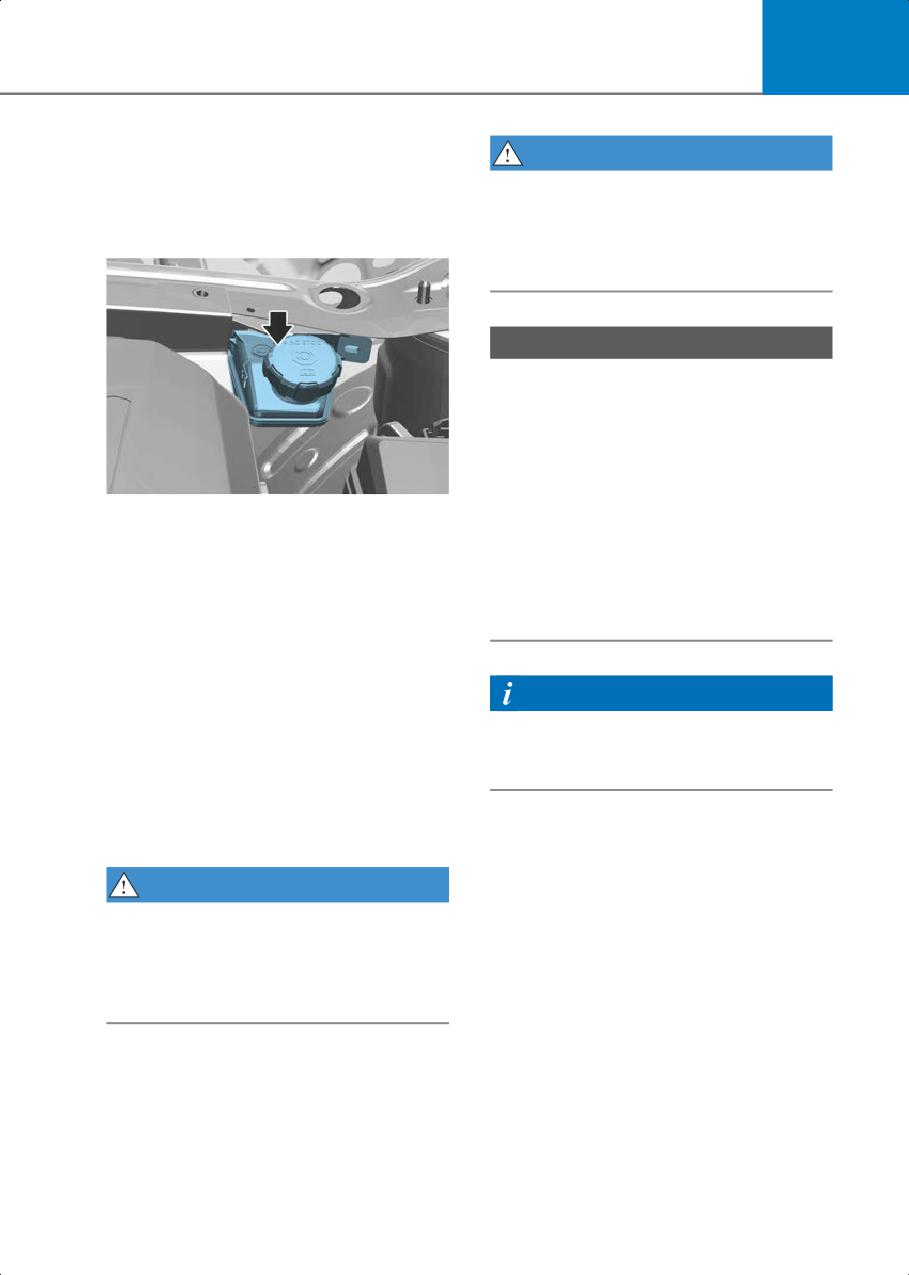
9
Brake Fluid
WARNING
Do not let brake fluid enter into your eyes.
If brake fluid gets in your eyes, flush your
Checking the Brake Fluid
eyes with clean water for at least 15
Level
minutes and get immediate medical
attention.
NOTICE
• Do not allow brake fluid to contact the
vehicle’s body paint, as it will result in
paint damage.
• NEVER use brake fluid which has been
exposed to open air for an extended
time, as its quality cannot be
ONE1091004
guaranteed. It should be disposed of
Check the fluid level in the reservoir
properly.
periodically. The fluid level should be
• Do not use the wrong type of brake
between MAX and MIN marks on the side
fluid. A few drops of mineral based oil in
of the reservoir.
your brake system can damage brake
Before removing the reservoir cap and
system parts.
adding brake fluid, clean the area around
the reservoir cap thoroughly to prevent
brake fluid contamination.
If the level is low, add the specified brake
Information
fluid to the MAX level. The level will fall
Use only the specified brake fluid (refer to
with accumulated kilometers. This is a
“Recommended Lubricants And
normal condition associated with the
Capacities” section in chapter 2).
wear of the brake linings. If the fluid level
is excessively low, have the brake system
checked by an authorized HYUNDAI
dealer.
WARNING
If the brake system requires frequent
additions of fluid this could indicate a leak
in the brake system. Have the vehicle
inspected by an authorized HYUNDAI
dealer.
9-13
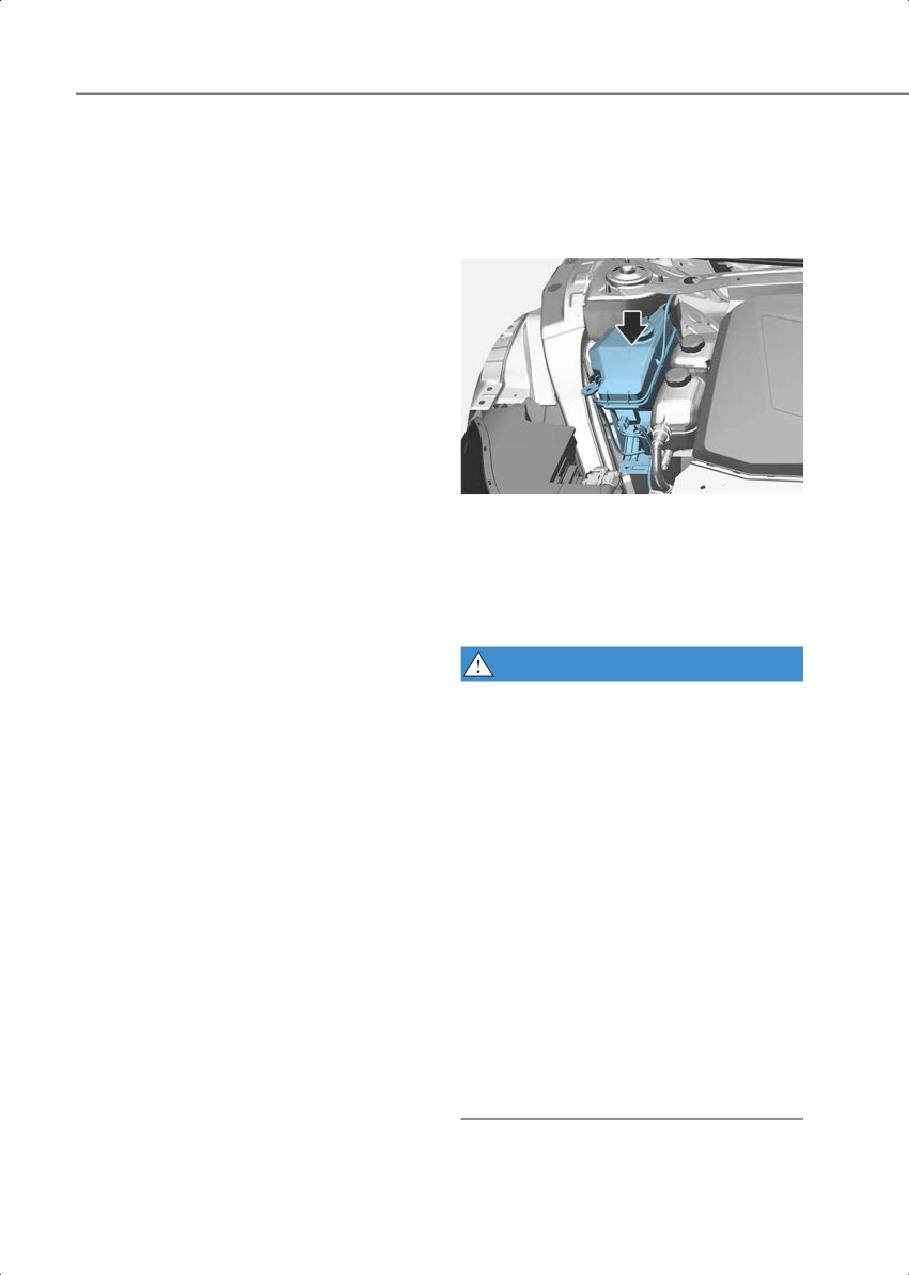
Maintenance
Gear Fluid
Washer Fluid
There is no gear fluid level gauge in the
vehicle. Check the gear fluid every 32,000
Checking the Washer Fluid
miles (52,000 km) regularly. If the vehicle
Level
is driven under severe condition, check
the maintenance under severe usage
condition and consult an authorized
HYUNDAI dealer.
ONE1091005
Check the fluid level in the washer fluid
reservoir and add fluid if necessary. Plain
water may be used if washer fluid is not
available. However, use washer solvent
with antifreeze characteristics in cold
climates to prevent freezing.
WARNING
To prevent serious injury or death, take
the following safety precautions when
using washer fluid:
• Do not use coolant or antifreeze in the
washer fluid reservoir. Coolant can
severely obscure visibility when
sprayed on the windshield and may
cause loss of vehicle control resulting in
an accident or damage to paint and
body trim.
• Do not allow sparks or flame to contact
the washer fluid or the washer fluid
reservoir. Washer fluid may contain
alcohol and can be flammable.
• Do not drink washer fluid and avoid
contact with skin. Washer fluid is
harmful to humans and animals.
• Keep washer fluid away from children
and animals.
9-14
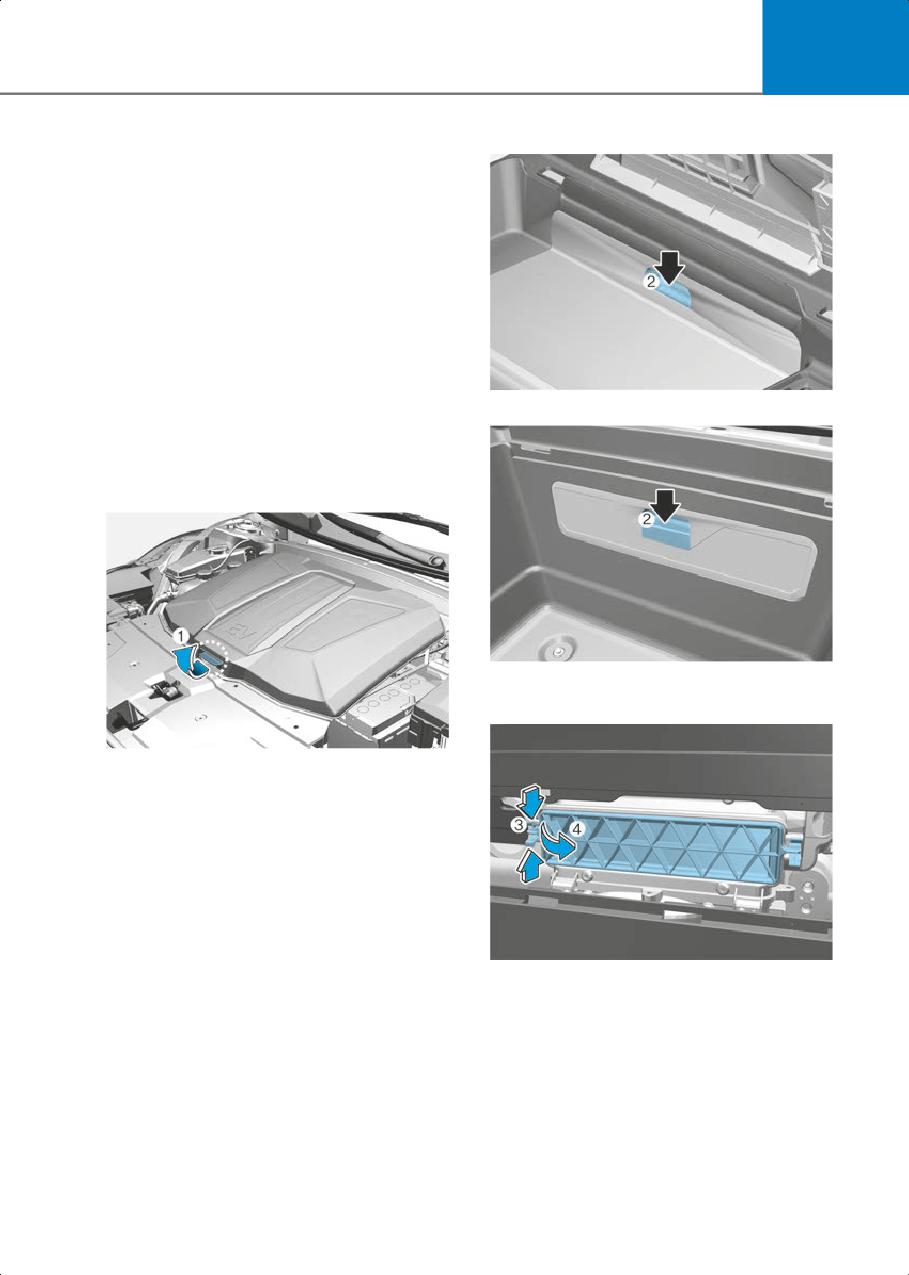
9
Type A
Cabin Air Filter
Filter Inspection
The cabin air filter should be replaced
according to the Maintenance Schedule.
If the vehicle is operated in severely
air-polluted cities or on dusty rough roads
for a long period, it should be inspected
more frequently and replaced sooner.
Replace the cabin air filter by following
the procedure below and be careful to
ONE1091006
avoid damaging other components.
Type B
Filter Replacement
1. Open the hood.
ONE1091033
3. Remove the cover by pulling the front
trunk handle (2).
ONE1051213
2. Lift up the front trunk cover while
depressing the front trunk lever (1).
ONE1091007
4. Press and hold the lock (3) on the left
side of the cover (4).
5. Replace the cabin air filter.
6. Reassemble in the reverse order of
disassembly.
9-15