Hyundai Ioniq 5 (2024 year). Manual in english - page 4
Convenience Features
Manual Temperature Control
Mode selection
Type A
Mode
The heating and cooling system can be
controlled manually by selecting
functions other than AUTO. In this case,
the system works sequentially according
to the order of the functions selected.
When selecting any other functions
except AUTO while using automatic
operation, the functions not selected will
be controlled automatically.
1. Start the vehicle.
ONE1051103
2. Set the mode to the desired position.
Type B
To improve the effectiveness of heating
and cooling, select the mode according
to the following:
• Heating:
• Cooling:
3. Set the temperature control to the
desired value.
4. Set the air intake control to Fresh or
Recirculation mode.
5. Set the fan speed control to the desired
ONE1051117
speed.
6.If air conditioning is desired, turn the air
Air flow direction
conditioning system on.
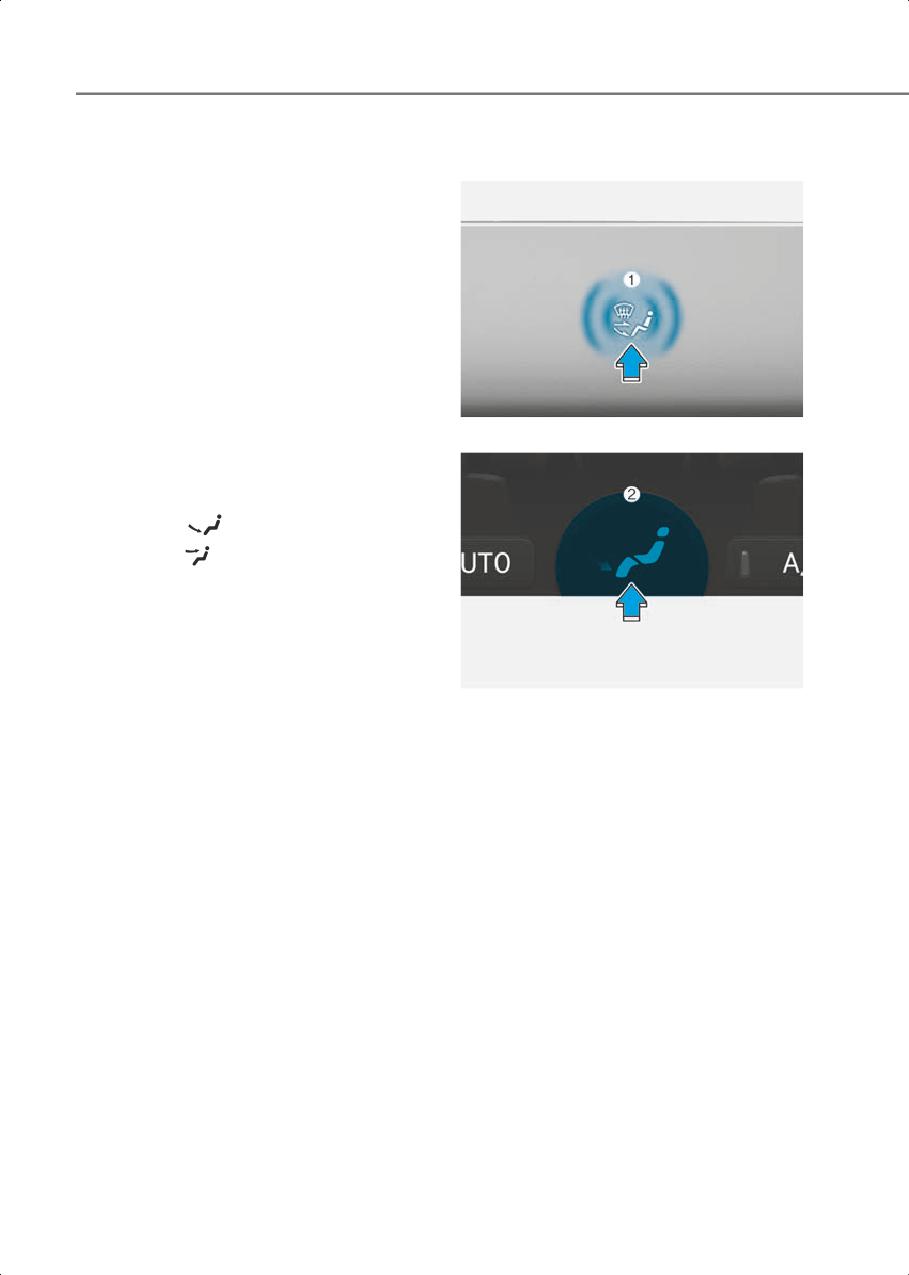
Touch the air flow direction icon (1) or (2)
7. Select AUTO to revert back to full
in the infotainment screen to select the
automatic control of the system.
desired air flow direction. The selected air
flow direction will be displayed on the
infotainment screen.
5-98
5
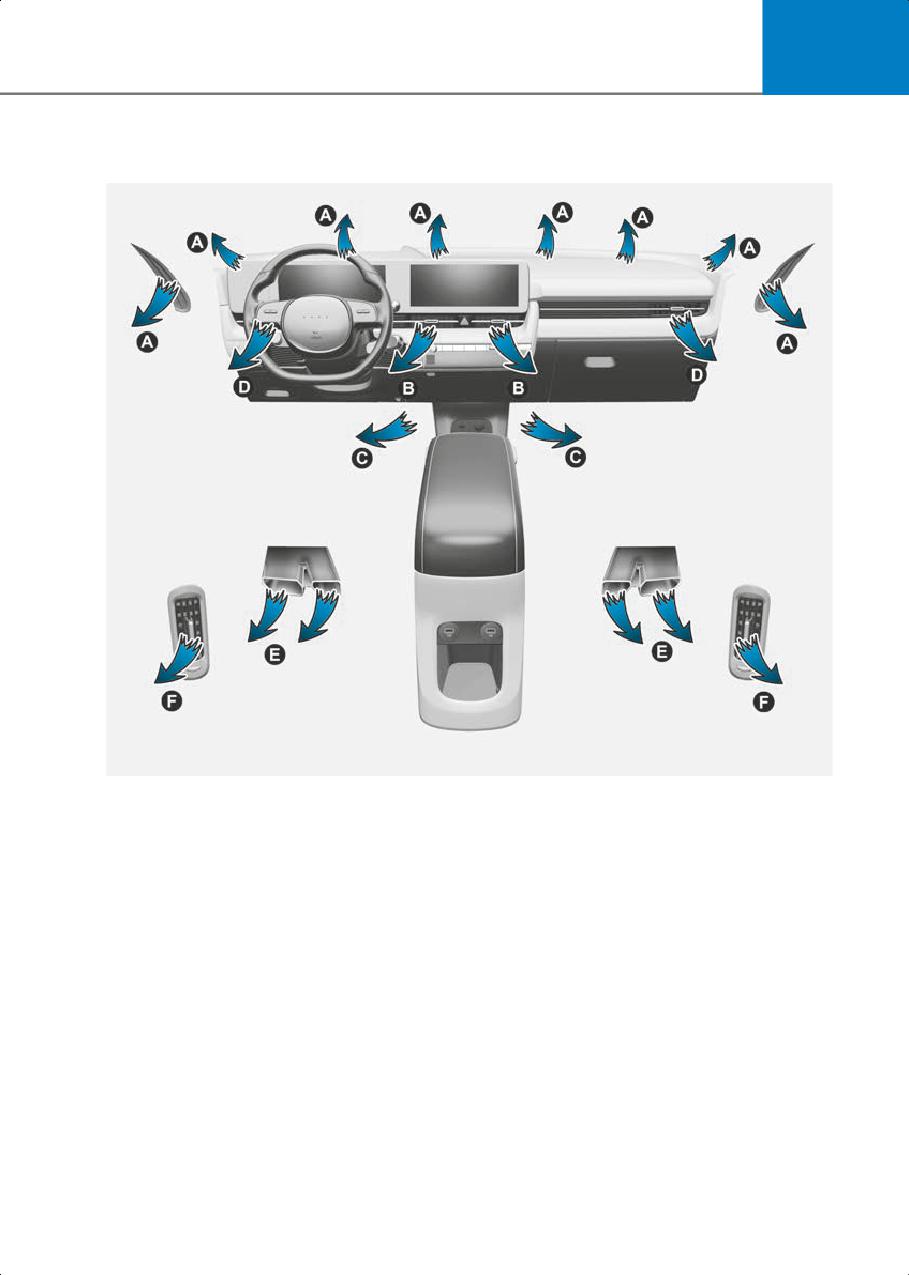
Air flow direction
Left-hand drive
ONE1051104
The mode selection Icon or button controls the direction of the air flow through the
ventilation system.
5-99
Convenience Features
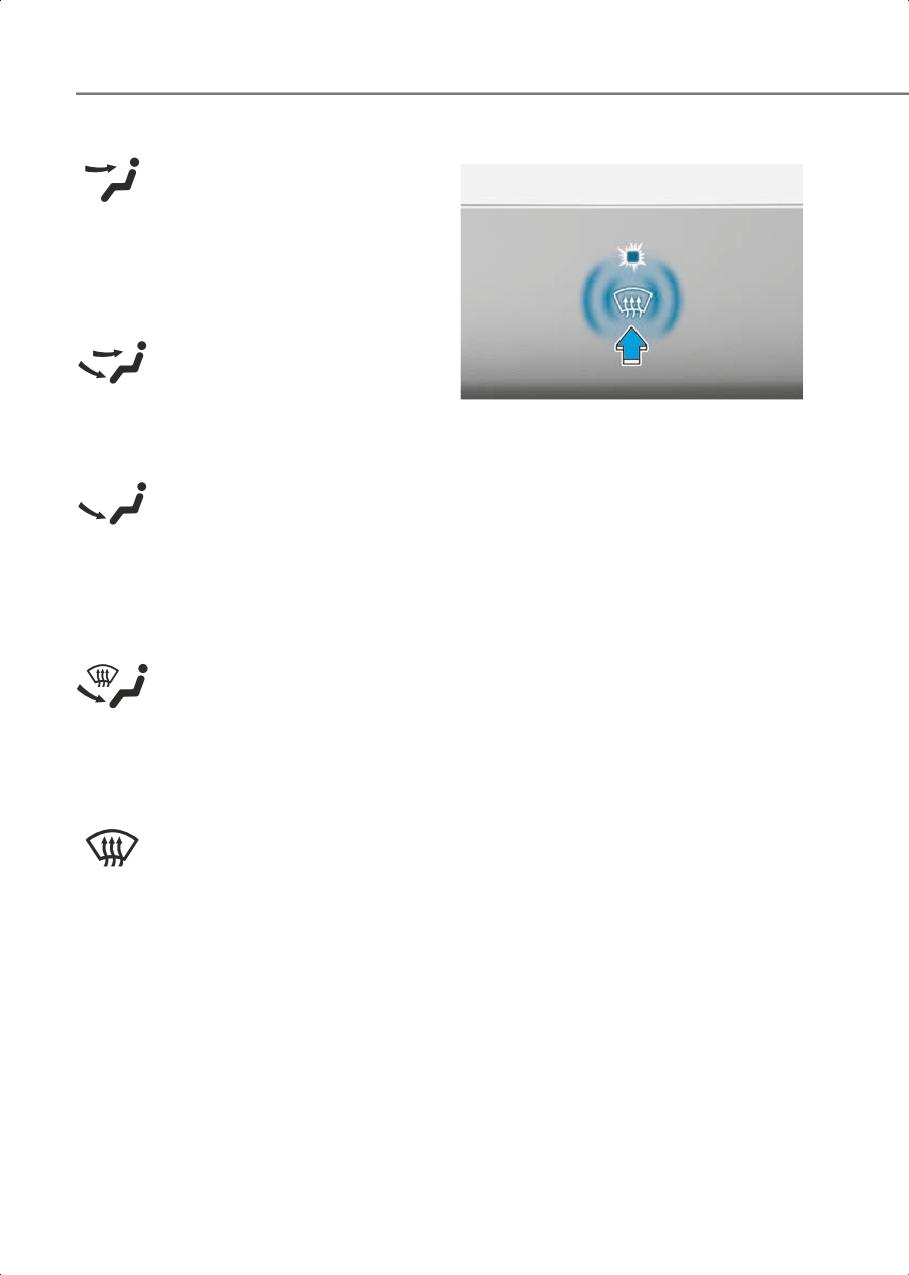
Face-Level (B, D, F)
Front windshield defroster
btn_W7-65
Air flow is directed toward the upper body
and face. Additionally, each outlet can be
controlled to direct the air discharged
from the outlet.
Bi-Level (B, D, C, E, F)
btn_W7-66
ONE1051105
Air flow is directed towards the face and
the floor.
Defrost-level (A, D)
Floor-Level (A, C, D, E)
Press the icon, and the indicator light will
illuminate and the windshield defroster
indicator will appear on the climate
btn_W7-67
control panel.
Most of the air flow is directed to the
Most of the air flow is directed to the
floor, with a small amount of the air being
windshield with a small amount of air
directed to the windshield and side
directed to the side window defrosters.
window defrosters.
When Defogging logic is enabled, Fresh
Floor/Defrost-Level (A, C, D, E)
mode is selected and air conditioning is
selected according to outside
temperature.
btn_W7-68
If the icon is pressed again, the indicator
Most of the air flow is directed to the floor
light will turn off and the previous settings
and the windshield with a small amount
will be selected.
directed to the side window defrosters.
Defroster-Level (A, D)
btn_W7-69
Most of the air flow is directed to the
windshield with a small amount of air
directed to the side window defrosters.
5-100
5
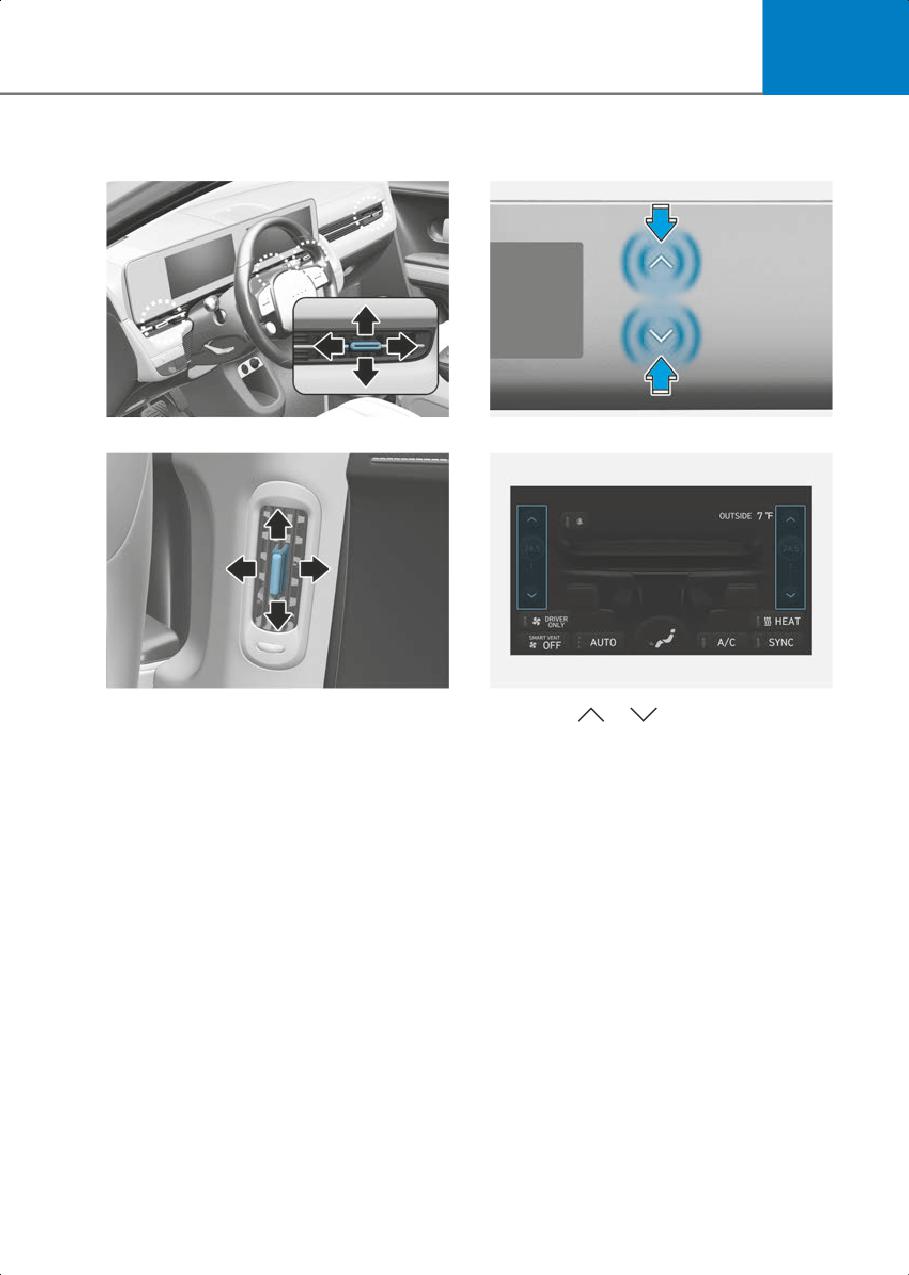
Instrument panel vents
Temperature control
Front seat
Type A
ONE1051106
ONE1051102
Rear seat
Type B
ONE1051107
ONE1051118N
The instrument panel vent air flow can be
Touch the
or
icon to select the
directed up/down or left/right using the
temperature.
vent adjustment lever.
The temperature can be increased or
The air flow can also be CLOSED using the
decreased by increments of 1°F (0.5°C)
vent adjustment lever.
for each incremental location. When set
to the lowest temperature setting, the air
Front seat
conditioning will operate continuously to
quickly cool the interior of the vehicle
• Move the lever away horizontally from
initially. After interior temperature has
the seat to close until the levers click
been cooled down sufficiently, select
and lock. Slightly move the lever
AUTO and set the temperature to 72 °F (22
toward the seating position to unlock
°C).
and open.
Rear seat
• Move the lever downward to close the
air flow. Move the lever upward to open
the air flow.
5-101
Convenience Features
SYNC
Recirculation mode
mark_WNE1-500
When Recirculation mode is selected, air
from the passenger compartment will be
recirculated through the system and
heated or cooled according to the
function selected.
Fresh mode
ONE1051120
Adjusting the temperature and air flow
direction equally
mark_WNE1-501
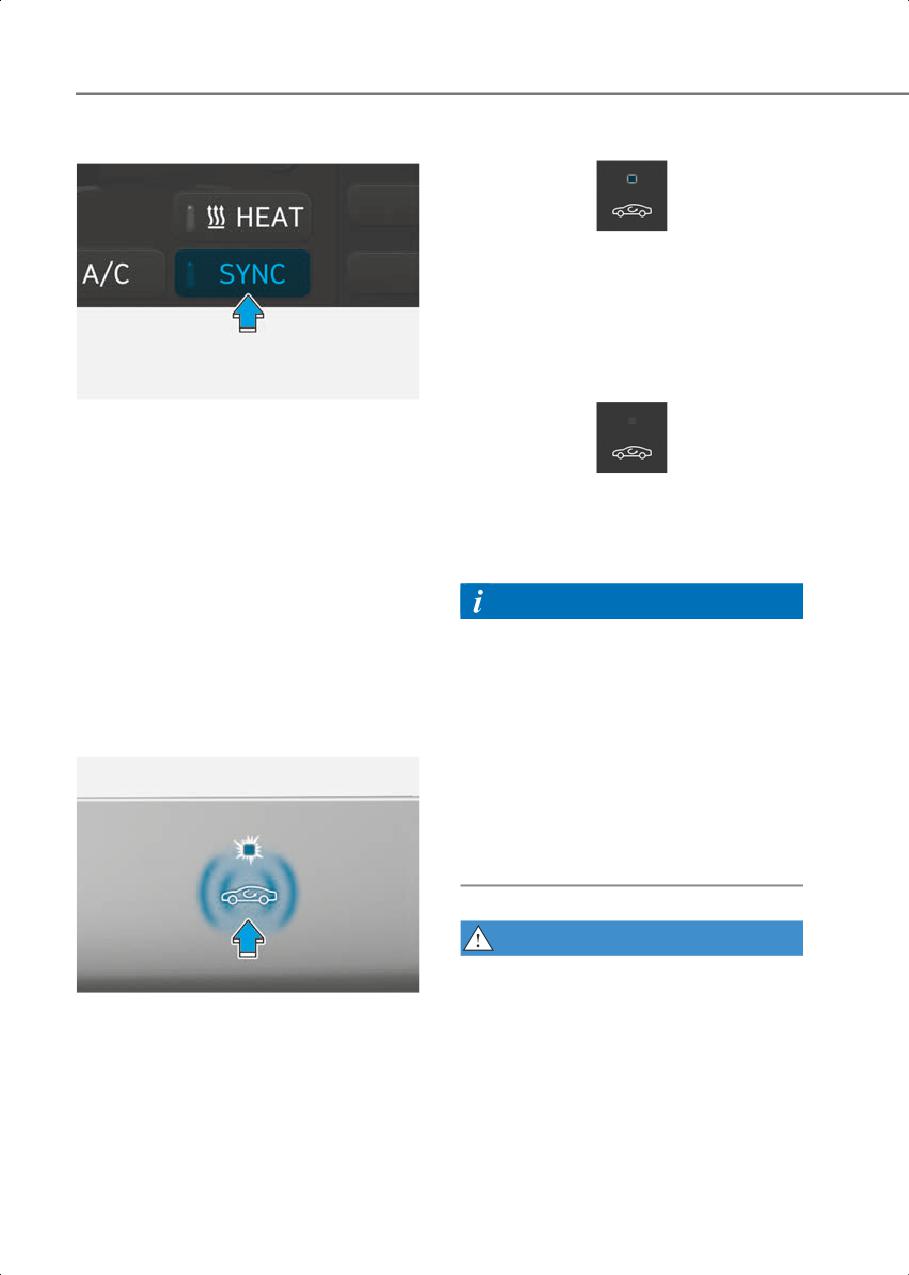
Press SYNC (indicator light ON), the
When Fresh mode is selected, air enters
passenger’s temperature and air flow
the vehicle from outside and is heated or
direction will be adjusted same as the
cooled according to the function
driver’s control.
selected.
Adjusting the temperature and air flow
Information
direction individually
Press SYNC (indicator light OFF), all seats
Operating the system primarily in Fresh
temperature and air flow direction will be
mode is recommended. Use
adjusted individually.
Recirculation mode temporarily only
when needed. Prolonged operation of the
heater in Recirculation mode and without
Air intake control
the air conditioning ON can cause
fogging of the windshield. In addition,
prolonged use of the air conditioning ON
in Recirculation mode may result in
excessively dry, dehumidified air in the
cabin and may promote formation of
musty vent odor due to stagnant air.
WARNING
• Continued use of the climate control
ONE1051126
system operation in Recirculation
mode for a prolonged period of time
Air intake control is used to select either
may cause drowsiness to the
Fresh mode (outside air) or Recirculation
occupants in the cabin. This may lead to
mode (cabin air).
loss of vehicle control which may lead
to an accident.
5-102
5
• Continued use of the climate control
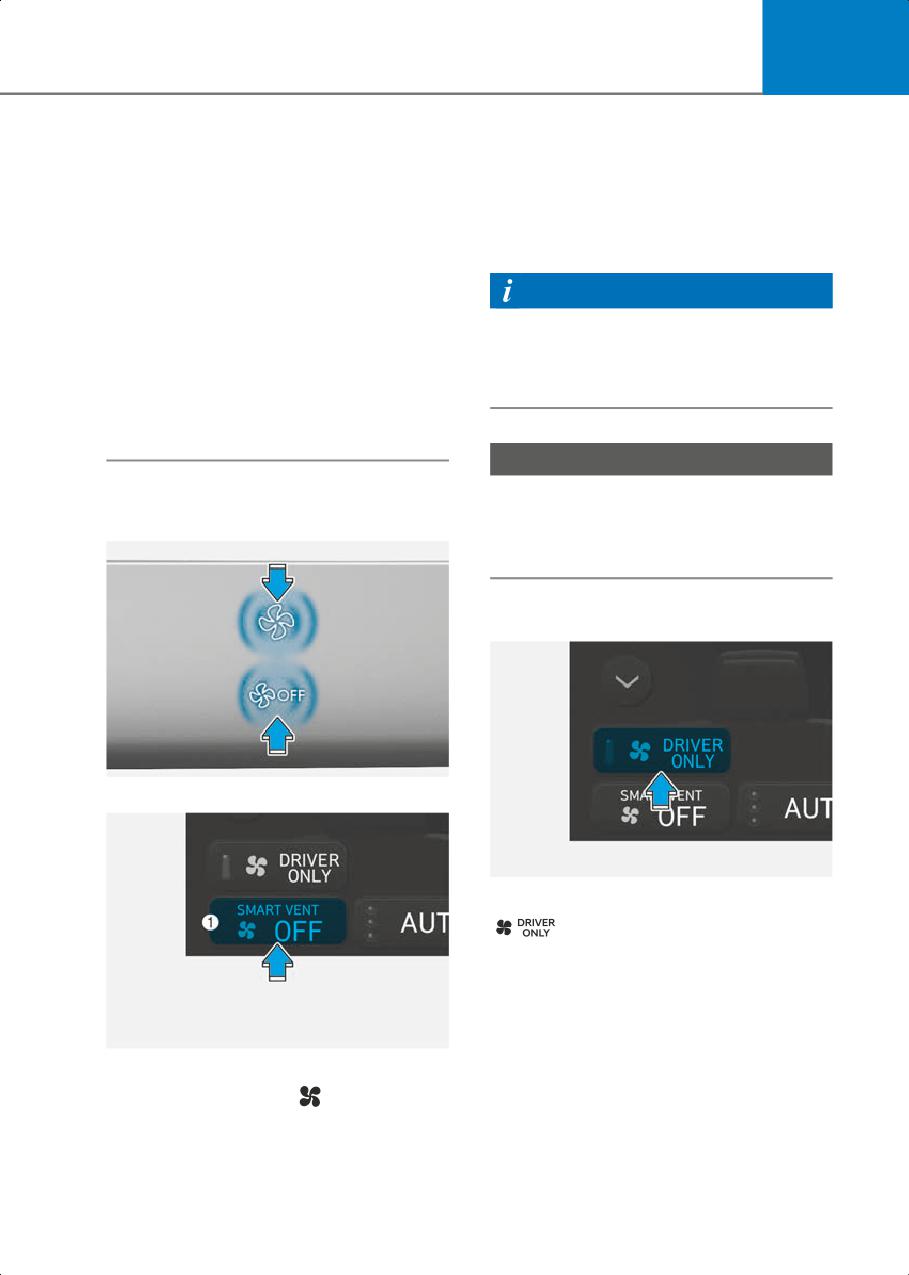
Pressing the OFF icon or button turns off
system operation in Recirculation
the fan.
mode with the air conditioning OFF
You can check the fan speed and auto air
may allow humidity to increase inside
circulation mode in the climate
the cabin. This may cause
information screen icon (1) in the
condensation to accumulate on the
infotainment system.
windshield and obscure visibility.
• Do not sleep in your vehicle or remain
Information
parked in your vehicle with the
To help improve microphone voice input
windows up and either the heater or the
sound, fan speed may automatically slow
air conditioning ON for prolonged
down for a couple of minutes when you
periods of time. Doing so may increase
activate voice recognition or hands free.
the levels of carbon dioxide in the cabin
which may lead to serious injury or
death.
NOTICE
Operating the fan when the Start/Stop
Fan speed control
button is in the OFF position could cause
Type A
the battery to discharge. Operate the fan
when the vehicle is running.
Driver only
ONE1051109
Type B
ONE1051122
If you touch the DRIVER ONLY icon
(
) and the indicator light
illuminates in the infotainment climate
control screen, cold air mostly blows in
the driver’s seat. However, some of the
cold air may come out of other seating
position ducts to keep indoor air pleasant.
ONE1051121
If you use the icon with no passenger in
The fan speed can be set to the desired
the front passenger seat, energy
speed by adjusting the icon in the
consumption will be reduced.
climate control panel.
More air is delivered with higher fan
speeds.
5-103
Convenience Features
DRIVER ONLY icon will be turned off
HEAT icon
under the following conditions:
1. Defrost on
2. DRIVER ONLY button re-touch
Air conditioning
ONE1051124
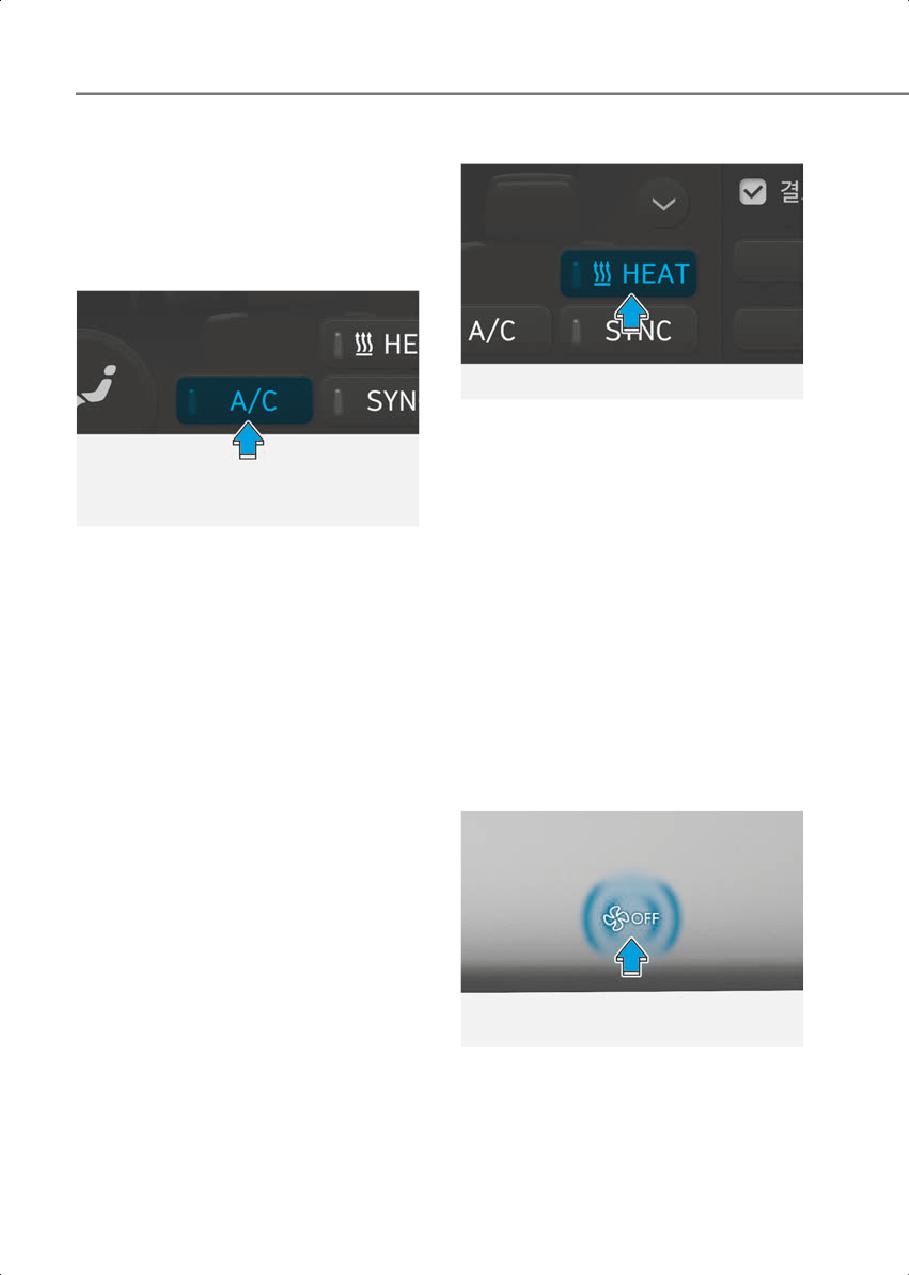
Touch CLIMATE icon in the climate
control panel. The climate information
screen will appear on the infotainment
screen. Touch the HEAT icon in the
infotainment screen to turn the heater on
ONE1051123
(indicator light will illuminate).
Touch the CLIMATE icon in the climate
Touch the button again to turn the heater
control panel. The climate information
off.
screen will appear on the infotainment
The air conditioner and heater uses
screen. Touch the A/C icon in the
energy from the battery. If you use the
infotainment screen to turn the air
heater or air conditioner for too long,
conditioning on (indicator light ON) and
distance to empty can be reduced due to
off.
too much power consumption.
Turn off the heater and air conditioner if
you do not need them.
OFF mode
ONE1051110
Touch the OFF icon to turn the climate
control system off. You can still operate
mode selection and air intake control as
long as the Start/Stop button is in the ON
position.
5-104
5
System Operation
Air conditioning
Your HYUNDAI Vehicle air conditioning
system is filled with R-1234yf refrigerant.
Cooling / Ventilation
1. Touch the [CLIMATE] icon to display
1. Select the Face Level (
) mode in the
climate information the infotainment
infotainment screen.
screen.
2. Set the air intake control to fresh or
2. Select A/C icon (indicator light ON) in
recirculation mode.
the climate information screen to
3. Set the temperature to the desired
activate the air-condition.
position.
3. Set the temperature low.
4. Set the fan speed to the desired speed.
4. Set the direction of air flow by touching
the mode selection icon.
Heating
5. Touch the HEAT icon (indicator light
OFF) to turn on the air-condition.
1. Select the Floor Level (
) mode in
the infotainment screen.
When maximum cooling is desired, set
the temperature to the lowest position,
2. Set the air intake control to fresh or
recirculation mode.
then set the fan speed control to the
highest setting.
3. Set the temperature to the desired
position.
Air conditioning system operation tips
4. Set the fan speed to the desired speed.
• If the vehicle has been parked in direct
5. If desired, turn the air conditioning ON
sunlight during hot weather, open the
with the temperature set high in order
windows for a short time to let the hot
to dehumidify the air before it enters
air inside the vehicle escape.
into the cabin.
• After sufficient cooling has been
If the windshield fogs up, select the Front
achieved, switch back from
Defrost (
) mode.
recirculation mode to fresh mode.
• To help reduce moisture inside of the
Operation Tips
windows on rainy or humid days,
• To keep dust or unpleasant fumes from
decrease the humidity inside the
entering the vehicle through the
vehicle by operating the air
ventilation system, temporarily set the
conditioning system with the windows
air intake control to the recirculation
and vision roof closed.
mode. Return the control to the
• Use the air conditioning system every
Recirculation mode to the Fresh mode
month only for a few minutes to ensure
when the unpleasant air outside has
maximum system performance.
diminished. This will help keep the
• If you operate air conditioner
driver alert and comfortable.
excessively, the difference between the
• To help prevent the inside of the
temperature of the outside air and that
windshield from fogging, set the air
of the windshield could cause the outer
intake control to fresh mode and the
surface of the windshield to fog up,
fan speed to the desired position, turn
causing loss of visibility. In this case, set
on the air conditioning system, and
the mode selection to the position
adjust the temperature control to the
and fan speed control to the lowest
desired temperature.
speed.
5-105
Convenience Features
System Maintenance
Checking the amount of air
conditioner refrigerant and
compressor lubricant
Cabin air filter
When the amount of refrigerant is low,
the performance of the air conditioning is
reduced. Overfilling also reduces the
performance of the air conditixoning
system.
Therefore, if abnormal operation is found,
have the system inspected by an
authorized HYUNDAI dealer.
NOTICE
It is important that the correct type and
amount of oil and refrigerant is used.
Table_OHI048581L
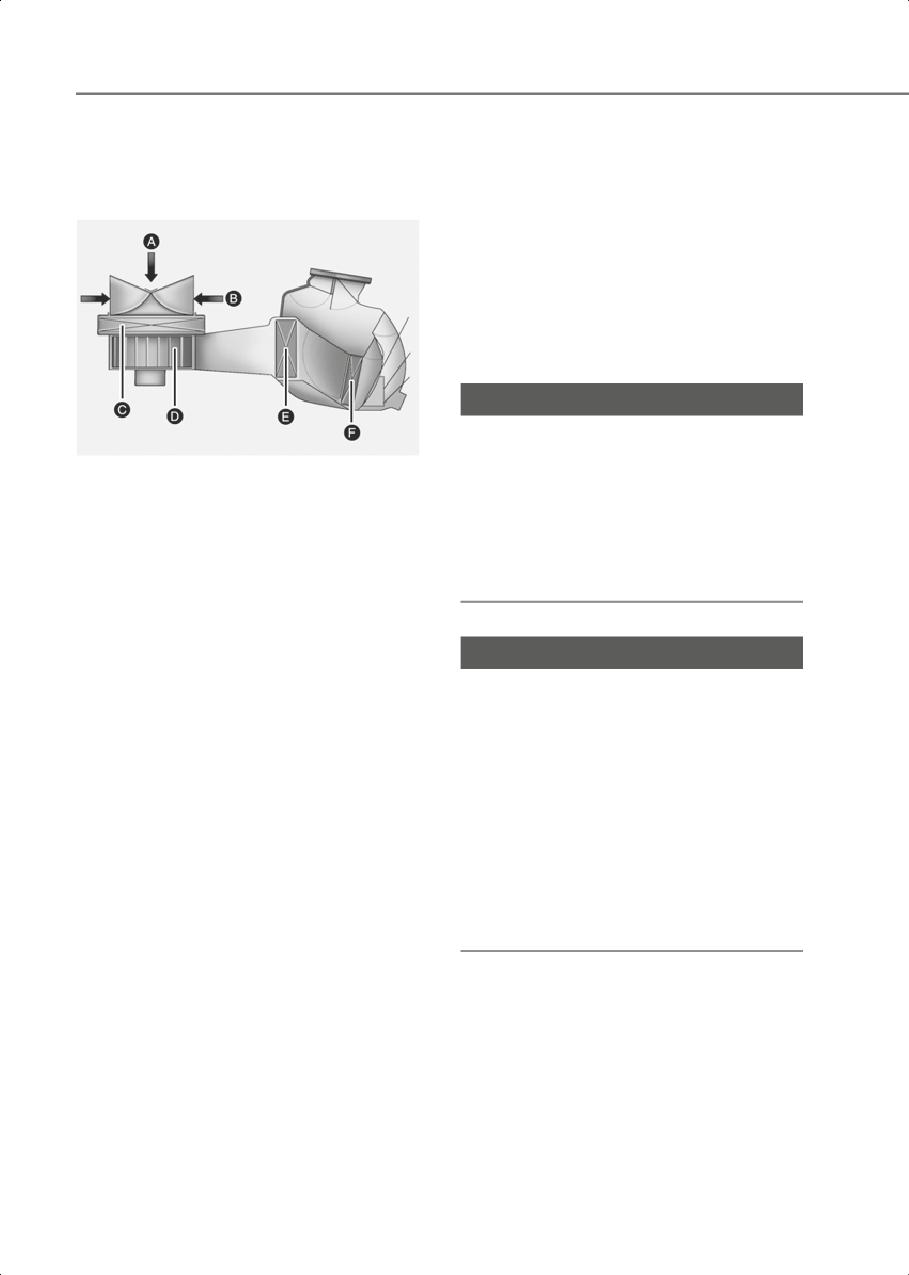
[A] : Outside air
Otherwise, damage to the compressor
[B] : Recirculated air
and abnormal system operation may
[C] : Cabin air filter
occur. To prevent damage, the air
[D] : Blower
[E] : Evaporator core
conditioning system in your vehicle
[F]
: PTC & Inner condenser
should only be serviced by trained and
The cabin air filter is installed behind the
certified technicians.
front trunk. It filters the dust or other
pollutants that enter the vehicle through
the heating and air conditioning system.
NOTICE
Have the cabin air filter replaced by an
authorized HYUNDAI dealer according to
The refrigerant system should only be
the maintenance schedule. If the vehicle
serviced by trained and certified
is being driven in severe conditions such
technicians to insure proper and safe
as dusty or rough roads, more frequent
operation.
cabin air filter inspections and changes
The refrigerant system should be serviced
are required.
in a well-ventilated place.
If the air flow rate suddenly decreases,
The air conditioning evaporator (cooling
have the system inspected at an
coil) shall never be repaired or replaced
authorized HYUNDAI dealer.
with one removed from a used or
salvaged vehicle and new replacement
MAC evaporators shall be certified (and
labeled) as meeting SAE Standard J2842.
5-106
5
Example
WARNING
Vehicles equipped with R-1234yf
mark_COOL-LAB-all
Since the refrigerant is mildly flammable
OHYK059002
and operated at high pressure, the air
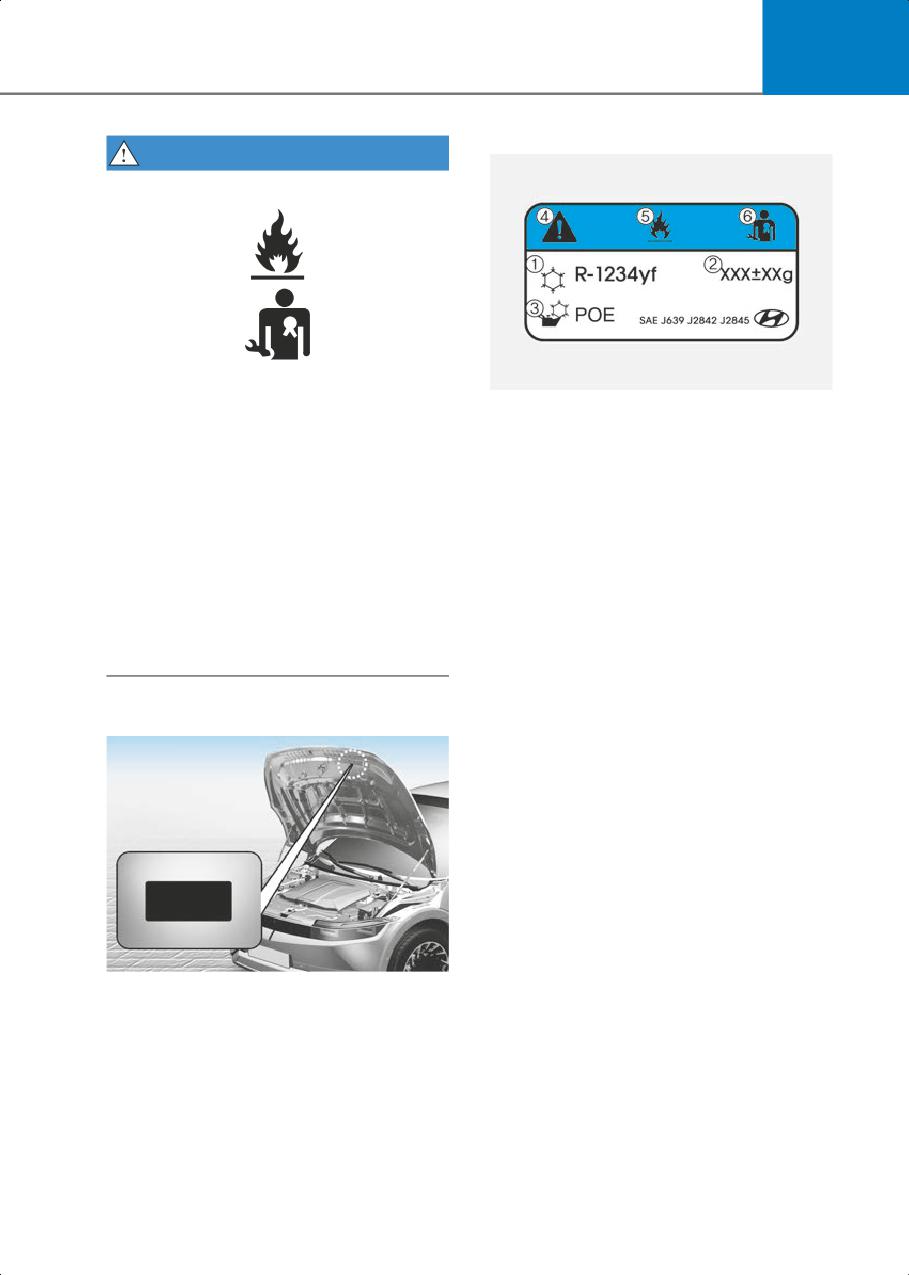
Each symbol and specification on the air
conditioning system should only be
conditioning refrigerant label is
serviced by trained and certified
represented as below:
technicians. It is important that the
1. Classification of refrigerant
correct type and amount of oil and
2. Amount of refrigerant
refrigerant are used.
3. Classification of compressor lubricant
All refrigerants should be reclaimed with
proper equipment.
4. Caution
Venting refrigerants directly to the
5. Flammable refrigerant
atmosphere is harmful to individuals and
6. To require registered technician to
environment. Failure to heed these
service air conditioning system
warnings can lead to serious injuries.
Air Conditioning refrigerant label
ONE1051075
You can find out which air conditioning
refrigerant is applied to your vehicle on
the label located inside of the hood.
5-107
Convenience Features
Windshield Defrosting
To Defog Inside Windshield
And Defogging
WARNING
Windshield heating
Do not use the
position during
cooling operation in extremely humid
weather. The difference between the
temperature of the outside air and that of
the windshield could cause the outer
surface of the windshield to fog up,
ONE1051112
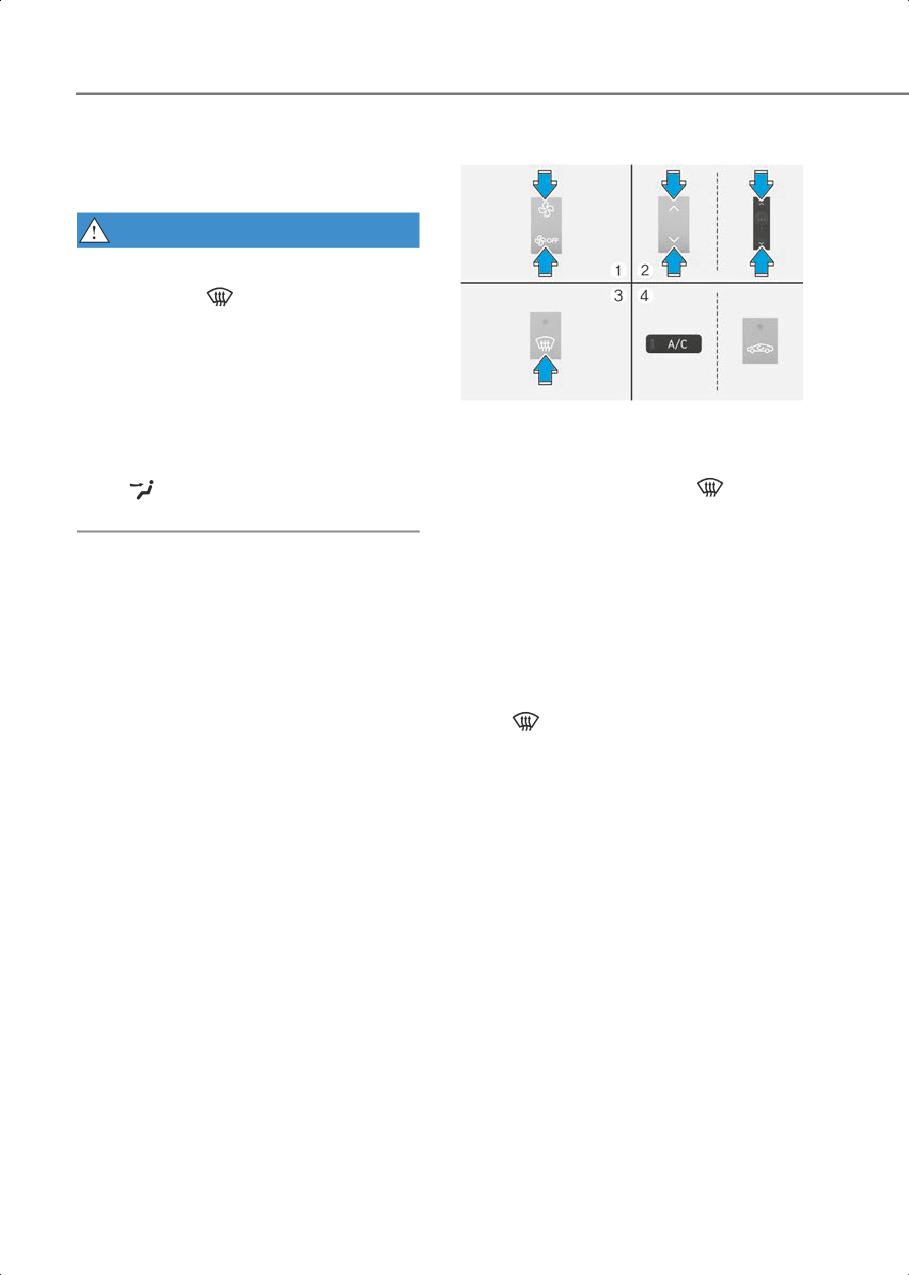
causing loss of visibility could cause an
1. Select the desired fan speed.
accident resulting in serious injury or
2. Select the desired temperature.
death. In this case, set the mode selection
to the
position and fan speed control
3. Touch the defroster icon (
).
to a lower speed.
4. When the defogging logic is enabled,
Fresh mode is selected and air
conditioning is selected according to
• For maximum defrost performance, set
outside temperature.
the temperature control to the highest
Check to make sure the air intake control
temperature setting and the fan speed
is in Fresh mode. If the air intake control
control to the highest setting.
indicator light is illuminated, touch the
• If warm air to the floor is desired while
icon once to enable Fresh mode
defrosting or defogging, set the mode
(indicator light OFF).
to the floor-defrost position.
If the
position is selected, the fan
• Before driving, clear all snow and ice
speed is automatically increased.
from the windshield, rear window, side
view mirrors, and all side windows.
• Clear all snow and ice from the hood
and air inlet in the cowl grill to improve
heater and defroster efficiency and to
reduce the probability of fogging up the
inside of the windshield.
5-108
5
To Defrost Outside
Defogging Logic
Windshield
To reduce the probability of fogging up
the inside of the windshield, the air intake
or air conditioning are controlled
automatically according to certain
conditions such as
positions. To
cancel or reset the defogging logic, do
the following.
1. Press the Start/Stop button to the ON
position.
2. Touch the defroster icon (
) or (
).
3. While touching the A/C icon, touch the
ONE1052113
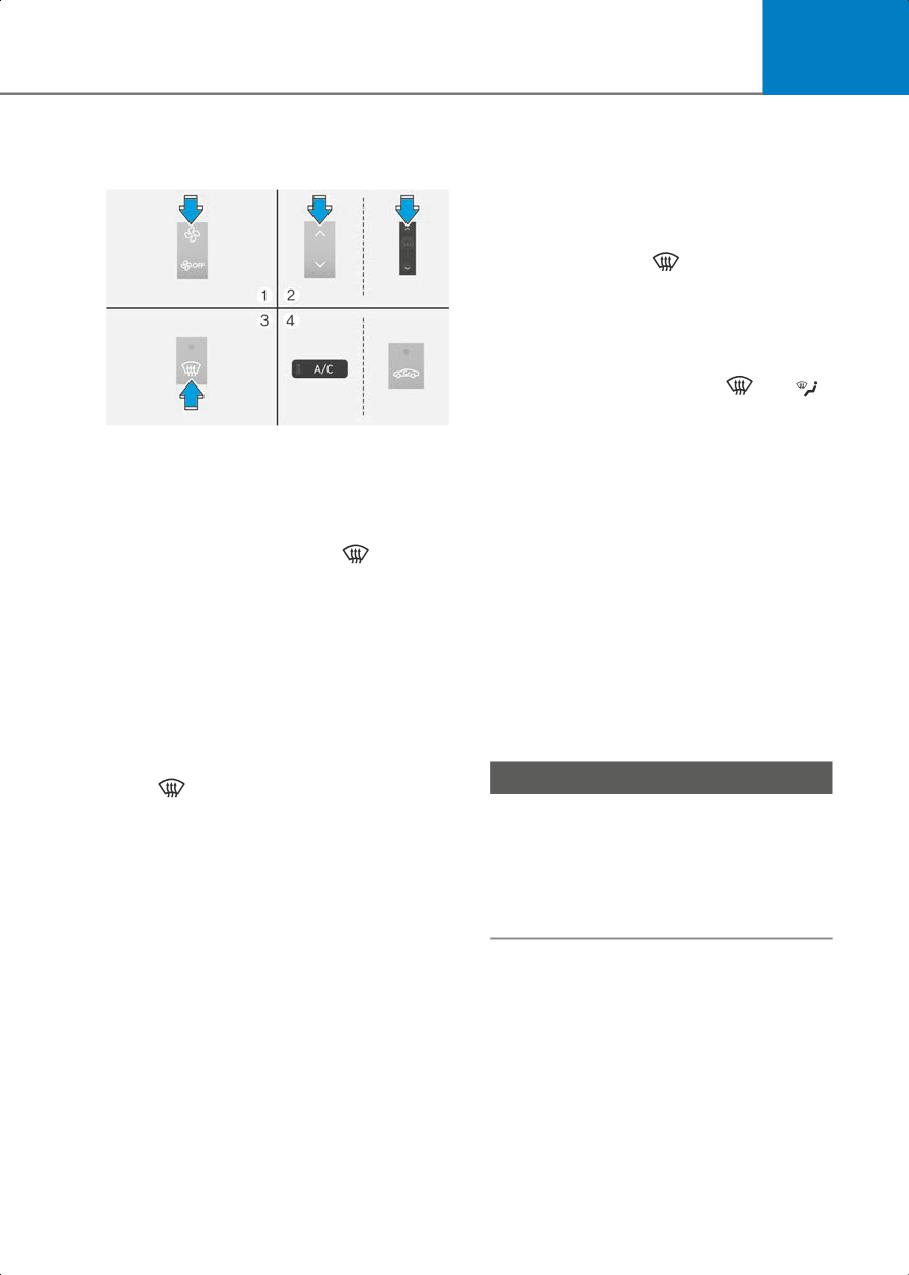
air intake control icon at least 5 times
1. Set the fan speed to the highest
within 3 seconds.
position.
The air intake control indicator will blink 3
2. Set the temperature to the extreme hot
times to indicate that the defogging logic
position.
has been disabled. Repeat the steps again
to re-enable the defogging logic.
3. Touch the defroster icon (
).
The air intake control indicator will blink 6
4. When Defogging logic is enabled, Fresh
times to indicate that the defogging logic
mode is selected and air conditioning is
has been enabled.
selected according to outside
temperature.
If the battery has been discharged or
disconnected, it resets to the defog logic
Check to make sure the air intake control
status.
is in Fresh mode. If the air intake control
indicator light is illuminated, touch the
icon once to enable Fresh mode
Rear Window Defroster
(indicator light OFF).
NOTICE
If the
position is selected, lower fan
speed is adjusted to a higher fan speed.
To prevent damage to the rear window
defroster conducting elements bonded to
the inside surface of the rear window,
never use sharp instruments or window
cleaners containing abrasives to clean the
window.
5-109
Convenience Features
Climate Control
Additional Features
A/C Automatic Drying
if equipped
A/C Automatic Drying feature dries the
moisture in the air conditioner and
reduces air conditioner odor. The blower
motor automatically operates after 30
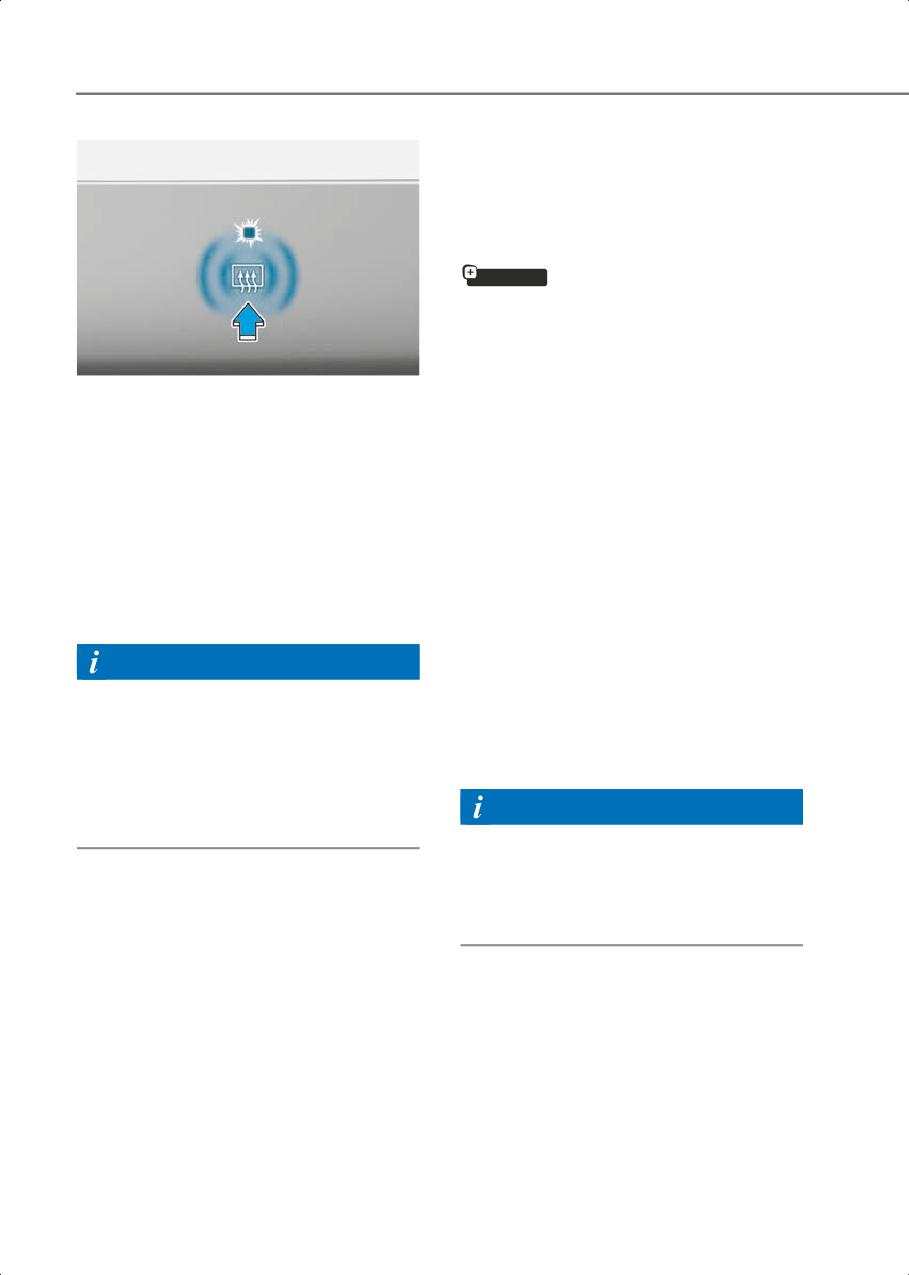
ONE1051114
minutes the vehicle is turned off.
The defroster heats the window to
remove frost, fog and thin ice from the
Turning A/C Automatic Drying On or
interior and exterior of the rear window,
off
while the vehicle is running.
The A/C Automatic Drying feature can be
• To activate the rear window defroster,
turned on and off by selecting Setup >
touch the rear window icon located in
Vehicle Settings > Climate > Climate
the center control panel. The indicator
Features > A/C Automatic Drying from
on the rear window defroster
the infotainment system.
illuminates when the defroster is on.
If the operating condition is satisfied after
• To turn off the defroster, touch the rear
setting the feature, the operating
window defroster button again.
condition is displayed on the
infotainment system screen and the
Information
blower motor automatically operates.
• If there is heavy accumulation of snow
When the A/C Automatic Drying feature is
on the rear window, brush it off before
activated, the air conditioner sets the fan
operating the rear defroster.
speed to the third level, selects Fresh
• The rear window defroster
mode, and directs the air flow to the floor.
automatically turns off after
approximately 20 minutes or when the
Information
Start/Stop button is in the OFF position.
The infotainment system may change
after software updates. For more
information, refer to the user's manual
Side view mirror defroster
provided in the infotainment system and
If your vehicle is equipped with the side
the quick reference guide.
view mirror defrosters, they will operate
at the same time you turn on the rear
window defroster.
Operating conditions
The A/C Automatic Drying feature
operates under the following conditions:
• The vehicle is turned off after operating
the air conditioner for a certain period
• The 12 V battery level is sufficient
• The outside temperature is above a
certain level
5-110
5
Non-operating conditions
The A/C Automatic Drying feature stops
operating under the following conditions:
btn_WDH7-69
• The A/C Automatic Drying feature has
When the Auto Defogging System
operated for 3 minutes
operates, the indicator will illuminate.
• The Start/Stop button is pressed, or the
If a high amount of humidity is detected in
vehicle is on
the vehicle, the Auto Defogging System
• The climate control system is operated
will be enabled. The following steps will
remotely
be performed automatically:
Step 1) Air conditioning will turn ON.
Information
Step 2) Air intake control will change to
• The A/C Automatic Drying feature
Fresh mode.
reduces air conditioner odors but may
Step 3) Mode will change to defrost to
not remove all odors.
direct airflow to the windshield.
• The A/C Automatic Drying feature does
Step 4) Fan speed will be set to MAX.
not operate if the remaining battery
level is insufficient to prevent battery
If the air conditioning is off or
discharge.
recirculation mode is manually selected
while Auto Defogging System is ON, the
Auto Defogging System will be canceled.
Auto Defogging System
Turning the Auto Defogging System
ON or OFF
Climate control system
Touch the front windshield defroster icon
for 3 seconds when the Start/Stop button
is in the ON position. When the Auto
Defogging System is turned off, the ADS
OFF symbol will blink 3 times and ADS
OFF will be displayed on the climate
control information screen.
ONE1051072
When the Auto Defogging System is
Auto defogging helps reduce the
turned on, the ADS OFF symbol will blink
possibility of fogging up the inside of the
6 times without a signal.
windshield by automatically sensing the
moisture on inside the windshield.
Information
The auto defogging system may not
operate normally, when the outside
temperature is below 14 °F (-10 °C).
5-111

Convenience Features
Infotainment system
Auto Dehumidify
Auto Defogging System can be turned on
if equipped
and off by selecting Setup > Vehicle
To increase cabin air quality and reduce
Settings > Climate > Defog/Defrost
windshield misting, recirculation mode
Options > Auto Defog from the
switches off automatically after about 5
infotainment system screen.
minutes, depending on the outside
temperature, and the air intake will
Information
change to fresh mode.
• When the air conditioning is turned on
by Auto Defogging System, if you try to
Turning Auto Dehumidify ON or OFF
turn off the air conditioning, the
indicator will blink 3 times and the air
Climate control system
conditioning will not be turned off.
To turn the Auto Dehumidify feature on or
• To maintain the effectiveness and
off, select Face level (
) mode and touch
efficiency of the Auto Defogging
the air intake control icon at least five
System, do not select Recirculation
times within three seconds. When Auto
mode while the system is operating.
Dehumidify is turned on, the air intake
• When Auto Defogging System is
control button indicator will blink 6 times.
operating, fan speed adjustment,
When turned off, the indicator will blink 3
temperature adjustment, and air intake
times.
control selection are all disabled.
• The infotainment system may change
Infotainment system
after software updates. For more
Auto Dehumidify can be turned on and off
information, refer to the user's manual
by selecting Setup > Vehicle Settings >
provided in the infotainment system
Climate > Automatic Ventilation > Auto
and the quick reference guide.
Dehumidify from the infotainment
system screen.
NOTICE
Information
• If the battery (12 V) is discharged or
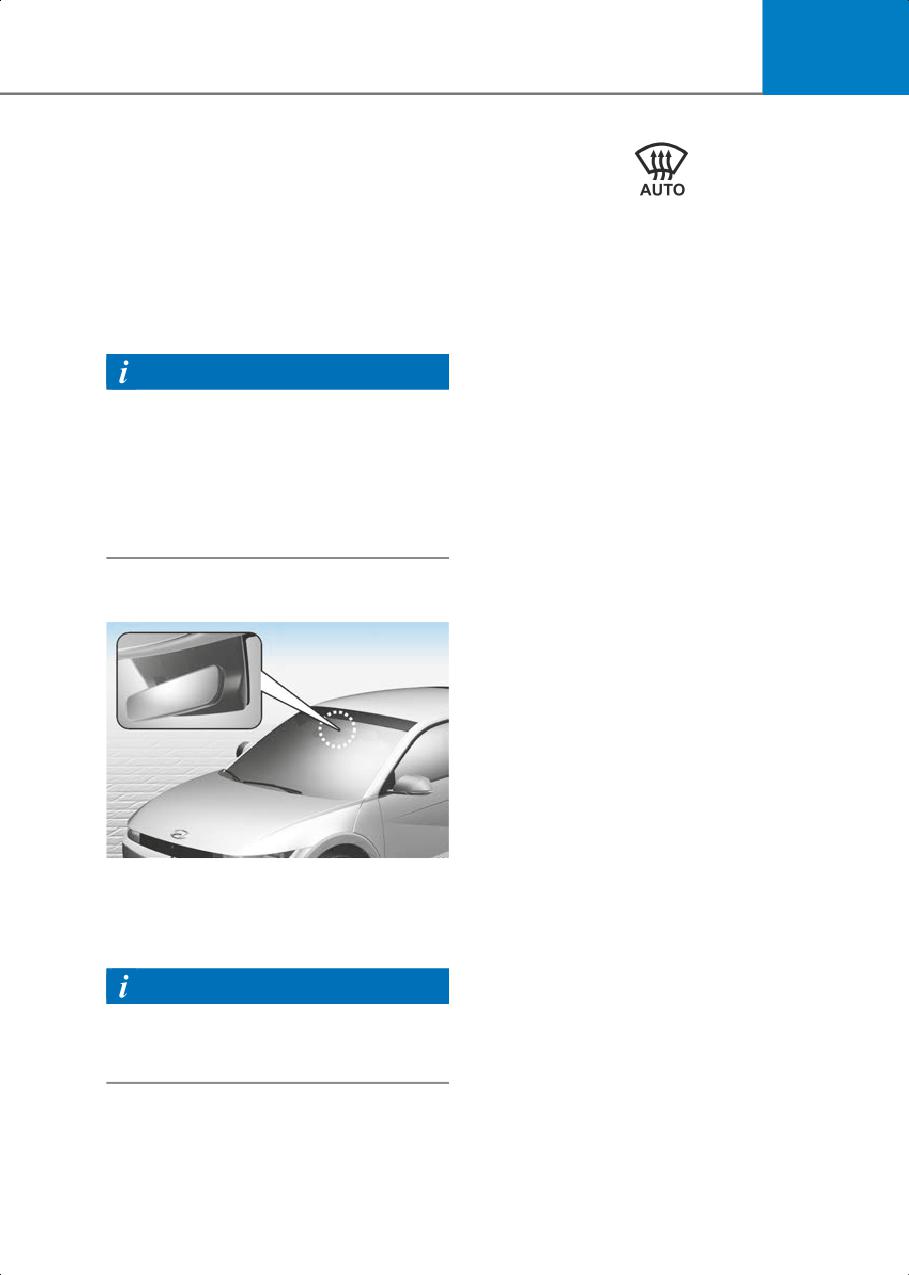
Do not remove the sensor cover located
disconnected, Auto dehumidify
on the upper end of the windshield glass.
settings will be reset. Readjust the
Damage to system parts could occur and
settings to turning Auto dehumidify
may not be covered by your vehicle
option ON or OFF.
warranty.
• The infotainment system may change
after software updates. For more
information, refer to the user's manual
provided in the infotainment system
and the quick reference guide.
5-112

5
Recirculating Air When
For more details on Auto Comfort
Control, refer to “Seat Warmers” and “Air
Washer Fluid Is Used
Ventilation Seats” section in chapter 3
Recirculation mode automatically
and “Heated Steering Wheel” section in
activates to reduce any objectionable
this chapter.
scent of the washer fluid from entering
the cabin when the windshield washer is
Information
used.
The infotainment system may change
after software updates. For more
Turning Activate upon Washer Fluid
information, refer to the user’s manual
Use ON or OFF
provided in the infotainment system and
Activate upon Washer Fluid Use can be
the quick reference guide.
turned on and off by selecting Setup >
Vehicle Settings > Climate > Recirculate
Air> Activate upon Washer Fluid Use (or
Smart Ventilation
Interlocking washer fluid) from the
The smart ventilation system maintains
infotainment system screen.
pleasant/fresh air condition inside the
passenger compartment by
Information
automatically detecting/controlling the
The infotainment system may change
temperature and humidity, when you
after software updates. For more
drive the vehicle with the climate control
information, refer to the user's manual
system in the OFF position. When the
provided in the infotainment system and
smart ventilation system starts to
the quick reference guide.
operate, the message “SMART
VENTILATION ON” appears for 5 seconds.
• The smart ventilation system stops
Auto. Controls That Use
operating, when the BLOWER DOWN
Climate Control Settings (for
OFF button of the climate control
system is selected.
driver’s seat)
• The smart ventilation system stops
The temperature of the driver’s seat
operating, when any button of the
warmer, air ventilated seat and heated
climate control system is selected for
steering wheel is automatically controlled
operation.
depending on the inside and outside
temperature of the vehicle when the
• The smart ventilation system may not
vehicle is running.
operate, when the vehicle is driven at
low speed.
To use these features, it must be enabled
from the Settings menu in the
infotainment system screen.
Select:
• Setup > Vehicle Settings > Seat>
Heated/Ventilated Features >
Heated/Ventilated Features > Auto.
Controls That Use Climate Control
Settings
5-113
Convenience Features
Storage Compartment
Center Console Storage
WARNING
Console Box
Never store cigarette lighters, propane
cylinders, or other flammable/explosive
materials in the vehicle. These items may
catch fire and/or explode if the vehicle is
exposed to hot temperatures for
extended periods.
WARNING
ALWAYS keep the storage compartment
covers closed securely while driving.
ONE1051208
Items inside your vehicle are moving as
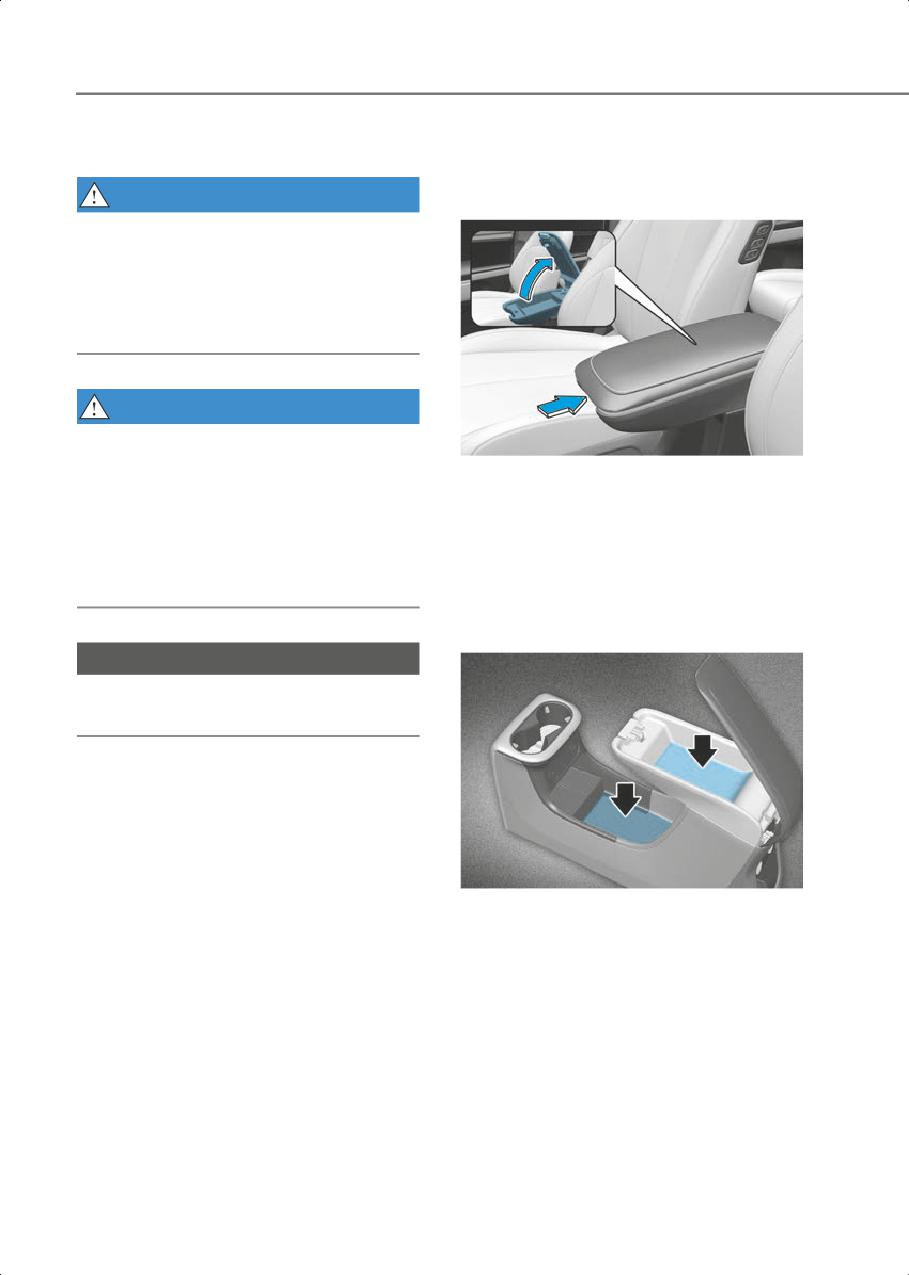
To open :
fast as the vehicle. If you have to stop or
Grab and hold the latch on the arm rest
turn quickly, or if there is a crash, the
then lift the lid.
items may fly out of the compartment and
• This space provides objects storing
may cause an injury if they strike the
compartment.
driver or a passenger.
Console Storage
NOTICE
To avoid possible theft, do not leave
valuables in the storage compartments.
ONE1051209
This space provides object storing
compartment.
5-114
5
Sliding console
Glove Box
if equipped
ONE1051076N
ONE1051210
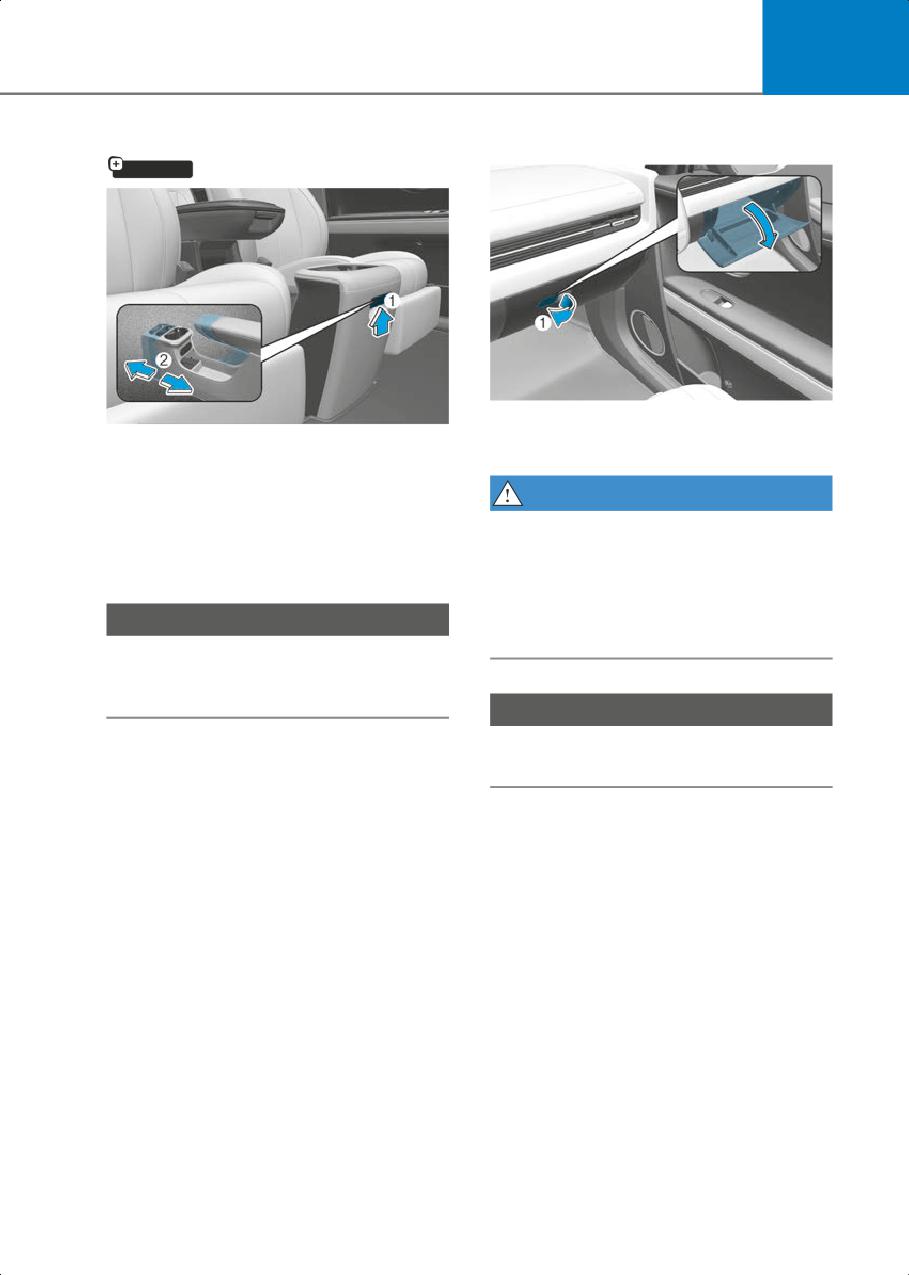
To open:
To slide the console (2)
Pull the lever (1).
forward/backward, pressing the handle
(1) and pull or push the console to the
WARNING
desired position.
ALWAYS close the glove box door after
Check if the console box makes a ‘click’
use.
sound, after moving the center console
An open glove box door can cause serious
box.
injury to the passenger in an accident,
NOTICE
even if the passenger is wearing a seat
belt.
Use of excessive force to the console box
may damage the sliding rail or the control
lever.
NOTICE
Use of excessive force to the glove box
may damage the sliding rail or the lever.
5-115
Convenience Features
Interior Features
WARNING
• Avoid abrupt starting and braking when
the cup holder is in use to prevent
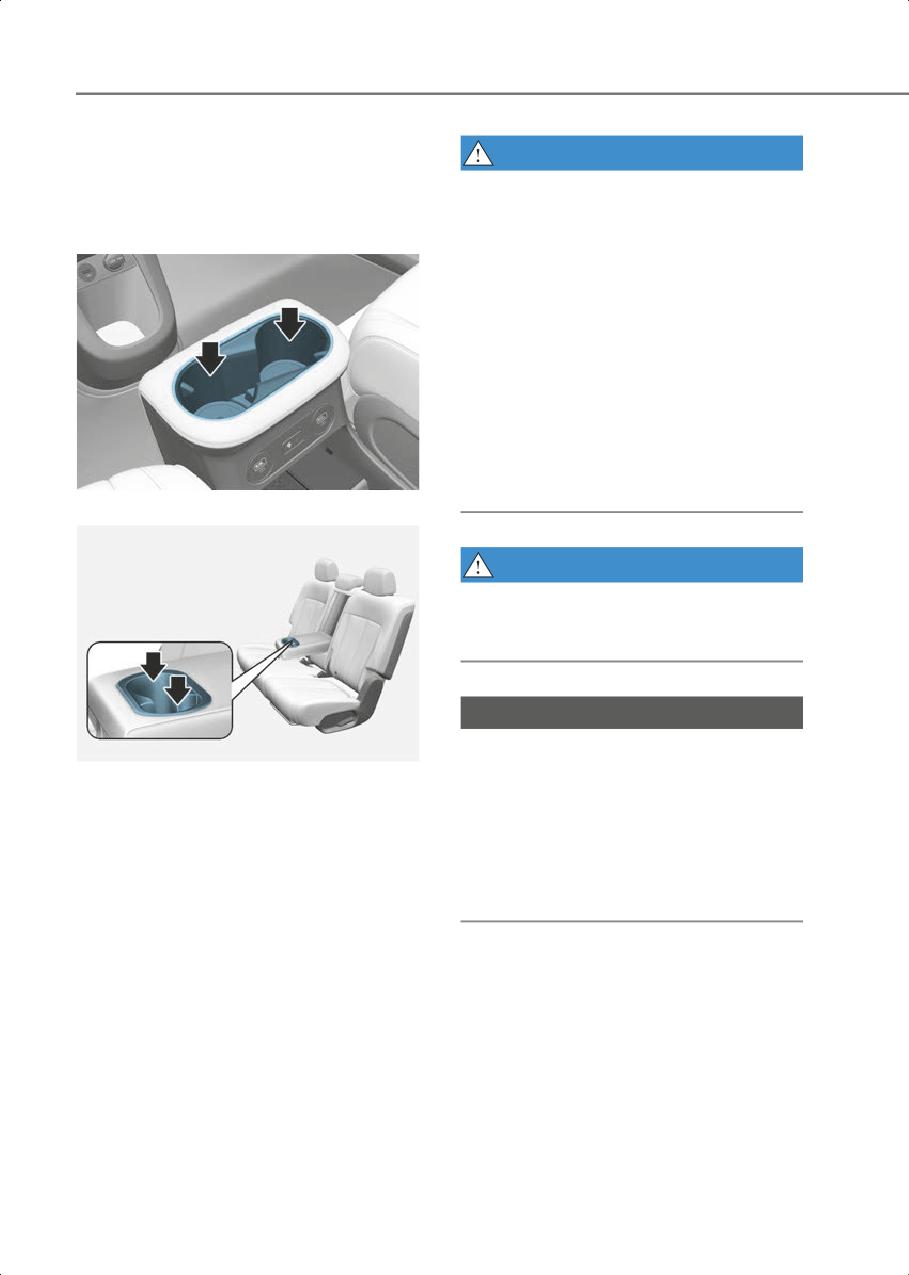
Cup Holder
spilling your drink. If hot liquid spills,
Front
you could be burned. Such a burn to the
driver could cause loss of vehicle
control resulting in an accident.
• Do not place uncovered or unsecured
cups, bottles, cans, etc., in the cup
holder containing hot liquid while the
vehicle is in motion. Injuries may result
in the event of a sudden stop or
collision.
• Only use soft cups in the cup holders.
Hard objects can injure you in an
ONE1051083
accident.
Rear
WARNING
Keep cans or bottles out of direct sun light
and do not put them in a hot vehicle. It
may explode.
NOTICE
• Keep your drinks sealed while driving to
ONE1051077N
prevent spilling your drink. If liquid
Cups or small beverages cups may be
spills, it may get into the vehicle’s
placed in the cup holders.
electrical/electronic system and
damage electrical/electronic parts.
• When cleaning spilled liquids do not
use hot air to blow out or dry the cup
holder. This may damage the interior.
5-116
5
Sunvisor
Power Outlet
Front
OHI048444
ONE1051078
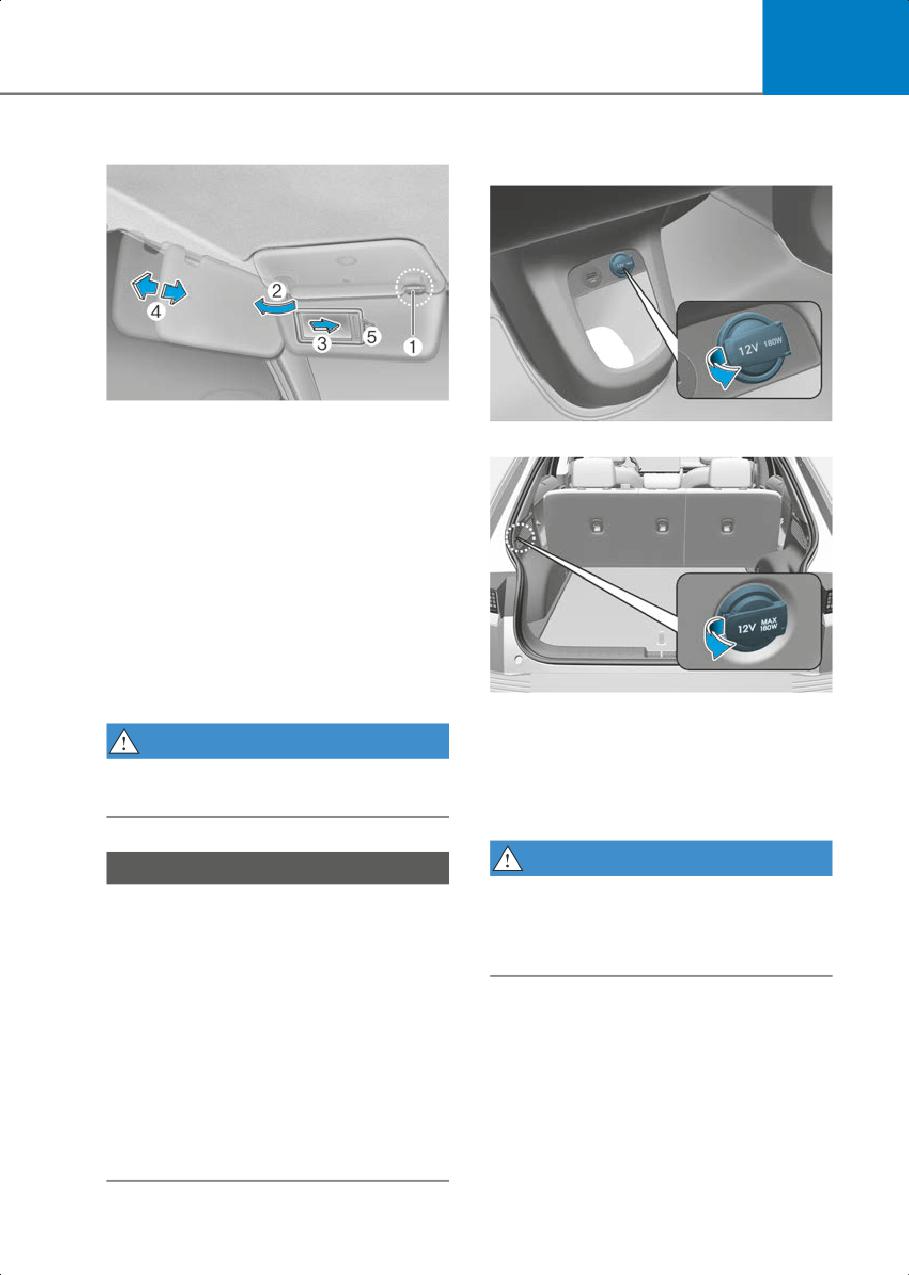
To use the sunvisor, pull it downward.
Luggage compartment
To use the sunvisor to block the sun from
the side window, pull it downward,
release it from the bracket (1) and swing it
to the side (2) towards the window.
To use the vanity mirror, pull down the
sunvisor and slide the mirror cover (3).
Adjust the sunvisor forward or backward
(4) as needed (if equipped). Use the ticket
holder (5) to hold tickets.
Close the vanity mirror cover securely and
return the sunvisor to its original position
ONE1051279N
after use.
The power outlet is designed to provide
power for mobile telephones or other
WARNING
devices designed to operate with vehicle
For your safety, do not block your view
electrical systems. The devices should
when using the sunvisor.
draw less than 180 watts with the vehicle
running.
WARNING
NOTICE
Avoid electrical shocks. Do not place your
• The tab (5) adjacent to the vanity mirror
fingers or foreign objects (pin, etc.) into a
on the sunvisor can be used for toll road
power outlet or touch the power outlet
tickets or self parking tickets. Use
with a wet hand.
caution when inserting tickets into the
ticket holder to avoid damage. Refrain
from putting several tickets in the ticket
holder as this could also damage the
retaining tab.
• Always have the switch in the off
position when the vanity mirror lamp is
not in use. If the sunvisor is closed
without the lamp off, it may discharge
the battery or damage the sunvisor.
5-117
Convenience Features
NOTICE
USB Charger
if equipped
To prevent damage to the power outlets:
Front
•
Use the power outlet only when the
vehicle is running and remove the
accessory plug after use. Using the
accessory plug for prolonged periods of
time with the vehicle off could cause
the battery to discharge.
•
Only use 12 V electric accessories which
are less than 180 watts in electric
capacity.
•
Adjust the air-conditioner or heater to
the lowest operating level when using
ONE1051080
the power outlet.
Rear
•
Close the cover when not in use.
•
Some electronic devices can cause
electronic interference when plugged
into a vehicle’s power outlet. These
devices may cause excessive audio
static and malfunctions in other
electronic systems or devices used in
your vehicle.
•
Push the plug in as far as it will go. If
good contact is not made, the plug may
overheat and the fuse may open.
ONE1051081
•
Plug in battery equipped
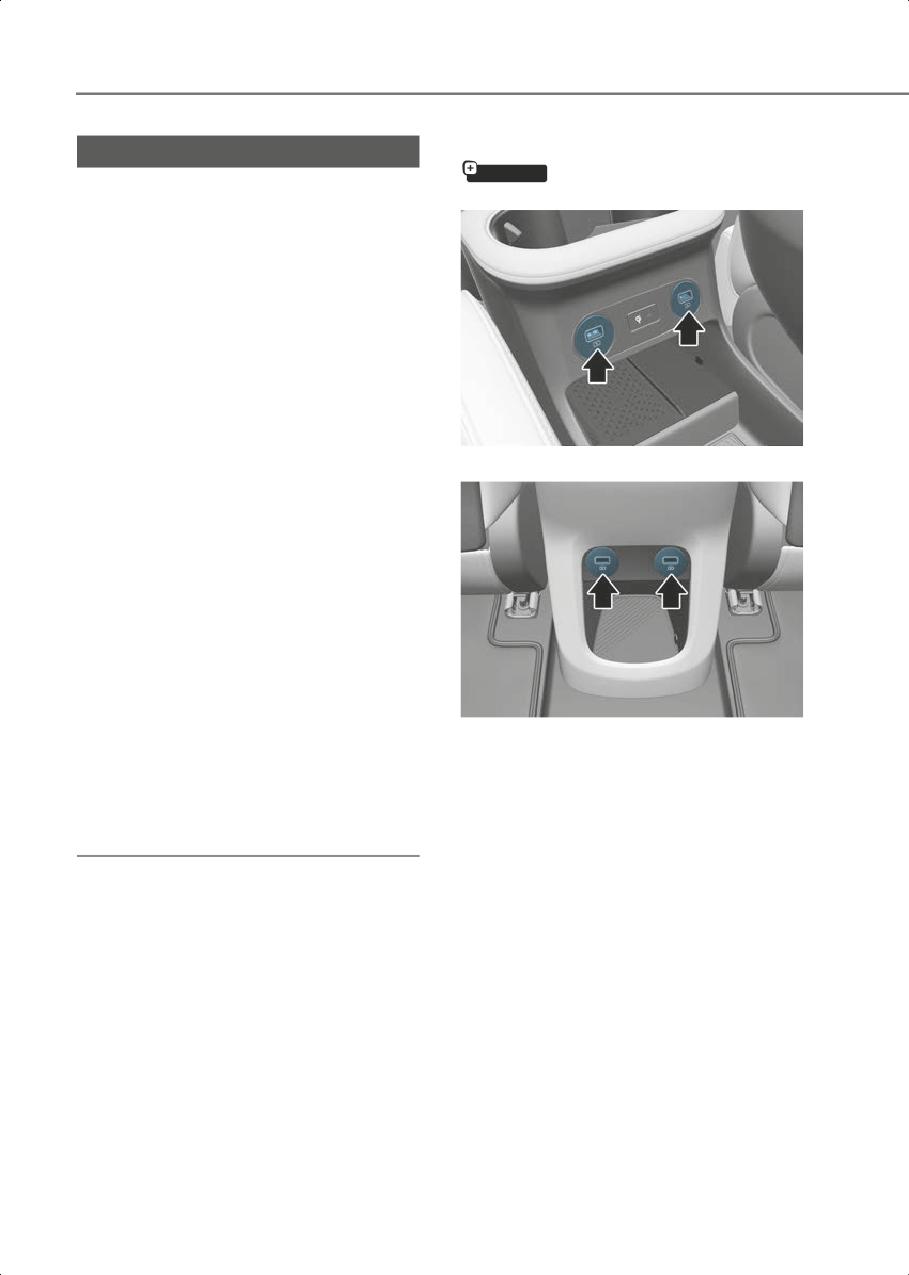
The USB charger is designed to recharge
electrical/electronic devices with
batteries of small size electrical devices
reverse current protection. The current
using a USB cable.
from the battery may flow into the
vehicle’s electrical/electronic system
The electrical devices can be recharged
and cause system malfunction.
when the Start/Stop button is in the ON or
START position.
The battery charging state may be
monitored on the electrical device.
Disconnect the USB cable from the USB
port after use.
• A smart phone or a tablet PC may get
warmer during the re-charging
process. It does not indicate any
malfunction with the charging system.
• A smart phone or a tablet PC, which
adopts a different re-charging method,
may not be properly re-charged. In this
case, use an exclusive charger of your
device.
5-118
5
• The charging terminal is only to
Charging smart phone
recharge a device. Do not use the
The wireless smart phone charging
charging terminal either to turn ON an
system charges only the Qi-enabled
audio or to play media In the
smart phones (
). Read the label on the
infotainment system.
smart phone accessory cover or visit your
NOTICE
smart phone manufacturer’s website to
check whether your smart phone
• Use the USB charger when the vehicle
supports the Qi technology.
is running. Using the USB charger for
The wireless charging process starts
prolonged periods of time with the
when you put a Qi-enabled smart phone
vehicle off could cause the battery to
on the wireless charging unit.
discharge.
1. Remove other items, including the
• To prevent damage to the USB charger:
smart key, from the wireless charging
- Do not insert foreign objects or spill
unit. If not, the wireless charging
liquid into the outlet. The USB
process may be interrupted. Place the
charging terminal may be damaged.
smart phone on the center of the
charging pad.
- Do not use devices with current
consumption exceeding 2,100 mA
2. The indicator light is orange when the
(2.1 A).
smart phone is charging. The indicator
light will turn blue when phone
charging is complete.
Wireless Smart Phone
3. You can turn ON or OFF the wireless
Charging System
charging function from the Settings
menu in the infotainment system
if equipped
screen.
Select:
• Setup > Vehicle > Convenience >
Wireless Charging
If your smart phone is not charging:
• Slightly change the position of the
smart phone on the charging pad.
• Make sure the indicator light is orange.
The indicator light will blink orange for 10
seconds if there is a malfunction in the
ONE1051082
wireless charging system.
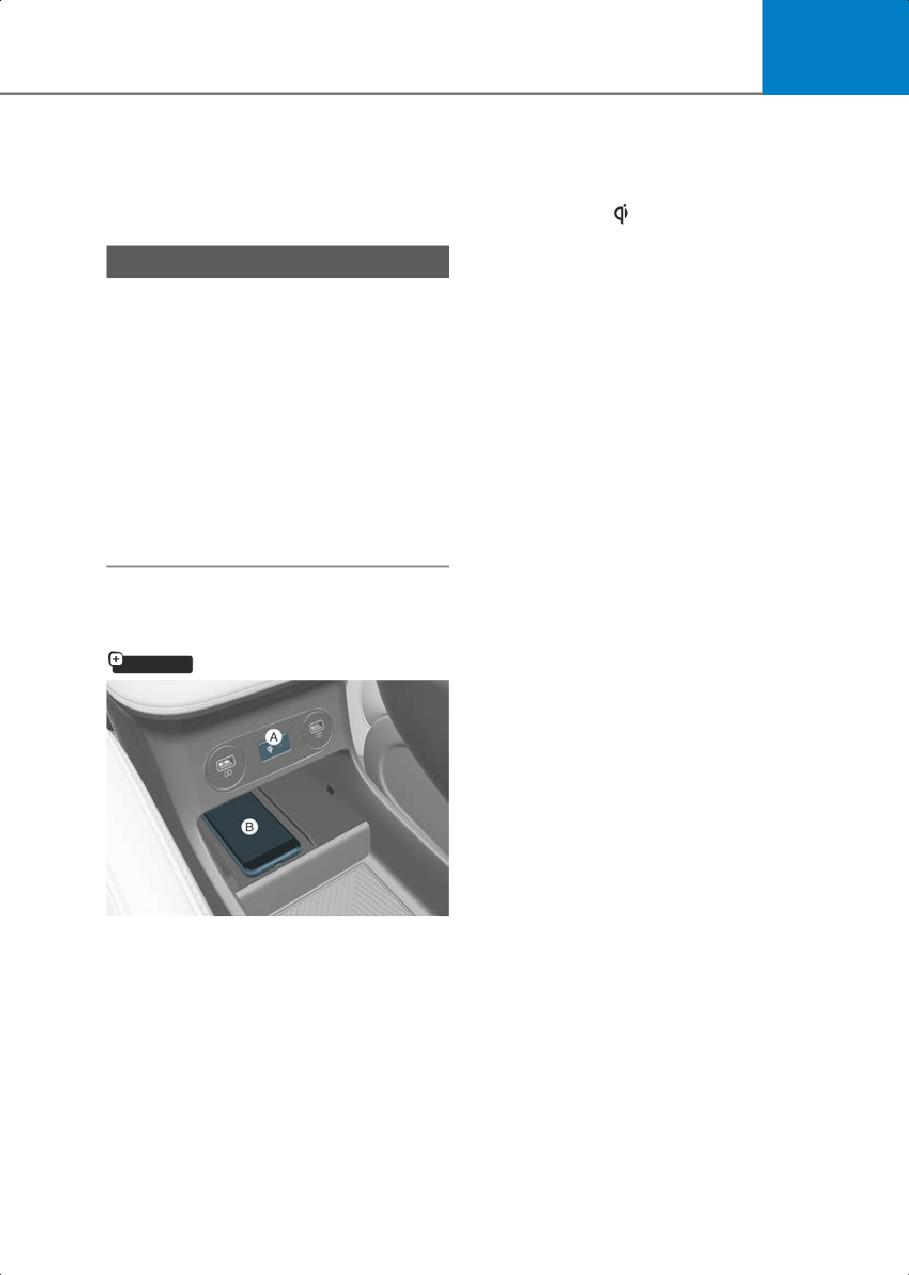
[A] : Indicator light,
[B] : Charging pad
In this case, temporarily stop the charging
On certain models, the vehicle comes
process, and re-attempt to charge your
equipped with a wireless smart phone
smart phone again.
charger.
The system warns you with a message on
The system is available when all doors are
the cluster display if the smart phone is
closed, and when the Start/Stop button is
still on the wireless charging unit after the
in the ON or START position.
vehicle is turned OFF and the front door is
opened.
5-119

Convenience Features
For some manufacturer’s smart phones,
•
The wireless charging process may
the system may not warn you even
temporarily stop, when temperature
though the smart phone is left on the
abnormally increases inside the
wireless charging unit. This is due to the
wireless smart phone charging system.
particular characteristic of the smart
The wireless charging process restarts,
phone and not a malfunction of the
when temperature falls to a certain
wireless charging.
level.
•
The wireless charging process may
Information
temporarily stop when there is any
• The infotainment system may change
metallic item, such as a coin, between
after software updates. For more
the wireless smart phone charging
information, refer to the user's manual
system and smart phone.
provided in the infotainment system
•
When charging some smart phones
and the quick reference guide.
with a self-protection feature, the
• For flip type smartphones, when using
wireless charging speed may decrease
wireless charging, place the
and the wireless charging may stop.
smartphone folded with the device’s
•
If the smart phone has a thick cover, the
back placed on the center of the
wireless charging may not be possible.
wireless charging unit.
•
If the smart phone is not completely
contacting the charging pad, wireless
charging may not operate properly.
NOTICE
•
Some magnetic items like credit cards,
phone cards or rail tickets may be
• The wireless smart phone charging
damaged if left with the smart phone
system may not support certain smart
during the charging process.
phones, which are not verified for the
•
When any smart phone without a
Qi specification ( ).
wireless charging function or a metallic
• When placing your smart phone on the
object is placed on the charging pad, a
charging pad, position the phone in the
small noise may sound. This small
middle of the mat for optimal charging
sound is due to the vehicle discerning
performance. If your smart phone is off
compatibility of the object placed on
to the side, the charging rate may be
the charging pad. It does not affect
less and in some cases the smart phone
your vehicle or the smart phone in any
may experience higher heat
way.
conduction.
• In some cases, the wireless charging
may stop temporarily when the smart
key is used, either when starting the
Information
vehicle or locking/unlocking the doors,
If the Start/Stop button is in the OFF
etc.
position, the charging also stops.
• When charging certain smart phones,
the charging indicator may not change
to blue when the smart phone is fully
charged.
5-120
5
Cluster Fascia Side Panel
Information
This device complies with Part 15 of the
FCC rules.
Operation is subject to the following three
conditions:
1. This device may not cause harmful
interference.
2. This device must accept any
interference received, including
interference that may cause undesired
operation.
ONE1051246
3. Changes or modifications not expressly
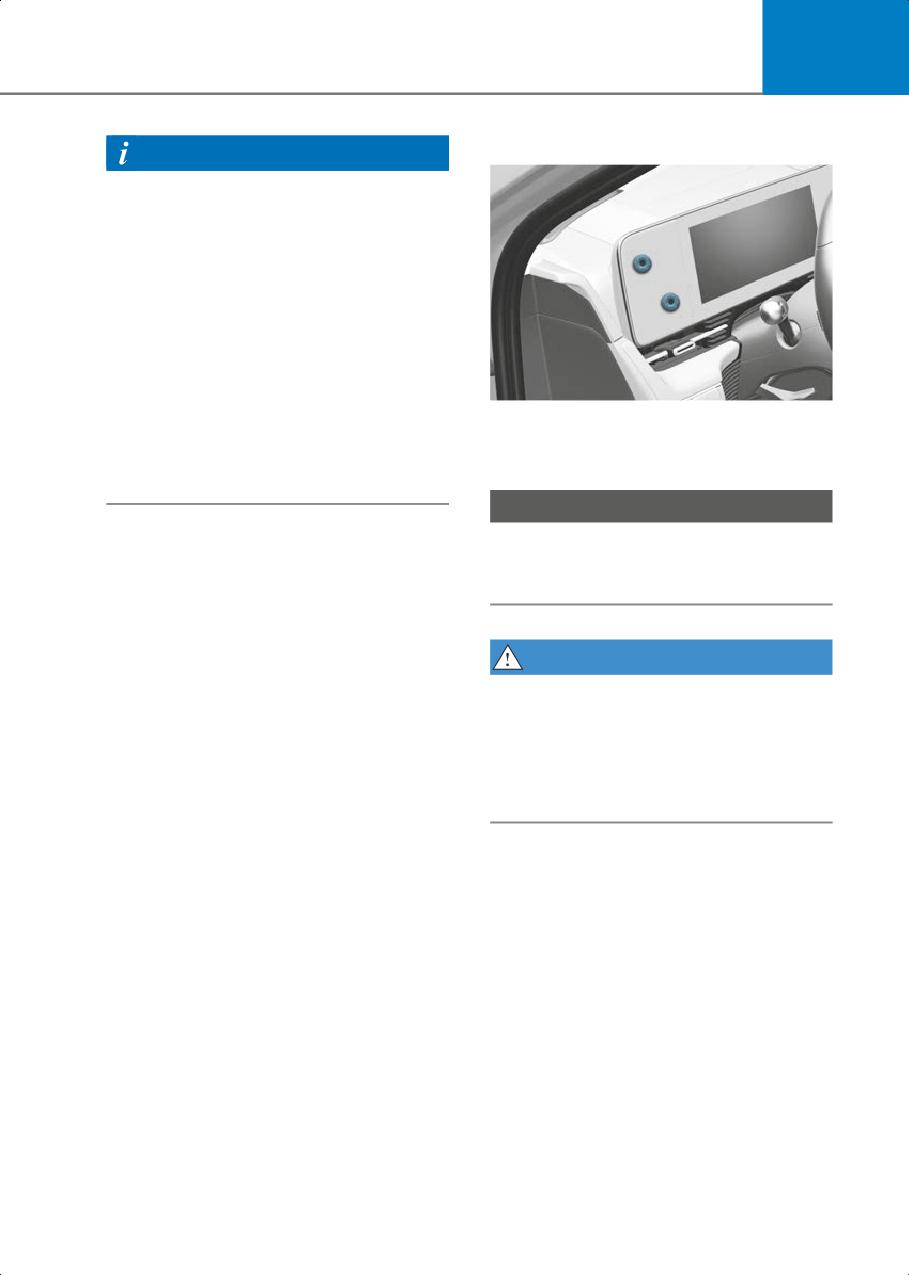
The cluster fascia side panel is a pad to
approved by the party responsible for
attach light items such as parking tickets,
compliance could void the user’s
receipts, etc., using its magnetic surface.
authority to operate the device
NOTICE
Do not attach heavy items such as cellular
phones. Dropping while driving, the items
can be damaged.
WARNING
Do not attach the cellular phones and
heavy or sharp items to the cluster fascia
side panel for safety reason.
This could result in loss of control, and an
accident causing death, serious injury, or
property damage.
5-121
Convenience Features
Vehicle to Load (V2L)
Coat Hook
if equipped
ONE1051085
ONE1051084N
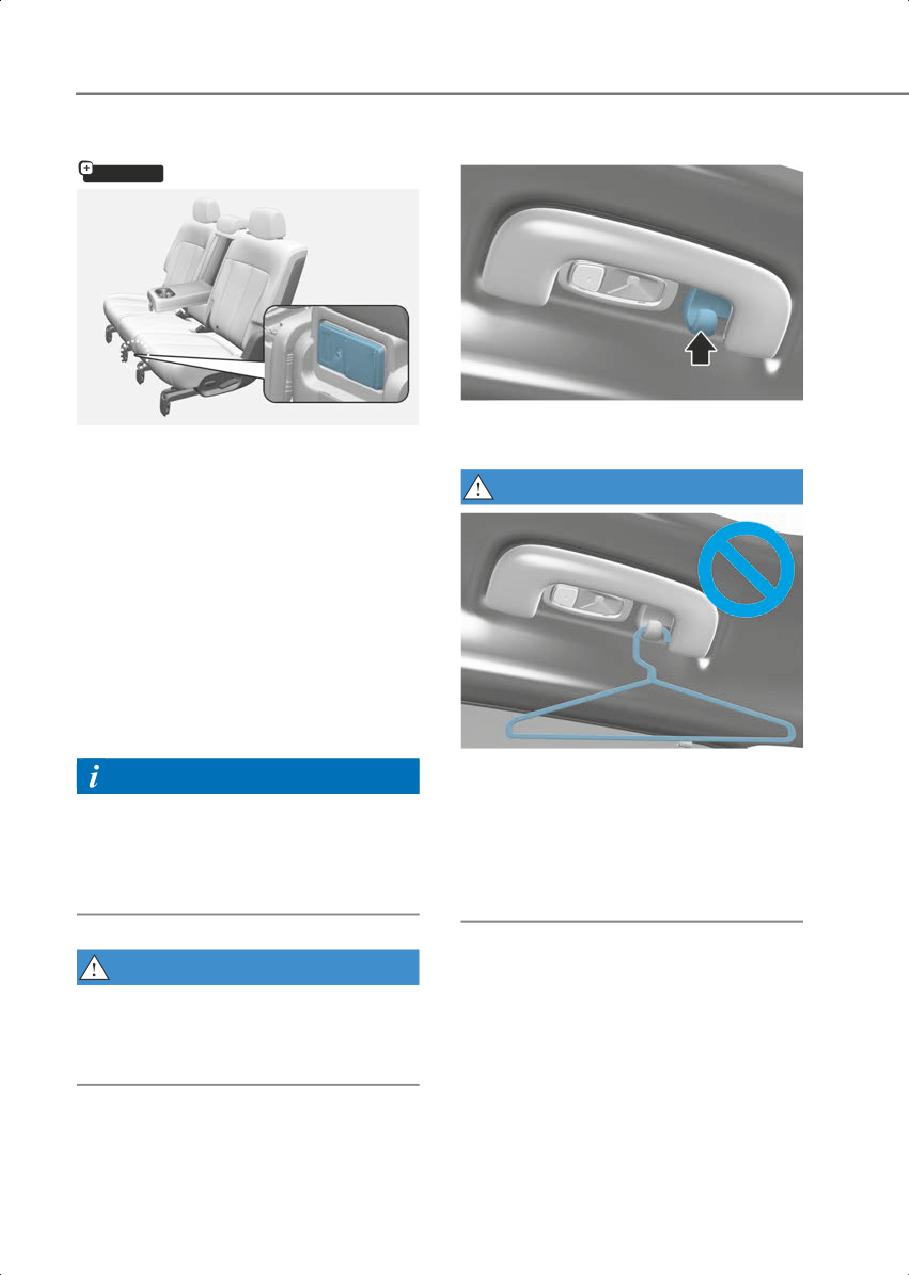
These hooks are not designed to hold
V2L(Vehicle to Load) is installed at the
large or heavy items.
central rear seat. V2L is a convenient
feature which provides enough electricity
WARNING
to use diverse household electrical
appliances in the vehicle.
V2L is installed at the central rear seat
bottom.
For more details, refer to “Vehicle to Load
(V2L)” section in chapter 1.
Clock
The clock can be set from the
infotainment system.
ONE1051086
Information
Do not hang other objects such as
hangers or hard objects except clothes.
The infotainment system may change
Also, do not put heavy, sharp or breakable
after software updates. For more
objects in the clothes pockets. In an
information, refer to the user`s manual
accident or when the curtain air bag is
provided in the infotainment system and
inflated, it may cause vehicle damage or
the quick reference guide.
personal injury.
WARNING
Do not attempt to adjust the clock while
driving. Doing so may result in distracted
driving which may lead to an accident
involving personal injury or death.
5-122
5
Floor Mat Anchor(s)
Rear Side Window Sunshades
ALWAYS use the Floor Mat Anchors to
if equipped
attach the front floor mats to the vehicle.
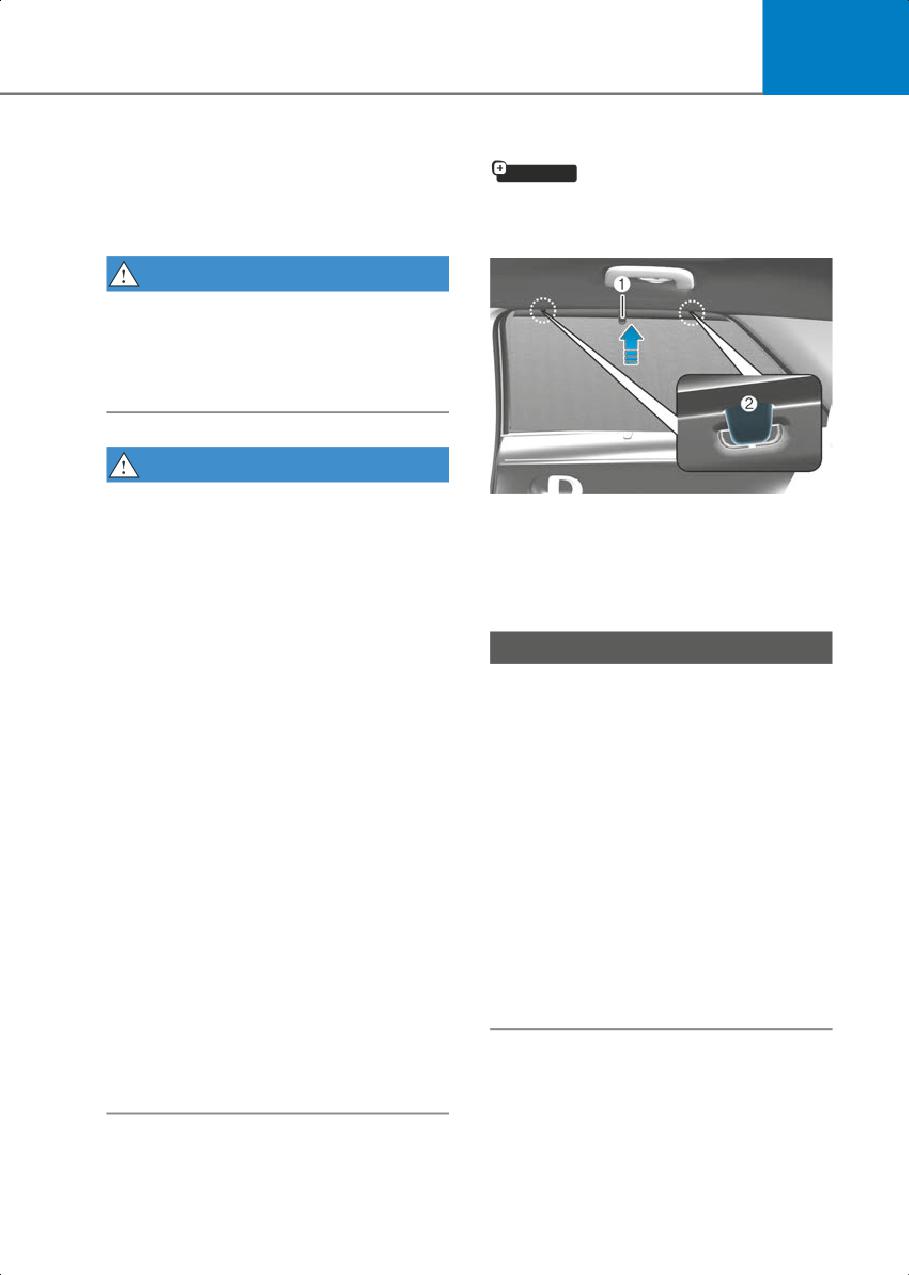
Use the rear side window sunshade to
The anchors on the front floor carpet keep
block external light coming through the
the floor mats from sliding forward.
rear window glass.
WARNING
Do not overlay additional mats or liners
over the floor mats. If using All Weather
mats, remove the carpeted floor mats
before installing them. Only use floor
mats designed to connect to the anchors.
WARNING
The following must be observed when
ONE1051087
installing ANY floor mat to the vehicle.
1. Lift the sunshade by the handle (1).
• Ensure to remove a protective film
2. Hang the sunshade on both sides of the
attached on the carpet before
hook (2). If the sunshade is hung on one
attaching a floor mat on the front floor
side of the hook, the sunshade may be
carpet. Otherwise, the floor mat may
wrinkled.
move freely on the protective film and it
could result in unintentional braking or
NOTICE
accelerating.
• Do not hang any other object except
• Ensure that the floor mats are securely
the rear side window sunshade on the
attached to the vehicle’s floor mat
hooks.
anchor(s) before driving the vehicle.
• If you pull the rear side window
• Do not use ANY floor mat that cannot
sunshade or apply force to return the
be firmly attached to the vehicle’s floor
sunshade to its original position after
mat anchors.
use, you may find the sunshade
• Do not stack floor mats on top of one
wrinkled or out of shape. To lower the
another (for example, all-weather
sunshade, be sure to put the handle
rubber mat on top of a carpeted floor
downward and slowly return the
mat). Only a single floor mat should be
sunshade to its original position.
installed in each position.
• Sunshades may not work properly if
IMPORTANT Your vehicle was
foreign objects (coins, toys, cookies,
manufactured with driver’s side floor mat
etc.) are stuck in the door. Be careful
anchors that are designed to securely
that the foreign objects do not get into
hold the floor mat in place. To avoid any
the door.
interference with pedal operation,
HYUNDAI Vehicle recommends that the
HYUNDAI floor mat designed for use in
your vehicle be installed.
5-123
Convenience Features
Luggage Net Holder
Cargo Security Screen
if equipped
if equipped
ONE1051280N
ONE1051239N
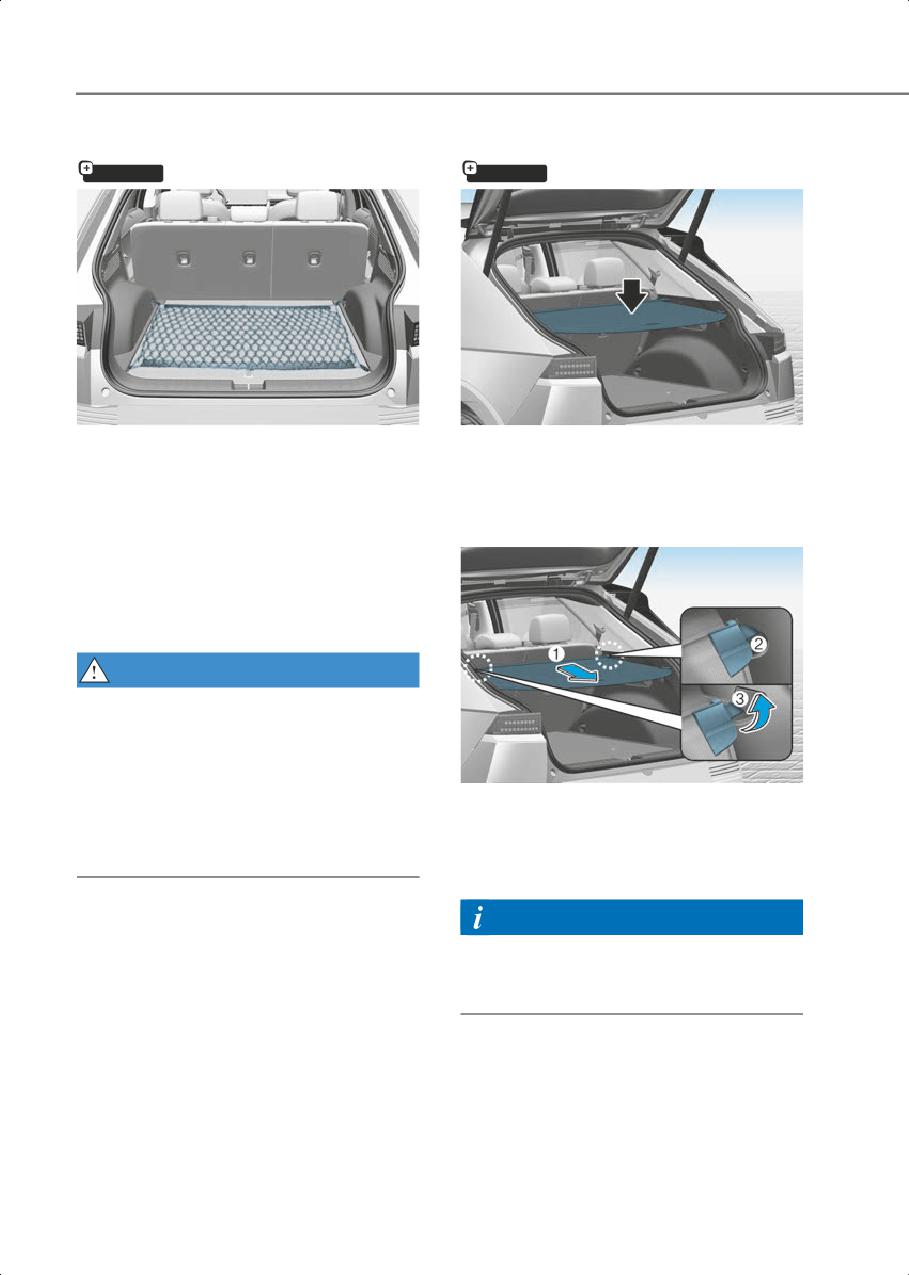
To keep items from shifting in the luggage
Use the cargo security screen to cover
compartment, you can use the 4 holders
items stored in the cargo area.
located in the luggage board to attach the
luggage net.
Using the cargo security screen
Make sure the luggage net is securely
attached to the holders in the luggage
board.
If necessary, contact your authorized
HYUNDAI dealer to obtain a luggage net.
WARNING
Avoid eye injury. DO NOT overstretch the
luggage net. ALWAYS keep your face and
body out of the luggage net’s recoil path.
DO NOT use the luggage net when the
strap has visible signs of wear or damage.
ONE1051240N
Use the luggage net to keep only light
1. Pull the cargo security screen towards
items from shifting in the luggage
the rear of the vehicle by the handle (1).
compartment.
2. Insert the guide pin (2) into the guide
(3).
Information
Pull out the cargo security screen with the
handle in the center to prevent the guide
pin from falling out of the guide.
5-124
5
When the cargo security screen is not in
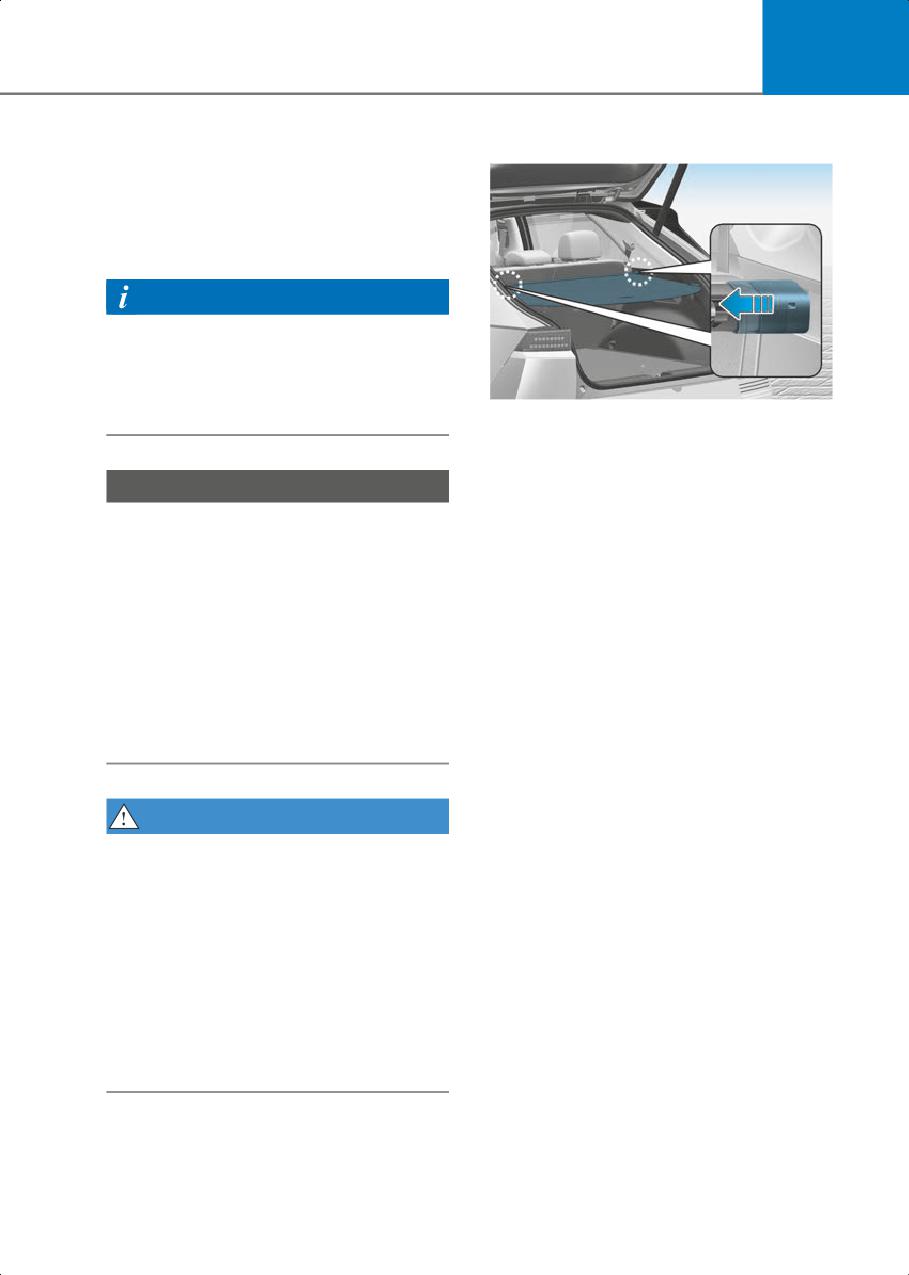
Removing the cargo security screen
use:
1. Pull the cargo security screen rearward
and down to release it from the guides.
2. The cargo security screen will
automatically slide back in.
Information
The cargo security screen may not
automatically slide back in if the cargo
security screen is not fully pulled out. Pull
the cargo screen out all the way and then
ONE1051241N
slowly allow the screen to retract back in.
1. Push one side of the cargo screen
inward to compress the spring and
release the screen from the vehicle.
NOTICE
2. While the spring is compressed, pull out
the cargo security screen.
• Since the cargo security screen may be
damaged or malformed, do not put
luggage on it when it is used.
• The cargo security screen and rear seat
may be damaged when the rear seat
slides forward/rearward or when the
rear seatback is reclined.
• Note that if you release the handle
while pulling the luggage screen handle
all the way, the screen may wind up
quickly and be damaged.
WARNING
• Do not place objects on the cargo
security screen. Such objects may be
thrown about inside the vehicle and
possibly injure vehicle occupants
during an accident or when braking.
• Never allow anyone to ride in the
luggage compartment. It is designed
for luggage only.
• Maintain the balance of the vehicle and
locate the weight as forward as
possible.
5-125
Convenience Features
Infotainment System
Antenna
NOTICE
• If you install an aftermarket HID head
lamp, your vehicle’s audio and
electronic devices may not function
properly.
• Prevent chemicals such as perfume,
cosmetic oil, sun cream, hand cleaner,
and air freshener from contacting the
interior parts because they may cause
damage or discoloration.
ONE1051089K
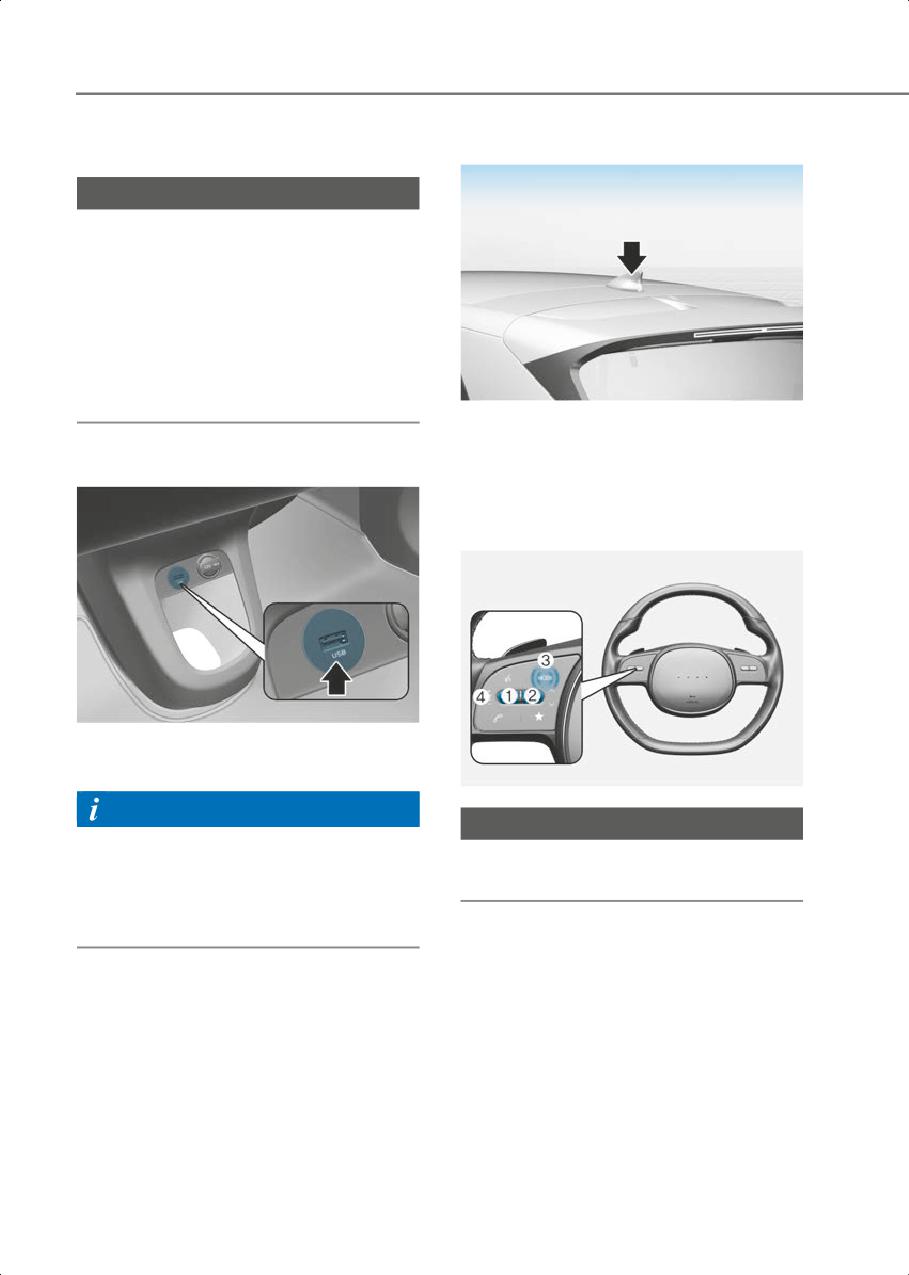
The shark fin antenna will receive AM, FM
broadcast signals and transmit data.
USB Port
Steering Wheel Remote
Controls
ONE1051092
You can use an USB cable to connect
audio devices to the vehicle USB port.
ONE1051090
Information
NOTICE
When using a portable audio device
connected to the power outlet, noise may
Do not operate multiple audio remote
occur during playback. If this happens,
control buttons simultaneously.
use the portable audio device’s power
source.
5-126
5
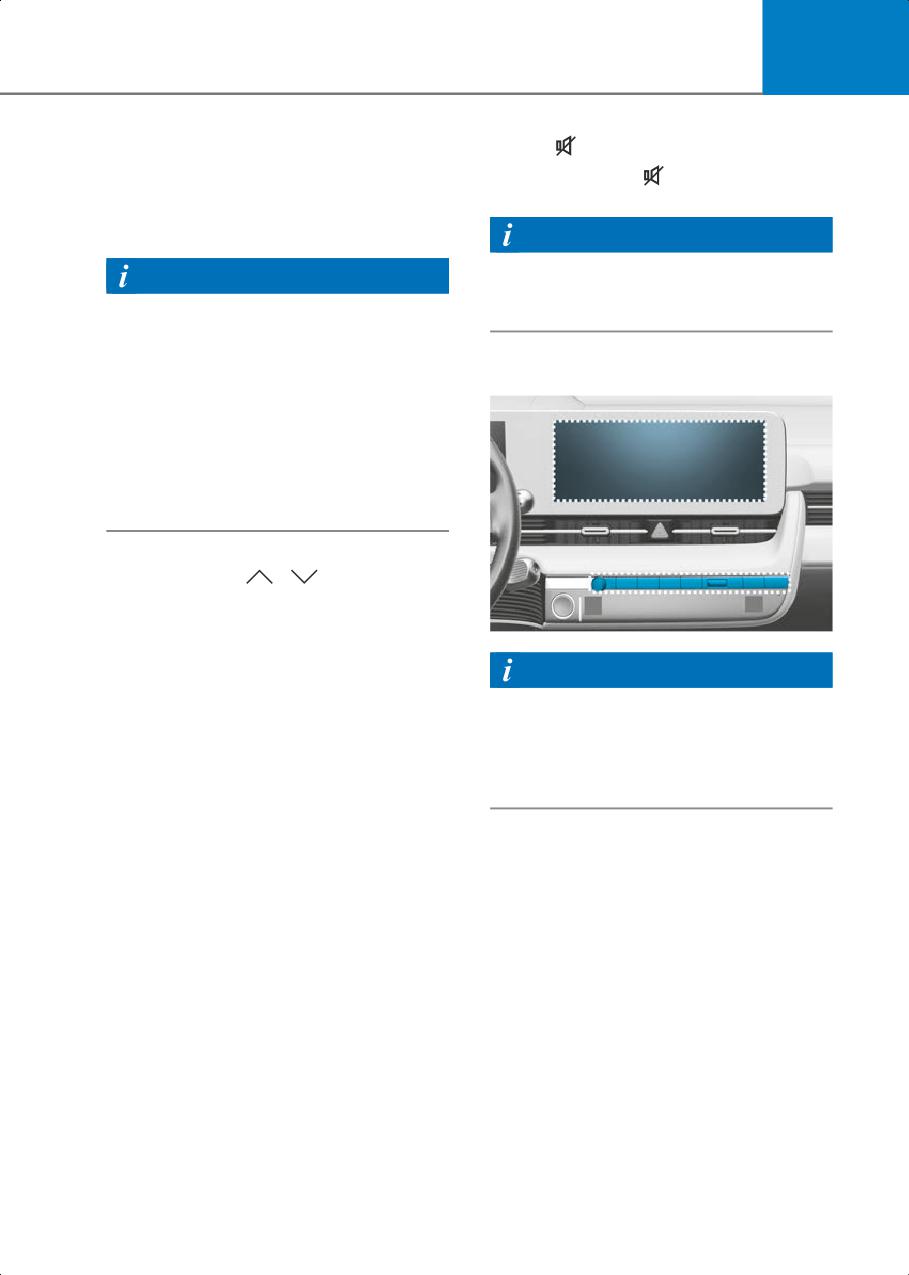
VOLUME (VOL + / VOL -) (1)
MUTE (
) (4)
• Rotate the VOLUME scroll up to
• Press the MUTE( )button to mute or
increase volume.
activate the sound.
• Rotate the VOLUME scroll down to
decrease volume.
Information
For more information, refer to the user’s
Information
manual provided in the infotainment
You can set the volume level of each
system and the quick reference guide.
source (FM, AM, SXM, USB, BT, etc.)
individually by adjusting the VOLUME
scroll.
Infotainment System
Then the infotainment system saves the
last volume level of each source in the
system sound settings.
If you change the source, the volume will
revert to the previously set volume for
that source.
SEEK/PRESET (
/
) (2)
If the SEEK/PRESET switch is pressed up
or down and held for 0.8 second or more,
it will function in the following modes:
ONE1051091
• RADIO mode
Information
It will function as the AUTO SEEK select
The infotainment system may change
button. It will SEEK until you release the
after software updates. For more
button.
information, refer to the manual provided
• MEDIA mode
in the infotainment system and the quick
It will function as the FF/RW button.
reference guide.
If the SEEK/PRESET switch is pressed up
or down, it will function in the following
modes:
• RADIO mode
It will function as the PRESET STATION
UP/DOWN button.
• MEDIA mode
It will function as the TRACK UP/ DOWN
button.
MODE (3)
Press the MODE button to toggle through
Radio or AUX modes.
5-127
Convenience Features
Voice Recognition
Bluetooth® Wireless
Technology
ONE1051095
ONE1051093
Information
For more information, refer to the user’s
manual provided in the infotainment
system and the quick reference guide.
ONE1051094
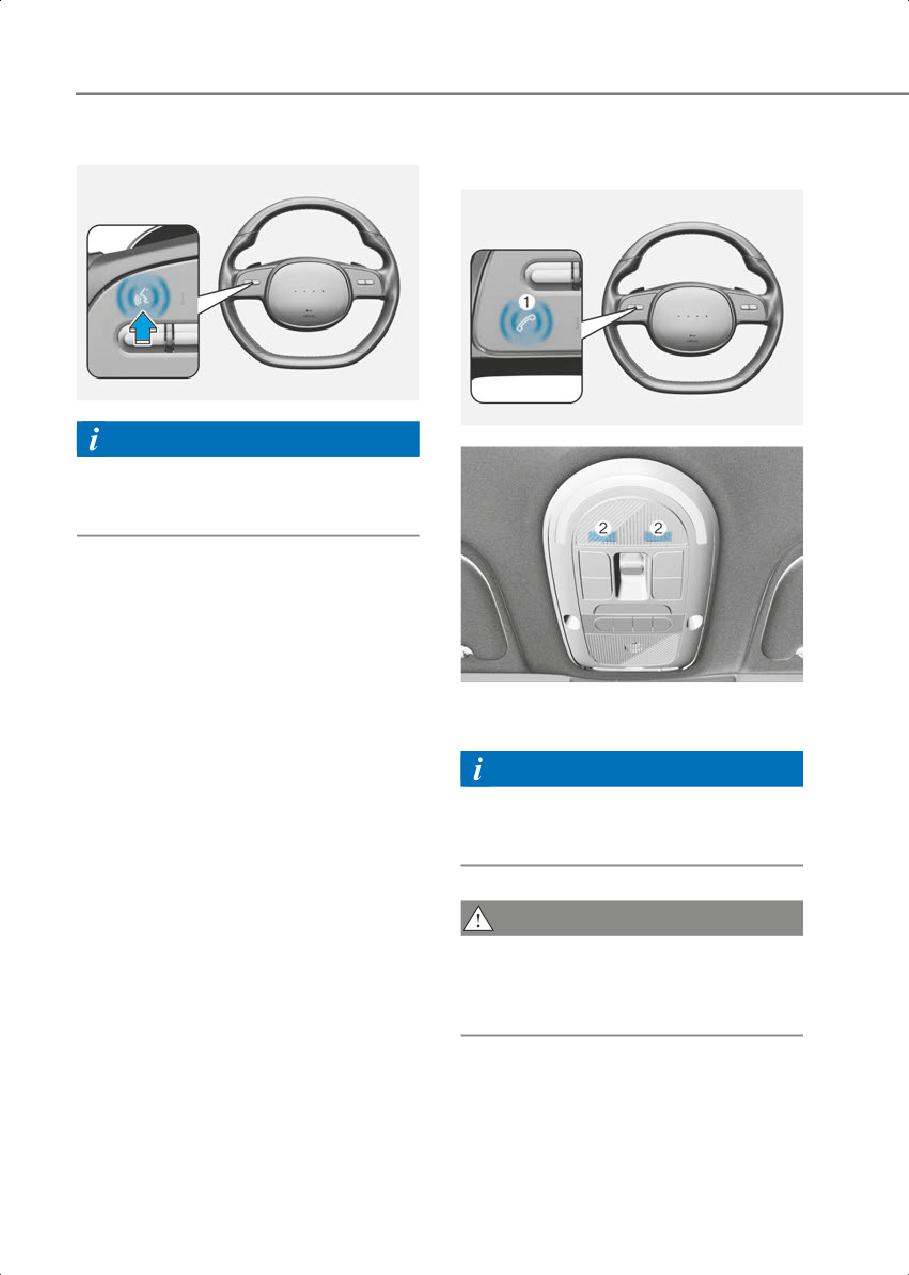
(1) Call / Answer / Call end button
(2) Microphone
Information
For more information, refer to the user’s
manual provided in the infotainment
system and the quick reference guide.
CAUTION
To avoid driver distractions, do not
excessively operate the device while
driving the vehicle which may lead to an
accident.
5-128
6. Driving Your Vehicle
Before Driving
6-3
Before Entering the Vehicle
6-3
Before Starting
6-3
Start/Stop Button
6-4
Start/Stop Button Positions
6-5
Starting the Vehicle
6-6
Turning Off the Vehicle
6-7
Remote Start
6-8
Shift By Wire
6-9
Rotary Shifter Operation
6-9
Cluster Display Messages
6-13
Good Driving Practices
6-15
Regenerative Braking System
6-16
One Pedal Driving
6-17
i-Pedal
6-18
Smart Recuperation System
6-19
Smart Recuperation System Setting
6-19
6
To Activate Smart Recuperation System
6-20
Ready to Operate
6-21
How to Operate
6-21
Smart Recuperation System Will Be Temporarily canceled When:
6-22
To Resume Smart Recuperation System
6-22
Vehicle-to-Vehicle Distance Recognition Sensor (Front Radar)
6-22
System Malfunction
6-23
Limitations of the System
6-23
Braking System
6-26
Power-Assist Brakes
6-26
Disc Brakes Wear Indicator
6-27
Electronic Parking Brake (EPB)
6-27
Auto Hold
6-31
Anti-Lock Brake System (ABS)
6-34
Electronic Stability Control (ESC)
6-35
Vehicle Stability Management (VSM)
6-38
Hill-Start Assist Control (HAC)
6-39
Good Braking Practices
6-39
All Wheel Drive (AWD)
6-40
Emergency Precautions
6-42
Drive Mode Integrated Control System (2WD)
6-43
Drive Mode
6-43
Drive Mode Integrated Control System (AWD)
6-45
Drive Mode
6-45
Drive Modes Characteristic
6-47
Active Air Flap
6-48
Malfunction
6-48
Special Driving Conditions
6-49
Hazardous Driving Conditions
6-49
Rocking the Vehicle
6-49
Smooth Cornering
6-49
Driving at Night
6-50
Driving in the Rain
6-50
Driving in Flooded Areas
6-50
6
Highway Driving
6-50
Reducing the Risk of a Rollover
6-51
Winter Driving
6-52
Snow or Icy Conditions
6-52
Winter Precautions
6-54
Vehicle Load Limit
6-55
The Loading Information Label
6-55
Trailer Towing
6-60
If You Decide to Pull a Trailer
6-60
Trailer Towing Equipment
6-63
Driving with a Trailer
6-64
Maintenance when Towing a Trailer
6-66
Vehicle Weight
6-67
Overloading
6-67

6
Before Driving
WARNING
To reduce the risk of SERIOUS INJURY or
DEATH, take the following precautions:
Before Entering the Vehicle
• ALWAYS wear your seat belt. All
• Be sure all windows, side view
passengers must be properly belted
mirror(s), and outside lights are clean
whenever the vehicle is moving. For
and unobstructed.
more information, refer to “Seat Belts”
• Remove frost, snow, or ice.
section in chapter 3.
• Visually check the tires for uneven wear
• Always drive defensively. Assume other
and damage.
drivers or pedestrians may be careless
• Check under the vehicle for any sign of
and make mistakes.
leaks.
• Stay focused on the task of driving.
• Be sure there are no obstacles behind
Driver distraction can cause accidents.
you if you intend to back up.
• Leave plenty of space between you and
the vehicle in front of you.
Before Starting
• Make sure the hood, the liftgate, and
the doors are securely closed and
WARNING
locked.
NEVER drink or take drugs and drive.
• Adjust the position of the seat and
Drinking or taking drugs and driving is
steering wheel.
dangerous and may result in an accident
• Adjust the inside and side view mirrors.
and SERIOUS INJURY or DEATH.
• Verify all the lights work.
Drunk driving is the number one
• Fasten your seat belt. Check that all
contributor to the highway death toll each
passengers have fastened their seat
year. Even a small amount of alcohol will
belts.
affect your reflexes, perceptions and
judgment. Just one drink can reduce your
• Check the gauges and indicators in the
ability to respond to changing conditions
instrument panel and the messages on
and emergencies and your reaction time
the instrument display when the
gets worse with each additional drink.
vehicle is in the ON position.
Driving while under the influence of drugs
• Check that any items you are carrying
is as dangerous or more dangerous than
are stored properly or fastened down
driving under the influence of alcohol.
securely.
You are much more likely to have a
serious accident if you drink or take drugs
and drive. If you are drinking or taking
drugs, don’t drive. Do not ride with a
driver who has been drinking or taking
drugs. Choose a designated driver or call
a taxi.
6-3
Driving Your Vehicle
Start/Stop Button
WARNING
•
NEVER press the Start/Stop button
while the vehicle is in motion except in
an emergency. This will result in the
vehicle turning off and loss of power
assist for the steering and brake
systems. This may lead to loss of
directional control and braking
function, which could cause an
accident.
•
Before leaving the driver’s seat, always
make sure the gear is in the P (Park)
ONE1061004
position, set the parking brake, press
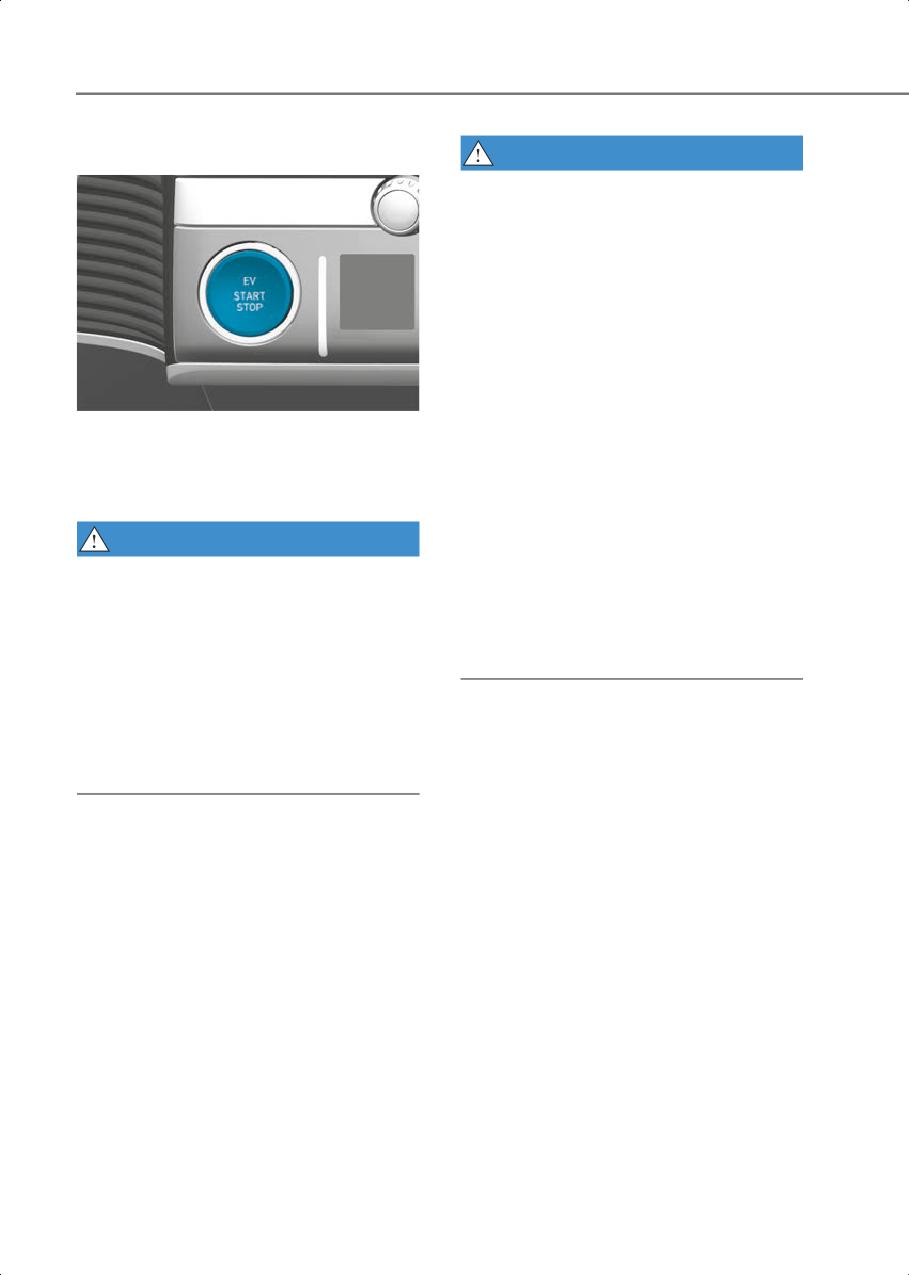
Whenever the front door is opened, the
the Start/Stop button to the OFF
Start/Stop button will illuminate and will
position, and take the Smart Key with
go off for a few seconds after the door is
you. Unexpected vehicle movement
closed.
may occur if these precautions are not
followed.
WARNING
•
NEVER reach through the steering
To turn the vehicle off in an emergency:
wheel for the Start/Stop button or any
other control while the vehicle is in
Press and hold the Start/Stop button for
motion. The presence of your hand or
more than two seconds OR Rapidly press
arm in this area may cause a loss of
and release the Start/Stop button three
vehicle control resulting in an accident.
times (within three seconds).
If the vehicle is still moving, you can
restart the vehicle without depressing the
brake pedal by pressing the Start/Stop
button with the gear in the N (Neutral)
position.
6-4

6
Start/Stop Button Positions
Button
Action
Notes
Position
To turn off the vehicle, press the
If the steering wheel is not locked
Start/Stop button with the vehicle
properly when you open the driver’s
shifted to P (Park).
door, the warning chime will sound.
OFF
If the Start/Stop button is pressed
with the vehicle shifted to D (Drive), R
(Reverse) or N (Neutral), the gear
automatically shifts to P (Park).
• If you leave the Start/Stop button in
Press the Start/Stop button when the
the ACC position for more than one
button is in the OFF position without
hour, the battery power will turn off
depressing the brake pedal.
automatically to prevent the battery
Some of the electrical accessories are
from discharging.
ACC
usable.
• If the steering wheel doesn’t unlock
The steering wheel unlocks.
properly, the Start/Stop button will
not work. Press the Start/Stop button
while turning the steering wheel
right and left to release.
Press the Start/Stop button while it is
Do not leave the Start/Stop button in
in the ACC position without
the ON position when the vehicle is
ON
depressing the brake pedal.
not running to prevent the battery
The warning lights can be checked
from discharging.
before the vehicle is started.
To start the vehicle, depress the brake
If you press the Start/Stop button
pedal and press the Start/Stop button
without depressing the brake pedal,
START
with the gear shifted to the P (Park)
the vehicle does not start and the
position.
Start/Stop button changes as follows:
OFF > ACC > ON > OFF or ACC
* To prevent vehicle battery discharge, the Start/Stop button changes to the OFF position
when the Start/Stop button is in the ACC or ON position with the gear in P (Park) for a
certain period of time. When the function operates, the tail lamps will turn off. To use the
tail lamps again, turn the headlight switch located on the steering column to the OFF and
ON position again.
6-5
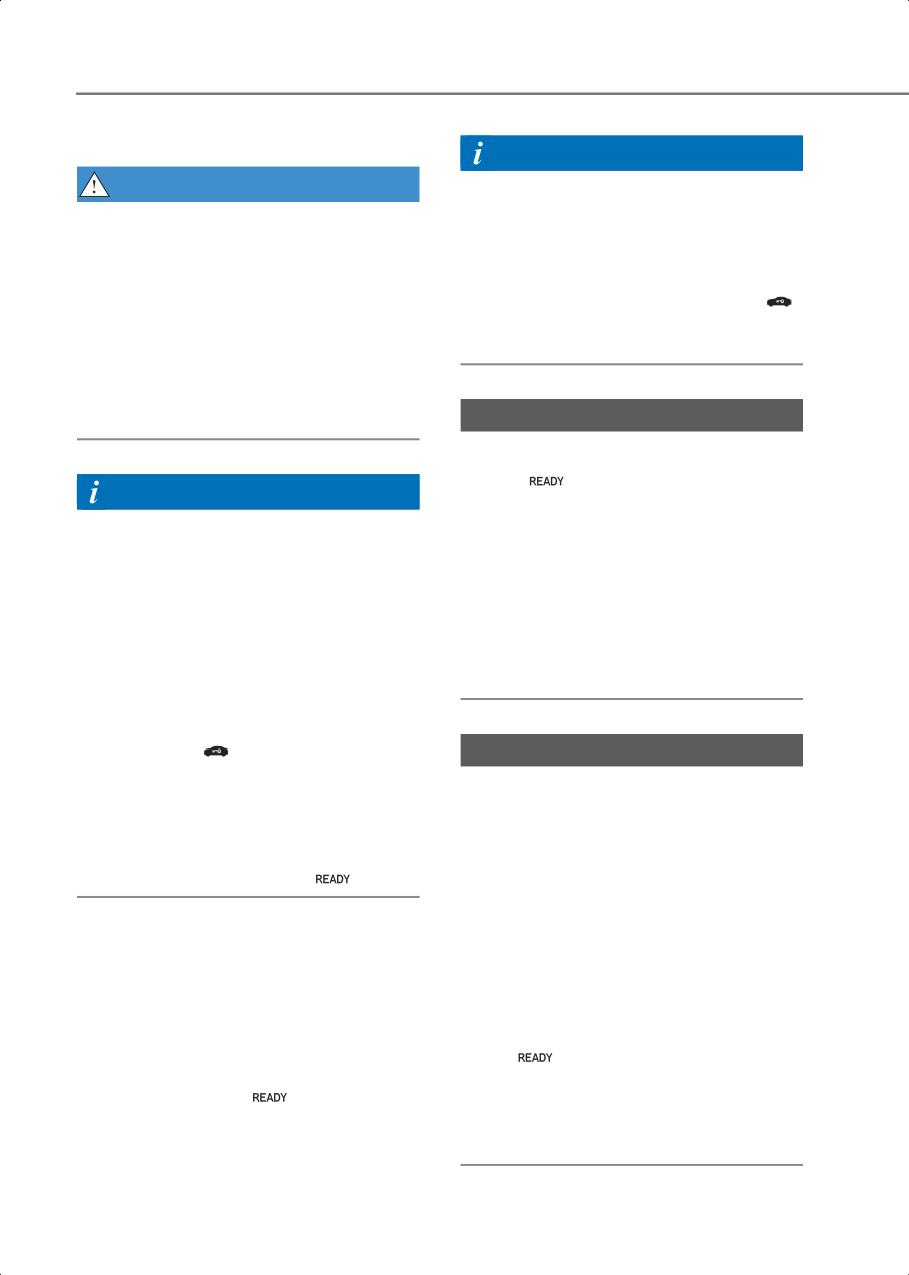
Driving Your Vehicle
Starting the Vehicle
Information
WARNING
• Always start the vehicle with your foot
on the brake pedal. Do not depress the
•
Always wear appropriate shoes when
accelerator while starting the vehicle.
operating your vehicle. Unsuitable
Do not race the motor while warming it
shoes, such as high heels, ski boots,
up.
sandals, flipflops, etc., may interfere
with your ability to use the brake and
• If ambient temperature is low, the “
”
accelerator pedals.
indicator may remain illuminated
longer than the normal amount of time.
•
Do not start the vehicle with the
accelerator pedal depressed.
The vehicle can move which can lead to
an accident.
NOTICE
To prevent damage to the vehicle:
• If the (
) indicator turns off while you
Information
are in motion, do not attempt to shift
the gear to the P (Park) position.
•
The vehicle will start by pressing the
Start/Stop button, only when the smart
If traffic and road conditions permit,
key is in the vehicle.
you may put the gear in N (Neutral)
while the vehicle is still moving and
•
Even if the smart key is in the vehicle,
press the Start/Stop button in an
and when it is far away from the driver,
attempt to restart the vehicle.
the vehicle may not start.
• Do not push or tow your vehicle to start
•
When the Start/Stop button is in the
the vehicle.
ACC or ON position, if any door is open,
the system checks for the smart key.
When the smart key is not in the
vehicle, the “
” indicator will blink
NOTICE
and the warning 'Key not in vehicle' will
To prevent damage to the vehicle:
come on. When all doors are closed, the
chime will also sound for a few
Do not press the Start/Stop button for
seconds. Keep the smart key in the
more than 10 seconds except when the
vehicle when in the ACC position or if
stop lamp fuse is blown.
the vehicle is in the ready (
) mode.
When the stop lamp fuse is blown, you
cannot normally start the vehicle.
Replace the fuse with a new one. If you
Starting the vehicle
are not able to replace the fuse, you can
1. Always carry the smart key with you.
start the vehicle by pressing and holding
the Start/Stop button for 10 seconds with
2. Make sure the parking brake is applied.
the Start/Stop button in the ACC position.
3. Make sure the gear is in P (Park).
Pressing the brake pedal many times
4. Depress the brake pedal.
while “
” indicator light is off will
5. Press the Start/Stop button. If the
increase the possibility of discharging the
vehicle starts, the "
" indicator will
12V battery.
come on.
For your safety always depress the brake
pedal before starting the vehicle.
6-6
6
Turning Off the Vehicle
Information
1. Stop the vehicle and depress the brake
Virtual Engine Sound System (VESS)
pedal fully.
VESS generates virtual engine sound to
2. Shift to P (Park).
make pedestrians to aware. VESS
3. Press the Start/Stop button to the OFF
operates when the vehicle can be driven.
position and apply the parking brake.
When the vehicle in P(parking) gear
status, VESS doesn't work.
4. Make sure the ‘
’ indicator light is off
in the instrument cluster.
CAUTION
CAUTION
If the "
" indicator light on the
• Because the vehicle doesn't make the
instrument cluster is still on, the vehicle is
engine sound, pay attention to the
not turned off and can move when the
surrounding environment and drive
gear is in any position except P (Park).
carefully.
• After parking or waiting for a traffic
light, please check around(children,
obstacle, etc.) before departure.
• When reversing, check directly behind
you before driving. Pedestrians may not
be able to recognize vehicle sounds.
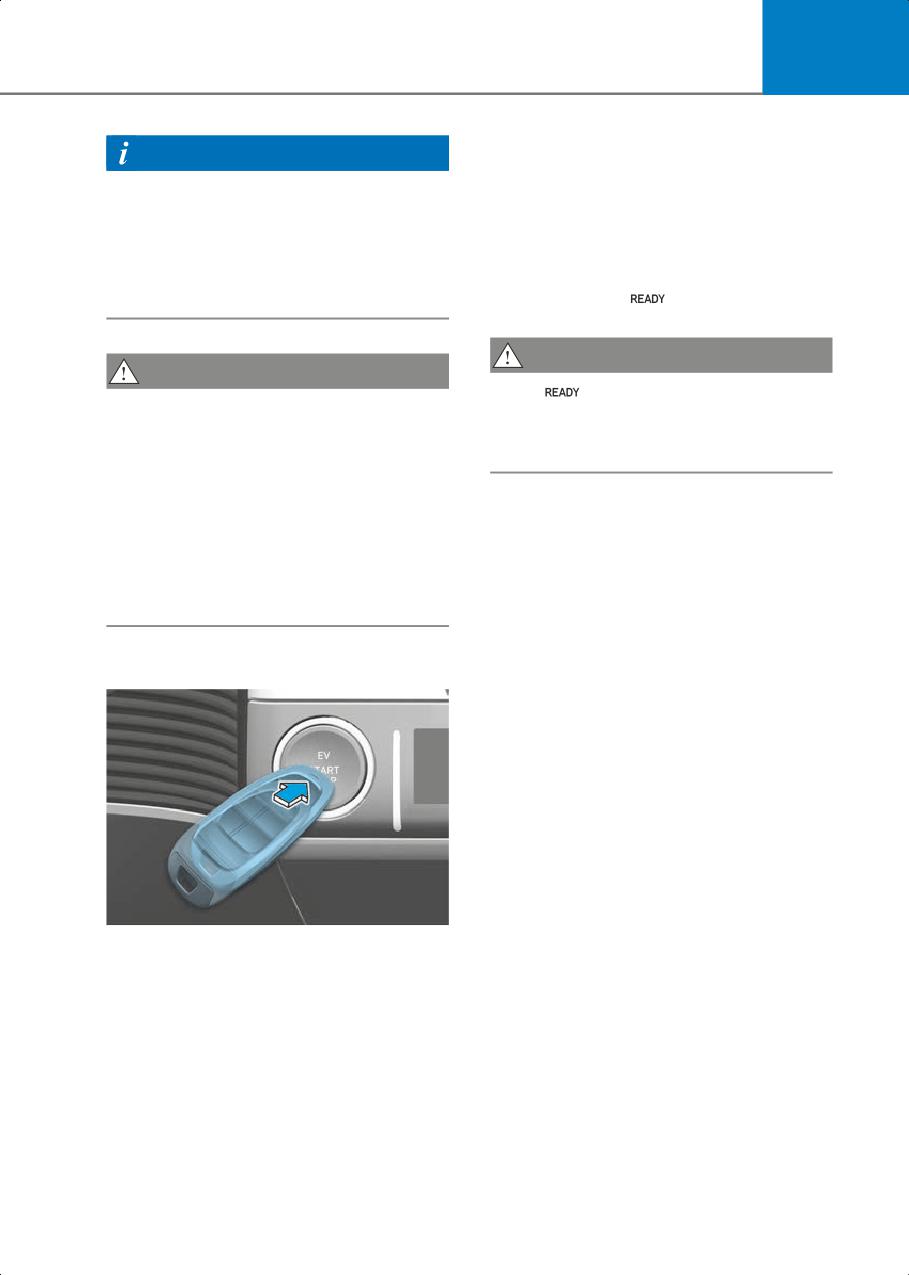
Emergency starting
ONE1061005
If the smart key battery is weak or the
smart key does not work correctly, you
can start the vehicle by pressing the
Start/Stop button with the smart key in
the direction of the picture above.
6-7
Driving Your Vehicle
Type D
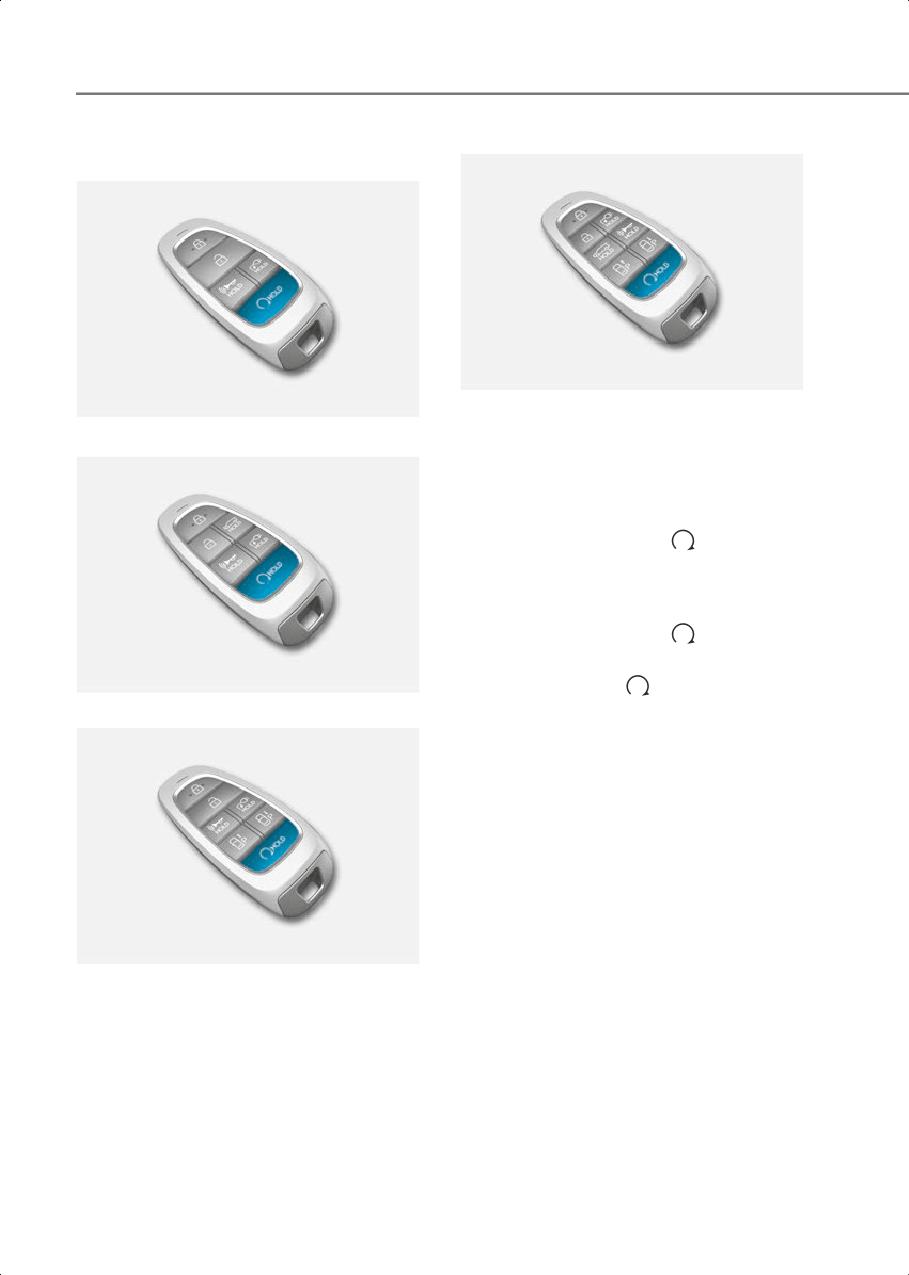
Remote Start
Type A
ONE1061007
You can start the vehicle using the
ONE1061047N
Remote Start button of the smart key.
Type B
To start the vehicle remotely:
1. Press the door lock button within 32
feet (10 m) from the vehicle.
2. Press the remote start (
) button for
over 2 seconds within 4 seconds after
locking the doors.
3. To turn off the remote start function,
press the remote start (
) button
once.
• The remote start (
) button may not
ONE1061006
operate if the smart key is not within 32
Type C
feet (10 m).
• The vehicle will not remotely start if the
hood or liftgate is opened.
• The vehicle must be in P (Park) for the
remote start function to start.
• The vehicle displays “Smart Key must
be present to keep the vehicle
running“ if you get on the vehicle
without a registered smart key.
• The vehicle turns off if you do not get in
ONE1061048N
the vehicle within 10 minutes after
remotely starting the vehicle.
6-8
6
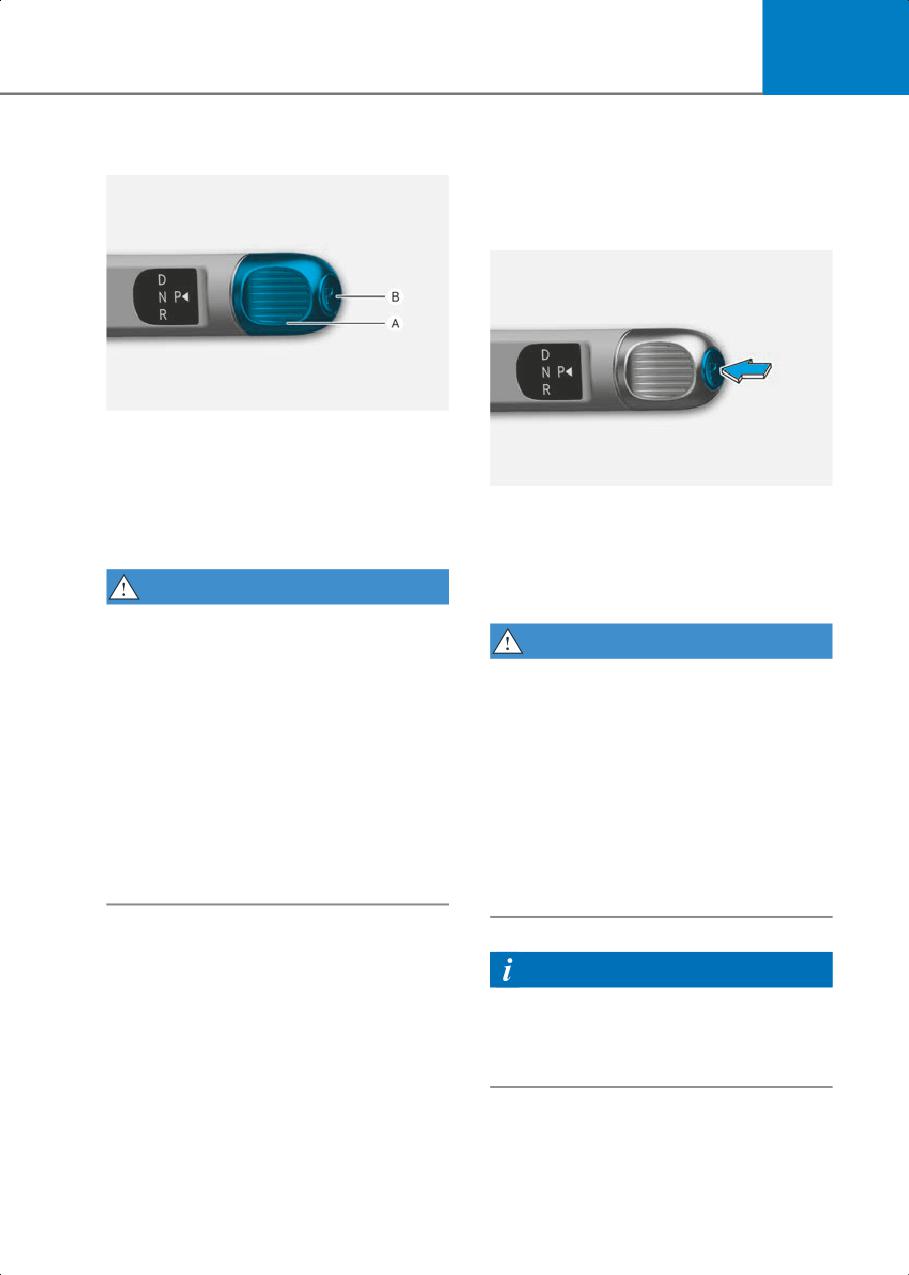
Rotary shifter/ Rotary gear shift dial
Shift By Wire
P (Park)
Always come to a complete stop before
shifting into P (Park).
ONE1061008
[A] : Rotary gear shift dial
[B] : P button
ONE1061001
Rotary Shifter Operation
To shift the gear to P (Park), press the P
To change the gear, depress the brake
button while depressing the brake pedal.
pedal and rotate the rotary gear shift dial.
If you turn the vehicle off in R (Reverse), N
(Neutral) or D (Drive), the gear will
WARNING
automatically shift to P (Park).
To reduce the risk of serious injury or
death:
WARNING
• ALWAYS check the surrounding areas
• Shifting into P (Park) while the vehicle is
near your vehicle for people, especially
in motion may cause you to lose control
children, before shifting a vehicle into D
of the vehicle.
(Drive) or R (Reverse).
• After the vehicle has stopped, always
• Before leaving the driver's seat, always
make sure the vehicle is in P (Park),
make sure the vehicle is shifted to the P
apply the parking brake, and turn the
(Park) position, then apply the parking
vehicle off.
brake, then press the Start/Stop button
• When parking on an incline, shift the
to the OFF position. Unexpected and
gear to P (Park) and apply the parking
sudden vehicle movement can occur if
brake to prevent the vehicle from
these precautions are not followed.
rolling downhill.
Information
For vehicles equipped with the Electronic
Parking Brake (EPB), EPB applies
automatically when the gear is shifted to
P (Park).
6-9
Driving Your Vehicle
Automatic gear shift to P (Park)
R (Reverse)
The gear is shifted to P (Park)
Use this position to drive the vehicle
automatically for safety reasons under
rearward.
the following conditions:
• When the vehicle is turned off with the
gear in R (Reverse), D (Drive) or N
(Neutral).
• When the driver’s door is open with the
vehicle running, the gear in R (Reverse),
D (Drive) or N (Neutral), and the vehicle
at a standstill.
• When the driver’s door is open with the
gear in N (Neutral) and the vehicle is
off.
ONE1061053
In situations the gear must be in P (Park),
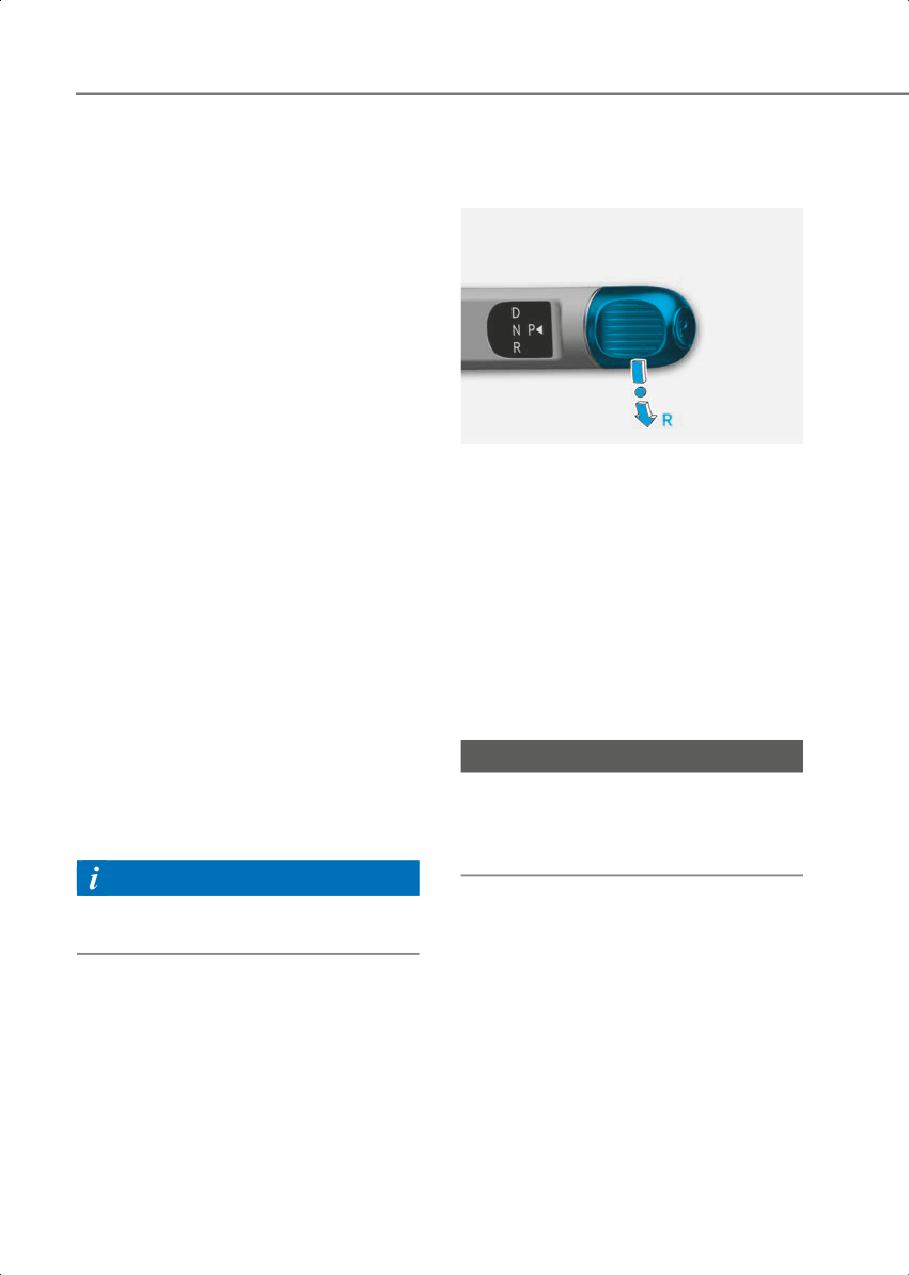
To shift the gear to R (Reverse), rotate the
always check if the gear is shifted to P
rotary gear shift dial to R (Reverse) while
(Park) by checking the instrument cluster.
depressing the brake pedal.
Shift-lock system
When the vehicle is stopped in the R
For your safety, your vehicle has a
(Reverse) position, if you open the
shift-lock system which prevents shifting
driver’s door, the gear will automatically
the gear from P (Park) or N (Neutral) into
shift to P (Park).
R (Reverse) or D (Drive) unless the brake
However, if the vehicle is in motion, the
pedal is depressed.
gear may not automatically shift to P
To shift from P (Park) or N (Neutral) into R
(Park) to prevent gear damage.
(Reverse) or D (Drive), from R (Reverse)
The direction of the rotary gear shift dial is
into D (Drive) or from D (Drive) into R
the same as that of the wheel.
(Reverse):
NOTICE
1. Depress and hold the brake pedal.
2. Start the vehicle.
Always come to a complete stop before
shifting into or out of R (Reverse); you
3. Shift the gear in R (Reverse) or D
may damage the gear if you shift into R
(Drive).
(Reverse) while the vehicle is in motion.
Information
The gear cannot be shifted while the
charging cable is connected.
6-10
6
N (Neutral)
To stay in N (Neutral) when vehicle is
OFF
ONE1061054
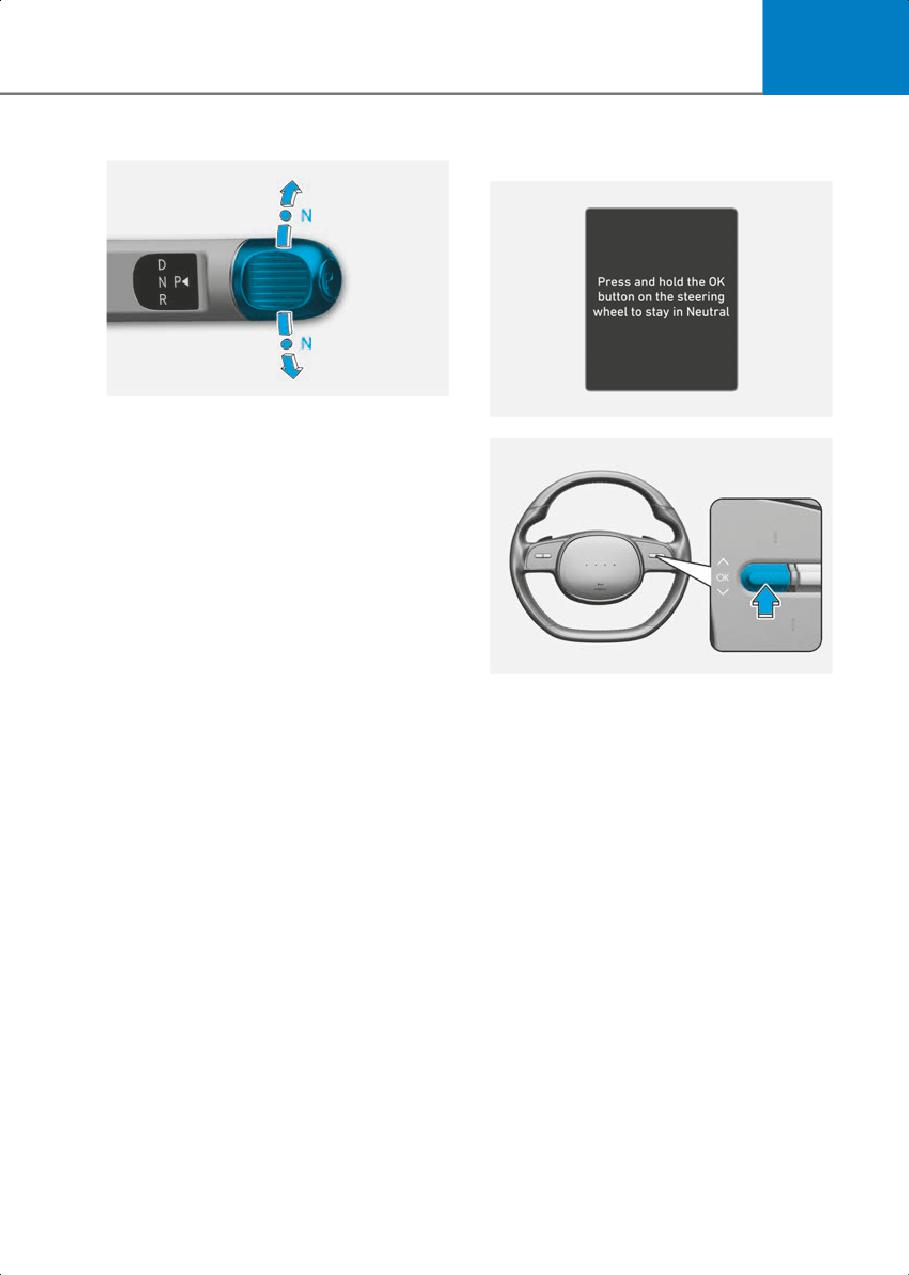
To shift the gear to N (Neutral), rotate the
ONE1061026L
rotary gear shift dial to N (Neutral) while
depressing the brake pedal.
Always depress the brake pedal when you
are shifting from N (Neutral) to another
gear.
If you turn the vehicle off in N (Neutral),
the gear will automatically shift to P
(Park).
However, if you need to stay in N
(Neutral) with the vehicle off, refer to “To
stay in N (Neutral) when vehicle is OFF” in
ONE1061011
the following description.
If you want to stay in N (Neutral) after the
To rotate the rotary gear shift dial to N
vehicle is in the ACC state, do the
(Neutral), rotate the rotary gear shift dial
following.
once clockwise or counterclockwise.
1. Turn off Auto Hold and release
If the current gear position is in D (Drive),
Electronic Parking Brake when the
rotate the rotary gear shift dial
vehicle is running.
counterclockwise. When the gear
2. Rotate the shift to N (neutral) while
position is in R (Reverse), rotate the rotary
depressing the brake pedal.
gear shift dial clockwise.
3. When you take your foot off the brake
pedal, the message ‘Press and hold the
OK button on the steering wheel to stay
in Neutral’ will appear on the cluster
display.
4. Press and hold the OK button on the
steering wheel for more than 1 second.
5. When the message ‘Vehicle will stay in
(N). Change gear to cancel’ (or ‘N will
stay engaged when the vehicle is Off’)
will appear on the cluster display, press
the Start/Stop button while depressing
the brake pedal.
6-11
Driving Your Vehicle
However, if you open the driver’s door
D (Drive)
within 3 minutes in the ACC state, the
This is the normal driving position.
gear will automatically shift to P (Park)
The gear automatically activates the
and the Start/Stop button will change to
regenerative braking system according to
the OFF position.
the road conditions.
NOTICE
• With the gear in N (Neutral) the
Start/Stop button will be in the ACC
position. Note that the doors cannot be
locked in the ACC position or the
battery (12 V) may discharge if left in the
ACC position for a long period.
• Before entering an automatic car wash,
release the Electronic Parking Brake
(EPB) manually. If EPB is applied, it may
damage the vehicle or automatic car
ONE1061055
wash.
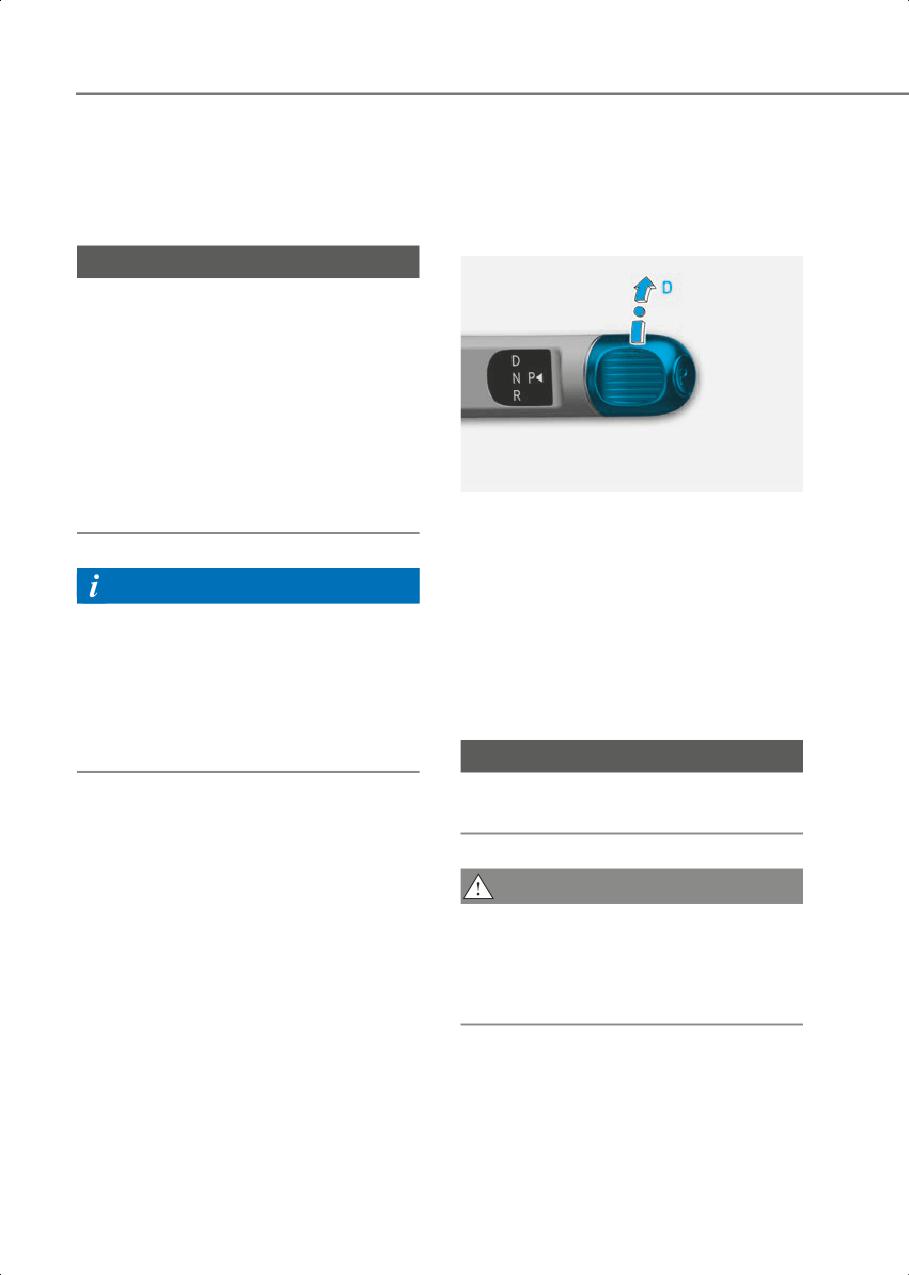
To shift the gear to D (Drive), rotate the
rotary gear shift dial to D (Drive) while
depressing the brake pedal.
Information
When the vehicle is stopped in the D
(Drive) position, if you open the driver's
When the Electronic Parking Brake (EPB)
door, the gear will automatically shift to P
is applied, press the EPB switch while
(Park).
depressing the brake pedal.
However, if the vehicle is in motion, the
The Electronic Parking Brake (EPB) must
gear may not automatically shift to P
be released manually because EPB does
(Park) to prevent gear damage.
not release automatically even though
the gear is shifted to N (Neutral).
NOTICE
Always come to a complete stop before
shifting into D (Drive).
CAUTION
When you start after stopping on a steep
incline, even if the gear is in D (Drive), if
you do not depress the accelerator or
brake pedal, the vehicle may roll
backwards, which can cause an accident.
6-12
6
When the battery (12 V) is discharged
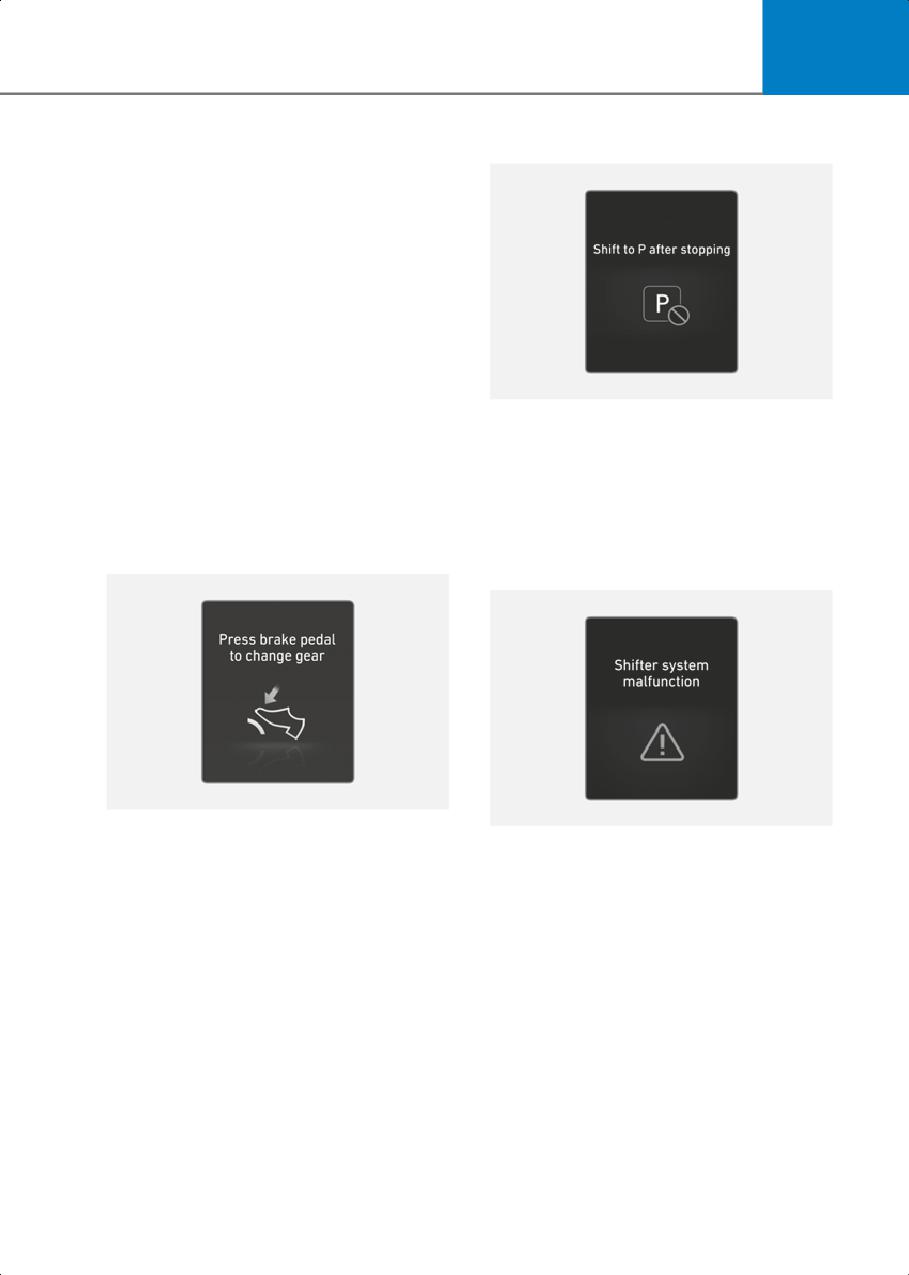
Shift to P after stopping
You cannot shift gears, when the battery
is discharged.
Jump start your vehicle (refer to “Jump
Starting (12V Battery)” in chapter 8) or
contact an authorized HYUNDAI dealer.
Parking
Always come to a complete stop and
continue to depress the brake pedal. Shift
the gear to P (Park), apply the parking
brake, and press the Start/Stop button to
OJK060053L
the OFF position. Take the Key with you
This message is displayed when the gear
when leaving the vehicle.
is shifted to P (Park) while the vehicle is
moving.
Stop the vehicle before shifting to P
Cluster Display Messages
(Park).
Press brake pedal to change gear
Shifter system malfunction
ONE1061038L
OJK060057L
This message is displayed when the brake
pedal is not depressed while shifting the
This message is displayed when the shift
gear.
gear does not properly operate in the P
(Park) position.
Depress the brake pedal and then shift
the gear.
Have the vehicle inspected by an
authorized HYUNDAI dealer.
6-13
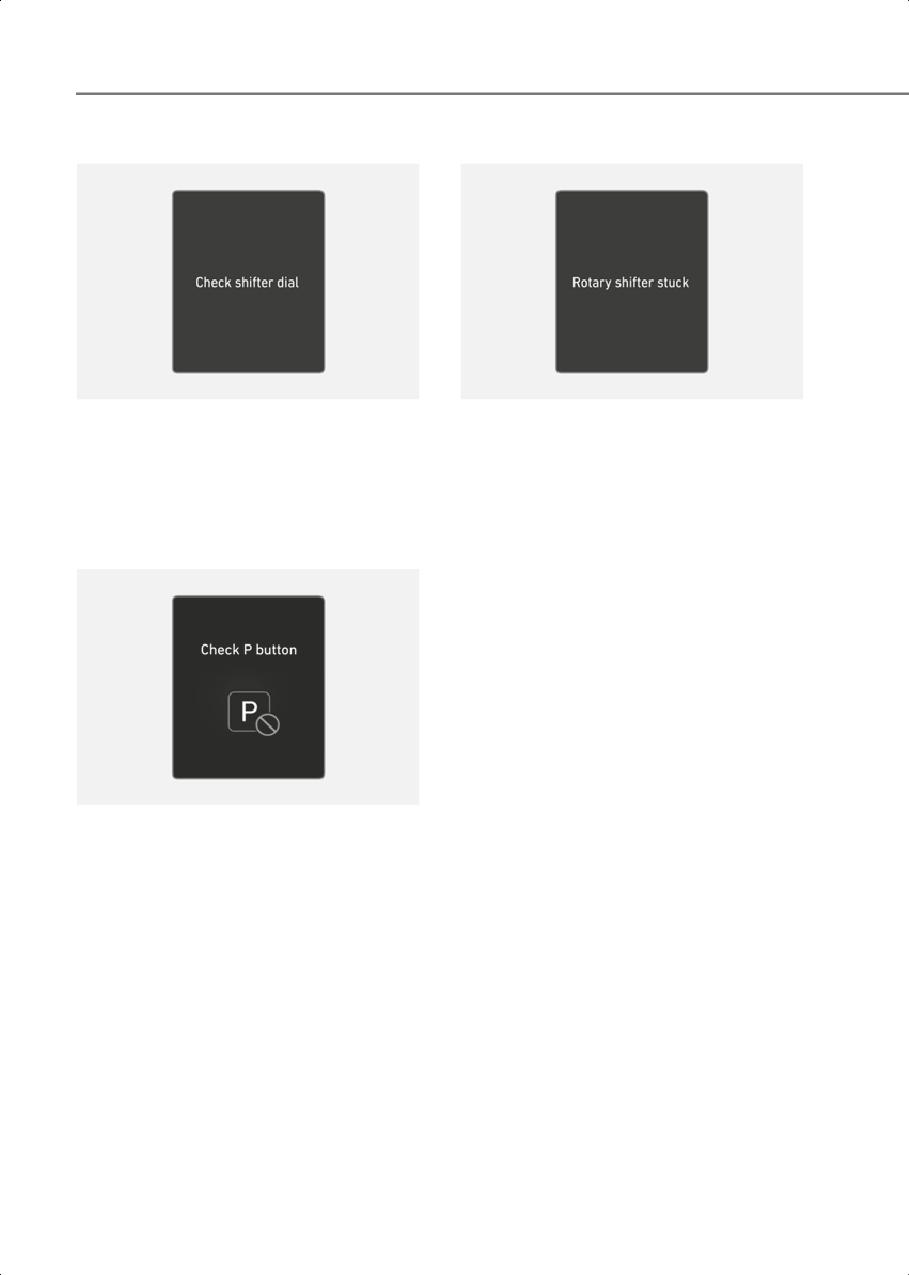
Driving Your Vehicle
Check shifter dial
Rotary shifter stuck
ONE1061029L
ONE1061030L
This message is displayed when there is a
This message is displayed when the rotary
malfunction with the rotary gear shift dial.
gear shift dial does not return back to it’s
normal position after rotating it.
Have the vehicle inspected by an
authorized HYUNDAI dealer.
Have the vehicle inspected by an
authorized HYUNDAI dealer.
Check P button
OJK060063L
This message is displayed when there is a
problem with the P button.
Have the vehicle inspected by an
authorized HYUNDAI dealer.
6-14
6
Good Driving Practices
• Optimum vehicle performance and
economy is obtained by smoothly
•
Never shift the gear from P (Park) or N
depressing and releasing the
(Neutral) to any other position with the
accelerator.
accelerator pedal depressed.
•
Never shift the gear into P (Park) when
WARNING
the vehicle is in motion.
To reduce the risk of SERIOUS INJURY or
Be sure the vehicle is completely
DEATH:
stopped before you attempt to shift
•
ALWAYS wear your seat belt. In a
into R (Reverse) or D (Drive).
collision, an unbelted occupant is
•
Do not shift the gear to N (Neutral)
significantly more likely to be seriously
when driving. If the gear is shifted to N
injured or killed than a properly belted
(Neutral) while driving. Doing so may
occupant.
increase the risk of an accident.
•
Avoid high speeds when cornering or
Also, shift the gear back to D (Drive)
turning.
while the vehicle is moving may
•
Do not make quick steering wheel
severely damage the gear.
movements, such as sharp lane
•
When driving uphill or downhill, always
changes or fast, sharp turns.
shift to D (Drive) for driving forward or
•
The risk of rollover is greatly increased
shift to R (Reverse) for driving
if you lose control of your vehicle at
rearwards. After selecting D (Drive) or R
highway speeds.
(Reverse), check the gear position
indicated on the instrument cluster
•
Loss of control often occurs if two or
before driving. If the vehicle moves in
more wheels drop off the roadway and
the opposite direction of the selected
the driver over steers to reenter the
gear, the vehicle may turn off and a
roadway.
serious accident might occur due to
•
In the event your vehicle leaves the
degraded brake performance.
roadway, do not steer sharply. Instead,
•
Do not drive with your foot resting on
slow down before pulling back into the
the brake pedal. Even light, but
travel lanes.
consistent pedal pressure can result in
•
HYUNDAI Vehicle recommends you to
the brakes overheating, brake wear and
follow all posted speed limits.
possibly even brake failure.
•
Always apply the parking brake when
leaving the vehicle. Do not depend on
placing the shift gear in P (Park) to keep
the vehicle from moving.
•
Exercise extreme caution when driving
on a slippery surface. Be especially
careful when braking, accelerating or
shifting gears. On a slippery surface, an
abrupt change in vehicle speed can
cause the drive wheels to lose traction
and may cause loss of vehicle control
resulting in an accident.
6-15
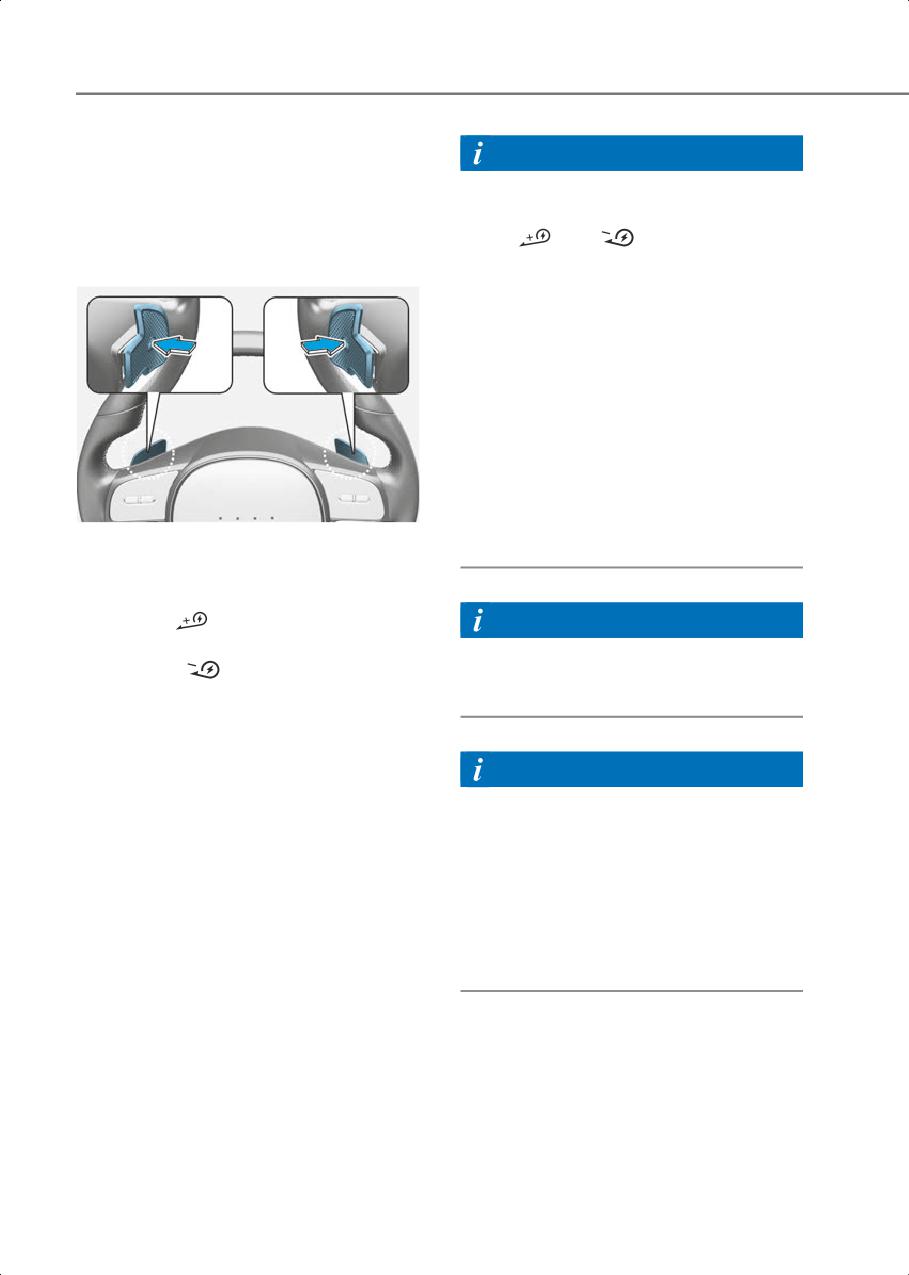
Driving Your Vehicle
Regenerative Braking
Information
System
The paddle shifter does not operate
when:
• The [
] and [
] paddle shifters are
Regenerative braking (Paddle
pulled at the same time.
shifter)
• The vehicle is decelerating by
depressing the brake pedal.
• The Cruise Control system or Smart
Cruise Control system is activated.
• Selecting 0 step of the regenerative
braking system, the brake disc cleaning
function is operated around 10 times.
While operating to clean the brake disc,
the driving distance and the
regenerative braking performance can
be reduced. After finishing, the
ONE1061014
regenerative braking performance will
The paddle shifter is used to adjust the
be restored.
regenerative braking level from 0 to 3
during decelerating.
• Left side (
): Increases regenerative
Information
braking and deceleration.
2WD Long Range vehicles default to level
• Right side (
): Decreases
3 regenerative braking whenever the
regenerative braking and deceleration.
vehicle is turned on.
• Pull and hold the left side paddle shifter
for more than 0.5 seconds and One
pedal driving function is operated,
increasing the regenerative braking. In
Information
this case, stopping the vehicle is
The regenerative braking system on 2WD
possible by keep on pulling the paddle
Long Range vehicles defaults to Level 3
shifter.
(L3) in order to maximize vehicle’s all
Refer to the following pages on “One
electric range. This setting will default to
Pedal Driving”.
Level 3 (L3) whenever the vehicle is
turned ON. Driver is able to adjust the
• Pull and hold the right side paddle
regenerative system to their preference
shifter for over 1 second to turn on and
after each vehicle start, but it will only
off the automatic change of the
remain until the vehicle is shut down.
regenerative braking.
Refer to the following pages on “Smart
Recuperation System”.
6-16
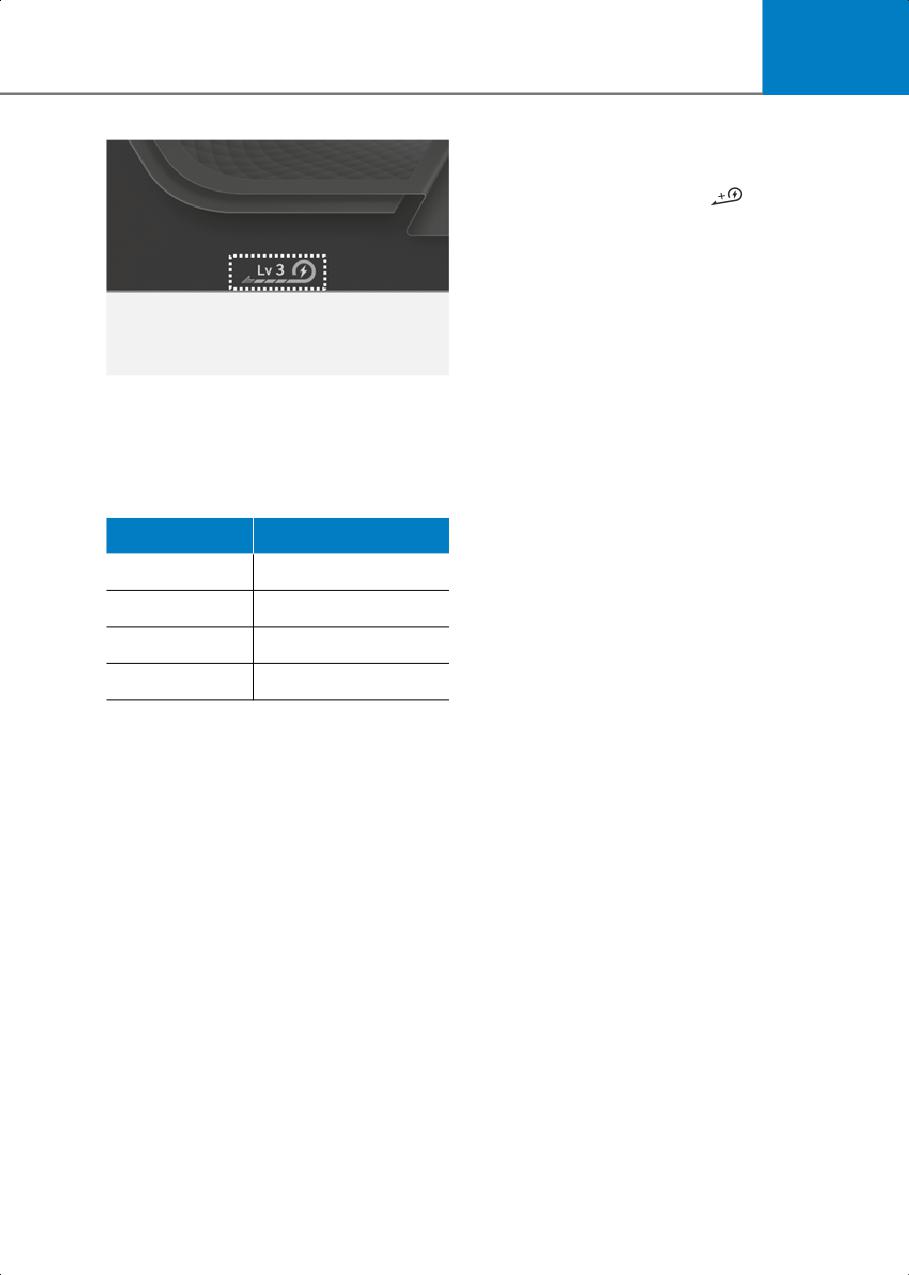
6
One Pedal Driving
The driver can stop the vehicle by pulling
the left side paddle shifter
To operate:
• Pull and hold the left side paddle shifter
while coasting.
• When the vehicle speed is above 1.8
mph (3 km/h), release the paddle
shifter to return to the preset
regenerative braking stage.
ONE1061036
The selected regenerative braking level is
• When the vehicle speed is below 1.8
displayed on the instrument cluster.
mph (3 km/h), the function maintains
control to stop the vehicle even though
Initial setting of the regenerative braking
the paddle shifter is released.
level and adjustable range vary according
to the selected Drive mode.
• While the One pedal driving is
operating, the driver can control the
Drive mode
Adjustable Range
vehicle stopping position using the
accelerator pedal.
SNOW
0 to 1
ECO
0 to 3
Limitations
The vehicle may move even if one pedal
NORMAL
0 to 3
driving is normally operated. Therefore,
SPORT
0 to 3
the driver should be careful to stop the
vehicle by this function under
For more details, refer to “Drive Mode
circumstances as follows:
Integrated Control System (2WD)” in this
• Driving on icy, snowy, wet, sandy,
chapter.
muddy roads, manhole/pit hole
surfaces
• Wheels not aligned
• Conditions in which wheel slip or spin
occurs
• On heavy loading
• By leaning left of right
• Under bad tire wear
• Driving uphill or downhill
• Driving where the slope starts or ends
• By repeating stop and go on ramp
6-17

Driving Your Vehicle
Automatic engagement of EPB
i-Pedal
After the vehicle is stopped by the One
i-Pedal is controlled by acceleration
Pedal Driving function, EPB is
pedal. i-Pedal provides vehicle speed
automatically engaged when any of these
control (acceleration/deceleration,
conditions occur:
stopping) without manually controlling
• The driver’s seatbelt is unfastened and
the paddle shifter.
the driver’s door is open.
To operate:
• The hood is open.
• Pull the left side paddle shifter at level 3
• The liftgate is open.
regenerative braking system.
•
5 minutes have passed after the vehicle
• During the activation of i-Pedal, the
has stopped.
vehicle is stopped when the vehicle
speed is less than 1 mph (3 km/h) even
• The system operation is limited due to
if the brake pedal is not pressed.
other reasons.
• When you press the accelerator pedal
WARNING
at the same time during one-pedal
driving by pulling the left paddle shift
• Stopping the vehicle may not be
lever, the vehicle cannot be stopped.
possible according to the vehicle and
road conditions. Pay attention to the
CAUTION
road condition ahead and apply the
brake if necessary.
When the vehicle is stopped or parked by
i-Pedal on the steep hills, be sure to
• Please refrain to use the one pedal
depress the brake pedal.
driving function with the road
conditions are bad such as being wet,
iced or covered with snow.
To deactivate:
• The i-Pedal is deactivated when the
driver turns off the vehicle. When the
CAUTION
vehicle is turned on, the regenerative
braking is set to be on level 3.
When the vehicle is stopped or parked by
One Pedal Driving on the steep hills, be
• The i-Pedal is turned off and the
sure to depress the brake pedal.
regenerative braking changes to level 3
when the gear is shifted to R.
6-18
6
Limitations
Smart Recuperation
The vehicle may move even if one pedal
System
driving is normally operated. Therefore,
the driver should be careful to stop the
The Smart Recuperation System controls
vehicle by this function under
the regenerative braking automatically
circumstances as follows:
according to the road gradient and
• Driving on icy, snowy, wet, sandy,
driving condition of the vehicle in front.
muddy roads, manhole/pit hole
The system minimizes the unnecessary
surfaces
operation of the brake and acceleration
• Wheels not aligned
pedal, improving the electric energy
efficiency and assisting the driver.
• Conditions in which wheel slip or spin
occurs
• On heavy loading
Smart Recuperation System
• By leaning left of right
Setting
• Under bad tire wear
Pull and hold the right side paddle shifter
for over 1 second to turn on and off the
• Driving uphill or downhill
automatic change of the regenerative
• Driving where the slope starts or ends
braking.
• By repeating stop and go on ramp
6-19
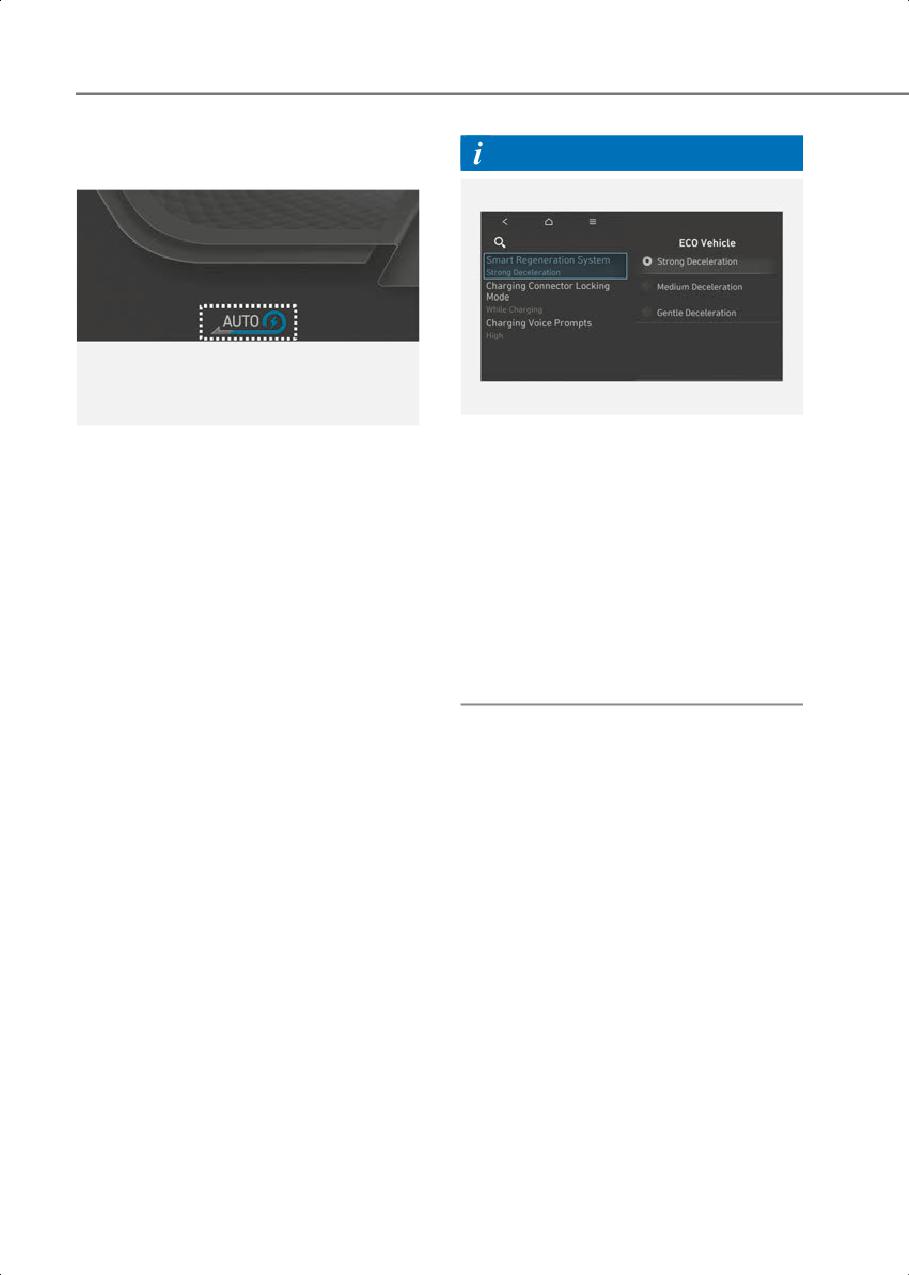
Driving Your Vehicle
To Activate Smart
Information
Recuperation System
ONE1061044L
ONE1041017
• The regenerative braking level can be
When Smart Recuperation System is On
adjusted based on the driver’s
in the infotainment system, ‘AUTO’ for the
deceleration style
regenerative braking level is displayed on
(strong/medium/gentle)
the instrument cluster. The regenerative
braking level is controlled automatically
To adjust the level, select Settings >
when vehicle speed is above 6 mph (10
ECO vehicle > Smart Regeneration
km/h) and one of the condition below is
System in the infotainment system.
met.
• The infotainment system may change
• The road gradient changes
after software updates. For more
information, refer to the user’s manual
• Distance from the vehicle ahead
provided in the infotainment system
reduces or increases
and the quick reference guide.
• Speed of the vehicle ahead reduces or
increases
6-20
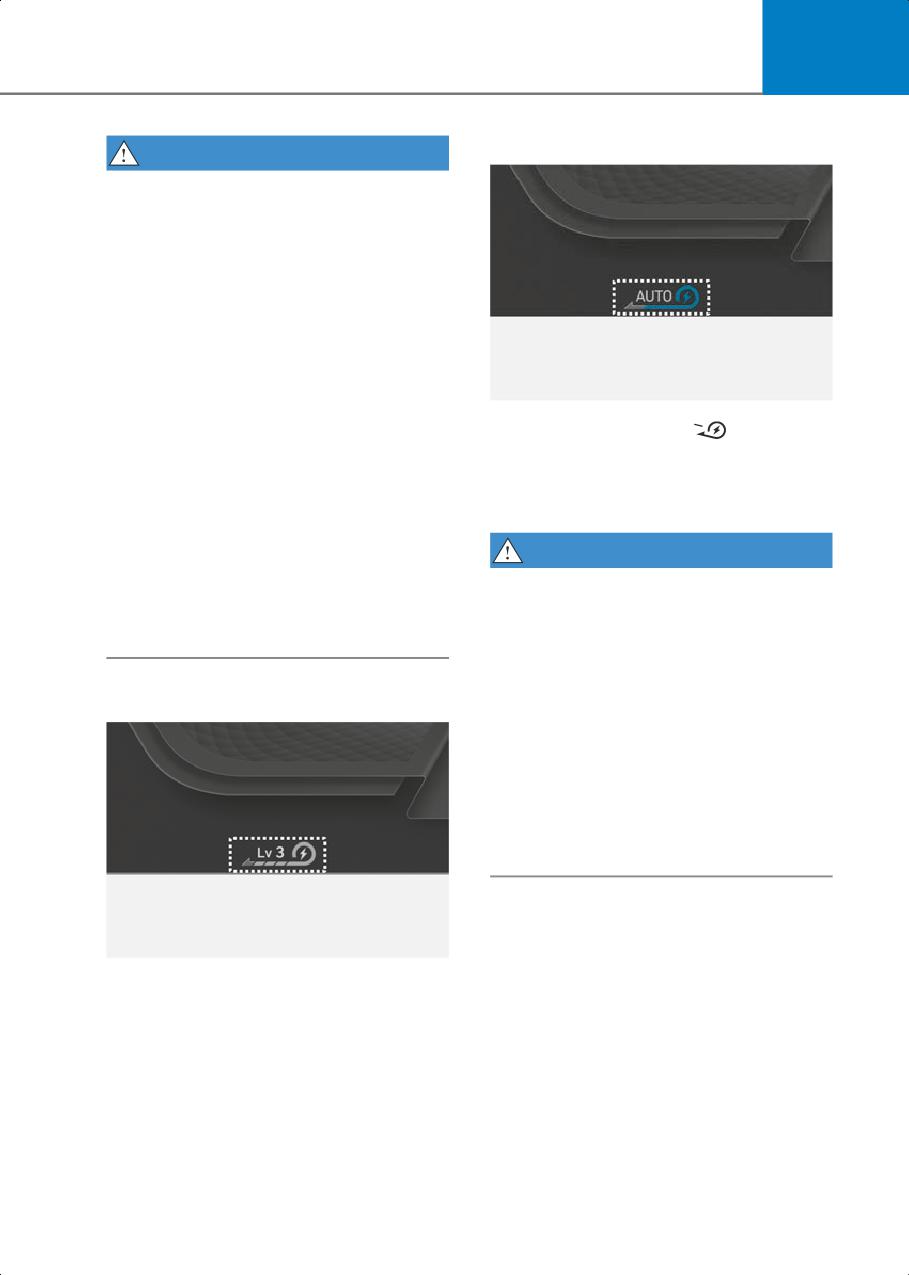
6
How to Operate
WARNING
When vehicle speed is under 6 mph (10
km/h), the Smart Recuperation System is
canceled. The driver must adjust the
vehicle speed by depressing the
accelerator or brake pedal according to
the road condition ahead and driving
condition.
Smart Recuperation System relies on
front view camera in the vehicle. Foreign
substances on the front view camera may
cause the malfunction of Smart
ONE1041017
Recuperation System. Be sure to maintain
Pulling the paddle-shift (
) for 1 or
clear view for the front view camera.
more seconds, the smart recuperation
The Smart Recuperation System will not
system will operate. The indicator of the
operate when the Forward
regenerative braking will be changed to
Collision-Avoidance Assist (FCA) system
'AUTO' from the level indicator.
warning light illuminates on the
instrument cluster. The driver must adjust
WARNING
the vehicle speed by depressing the
The Smart Recuperation System which
accelerator or brake pedal according to
automatically controls the regenerative
the road condition ahead and driving
braking level when coasting is only a
condition.
supplemental system for the driver's
convenience. The system cannot
completely stop the vehicle nor avoid all
Ready to Operate
collisions. The brake control may be
insufficient depending on the speed of
the vehicle in front and when the vehicle
in front suddenly stops, a vehicle cuts in
suddenly and there is a steep slope.
Always look ahead cautiously to prevent
unexpected and sudden situations from
occurring.
ONE1061036
Regenerative braking level is displayed on
the instrument cluster.
6-21
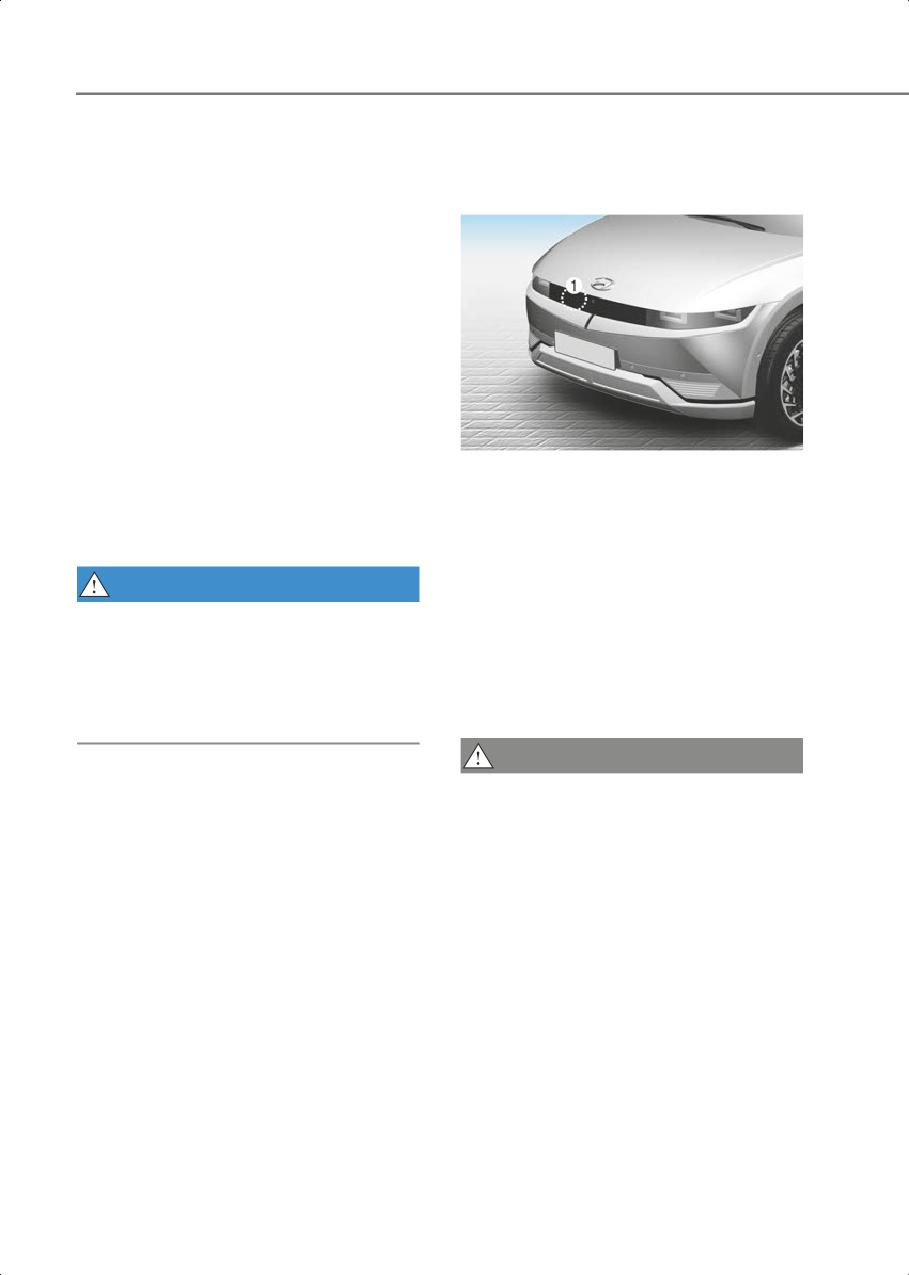
Driving Your Vehicle
Smart Recuperation System
Vehicle-to-Vehicle Distance
Will Be Temporarily canceled
Recognition Sensor (Front
When:
Radar)
• Canceled manually
Pulling and holding the right side
paddle shifter for more than 1 second.
The Smart Recuperation System turns
off temporarily and “AUTO” will be
replaced with regenerative braking
level indicator.
• Canceled automatically
- The vehicle is shifted to N (Neutral), R
(Reverse) or P (Park).
- Cruise Control system (including
ONE1072018N
Smart Cruise Control system) is in
(1)
: Front radar
activation.
For detail location of sensor, refer to the
- The ESC (Electronic Stability Control)
picture above.
or ABS is operating.
In order for the Smart Recuperation
System to operate properly, always make
WARNING
sure the radar sensor cover is clean and
free of dirt, snow, and debris. Dirt, snow,
When the Smart Recuperation System is
or foreign substances on the lens may
canceled automatically, adjust the
adversely affect the sensing performance
vehicle speed directly by depressing the
of the sensor. In this case, the system
accelerator or brake pedal according to
operation may stop temporarily and not
the road condition ahead and driving
operate normally.
condition.
CAUTION
To Resume Smart
• Do not apply license plate frame or
Recuperation System
foreign objects such as a bumper
sticker or a bumper guard near the
To re-activate the Smart Recuperation
radar sensor. Doing so may adversely
System while driving, pull and hold the
affect the sensing performance of the
right side paddle shifter for more than 1
radar.
second again. Then, AUTO for the
regenerative braking level will appear on
• Always keep the radar sensor and lens
the instrument cluster.
cover clean and free of dirt and debris.
• Use only a soft cloth to wash the
vehicle. Do not spray pressurized water
directly on the sensor or sensor cover.
6-22
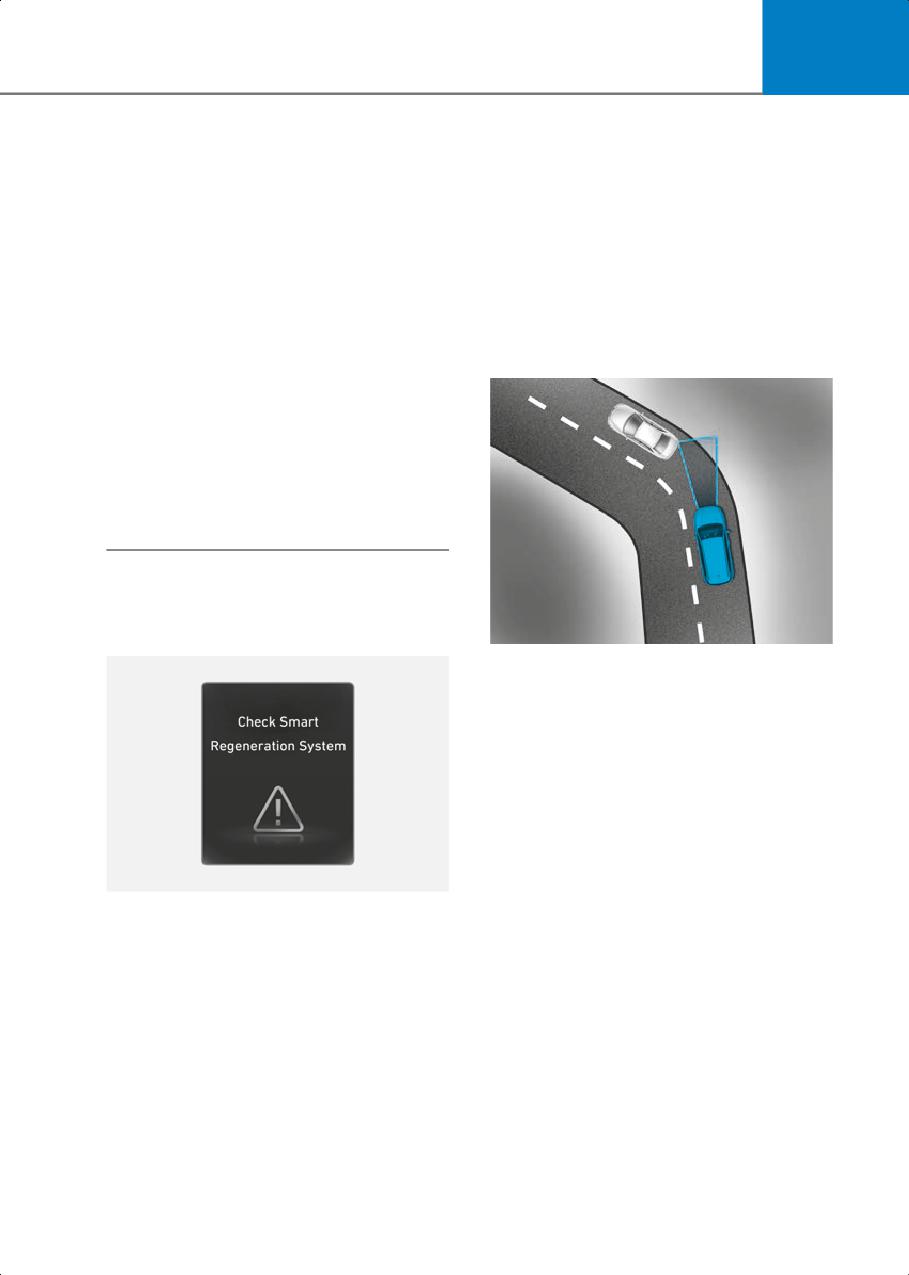
6
• Be careful not to apply unnecessary
Limitations of the System
force on the radar sensor or sensor
The Smart Recuperation System may not
cover. If the sensor is forcibly moved
operate properly in certain situations
out of proper alignment, the Smart
when the driving condition is beyond the
Recuperation System may not operate
performance of the front radar sensor.
correctly. In this case, a warning
message may not be displayed. Have
Driver's attention is required in such
the vehicle inspected by an authorized
cases when the system does not react
HYUNDAI dealer.
properly or operate unintentionally.
• If the front bumper becomes damaged
in the area around the radar sensor, the
On curves
Smart Recuperation System may not
operate properly. Have the vehicle
authorized HYUNDAI dealer.
• Use only genuine parts or the
equivalent specified for your vehicle to
repair or replace a damaged sensor or
sensor cover. Do not apply paint to the
sensor cover.
System Malfunction
Check smart recuperation system
OTM058117
When coasting on the curve, the system
may not detect the vehicle in your lane
and the regenerative braking level will
reduce automatically, making you feel
that the vehicle is accelerating.
Also, if the system suddenly recognizes
the vehicle in front, the regenerative
braking level will increase automatically,
making you feel that the vehicle is
decelerating.
OOSEV040521L
The driver must maintain a safe braking
distance, and if necessary, depress the
The message will appear when the
brake pedal to reduce your driving speed
system is not functioning normally. The
in order to maintain a safe distance.
system will be canceled and the word
'AUTO' on the cluster display will
disappear and instead display
regenerative braking level. Check for
foreign substances on the front radar.
Remove any dirt, snow, or foreign
material that could interfere with the
radar sensors. If the system still does not
operate normally, take your vehicle to an
authorized HYUNDAI dealer and have the
system checked.
6-23
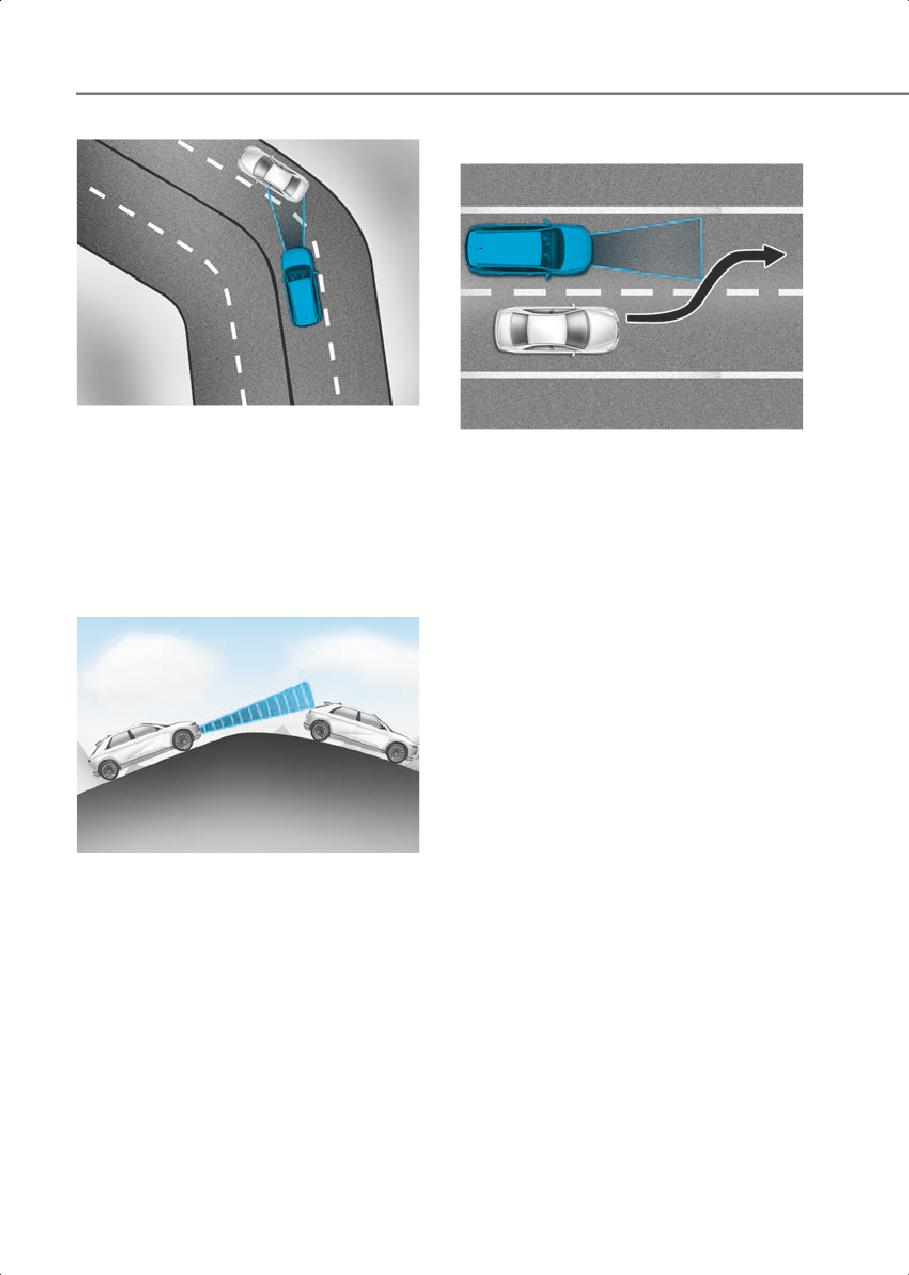
Driving Your Vehicle
Lane changing
OTM058073
Your vehicle speed can be reduced due to
OTM058074
a vehicle in the adjacent lane.
• A vehicle which moves into your lane
Apply the accelerator pedal and select the
from an adjacent lane cannot be
appropriate speed. Check to be sure that
recognized by the sensor until it is in the
the road conditions permit safe operation
sensor's detection range.
of the Smart Recuperation System.
• The radar may not detect immediately
when a vehicle cuts in suddenly. Always
pay attention to the traffic, road and
On inclines
driving conditions.
ONE1071209
When coasting on an uphill or downhill,
the system may not detect the vehicle in
your lane and the regenerative braking
level will reduce automatically, making
you feel that the vehicle is accelerating.
Also, if the system suddenly recognizes
the vehicle in front, the regenerative
braking level will increase automatically,
making you feel that the vehicle is
decelerating.
The driver must maintain a safe braking
distance, and if necessary, depress the
brake pedal to reduce your driving speed
in order to maintain a safe distance.
6-24
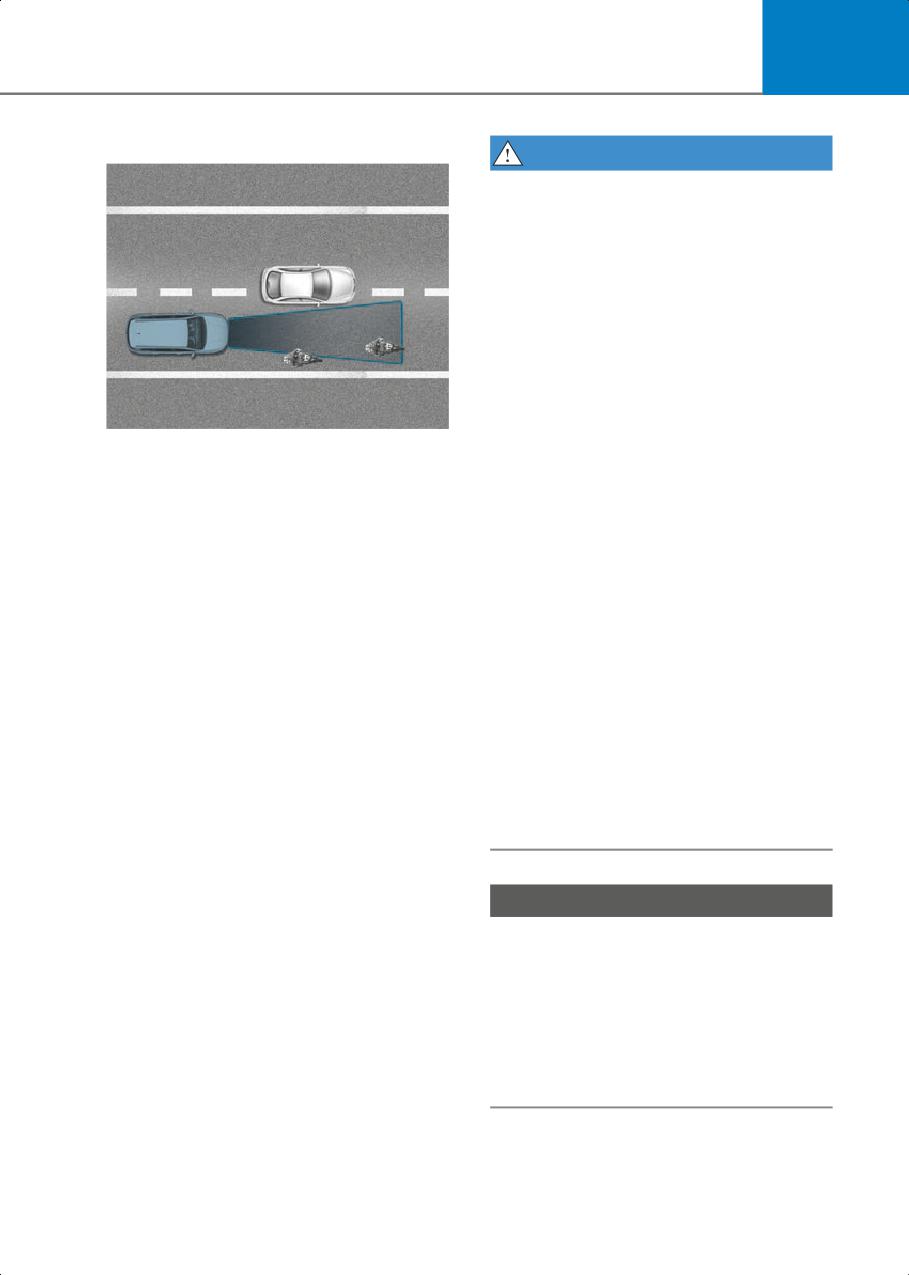
6
Vehicle recognition
WARNING
When using the Smart Recuperation
System take the following precautions:
•
If an emergency stop is necessary, you
must apply the brakes.
•
Keep a safe distance according to road
conditions and vehicle speed. If the
vehicle to vehicle distance is too close
during a high-speed driving, a serious
collision may result.
•
Always maintain sufficient braking
distance and decelerate your vehicle by
OTM058128
applying the brakes if necessary.
Some vehicles in your lane cannot be
•
The Smart Recuperation System cannot
recognized by the sensor:
recognize a stopped vehicle,
• Narrow vehicles such as motorcycles or
pedestrians or an oncoming vehicle.
bicycles
Always look ahead cautiously to
prevent unexpected and sudden
• Vehicles offset to one side
situations from occurring.
• Slow-moving vehicles or
•
Vehicles moving in front of you with a
sudden-decelerating vehicles
frequent lane changes may cause a
• Stopped vehicles (When the vehicle
delay in the system's reaction or may
ahead drives away, the system may not
cause the system to react to a vehicle
detect a stopped vehicle.)
actually in an adjacent lane. Always
• Vehicles with small rear profile such as
drive cautiously to prevent unexpected
trailers with no loads
and sudden situations from occurring.
A vehicle ahead cannot be recognized
•
The Smart Recuperation System may
correctly by the sensor if any of following
not recognize complex driving
occurs:
situations so always pay attention to
driving conditions and control your
• When the vehicle is pointing upwards
vehicle speed.
due to overloading in the luggage
compartment.
• While the steering wheel is operating.
NOTICE
• When driving to one side of the lane.
• When driving on narrow lanes or on
The Smart Recuperation System may not
curves.
operate temporarily due to:
• Apply the brake or accelerator pedal if
• Electrical interference
necessary.
• Modifying the suspension
• Differences of tire abrasion or tire
pressure
• Installing different type of tires
6-25

Driving Your Vehicle
• When descending down a long or steep
Braking System
hill, use the paddle shifter to increase
the regeneration braking level in order
to decrease your speed without using
Power-Assist Brakes
the brake pedal excessively. Applying
Your vehicle has power-assisted brakes
the brakes continuously will cause the
that adjust automatically through normal
brakes to overheat and could result in a
usage.
temporary loss of braking performance.
In the event of a vehicle power failure, the
• Wet brakes may impair the vehicle's
power assist for the brakes will not work.
ability to safely decelerate. Because
You can still stop your vehicle, but it will
wet brakes increase braking distance
require greater force and increased pedal
and cause noise troubles, select 0 step
travel than normal. The stopping
of the regenerative braking system and
distance, however, will be longer than
depress the brake pedal around 10
with power brakes.
times, with keeping the safe distance
from other vehicles, lightly in order to
Information
dry the braking system. Such
procedure may decrease the driving
• When the brake pedal is depressed
distance by restraining the
under certain driving conditions or
regenerative braking system, which is
weather conditions, you may
not a system malfunction. Inspect the
temporarily hear a noise. This is normal
braking system after car wash or
and does not indicate a problem with
driving over wet road conditions.
your brakes.
• While driving on a road with deicing
chemicals, brake noise or abnormal tire
wear may occur due to deicing
NOTICE
chemicals. In a safe traffic condition,
• Do not continue depressing the brake
additionally apply the brakes to remove
pedal if the "
" indicator is OFF. The
deicing chemicals on the brake discs
battery may be discharged.
and pads.
• Noise and vibration generated during
braking is normal.
• Under normal operation, electric brake
WARNING
pump noise and motor vibration may
Take the following precautions:
occur temporarily in below cases.
• Do not drive with your foot resting on
- When the pedal is depressed
the brake pedal. This will create
suddenly.
abnormal high brake temperatures,
- When the pedal is repeatedly
excessive brake lining and pad wear,
depressed in short intervals.
and increased stopping distances. So
- When the ABS function is activated
increase the regeneration braking level
while braking.
with the left paddle shift lever to
decrease the speed.
6-26
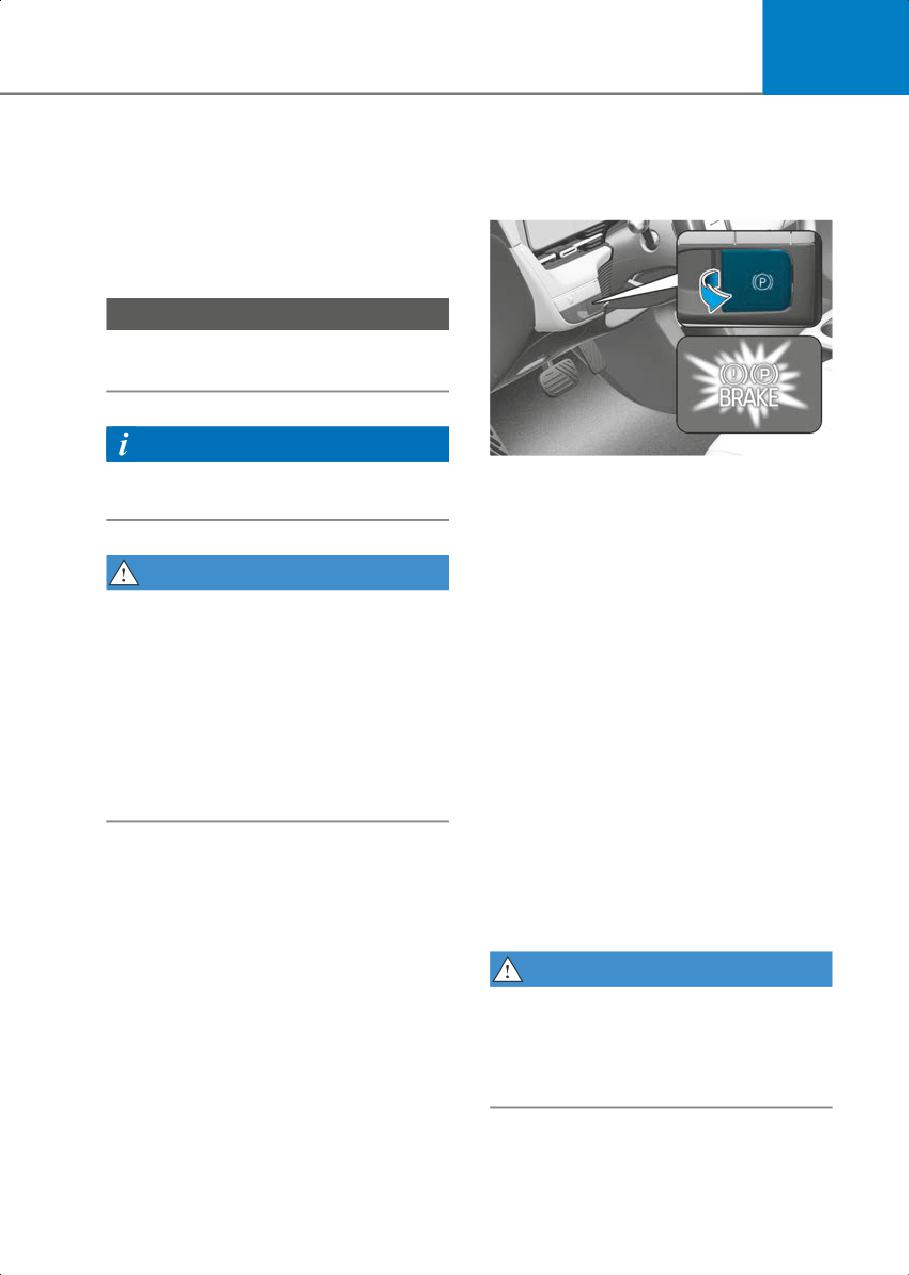
6
Disc Brakes Wear Indicator
Electronic Parking Brake (EPB)
When your brake pads are worn and new
pads are required, you will hear a high
Applying the parking brake
pitched warning sound from your front or
rear brakes. You may hear this sound
come and go or it may occur whenever
you depress the brake pedal.
NOTICE
To avoid costly brake repairs, do not
continue to drive with worn brake pads.
Information
ONE1061015
Always replace brake pads as complete
front or rear axle sets.
To apply EPB (Electronic Parking Brake):
1. Depress and hold the brake pedal.
2. Pull up the EPB switch.
WARNING
Make sure the Parking Brake warning light
comes on.
Frequent braking may deform
components and worn the disc brake
EPB (Electronic Parking Brake) may be
causing vibration when braking. Observe
automatically applied when:
the speed limit to prevent brake damage
from excessive braking.
• Requested by other systems
Brake wear, noise, vibration from
• The driver turns the vehicle off while
excessive braking or deformation of the
Auto Hold is operating.
brakes caused by repeatedly braking in
high speed, racing on tracks, etc. can be
Emergency braking
excluded from warranty coverage.
If there is a problem with the brake pedal
while driving, emergency braking is
possible by pulling up and holding the
EPB switch. Braking is possible only while
you are holding the EPB switch. However,
braking distance will be longer than
normal.
WARNING
To reduce the risk of SERIOUS INJURY or
DEATH, do not operate the EPB while the
vehicle is moving except in an emergency
situation. It could damage the brake
system and lead to an accident.
6-27
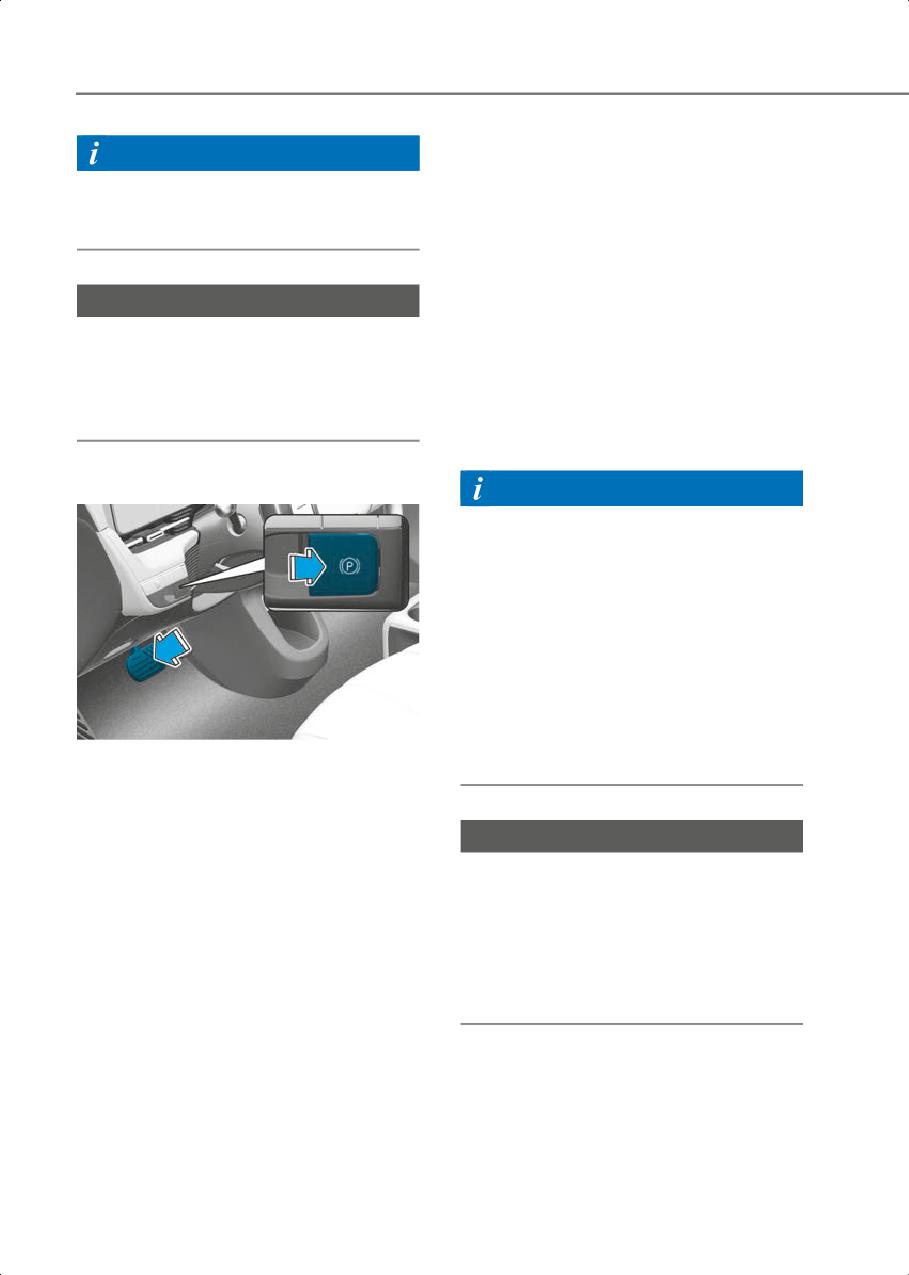
Driving Your Vehicle
• Gear in N (Neutral)
Information
With the vehicle running depress the
During emergency braking, the Parking
brake pedal and shift out of N (Neutral)
Brake warning light will illuminate to
to R (Reverse) or D (Drive).
indicate that the system is operating.
• Satisfy the following conditions
1. Ensure seat belts are fastened and the
doors, hood and liftgate are closed.
NOTICE
2. With the vehicle running, depress the
If you continuously notice a noise or
brake pedal and shift out of P (Park) to
burning smell when the EPB is used for
R (Reverse), D (Drive) or Manual shift
emergency braking, have the system
mode.
checked by an authorized HYUNDAI
3. Depress the accelerator pedal.
dealer.
Make sure the Parking Brake warning
light goes off.
Releasing the parking brake
Information
• For the Middle East, EPB is released
regardless of seat belt fastening.
• For your safety, you can engage EPB
even though the Vehicle Stop/Start
button is in the OFF position (only if
battery power is available), but you
cannot release it.
• For your safety, depress the brake
pedal and release the parking brake
manually with the EPB switch when you
ONE1061016
drive downhill or when backing up the
vehicle.
To release EPB (Electronic Parking
Brake):
1. Press the Start/Stop button to the ON
NOTICE
or START position.
• If the Parking Brake warning light is still
2. Press the EPB switch while depressing
on even though the EPB has been
the brake pedal.
released, have the system checked by
Make sure the Parking Brake warning light
an authorized HYUNDAI dealer.
goes off.
• Do not drive your vehicle with EPB
applied. It may cause excessive brake
To release EPB (Electronic Parking Brake)
pad and brake rotor wear.
automatically:
• Gear in P (Park)
With the vehicle running depress the
brake pedal and shift out of P (Park) to
R (Reverse) or D (Drive).
6-28
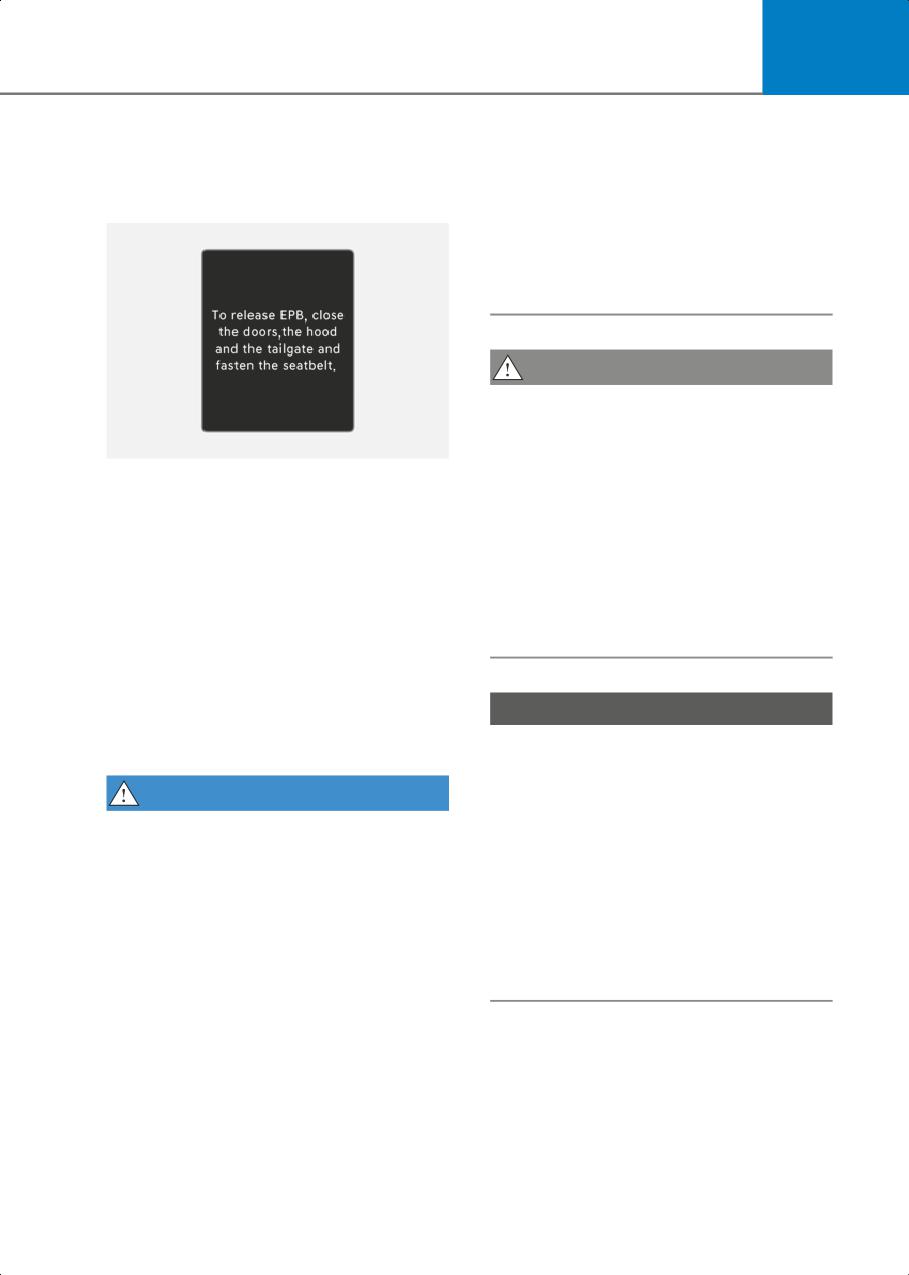
6
Warning messages
• NEVER allow anyone who is unfamiliar
with the vehicle to touch the EPB
To release EPB, close the doors, hood and
switch. If EPB is released
liftgate and fasten the seatbelt
unintentionally, serious injury may
occur.
• Only release EPB when you are seated
inside the vehicle with your foot firmly
on the brake pedal.
CAUTION
In winter, the Electronic Parking Brake
(EPB) related device may freeze and
cannot be released. Do not use the
OJK060066L
Electronic Parking Brake (EPB) but park
• If you try to drive with EPB applied, a
on a flat surface with the gear in P (Park).
warning will sound and a message will
Use wheel chocks under the wheels if
appear.
necessary.
• If the driver's seat belt is unfastened
If the Electronic Parking Brake (EPB)
and the hood or liftgate is opened, a
applies automatically when the gear is
warning will sound and a message will
shifted to P (Park), turn off Auto Hold, and
appear.
press the Electronic Parking Brake (EPB)
switch to release the parking brake.
• If there is a problem with the vehicle, a
warning may sound and a message may
appear.
If the situation occurs, depress the brake
NOTICE
pedal and release EPB by pressing the
• Do not apply the accelerator pedal
EPB switch.
while the parking brake is engaged. If
you depress the accelerator pedal with
WARNING
EPB engaged, a warning will sound and
• Whenever leaving the vehicle or
a message will appear. Damage to the
parking, always come to a complete
parking brake may occur.
stop and continue to depress the brake
• Driving with the parking brake on can
pedal.
overheat the braking system and cause
Shift the gear into P (Park), pull the EPB
premature wear or damage to brake
switch, and press the Start/Stop button
parts. Make sure EPB is released and
to the OFF position. Take the Key with
the Parking Brake warning light is off
you when leaving the vehicle.
before driving.
Vehicles not fully engaged in P (Park)
with the parking brake set are at risk for
moving inadvertently and causing
injury to yourself or others.
6-29
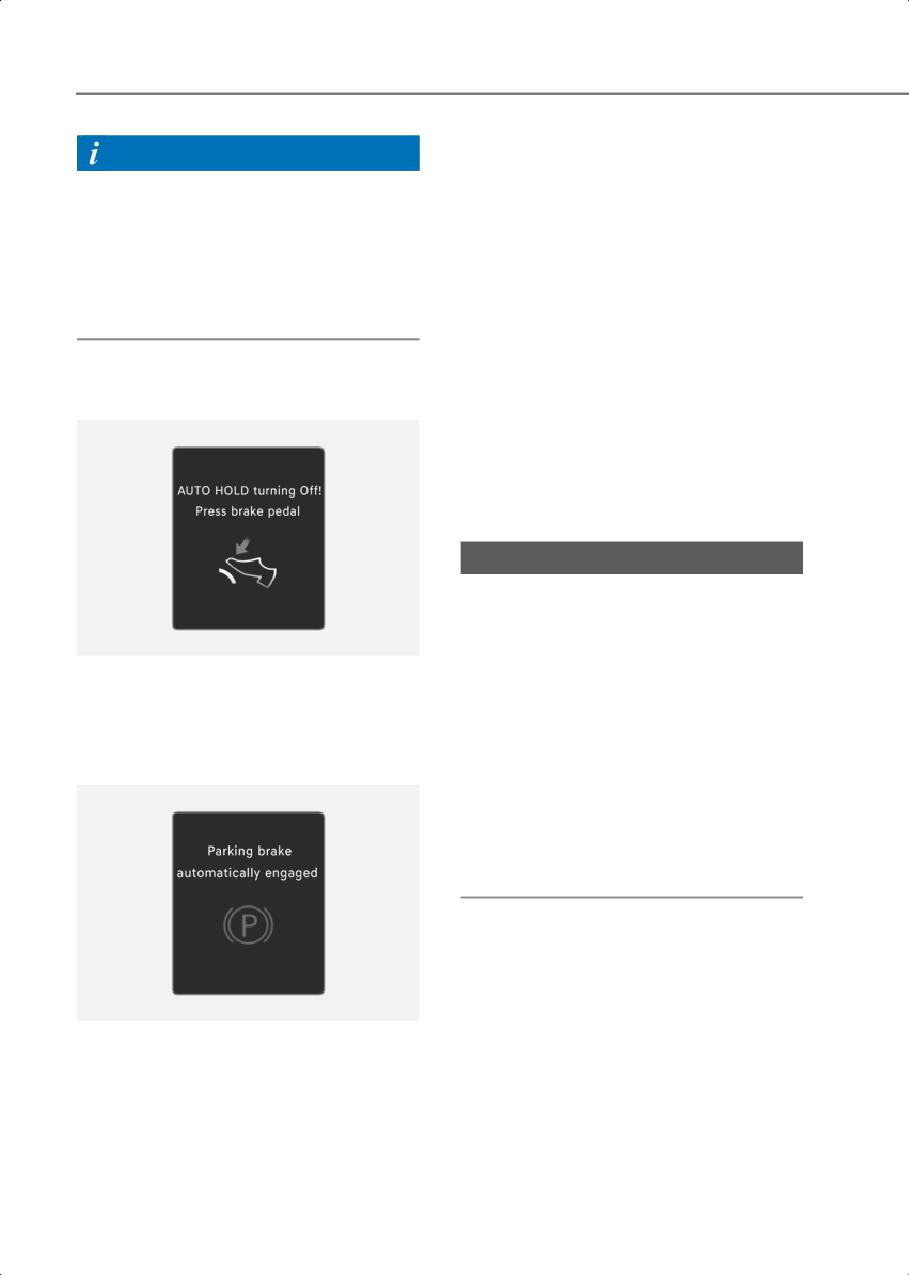
Driving Your Vehicle
EPB malfunction
Information
Electronic Parking Brake (EPB) warning
• A clicking sound may be heard while
light illuminates if the Start/Stop button is
operating or releasing the EPB. These
pressed to the ON position and goes off in
conditions are normal and indicate that
approximately 3 seconds if the system is
EPB is functioning properly.
operating normally.
• When leaving your keys with a parking
If the EPB warning light remains on,
attendant or assistant, make sure to
comes on while driving, or does not come
inform him/her how to operate EPB.
on when the Start/Stop button is pressed
to the ON position, this indicates that the
EPB may have malfunctioned.
AUTO HOLD turning Off! Press brake
If this occurs, have the system checked
pedal
by an authorized HYUNDAI dealer.
The EPB warning light may illuminate
when the ESC indicator comes on to
indicate that ESC is not working properly,
but it does not indicate a malfunction of
EPB.
NOTICE
• If the EPB warning light is still on, have
the system checked by an authorized
HYUNDAI dealer.
OIK060067L
• If the Parking Brake warning light does
When the conversion from Auto Hold to
not illuminate or blinks even though the
EPB is not working properly a warning will
EPB switch was pulled up, EPB may not
sound and a message will appear.
be applied.
• If the Parking Brake warning light blinks
Parking brake automatically engaged
when the EPB warning light is on, press
the switch, and then pull it up. Repeat
this one more time. If the EPB warning
does not go off, have the system
checked by an authorized HYUNDAI
dealer.
OIK060069L
When EPB is applied while Auto Hold is
activated, a warning will sound and a
message will appear.
6-30
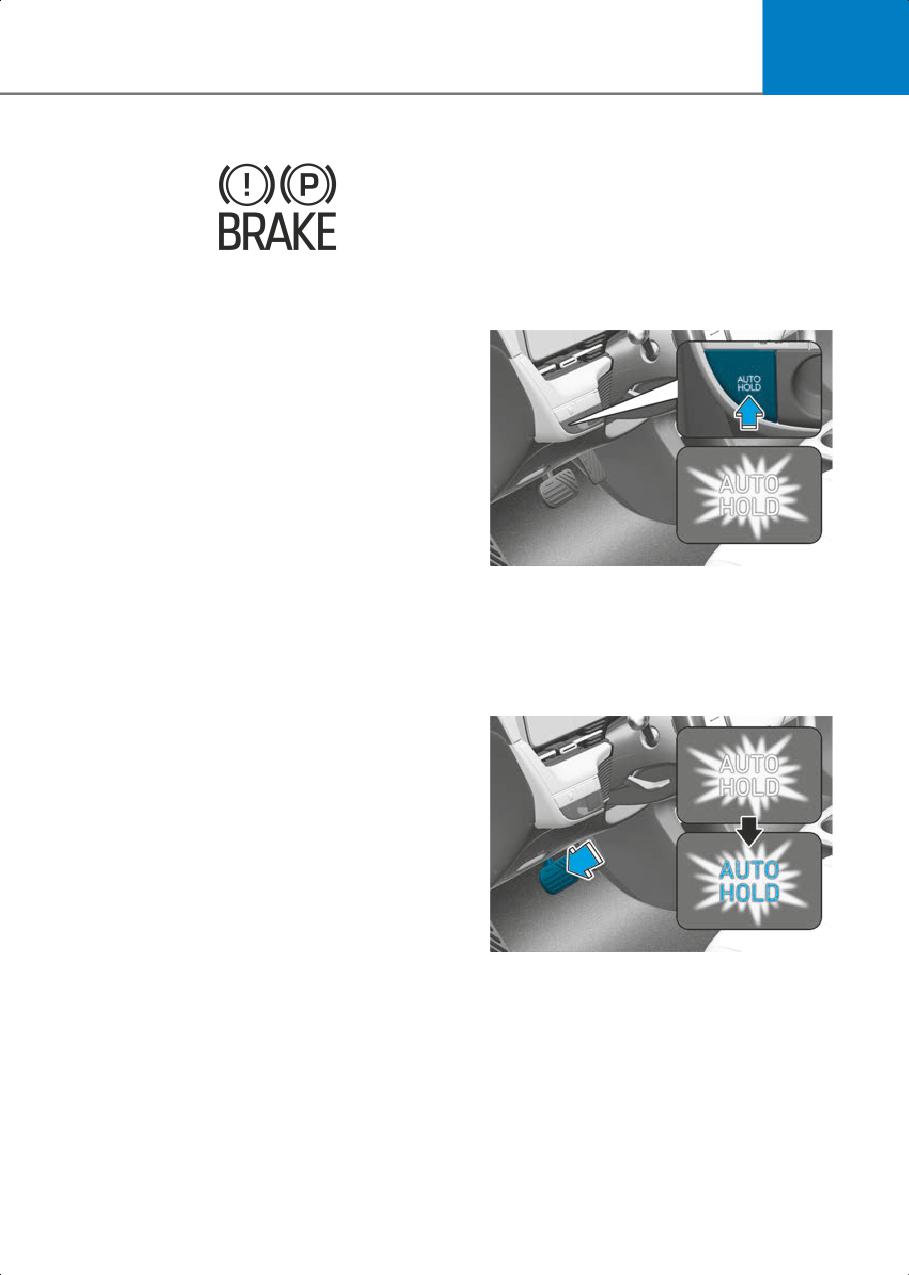
6
Parking brake warning light
Auto Hold
Auto Hold maintains the vehicle in a
standstill even though the brake pedal is
not depressed after the driver brings the
vehicle to a complete stop by depressing
WAE-205
the brake pedal.
Check the Parking Brake warning light by
pressing the Vehicle Stop/Start button to
To apply:
the ON position.
This light will be illuminated when the
parking brake is applied with the Vehicle
Stop/Start button in the START or ON
position.
Before driving, be sure the parking brake
is released and the Parking Brake warning
light is OFF.
If the Parking Brake warning light remains
on after the parking brake is released
while the motor is running, there may be
a malfunction in the brake system.
ONE1061017
Immediate attention is necessary.
1. With the driver's door and hood closed,
If at all possible, cease driving the vehicle
depress the brake pedal and then press
immediately. If that is not possible, use
the AUTO HOLD switch. The white
extreme caution while operating the
AUTO HOLD indicator will come on and
vehicle and only continue to drive the
the system will be in the standby
vehicle until you can reach a safe
position.
location.
When the EPB (Electronic Parking
Brake) does not release
If the EPB does not release normally,
contact an authorized HYUNDAI dealer by
loading the vehicle on a flatbed tow truck
and have the system checked.
ONE1061018
2. When you stop the vehicle completely
by depressing the brake pedal, Auto
Hold maintains the brake pressure to
hold the vehicle stationary. The
indicator changes from white to green.
3. The vehicle will remain stationary even
if you release the brake pedal.
4. If EPB is applied, Auto Hold will be
released.
6-31
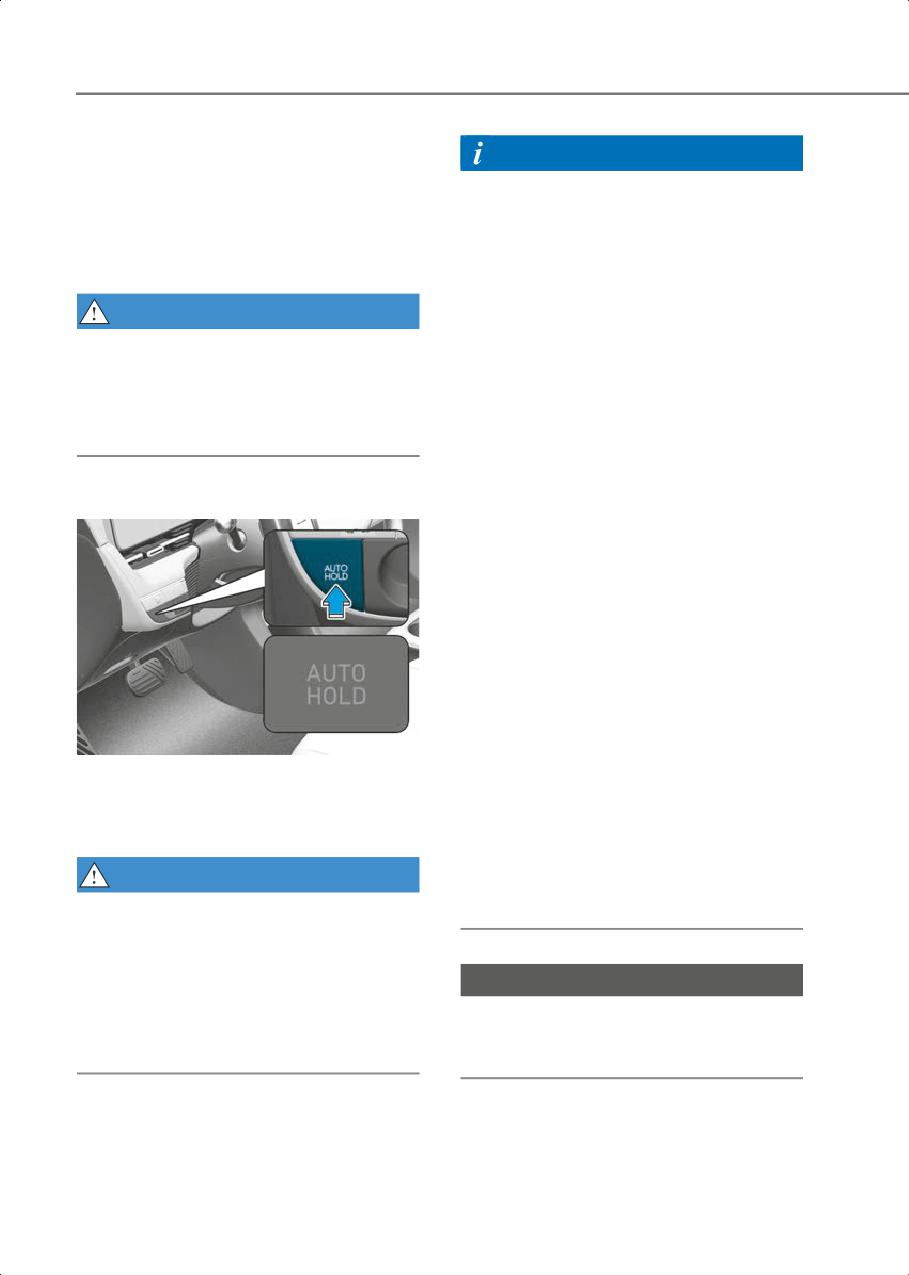
Driving Your Vehicle
To release:
Information
If you depress the accelerator pedal with
the gear in D (Drive) or Manual shift
• The Auto Hold does not operate when:
mode, the Auto Hold will be released
- The gear is in P (Park)
automatically and the vehicle will start to
- EPB is applied
move. The AUTO HOLD indicator changes
from green to white.
• For your safety, the Auto Hold
automatically switches to EPB when:
WARNING
- The driver's door is opened
When Auto Hold is automatically released
- The tail gate is opened
by depressing the accelerator pedal,
- The hood is opened
always take a look around your vehicle.
- The vehicle is in a standstill for more
Slowly depress the accelerator pedal for a
than 10 minutes
smooth start.
- The vehicle is standing on a steep
slope
- The vehicle moved several times
To cancel:
In these cases, the Parking Brake
warning light comes on, the AUTO
HOLD indicator changes from green to
white, and a warning sound and a
message will appear to inform you that
EPB has been automatically engaged.
Before driving off again, depress the
brake pedal, check the surrounding
area near your vehicle and release the
parking brake manually with the EPB
switch.
ONE1061019
• While operating Auto Hold, you may
hear mechanical noise. However, it is
1. Depress and hold the brake pedal.
normal operating noise.
2. Press the AUTO HOLD switch.
• If the vehicle is restarted with the Auto
The AUTO HOLD indicator will turn off.
Hold system in the standby position or
operating, the Auto hold system will
WARNING
continue to operate in the standby
To prevent, unexpected and sudden
position.
vehicle movement, ALWAYS press your
foot on the brake pedal to cancel the Auto
Hold before you:
NOTICE
• Drive downhill.
If the AUTO HOLD indicator changes to
• Drive the vehicle in R (Reverse).
yellow, Auto Hold is not working properly.
• Park the vehicle.
Contact an authorized HYUNDAI dealer.
6-32
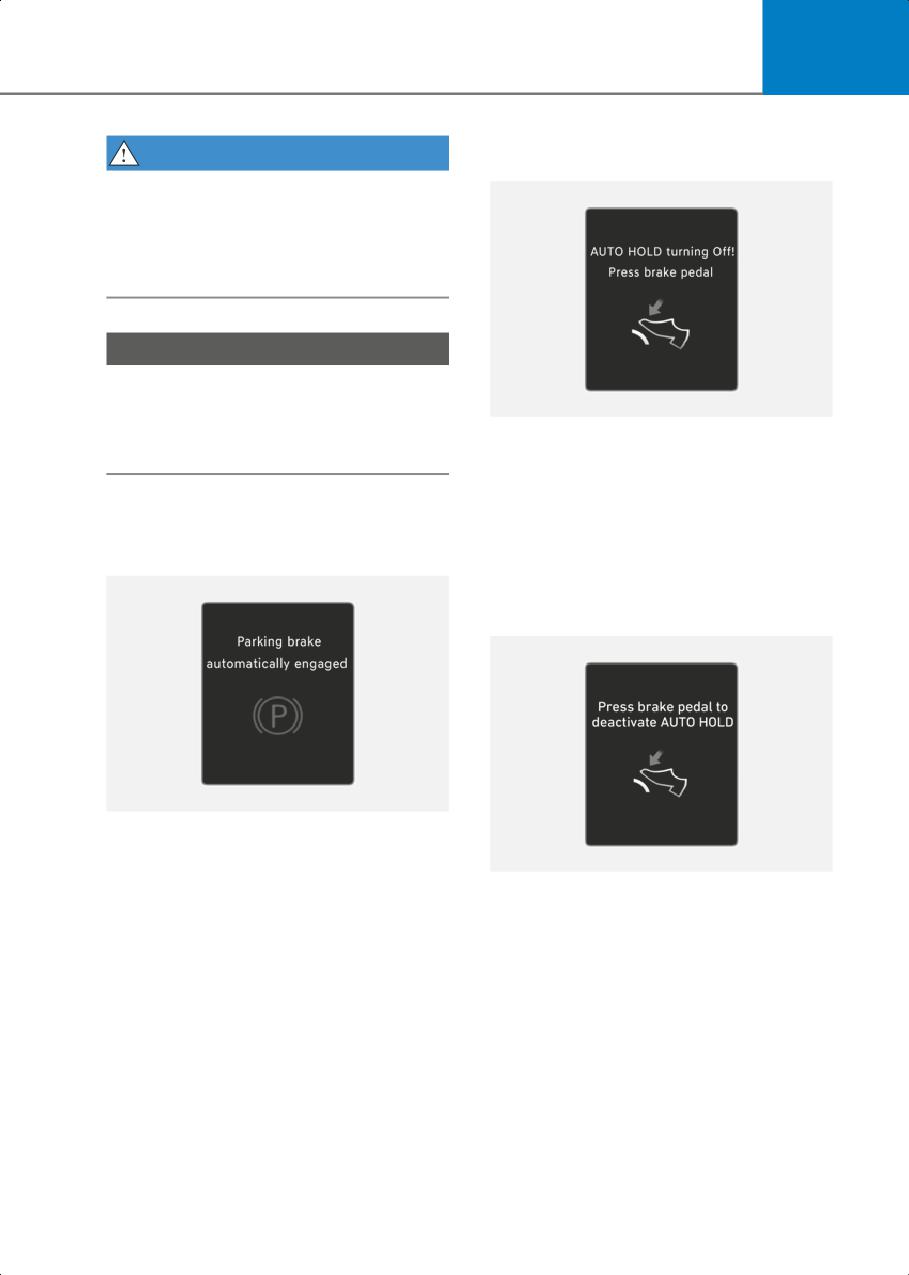
6
AUTO HOLD turning Off! Press brake
WARNING
pedal
• Depress the accelerator pedal slowly
when you start the vehicle.
• For your safety, cancel Auto Hold when
you drive downhill, back up the vehicle
or park the vehicle.
NOTICE
If there is a malfunction with the driver's
door or hood open detection system,
Auto Hold may not work properly.
OIK060067L
When the conversion from Auto Hold to
Contact an authorized HYUNDAI dealer.
EPB is not working properly a warning will
sound and a message will appear.
Warning messages
When this message is displayed, Auto
Hold and EPB may not operate. For your
Parking brake automatically engaged
safety, depress the brake pedal.
Press brake pedal to deactivate AUTO
HOLD
OIK060069L
When EPB is applied while Auto Hold is
activated, a warning will sound and a
message will appear.
OIK060071L
If you did not apply the brake pedal when
you release Auto Hold by pressing the
AUTO HOLD switch, a warning will sound
and a message will appear.
6-33
Driving Your Vehicle
Anti-Lock Brake System (ABS)
Using ABS
To obtain the maximum benefit from your
WARNING
ABS in an emergency situation, do not
attempt to modulate your brake pressure
Anti-Lock Braking System (ABS) or
and do not try to pump your brakes.
Electronic Stability Control (ESC) system
Depress your brake pedal as hard as
will not prevent accidents due to
possible.
improper or dangerous driving
maneuvers. Even though vehicle control
When you apply your brakes under
is improved during emergency braking,
conditions which may lock the wheels,
always maintain a safe distance between
you may hear sounds from the brakes, or
you and objects ahead of you. Vehicle
feel a corresponding sensation in the
speeds should always be reduced during
brake pedal. This is normal and it means
extreme road conditions. The braking
your ABS is active.
distance for vehicles equipped with ABS
ABS does not reduce the time or distance
or ESC may be longer than for those
it takes to stop the vehicle.
without these systems in the following
Always maintain a safe distance from the
road conditions.
vehicle in front of you.
Drive your vehicle at reduced speeds
ABS will not prevent a skid that results
during the following conditions:
from sudden changes in direction, such
• Rough, gravel or snow-covered roads.
as trying to take a corner too fast or
• On roads where the road surface is
making a sudden lane change. Always
pitted or has different surface height.
drive at a safe speed for the road and
weather conditions.
• Tire chains are installed on your vehicle.
ABS cannot prevent a loss of stability.
The safety features of ABS or ESC
Always steer moderately when braking
equipped vehicle should not be tested by
hard. Severe or sharp steering wheel
high speed driving or cornering. This
movement can still cause your vehicle to
could endanger the safety of yourself or
veer into oncoming traffic or off the road.
others.
On loose or uneven road surfaces,
operation of the anti-lock brake system
ABS is an electronic braking system that
may result in a longer stopping distance
helps prevent a braking skid. ABS allows
than for vehicles equipped with a
the driver to steer and brake at the same
conventional brake system.
time.
The ABS (
) warning light will stay on
for several seconds after the Start/Stop
button is in the ON position.
During that time, ABS will go through
self-diagnosis and the light will go off if
everything is normal. If the light stays on,
you may have a problem with your ABS.
Contact an authorized HYUNDAI dealer as
soon as possible.
6-34
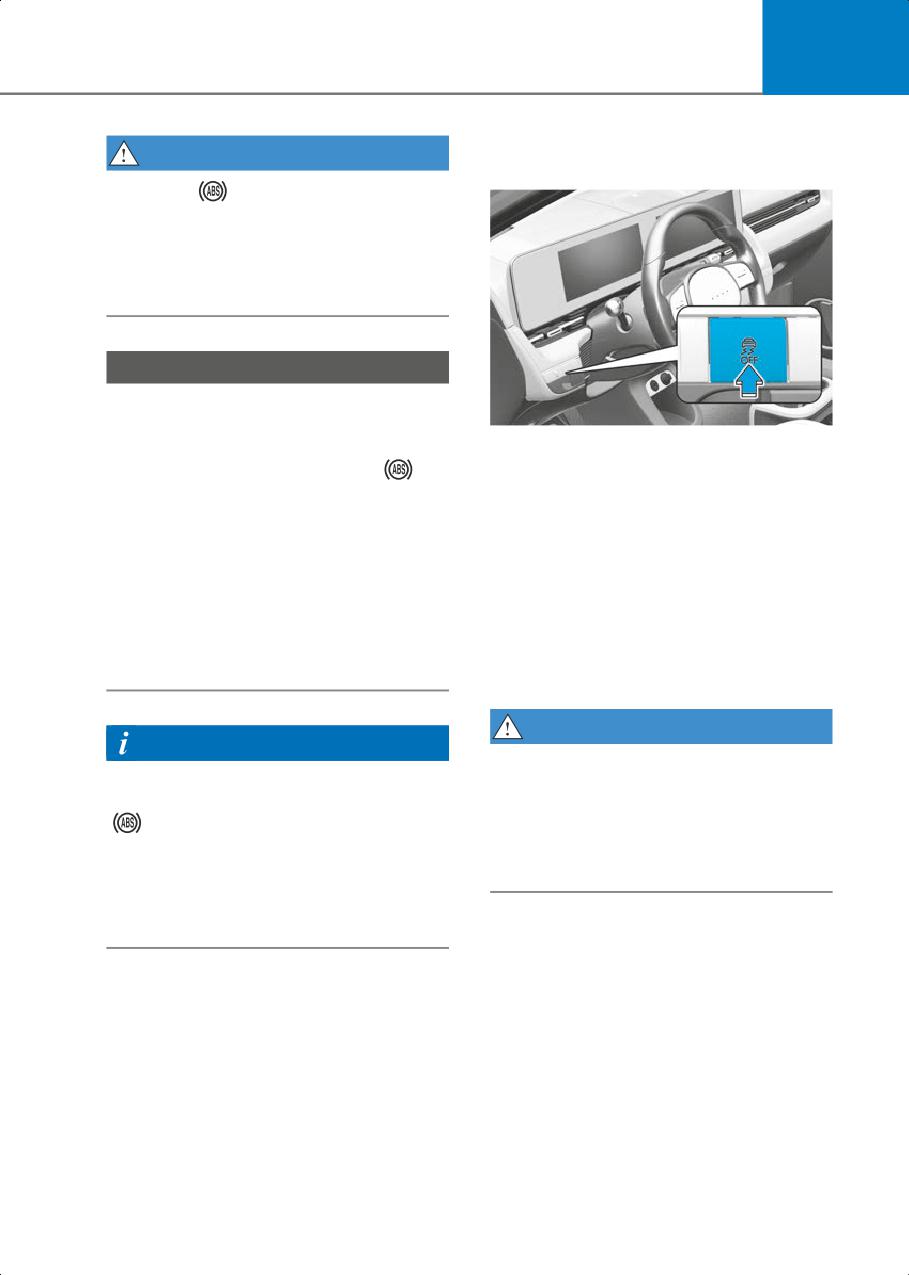
6
Electronic Stability Control
WARNING
(ESC)
If the ABS (
) warning light is on and
stays on, you may have a problem with
the ABS. Your power brakes will work
normally. To reduce the risk of serious
injury or death, contact your authorized
HYUNDAI dealer as soon as possible.
NOTICE
When you drive on a road having poor
traction, such as an icy road, and apply
ONE1061020
your brakes continuously, ABS will be
Electronic Stability Control helps to
active continuously and the ABS (
)
stabilize the vehicle during cornering
warning light may illuminate. Pull your
maneuvers.
vehicle over to a safe place and turn the
ESC checks where you are steering and
vehicle off.
where the vehicle is actually going. ESC
Restart the vehicle. If the ABS warning
applies braking pressure to any one of the
light is off, then your ABS system is
vehicle's brakes and intervenes in the
normal.
electric vehicle control system to assist
Otherwise, you may have a problem with
the driver with keeping the vehicle on the
your ABS system. Contact an authorized
intended path. It is not a substitute for
HYUNDAI dealer as soon as possible.
safe driving practices. Always adjust your
speed and driving to the road conditions.
WARNING
Information
Never drive too fast for the road
When you jump start your vehicle
conditions when cornering. ESC will not
because of a drained battery, the ABS
prevent accidents.
(
) warning light may turn on at the
Excessive speed in turns, abrupt
same time. This happens because of the
maneuvers, and hydroplaning on wet
low battery voltage. It does not mean
surfaces can result in severe accidents.
your ABS is malfunctioning. Have the
battery recharged before driving the
vehicle.
6-35
Driving Your Vehicle
ESC operation
ESC OFF condition
ESC ON condition
When the Start/Stop button is in the ON
btn_WAE-208
position, ESC and the ESC OFF indicator
To cancel ESC operation:
lights illuminate for approximately three
seconds. After both lights go off, ESC is
• State 1
enabled.
Press the ESC OFF button briefly. The ESC
OFF indicator light and/or message
When operating
'Traction Control disabled' will illuminate.
In this state, the traction control function
of ESC (electric vehicle control
management) is disabled, but the brake
btn_WAE-207
control function of ESC (braking
When ESC is in operation, the ESC
management) still operates.
indicator light blinks:
• State 2
• When you apply your brakes under
Press and hold the ESC OFF button
conditions which may lock the wheels,
continuously for more than 3 seconds.
you may hear sounds from the brakes,
The ESC OFF indicator light and/or
or feel a corresponding sensation in the
message 'Traction & Stability Control
brake pedal. This is normal and it means
disabled' illuminates and a warning chime
your ESC is active.
sounds. In this state, both the traction
• When ESC activates, the vehicle may
control function of ESC (electric vehicle
not respond to the accelerator as it
control management) and the brake
does under routine conditions.
control function of ESC (braking
• If Cruise Control was in use when ESC
management) are disabled.
activates, Cruise Control automatically
If the Start/Stop button is pressed to the
disengages. Cruise Control can be
OFF position when ESC is off, ESC
reengaged when the road conditions
remains off. Upon restarting the vehicle,
allow. See “Smart Cruise Control
ESC will automatically turn on again.
(SCC)” section in chapter 7 (if
When ESC (electric vehicle control) is
equipped).
deactivated, the vehicle will loose the
traction and stability if the vehicle is
driven by abrupt steering wheel control. It
is possible that the tire may make a
collision with the connected parts of the
tire. We recommend to do not turn off
ESC while driving the vehicle for your
safety.
6-36
6
Indicator lights
ESC OFF usage
ESC indicator light (blinks)
When Driving
The ESC OFF mode should only be used
briefly to help free the vehicle if stuck in
btn_WAE-207
snow or mud, by temporarily stopping
ESC OFF indicator light (comes on)
operation of ESC, to maintain wheel
torque.
To turn ESC off while driving, press the
ESC OFF button while driving on a flat
road surface.
btn_WAE-208
NOTICE
When the Start/Stop button is pressed to
the ON position, the ESC indicator light
To prevent damage to the gear:
illuminates, then goes off if the ESC
•
Do not allow wheel(s) of one axle to
system is operating normally.
spin excessively while the ESC, ABS,
The ESC indicator light blinks whenever
and Parking Brake warning lights are
ESC is operating.
displayed. The repairs would not be
If the ESC indicator light stays on, your
covered by the vehicle warranty.
vehicle may have a malfunction with the
Reduce motor power and do not spin
ESC system. When this warning light
the wheel(s) excessively while these
illuminates , have the vehicle checked by
lights are displayed.
an authorized HYUNDAI dealer as soon as
•
When operating the vehicle on a
possible.
dynamometer, make sure ESC is turned
The ESC OFF indicator light comes on
off (ESC OFF light illuminated).
when ESC is turned off.
WARNING
Information
When ESC is blinking, this indicates ESC is
•
Turning ESC off does not affect ABS or
active:
standard brake system operation.
Drive slowly and NEVER attempt to
•
Select 0 step of the regenerative
accelerate. NEVER turn ESC off while the
braking system and depress the brake
ESC indicator light is blinking or you may
pedal around 10 times to efficiently
lose control of the vehicle resulting in an
apply brake disc cleaning.
accident.
Brake disc cleaning may decrease the
driving distance by restraining the
regenerative braking system. After
NOTICE
brake disc cleaning, the regenerative
braking system may be restored.
Driving with wheels and tires with
different sizes may cause the ESC system
If the regenerative braking system is
to malfunction. Before replacing tires,
not restored after the brake disc
make sure all four tires and wheels are the
cleaning, have the vehicle inspected by
same size. Never drive the vehicle with
an authorized HYUNDAI dealer.
different sized wheels and tires installed.
6-37
Driving Your Vehicle
Vehicle Stability Management
VSM OFF condition
(VSM)
To cancel VSM operation, press the ESC
Vehicle Stability Management is a
OFF button. ESC OFF (
) indicator light
function of the Electronic Stability
will illuminate.
Control (ESC) system. It helps the vehicle
To turn on VSM, press the ESC OFF button
stay stable when accelerating or braking
again. The ESC OFF indicator light will go
suddenly on wet, slippery and rough
out.
roads where traction over the four tires
can suddenly become uneven.
WARNING
WARNING
If the ESC (
) indicator light or MDPS
(
) warning light stays illuminated or
Take the following precautions when
blinks, your vehicle may have a
using Vehicle Stability Management:
malfunction with the VSM system. When
• ALWAYS check the speed and the
the warning light illuminates have the
distance to the vehicle ahead. VSM is
vehicle checked by an authorized
not a substitute for safe driving
HYUNDAI dealer as soon as possible.
practices.
• Never drive too fast for the road
conditions. VSM will not prevent
NOTICE
accidents. Excessive speed in bad
weather, on slippery and uneven roads
Driving with wheels and tires with
can result in severe accidents.
different sizes may cause the VSM system
to malfunction. Before replacing tires,
make sure all four tires and wheels are the
VSM operation
same size. Never drive the vehicle with
different sized tires and wheels installed.
When operating
When you apply your brakes under
conditions which may activate ESC, you
may hear sounds from the brakes, or feel
a corresponding sensation in the brake
pedal. This is normal and it means your
VSM is active.
Information
VSM does not operate when:
• Driving on a banked road such as
gradient or incline.
• Driving in reverse.
• The ESC OFF indicator light is on.
• The MDPS (Motor Driven Power
Steering) warning light (
) is on or
blinks.
6-38

6
Hill-Start Assist Control (HAC)
Good Braking Practices
Hill-Start Assist Control helps prevent the
WARNING
vehicle from rolling backwards when
starting a vehicle from a stop on a hill. The
Whenever leaving the vehicle or parking,
system operates the brakes automatically
always come to a complete stop and
for approximately 2 seconds (maximum
continue to depress the brake pedal. Shift
of 5 seconds when the accelerator pedal
the gear to the P (Park) position, then
is slightly depressed during HAC
apply the parking brake, and press the
operation) and releases the brake after 2
Start/Stop button to the OFF position.
seconds or when the accelerator pedal is
Vehicles parked with the parking brake
depressed.
not applied or not fully engaged may roll
inadvertently and may cause injury to the
WARNING
driver and others. ALWAYS apply the
Always be ready to depress the
parking brake before exiting the vehicle.
accelerator pedal when starting off an
incline. Hill-Start Assist Control activates
only for approximately 2 seconds
Be aware of wet brakes. The brakes may
(maximum of 5 seconds when the
get wet if the vehicle is driven through
accelerator pedal is slightly depressed
standing water or if it is washed. Your
during HAC operation).
vehicle will not stop as quickly if the
brakes are wet. Wet brakes may cause the
vehicle to pull to one side.
To dry the brakes, apply the brakes lightly
Information
until the braking action returns to normal.
• Hill-Start Assist Control does not
If the braking action does not return to
operate when the gear is shifted to P
normal, stop as soon as it is safe to do so
(Park) or N (Neutral).
and call an authorized HYUNDAI dealer
• Hill-Start Assist Control activates even
for assistance.
when the ESC (Electronic Stability
DO NOT drive with your foot resting on
Control) is off. However, it does not
the brake pedal. Even light, but constant
activate, when ESC does not operate
pedal pressure can result in the brakes
normally.
overheating, brake wear, and possibly
even brake failure.
If a tire goes flat while you are driving,
apply the brakes gently and keep the
vehicle pointed straight ahead while you
slow down. When you are moving slowly
enough for it to be safe to do so, pull off
the road and stop in a safe location.
Keep your foot firmly on the brake pedal
when the vehicle is stopped to prevent
the vehicle from rolling forward.
6-39
Driving Your Vehicle
• In the event your vehicle leaves the
All Wheel Drive (AWD)
roadway, do not steer sharply. Instead,
if equipped
slow down before pulling back into the
When All Wheel Drive (AWD) is activated,
travel lanes.
driving forces are distributed
appropriately to front and rear wheels. It
could improve driving performance by
NOTICE
maximizing the driving force of vehicles
on severe road conditions such as steep
• Do not drive in water if the level is
hills, unpaved, slippery, etc.
higher than the bottom of the vehicle.
Advantage of electronic AWD
• Check your brake condition once you
are out of mud or water. Depress the
1. Improvement of straight stability
brake pedal several times as you move
2. Improvement of driving performance
slowly until you feel normal braking
on curve
return.
3. Secure stability on severe condition
• Shorten your scheduled maintenance
such as wet and sandy roads.
interval if you drive in off-road
4. Improvement of energy efficiency from
conditions such as sand, mud or water
driving mode automatic control.
(see "Maintenance Under Severe Usage
and Low Mileage Conditions" section in
Information
chapter 9).
AWD vehicles could change the
• Always wash your vehicle thoroughly
engagement status of the motor
after off road use, especially the
according to the situation required. Auto
bottom of the vehicle.
changing the driving mode(2WD/AWD)
• Be sure to equip the vehicle with four
helps improve energy efficiency and
tires of the same size and type.
driving stability.
• Make sure that a full time AWD vehicle
is towed by a flat bed tow truck.
WARNING
For safe AWD operation
To reduce the risk of SERIOUS INJURY or
DEATH:
Before driving
• Avoid high speeds when cornering or
• Make sure all passengers are wearing
turning.
seat belts.
• Do not make quick steering wheel
• Sit upright and closer to the steering
movements, such as sharp lane
wheel than usual. Adjust the steering
changes or fast, sharp turns.
wheel to a position comfortable for you
• The risk of a rollover is greatly increased
to drive.
if you lose control of your vehicle at
highway speeds.
Driving on snow-covered or icy roads
• Loss of control often occurs if two or
• Start off slowly by applying the
more wheels drop off the roadway and
accelerator pedal gently.
the driver over steers to reenter the
• Use snow tires or tire chains.
roadway.
• Keep sufficient distance between your
vehicle and the vehicle in front of you.
6-40

6
• Using regenerative braking helps the
NOTICE
steering on the downhill. However, it
may be difficult to adjust the vehicle
When the vehicle is stuck in snow, sand or
while coasting using regenerative
mud, place a nonslip material under the
braking, so avoid using the third level of
drive wheels to provide traction OR slowly
regenerative braking as much as
spin the wheels in forward and reverse
possible.
directions which causes a rocking motion
• Avoid speeding, rapid acceleration,
that may free the vehicle.
sudden brake applications, and sharp
turns to prevent skids.
Driving up or down hills
• It is difficult to start again if the vehicle
stops on an uphill road. Keep your
• Driving uphill
distance from other vehicles and drive
- Before starting off, check if it is
slowly.
possible to drive uphill.
- Drive as straight as possible.
Information
• Driving downhill
When using Snow Tires, mount them on
- Do not change gear while driving
all four wheels.
downhill. Select gear before driving
When using tire chains, install them on
downhill.
the rear tires.
- Drive straight as possible.
However, driving speed must be below
30 km/h and minimize the driving
WARNING
distance. High-speed or long-term
Exercise extreme caution driving up or
driving with tire chains installed may
down steep hills. The vehicle may flip over
malfunction or damage the AWD system.
depending on the grade, terrain, water
For more details on Snow Tires and Tire
and mud conditions.
Chains, refer to “Winter Driving” section
later in this chapter.
WARNING
Driving in sand or mud
Do not drive across the contour of steep
• Maintain slow and constant speed.
hills. A slight change in the wheel angle
• Use tire chains driving in mud if
can destabilize the vehicle, or a stable
necessary.
vehicle may lose stability if the vehicle
• Keep sufficient distance between your
stops its forward motion. Your vehicle
vehicle and the vehicle in front of you.
may roll over and lead to a serious injury
or death.
• Reduce vehicle speed and always
check the road condition.
• Avoid speeding, rapid acceleration,
sudden brake applications, and sharp
turns to prevent getting stuck.
6-41
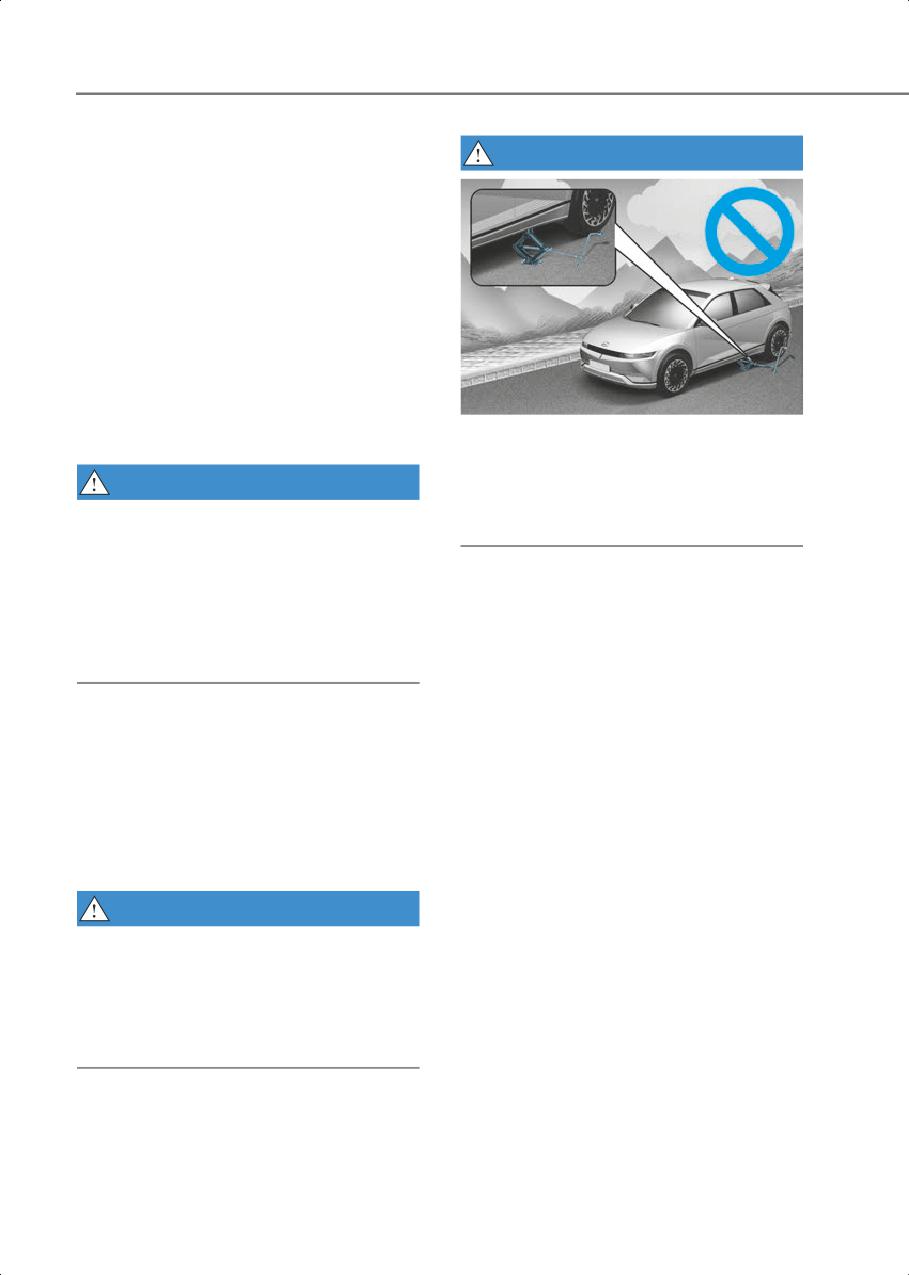
Driving Your Vehicle
Additional driving conditions
WARNING
• Become familiar with the off-road
conditions before driving.
• Always pay attention when driving
off-road and avoid dangerous areas.
• Drive slowly when driving in heavy
wind.
• Reduce vehicle speed when cornering.
The center of gravity of AWD vehicles is
higher than conventional 2WD vehicles,
making them more likely to roll over
when you rapidly turn corners.
• Always hold the steering wheel firmly
ONE1061023K
when you are driving off-road.
Never start or run the vehicle while an
AWD vehicle is raised on a jack. The
WARNING
vehicle can slip or roll off of a jack causing
serious injury or death to you or those
Do not grab the inside of the steering
nearby.
wheel when you are driving off-road. You
may hurt your arm by a sudden steering
maneuver or from steering wheel
Towing
rebound due to an impact with objects on
AWD vehicles must be towed with a
the ground. You could lose control of the
wheel lift and dollies or flatbed
steering wheel which may lead to serious
equipment with all the wheels off the
injury or death.
ground. For more details, refer to
"Towing" section in chapter 8.
Emergency Precautions
Vehicle inspection
Tires
• If the vehicle needs to be operated on a
vehicle lift do not attempt to stop any of
When replacing tires, be sure to equip all
the four wheels from turning. This could
four tires with the same size, type, tread
damage the AWD system.
patterns, brand and load-carrying
capacity.
• Never engage the parking brake while
running the vehicle on a car lift. This
WARNING
may damage the AWD system.
Do not use tire and wheel with different
size and type from the one originally
installed on your vehicle. It can affect the
safety and performance of your vehicle,
which could lead to steering failure or
rollover causing serious injury.
6-42
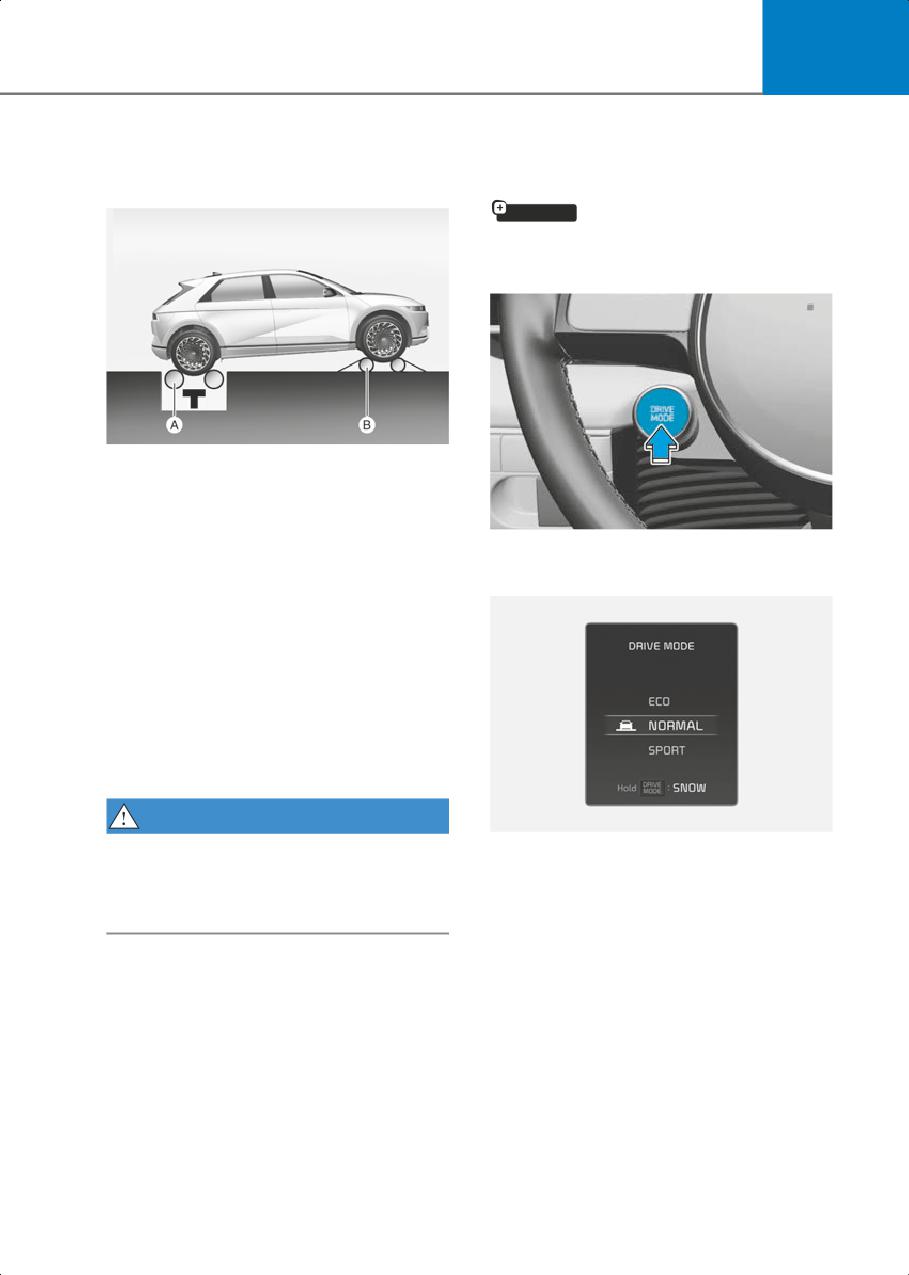
6
Dynamometer testing
Drive Mode Integrated
An AWD vehicle must be tested on a
Control System (2WD)
special four wheel chassis dynamometer.
if equipped
Drive Mode
ONE1062024N
[A] : Roll tester (Speedometer),
[B] : Temporary free roller
An AWD vehicle should not be tested on a
2WD roll tester. If a 2WD roll tester must
ONE1061021
be used, perform the following
Drive mode may be selected according to
procedure:
the driver's preference or road condition.
1. Check the tire pressures recommended
for your vehicle.
2. Place the rear wheels on the roll tester
for a speedometer test as shown in the
illustration.
3. Release the parking brake.
4. Place the front wheels on the
temporary free roller as shown in the
illustration.
WARNING
ONE1061041
Keep away from the front of the vehicle
The mode changes whenever the driver
while the vehicle is in gear on the
pushes the DRIVE MODE button.
dynamometer. The vehicle can jump
forward and cause serious injury or death.
NORMAL mode
Normal mode is a driving mode used
when driving on general roads, city center
and highways.
6-43
Driving Your Vehicle
ECO mode
SPORT mode
ECO mode is a driving mode improving
SPORT mode is a driving mode improving
energy efficiency by controlling motors
driving performance by controlling
and gear.
motors and gear.
Electric energy efficiency varies
In SPORT mode, the electric energy
according to the driver's driving habit and
efficiency may decrease.
road condition.
• When SPORT mode is selected, the
• When ECO mode is selected, the ECO
SPORT indicator will illuminate on the
indicator will illuminate on the
instrument cluster and the color of the
instrument cluster and the color of the
mood lamp will change.
mood lamp will change.
• Whenever the vehicle is restarted, the
• When ECO mode is activated:
drive mode will revert back to NORMAL
mode. If SPORT mode is desired,
- The acceleration response may be
re-select SPORT mode.
slightly reduced if the accelerator
pedal is depressed moderately.
- The air conditioner performance may
SNOW mode
be limited.
SNOW mode provides safe driving on the
The above situations are normal
snowy roads.
conditions when ECO mode is
• Press and hold the drive mode button
activated to help improve electric
to select SNOW mode.
energy efficiency.
• When SNOW mode is selected, the
SNOW indicator will illuminate on the
Limitations of ECO mode
instrument cluster and the color of the
If the following conditions occur while
mood lamp will change.
ECO mode is operating, the system
operation is limited even though there is
NOTICE
no change in the ECO indicator.
• Depress the accelerator pedal softly on
• When coolant temperature is low:
the snow and the ice.
The system will be limited until motor
• Keep the distance from the vehicle in
performance becomes normal.
the front.
• When driving up a hill:
• Prevent rapid acceleration,
The system will be limited to gain
deceleration and steering control.
power when driving uphill because
Abrupt driving on the snow may cause
motor torque is restricted.
the accident.
6-44
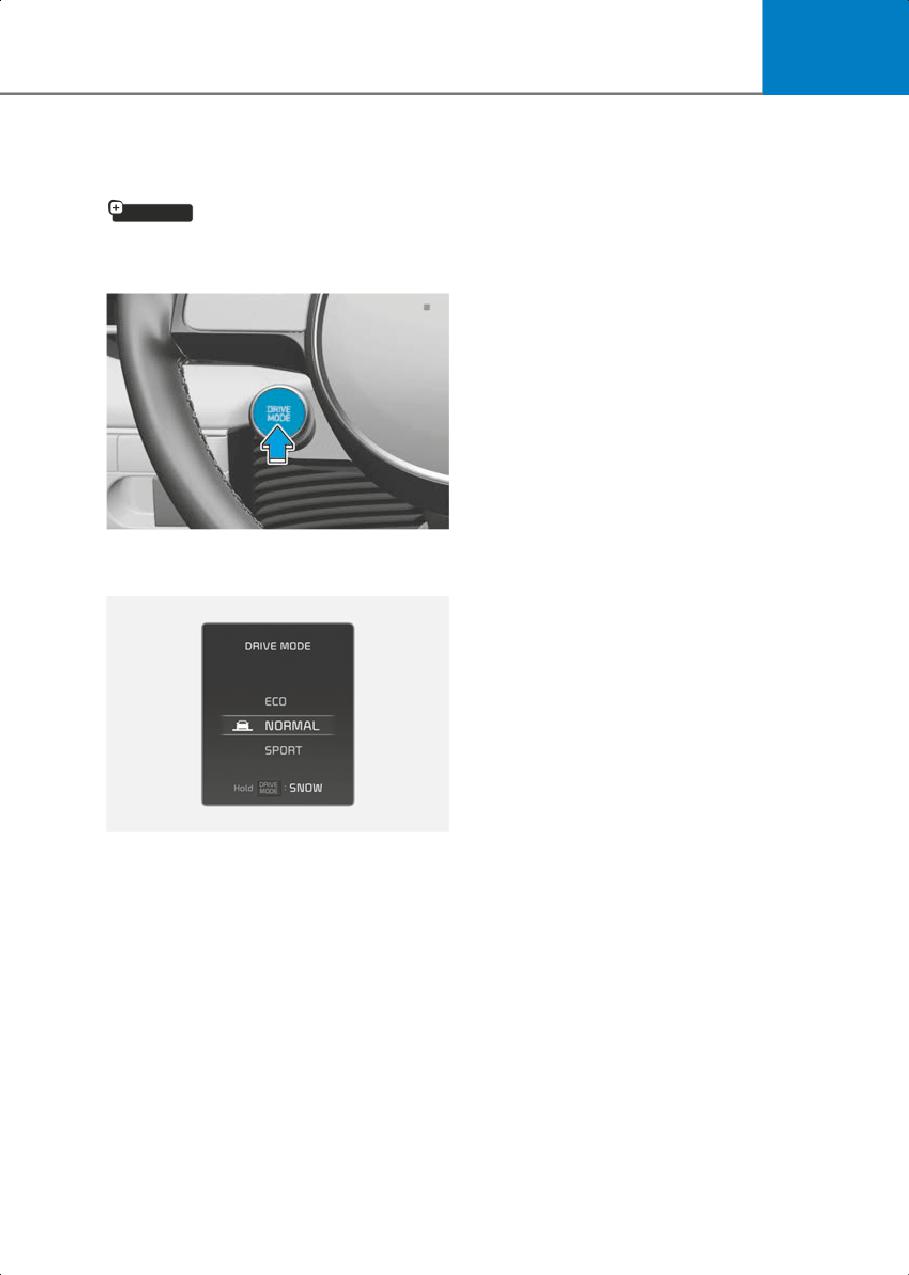
6
ECO mode
Drive Mode Integrated
ECO mode is a driving mode vehicles
Control System (AWD)
could change the engagement status of
if equipped
the motor according to the situation
required. Auto changing the driving
mode(2WD/AWD) helps improve energy
Drive Mode
efficiency.
Electric energy efficiency varies
according to the driver's driving habit and
road condition.
• When ECO mode is selected, the ECO
indicator will illuminate on the
instrument cluster and the color of the
mood lamp will change.
• When ECO mode is activated:
- The acceleration response may be
slightly reduced if the accelerator
pedal is depressed moderately.
ONE1061021
Drive mode may be selected according to
- The air conditioner performance may
the driver's preference or road condition.
be limited.
- The shift pattern of the gear may
change.
The above situations are normal
conditions when ECO mode is
activated to help improve electric
energy efficiency.
Limitations of ECO mode
If the following conditions occur while
ECO mode is operating, the system
operation is limited even though there is
ONE1061041
no change in the ECO indicator.
The mode changes whenever the driver
• When coolant temperature is low:
pushes the DRIVE mode button.
The system will be limited until motor
performance becomes normal.
NORMAL mode
• When driving up a hill:
Normal mode is a driving with auto
The system will be limited to gain
changing the driving mode(2WD/AWD)
power when driving uphill because
on road condition.
motor torque is restricted.
6-45
Driving Your Vehicle
SPORT mode
SNOW mode
SPORT mode is a driving mode improving
SNOW mode is a driving mode improving
driving performance by fixing AWD
driving performance by changing the
system and controlling gear.
engagement status of the motor
according to the situation required. Auto
In SPORT mode, the electric energy
changing the driving mode(2WD/AWD)
efficiency may decrease.
helps improve driving stability.
• When SPORT mode is selected, the
• Press and hold the drive mode button
SPORT indicator will illuminate on the
to select SNOW mode.
instrument cluster and the color of the
mood lamp will change.
• When SNOW mode is selected, the
SNOW indicator will illuminate on the
• Whenever the vehicle is restarted, the
instrument cluster and the color of the
drive mode will revert back to NORMAL
mood lamp will change.
mode. If SPORT mode is desired,
re-select SPORT mode.
• When SNOW mode is activated, the
driving power is distributed to four
wheels automatically, increasing the
stability of the vehicle.
NOTICE
• Depress the accelerator pedal softly on
the snow and the ice.
• Keep the distance from the vehicle in
the front.
• Prevent rapid acceleration,
deceleration and steering control.
Abrupt driving on the snow may cause
the accident.
6-46

6
Drive Modes Characteristic
The characteristic of each components varies according to which drive mode is selected.
Drive mode
SNOW
NORMAL
ECO
SPORT
High electric
Normal driving
Sporty driving
Characteristics
Snow driving
energy efficiency
mode
mode
mode
Press more than
Button activation
Press
Press
Press
1 sec.
Indicator on the
SNOW
NORMAL
ECO
SPORT
cluster
Climate system
ECO
NORMAL
NORMAL
NORMAL
control
(ECO/NORMAL) *1
Speed Limit
-
-
-
-
Regenerative
0~1
0~3
braking level
NORMAL/
NORMAL/
BRAKE MODE
NORMAL
NORMAL
SPORT *1
SPORT *1
*1 : It is possible to set the driving condition for each drive mode, at the drive mode setting in Infotainment system.
Information
The infotainment system may change after software updates. For more information,
refer to the user’s manual provided in the infotainment system and the quick reference
guide.
6-47
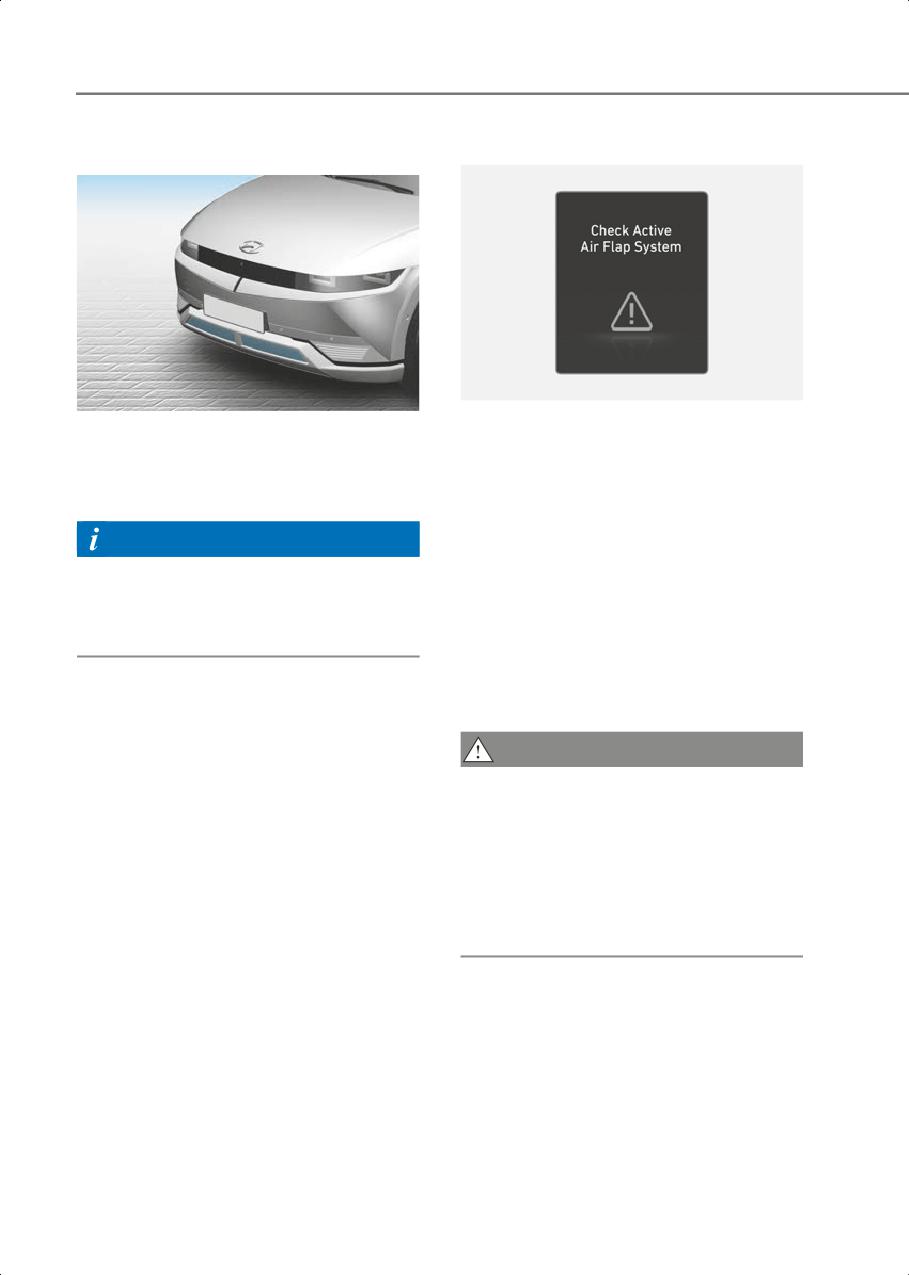
Driving Your Vehicle
Active Air Flap
Malfunction
ONE1061040L
ONE1061039
The active air flap system may not
Active air flap system controls the air flap
operate normally if the air flap is
below the front bumper to cool the
temporarily opened due to foreign factors
vehicle parts and improve energy
or if the controller is contaminated by
efficiency.
snow or rain, etc.
Information
When “Check the active air flap system”
is popped up on display, stop the vehicle
Active air flap system could be activate
in a safe place and check the status of the
regardless of the vehicle
air flap.
condition.(Parking, driving, charging,
Start the vehicle after performing the
etc.)
necessary work like foreign matter
removal and waiting 10 minutes. If the
pop-up remains up, contact an
authorized HYUNDAI dealer.
CAUTION
• Regardless of the pop-up, if the air flaps
aren't in the same position, stop the
vehicle and wait for 10 minutes and
start the vehicle and inspect the air flap.
• The active air flap system is actuated by
motors. Do not disturb actuation or
apply force excessively. It may cause
failure.
6-48

6
Special Driving
WARNING
Conditions
If the vehicle is stuck and excessive wheel
spin occurs, the temperature in the tires
can increase very quickly. If the tires
Hazardous Driving Conditions
become damaged, a tire blow out or tire
explosion can occur. This condition is
When hazardous driving elements are
dangerous - you and others may be
encountered such as water, snow, ice,
injured. Do not attempt this procedure if
mud and sand, take the following
people or objects are anywhere near the
precautions:
vehicle.
• Drive cautiously and maintain a longer
If you attempt to free the vehicle, the
braking distance.
vehicle can overheat quickly, possibly
• Avoid abrupt braking or steering.
causing an motor compartment fire or
• When your vehicle is stuck in snow,
other damage. Try to avoid spinning the
mud, or sand, accelerate slowly to
wheels as much as possible to prevent
avoid unnecessary wheel spin.
overheating of either the tires or the
• Put sand, rock salt, tire chains or other
motor. DO NOT allow the vehicle to spin
non-slip materials under the wheels to
the wheels above 35 mph (56 km/h).
provide additional traction while the
vehicle becomes stuck in ice, snow, or
mud.
Information
WARNING
The ESC system must be turned OFF
before rocking the vehicle.
Changing the tire speed suddenly could
cause the tires to skid while driving on
slippery surface. Be careful when driving
on slippery surfaces.
NOTICE
If you are still stuck after rocking the
vehicle a few times, have the vehicle
Rocking the Vehicle
pulled out by a tow vehicle to avoid motor
If it is necessary to rock the vehicle to free
overheating, possible damage to the
it from snow, sand, or mud, first turn the
gear, and tire damage. See “Towing”
steering wheel right and left to clear the
section in chapter 8.
area around your front wheels. Then, shift
back and forth between R (Reverse) and a
forward gear.
Smooth Cornering
Try to avoid spinning the wheels, and do
Avoid braking or gear changing in
not race the vehicle.
corners, especially when roads are wet.
To prevent gear wear, wait until the
Ideally, corners should always be taken
wheels stop spinning before shifting
under gentle acceleration.
gears. Release the accelerator pedal
while shifting, and press lightly on the
accelerator pedal while the vehicle is in
gear. Slowly spinning the wheels in
forward and reverse directions causes a
rocking motion that may free the vehicle.
6-49
Driving Your Vehicle
Driving at Night
• Driving too fast through large puddles
can affect your brakes. If you must go
Night driving presents more hazards than
through puddles, try to drive through
driving in the daylight. Here are some
them slowly.
important tips to remember:
• If you believe your brakes may be wet,
• Slow down and keep more distance
apply them lightly while driving until
between you and other vehicles, as it
normal braking operation returns.
may be more difficult to see at night,
especially in areas where there may not
be any street lights.
Hydroplaning
• Adjust your mirrors to reduce the glare
If the road is wet enough and you are
from other drivers’ headlights.
going fast enough, your vehicle may have
little or no contact with the road surface
• Keep your headlights clean and
and actually ride on the water. The best
properly aimed. Dirty or improperly
advice is SLOW DOWN when the road is
aimed headlights will make it much
wet.
more difficult to see at night.
The risk of hydroplaning increases as the
• Avoid staring directly at the headlights
depth of tire tread decreases.
of oncoming vehicles. You could be
temporarily blinded, and it will take
several seconds for your eyes to
Driving in Flooded Areas
readjust to the darkness.
Avoid driving through flooded areas
unless you are sure the water is no higher
Driving in the Rain
than the bottom of the wheel hub. Drive
through any water slowly. Allow adequate
Rain and wet roads can make driving
stopping distance because brake
dangerous. Here are a few things to
performance may be reduced.
consider when driving in the rain or on
slick pavement:
After driving through water, dry the
brakes by gently applying them several
• Slow down and allow extra following
times while the vehicle is moving slowly.
distance. A heavy rainfall makes it
harder to see and increases the
distance needed to stop your vehicle.
Highway Driving
• Turn OFF your Cruise Control. (if
equipped)
Tires
• Replace your windshield wiper blades
Adjust the tire inflation, as specified.
when they show signs of streaking or
Under-inflation may overheat or damage
missing areas on the windshield.
the tires.
• Be sure your tires have enough tread. If
Do not install worn-out or damaged tires,
your tires do not have enough tread,
which may reduce traction or fail the
making a quick stop on wet pavement
braking operation.
can cause a skid and possibly lead to an
accident.
Information
• Turn on your headlights to make it
easier for others to see you.
Never over-inflate your tires above the
maximum inflation pressure, as specified
on your tires.
6-50

6
Coolant and high voltage battery
WARNING
Driving at higher speeds on the highway
consumes more electric energy and is
Utility vehicles have a significantly higher
less efficient than driving at a slower,
rollover rate than other types of vehicles.
more moderate speed. Maintain a
To prevent rollovers or loss of control:
moderate speed in order to conserve
• Take corners at slower speeds than you
electric energy when driving on the
would with a passenger vehicle.
highway.
• Avoid sharp turns and abrupt
Be sure to check both the coolant level
maneuvers.
and the electric energy level before
• Do not modify your vehicle in any way
driving.
that you would raise the center of
gravity.
Reducing the Risk of a
• Keep tires properly inflated.
Rollover
• Do not carry heavy cargo on the roof.
Your multi-purpose passenger vehicle is
defined as a Sports Utility Vehicle (SUV).
SUV’s have higher ground clearance and
WARNING
a narrower track to make them capable of
performing in a wide variety of off-road
In a rollover crash, an unbelted person is
applications. The specific design
significantly more likely to die than a
characteristics give them a higher center
person wearing a seat belt. Make sure all
of gravity than ordinary vehicles making
passengers are wearing their seat belts.
them more likely to roll over if you make
abrupt turns. Utility vehicles have a
significantly higher rollover rate than
other types of vehicles. Due to this risk,
driver and passengers are strongly
recommended to buckle their seat belts.
In a rollover crash, an unbelted person is
significantly more likely to die than a
person wearing a seat belt.
There are steps that a driver can make to
reduce the risk of a rollover. If at all
possible, avoid sharp turns or abrupt
maneuvers, do not load your vehicle with
heavy cargo on the roof, and never
modify your vehicle in any way.
6-51
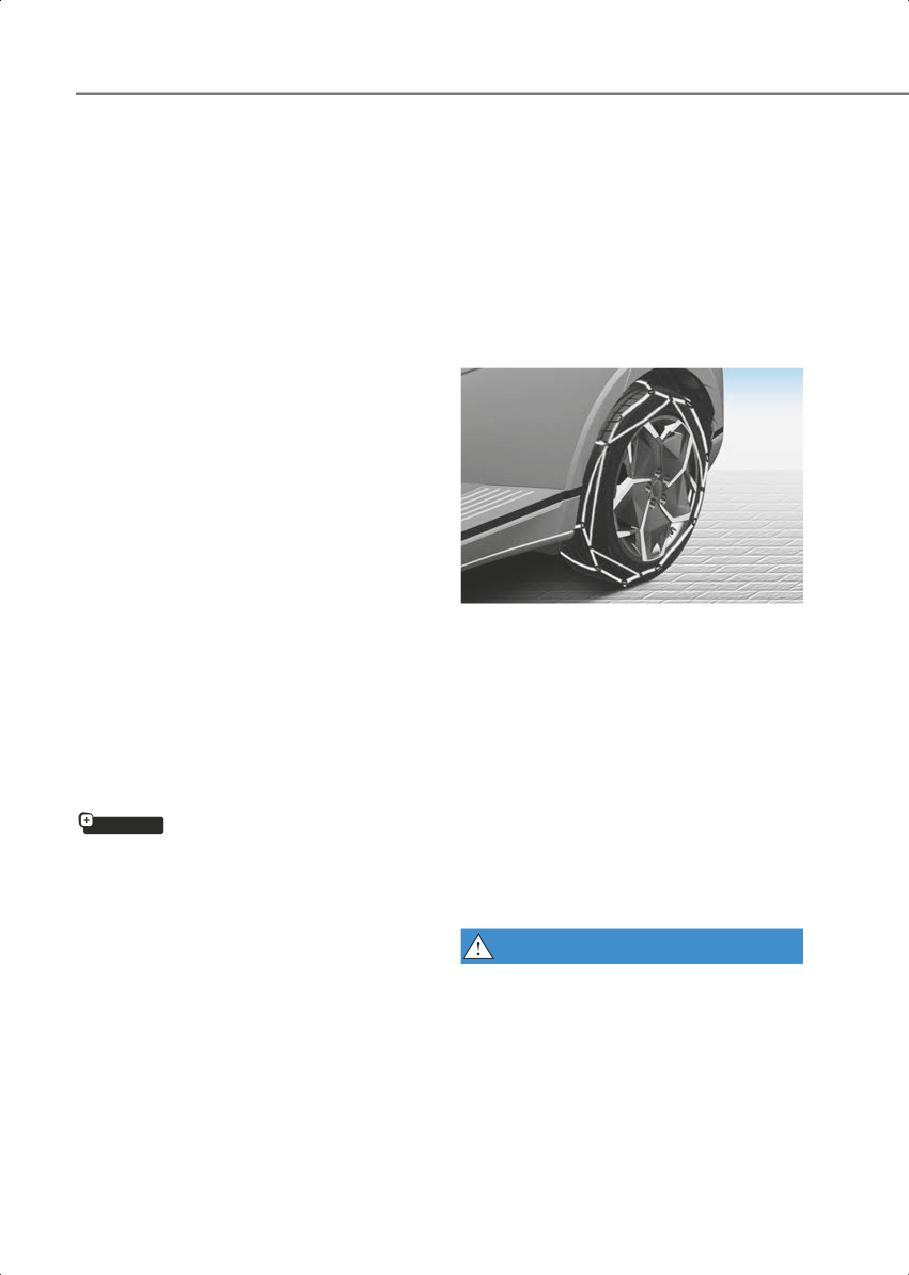
Driving Your Vehicle
• When using the M+S tires, use tires with
Winter Driving
the same tread produced by the same
The severe weather conditions of winter
manufacturer for safe driving.
quickly wear out tires and cause other
• When driving with the M+S tires with
problems. To minimize winter driving
the lower maximum allowable speed
problems, you should take the following
than that of the vehicle’s standard
suggestions:
summer tire, be careful not to exceed
the speed allowed for the M+S tires.
Snow or Icy Conditions
Tire chains (Wire chains)
You need to keep sufficient distance
between your vehicle and the vehicle in
front of you.
Apply the brakes gently. Speeding, rapid
acceleration, sudden brake applications,
and sharp turns are potentially very
hazardous practices. Sudden brake
applications on snowy or icy roads may
cause the vehicle to skid.
To drive your vehicle in deep snow, it may
be necessary to install tire chains on your
tires.
ONE1061022K
Always carry emergency equipment.
Since the sidewalls of radial tires are
Some of the items you may want to carry
thinner than other types of tires, they may
include tire chains, tow straps or chains, a
be damaged by mounting some types of
flashlight, emergency flares, sand, a
tire chains on them. Therefore, the use of
shovel, jumper cables, a window scraper,
snow tires is recommended instead of tire
gloves, ground cloth, coveralls, a blanket,
chains. If tire chains must be used, use
etc.
genuine Hyundai parts and install the tire
chain after reviewing the instructions
Summer tires
provided with the tire chains. Damage to
your vehicle caused by improper tire
if equipped
chain use is not covered by your vehicle
• Summer tires are used to maximize the
manufacturer’s warranty.
driving performance on dry roads.
When using tire chains, install tire chains
• If the temperature is below 7°C or you
only on the rear tires.
are driving on snowy or icy roads, the
summer tires lose their brake
WARNING
performance and traction as the tire
grip weakens significantly.
The use of tire chains may adversely
affect vehicle handling:
• If the temperature is below 7°C or you
are driving on snowy or icy roads,
• Drive less than 20 mph (30 km/h) or the
mount snow tires or all-season tires of
chain manufacturer’s recommended
the same size with your vehicle’s
speed limit, whichever is lower.
standard tire for safe driving. Both
• Drive carefully and avoid bumps, holes,
snow and all-season tires have M+S
sharp turns, and other road hazards,
markings.
which may cause the vehicle to
bounce.
6-52
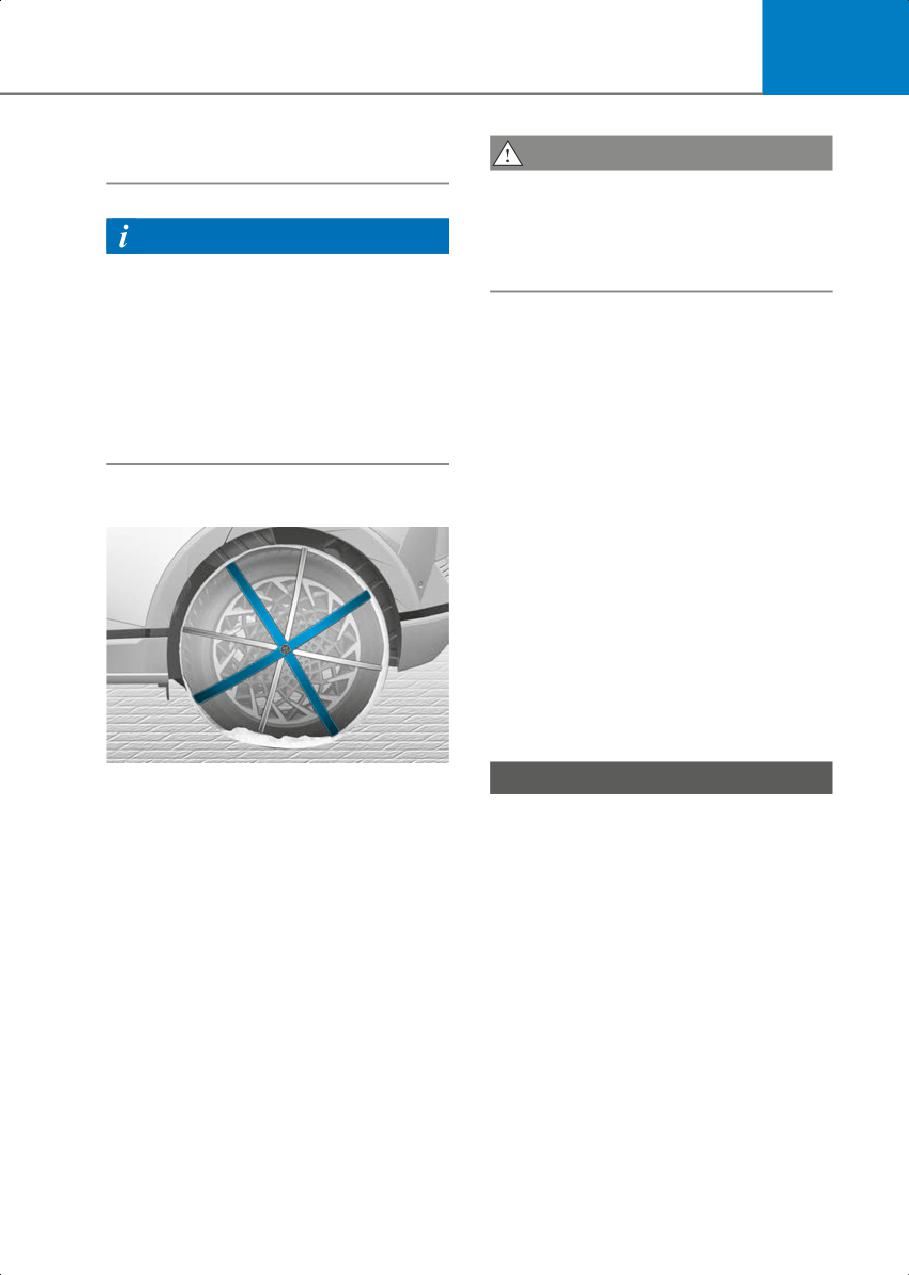
6
• Avoid sharp turns or locked wheel
CAUTION
braking.
Always check chain installation for proper
mounting after driving approximately 0.3
to 0.6 miles (0.5 to 1 km) to ensure safe
Information
mounting. Retighten or remount the
• Install tire chains only in pairs and on
chains if they are loose.
the rear tires. It should be noted that
installing tire chains on the tires will
provide a greater driving force, but will
Chain Installation
not prevent side skids.
When installing tire chains, follow the
• Do not install studded tires without first
manufacturer’s instructions and mount
checking local and municipal
them as tightly possible. Drive slowly (less
regulations for possible restrictions
than 20 mph (30 km/h)) with chains
against their use.
installed. If you hear the chains
contacting the body or chassis, stop and
tighten them. If they still make contact,
Tire chains (Auto sock)
slow down until the noise stops. Remove
the tire chains as soon as you begin
driving on cleared roads.
When mounting snow chains, park the
vehicle on level ground away from traffic.
Turn on the vehicle Hazard Warning
Flasher and place a triangular emergency
warning device behind the vehicle (if
available). Always place the vehicle in P
(Park), apply the parking brake and turn
off the vehicle before installing snow
chains.
ONE1061045
NOTICE
Since the sidewalls of radial tires are
thinner, they can be damaged by
When using tire chains:
mounting some types of snow chains on
• Wrong size chains or improperly
them. Therefore, the use of snow tires is
installed chains can damage your
recommended instead of snow chains.
vehicle’s brake lines, suspension, body
Do not mount tire chains on vehicle
and wheels.
equipped with aluminum wheels; snow
• Use SAE “S” class or wire chains.
chains may cause damage to the wheels.
• If you hear noise caused by chains
If snow chains must be used, use
contacting the body, retighten the
AutoSock (fabric snow chain). Damage to
chain to prevent contact with the
your vehicle caused by improper snow
vehicle body.
chain use is not covered by your vehicle
manufacturer’s warranty.
• To prevent body damage, retighten the
chains after driving 0.3~0.6 miles
When using tire chains, install tire chains
(0.5~1.0 km).
only on the rear tires.
• Do not use tire chains on vehicles
equipped with aluminum wheels. If
unavoidable, use a wire type chain.
6-53
Driving Your Vehicle
• Install tire chains that meet the
Do not let your parking brake freeze
specifications of each tire size to
Under some conditions your parking
prevent damage your vehicle.
brake can freeze in the engaged position.
-
19 in. tires use wire chains less than
This is most likely to happen when there is
0.47in. (12 mm).
an accumulation of snow or ice around or
near the rear brakes or if the brakes are
-
20 in. tires use AutoSock (fabric snow
wet. When there is the risk that your
chain).
parking brake may freeze, temporarily
apply it with the gear in P (Park). Also,
block the rear wheels in advance, so the
Winter Precautions
vehicle may not roll. Then, release the
parking brake.
Check battery and cables
Winter temperatures affect battery
Do not let ice and snow accumulate
performance. Inspect the battery and
underneath
cables, as specified in chapter 9. The
Under some conditions, snow and ice can
battery charging level can be checked by
build up under the fenders and interfere
an authorized HYUNDAI dealer or in a
with the steering. When driving in such
service station.
conditions during the severe winter, you
should check underneath the vehicle on a
To prevent locks from freezing
regular basis, to ensure that the front
To prevent the locks from being frozen,
wheels and the steering components is
spray approved de-icing fluid or glycerin
unblocked.
into key holes. When a lock opening is
already covered with ice, spray approved
Carry emergency equipment
de-icing fluid over the ice to remove it.
In accordance with weather conditions,
When an internal part of a lock freezes, try
you should carry appropriate emergency
to thaw it with a heated key. Carefully use
equipment, while driving. Some of the
the heated key to avoid an injury.
items you may want to carry include tire
chains, tow straps or chains, flashlight,
Use approved window washer anti-freeze
emergency flares, sand, shovel, jumper
solution in system
cables, window scraper, gloves, ground
To prevent the window washer from
cloth, coveralls, blanket, etc.
being frozen, add authorized window
washer anti-freeze solution, as specified
Do not place objects or materials in the
on the window washer container.
motor compartment
Window washer anti-freeze solution is
Putting objects or materials in the motor
available from an authorized HYUNDAI
compartment may cause an motor
dealer, and most vehicle accessory
failure. Such damage will not be covered
outlets. Do not use coolant or other types
by the manufacturer’s warranty.
of anti-freeze solution, to prevent any
damage to the vehicle paint.
6-54
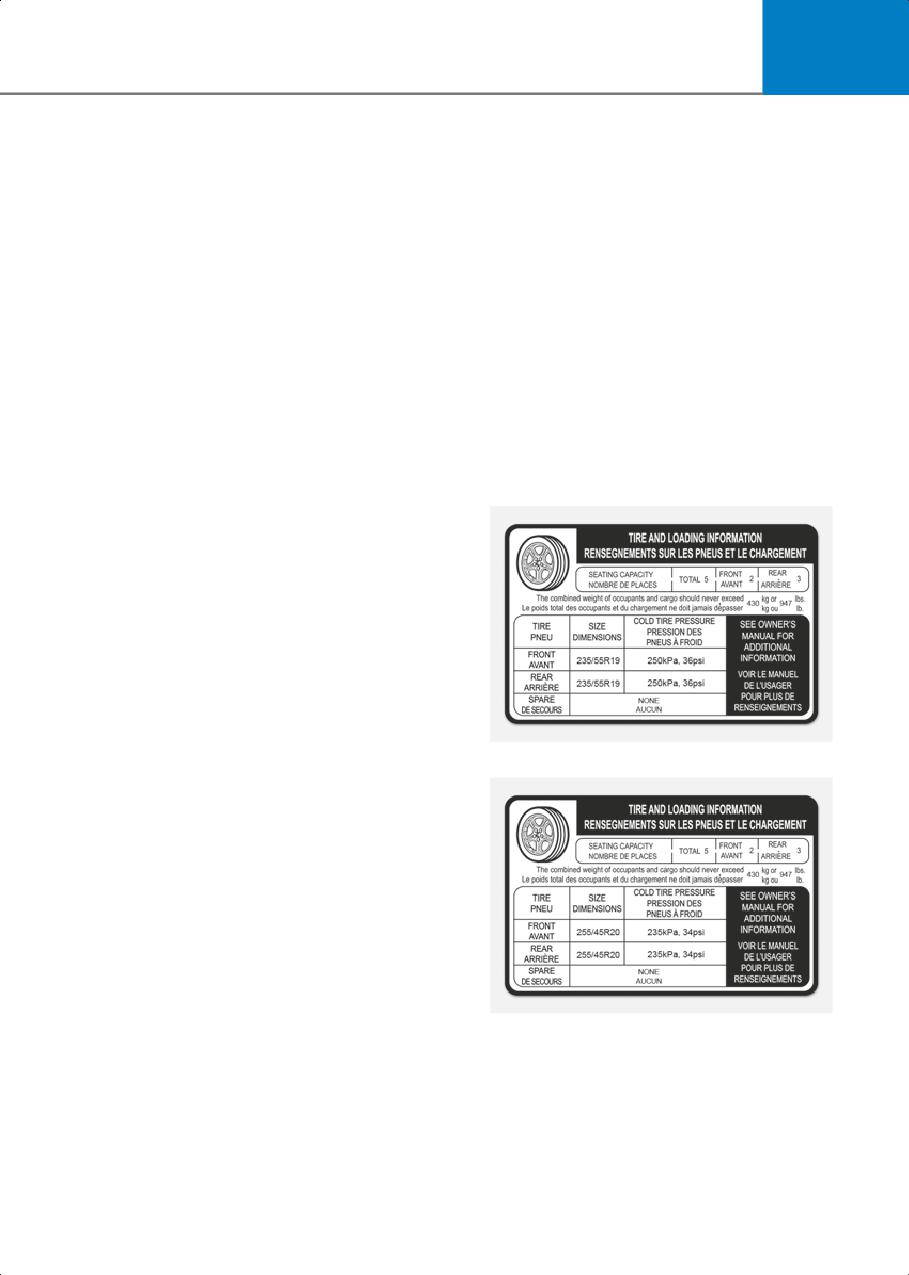
6
GVW (Gross Vehicle Weight)
Vehicle Load Limit
This is the Base Curb Weight plus
Two labels on your driver’s door sill
actual Cargo Weight plus passengers.
show how much weight your vehicle
was designed to carry: the Tire and
GVWR (Gross Vehicle Weight Rating)
Loading Information Label and the
This is the maximum allowable
Certification Label.
weight of the fully loaded vehicle
Before loading your vehicle,
(including all options, equipment,
familiarize yourself with the following
passengers and cargo). The GVWR is
terms for determining your vehicle’s
shown on the Certification Label
weight ratings, from the vehicle’s
located on the driver’s door sill.
specifications and the Certification
Label:
The Loading Information
Base Curb Weight
Label
This is the weight of the vehicle
Type A
including a full tank of fuel and all
standard equipment. It does not
include passengers, cargo, or
optional equipment.
Vehicle Curb Weight
This is the weight of your new vehicle
when you picked it up from your
dealer plus any aftermarket
equipment.
ONE1061056N
Type B
Cargo Weight
This figure includes all weight added
to the Base Curb Weight, including
cargo and optional equipment.
GAW (Gross Axle Weight)
This is the total weight placed on
each axle (front and rear) - including
vehicle curb weight and all payload.
GAWR (Gross Axle Weight Rating)
ONE1061057N
This is the maximum allowable
weight that can be carried by a single
axle (front or rear). These numbers
are shown on the Certification Label.
The total load on each axle must
never exceed its GAWR.
6-55
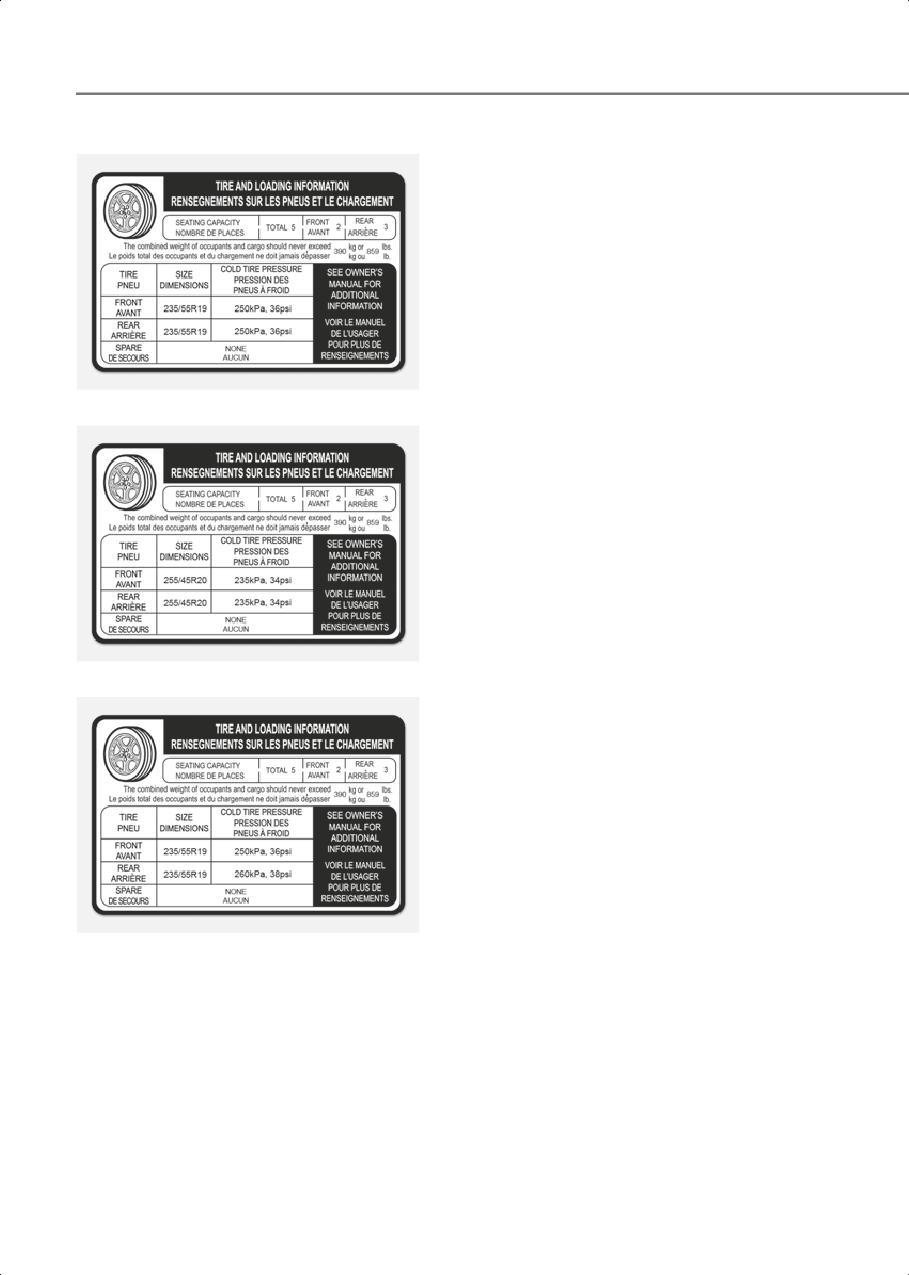
Driving Your Vehicle
Type C
Vehicle capacity weight
5 persons (Standard) : 947 lbs. (430
kg)
5 persons (Long Range) : 859 lbs.
(390 kg)
Vehicle capacity weight is the
maximum combined weight of
occupants and cargo. If your vehicle
is equipped with a trailer, the
combined weight includes the
ONE1061058N
tongue load.
Type D
Seating capacity
Total : 5 persons (Front seat : 2
persons, Rear seat : 3 persons)
Seating capacity is the maximum
number of occupants including a
driver, your vehicle may carry.
However, the seating capacity may
be reduced based upon the weight of
all of the occupants, and the weight
ONE1061061N
of the cargo being carried or towed.
Type E
Do not overload the vehicle as there
is a limit to the total weight, or load
limit including occupants and cargo,
the vehicle can carry.
Towing capacity
With brake system : 2,000 lbs (907
kg)
Without brake system : 1,653 lbs (750
kg)
ONE1061062N
Towing capacity is the maximum
The label located on the driver’s door
trailer weight including its cargo
sill gives the original tire size, cold tire
weight, your vehicle can tow.
pressures recommended for your
vehicle, the number of people that
Cargo capacity
can be in your vehicle and vehicle
The cargo capacity of your vehicle
capacity weight.
will increase or decrease depending
on the weight and the number of
occupants and the tongue load, if
your vehicle is equipped with a trailer.
6-56
6
Steps for determining correct load
limit
1. Locate the statement “The
combined weight of occupants and
cargo should never exceed XXX kg
or XXX lbs.” on your vehicle's
placard.
2.Determine the combined weight of
the driver and passengers that will
be riding in your vehicle.
3.Subtract the combined weight of
the driver and passengers from XXX
kg or XXX lbs.
4.The resulting figure equals the
available amount of cargo and
luggage load capacity. For
example, if the “XXX” amount
equals 1,400 lbs. and there will be
five 150 lb passengers in your
vehicle, the amount of available
cargo and luggage load capacity is
650 lbs. (1,400 - 750 (5 x 150) = 650
lbs.)
5.Determine the combined weight of
luggage and cargo being loaded on
the vehicle. That weight may not
safely exceed the available cargo
and luggage load capacity
calculated in Step 4.
6.If your vehicle will be towing a
trailer, load from your trailer will be
transferred to your vehicle. Consult
this manual to determine how this
reduces the available cargo and
luggage load capacity of your
vehicle.
6-57
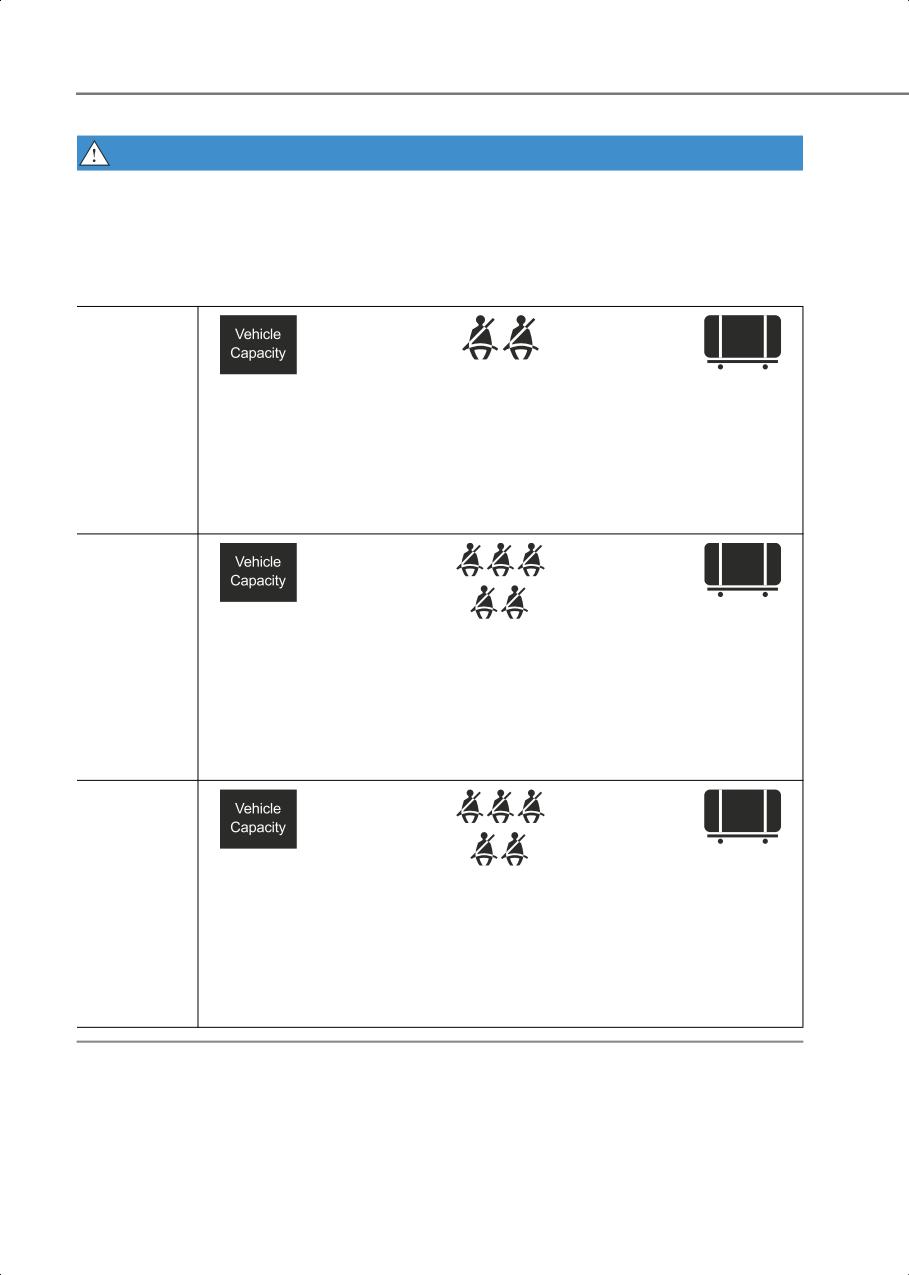
Driving Your Vehicle
WARNING
Do not overload the vehicle as there is a limit to the total weight, or load limit,
including occupants and cargo, the vehicle can carry. Overloading can shorten
the life of the vehicle. If the GVWR or the GAWR is exceeded, parts on the vehicle
can break, and it can change the handling of your vehicle. These could cause
you to lose control and result in an accident.
mark_OLMB083010
mark_Vehicle_Capa
mark_Weight
city
_2Passenger
Cargo
Maximum
Example 1
≥
Weight
+
Weight
Load
(150 lbs. × 2
(1,100 lbs.)
(1,400 lbs.)
= 300 lbs.)
(499 kg)
(635 kg)
(68 kg × 2 =
136 kg)
mark_Weight
mark_Vehicle_Capa
city
mark_OLMB083010
Cargo
Maximum
Passenger
Weight
Example 2
≥
+
Load
Weight
(650 lbs.)
(1,400 lbs.)
(150 lbs. × 5
(295 kg)
(635 kg)
= 750 lbs.)
(68 kg × 5 =
340 kg)
mark_Vehicle_Capa
mark_Weight
city
mark_OLMB083010
Cargo
Maximum
Passenger
Weight
Example 3
≥
+
Load
Weight
(540 lbs.)
(1,400 lbs.)
(172 lbs. × 5
(245 kg)
(635 kg)
= 860 lbs.)
(78 kg × 5 =
390 kg)
6-58
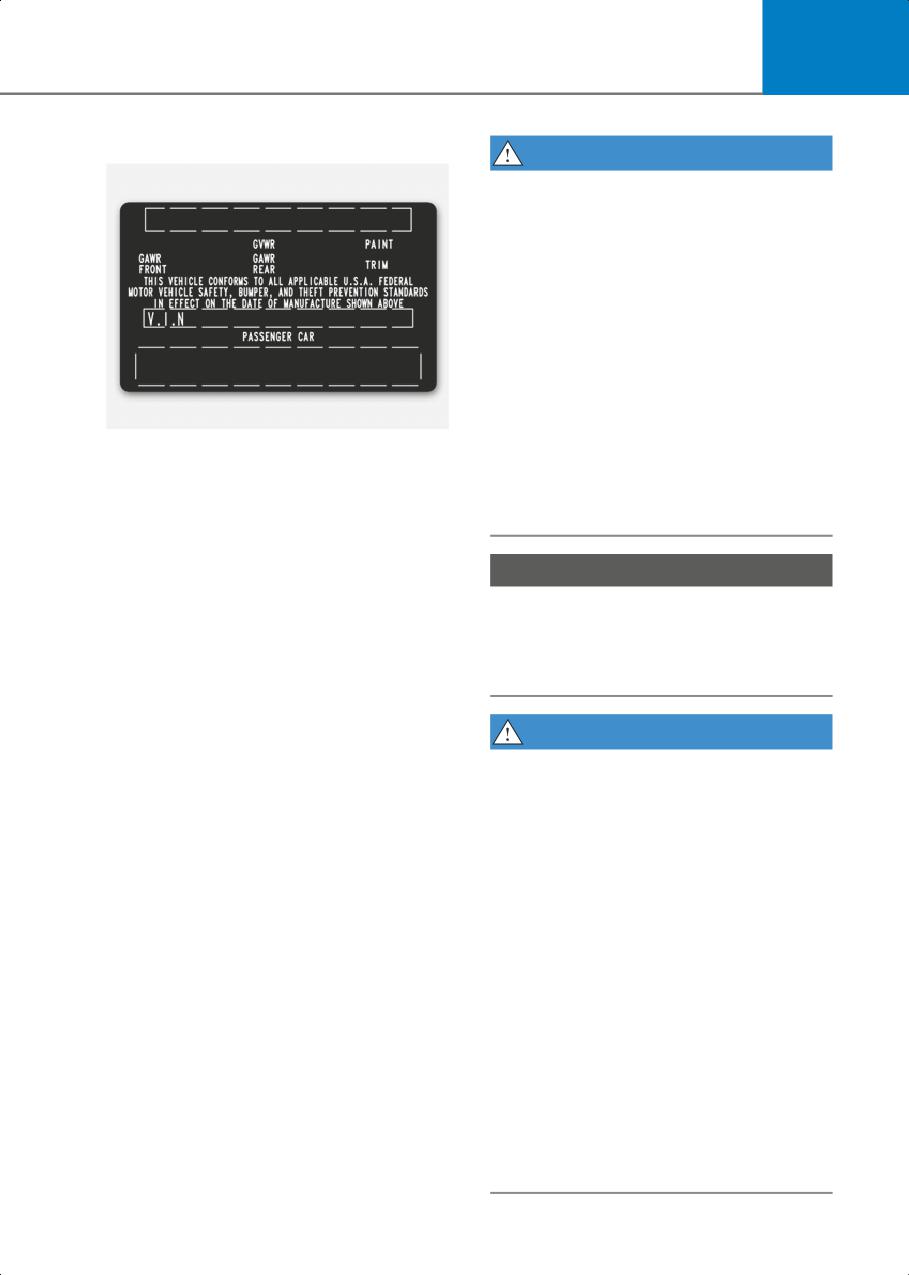
6
Certification label
WARNING
Overloading
• Never exceed the GVWR for your
vehicle, the GAWR for either the
front or rear axle and vehicle
capacity weight. Exceeding these
ratings can affect your vehicle's
handling and braking ability, and
cause an accident.
• Do not overload your vehicle.
Overloading your vehicle can cause
heat buildup in your vehicle's tires
OBH059070
and possible tire failure, increased
The certification label is located on
stopping distances and poor
the driver's door sill at the center
vehicle handling-all of which may
pillar and shows the maximum
result in a crash.
allowable weight of the fully loaded
vehicle. This is called the GVWR
(Gross Vehicle Weight Rating). The
NOTICE
GVWR includes the weight of the
Overloading your vehicle may cause
vehicle, all occupants, fuel and cargo.
damage. Repairs would not be
This label also tells you the maximum
covered by your warranty. Do not
weight that can be supported by the
overload your vehicle.
front and rear axles, called Gross Axle
Weight Rating (GAWR).
WARNING
The total weight of the vehicle,
including all occupants, accessories,
If you carry items inside your vehicle
cargo, and trailer tongue load must
(for example, suitcases, tools,
not exceed the Gross Vehicle Weight
packages, or anything else), they are
Rating (GVWR) or the Gross Axle
moving as fast as the vehicle. If you
Weight Rating (GAWR). To find out
have to stop or turn quickly, or if there
the actual loads on your front and
is a crash, the items will keep going
rear axles, you need to go to a weigh
and can cause an injury if they strike
station and weigh your vehicle. Be
the driver or a passenger.
sure to spread out your load equally
• Put items in the cargo area of your
on both sides of the centerline.
vehicle. Try to spread the weight
evenly.
• Do not stack items, like suitcases,
inside the vehicle above the tops of
the seats.
• Do not leave an unsecured child
restraint in your vehicle.
• When you carry something inside
the vehicle, secure it.
6-59
Driving Your Vehicle
Trailer Towing
If You Decide to Pull a Trailer
Here are some important points if you
If you are considering to tow with your
decide to pull a trailer:
vehicle, you should first your state’s legal
requirements. As laws vary the
•
Consider using a sway control. You can
requirements for towing trailers, cars, or
ask a trailer hitch dealer about sway
other types of vehicles or apparatus may
control.
differ. Ask an authorized HYUNDAI dealer
•
Do not do any towing with your vehicle
for further details before towing.
during its first 1,200 miles (2,000 km) in
Remember that trailering is different than
order to allow the vehicle to properly
just driving your vehicle by itself.
break in. Failure to heed this caution
Trailering means changes in handling,
may result in serious motor damage.
durability, and electric energy economy.
•
When towing a trailer, consult an
Successful, safe trailering requires
authorized HYUNDAI dealer for further
correct equipment, and it has to be used
information on additional requirements
properly. Damage to your vehicle caused
such as towing kit etc.
by improper trailer towing is not covered
•
Always drive your vehicle at a moderate
by your vehicle manufacturer’s warranty.
speed (less than 60 mph (100 km/h)) or
This section contains many time-tested,
posted towing speed limit.
important trailering tips and safety rules.
•
On a long uphill grade, do not exceed
Many of these are important for your
45 mph (70 km/h) or the posted towing
safety and that of your passengers. Please
speed limit, whichever is lower.
read this section carefully before you pull
•
Carefully observe the weight and load
a trailer.
limits provided in the following pages.
WARNING
Take the following precautions:
• If you don’t use the correct equipment
and/or drive improperly, you can lose
control of the vehicle when you are
pulling a trailer. For example, if the
trailer is too heavy, the braking
performance may be reduced. You and
your passengers could be seriously or
fatally injured. Pull a trailer only if you
have followed all the steps in this
section.
• Before towing, make sure the total
trailer weight, GCW (Gross
Combination Weight), GVW (Gross
Vehicle Weight), GAW (Gross Axle
Weight) and trailer tongue load are all
within the limits.
6-60
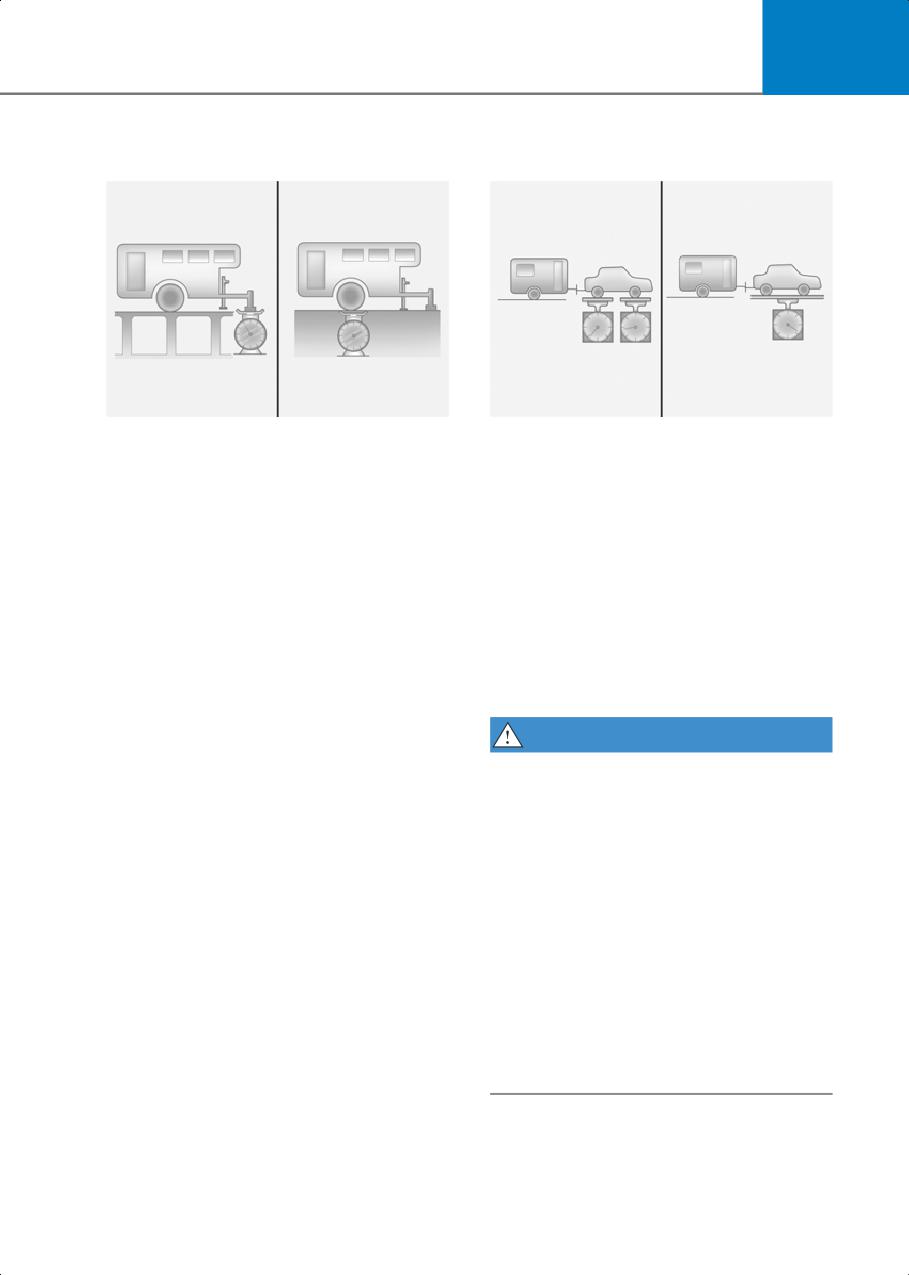
6
Trailer weight
Tongue load
Tongue Load/Total Trailer Weight
Gross Axle Weight/Gross Vehicle Weight
OOSH069129L
OOSH069130L
What is the maximum safe weight of a
The tongue load is an important weight to
trailer? It should never weigh more than
measure because it affects the total Gross
the maximum trailer weight with trailer
Vehicle Weight (GVW) of your vehicle.
brakes. But even that can be too heavy. It
The trailer tongue should weigh a
depends on how you plan to use your
maximum of 10% of the total loaded
trailer. For example, speed, altitude, road
trailer weight, within the limits of the
grades, outside temperature and how
maximum trailer tongue load permissible.
often your vehicle is used to pull a trailer
After you’ve loaded your trailer, weigh the
are all important. The ideal trailer weight
trailer and then the tongue, separately, to
can also depend on any special
see if the weights are proper. If they
equipment that you have on your vehicle.
aren’t, you may be able to correct them
simply by moving some items around in
the trailer.
WARNING
Take the following precautions:
• Never load a trailer with more weight in
the rear than in the front. The front
should be loaded with approximately
60% of the total trailer load; the rear
should be loaded with approximately
40% of the total trailer load.
• Never exceed the maximum weight
limits of the trailer or trailer towing
equipment. Improper loading can
result in damage to your vehicle and/or
personal injury. Check weights and
loading at a commercial scale or
highway patrol office equipped with
scales.
6-61

Driving Your Vehicle
Reference weight and distance when towing a trailer
ltem
Standard
Long Range
With brake
-
2,000 (907)
system
Maximum trailer weight
lbs. (kg)
Without brake
-
1,653 (750)
system
Maximum tongue weight
-
220 (100)
lbs. (kg)
6-62
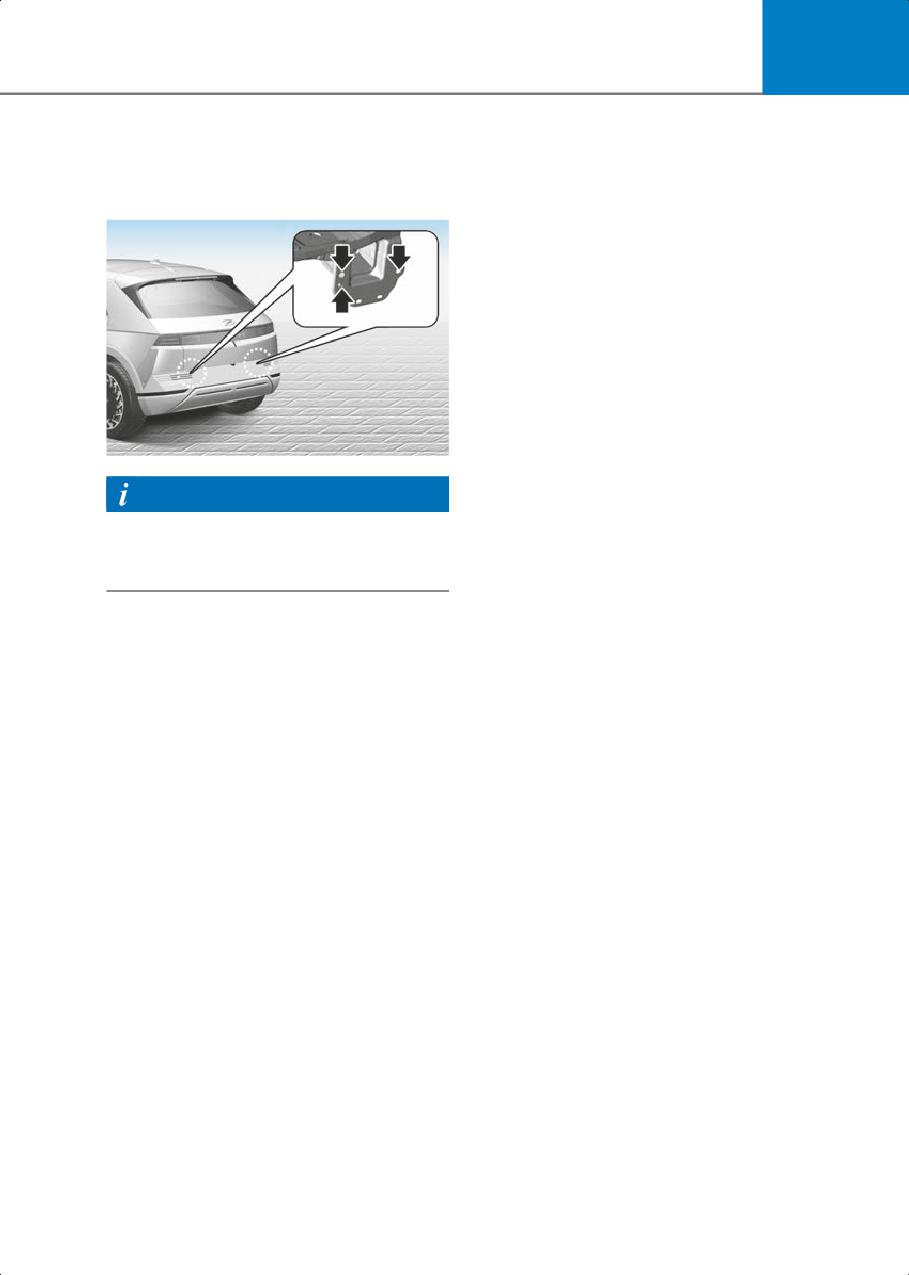
6
Trailer Towing Equipment
• Any part of the rear number plate or
lighting devices of the vehicle must not
be obscured by the mechanical
Hitches
coupling device.
If the rear number plate and/or lighting
devices can be obscured partially by
any part of the mechanical coupling
device, mechanical coupling devices
that can not be easily removed or
repositioned without use of any tools,
except an easily operated (for example,
an effort not exceeding 20Nm) release
key which is supplied by the
manufacturer of the coupling device,
are not permitted for use.
ONE1061060N
Please note that the mechanical
coupling device that is fitted and not in
Information
use must always be removed or
The mounting hole for hitches are located
repositioned if the rear number plate
on both sides of the underbody behind
and/or rear lighting devices are
the rear tires.
obscured by any part of the mechanical
coupling device.
• A HYUNDAI Vehicle trailer hitch
It’s important to have the correct hitch
accessory is available at an authorized
equipment. Crosswinds, large trucks
HYUNDAI dealer.
going by, and rough roads are a few
reasons why you’ll need the right hitch.
Here are some rules to follow:
Safety chains
• Do you have to make any holes in the
You should always attach chains between
body of your vehicle when you install a
your vehicle and your trailer.
trailer hitch? If you do, then be sure to
Instructions about safety chains may be
seal the holes later when you remove
provided by the hitch manufacturer or
the hitch. If you don’t seal them, dirt
trailer manufacturer. Follow the
and water can get into your vehicle.
manufacturer’s recommendation for
• The bumpers on your vehicle are not
attaching safety chains. Always leave just
intended for hitches. Do not attach
enough slack so you can turn with your
rental hitches or other bumper-type
trailer. And, never allow safety chains to
hitches to them. Use only a
drag on the ground.
frame-mounted hitch that does not
attach to the bumper.
6-63

Driving Your Vehicle
Trailer brakes
Information
If your trailer is equipped with a braking
system, make sure it conforms to your
When the ambient temperature is lower
state’s regulations and that it is properly
than 32°F (0°C) and the remaining high
installed and operating correctly.
voltage battery is low, the power of the
vehicle with a trailer can be dropped,
If your trailer weighs more than the
causing a trouble in acceleration or drop
maximum trailer weight without trailer
of the speed when driving hills.
brakes loaded, then it needs its own
brakes and they must be adequate. Be
When driving with a trailer, be sure to
sure to read and follow the instructions
charge the high voltage battery more
for the trailer brakes so you’ll be able to
than 50% if the ambient temperature is
install, adjust and maintain them
lower than 32°F (0°C).
properly. Be sure not to modify your
vehicle’s brake system.
Distance
WARNING
Stay at least twice as far behind the
vehicle ahead as you would when driving
Do not use a trailer with its own brakes
your vehicle without a trailer. This can
unless you are absolutely certain that you
help you avoid situations that require
have properly set up the brake system.
heavy braking and sudden turns.
This is not a task for amateurs. Use an
experienced, competent trailer shop for
this work.
Passing
You will need more passing distance up
ahead when you’re towing a trailer. And,
Driving with a Trailer
because of the increased vehicle length,
Towing a trailer requires a certain amount
you’ll need to go much farther beyond the
of experience. Before setting out for the
passed vehicle before you can return to
open road, you must get to know your
your lane.
trailer. Acquaint yourself with the feel of
handling and braking with the added
Backing up
weight of the trailer. And always keep in
mind that the vehicle you are driving is
Hold the bottom of the steering wheel
now longer and not nearly as responsive
with one hand. Then, to move the trailer
as your vehicle is by itself.
to the left, move your hand to the left. To
move the trailer to the right, move your
Before you start, check the trailer hitch
hand to the right. Always back up slowly
and platform, safety chains, electrical
and, if possible, have someone guide you.
connector(s), lights, tires and brakes.
During your trip, occasionally check to be
sure that the load is secure, and that the
Making turns
lights and trailer brakes are still working.
When you’re turning with a trailer, make
wider turns than normal. Do this so your
trailer won’t strike soft shoulders, curbs,
road signs, trees, or other objects. Avoid
jerky or sudden maneuvers. Signal well in
advance.
6-64

6
Turn signals
Driving on hills
When you tow a trailer, your vehicle has
Reduce speed before you start down a
to have a different turn signal flasher and
long or steep downgrade.
extra wiring. The green arrows on your
On a long uphill grade, reduce your speed
instrument panel will flash whenever you
to around 45 mph (70 km/h) to reduce the
signal a turn or lane change. Properly
possibility of motor overheating.
connected, the trailer lights will also flash
to alert other drivers you’re about to turn,
NOTICE
change lanes, or stop.
To prevent motor overheating:
When towing a trailer, the green arrows
on your instrument panel will flash for
When towing a trailer, your vehicle speed
turns even if the bulbs on the trailer are
may be much slower than the general
burned out. Thus, you may think drivers
flow of traffic, especially when climbing
behind you are seeing your signals when,
an uphill grade. Use the right hand lane
in fact, they are not. It’s important to
when towing a trailer on an uphill grade.
check occasionally to be sure the trailer
Choose your vehicle speed according to
bulbs are still working. You must also
the maximum posted speed limit for
check the lights every time you
vehicles with trailers, the steepness of the
disconnect and then reconnect the wires.
grade, and your trailer weight.
WARNING
Parking on hills
Do not connect a trailer lighting system
Generally, if you have a trailer attached to
directly to your vehicle’s lighting system.
your vehicle, you should not park your
Use an approved trailer wiring harness.
vehicle on a hill.
Failure to do so could result in damage to
the vehicle electrical system and/or
However, if you ever have to park your
personal injury. Consult an authorized
trailer on a hill, here’s how to do it:
HYUNDAI dealer for assistance.
1. Pull the vehicle into the parking space.
Turn the steering wheel in the direction
of the curb (right if headed down hill,
left if headed up hill).
2. Shift the gear to P (Park).
3. Set the parking brake and shut off the
vehicle.
4. Place wheel chocks under the trailer
wheels on the down hill side of the
wheels.
5. Start the vehicle, hold the brakes, shift
to neutral, release the parking brake
and slowly release the brakes until the
trailer chocks absorb the load.
6. Reapply the brakes and parking brakes.
7. Shift the gear to P (Park) when the
vehicle is parked on a uphill grade and
in R (Reverse) on a downhill.
6-65
Driving Your Vehicle
8.Shut off the vehicle and release the
Maintenance when Towing a
vehicle brakes but leave the parking
Trailer
brake set.
Your vehicle will need service more often
WARNING
when you regularly pull a trailer.
Important items to pay particular
To prevent serious or fatal injury:
attention to include gear fluid, axle
• Do not get out of the vehicle without
lubricant and cooling system fluid. Brake
the parking brake firmly set. If you have
condition is another important item to
left the vehicle running, the vehicle can
frequently check. If you’re trailering, it’s a
move suddenly. You and others could
good idea to review these items before
be seriously or fatally injured.
you start your trip. Don’t forget to also
maintain your trailer and hitch. Follow the
• Do not apply the accelerator pedal to
maintenance schedule that accompanied
hold the vehicle on an uphill.
your trailer and check it periodically.
Preferably, conduct the check at the start
of each day’s driving. Most importantly,
Driving the vehicle after it has been
all hitch nuts and bolts should be tight.
parked on a hill
1. With the gear in P (Park), apply your
NOTICE
brakes and hold the brake pedal down
while you:
To prevent vehicle damage:
• Start your vehicle;
• Due to higher load during trailer usage,
overheating might occur on hot days or
• Shift into gear; and
during uphill driving.
• Release the parking brake.
• When towing check gear fluid more
2. Slowly remove your foot from the brake
frequently.
pedal.
3. Drive slowly until the trailer is clear of
the chocks.
4. Stop and have someone pick up and
store the chocks.
6-66
6
GVWR (Gross Vehicle Weight Rating)
Vehicle Weight
This is the maximum allowable weight of
Two labels on your driver’s door sill show
the fully loaded vehicle (including all
how much weight your vehicle was
options, equipment, passengers and
designed to carry: the Tire and Loading
cargo). The GVWR is shown on the
Information Label and the Certification
Certification Label located on the driver’s
Label.
door sill.
Before loading your vehicle, familiarize
yourself with the following terms for
determining your vehicle’s weight
Overloading
ratings, from the vehicle’s specifications
WARNING
and the Certification Label:
The Gross Axle Weight Rating (GAWR)
Base Curb Weight
and the Gross Vehicle Weight Rating
This is the weight of the vehicle including
(GVWR) for your vehicle are on the
high voltage battery and all standard
Certification Label attached to the
equipment. It does not include
driver’s (or front passenger’s) door.
passengers, cargo, or optional
Exceeding these ratings can cause an
equipment.
accident or vehicle damage. You can
calculate the weight of your load by
Vehicle Curb Weight
weighing the items (and people) before
putting them in the vehicle. Be careful not
This is the weight of your new vehicle
to overload your vehicle.
when you picked it up from your dealer
plus any aftermarket equipment.
Cargo Weight
This figure includes all weight added to
the Base Curb Weight, including cargo
and optional equipment.
GAW (Gross Axle Weight)
This is the total weight placed on each
axle (front and rear) - including vehicle
curb weight and all payload.
GAWR (Gross Axle Weight Rating)
This is the maximum allowable weight
that can be carried by a single axle (front
or rear). These numbers are shown on the
Certification Label. The total load on each
axle must never exceed its GAWR.
GVW (Gross Vehicle Weight)
This is the Base Curb Weight plus actual
Cargo Weight plus passengers.
6-67
7. Driver Assistance System
Driver Assistance System Notice
7-4
Forward Collision-Avoidance Assist (FCA)
7-4
Forward Collision-Avoidance Assist Settings
7-8
Forward Collision-Avoidance Assist Operation
7-10
Forward Collision-Avoidance Assist Malfunction and Limitations
7-19
Lane Keeping Assist (LKA)
7-28
Lane Keeping Assist Settings
7-28
Lane Keeping Assist Operation
7-30
Lane Keeping Assist Malfunction and Limitations
7-32
Blind-Spot Collision-Avoidance Assist (BCA)
7-33
Blind-Spot Collision-Avoidance Assist Settings
7-36
Blind-Spot Collision-Avoidance Assist Operation
7-38
Blind-Spot Collision-Avoidance Assist Malfunction and Limitations
7-41
Safe Exit Assist (SEA)
7-46
Safe Exit Assist Settings
7-46
Safe Exit Assist Operation
7-47
Safe Exit Assist Malfunction and Limitations
7-49
Manual Speed Limit Assist (MSLA)
7-51
Manual Speed Limit Assist Operation
7-51
Intelligent Speed Limit Assist (ISLA)
7-53
7
Intelligent Speed Limit Assist Settings
7-54
Intelligent Speed Limit Assist Operation
7-55
Intelligent Speed Limit Assist Malfunction and Limitations
7-57
Driver Attention Warning (DAW)
7-59
Driver Attention Warning Settings
7-59
Driver Attention Warning Operation
7-60
Driver Attention Warning Malfunction and Limitations
7-63
Blind-Spot View Monitor (BVM)
7-65
Blind-Spot View Monitor Settings
7-66
Blind-Spot View Monitor Operation
7-66
Blind-Spot View Monitor Malfunction
7-67
Smart Cruise Control (SCC)
7-67
Smart Cruise Control Settings
7-68
Smart Cruise Control Operation
7-73
Smart Cruise Control Malfunction and Limitations
7-79