Hyundai Ioniq 5 (2024 year). Manual in english - page 2
Vehicle Information, Consumer Information and Reporting Safety Defects
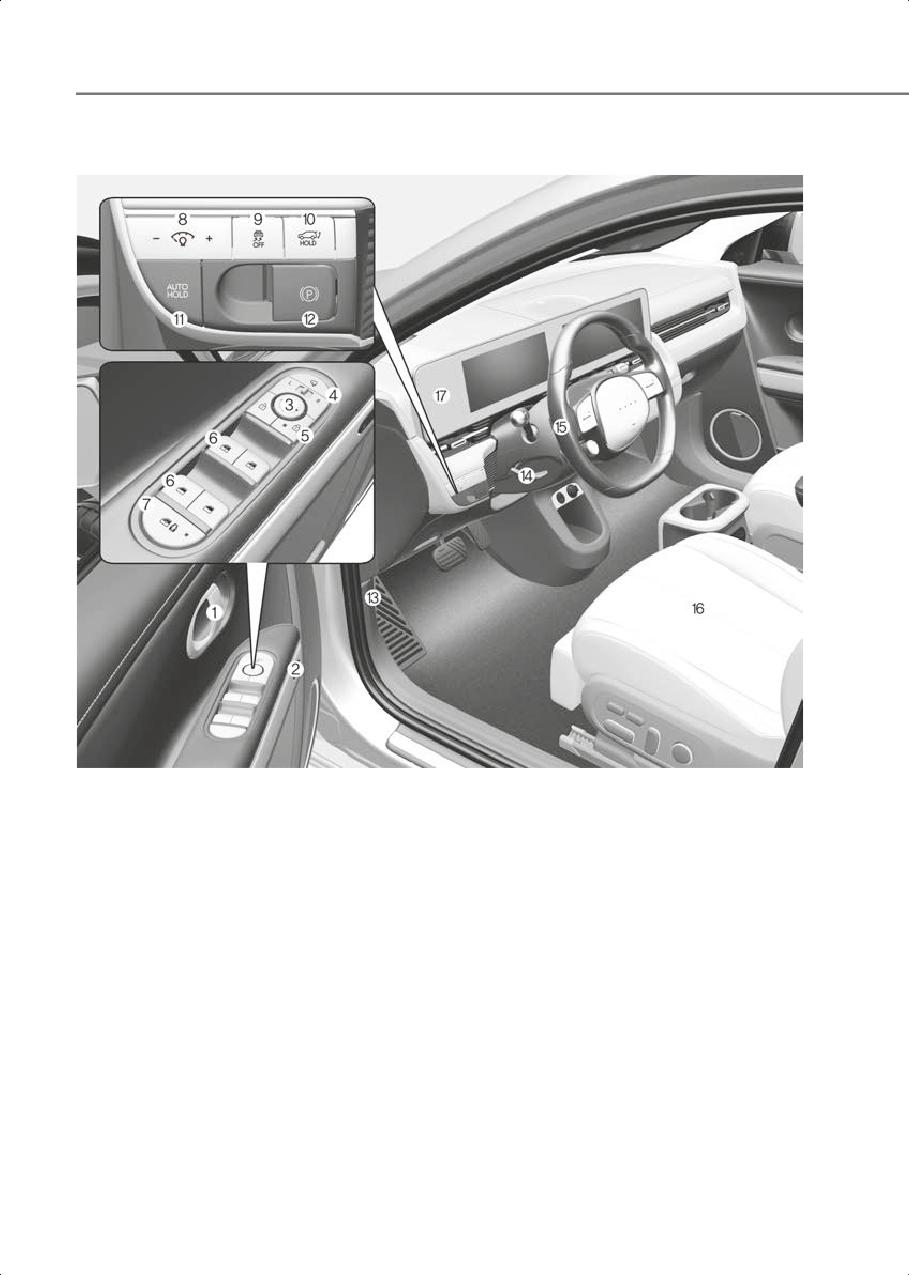
Interior Overview
ONE1011003N
The actual shape may differ from the illustration.
(1) Inside door handle
5-29
(2) Integrated memory system
5-36
(3) Side view mirror control switch
5-52
(4) Side view mirror folding button
5-52
(5) Central door lock switch
5-29
(6) Power window switches
5-61
(7) Power window lock button / Electronic child safety lock button
5-61/5-32
(8) Instrument panel illumination
4-3
(9) ESC (Electronic Stability Control) OFF button
6-35
(10)Power liftgate open/close button
5-72
(11) AUTO Hold button
6-31
(12)EPB (Electronic Parking Brake) switch
6-27
(13)Hood release lever
5-68
(14)Steering wheel tilt/telescopic lever
5-40
(15)Steering wheel
5-39
(16)Seat
3-3
(17)Cluster fascia side panel
5-121
2-4
2
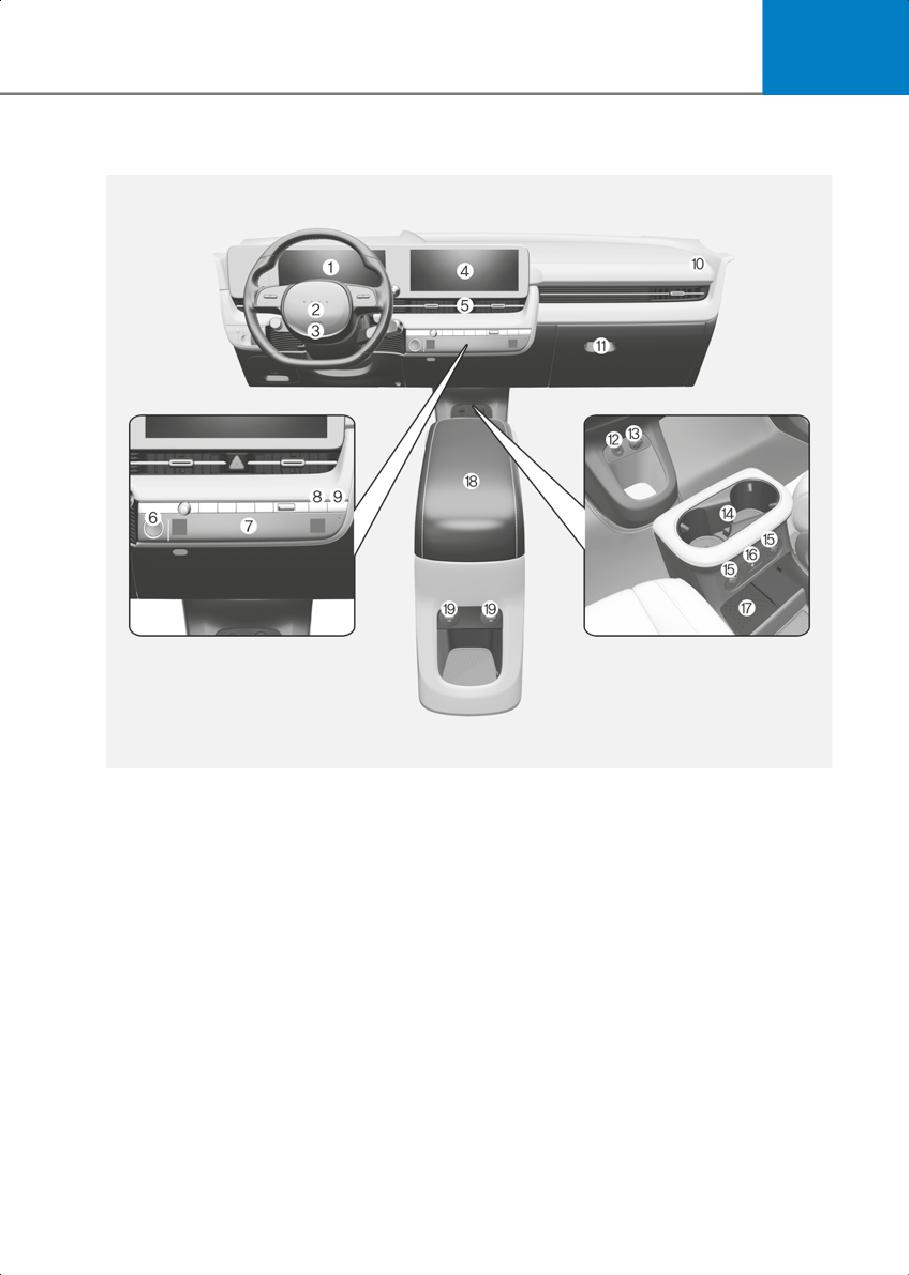
Center Console Overview
ONE1011004
The actual shape may differ from the illustration.
(1) Instrument cluster
4-2
(2) Horn
5-41
(3) Driver’s front air bag
3-39
(4) Infotainment system
5-127
(5) Hazard warning flasher button
8-2
(6) Start/Stop button
6-4
(7) Automatic climate control system
5-95
(8) Parking/View button
7-108
(9) Parking Safety button
7-126
(10)Passenger’s front air bag
3-39
(11) Glove box
5-115
(12)USB port
5-118
(13)Power outlet
5-117
(14)Cup holder
5-116
(15)USB charger
5-118
(16)Wireless charging system
5-119
(17)Wireless charging system pad
5-119
2-5
Vehicle Information, Consumer Information and Reporting Safety Defects
(18)Center console
5-114
(19)Rear seat USB charger
5-118
2-6
2
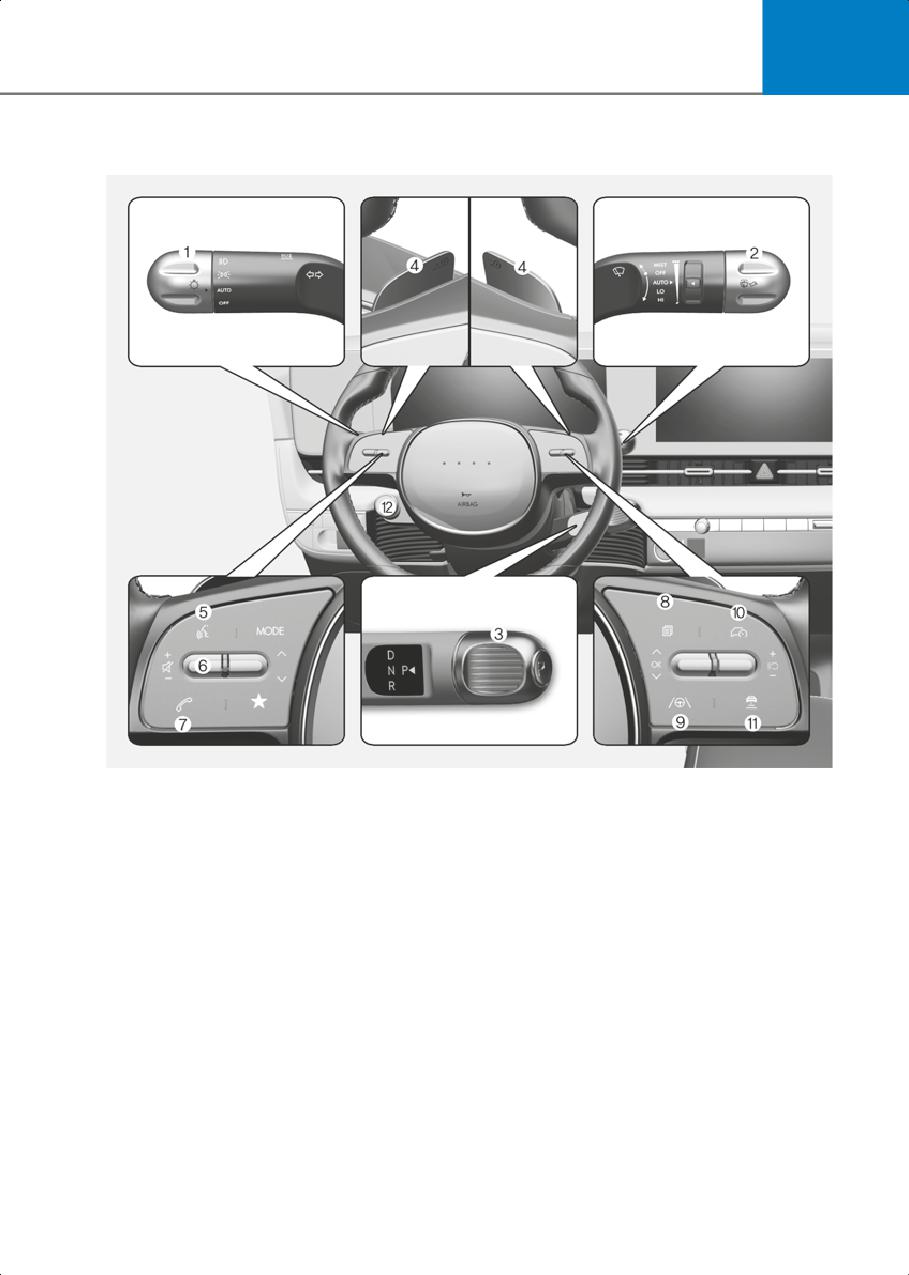
Steering Wheel Control Overview
ONE1011005
The actual shape may differ from the illustration.
(1) Lighting control lever
5-83
(2) Wiper and washer control lever
5-92
(3) Rotary shifter(Rotary gear shift dial)
6-9
(4) Paddle shifter
6-16
(5) Voice recognition button
5-128
(6) Steering wheel audio controls
5-126
(7) Bluetooth wireless technology hands-free button
5-128
(8) Cluster display control
4-24
(9) Lane Driving Assist button
7-29, 7-91
(10)Driving Assist button
7-68
(11) Vehicle Distance button
7-68
(12)Drive mode button
6-43
2-7
Vehicle Information, Consumer Information and Reporting Safety Defects
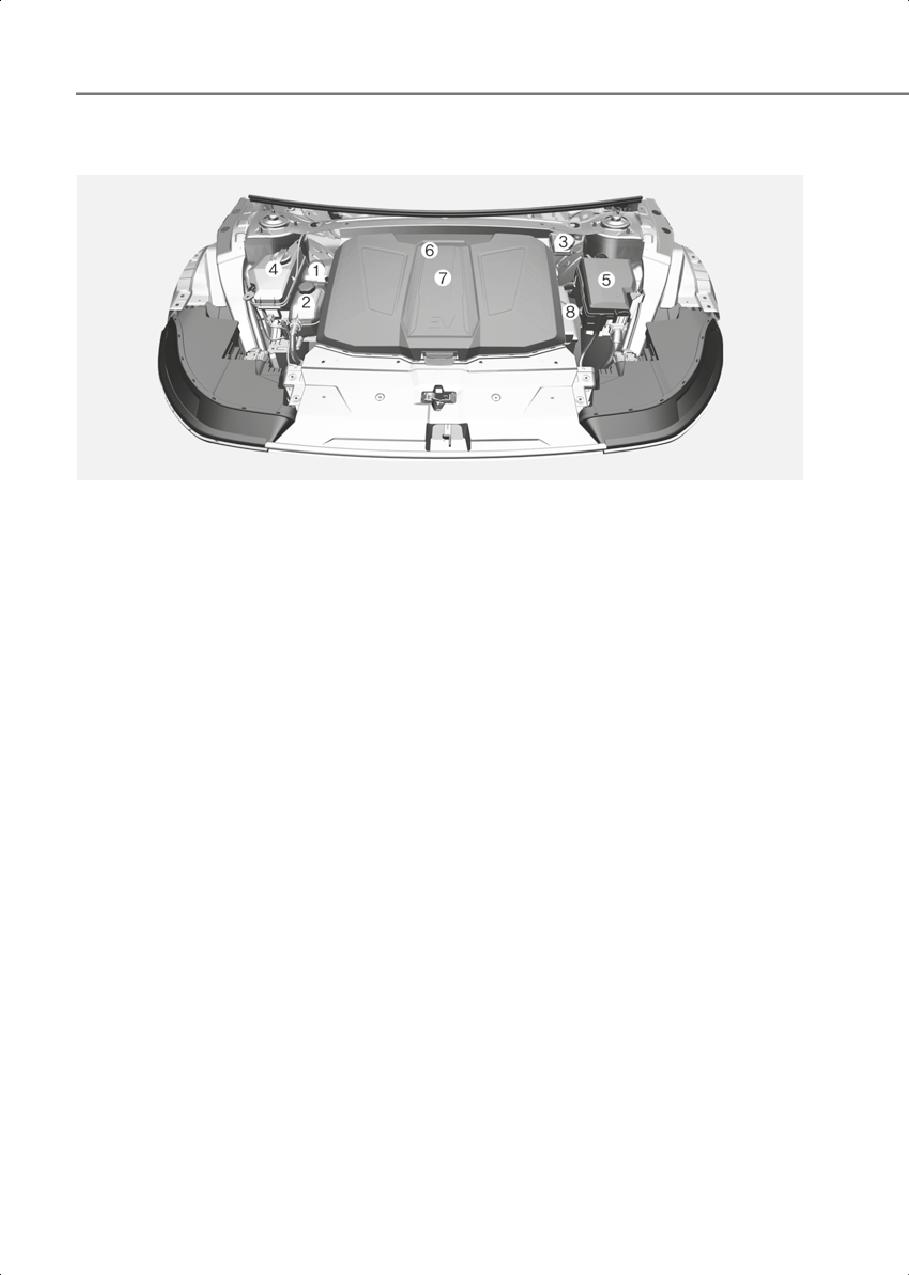
Compartment Overview
ONE1091001
The actual motor compartment in the vehicle may differ from the illustration.
(1) Coolant reservoir
9-12
(2) Low Conductivity Coolant
9-12
(3) Brake fluid reservoir
9-13
(4) Windshield washer fluid reservoir
9-14
(5) Fuse box
9-35
(6) Cabin air filter
9-15
(7) Front trunk
5-69
(8) Battery (12 V)
9-20
2-8
2
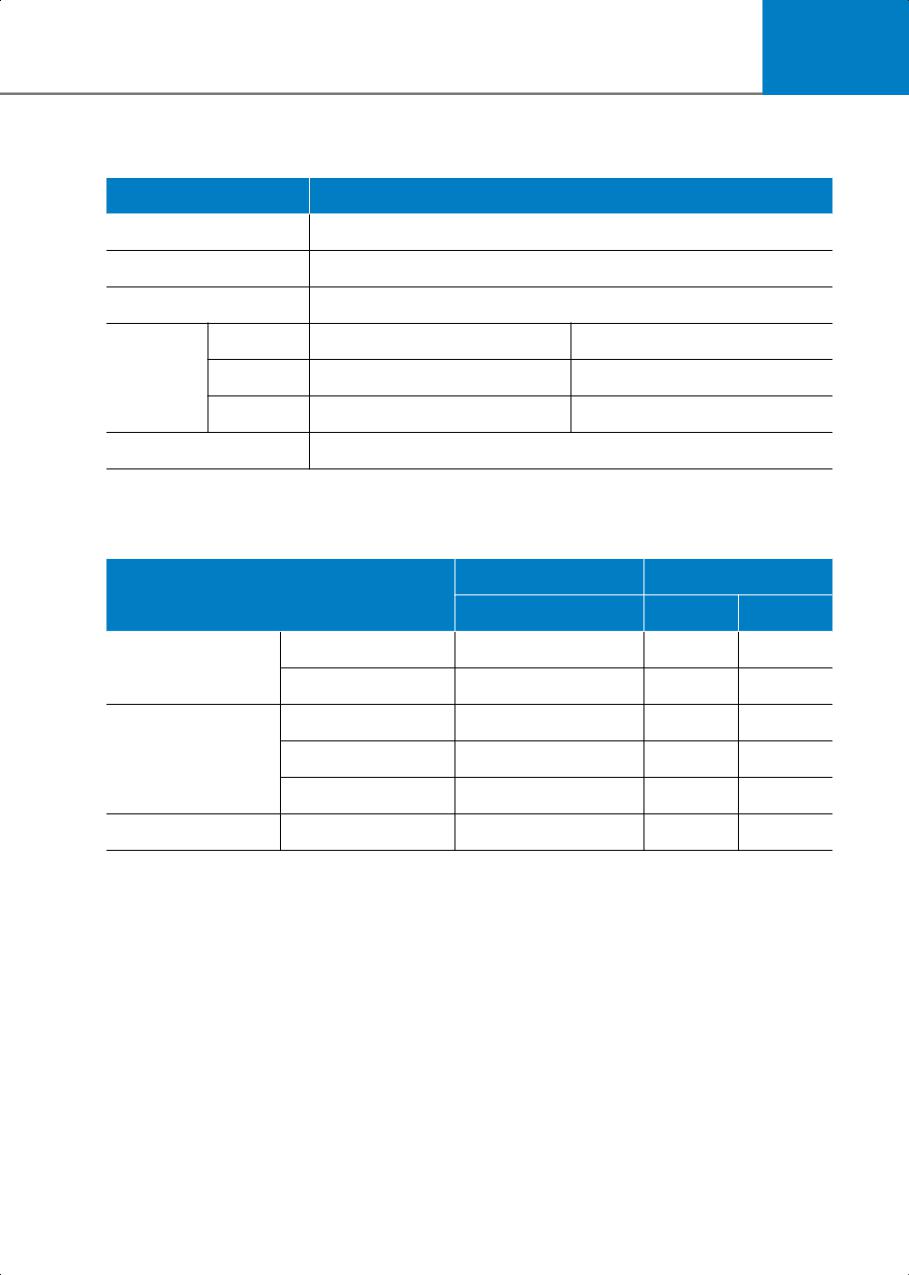
Dimensions
Items
in (mm)
Overall length
182.48 (4,635)
Overall width
74.41 (1,890)
Overall height
63 (1,600)
Tire size
Front
Rear
Tread
19 in
64.49 (1,638)
64.84 (1,647)
20 in
64.09 (1,628)
64.49 (1,637)
Wheelbase
118.11 (3,000)
Electric Vehicle Specifications
Standard
Long Range
Items
2WD
2WD
AWD
Max. output (kW)
125
168
74+165
Motor
Max. torque (Nm)
350
350
255 + 350
Capacity (kWh)
58
77.4
77.4
Battery
Power output (kW)
195
272
272
(Lithium-ion)
Voltage (V)
523
697
697
Charger (OBC)
Max. output (kW)
10.5 kW
10.9
10.9
OBC : On-Board Battery Chargers
2-9
Vehicle Information, Consumer Information and Reporting Safety Defects
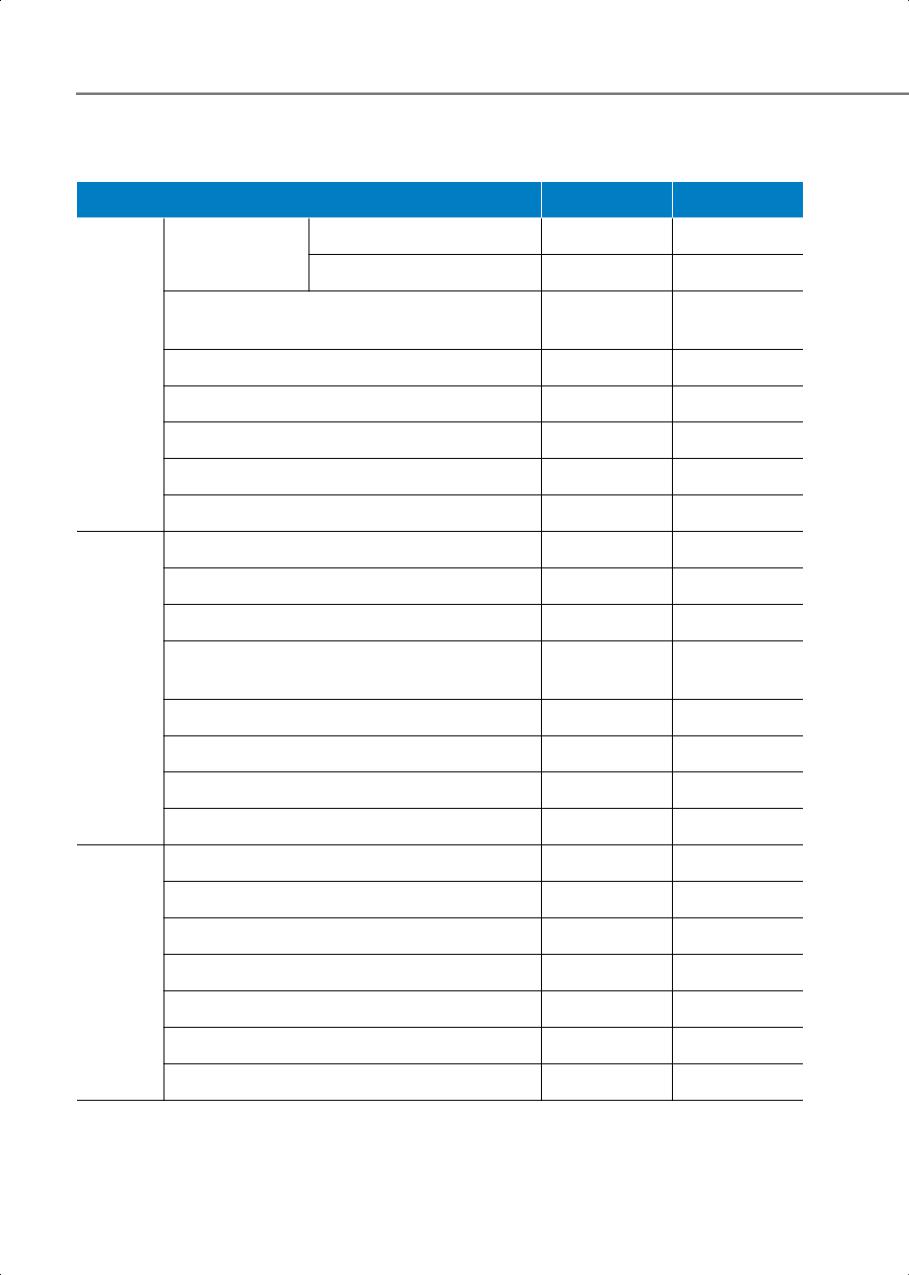
Bulb Wattage
Light bulb
Bulb type
Wattage
Low
LED
LED
Headlight
High
LED
LED
STD : PY21W
STD : 21W
Turn signal lamp
OPT : LED
OPT : LED
Parking lamp
LED
LED
Front
Daytime Running Lamp (DRL)
LED
LED
Side marker
LED
LED
Front garnish lamp
LED
LED
Front trunk lamp
LED
LED
Stop lamp
LED
LED
Tail lamp
LED
LED
Turn signal lamp
LED
LED
STD : P21W
STD : P21W
Reverse lamp
OPT : LED
OPT : LED
Rear
Side marker
LED
LED
License plate lamp
LED
LED
Fog lamp
LED
LED
High mounted stop lamp
LED
LED
Front seat map and room lamp
LED
LED
Rear seat room lamp (without vision roof)
LED
LED
Rear seat personal lamp (with vision roof)
LED
LED
Interior
Vanity mirror lamp
FESTOON 5W
5W
Glove box lamp
LED
LED
Door mood lamp
LED
LED
Luggage compartment lamp
FESTOON 10W
10W
2-10
2
Tires And Wheels
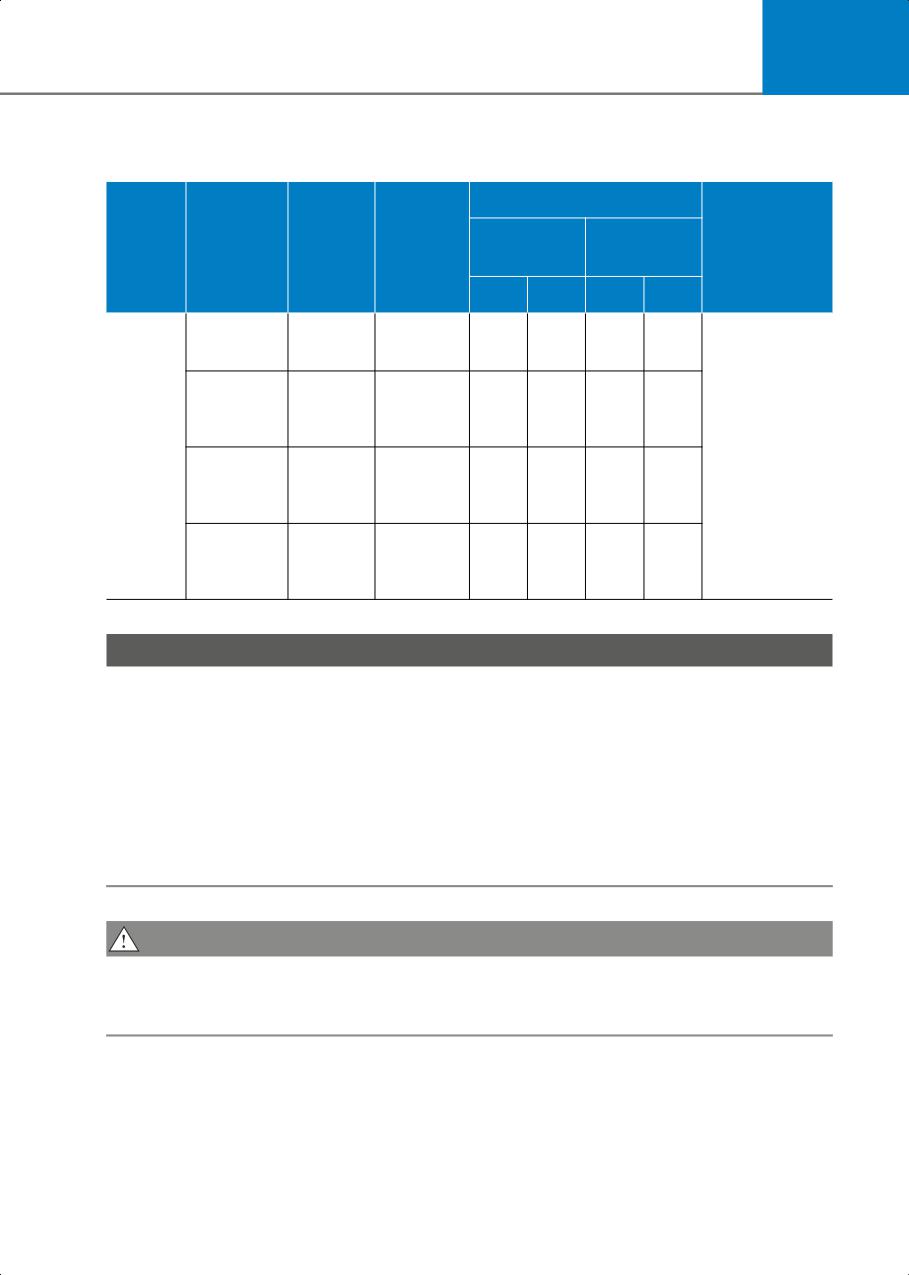
Inflation pressure psi (kPa)
Wheel lug nut
Wheel
Battery
Maximum
Items
Tire size
Normal load
torque lbf-ft
size
type
load
(kgf-m, N-m)
Front
Rear
Front
Rear
2WD
36
36
36
36
235/55R 19
7.5J X 19
Standard
(250)
(250)
(250)
(250)
2WD
38
38
38
38
235/55R 19
7.5J X 19
Long
(260)
(260)
(260)
(260)
Range
79~94
Full size
(11~13,
tire
AWD
36
37
36
37
108~127)
235/55R 19
7.5J X 19
Long
(250)
(255)
(250)
(255)
Range
AWD
34
34
34
34
255/45R20
8.5J X 20
Long
(235)
(235)
(235)
(235)
Range
NOTICE
• Ambient temperature affects the tire pressure (about 1 psi (7 kPa) for every 12°F (7°C)
change). If colder temperatures are anticipated, it is permissible to increase cold tire
inflation pressure by up to 3 psi (20 kPa) over the specification. If extreme temperature
changes are expected, be sure to check and adjust tire pressure accordingly.
• Tire inflation pressure decreases with higher elevation, and increases with lower
elevation (about 2.4 psi (10 kPa) for every mile (or kilometer) elevation change). Be sure
to check and adjust tire pressure accordingly when driving through changing
elevations.
• Do not exceed the maximum inflation pressure, as found on the sidewall of the tire(s).
CAUTION
When replacing tires, ALWAYS use the same size, type, brand, construction and tread
pattern supplied with the vehicle. If not, it can damage the related parts or make it work
irregularly.
2-11
Vehicle Information, Consumer Information and Reporting Safety Defects
Air Conditioning System
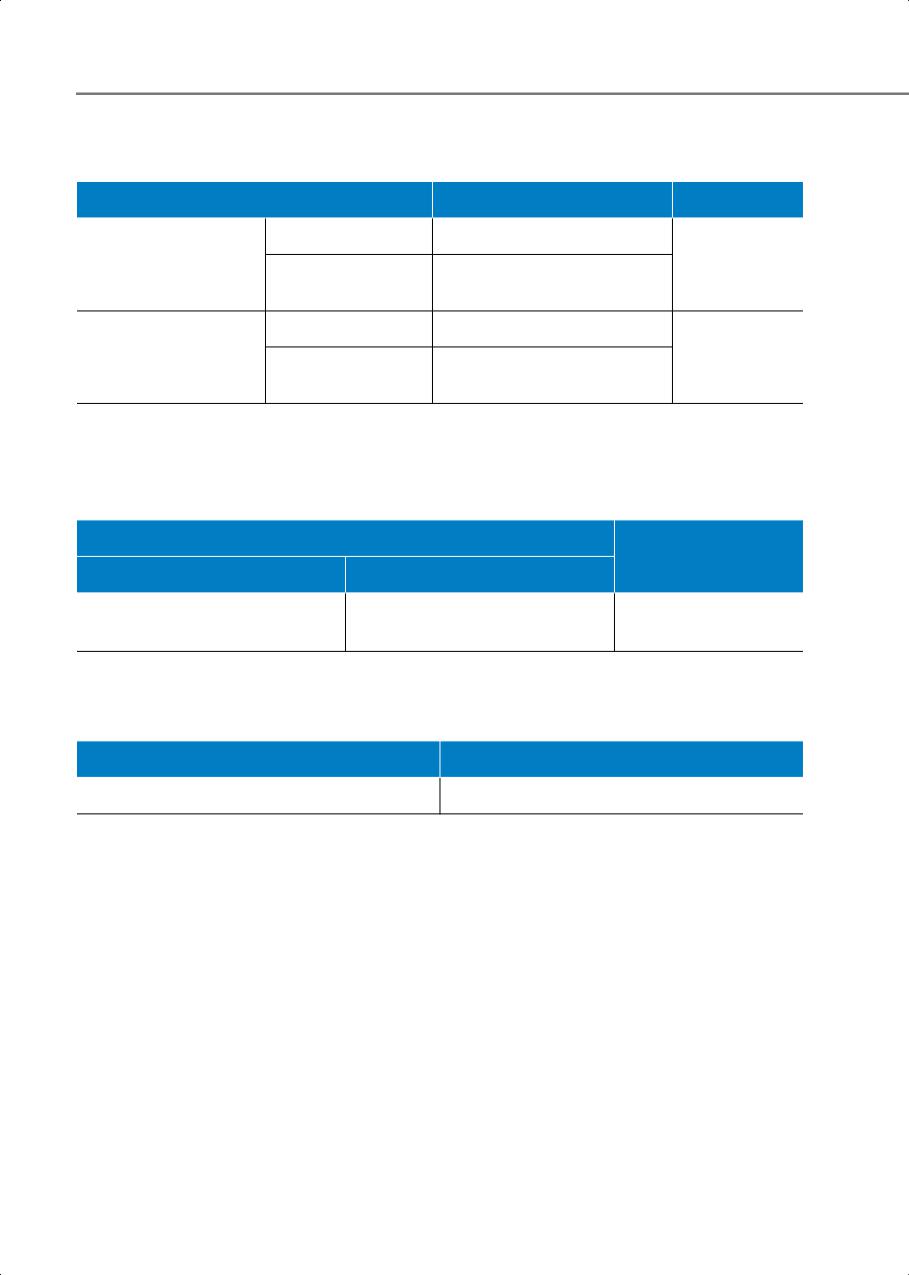
Item
Weight of volume
Classification
Heat pump
32±0.9 oz. (900±25g)
Refrigerant
R-1234yf
Without heat
25±0.9 oz. (700±25g)
pump
Heat pump
6.35±0.35 oz. (180±10 g)
Compressor lubricant
POE J639
Without heat
5.29±0.35 oz. (150±10 g)
pump
Contact an authorized HYUNDAI dealer for more details.
Vehicle Weight And Luggage Volume
Gross vehicle weight
Luggage volume
Standard
Long Range
2WD: 5,357 lbs. (2,430 kg)
2WD: 5,225 lbs. (2,370 kg)
27.2 cu.ft (770 ℓ)
AWD: 5,600 lbs. (2,540 kg)
Available Front Trunk Weight
2WD
AWD
55 lbs (25 kg)
22 lbs (10 kg)
Available front trunk weight depends on the specifications.
2-12
2
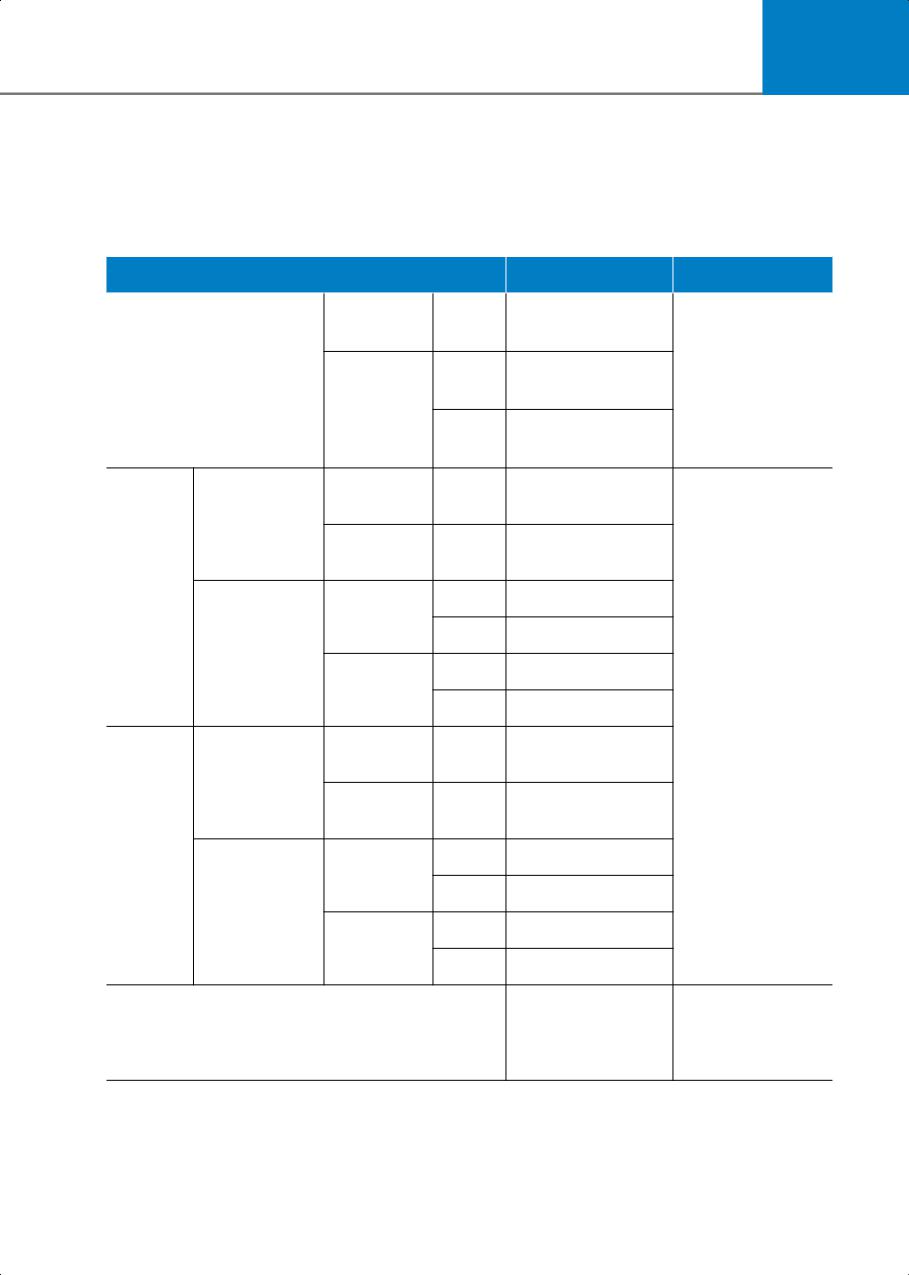
Recommended Lubricants And Capacities
To help achieve proper vehicle performance and durability, use only lubricants of the
proper quality.
These lubricants and fluids are recommended for use in your vehicle.
Lubricant
Volume
Classification
3.6~3.7 US qt.
2WD
Rear
(3.4~3.5 ℓ)
3.4~3.5 US qt.
Gear fluid
Front
HK ATF 65 SP4M-1
(3.2~3.3 ℓ)
AWD
3.6~3.7 US qt.
Rear
(3.4~3.5 ℓ)
with heat
2WD
6.6 US qt. (6.3 ℓ)
pump
Standard
without
2WD
6.8 US qt. (6.4 ℓ)
heat pump
Coolant
2WD
6.6 US qt. (6.3 ℓ)
with heat
pump
AWD
7.2 US qt. (6.8 ℓ)
Long Range
2WD
6.8 US qt. (6.4 ℓ)
without
heat pump
AWD
7.2 US qt. (6.8 ℓ)
Designated
coolant for
with heat
electric vehicles
2WD
9.9 US qt. (9.4 ℓ)
pump
Standard
without
2WD
9.3 US qt. (8.8 ℓ)
heat pump
LCW
2WD
12.6 US qt. (11.9 ℓ)
Coolant
with heat
pump
AWD
12.3 US qt. (11.6 ℓ)
Long Range
2WD
11.8 US qt. (11.2 ℓ)
without
heat pump
AWD
12.4 US qt. (11.7 ℓ)
SAE J1704 DOT-4
LV, FMVSS 116
Brake fluid
As required
DOT-4, ISO 4925
CLASS-6
2-13
Vehicle Information, Consumer Information and Reporting Safety Defects
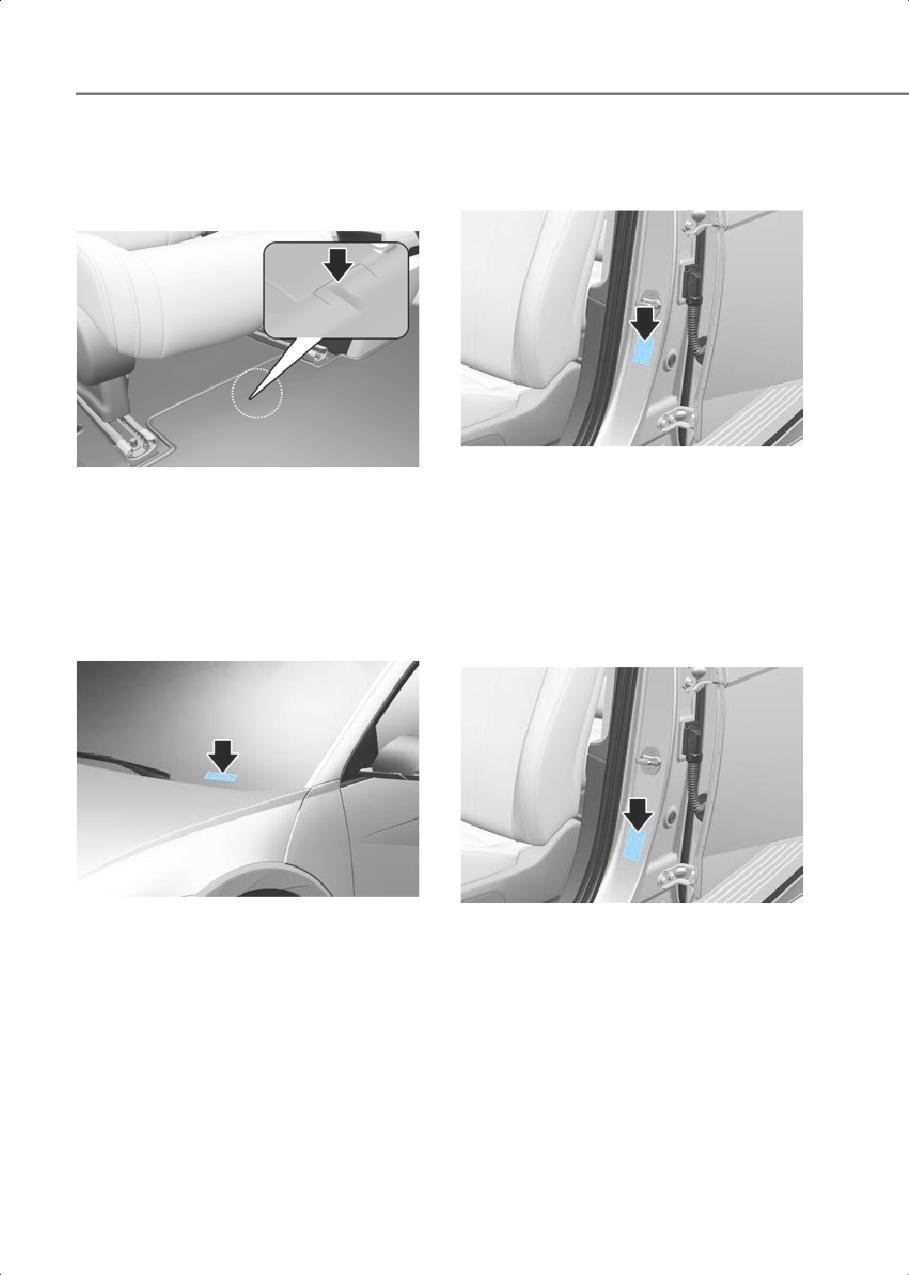
Vehicle Identification
Vehicle Certification
Number (VIN)
Label
Frame number
ONE1011022
ONE1011020N
The vehicle certification label attached on
The vehicle identification number (VIN) is
the driver’s (or front passenger’s) side
the number used in registering your
center pillar gives the vehicle
vehicle and in all legal matters pertaining
identification number (VIN).
to its ownership, etc.
The number is punched on the floor under
the right front seat. To check the number,
Tire Specification And
open the cover.
Pressure Label
VIN label (if equipped)
ONE1011021
ONE1011025L
The VIN is also on a plate attached to the
The tires supplied on your new vehicle are
top of the left side dashboard. The
chosen to provide the best performance
number on the plate can easily be seen
for normal driving.
through the windshield from outside.
The tire label located on the driver’s side
center pillar gives the tire pressures
recommended for your vehicle.
2-14
2
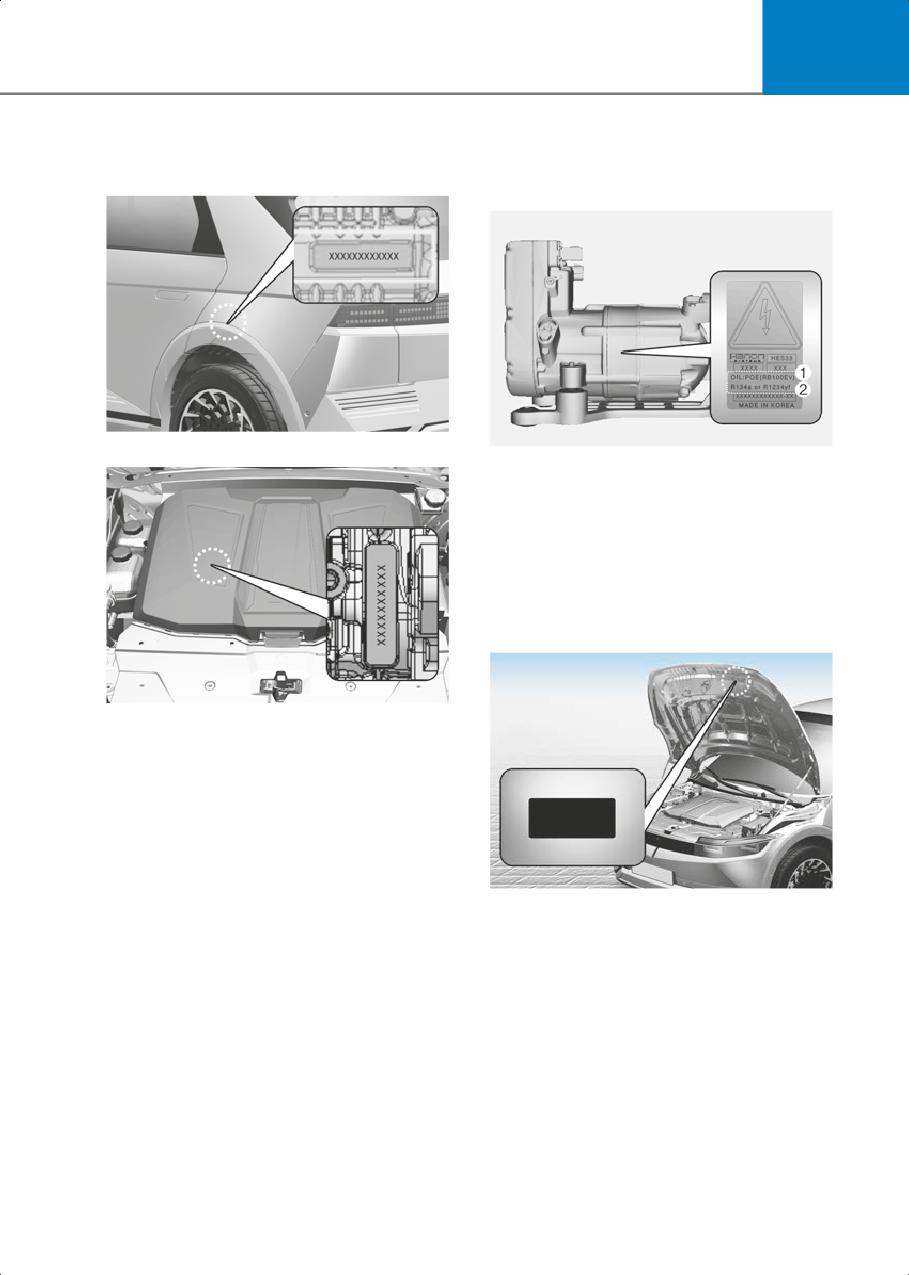
Motor Number
Air Conditioner
2WD/AWD
Compressor Label
ONE1011024
AWD
ONE1011026L
A compressor label informs you the type
of compressor your vehicle is equipped
with such as model, supplier part number,
production number, refrigerant (1) and
refrigerant oil (2).
Refrigerant Label
ONE1011023
The motor numbers can be checked at
the bottom of the vehicle.
ONE1051075
The refrigerant label provides information
such as refrigerant type and amount.
(R-1234yf)
2-15
Vehicle Information, Consumer Information and Reporting Safety Defects
Consumer Information
Reporting Safety Defects
This consumer information has been
If you believe that your vehicle has a
prepared in accordance with regulations
defect which could cause a crash or
issued by the National Highway Traffic
could cause injury or death, you
Safety Administration of the U.S.
should immediately inform the
Department of Transportation.Your
National Highway Traffic Safety
HYUNDAI dealer will help answer any
Administration (NHTSA) in addition to
questions you may have as you read this
notifying HYUNDAI MOTOR
information.
AMERICA.
HYUNDAI motor vehicles are designed
and manufactured to meet or exceed all
To contact NHTSA, you may call the
applicable safety standards.
Vehicle Safety Hotline toll-free at
1-888-327-4236
For your safety, however, we strongly
urge you to read and follow all directions
(TTY: 1-800-424-9153);
in this Owner’s Manual, particularly the
go to http://www.safercar.gov;
information under the headings
download the SaferCar mobile
“NOTICE”, “CAUTION” and “WARNING”.
application;
If, after reading this manual, you have any
questions regarding the operation of your
or write to:
vehicle, please contact the Hyundai
Administrator, NHTSA 1200 New
Customer Care Center.
Jersey Ave, SE, West Building
Hyundai Customer Care
Washington, D.C. 20590.
P.O. Box 20850
You can also obtain other information
Fountain Valley, CA 92728
about motor vehicle safety from
800-633-5151
consumeraffairs@hmausa.com
If NHTSA receives similar complaints,
it may open an investigation, and if it
Hyundai’s Customer Care representatives
are available Monday through Friday,
finds that a safety defect exists in a
group of vehicles, it may order a
between the hours of 6:00 AM and 5:00
recall and remedy campaign.
PM PST
However, NHTSA cannot become
and Saturday between 6:30 AM and 3:00
involved in individual problems
PM PST (English).
between you, your dealer, or
For Customer Care assistance in Spanish
HYUNDAI MOTOR AMERICA.
or Korean, representatives are available
Monday through Friday between 6:30 AM
and 3:00 PM PST.
2-16
3. Seats & Safety System
Important Safety Precautions
3-2
Always Wear Your Seat Belt
3-2
Restrain All Children
3-2
Air Bag Hazards
3-2
Driver Distraction
3-2
Control Your Speed
3-2
Keep Your Vehicle In Safe Condition
3-2
3
Seats
3-3
Safety Precautions
3-6
Front Seats
3-7
Rear Seats
3-13
Head Restraint
3-16
Seat Warmers
3-19
Air Ventilation Seats
3-21
Seat Belts
3-23
Seat Belt Safety Precautions
3-23
Seat Belt Warning Light
3-24
Seat Belt Restraint System
3-25
Additional Seat Belt Safety Precautions
3-28
Care of Seat Belts
3-30
Child Restraint System (CRS)
3-31
Children Always in the Rear
3-31
Selecting a Child Restraint System (CRS)
3-32
Installing a Child Restraint System (CRS)
3-33
Air Bag - Supplemental Restraint System
3-39
Where are the Air Bags?
3-41
How does the Air Bags System Operate?
3-44
What to Expect After an Air Bag Inflates
3-47
Occupant Classification System (OCS)
3-48
Why didn’t my air bag go off in a collision?
3-54
SRS Care
3-59
Additional Safety Precautions
3-59
Air Bag Warning Labels
3-60
Seats & Safety System
array of potential distractions, such as
Important Safety
drowsiness, reaching for objects, eating,
Precautions
personal grooming, other passengers,
and using mobile phones.
You will find many safety precautions and
Drivers can become distracted when they
recommendations throughout this
take their eyes and attention off the road
section, and throughout this manual. The
or their hands off the wheel to focus on
safety precautions in this section are
activities other than driving. To reduce
among the most important.
your risk of distraction and an accident:
• Set up your mobile devices (for
Always Wear Your Seat Belt
example, MP3 players, phones,
A seat belt is your best protection in all
navigation units, etc.) ONLY when your
types of accidents. Air bags are designed
vehicle is parked or safely stopped.
to supplement seat belts, not to replace
• ONLY use your mobile device when
them. So even though your vehicle is
allowed by laws and conditions permit
equipped with air bags, ALWAYS make
safe use. NEVER text or email while
sure you and your passengers wear your
driving. Most states have laws
seat belts, and wear them properly.
prohibiting drivers from texting. Some
states and cities also prohibit drivers
from using handheld phones.
Restrain All Children
• NEVER let the use of a mobile device
All children under age 13 should ride in
distract you from driving. You have a
your vehicle properly restrained in a rear
responsibility to your passengers and
seat, not the front seat. Infants and small
others on the road to always drive
children should be restrained in an
safely, with your hands on the wheel as
appropriate Child Restraint System.
well as your eyes and attention on the
Larger children should use a booster seat
road.
with the lap/shoulder belt until they can
use the seat belt properly without a
booster seat.
Control Your Speed
Excessive speed is a major factor in crash
injuries and deaths. Generally, the higher
Air Bag Hazards
the speed, the greater the risk, but serious
While air bags can save lives, they can
injuries can also occur at lower speeds.
also cause serious or fatal injuries to
Never drive faster than is safe for current
occupants who sit too close to them, or
conditions, regardless of the maximum
who are not properly restrained. Infants,
speed posted.
young children, and short adults are at the
greatest risk of being injured by an
inflating air bag. Follow all instructions
Keep Your Vehicle In Safe
and warnings in this manual.
Condition
Having a tire blowout or a mechanical
Driver Distraction
failure can be extremely hazardous. To
reduce the possibility of such problems,
Driver distraction presents a serious and
check your tire pressures and condition
potentially deadly danger, especially for
frequently, and perform all regularly
inexperienced drivers. Safety should be
scheduled maintenance.
the first concern when behind the wheel
and drivers need to be aware of the wide
3-2
3
Seats
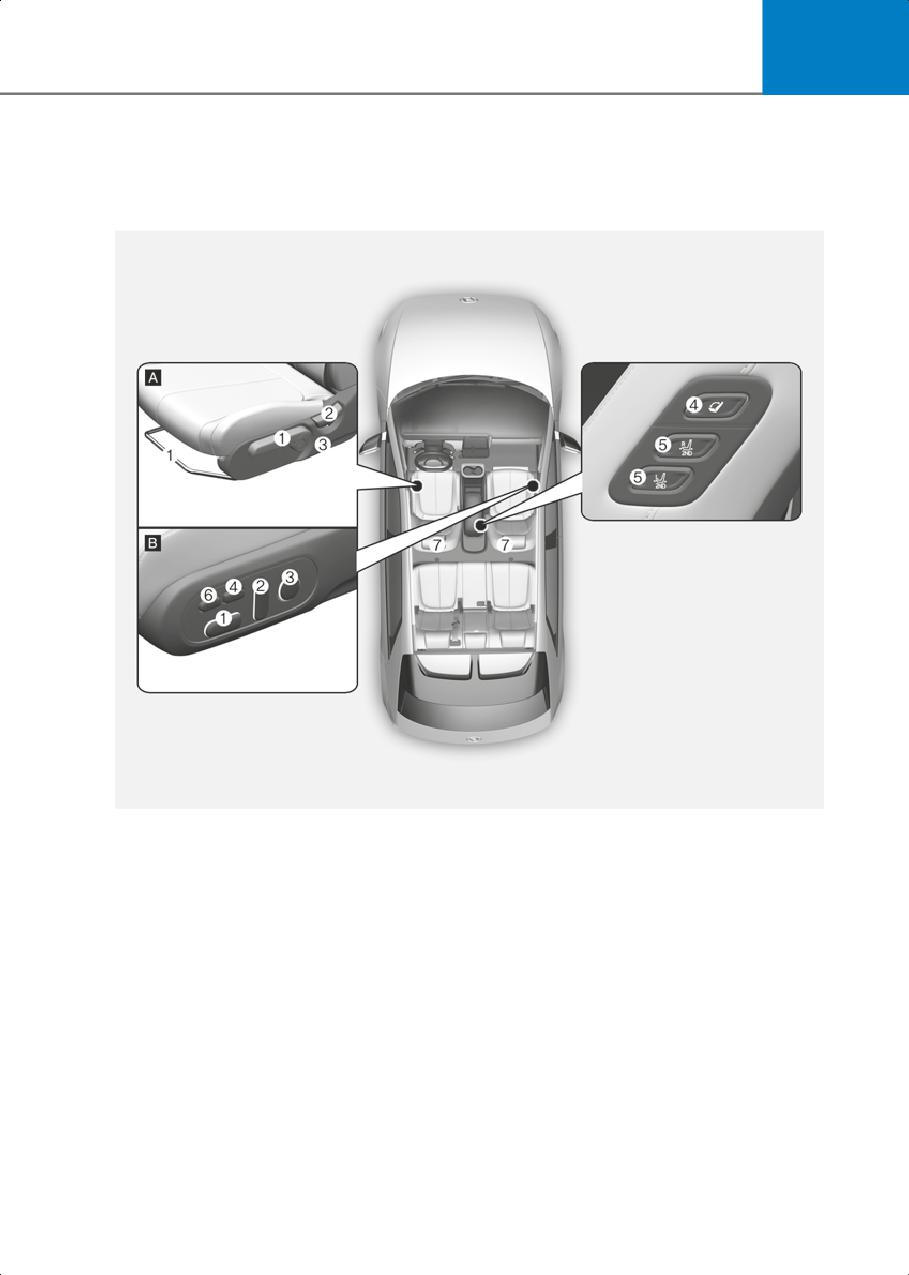
Front seat
ONE1033001N
The actual shape may differ from the illustration.
[A] Manual
[B] Power
(1) Seat sliding forward or rearward/Cushion height/
Seat cushion (Relaxation comfort) angle
(2) Seatback angle
(3) Lumbar support
(4) Relaxation comfort seat switch
(5) Rear seat control switch
(6) Leg support
(7) Head restraint
* Relaxation: Relax + Position
3-3
Seats & Safety System
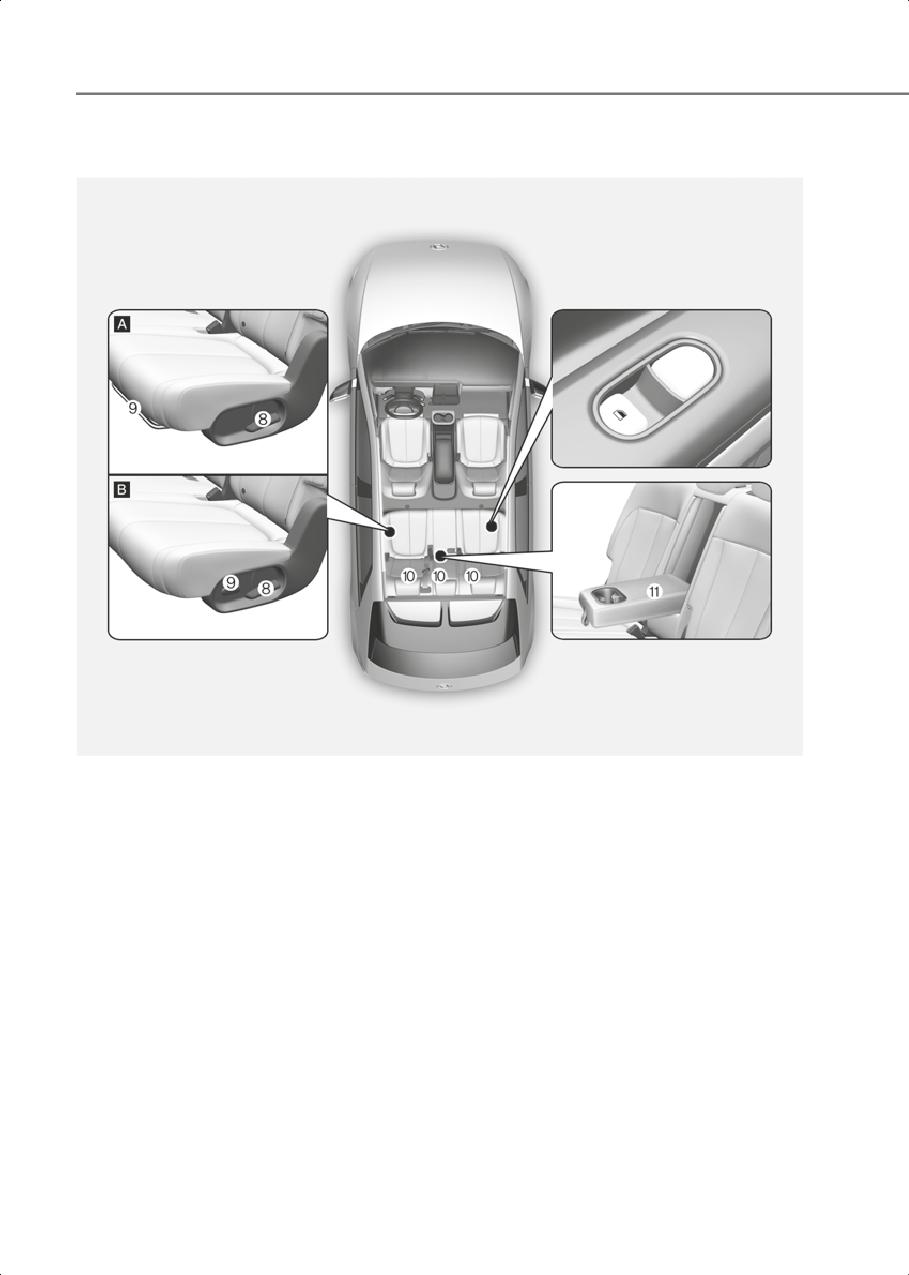
Rear seat
Manual/Power
ONE1033002N
The actual shape may differ from the illustration.
[A] Manual
[B] Power
(8) Seatback angle / Seatback folding lever
(9) Seat slide forward or rearward
(10)Head restraint
(11) Armrest
3-4
3
Infotainment system
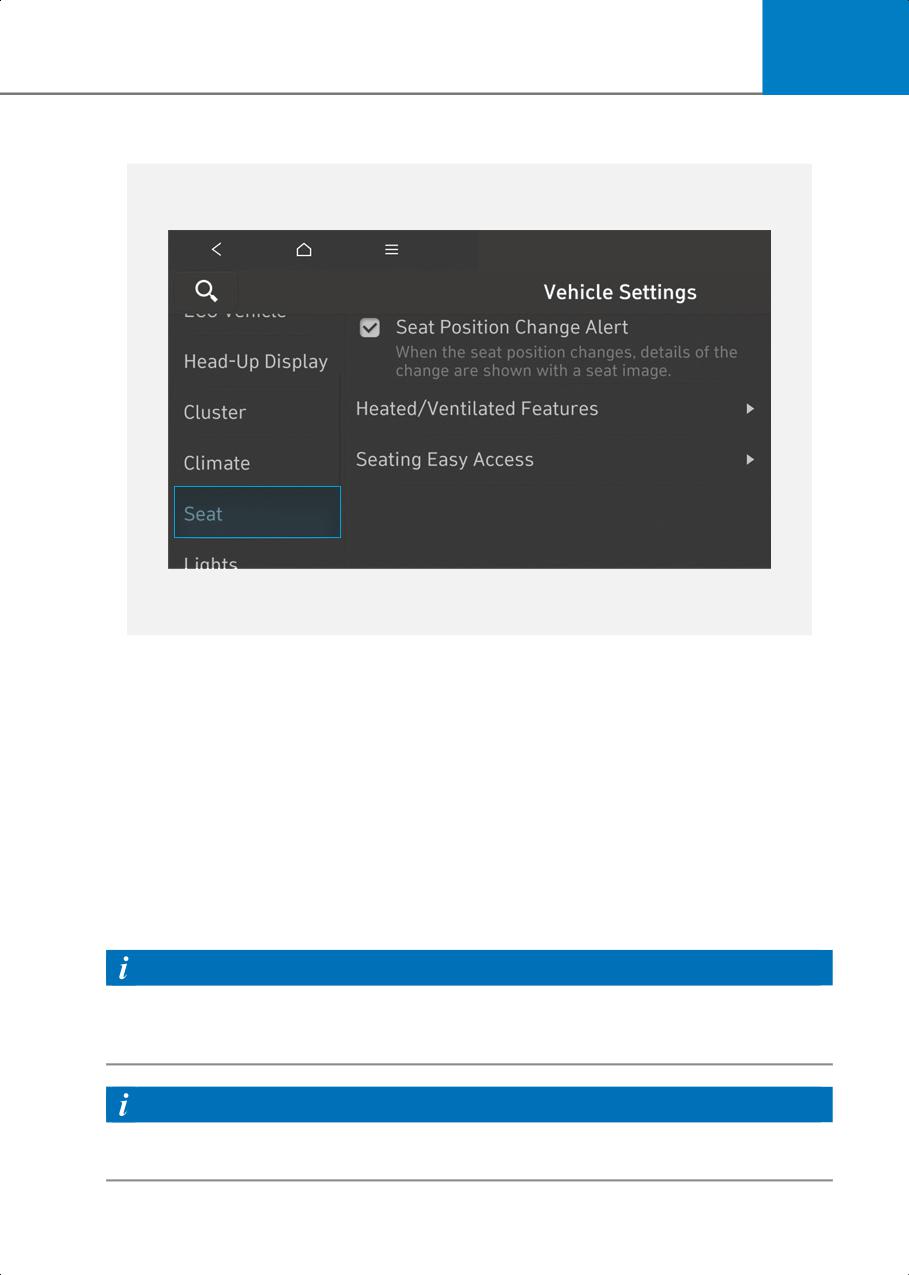
ONE1031077L
Select Setup > Vehicle Settings > Seat from the Settings menu in the infotainment
system screen, you may use various convenience functions.
• Seat position change alert : When the seat position changes, details of the change are
shown with a seat image.
• Heated/Ventilated features
- Auto. Controls That Use Climate Control Settings (for driver’s seat) : The seat
temperature is automatically controlled.
• Seating easy access
- Steering wheel easy access : Moves the steering wheel when the driver enters or
leaves the vehicle.
- Driver seat easy access : The distance (Normal/Extended/Off) the seat automatically
moves when the driver enters or leaves the vehicle may be selected.
Information
The infotainment system may change after software updates. For more information,
refer to the user's manual provided in the infotainment system and the quick reference
guide.
Information
The information provided may differ depending on which functions are applicable to
your vehicle.
3-5

Seats & Safety System
Safety Precautions
Seat belts
Adjusting the seats so that you are sitting
Always fasten your seat belt before
in a safe and comfortable position plays
starting any trip. At all times, passengers
an important role for the safety of the
should sit upright and be properly
driver and passengers, as much as seat
restrained. Infants and small children
belts and air bags when in an accident.
must be restrained in appropriate Child
Restraint Systems. Children who have
WARNING
outgrown a booster seat and adults must
be restrained using the seat belts.
Do not use a cushion that reduces friction
between the seat and the passenger. The
WARNING
passenger’s hips may slide under the lap
portion of the seat belt during an accident
Take the following precautions when
or a sudden stop.
adjusting your seat belt:
Serious or fatal internal injuries could
•
NEVER use one seat belt for more than
result because the seat belt cannot
one occupant.
operate properly.
•
Always position the seatback upright
with the lap portion of the seat belt
snug and low across the hips.
Air bags
•
NEVER allow children or small infants to
You can take steps to reduce the risk of
ride on a passenger’s lap.
being injured by an inflating air bag.
•
Do not route the seat belt across your
Sitting too close to an air bag greatly
neck, across sharp edges, or reroute
increases the risk of injury in the event the
the shoulder strap away from your
air bag inflates. Move your seat as far
body.
back as possible from front air bags, while
•
Do not allow the seat belt to become
still maintaining control of the vehicle.
caught or jammed.
WARNING
To reduce the risk of serious injury or
death from an inflating air bag, take the
following precautions:
• Adjust the driver’s seat as far to the rear
as possible while maintaining the ability
to control the vehicle.
• Adjust the front passenger seat as far to
the rear as possible.
• Hold the steering wheel by the rim with
your hands at the 9 o’clock and 3
o’clock positions to minimize the risk of
injuries to your hands and arms.
• NEVER place anything or anyone
between you and the air bag.
• Do not allow the front passenger to
place feet or legs on the dashboard to
minimize the risk of leg injuries.
3-6
3
Front Seats
WARNING
WARNING
NEVER allow children in the vehicle
unattended. The power seats are
Take the following precautions when
operable when the vehicle is turned off.
adjusting your seat:
•
NEVER attempt to adjust the seat while
the vehicle is moving. The seat could
NOTICE
respond with unexpected movement
and may cause loss of vehicle control
To prevent damage to the seats:
resulting in an accident.
• Always stop adjusting the seats when
•
Do not place anything under the front
the seat has been adjusted as far
seats. Loose objects in the driver’s foot
forward or rearward as possible.
area could interfere with the operation
• Do not adjust the seats longer than
of the foot pedals, causing an accident.
necessary when the vehicle is turned
•
Do not allow anything to interfere with
off. This may result in unnecessary
the normal position and proper locking
battery drain.
of the seatback.
• Do not operate two or more seats at the
•
Do not place a cigarette lighter on the
same time. This may result in an
floor or seat. When you operate the
electrical malfunction.
seat, gas may exit out of the lighter
causing a fire.
•
Use extreme caution when picking up
Manual adjustment
small objects trapped under the seats
if equipped
or between the seat and the center
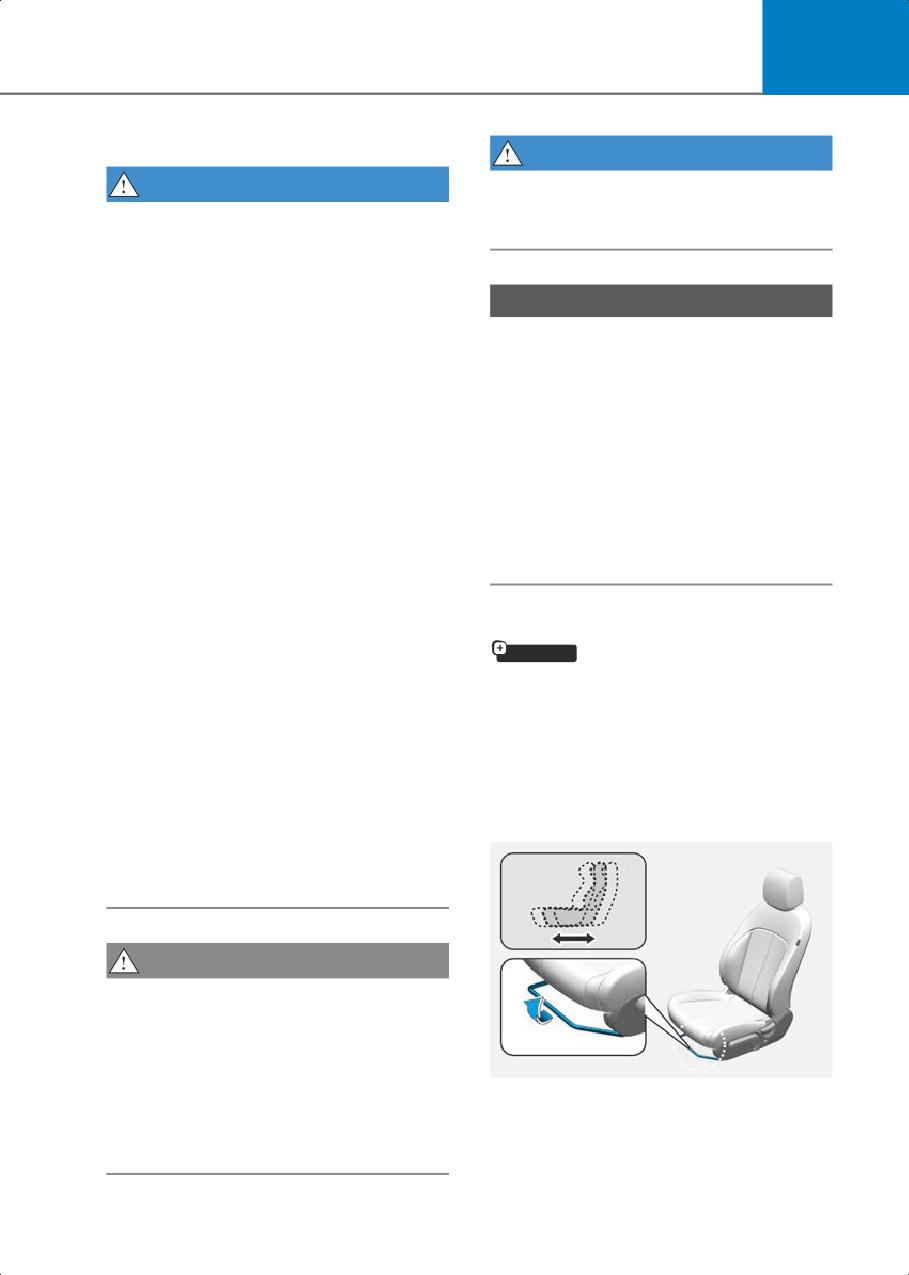
The front seat can be adjusted by using
console. Your hands might be cut or
the levers located underneath the seat
injured by the sharp edges of the seat
cushion. Before driving, adjust the seat to
mechanism.
the proper position so that you can easily
•
If there are occupants in the rear seats,
control the steering wheel, foot pedals
be careful while adjusting the front seat
and controls on the instrument panel.
position.
•
Make sure that the seat is locked in
Forward and rearward adjustment
place after the adjustment. If not, the
seat might move unexpectedly
resulting in an accident.
CAUTION
To prevent injury:
• Do not adjust your seat while wearing
your seat belt. Moving the seat cushion
forward may cause strong pressure on
your abdomen.
ONE1031003N
To move the seat forward or rearward:
• Do not allow your hands or fingers to
get caught in the seat mechanisms
1. Pull up the seat slide adjustment lever
while the seat is moving.
and hold it.
3-7
Seats & Safety System
2. Slide the seat to the position you desire.
WARNING
3. Release the lever and make sure the
seat is locked in place. Move forward
NEVER ride with a reclined seatback
and rearward without using the lever. If
when the vehicle is moving.
the seat moves, it is not locked
Riding with a reclined seatback increases
properly.
your chance of serious or fatal injuries in
the event of a collision or sudden stop.
Seatback angle
Drivers and passengers should ALWAYS
sit well back in their seats, properly
belted, and with the seatbacks upright.
Seat belts must be snug against your hips
and chest to work properly. When the
seatback is reclined, the shoulder belt
cannot do its job because it will not be
snug against your chest. Instead, it will be
in front of you. During an accident, you
could be thrown into the seat belt,
ONE1031004N
causing neck or other injuries.
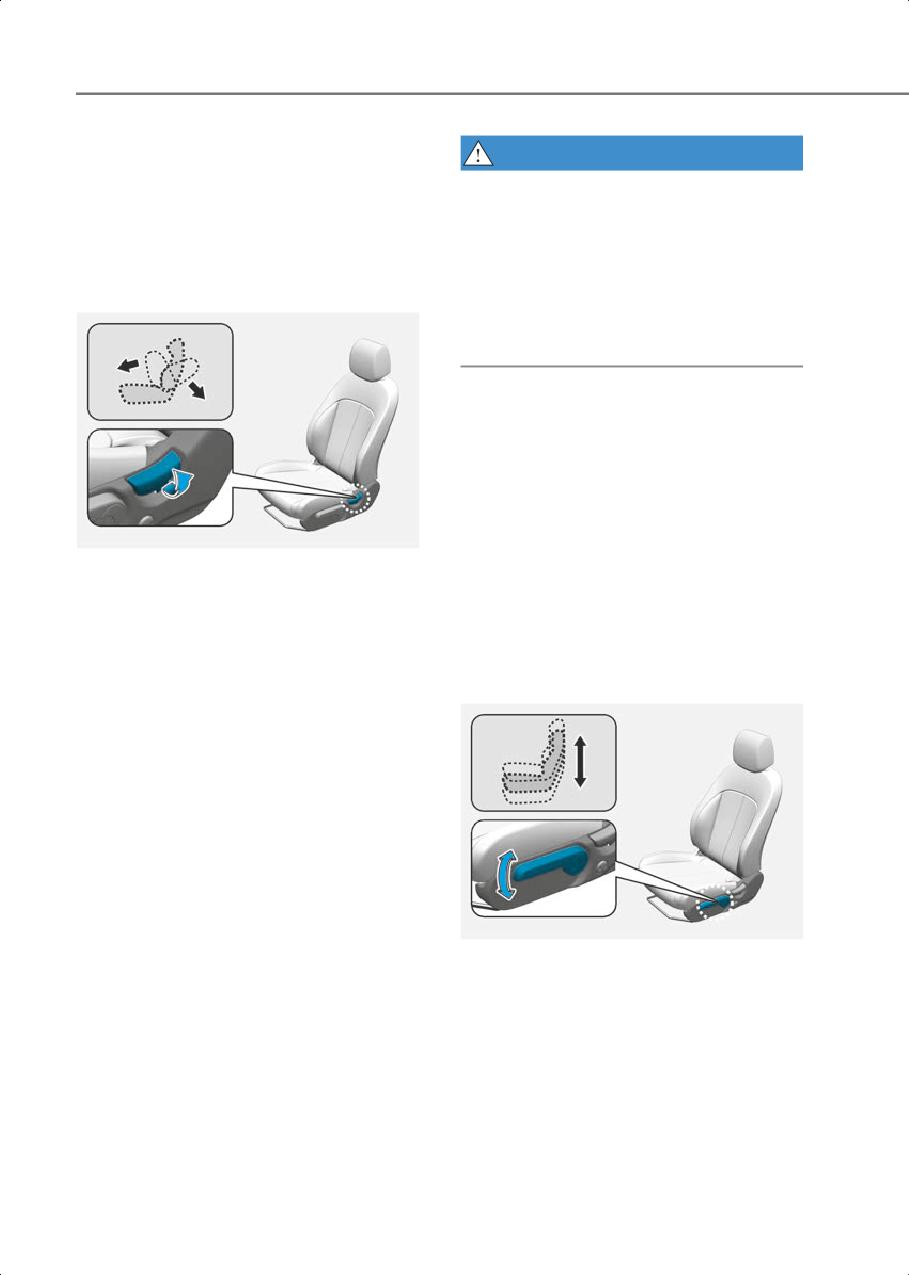
To recline the seatback:
The more the seatback is reclined, the
1. Lean forward slightly and lift up the
greater chance the passenger’s hips will
seatback lever.
slide under the lap belt or the passenger’s
neck will strike the shoulder belt.
2. Carefully lean back on the seat and
adjust the seatback to the position you
Seat height
desire.
3. Release the lever and make sure the
seatback is locked in place. (The lever
MUST return to its original position for
the seatback to lock.)
Reclining seatback
Sitting in a reclined position when the
vehicle is in motion can be dangerous.
Even when buckled up, the protections of
your restraint system (seat belts and/or
air bags) is greatly reduced by reclining
your seatback.
ONE1031005N
To change the height of the seat cushion:
• Push down the lever several times, to
lower the seat cushion.
• Pull up the lever several times, to raise
the seat cushion.
3-8
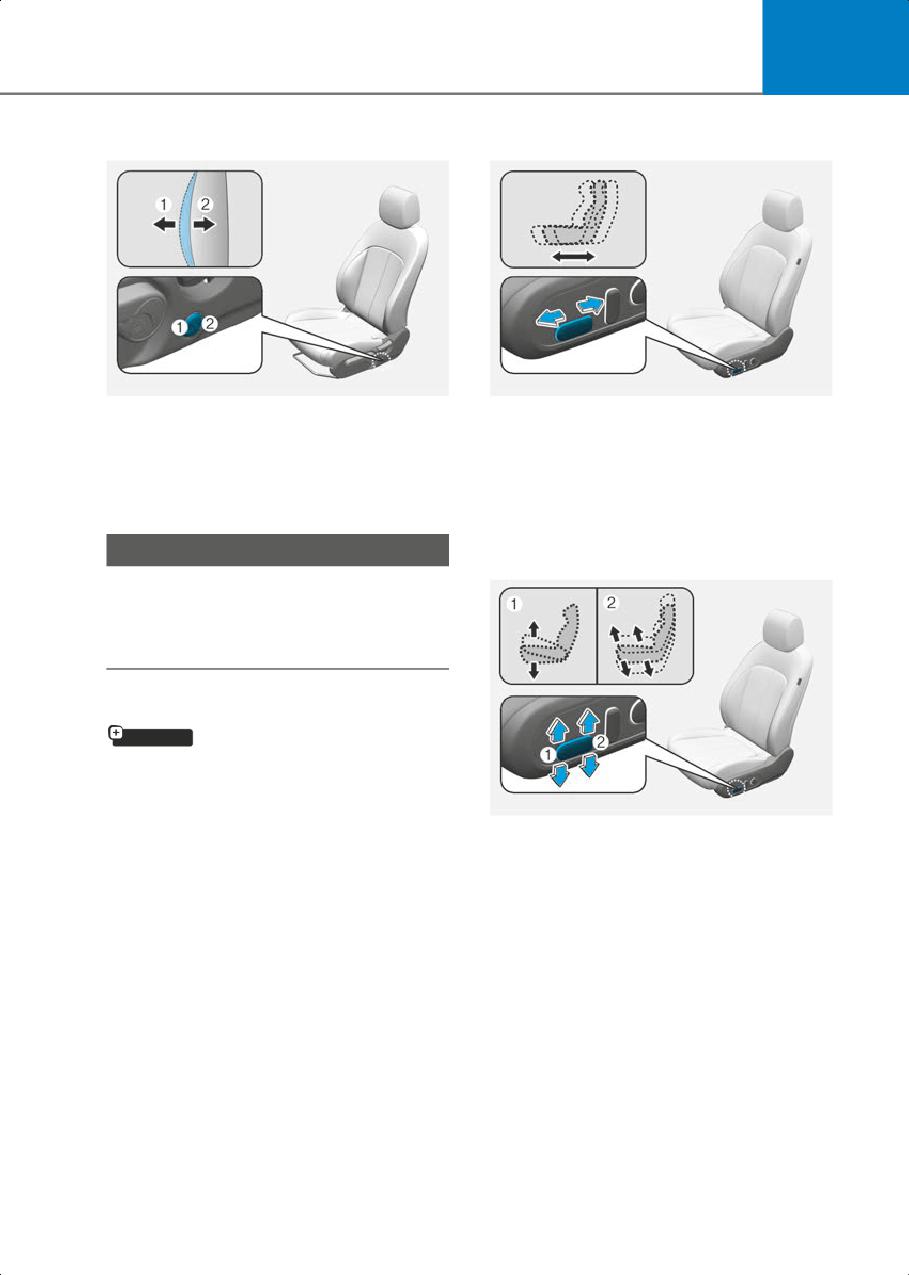
3
Lumbar support
Forward and rearward adjustment
ONE1031090N
ONE1031006N
To adjust the lumbar support:
To move the seat forward or rearward:
• Press the front portion of the switch (1)
1. Push the control switch forward or
to increase the support or the rear
rearward.
portion of the switch (2) to decrease the
2. Release the switch once the seat
support.
reaches the desired position.
NOTICE
Seat cushion tilt/height adjustment
Do not continue to operate the lumbar
support when the lumbar support
provides its maximum support. Damage
to the lumbar support motor could occur.
Power adjustment
if equipped
The front seat can be adjusted by using
the control switches located on the
outside of the seat cushion. Before
ONE1031009N
driving, adjust the seat to the proper
position so that you can easily control the
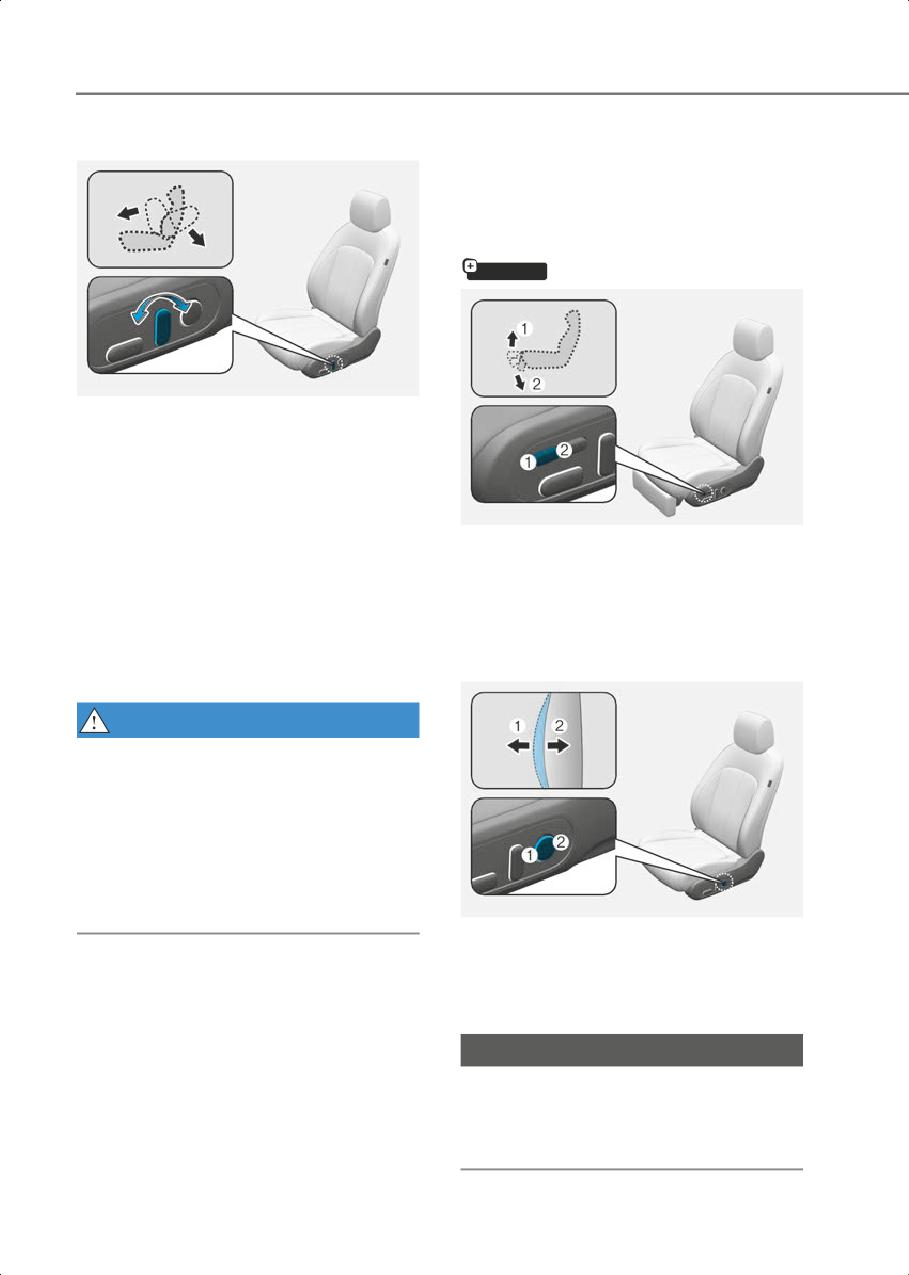
• Seat cushion tilt (1)
steering wheel, foot pedals and controls
To change the angle of the front part of
on the instrument panel.
the seat cushion:
Push the front portion of the control
switch up to raise or down to lower the
front part of the seat cushion.
Release the switch once the seat reaches
the desired position.
• Seat height (2)
To change the height of the seat cushion:
Push the rear portion of the control switch
up to raise or down to lower the height of
the seat cushion.
Release the switch once the seat reaches
the desired position.
3-9
Seats & Safety System
Seatback angle adjustment
The more the seatback is reclined, the
greater chance the passenger’s hips will
slide under the lap belt or the passenger’s
neck will strike the shoulder belt.
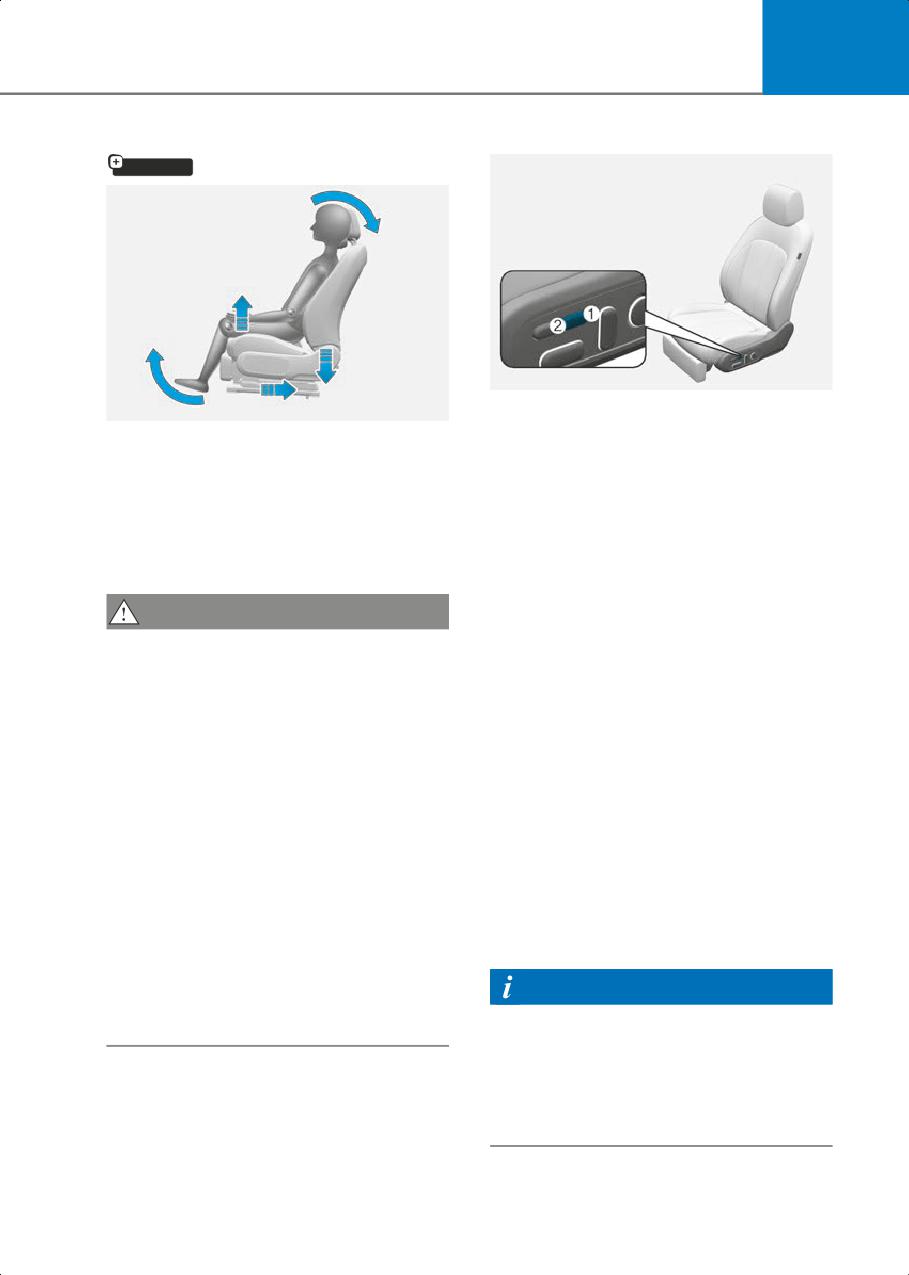
Leg support adjustment
if equipped
ONE1031007N
To recline the seatback:
1. Push the control switch forward or
rearward.
2. Release the switch once the seatback
reaches the desired position.
ONE1031008N
Reclining seatback
1. Press the front portion of the switch (1)
Sitting in a reclined position when the
to raise the leg support.
vehicle is in motion can be dangerous.
2. Press the rear portion of the switch (2)
Even when buckled up, the protections of
to lower the leg support.
your restraint system (seat belts and air
bags) is greatly reduced by reclining your
Lumbar support
seatback.
WARNING
NEVER ride with a reclined seatback
when the vehicle is moving.
Riding with a reclined seatback increases
your chance of serious or fatal injuries in
the event of a collision or sudden stop.
Driver and passengers should ALWAYS sit
well back in their seats, properly belted,
and with the seatbacks upright.
ONE1031010N
To adjust the lumbar support:
Seat belts must be snug against your hips
• Press the front portion of the switch (1)
and chest to work properly. When the
to increase support or the rear portion
seatback is reclined, the shoulder belt
of the switch (2) to decrease support.
cannot do its job because it will not be
NOTICE
snug against your chest. Instead, it will be
in front of you. During an accident, you
Do not continue to operate the lumbar
could be thrown into the seat belt,
support when the lumbar support
causing neck or other injuries.
provides its maximum support. Damage
to the lumbar support motor could occur.
3-10
3
Relaxation comfort seat (for Driver’s seat)
Driver relaxation comfort seat switch
if equipped
ONE1031013N
To activate relaxation comfort seat
ONE1031011
Press the switch (1) more than 0.5
Relaxation comfort seats help distribute
seconds, an alarm appears on the
body pressure and concentrated weight
infotainment screen. Then, press the
on specific body parts that occur while
switch (1) again for more than 0.5
sitting in the same position for a long
seconds.
period of time. The seat helps relieve
fatigue and discomfort by providing the
If the switch is not pressed within 5
optimal sit position.
seconds after the alarm appears,
relaxation comfort seat will not be
CAUTION
activated.
When relaxation comfort seat is
Take the following precautions when
activated:
using the relaxation comfort seat:
1. The seat cushion will be moved forward
• Do not use the relaxation comfort seat
or rearward automatically.
while the vehicle is moving. Using the
comfort seat could increase the risk of
2. The seat cushion, seatback angle and
injuries in the event of a collision or
leg support will be adjusted.
sudden stop.
In the following cases, an alarm appears
• Do not use the relaxation comfort seat
on when the infotainment screen is on
when the luggage or other objects are
and the relaxation comfort seat will be
placed at the rear seat.
deactivated.
• Do not use the relaxation comfort seat
• When the gear is not in P (Parking).
while the vehicle is moving. Seat belts
• When the vehicle is moving more than
may not operate normally due to the
1.8 mph (3 km/h).
lack of adherence between the
• When the rear seat belt is fastened
shoulder belts and the body.
• Do not use the relaxation comfort seat
Information
when the rear seats are not in the
rearmost position and upright.
When relaxion comfort seat cannot be
operated, try to reset Integrated Memory
System. If relaxation comfort seat does
not operate even after Integrated
Memory System is reset, contact an
authorized HYUNDAI dealer.
3-11
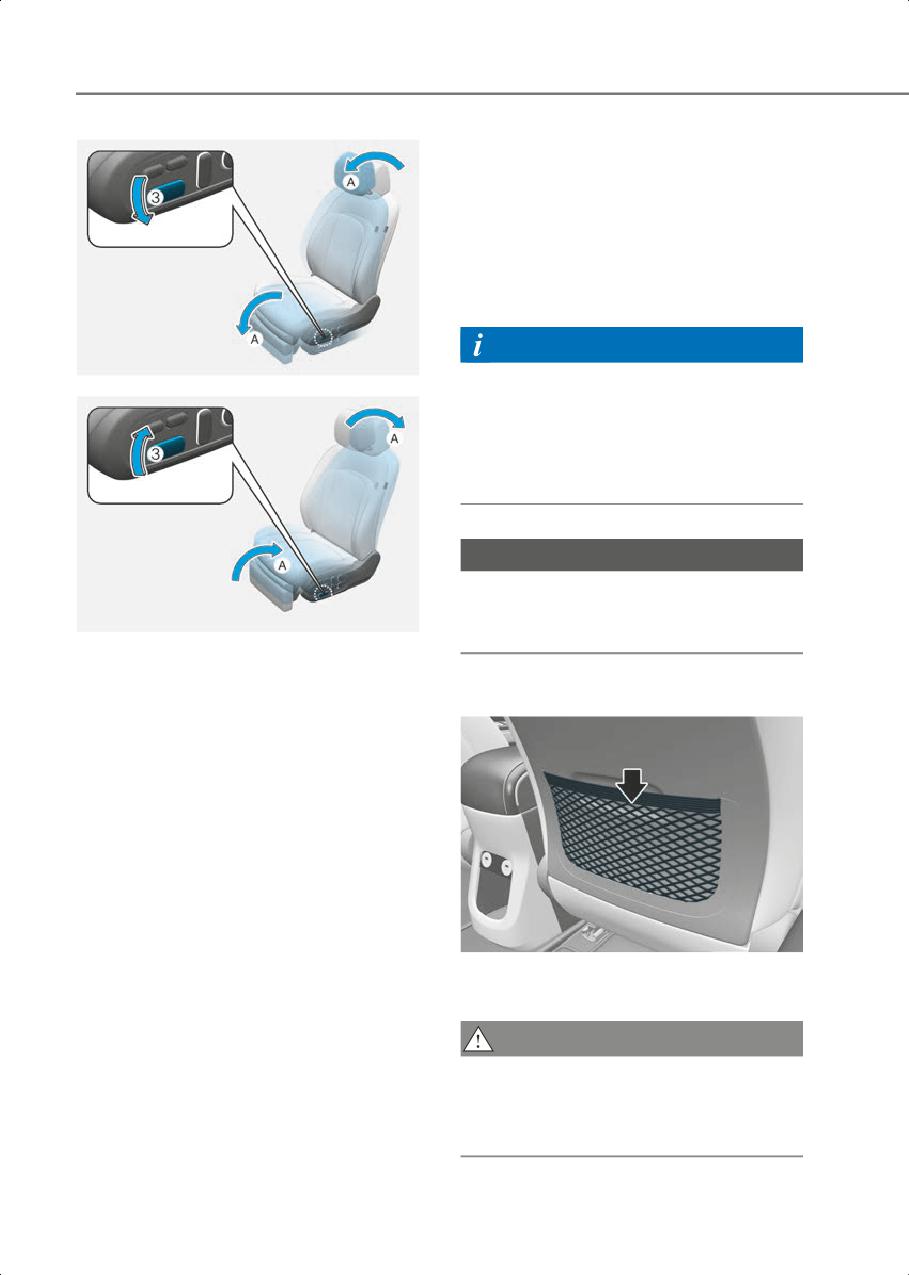
Seats & Safety System
• Passenger seat will return to the
original position.
In the following cases, the relaxation
comfort seat will not return to the original
position for the driver’ seat.
• When the gear is not in P (Parking).
• When the vehicle is moving more than
1.8 mph (3 km/h).
Information
ONE1031014N
When relaxation comfort seat cannot be
operated, try to reset Integrated Memory
System. If relaxation comfort seat does
not operate even after Integrated
Memory System is reset, contact an
authorized HYUNDAI dealer.
NOTICE
Do not use the seat switches
simultaneously. It may damage the seat
ONE1031015N
system.
[A] : Moves simultaneously
You can adjust moves simultaneously the
seat directly by using the seat adjustment
Seatback pocket
switches (3).
Push down the forward part of the switch
(3) to move back the chair to the original
position.
Pull up the forward part of the switch (3)
to adjust the seat to the relaxation
comfort position.
Even when the relaxation comfort seat is
operated by others, the additional
adjustment is possible by pressing
relaxation comfort seat switches.
ONE1031022
• To deactivate relaxation comfort seat
The seatback pocket is provided on the
If you press the front portion of the
back of the front seatbacks.
switch (2) while the seat is in the
relaxion comfort seat position, the seat
CAUTION
return backs to the original position.
Do not put heavy or sharp objects in the
When relaxation comfort seat is
seatback pockets. In an accident they
deactivated:
could come loose from the pocket and
• The driver seat will return to the
injure occupants.
position which the gear was in P (Park).
3-12
3
Rear Seats
-
Never allow passengers to sit on top
of the folded down seatback while
the vehicle is moving. This is not a
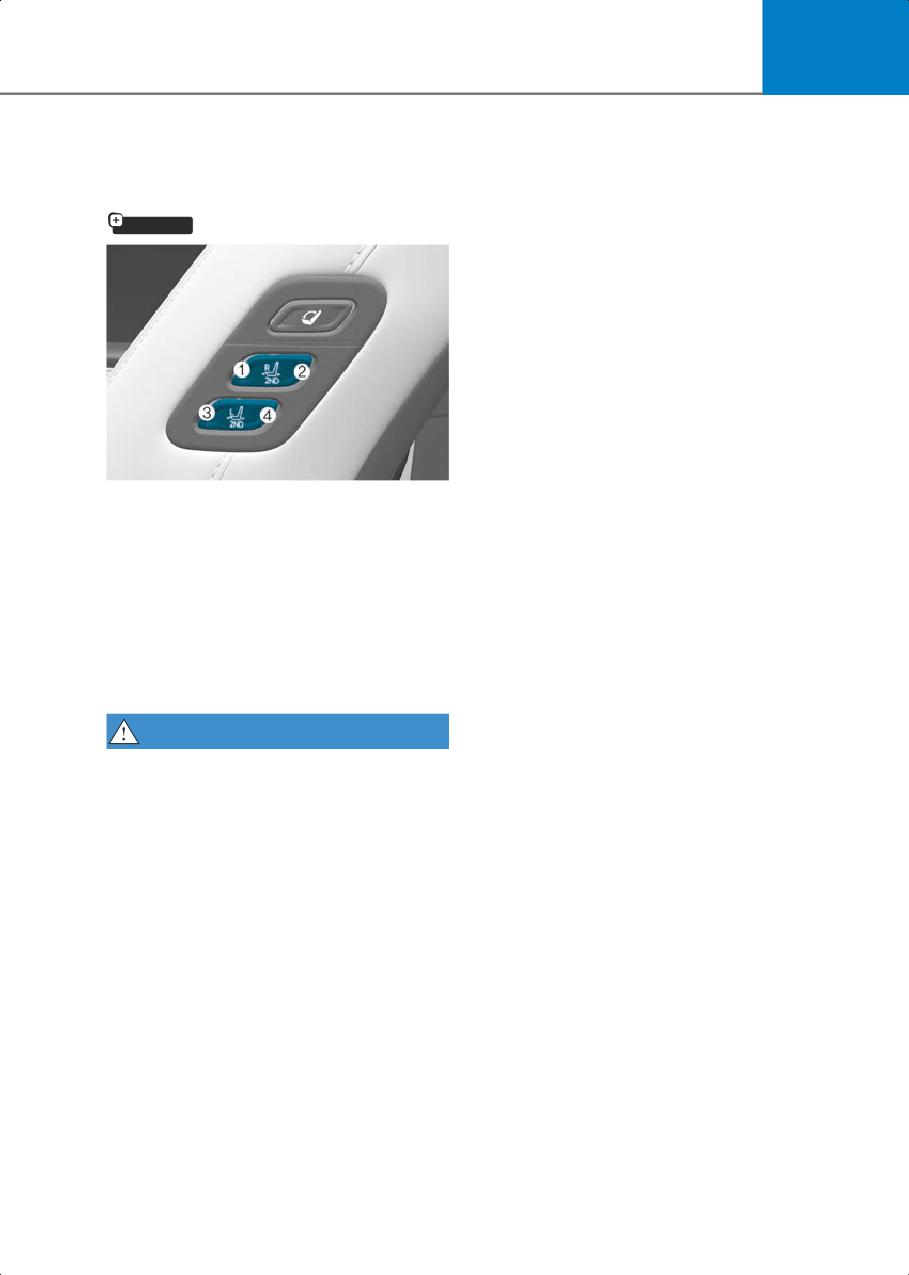
Rear seat control switch
proper seating position and no seat
if equipped
belts are available for use. This could
result in serious injury or death in
case of an accident or sudden stop.
-
Objects carried on the folded down
seatback should not extend higher
than the top of the front seatbacks.
This could allow cargo to slide
forward and cause injury or damage
during sudden stops.
-
When returning the rear seatback
from a folded to an upright position,
hold the seatback and return it
ONE1031023
slowly. Ensure that the seatback is
The front and rear seat passengers may
completely locked into its upright
use the switches to control the rear seats.
position by pushing on the top of the
• Sliding forward or rearward:
seatback. In an accident or sudden
stop, the unlocked seatback could
Press the switch (1) or (2) to move the
allow cargo to move forward with
second row right side seat forward or
great force and enter the passenger
rearward.
compartment, which could result in
Press the switch (3) or (4) to move the
serious injury or death.
second row left side seat forward or
-
When folding the seatback, slightly
rearward.
pushing the seatback or head
restraint against the folding direction
WARNING
to control the folding speed. Without
Take the following precautions:
the push, the seatback may abruptly
fold down and cause injuries when
• Adjusting the seats
the lever is pulled.
- NEVER attempt to adjust the seat
• Loading cargo
while the vehicle is moving. The seat
may suddenly move and may injure
- Make sure the vehicle is off, the gear
the passenger.
shifted to P (Park), and the parking
brake is securely applied whenever
- Make sure that the seat is locked in
loading or unloading cargo. Failure to
place after the adjustment. If not, the
take these steps may allow the
seat might move unexpectedly
vehicle to move if the shift button or
resulting in an accident.
shift dial is inadvertently pressed or
• Folding the seats
rotated to another position.
- Do not fold the seatback when the
- When cargo is loaded through the
seat is occupied (for example,
rear passenger seats, ensure the
passenger, pets or luggage). It may
cargo is properly secured to prevent
injure the passenger or pet, or
it from moving while driving.
damage the luggage.
3-13
Seats & Safety System
• Do not place objects in the rear seats,
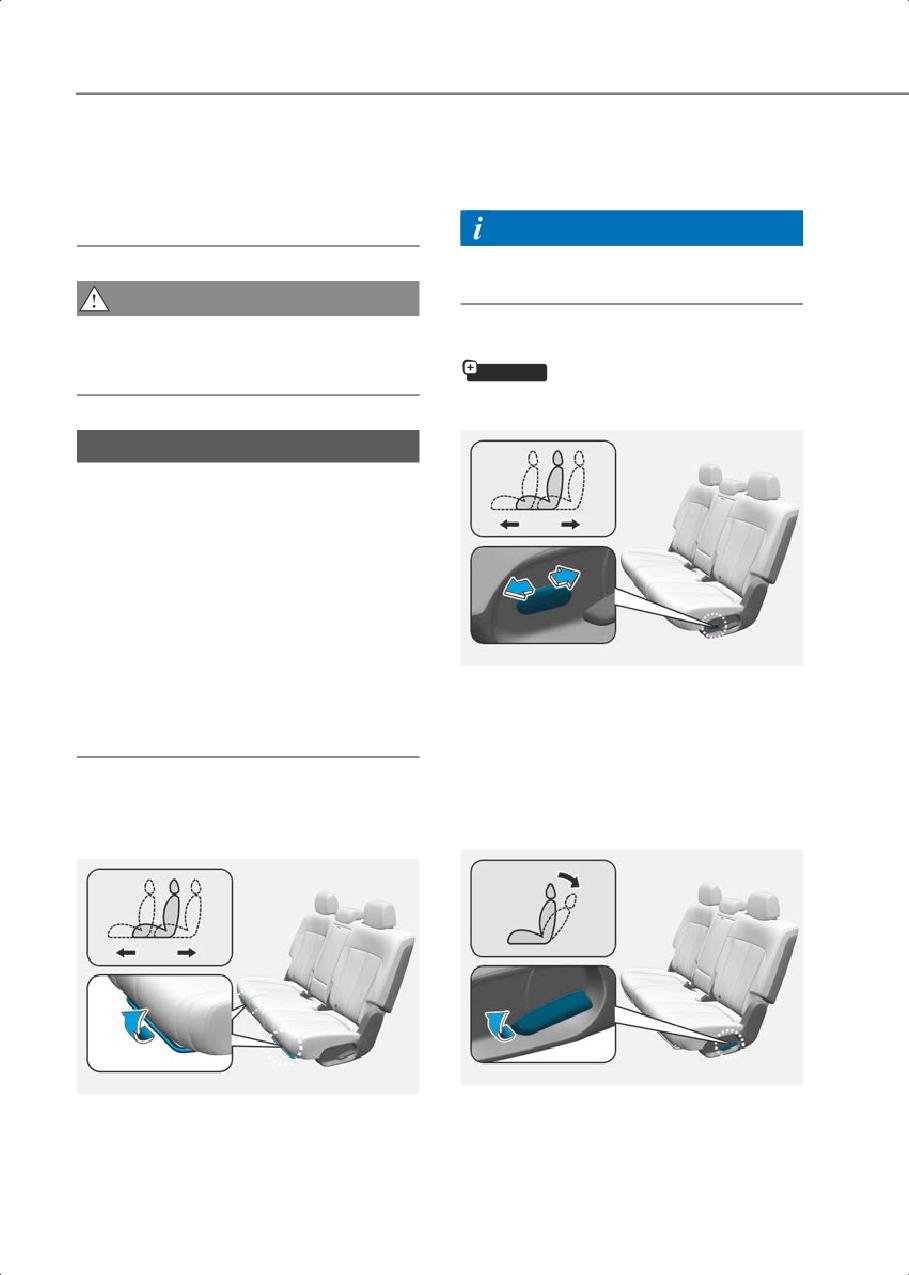
2. Slide the seat to the position you desire.
since they cannot be properly secured
3. Release the lever and make sure the
and may hit vehicle occupants in a
seat is locked in place.
collision causing serious injury or
death.
Information
For the optimal safety, slide the rear seat
to the rearmost position.
CAUTION
Do not allow your hands or fingers to get
Power adjustment
caught in the seat mechanisms while
adjusting the seats.
if equipped
Forward and rearward
NOTICE
To prevent damage to the vehicle:
• Rear seat belts
Before folding the seatback, insert the
seat belt buckle in the holder between
the seatback and cushion. And insert
the seat belt webbing in the guide to
prevent the seat belt from being
damaged.
• Cargo
ONE1031074N
Be careful when loading cargo through
To move the seat forward or rearward:
the rear passenger seats to prevent
1. Push the control switch forward or
damage to the vehicle interior.
rearward.
2. Release the switch once the seat
reaches the desired position.
Manual adjustment
Seatback angle
Forward and rearward
ONE1031024N
ONE1031073N
To recline the seatback:
To move the seat forward or rearward:
1. Pull up the seatback recline lever.
1. Pull the seat slide adjustment lever up
and hold it.
3-14
3
2. Hold the lever and adjust the seatback
3. Route the seat belt webbing to the
of the seat to the position you desire.
outward of the rear seat to prevent the
belts from being trapped behind or
3. Release the lever and make sure the
under the seats.
seatback is locked in place. The lever
MUST return to its original position for
the seatback to lock.
* The seatbacks can be folded with the
seatback recline lever.
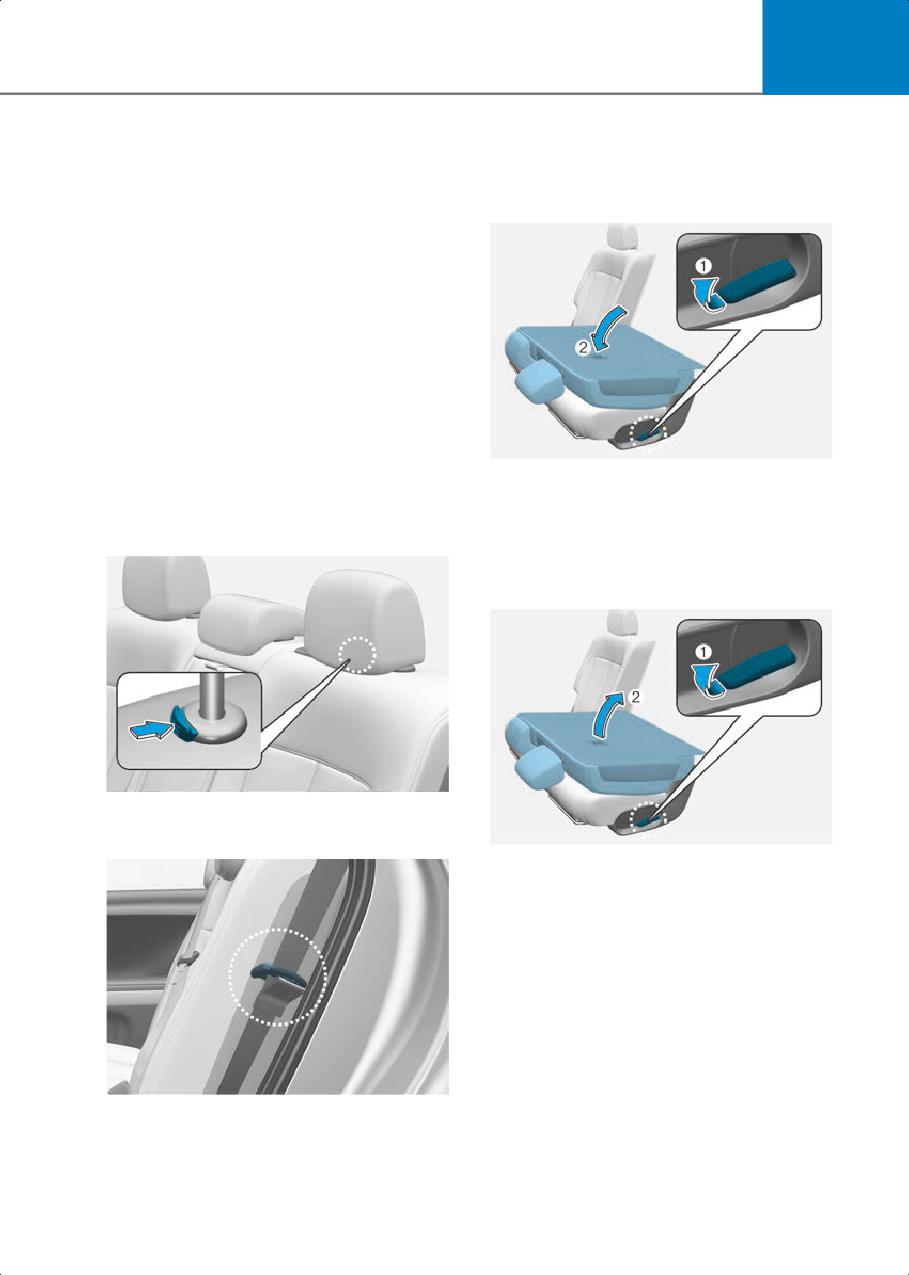
Folding the rear seats
The rear seatbacks can be folded to
facilitate carrying long items or to
increase the luggage capacity of the
vehicle.
ONE1031027N
To fold down the rear seatback:
4. Pull up the seatback folding lever (1),
1. Set the front seatback to the upright
then fold the seat (2) toward the front of
position and if necessary, slide the front
the vehicle. When you return the
seat forward.
seatback to its upright position, always
be sure it has locked into position by
pushing on the top of the seatback.
ONE1031025N
2. Lower the rear head restraints to the
lowest position.
ONE1031028N
5. To use the rear seat, lift and unfold the
seatback (2) to the upright position by
pulling up the folding lever (1). Push the
seatback firmly until it clicks into place.
Make sure the seatback is locked in
place.
6. Return the rear seat belt to the proper
position.
ONE1031026
3-15
Seats & Safety System
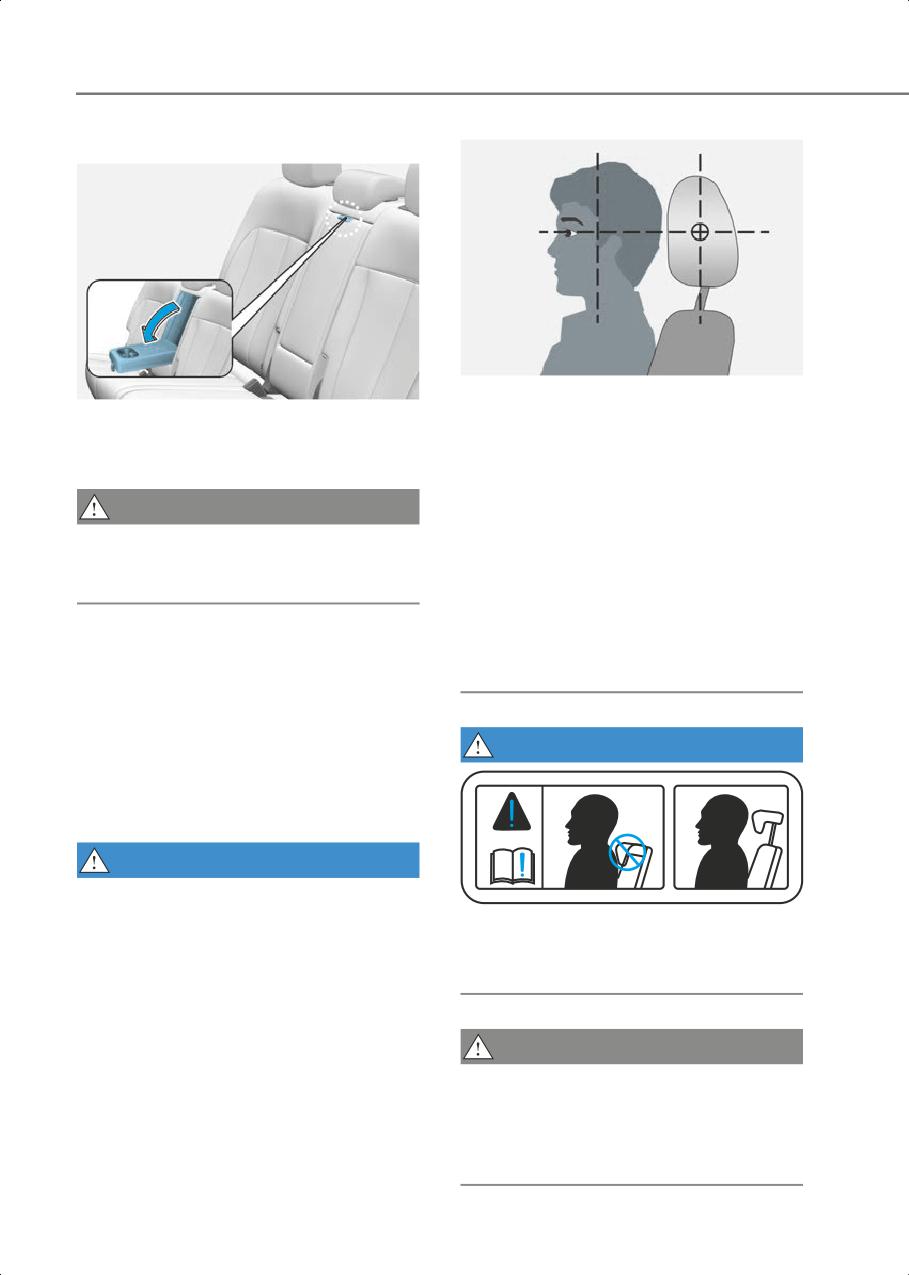
Armrest
OHI039190N
ONE1031031N
• Adjust the head restraints so the middle
The armrest is located in the center of the
of the head restraint is at the same
rear seat. Pull the armrest down from the
height as the height of the top of the
seatback to use it.
eyes.
• NEVER adjust the head restraint
CAUTION
position of the driver’s seat when the
vehicle is in motion.
The armrest handle may be pressed when
folding the rear seatback, but it will be
• Adjust the head restraint as close to the
restored after a certain period of time.
passenger’s head as possible. Do not
use a seat cushion that holds the body
away from the seatback.
Head Restraint
• Make sure the head restraint locks into
The vehicle’s front and rear seats have
position after adjusting it.
adjustable head restraints. The head
restraints provide comfort for
passengers, but more importantly they
WARNING
are designed to help protect passengers
from whiplash and other neck and spinal
injuries during an accident, especially in a
rear impact collision.
WARNING
To reduce the risk of serious injury or
OTL035061
death in an accident, take the following
precautions when adjusting your head
When sitting on the rear seat, do not
restraints:
adjust the height of the head restraint to
the lowest position.
• Always properly adjust the head
restraints for all passengers BEFORE
starting the vehicle.
• NEVER let anyone ride in a seat with the
CAUTION
head restraint removed or reversed.
When there is no occupant in the rear
seats, adjust the height of the head
restraint to the lowest position. The rear
seat head restraint can reduce the
visibility of the rear area.
3-16
3
NOTICE
NOTICE
To prevent damage, NEVER hit or pull on
the head restraints.
Front seat head restraints
OHI038136
If you recline the seatback towards the
front with the head restraint and seat
cushion raised, the head restraint may
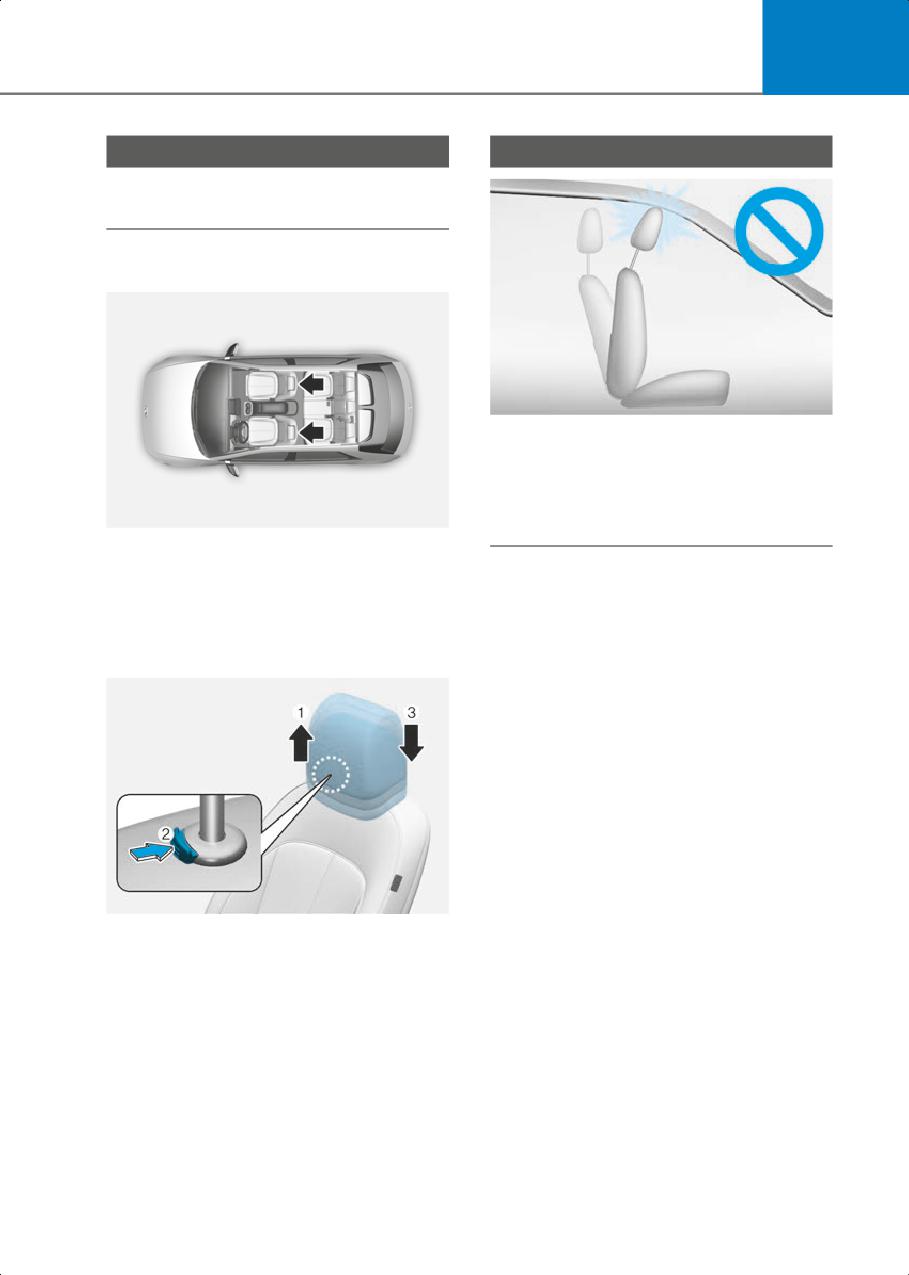
come in contact with the sunvisor or
other parts of the vehicle.
ONE1031076L
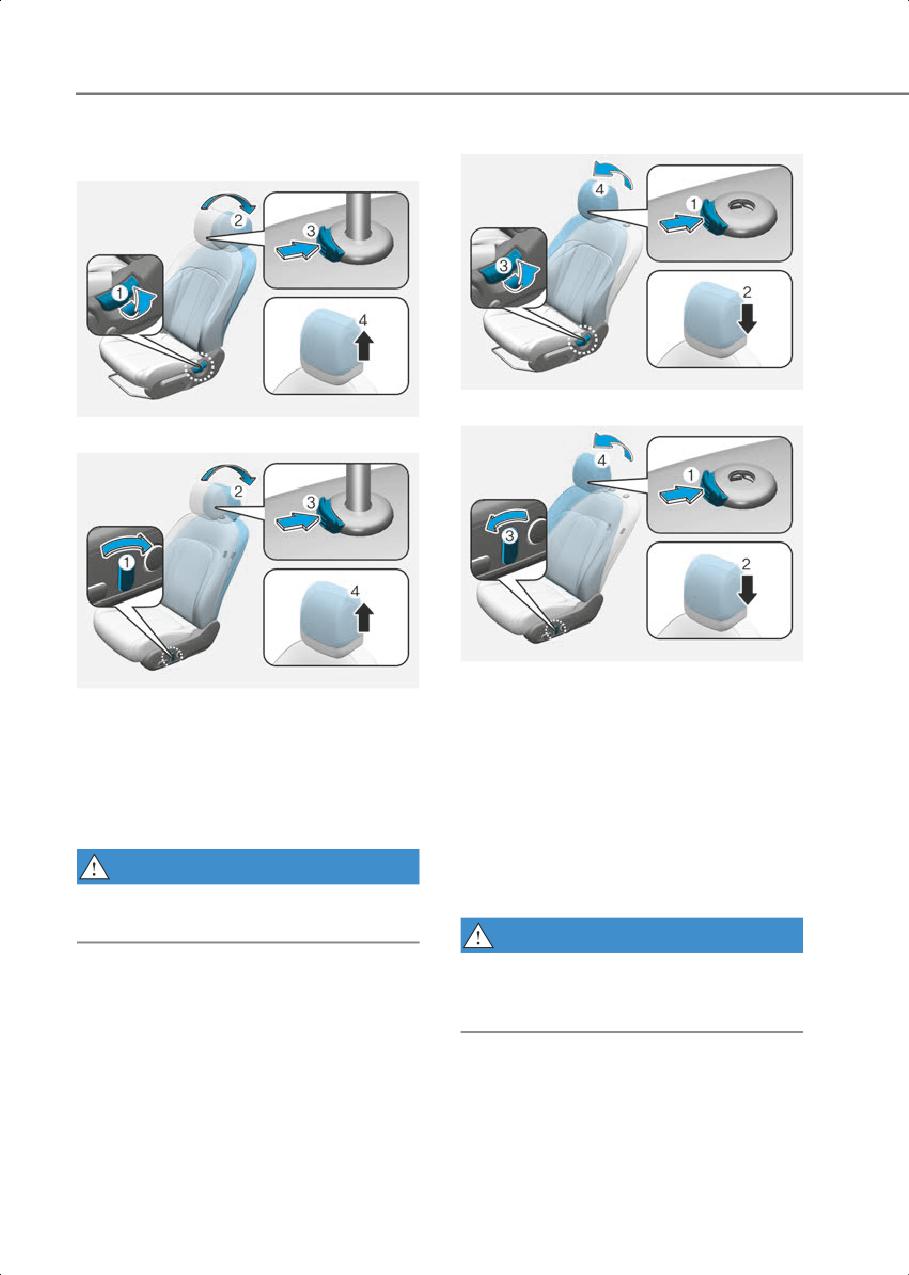
The driver’s and front passenger’s seats
are equipped with adjustable head
restraints for the passengers safety and
comfort.
Adjusting the height up and down
ONE1031016N
To raise the head restraint:
1. Pull it up to the desired position (1).
To lower the head restraint:
1. Push and hold the release button (2) on
the head restraint support.
2. Lower the head restraint to the desired
position (3).
3-17
Seats & Safety System
Removal/Reinstall
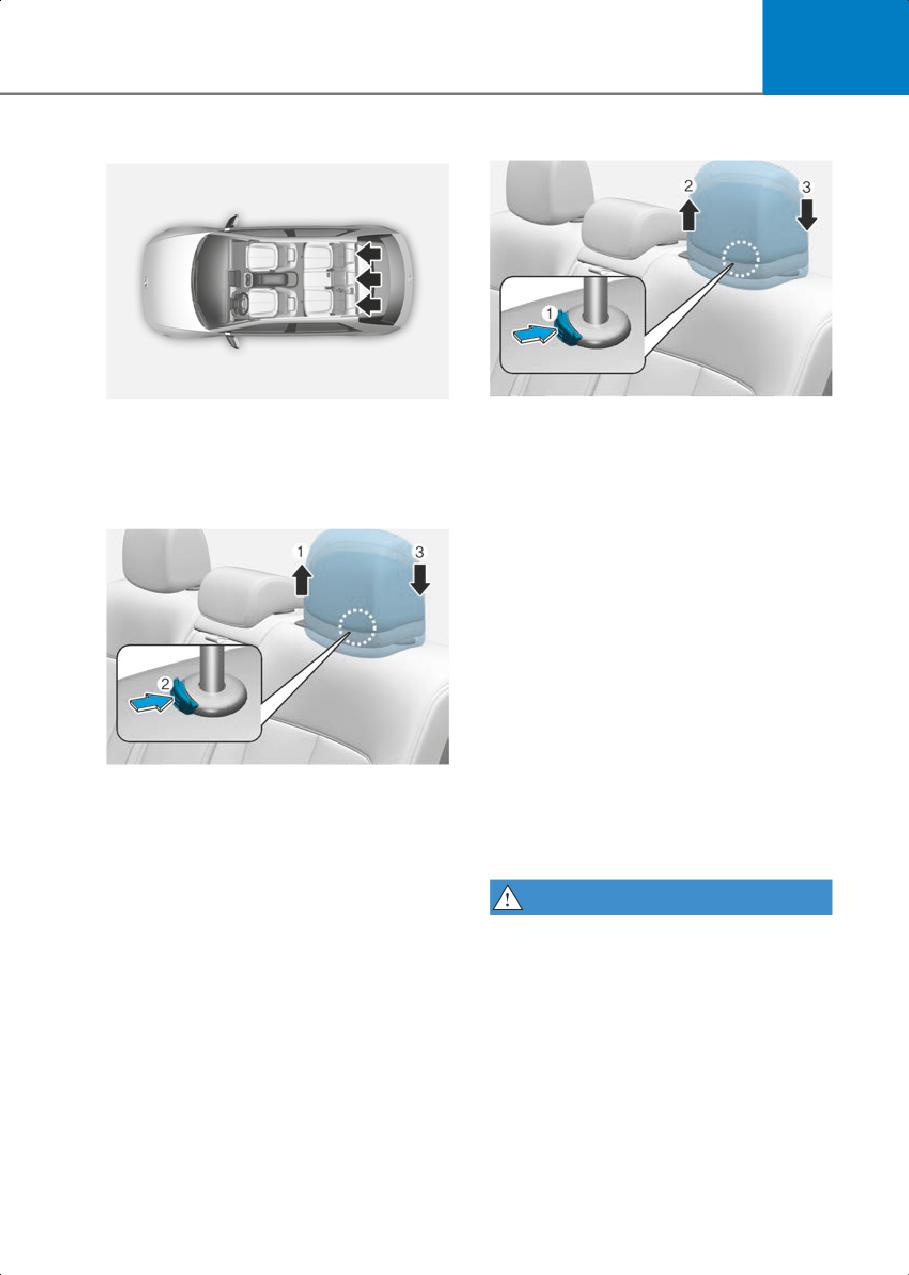
Type A
Type A
ONE1031019N
Type B
ONE1031018N
Type B
ONE1031021N
ONE1031020N
To reinstall the head restraint :
To remove the head restraint:
1. Recline the seat back by pressing
seatback angle lever or switch (3).
1. Recline the seatback (2) with the
seatback angle switch (1).
2. Put the head restraint poles (2) into the
holes while pressing the release button
2. Pull up the head restraint to the upmost
(1).
position and press the release button
(3) to remove the head restraint (4).
3. Adjust the head restraint to the
appropriate height.
WARNING
4. Adjust the seatback angle (4) with the
NEVER allow anyone to travel in a seat
seatback angle switch (3).
with the head restraint removed.
WARNING
Always make sure the head restraint locks
into position after reinstalling and
adjusting it properly.
3-18
3
Rear seat head restraints
Removal/Reinstallation
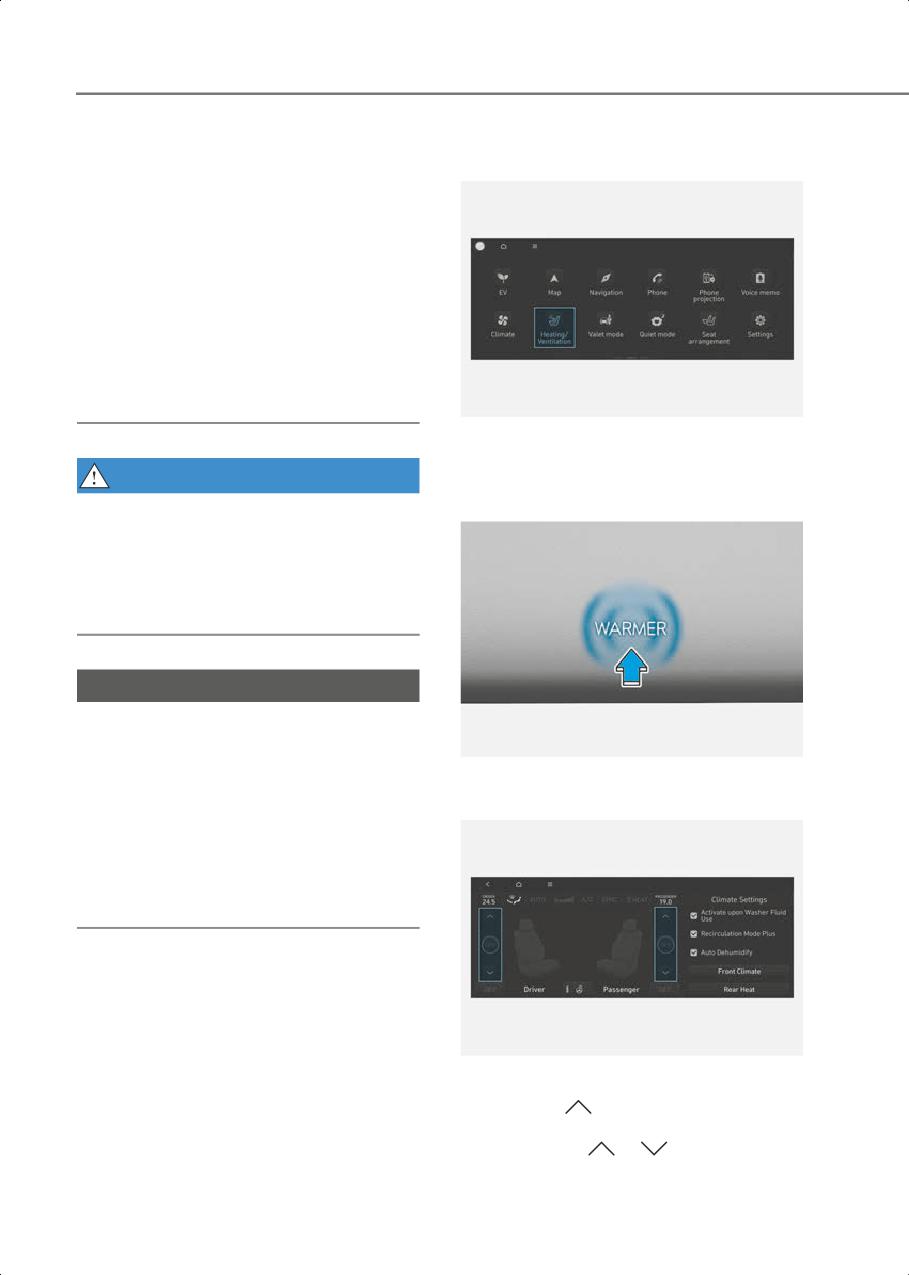
ONE1031029
ONE1031083N
The rear seats are equipped with head
To remove the head restraint:
restraints in all the seating positions for
1. Raise the head restraint as far as it can
the passenger’s safety and comfort.
go.
2. Press the head restraint release button
Adjusting the height up and down
(1) while pulling the head restraint up
(2).
To reinstall the head restraint:
1. Put the head restraint poles into the
holes (3) while pressing the release
button (1).
2. Adjust the head restraint to the
appropriate height.
Seat Warmers
ONE1031030N
Seat warmers are provided to warm the
To raise the head restraint:
seats during cold weather.
1. Pull it up to the desired position (1).
During mild weather or under conditions
where the operation of the seat warmer is
To lower the head restraint:
not needed, keep the seat warmers OFF.
1. Push and hold the release button (2) on
the head restraint support.
WARNING
2. Lower the head restraint to the desired
The seat warmers can cause a SERIOUS
position (3).
BURN, even at low temperatures and
especially if used for long periods of time.
Passengers must be able to feel if the seat
is becoming too warm so they can turn it
off, if needed.
Seat warmer consume large amounts of
electricity. Please avoid using seat
warmers while the vehicle is off in order
to prevent battery discharge.
3-19
Seats & Safety System
People who cannot detect temperature
Front seat warmers
change or pain to the skin should use
Infotainment system
extreme caution, especially the following
types of passengers:
• Infants, children, elderly or disabled
persons, or hospital outpatients.
• People with sensitive skin or who burn
easily.
• Fatigued individuals.
• Intoxicated individuals.
• People taking medication that can
cause drowsiness or sleepiness.
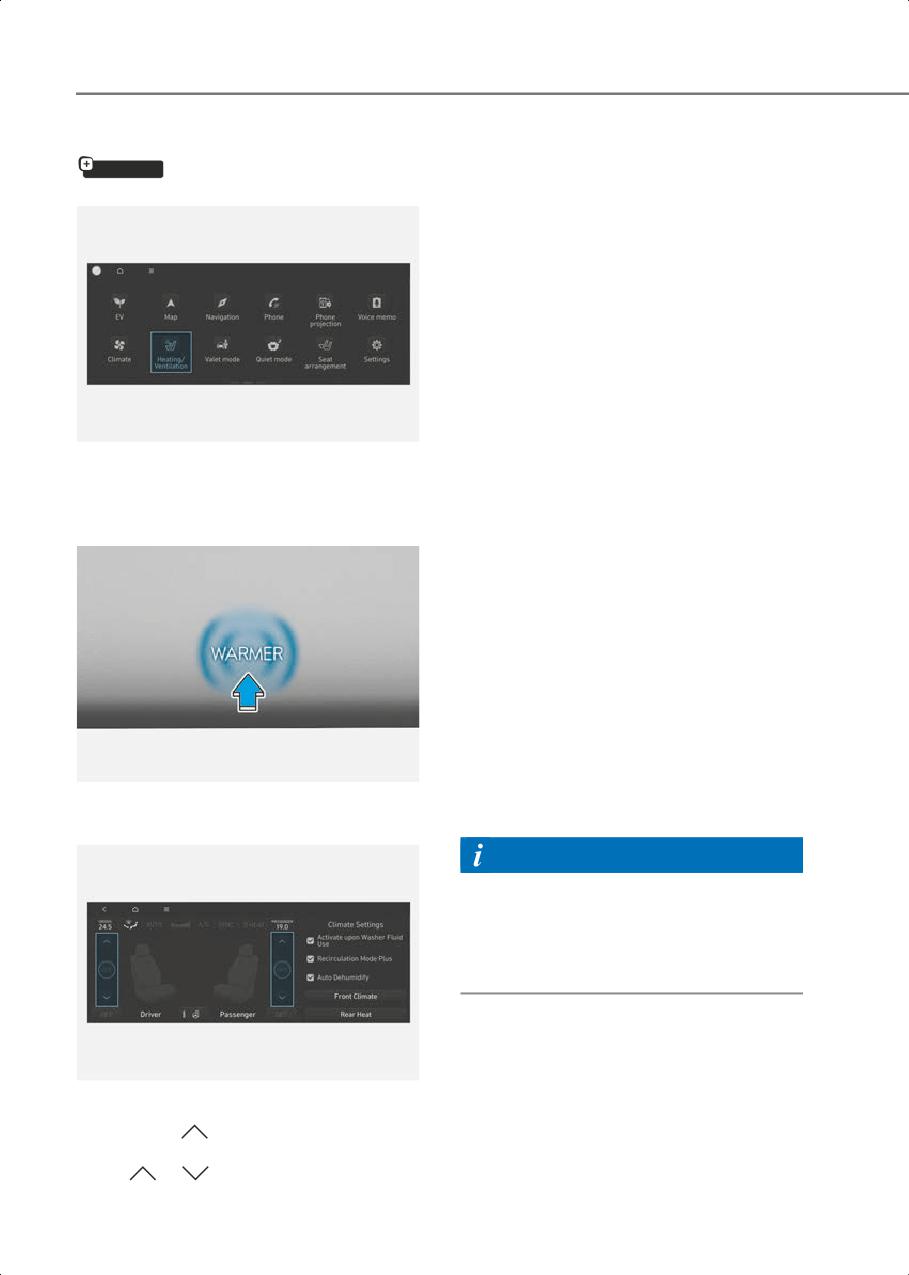
ONE1031085L
While the vehicle is running, touch
Heating/Ventilation icon in the
WARNING
infotainment home screen.
NEVER place anything on the seat that
Climate control panel
insulates against heat when the seat
warmer is in operation, such as a blanket
or seat cushion. This may cause the seat
warmer to overheat, causing a burn or
damage to the seat.
NOTICE
To prevent damage to the seat warmers
and seats:
ONE1031081
• Never use a solvent such as paint
Press WARMER in the front climate
thinner, benzene, alcohol or gasoline to
control panel.
clean the seats.
• Do not place heavy or sharp objects on
seats equipped with seat warmers.
• Do not change the seat cover. It may
damage the seat warmer.
ONE1031080L
To activate seat warmer of each front
seats, touch
icon on the infotainment
screen. Adjust the temperature by
pressing either
or
icons.
3-20

3
The seat warmer will automatically stop
Air Ventilation Seats
when the seat temperature reaches
The air ventilation seats are provided to
certain level and will automatically
cool the front seats by blowing air
reactivate when the seat temperature
through small vent holes on the surface of
drops below certain temperature.
the seat cushions and seatbacks.
• Automatic temperature control
When the operation of the air ventilation
The seat warmer starts to automatically
seat is not needed, keep the air
control the seat temperature in order to
ventilation seats OFF.
prevent low temperature burns after
being manually turned on.
NOTICE
To prevent damage to the air ventilation
OFF → HIGH ( 3 ) → MEDIUM ( 2 ) → LOW ( 1 )
seats:
30 min
60 min
•
Never use a solvent such as paint
You may manually touch the icon to
thinner, benzene, alcohol or gasoline to
increase seat temperature. However,
clean the seats.
the seat temperature is automatically
•
Avoid spilling liquids on the surface of
adjusted again.
the front seats and seatbacks; this may
•
Auto. Controls That Use Climate
cause the air vent holes to block and
Control Settings (for driver’s seat)
not work properly.
The seat warmer automatically controls
•
Do not place materials such as plastic
the seat temperature depending on the
bags or newspapers under the seats.
They may block the air intake causing
ambient temperature when the vehicle
malfunction of the air vent.
is running.
•
Do not change the seat covers. It may
To use this function, it must be enabled
damage the air ventilation seat.
from the Settings menu in the
infotainment system screen.
•
If the air vents do not operate, restart
the vehicle. If there is no change, have
Select:
the vehicle to be inspected by an
- Setup > Vehicle Settings > Seat >
authorized HYUNDAI dealer.
Heated/Ventilated Features > Auto.
Controls That Use Climate Control
Settings > Seat Warmer/Ventilation
•
The seat warmer defaults to the OFF
position whenever the Start/Stop
button is pressed to the ON position.
However, if the Auto. Controls That Use
Climate Control Settings function is On,
the driver’s seat warmer will turn on
and off depending on the ambient
temperature.
Information
The infotainment system may change
after software updates. For more
information, refer to the user’s manual
provided in the infotainment system and
the quick reference guide.
3-21
Seats & Safety System
Front air ventilation seats
•
If the air ventilation seat is positioned at
if equipped
HIGH, the airflow speed will increase
according to vehicle speed.
Infotainment system
•
Use the air ventilation seat with the air
conditioning on for more effective
ventilation.
•
It may take 3~5 minutes after switch
operation to feel the temperature
change.
•
Auto. Controls That Use Climate
Control Settings (for driver’s seat)
The air ventilation seat automatically
controls the seat temperature
ONE1031085L
depending on the ambient temperature
when the vehicle is running.
While the vehicle is running, touch
Heating/Ventilation icon in the
To use this function, it must be enabled
infotainment home screen.
from the Settings menu in the
Climate control panel
infotainment system screen.
Select:
- Setup > Vehicle Settings > Seat >
Heated/Ventilated Features > Auto.
Controls That Use Climate Control
Settings > Seat Warmer/Ventilation
•
The air ventilation seats defaults to the
OFF position whenever the Start/Stop
button is pressed to the ON position.
However, if the Auto. Controls That Use
Climate Control Settings function is on,
the driver’s seat warmer will turn on
ONE1031081
and off depending on the ambient
Press WARMER in the front climate
temperature.
control panel.
Information
The infotainment system may change
after software updates. For more
information, refer to the user’s manual
provided in the infotainment system and
the quick reference guide.
ONE1031080L
To activate air ventilation of each front
seats, touch
icon on the infotainment
screen. Adjust the airflow by pressing
either
or
icons.
3-22

3
• Do not latch the seat belt into the
Seat Belts
buckles of other seats.
This section describes how to use the seat
• NEVER unfasten the seat belt while
belts properly. It also describes some of
driving. This may cause loss of vehicle
the things not to do when using seat belts.
control resulting in an accident.
• Make sure there is nothing in the buckle
Seat Belt Safety Precautions
interfering with the seat belt latch
mechanism, because any materials in
Always fasten your seat belt and make
the buckle can cause the seat belt not
sure all passengers have fastened their
to be fastened securely.
seat belts before starting any trip. Air bags
are designed to supplement the seat belt
• No modifications or additions should
as an additional safety device, not a
be made by the user which will either
replacement. Most states require all
prohibit the seat belt adjusting devices
occupants of a vehicle to wear seat belts.
from operating to remove slack, or
prohibit the seat belt assembly from
WARNING
being adjusted to remove slack.
Seat belts must be used by ALL
passengers whenever the vehicle is
moving. Take the following precautions
WARNING
when adjusting and wearing seat belts:
Damaged seat belts and seat belt
• Children under the age of 13 should be
assemblies will not operate properly.
properly restrained in the rear seats.
Always replace:
• Never allow children to ride in the front
• Frayed, contaminated, or damaged
passenger seat, unless the air bag is
webbing.
deactivated. If a child is seated in the
• Damaged hardware.
front passenger seat, move the seat as
• The entire seat belt assembly after it
far back as possible. And the child must
has been worn in an accident, even if
always be restrained in the seat
damage to webbing or assembly is not
properly.
apparent.
• NEVER allow an infant or child to be
carried on an occupant’s lap.
• NEVER ride with the seatback reclined
when the vehicle is moving.
• Do not allow children to share a seat or
seat belt.
• Do not wear the shoulder belt under
your arm or behind your back.
• NEVER wear a seat belt over fragile
objects. If there is a sudden stop or
impact, the seat belt can damage it.
• Do not use the seat belt if it is twisted. A
twisted seat belt will not protect you
properly in an accident.
• Do not use a seat belt if the webbing or
hardware is damaged.
3-23
Seats & Safety System
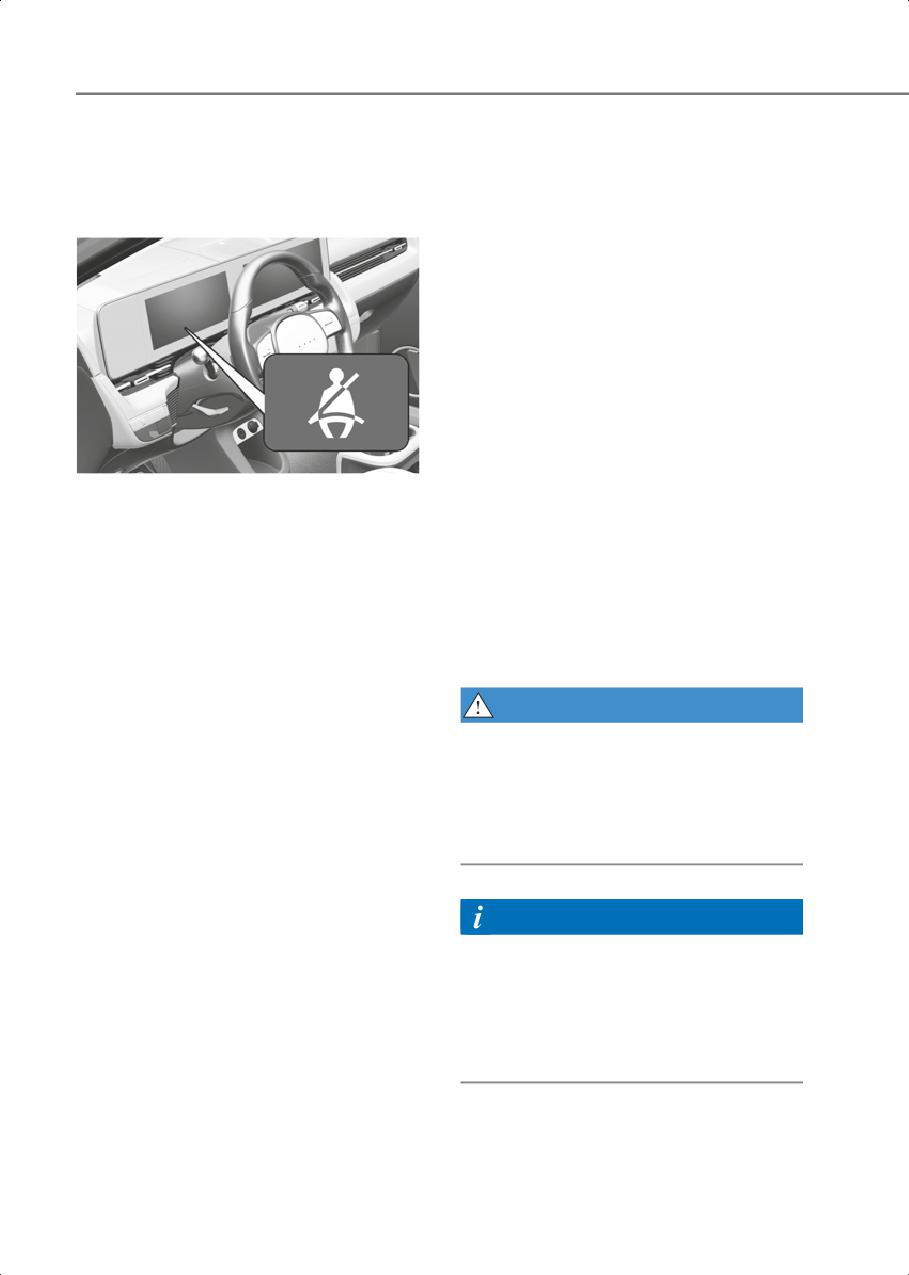
Seat Belt Warning Light
Front passenger’s seat belt warning
As a reminder to the front passenger, the
front passenger’s seat belt warning lights
Driver’s seat belt warning
will illuminate for approximately 6
Instrument cluster
seconds each time the Start/Stop button
is in the ON position regardless of belt
fastening.
If you start to drive without the seat belt
fastened or you unfasten the seat belt
when you drive under 12 mph (20 km/h) or
stop, the corresponding warning light will
illuminate.
If you start to drive without the seat belt
fastened or you unfasten the seat belt
when you drive 12 mph (20 km/h) and
ONE1031033
faster, the warning light will blink and
As a reminder to the driver, the driver’s
warning chime will sound for
seat belt warning lights will illuminate for
approximately 100 seconds.
approximately 6 seconds each time the
When the seat belt is unfastened during
Start/Stop button is in the ON position
driving, the warning light will illuminate
regardless of belt fastening. If the
when the speed is under 12 mph (20
seatbelt is not fastened, the warning
km/h). When the speed is 12 mph (20
chime will sound for about 6 seconds.
km/h) and faster, the warning light will
If you start to drive without the seat belt
blink and warning chime will sound for
fastened or you unfasten the seat belt
approximately 100 seconds.
when you drive under 12 mph (20 km/h) or
stop, the corresponding warning light will
WARNING
illuminate.
Riding in an improper position adversely
If you start to drive without the seat belt
affects the front passenger’s seat belt
fastened or you unfasten the seat belt
warning system. It is important for the
when you drive 12 mph (20 km/h) and
driver to instruct the passenger to
faster, the warning light will blink and
properly be seated as instructed in this
warning chime will sound for
manual.
approximately 100 seconds.
When the seat belt is unfastened during
driving, the warning light will illuminate
Information
when the speed is under 12 mph (20
km/h).
• Although the front passenger seat is not
occupied, the seat belt warning light
When the speed is 12 mph (20 km/h) and
will blink or illuminate for 6 seconds.
faster, the warning light will blink and
warning chime will sound for
• The front passenger’s seat belt warning
approximately 100 seconds.
may operate when luggage is placed on
the front passenger seat.
3-24
3
Seat Belt Restraint System
NOTICE
If you are not able to smoothly pull
Lap/shoulder belt
enough of the seat belt out from the
retractor, firmly pull the seat belt out and
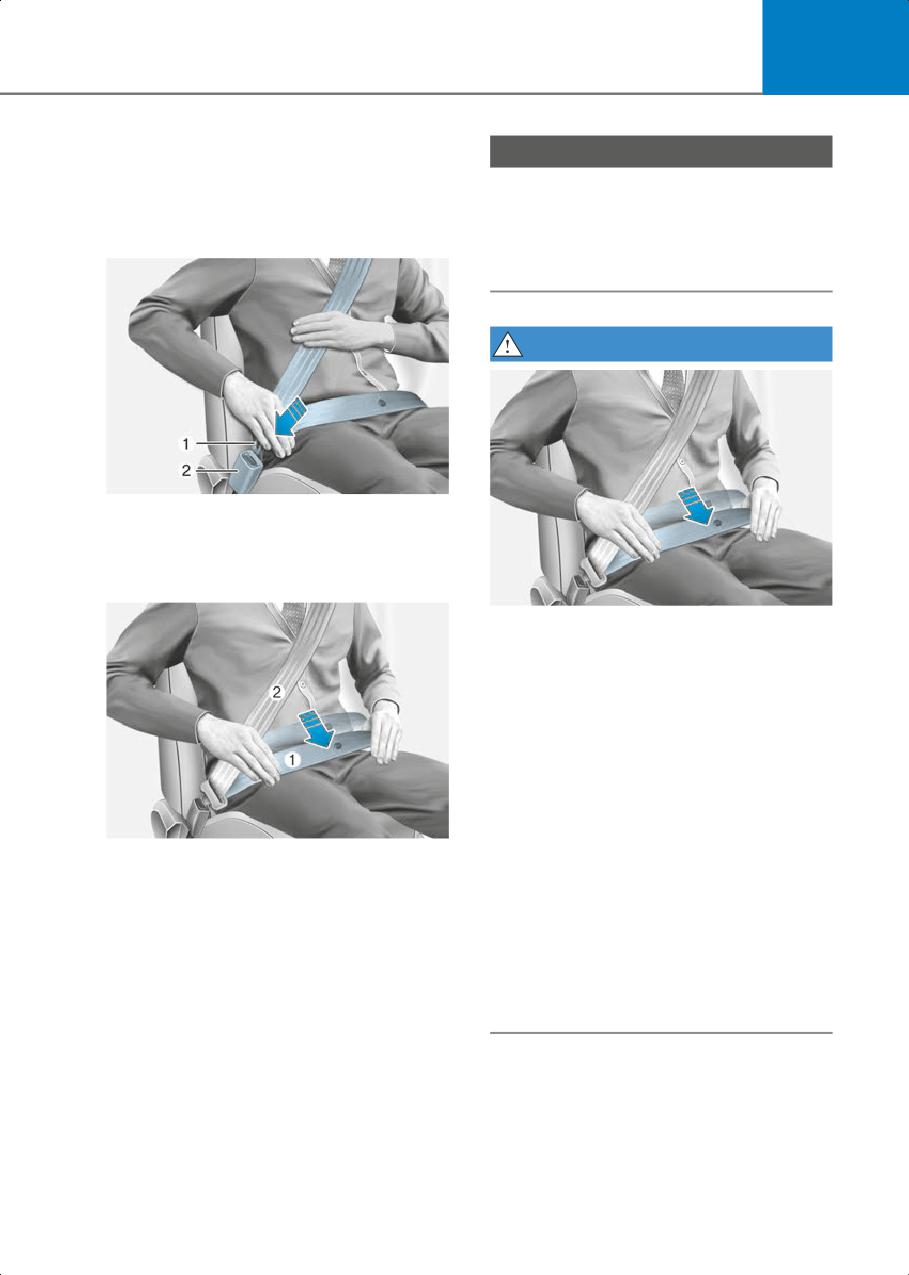
To fasten your seat belt:
release it. After release, you will be able to
pull the belt out smoothly.
WARNING
OHI038140
Pull it out of the retractor and insert the
metal tab (1) into the buckle (2). There will
be an audible “click” when the tab locks
into the buckle.
OHI038182L
Improperly positioned seat belts may
increase the risk of serious injury in an
accident. Take the following precautions
when adjusting the seat belt:
• Position the lap portion of the seat belt
as low as possible across your hips, not
on your waist, so that it fits snugly. This
allows your strong pelvic bones to
absorb the force of the crash, reducing
the chance of internal injuries.
OHI038137
• Position one arm under the shoulder
You should place the lap belt (1) portion
belt and the other over the belt, as
across your hips and the shoulder belt (2)
shown in the illustration.
portion across your chest.
• Always position the shoulder belt
The seat belt automatically adjusts to the
anchor into the locked position at the
proper length after the lap belt portion is
appropriate height.
adjusted manually so that it fits snugly
• Never position the shoulder belt across
around your hips. If you lean forward in a
your neck or face.
slow, easy motion, the belt will extend
and move with you.
If there is a sudden stop or impact, the
belt will lock into position. It will also lock
if you try to lean forward too quickly.
3-25
Seats & Safety System
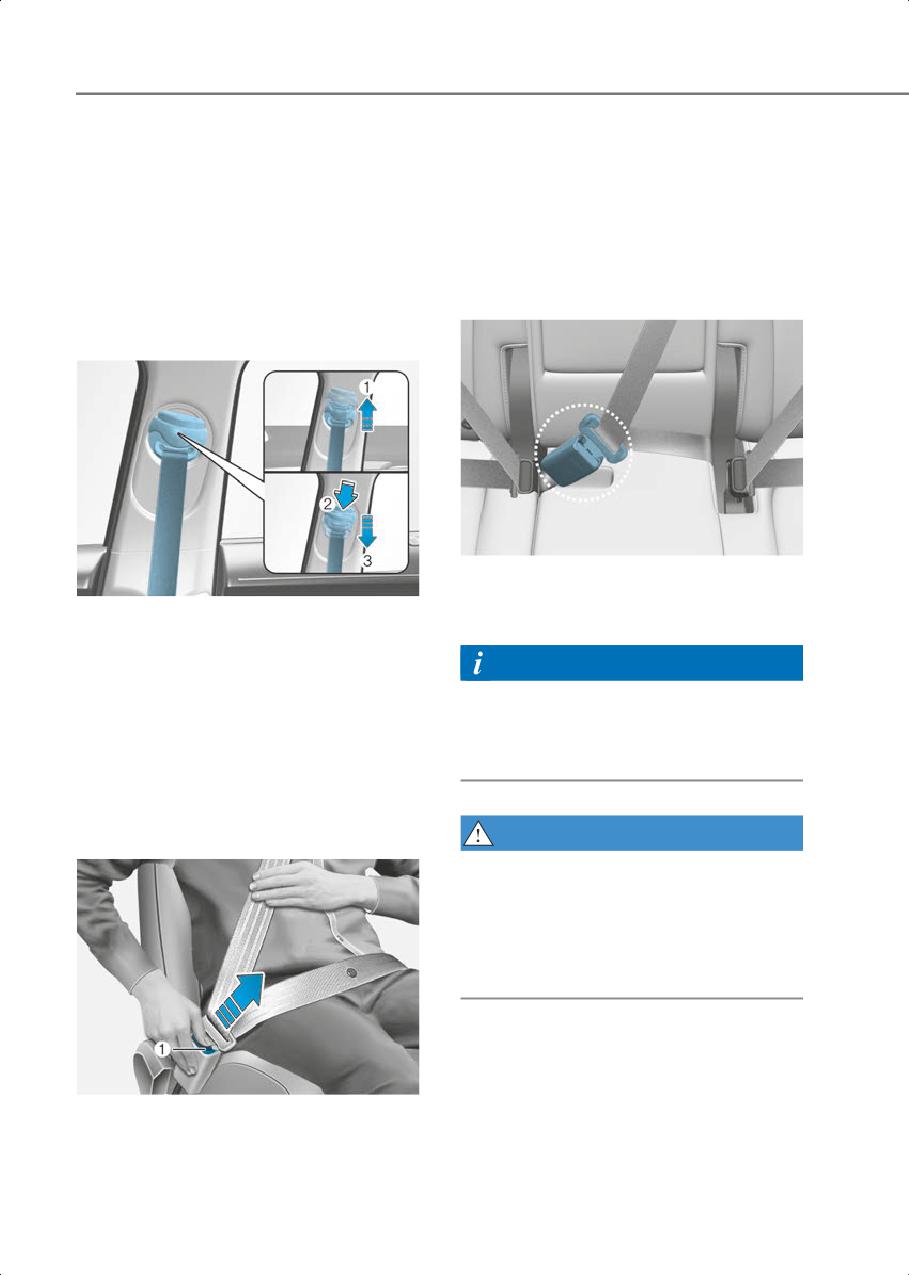
Height adjustment
Once released, the belt should
automatically draw back into the
You can adjust the height of the shoulder
retractor. If this does not happen, check
belt anchor to one of the four different
the belt to be sure it is not twisted, then
positions for maximum comfort and
try again.
safety.
The shoulder portion should be adjusted
so it lies across your chest and midway
Rear center seatbelt (3-point rear
over your shoulder nearest the door, not
center seat belt)
over your neck.
Front seat
ONE1031087L
When using the rear center seat belt, the
ONE1031035
buckle with the “CENTER” mark must be
To adjust the height of the seat belt
used.
anchor, lower or raise the height adjuster
into an appropriate position.
Information
To raise the height adjuster, pull it up (1).
If you are not able to pull out the safety
To lower it, push it down (3) while
belt from the retractor, firmly pull the belt
pressing the height adjuster button (2).
out and release it. After release, you will
Release the button to lock the anchor into
be able to pull the belt out smoothly.
position. Try sliding the height adjuster to
make sure that it has locked into position.
To release your seat belt:
WARNING
Make sure that the seatback is locked in
place when using the rear center seat
belt.
If not, the seatback may move when there
is a sudden stop or collision, which could
result in serious injury.
OHI038142
Press the release button (1) in the locking
buckle.
3-26
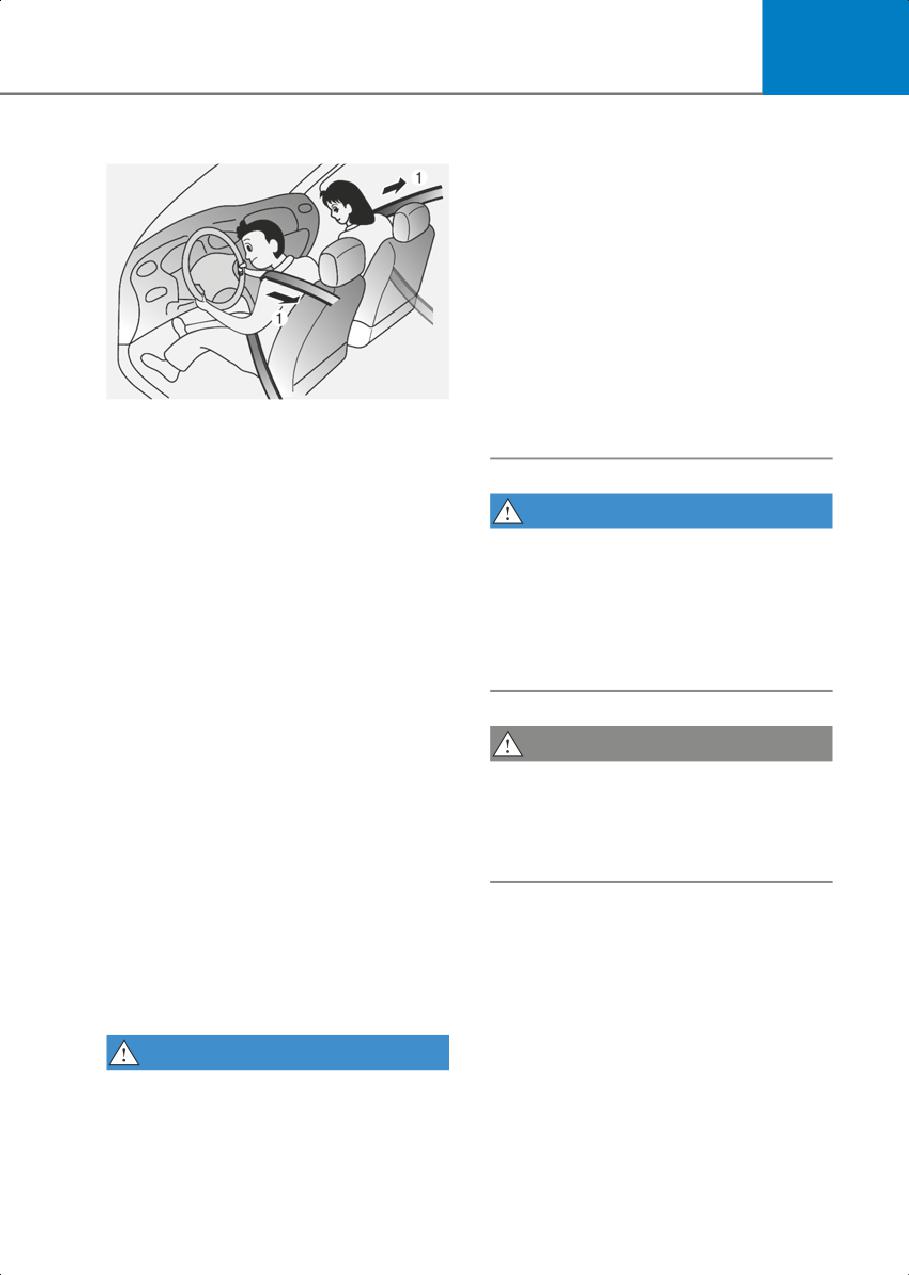
3
Pre-tensioner seat belt
• Do not use the seat belt if it is loose or
twisted. A loose or twisted seat belt will
not protect you properly in an accident.
• Do not place anything near the buckle.
This may adversely affect the buckle
and cause it to function improperly.
• Always replace your pre-tensioners
after activation or an accident.
• NEVER inspect, service, repair or
replace the pre-tensioners yourself.
Have the pre-tensioners inspected,
serviced, repaired or replaced by an
OJX1039118
authorized HYUNDAI dealer.
Your vehicle is equipped with front and
• Do not hit the seat belt assemblies.
rear (outboard) Pre-tensioner Seat
Belts(Retractor Pretensioner). The
purpose of the pre-tensioner is to make
sure the seat belts fit tightly against the
WARNING
occupant’s body in certain frontal or side
Do not touch the pre-tensioner seat belt
collision(s). The Retractor Pre-tensioner
assemblies for several minutes after they
may be activated in certain crashes where
have been activated. When the
the frontal collision(s) is severe enough.
pre-tensioner seat belt mechanism
When the vehicle stops suddenly, or if the
deploys during a collision, the
occupant tries to lean forward too
pre-tensioner can become hot and can
quickly, the seat belt retractor will lock
burn you.
into position. In certain frontal or side
collision(s), the pre-tensioner will activate
and pull the seat belt into tighter contact
against the occupant’s body.
CAUTION
(1) Retractor Pretensioner
Body work on the front area of the vehicle
The purpose of the retractor
may damage the pre-tensioner seat belt
pre-tensioner is to make sure that the
system. Therefore, have the system
shoulder belts fit in tightly against the
serviced by an authorized HYUNDAI
occupant’s upper body in certain frontal
dealer.
or side collision(s).
If the system senses excessive tension on
the driver or passenger’s seat belt when
the pre-tensioner system activates, the
load limiter inside the retractor
pre-tensioner will release some of the
pressure on the affected seat belt.
WARNING
• Always wear your seat belt and sit
properly in your seat.
3-27
Seats & Safety System
Information
• Pre-tensioner seat belts may be
activated in certain frontal or side
collisions or rollover situations (if
equipped with rollover sensor).
• When the pre-tensioner seat belts are
activated, a loud noise may be heard
and fine dust, which may appear to be
smoke, may be visible in the passenger
compartment. These are normal
OHI038175L
operating conditions and are not
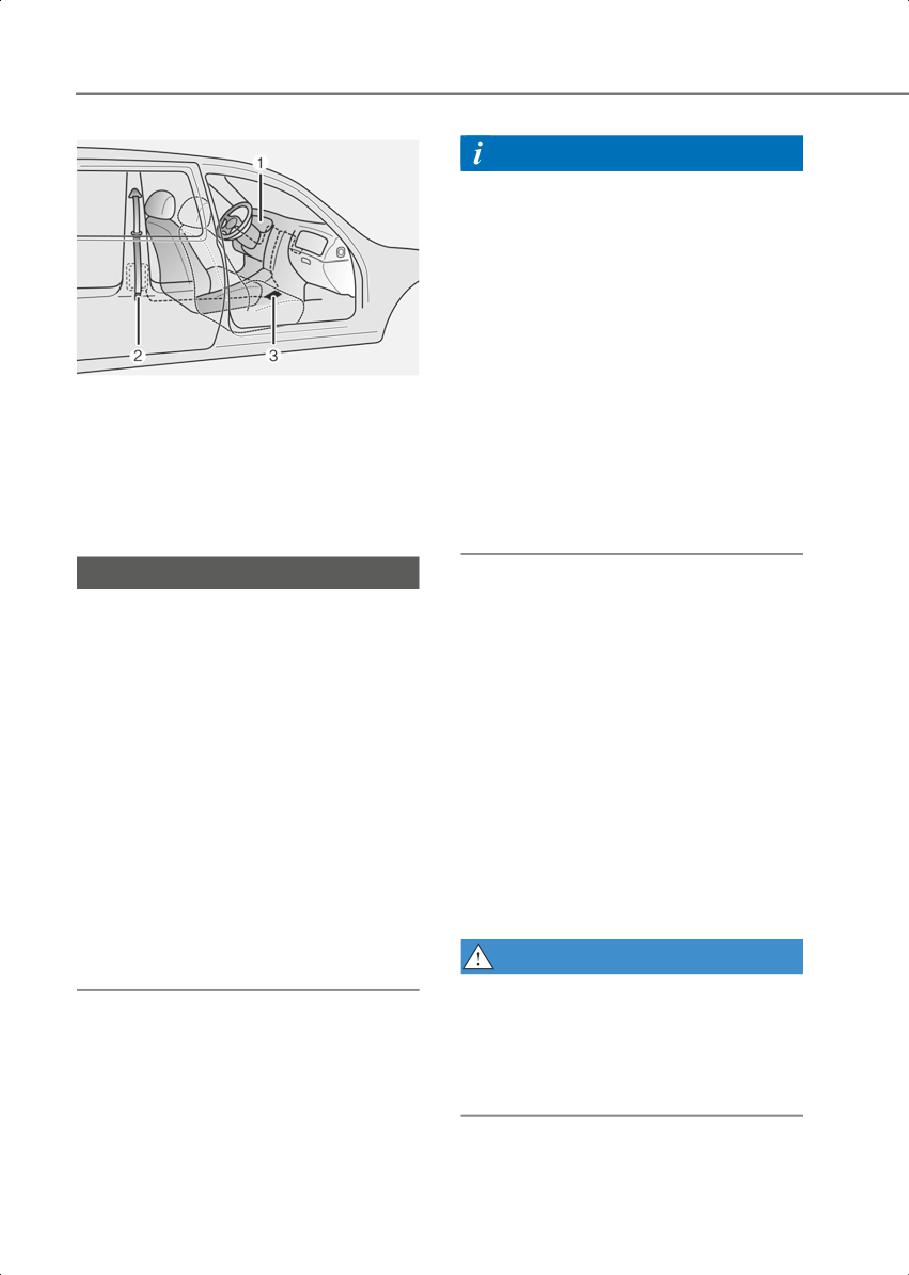
The Pre-Tensioner Seat Belt System
hazardous.
consists mainly of the following
• Although it is non-toxic, the fine dust
components. Their locations are shown in
may cause skin irritation and should not
the illustration above:
be inhaled for prolonged periods. Wash
(1) SRS air bag warning light
all exposed skin areas thoroughly after
(2) Retractor pre-tensioner
an accident in which the pre-tensioner
(3) SRS control module
seat belts were activated.
NOTICE
Additional Seat Belt Safety
The sensor that activates the SRS control
Precautions
module is connected with the
pre-tensioner seat belts. The SRS air bag
warning light on the instrument cluster
Seat belt use during pregnancy
will illuminate for approximately 3~6
The seat belt should always be used
seconds after the Start/Stop button is in
during pregnancy. The best way to
the ON position, and then it should turn
protect your unborn child is to protect
off.
yourself by always wearing the seat belt.
If the pre-tensioner is not working
Pregnant women should always wear a
properly, the warning light will illuminate
lap-shoulder seat belt. Place the shoulder
even if the SRS air bag is not
belt across your chest, routed between
malfunctioning. If the warning light does
your breasts and away from your neck.
not illuminate, stays illuminated or
Place the lap belt below your belly so that
illuminates when the vehicle is being
it fits SNUGLY across your hips and pelvic
driven, have the pre-tensioner seat belts
bone, under the rounded part of the belly.
and/or SRS control module be inspected
by an authorized HYUNDAI dealer as soon
WARNING
as possible.
To reduce the risk of serious injury or
death to an unborn child during an
accident, pregnant women should NEVER
place the lap portion of the seat belt
above or over the area of the abdomen
where the unborn child is located.
3-28

3
Seat belt use and children
Larger children
Children under age 13 and who are too
Infant and small children
large for a booster seat should always
Most states have Child Restraint System
occupy the rear seat and use the available
laws which require children to travel in
lap/shoulder belts. A seat belt should lie
approved Child Restraint System devices,
across the upper thighs and be snug
including booster seats. The age at which
across the shoulder and chest to restrain
seat belts can be used instead of Child
the child safely. Check belt fit
Restraint System differs among states, so
periodically. A child’s squirming could put
you should be aware of the specific
the belt out of position. In the event of an
requirements in your state, and where
accident, children are afforded the best
you are travelling. Infant and Child
safety restrained by a proper Child
Restraint System must be properly placed
Restraint System in the rear seats.
and installed in a rear seat.
If a larger child over age 13 must be seated
For more information refer to the “Child
in the front seat, the child must be
Restraint System (CRS)” section in this
securely restrained by the available
chapter.
lap/shoulder belt and the seat should be
placed in the rearmost position.
WARNING
If the shoulder belt portion slightly
ALWAYS properly restrain infants and
touches the child’s neck or face, try
small children in a Child Restraint System
placing the child closer to the center of
appropriate for the child’s height and
the vehicle. If the shoulder belt still
weight.
touches their face or neck, they need to
be returned to an appropriate booster
To reduce the risk of serious injury or
seat in the rear seat.
death to a child and other passengers,
NEVER hold a child in your lap or arms
WARNING
when the vehicle is moving. The violent
forces created during an accident will tear
• Always make sure larger children’s seat
the child from your arms and throw the
belts are worn and properly adjusted.
child against the interior of the vehicle.
• NEVER allow the shoulder belt to
contact the child’s neck or face.
• Do not allow more than one child to use
Small children are best protected from
a single seat belt.
injury in an accident when properly
restrained in the rear seat by a child
restraint system that meets the
Seat belt use and injured people
requirements of the Federal Motor
Vehicle Safety Standards. Before buying
A seat belt should be used when an
any child restraint system, make sure that
injured person is being transported.
it has a label certifying that it meets
Consult a physician for specific
Federal Motor Vehicle Safety Standard
recommendations.
FMVSS 213. The restraint must be
appropriate for your child’s height and
One person per belt
weight. Check the label on the child
Two people (including children) should
restraint for this information. Refer to the
never attempt to use a single seat belt.
“Child Restraint System (CRS)” section in
This could increase the severity of injuries
this chapter.
in case of an accident.
3-29
Seats & Safety System
Do not lie down
Care of Seat Belts
Sitting in a reclined position when the
Seat belt systems should never be
vehicle is in motion can be dangerous.
disassembled or modified. In addition,
Even when buckled up, the protections of
care should be taken to assure that seat
your restraint system (seat belts and/or
belts and belt hardware are not damaged
air bags) is greatly reduced by reclining
by seat hinges, doors or other abuse.
your seatback.
Seat belts must be snug against your hips
Periodic inspection
and chest to work properly.
All seat belts should be inspected
During an accident, you could be thrown
periodically for wear or damage of any
into the seat belt, causing neck or other
kind. Any damaged parts should be
injuries.
replaced as soon as possible.
The more the seat back is reclined, the
greater the chance for the passenger’s
Keep belts clean and dry
hips to slide under the lap belt or the
passenger’s neck to strike the shoulder
Seat belts should be kept clean and dry. If
belt.
belts become dirty, they can be cleaned
by using a mild soap solution and warm
WARNING
water. Bleach, dye, strong detergents or
abrasives should not be used because
• NEVER ride with a reclined seatback
they may damage and weaken the fabric.
when the vehicle is moving.
• Riding with a reclined seatback
When to replace seat belts
increases your chance of serious or
fatal injuries in the event of a collision or
The entire seat belt assembly or
sudden stop.
assemblies should be replaced if the
vehicle has been involved in an accident.
• Driver and passengers should always sit
This should be done even if no damage is
well back in their seats with the
visible. Consult an authorized HYUNDAI
seatbacks upright and should be belted
dealer.
properly.
3-30

3
Child Restraint Systems are generally
Child Restraint System
designed to be secured in a vehicle seat
(CRS)
by lap belt portion of a lap/shoulder belt,
or by a LATCH system in the rear seats of
the vehicle.
Children Always in the Rear
Child Restraint System (CRS)
WARNING
Infants and younger children must be
Always properly restrain children in the
restrained in an appropriate
rear seats of the vehicle. Children of all
rearward-facing or forward-facing CRS
ages are safer when restrained in the rear
that has first been properly secured to the
seat. A child riding in the front passenger
seat of the vehicle. Read and comply with
seat can be forcefully struck by an
the instructions for installation and use
inflating air bag resulting in SERIOUS
provided by the manufacturer of the Child
INJURY or DEATH.
Restraint System.
WARNING
Children under age 13 should always ride
An improperly secured child restraint can
in the rear seats and must always be
increase the risk of SERIOUS INJURY or
properly restrained to minimize the risk of
DEATH in an accident. Always take the
injury in an accident, sudden stop or
following precautions when using a Child
sudden maneuver.
Restraint System:
According to accident statistics, children
• NEVER install a child or infant restraint
are safer when properly restrained in the
in the front passenger's seat.
rear seats than in the front seat. Even
with air bags, children can be seriously
• Always properly secure the child
injured or killed. Children too large for a
restraint to a rear seat of the vehicle.
Child Restraint System must use the seat
• Always follow the child restraint system
belts provided.
manufacturer's instructions for
All 50 states have child restraint laws
installation and use.
which require children to travel in
• Always properly restrain your child in
approved Child Restraint Systems.
the child restraint.
The laws governing the age or
• If the vehicle head restraint prevents
height/weight restrictions at which seat
proper installation of a child seat (as
belts can be used instead of Child
described in the child restraint system
Restraint System differs among states, so
manual), the head restraint of the
you should be aware of the specific
respective seating position shall be
requirements in your state, and where
readjusted or entirely removed.
you are travelling.
• Do not use an infant carrier or a child
Child Restraint Systems must be properly
safety seat that “hooks” over a
placed and installed in the rear seat. You
seatback, it may not provide adequate
must use a commercially available Child
protection in an accident.
Restraint System that meets the
• After an accident, have an authorized
requirements of the Federal Motor
HYUNDAI dealer check the child
Vehicle Safety Standards (FMVSS 213).
restraint system, seat belts, tether
anchors and lower anchors.
3-31
Seats & Safety System
Selecting a Child Restraint
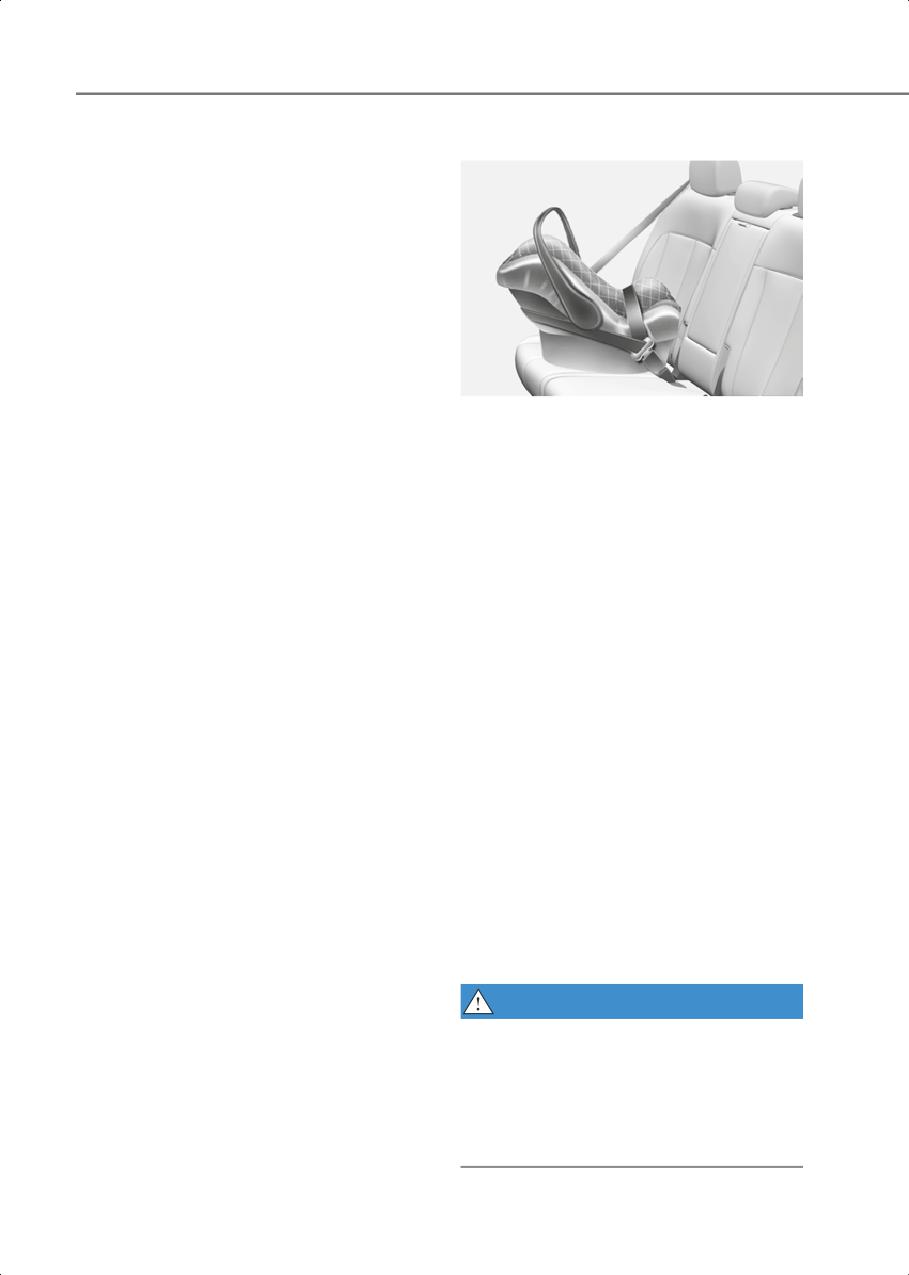
Rearward-facing Child Restraint System
System (CRS)
When selecting a Child Restraint System
for your child, always:
• Make sure the Child Restraint System
has a label certifying that it meets
applicable Federal Motor Vehicle
Safety Standards (FMVSS 213).
• Select a Child Restraint System based
on your child’s height and weight. The
required label or the instructions for use
typically provide this information.
ONE1031037N
• Select a Child Restraint System that fits
A rearward-facing Child Restraint System
the vehicle seating position where it will
provides restraint with the seating
be used.
surface against the back of the child. The
harness system holds the child in place,
• Read and comply with the warnings
and in an accident, acts to keep the child
and instructions for installation and use
positioned in the Child Restraint Systems
provided with the Child Restraint
and reduce the stress to the fragile neck
System.
and spinal cord.
All children under the age of one year
Child Restraint System types
must always ride in a rearward-facing
There are three main types of Child
Child Restraint System. Convertible and
Restraint Systems: rearward-facing,
3-in-1 Child Restraint Systems typically
forward-facing and booster Child
have higher height and weight limits for
Restraint Systems.
the rearward-facing position, allowing
They are classified according to the
you to keep your child rearward-facing
child’s age, height and weight.
for a longer period of time.
Keep using Child Restraint Systems in the
rearward-facing position as long as
children fit within the height and weight
limits allowed by the Child Restraint
System’s manufacturer. It’s the best way
to keep them safe.
Once your child has outgrown the
rearward-facing Child Restraint System,
your child is ready for a forward-facing
Child Restraint System with a harness.
WARNING
NEVER install a child or infant restraint in
the front passenger's seat.
Placing a rearward-facing child restraint
in the front seat can result in SERIOUS
INJURY or DEATH if the child restraint is
struck by an inflating air bag.
3-32
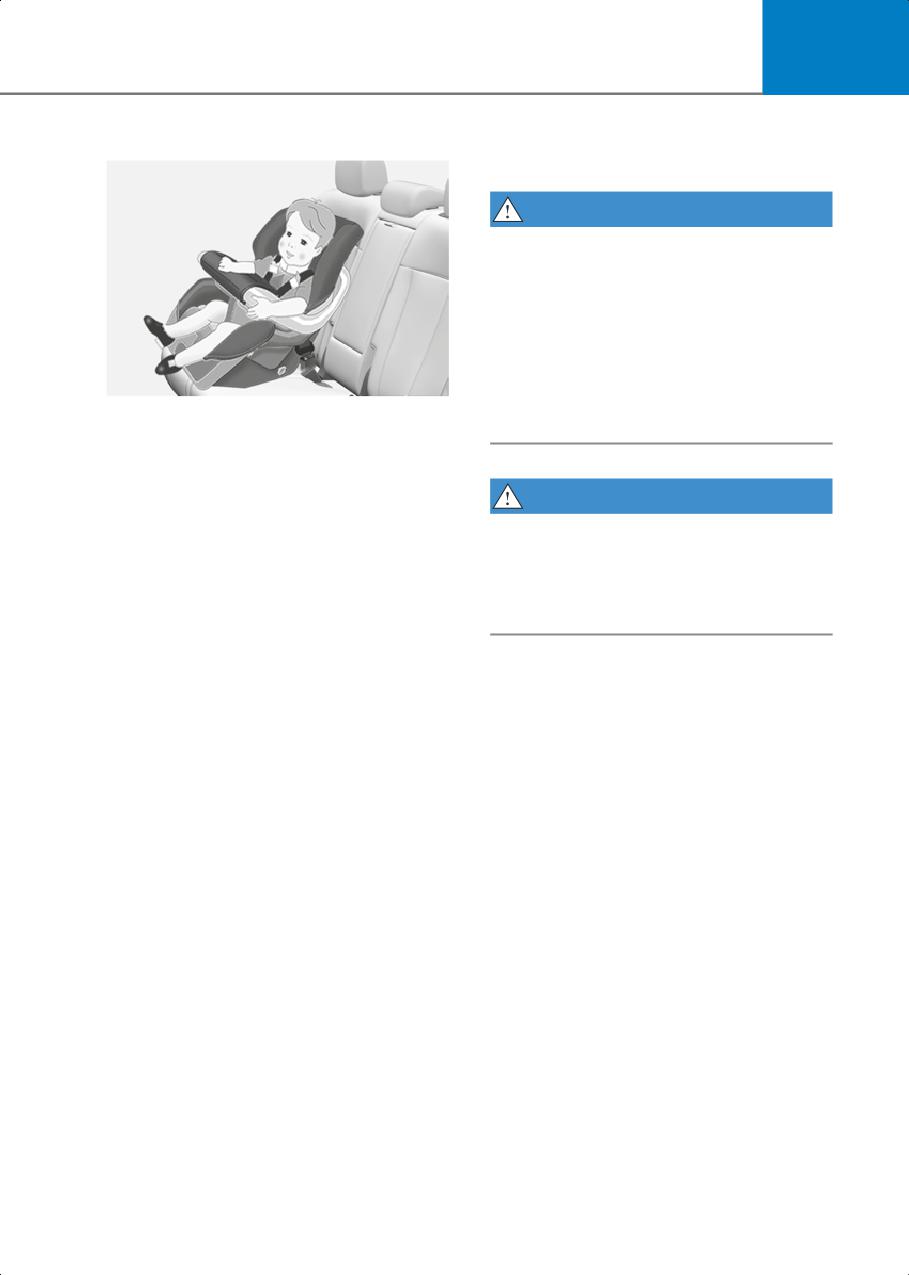
3
Forward-facing Child Restraint System
Installing a Child Restraint
System (CRS)
WARNING
Before installing your Child Restraint
System always:
Read and follow the instructions provided
by the manufacturer of the Child
Restraint System.
Failure to follow all warnings and
instructions could increase the risk of the
ONE1031038N
SERIOUS INJURY or DEATH if an accident
A forward-facing Child Restraint System
occurs.
provides restraint for the child’s body
with a harness. Keep children in a
forward-facing Child Restraint System
WARNING
with a harness until they reach the top
height or weight limit allowed by your
If the vehicle head restraint prevents
Child Restraint System’s manufacturer.
proper installation of a Child Restraint
Once your child outgrows the
System, the head restraint of the
forward-facing Child Restraint System,
respective seating position shall be
your child is ready for a booster seat.
readjusted or entirely removed.
Booster seats
After selecting a proper Child Restraint
A booster seat is a Child Restraint System
System for your child and checking that
designed to improve the fit of the
the Child Restraint System fits properly
vehicle’s seat belt system. A booster seat
on the seating position, there are three
positions the seat belt so that it fits
general steps for a proper installation:
properly over the stronger parts of your
child’s body. Keep your children in
• Properly secure the Child Restraint
booster seats until they are big enough to
System to the vehicle. All Child
fit in a seat belt properly.
Restraint Systems must be secured to
the vehicle with the lap belt or lap part
For a seat belt to fit properly, the lap belt
of a lap/shoulder belt or with the lower
must lie comfortable across the upper
anchor and/or tether anchor and/or
thighs, not the stomach. The shoulder
with the support leg.
belt should lie comfortable across the
shoulder and chest and not across the
• Make sure the Child Restraint System
neck or face. Children under age 13 must
is firmly secured. After installing a
always be properly restrained to minimize
Child Restraint System to the vehicle,
the risk of injury in an accident, sudden
push and pull the seat forward and from
stop or sudden maneuver.
side-to-side to verify that it is securely
attached to the seat. A Child Restraint
System secured with a seat belt should
be installed as firmly as possible.
However, some side-to-side
movement can be expected.
3-33
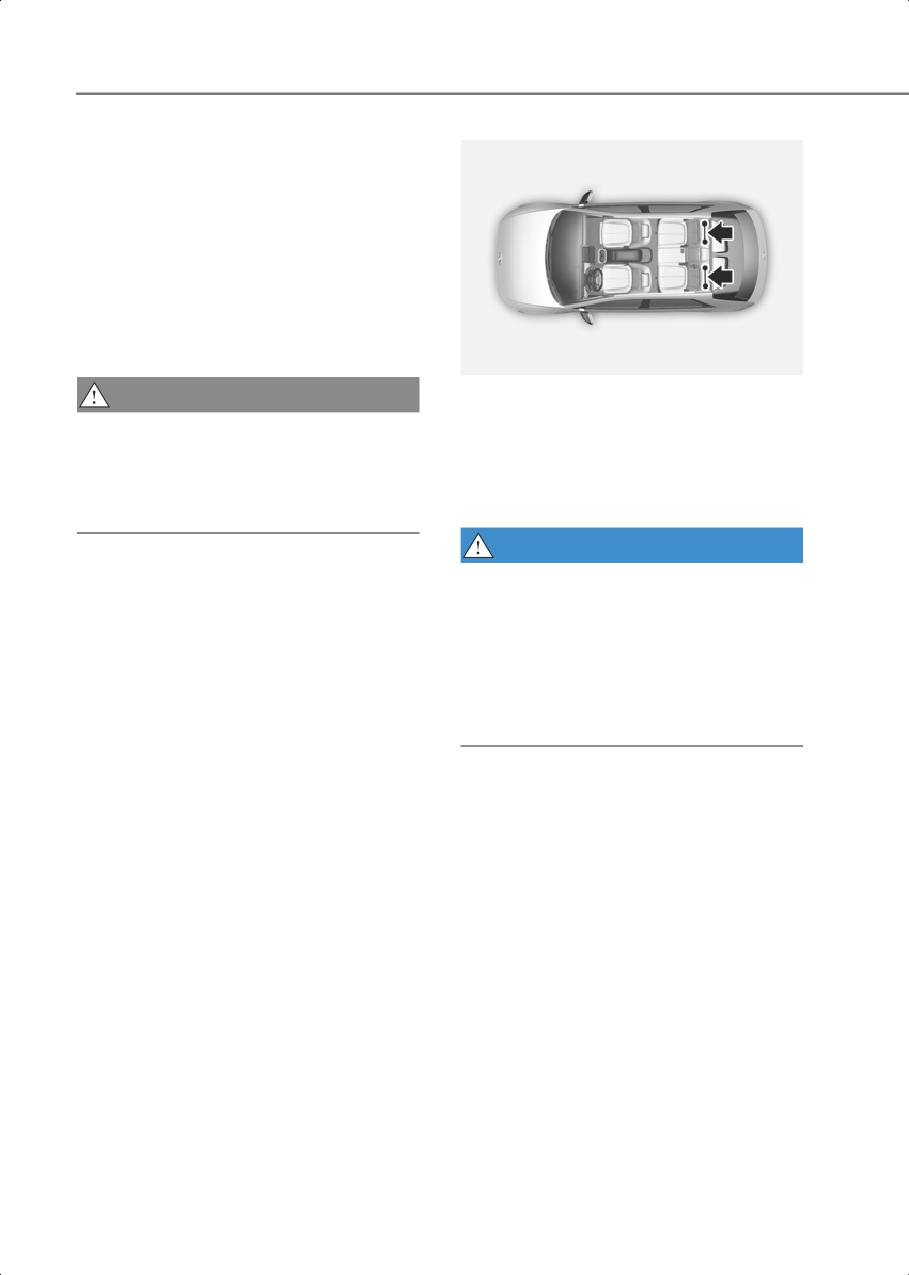
Seats & Safety System
When installing a Child Restraint
System, adjust the vehicle seat and
seatback (up and down, forward and
rearward) so that your child fits in the
Child Restraint System in a comfortable
manner.
• Secure the child in the Child Restraint
System. Make sure the child is properly
strapped in the Child Restraint System
according to the Child Restraint System
manufacturer’s instructions.
ONE1031041
CAUTION
LATCH anchors have been provided in the
left and right outboard rear seating
A Child Restraint System in a closed
positions. Their locations are shown in the
vehicle can become very hot. To prevent
illustration. There are no LATCH anchors
burns, check the seating surface and
provided for the center rear seating
buckles before placing your child in the
position.
Child Restraint System.
WARNING
Lower Anchors and Tether for
Do not attempt to install a Child Restraint
Children (LATCH System)
System using LATCH anchors in the rear
The LATCH system holds a Child Restraint
center seating position. There are no
System during driving and in an accident.
LATCH anchors provided for this seat.
This system is designed to make
Using the outboard seat anchors can
installation of the Child Restraint System
damage the anchors which may break or
easier and reduce the possibility of
fail in a collision resulting in serious injury
improperly installing your Child Restraint
or death.
System. The LATCH system uses anchors
in the vehicle and attachments on the
Child Restraint System. The LATCH
system eliminates the need to use seat
belts to secure the Child Restraint System
to the rear seats.
Lower anchors are metal bars built into
the vehicle. There are two lower anchors
for each LATCH seating position that will
accommodate a Child Restraint System
with lower attachments.
To use the LATCH system in your vehicle,
you must have a Child Restraint System
with LATCH attachments.
The Child Restraint System manufacturer
will provide you with instructions on how
to use the Child Restraint System with its
attachments for the LATCH anchorages.
3-34
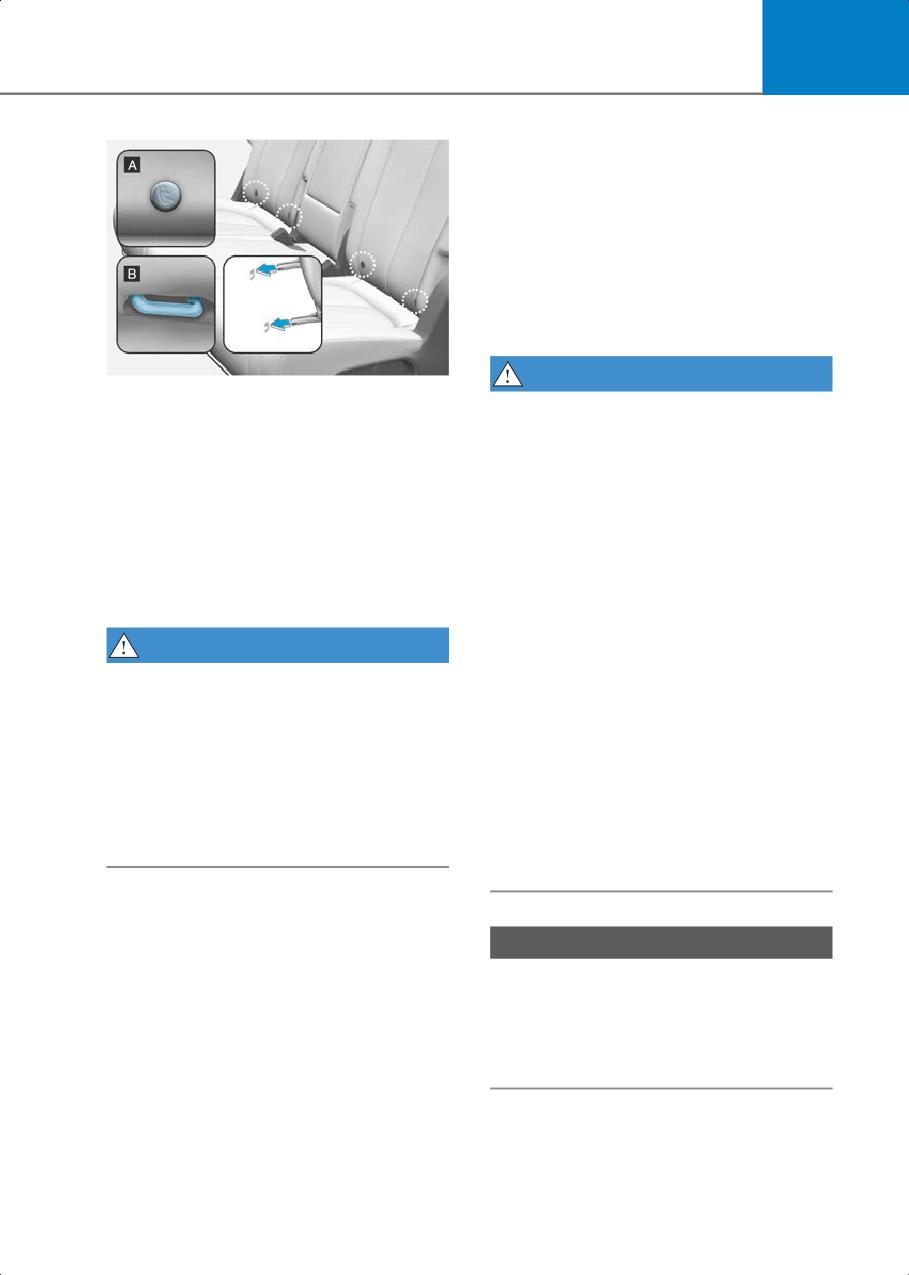
3
3. Place the Child Restraint System on the
vehicle seat, then attach the seat to the
lower anchors according to the
instructions provided by the Child
Restraint System manufacturer.
4. Follow the instructions of the Child
Restraint System’s manufacturer for
proper installation and connection of
the lower attachments on the Child
Restraint System to the lower anchors.
ONE1031042
WARNING
[A] : Lower Anchor Position Indicator
[B] : Lower Anchor
Take the following precautions when
The lower anchor position indicator
using the LATCH system:
symbols are located on the left and right
• Read and follow all installation
rear seat backs to identify the position of
instructions provided with your Child
the lower anchors in your vehicle (see
Restraint System.
arrows in illustration).
• To prevent the child from reaching and
The LATCH anchors are located between
taking hold of unretracted seat belts,
the seatback and the seat cushion of the
buckle all unused rear seat belts and
rear seat left and right outboard seating
retract the seat belt webbing behind
positions.
the child. Children can be strangled if a
shoulder belt becomes wrapped
WARNING
around their neck and the seat belt
tightens.
Before installing the Child Restraint
System, make sure that there are no
• NEVER attach more than one Child
objects (for example, toy, pen, wire)
Restraint System to a single anchorage.
around the lower anchor area. Those
This could cause the anchor or
objects may damage either the seat belt
attachment to come loose or break.
system or the Child Restraint System
• Always have the LATCH system
during the installment procedure. If
inspected by your dealer after an
necessary, have the vehicle inspected by
accident. An accident can damage the
an authorized HYUNDAI dealer.
LATCH system and may not properly
secure the Child Restraint System.
Securing a Child Restraint System
with the “LATCH Anchors System”
NOTICE
To install a LATCH-compatible Child
Restraint System in either of the rear
The recommended weight for the LATCH
outboard seating positions:
system is under 65 lb. (30 kg).
1. Move the seat belt buckle away from
How to determine an appropriate child
the lower anchors.
restraint weight: Child weight + Child
restraint system weight < 65 lb. (30kg)
2. Move any other objects away from the
anchorages that could prevent a secure
connection between the Child Restraint
System and the lower anchors.
3-35
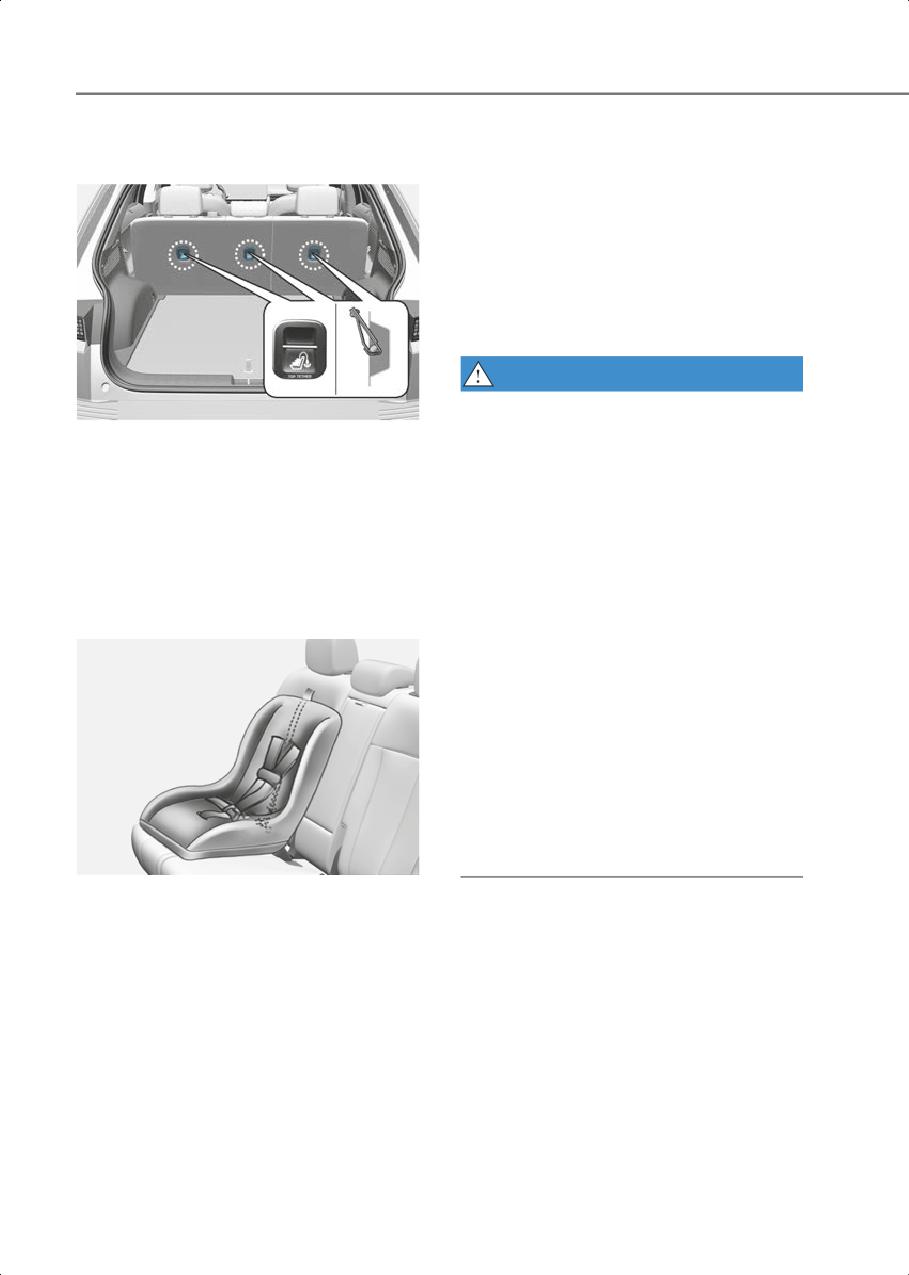
Seats & Safety System
Securing a Child Restraint System
2. Connect the tether strap hook to the
seat with “Tether Anchor” system
tether anchor, then tighten the
top-tether strap according to the
instructions of your Child Restraint
System’s manufacturer to firmly attach
the Child Restraint System to the seat.
3. Check that the Child Restraint System
is securely attached to the seat by
pushing and pulling the seat
forward-and-back and side-to-side.
WARNING
Take the following precautions when
ONE1031099N
installing the top-tether:
First secure the child restraint with the
•
Read and follow all installation
LATCH lower anchors or the seat belt. If
instructions provided with your Child
the child restraint manufacturer
Restraint System.
recommends that the top tether strap be
attached, attach and tighten the top
•
NEVER attach more than one Child
tether strap to the top tether strap
Restraint System to a single tether
anchor.
anchor. This could cause the anchorage
or attachment to come loose or break.
Child restraint hook holders are located
on the rear of the seatbacks.
•
Do not attach the tether strap to
anything other than the correct
top-tether anchor. It may not work
properly if attached to something else.
•
Child Restraint System anchors are
designed to withstand only those loads
imposed by correctly fitted Child
Restraint System.
Under no circumstances are the
anchors to be used for adult seat belts
or harnesses or for attaching other
items or equipment to the vehicle.
ONE1031040N
To install the tether anchor:
1. Route the Child Restraint System
top-tether strap over the seatback.
Route the tether strap under the head
restraint and between the head
restraint posts, or route the tether strap
over the top of the vehicle seatback.
Make sure the strap is not twisted.
3-36
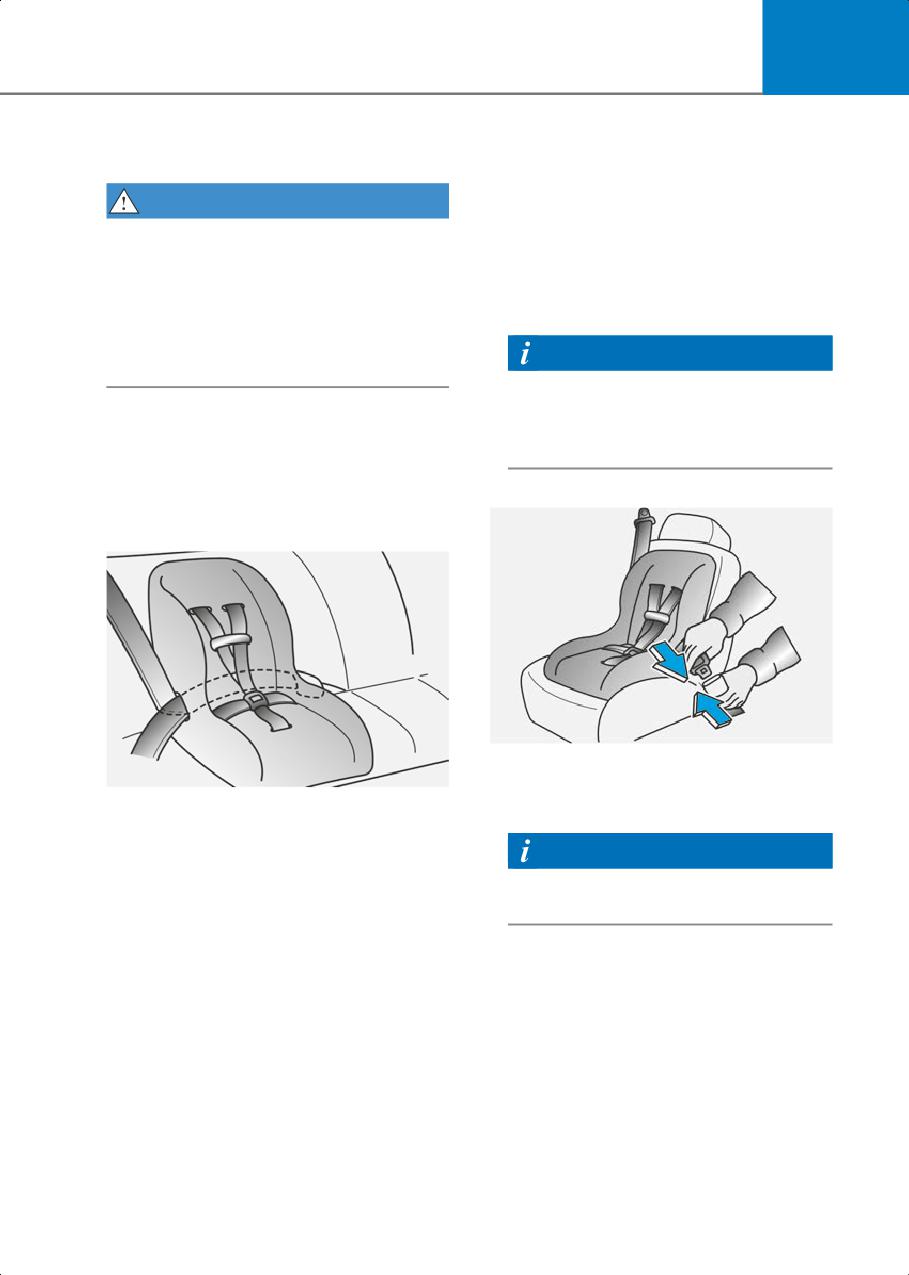
3
Securing a Child Restraint System
To install a Child Restraint System on the
with a lap/shoulder belt
rear seats, do the following:
1. Place the Child Restraint System on a
WARNING
rear seat and route the lap/shoulder
ALWAYS place a rearward-facing Child
belt around or through the Child
Restraint System in the rear seat of the
Restraint System, following the Child
vehicle.
Restraint System manufacturer’s
instructions. Make sure the seat belt
Placing a rearward-facing child restraint
webbing is not twisted.
in the front seat can result in serious injury
or death if the Child Restraint System is
Information
struck by an inflating air bag.
When using the rear center seat belt,
you should also refer to the “Rear
When not using the LATCH system, all
center seatbelt (3-point rear center
Child Restraint Systems must be secured
seat belt)” section in this chapter.
to a rear seat with the lap part of a
lap/shoulder belt.
Automatic locking mode
OHI038146
2. Fasten the lap/shoulder belt latch into
OHI038145
the buckle. Listen for the distinct “click”
Since all passenger seat belts move freely
sound.
under normal conditions and only lock
under extreme or emergency conditions
Information
(emergency locking mode), you must
Position the release button so that it is
manually pull the seat belt all the way out
easy to access in case of an emergency.
to shift the retractor to the “Automatic
Locking” mode to secure a Child Restraint
System.
The “Automatic Locking” mode will help
prevent the normal movement of the
child in the vehicle from causing the seat
belt to loosen and compromise the Child
Restraint System. To secure a Child
Restraint System, use the following
procedure.
3-37
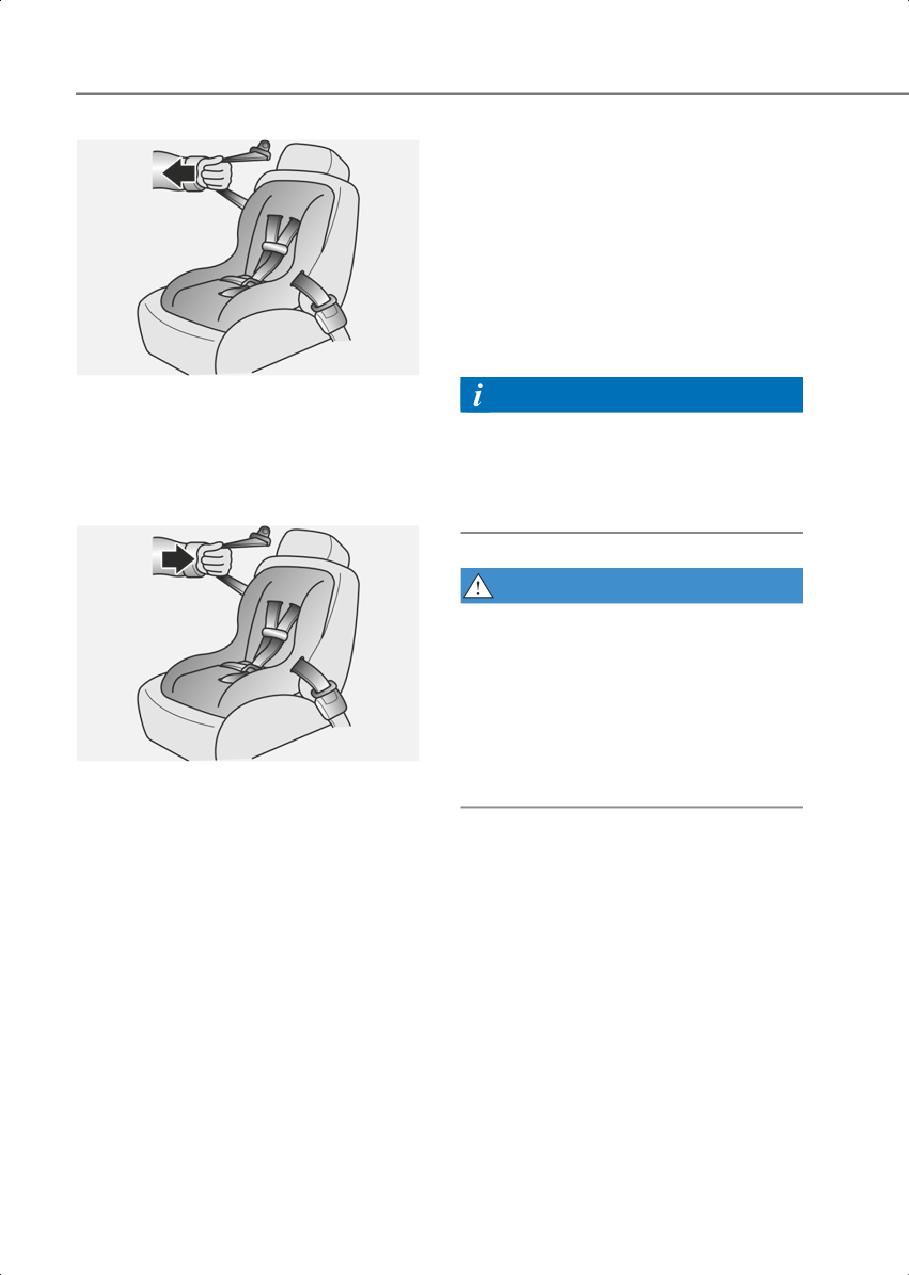
Seats & Safety System
7. Double check that the retractor is in the
“Automatic Locking” mode by
attempting to pull more of the seat belt
out of the retractor. If you cannot, the
retractor is in the “Automatic Locking”
mode.
If your Child Restraint System
manufacturer instructs or recommends
you to use a tether anchor with the lap/
shoulder belt, refer to the previous pages
for more information.
OHI038147
3. Pull the shoulder portion of the seat belt
Information
all the way out. When the shoulder
When the seat belt is allowed to retract to
portion of the seat belt is fully
its fully stowed position, the retractor will
extended, it will shift the retractor to
automatically switch from the “Automatic
the “Automatic Locking” (child
Locking” mode to the emergency lock
restraint) mode.
mode for normal adult usage.
WARNING
If the retractor is not in the “Automatic
Locking” mode, the child restraint can
move when your vehicle turns or stops
suddenly. A child can be seriously injured
or killed if the child restraint is not
properly anchored in the car, including
manually pulling the seat belt all the way
OHI038148
out to shift the retractor to the
4. Slowly allow the shoulder portion of the
“Automatic Locking” mode.
seat belt to retract and listen for an
audible “clicking” or “ratcheting”
sound. This indicates that the retractor
To remove the Child Restraint System,
is in the “Automatic Locking” mode. If
press the release button on the buckle
no distinct sound is heard, repeat steps
and then pull the lap/shoulder belt out of
3 and 4.
the Child Restraint System and allow the
seat belt to retract fully.
5. Remove as much slack from the belt as
possible by pushing down on the Child
Restraint System while feeding the
shoulder belt back into the retractor.
6.Push and pull on the Child Restraint
System to confirm that the seat belt is
holding it firmly in place. If it is not,
release the seat belt and repeat steps 2
through 6.
3-38
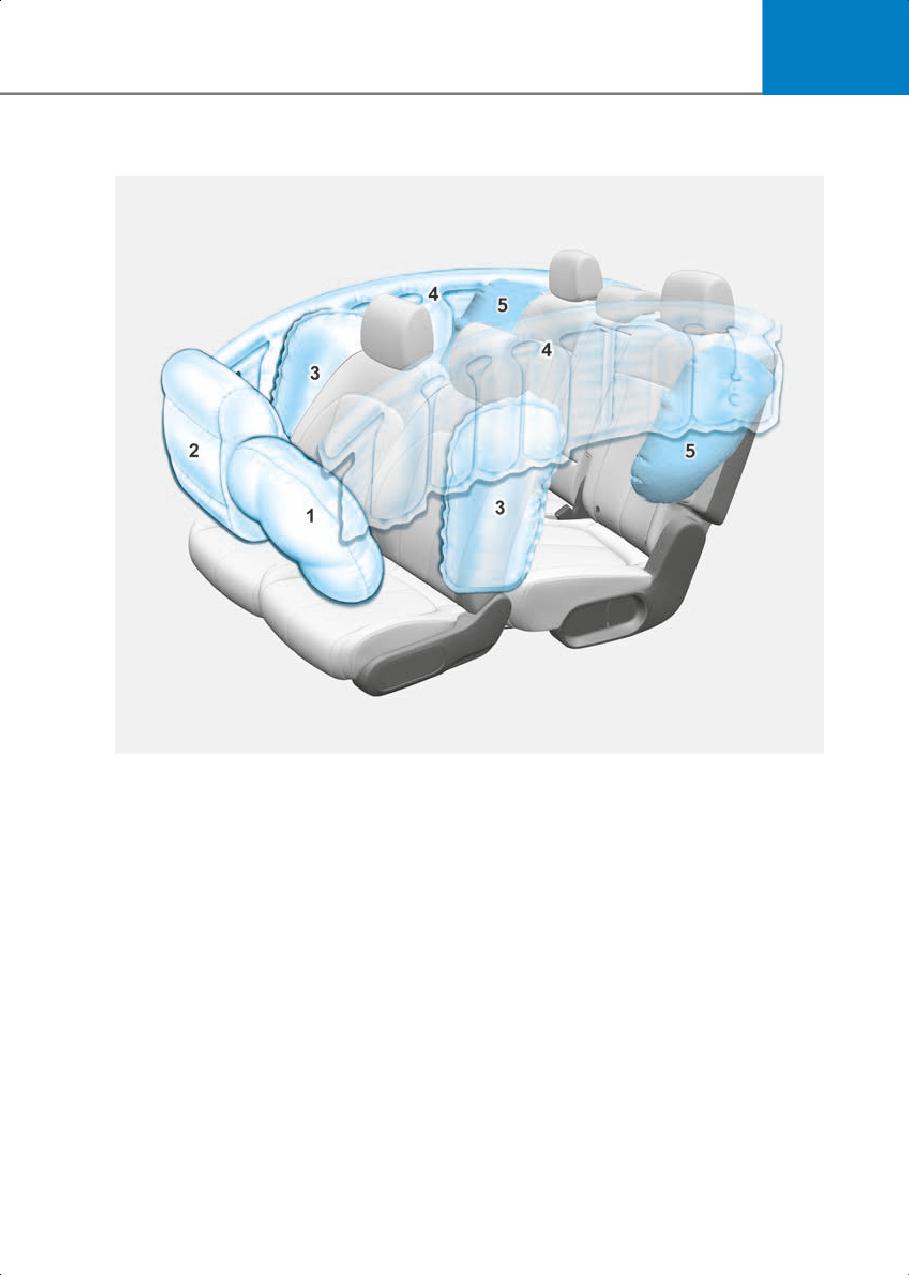
3
Air Bag - Supplemental Restraint System
ONE1033043N
The actual air bags in the vehicle may differ from the illustration.
(1) Driver’s front air bag
(2) Passenger’s front air bag
(3) Side air bag
(4) Curtain air bag
(5) Rear side air bag
3-39

Seats & Safety System
The vehicles are equipped with a Supplemental Air Bag System for the driver’s seat and
front passenger’s seats.
The front air bags are designed to supplement the three-point seat belts. For these air
bags to provide protection, the seat belts must be worn at all times when driving.
You can be severely injured or killed in an accident if you are not wearing a seat belt. Air
bags are designed to supplement seat belts, but do not replace them. Also, air bags are
not designed to deploy in every collision. In some accidents, the seat belts are the only
restraint protecting you.
WARNING
AIR BAG SAFETY PRECAUTIONS
ALWAYS use seat belts and Child Restraint Systems - every trip, every time, everyone!
Even with air bags, you can be seriously injured or killed in a collision if you are improperly
belted or not wearing your seat belt when the air bag inflates.
NEVER place a child in any Child Restraint System or booster seat in the front passenger
seat, unless the air bag is deactivated.
An inflating air bag could forcefully strike the infant or child causing serious or fatal
injuries.
ABC - Always Buckle Children under age 13 in the back seat. It is the safest place for
children of any age to ride. If a child age 13 or older must be seated in the front seat, he
or she must be properly belted and the seat should be moved as far back as possible.
All occupants should sit upright with the seatback in an upright position, centered on the
seat cushion with their seat belt on, legs comfortably extended and their feet on the floor
until the vehicle is parked and the vehicle is turned off. If an occupant is out of position
during an accident, the rapidly deploying air bag may forcefully contact the occupant
causing serious or fatal injuries.
You and your passengers should never sit or lean unnecessarily close to the air bags or
lean against the door or center console.
Move your seat as far back as possible from front air bags, while still maintaining control
of the vehicle. The U.S. National Highway Traffic Safety Administration (NHTSA)
recommends that drivers allow at least 10 inches (25 cm) between the center of the
steering wheel and the chest.
3-40
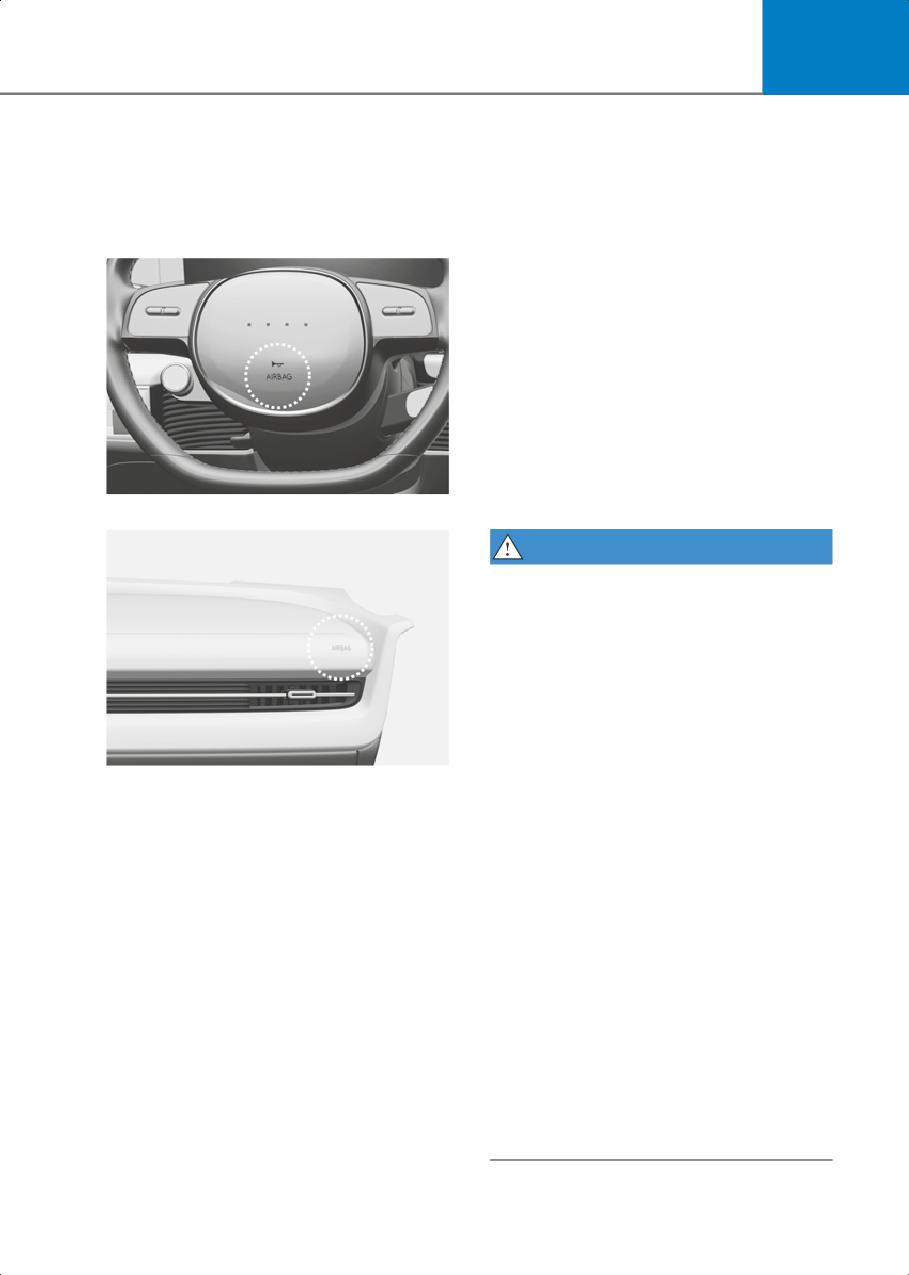
3
Where are the Air Bags?
The seat belt buckle sensors determine if
the driver and front passenger's seat belts
are fastened. These sensors provide the
Driver’s and passenger’s front air
ability to control the SRS deployment
bags
based on whether or not the seat belts are
Driver’s front air bag
fastened, and how severe the impact is.
The advanced SRS offers the ability to
control the air bag inflation within two
levels. A first stage level is provided for
moderate-severity impacts. A second
stage level is provided for more severe
impacts.
According to the impact severity, and
seat belt usage, the SRS Control Module
(SRSCM) controls the air bag inflation.
Failure to properly wear seat belts can
increase the risk or severity of injury in an
ONE1031045
accident.
Passenger’s front air bag
WARNING
To reduce the risk of serious injury or
death from inflating front air bags, take
the following precautions:
• Seat belts must be worn at all times to
help keep occupants positioned
properly.
• Move your seat as far back as possible
from front air bags, while still
ONE1031046
maintaining control of the vehicle.
Your vehicle is equipped with a
• Never lean against the door or center
Supplemental Restraint System (SRS) and
console.
lap/shoulder belts at both the driver and
• Do not allow the front passenger to
passenger seating positions.
place their feet or legs on the
The SRS consists of air bags which are
dashboard.
located in the center of the steering
• No objects (such as crash pad cover,
wheel and the passenger’s side front
mobile phone holder, cup holder,
panel pad above the glove box.
perfume or stickers) should be placed
The air bags are labeled with the letters
over or near the air bag modules on the
“AIR BAG” embossed on the pad covers.
steering wheel, instrument panel,
windshield glass, and the front
The purpose of the SRS is to provide the
passenger’s panel above the glove box.
vehicle’s driver and front passengers with
Such objects could cause harm if the
additional protection than that offered by
vehicle is in a crash severe enough to
the seat belt system alone in case of a
cause the air bags to deploy.
frontal impact of sufficient severity.
• Do not attach any objects on the front
windshield and inside mirror.
3-41
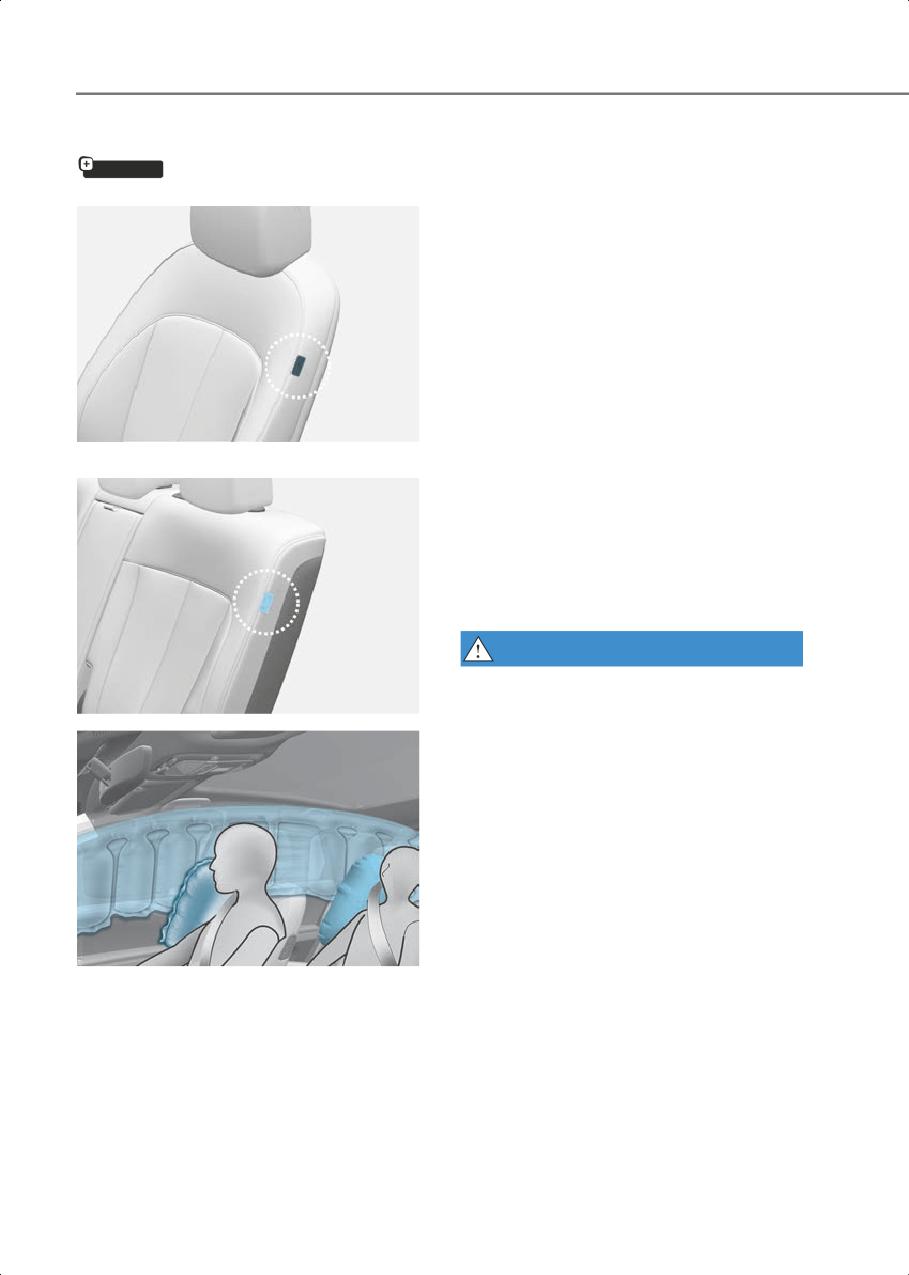
Seats & Safety System
Side air bags
The side air bags are designed to deploy
if equipped
during certain side impact collisions,
depending on the crash severity, angle,
Front side air bag
speed and point of impact.
The side air bags on both sides of the
vehicle are designed to deploy when a
rollover is detected by a rollover sensor.
(if equipped with rollover sensor)
The side air bags are not designed to
deploy in all side impact or rollover
situations.
The side air bags are designed to deploy
during certain side impact collisions,
depending on the crash severity.
ONE1031053N
Rear side air bag
For vehicles equipped with a rollover
sensor the side and/or curtain air bags
and pre-tensioners on both sides of the
vehicle may deploy if a rollover or
possible rollover is detected.
The side air bags are not designed to
deploy in all side impact or rollover
situations.
WARNING
To reduce the risk of serious injury or
death from an inflating side air bag, take
the following precautions:
• Seat belts must be worn at all times to
help keep occupants positioned
properly.
• Do not allow passengers to lean their
heads or bodies onto doors, put their
arms on the doors, stretch their arms
out of the window, or place objects
between the doors and seats.
• Hold the steering wheel at the 9 o’clock
and 3 o’clock positions, to minimize the
ONE1033054N
risk of injuries to your hands and arms.
Your vehicle is equipped with a side air
• Do not use any accessory seat covers.
bag in each front seat. The purpose of the
This could reduce or prevent the
air bag is to provide the vehicle’s driver
effectiveness of the system.
and the front passenger with additional
• Do not hang other objects except
protection than that offered by the seat
clothes. In an accident it may cause
belt alone.
vehicle damage or personal injury
especially when air bag is inflated.
3-42
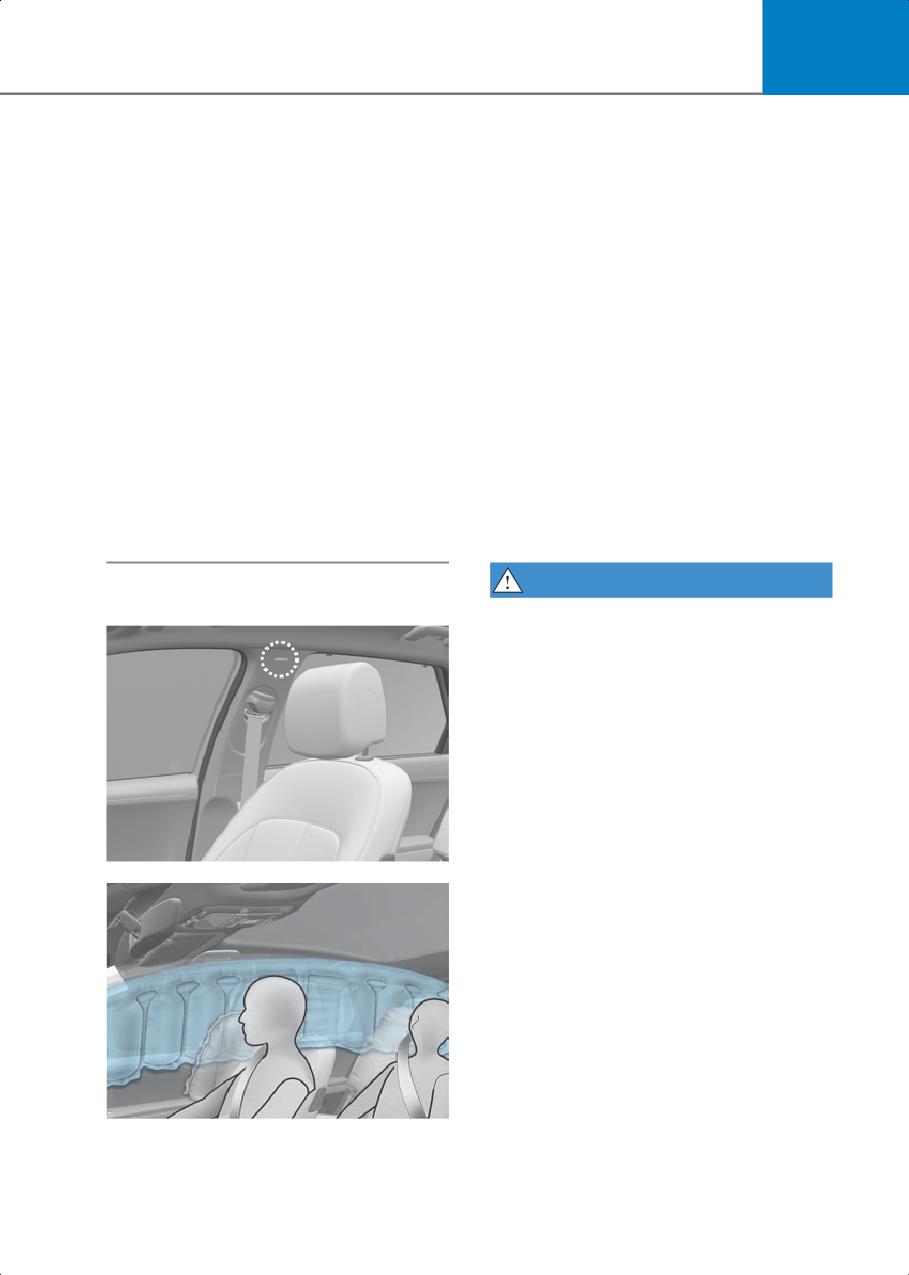
3
• Do not place any objects over the air
Curtain air bags are located along both
bag or between the air bag and
sides of the roof rails above the front and
yourself. Also, do not attach any objects
rear doors.
around the area the air bag inflates
They are designed to help protect the
such as the door, side door glass, front
heads of the front seat occupants and the
and rear pillar.
rear outboard seat occupants in certain
• Do not place any objects between the
side impact collisions.
door and the seat. They may become
The curtain air bags are designed to
dangerous projectiles if the side air bag
deploy during certain side impact
inflates.
collisions, depending on the crash
• Do not install any accessories on the
severity.
side or near the side air bags.
For vehicles equipped with a rollover
• Do not cause impact to the doors when
sensor the side and/or curtain air bags
the Start/Stop button is in the ON or
and pre-tensioners on both sides of the
START position as this may cause the
vehicle may deploy if a rollover or
side air bags to inflate.
possible rollover is detected.
• If the seat or seat cover is damaged,
The curtain air bags are not designed to
have the system serviced by an
deploy in all side impact or rollover
authorized HYUNDAI dealer.
situations.
WARNING
Curtain air bags
To reduce the risk of serious injury or
death from an inflating curtain air bag,
take the following precautions:
• All seat occupants must wear seat belts
at all times to help keep occupants
positioned properly.
• Properly secure Child Restraint System
as far away from the door as possible.
• Do not place any objects over the air
bag. Also, do not attach any objects
around the area the air bag inflates
ONE1031055N
such as the door, side door glass, front
and rear pillar, roof side rail.
• Do not hang other objects except
clothes, especially hard or breakable
objects.
In an accident, it may cause vehicle
damage or personal injury.
• Do not allow passengers to lean their
heads or bodies onto doors, put their
arms on the doors, stretch their arms
out of the window, or place objects
between the doors and seats.
ONE1033056N
3-43
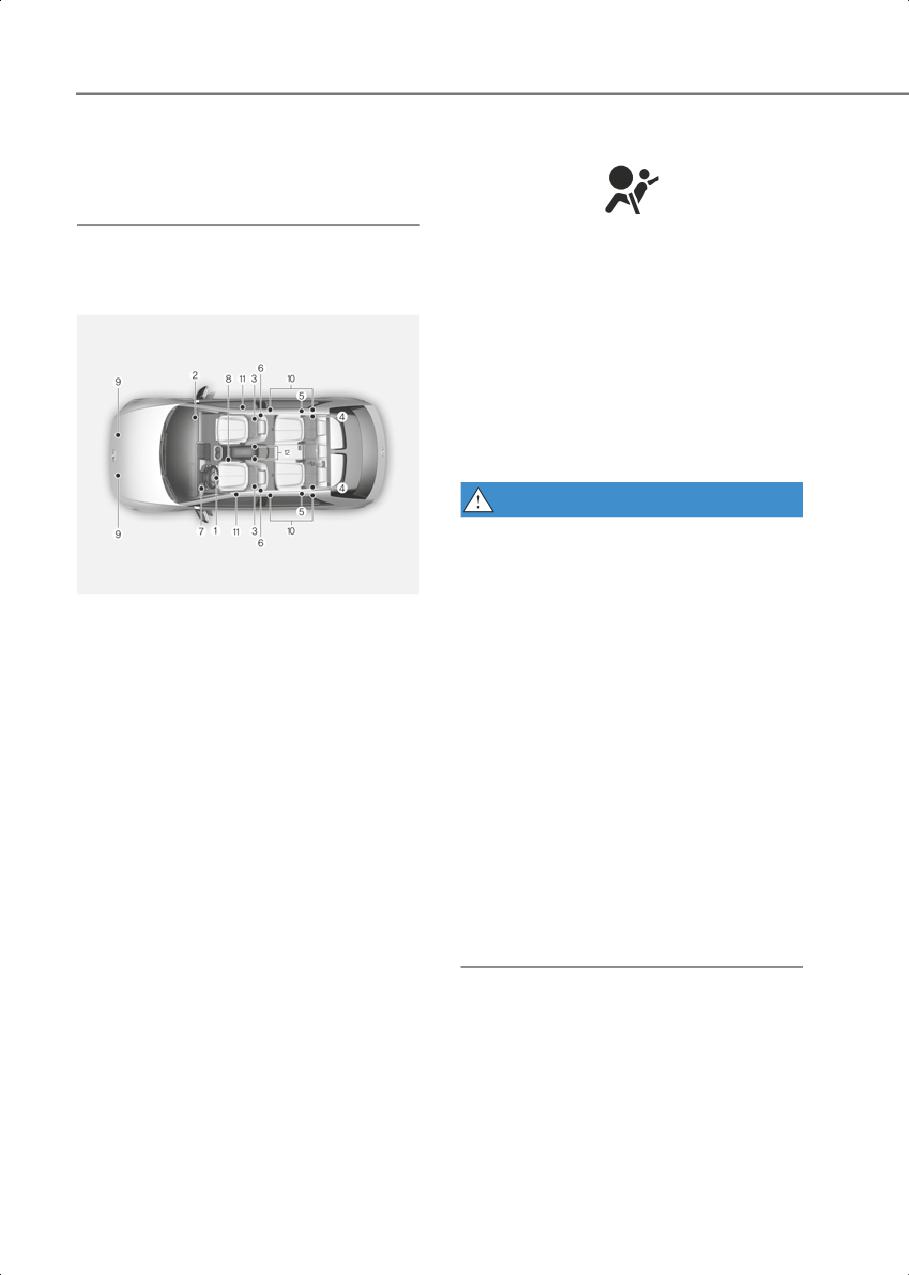
Seats & Safety System
• Do not attempt to open or repair the
SRS warning light
side curtain airbags yourself. If
necessary, have the air bag inspected
by an authorized HYUNDAI dealer.
btn_W7-147
The SRS (Supplemental Restraint System)
How does the Air Bags System
air bag warning light on the instrument
Operate?
panel displays the air bag symbol
depicted in the illustration. The system
checks the air bag electrical system for
malfunctions. The light indicates that
there is a potential problem with your air
bag system, which could include your
side and/or curtain air bags used for
rollover protection (if equipped with
rollover sensor).
WARNING
If your SRS malfunctions, the air bag may
not inflate properly during an accident
increasing the risk of serious injury or
ONE1033044N
death.
The SRS consists of the following
If any of the following conditions occur,
components:
your SRS is malfunctioning:
(1) Driver’s front air bag module
• The light does not turn on for
(2) Passenger’s front air bag module
approximately three to six seconds
(3) Side air bag modules
when the Start/Stop button is in the ON
(4) Rear side air bag modules
position.
(5) Curtain air bag modules
• The light stays on after illuminating for
(6) Front retractor pre-tensioner
approximately three to six seconds.
(7) Air bag warning light
• The light comes on while the vehicle is
(8) SRS control module (SRSCM) /
in motion.
Rollover sensor
• The light blinks when the vehicle is
(9) Front impact sensors
running.
(10)Side impact sensors (acceleration)
Have an authorized HYUNDAI dealer
(11) Side impact sensors (pressure)
inspect the SRS as soon as possible if any
(12)Driver’s and front passenger’s seat
of these conditions occur.
belt buckle sensors.
The SRSCM (Supplemental Restraint
System Control Module) continually
monitors all SRS components while the
Start/Stop button is ON to determine if a
crash impact is severe enough to require
air bag deployment or pre-tensioner seat
belt deployment.
3-44
3
During a moderate to severe frontal
•
In addition to inflating in serious side
collision, sensors will detect the vehicle’s
collisions, vehicles equipped with a
rapid deceleration. If the rate of
rollover sensor, side and/or curtain air
deceleration is high enough, the control
bags will inflate if the sensing system
unit will inflate the front air bags, at the
detects a rollover.
time and with the force needed.
When a rollover is detected, curtain air
The front air bags help protect the driver
bags will remain inflated longer to help
and front passenger by responding to
provide protection from ejection,
frontal impacts in which seat belts alone
especially when used in conjunction
cannot provide adequate restraint. When
with the seat belts. (if equipped with a
needed, the side air bags help provide
rollover sensor)
protection in the event of a side impact or
•
To help provide protection, the air bags
rollover by supporting the side upper
must inflate rapidly. The speed of air
body area.
bag inflation is a consequence of
•
Air bags are activated (able to inflate if
extremely short time in which to inflate
necessary) only when the Start/Stop
the air bag between the occupant and
button is in the ON or START position,
the vehicle structures before the
and it can be activated within about 3
occupant impacts those structures.
minutes after the vehicle is turned off.
This speed of inflation reduces the risk
of serious or life-threatening injuries
•
Air bags inflate in the event of certain
and is thus a necessary part of air bag
frontal or side collisions to help protect
design.
the occupants from serious physical
injury.
However, the rapid air bag inflation can
also cause injuries which can include
•
Generally, air bags are designed to
facial abrasions, bruises and broken
inflate based upon the severity of a
bones because the inflation speed also
collision, its direction, or etc. These two
causes the air bags to expand with a
factors determine whether the sensors
great deal of force.
produce an electronic
deployment/inflation signal.
•
There are even circumstances under
which contact with the air bag can
•
The front air bags will completely
cause fatal injuries, especially if the
inflate and deflate in an instant. It is
occupant is positioned excessively
virtually impossible for you to see the
close to the air bag.
air bags inflate during an accident. It is
much more likely that you will simply
You can take steps to reduce the risk of
see the deflated air bags hanging out of
being injured by an inflating air bag. The
their storage compartments after the
greatest risk is sitting too close to the air
collision.
bag. An air bag needs about 10 in. (25 cm)
of space to inflate. NHTSA recommends
that drivers allow at least 10 in. (25 cm)
between the center of the steering wheel
and the chest.
3-45
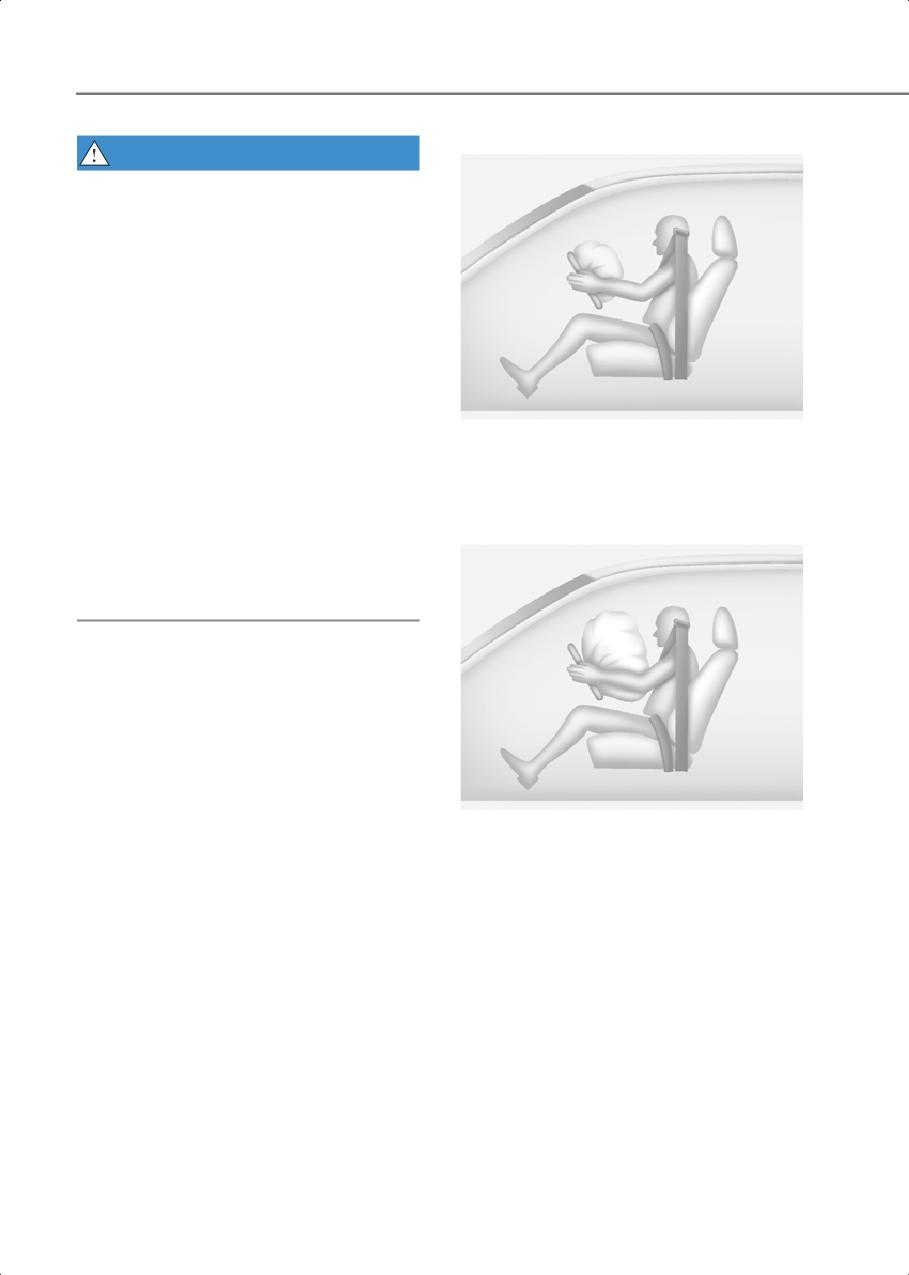
Seats & Safety System
Driver’s front air bag (1)
WARNING
To reduce the risk of serious injury or
death from an inflating air bag, take the
following precautions:
• NEVER place a child restraint in the
front passenger seat.
Always properly restrain children under
age 13 in the rear seats of the vehicle.
• Adjust the front passenger’s and
driver's seats as far to the rear as
possible while allowing you to maintain
full control of the vehicle.
OLMB033054
• Hold the steering wheel with hands at
When the SRSCM detects a sufficiently
the 9 o'clock and 3 o'clock positions.
severe impact to the front of the vehicle,
• Never place anything or anyone
it will automatically deploy the front air
between the air bag and the seat
bags.
occupant.
Driver’s front air bag (2)
• Do not allow the front passenger to
place their feet or legs on the
dashboard.
OLMB033055
Upon deployment, tear seam molded
directly into the pad cover will separate
under pressure from the expansion of the
air bags. Further opening of the covers
allows full inflation of the air bags.
A fully inflated air bag, in combination
with a properly worn seat belt, slows the
driver’s or the front passenger’s forward
motion, reducing the risk of head and
chest injury.
3-46
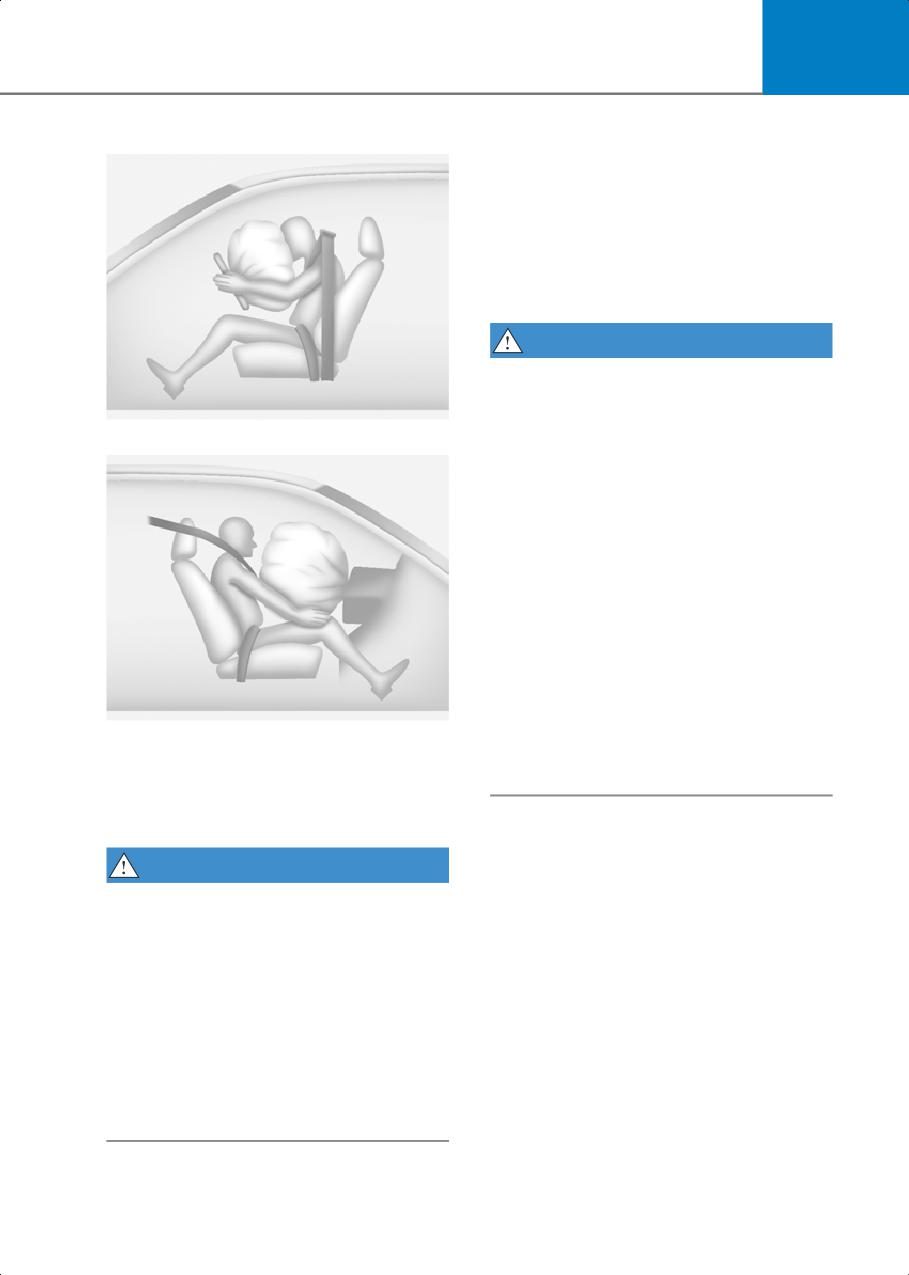
3
Driver’s front air bag (3)
What to Expect After an Air
Bag Inflates
After a frontal or side air bag inflates, it
will deflate very quickly. Air bag inflation
will not prevent the driver from seeing out
of the windshield or being able to steer.
Curtain air bags may remain partially
inflated for some time after they deploy.
WARNING
After an air bag inflates, take the following
precautions:
OLMB033056
•
Open your windows and doors as soon
Passenger’s front air bag
as possible after impact to reduce
prolonged exposure to the smoke and
powder released by the inflating air
bag.
•
Do not touch the air bag storage area’s
internal components immediately after
an air bag has inflated. The parts that
come into contact with an inflating air
bag may be very hot.
•
Always wash exposed skin areas
thoroughly with cold water and mild
soap.
•
Have an authorized HYUNDAI dealer
OLMB033057
replaced the air bag immediately after
After complete inflation, the air bag
deployment. Air bags are designed to
immediately starts deflating, enabling the
be used only once.
driver to maintain forward visibility and
the ability to steer or operate other
controls.
WARNING
To prevent objects from becoming
dangerous projectiles when the
passenger’s air bag inflates:
• Do not install or place any objects (drink
holder, CD holder, stickers, etc.) on the
front passenger’s panel above the
glove box where the passenger’s air
bag is located.
• Do not install a container of liquid air
freshener near the instrument cluster or
on the instrument panel surface.
3-47
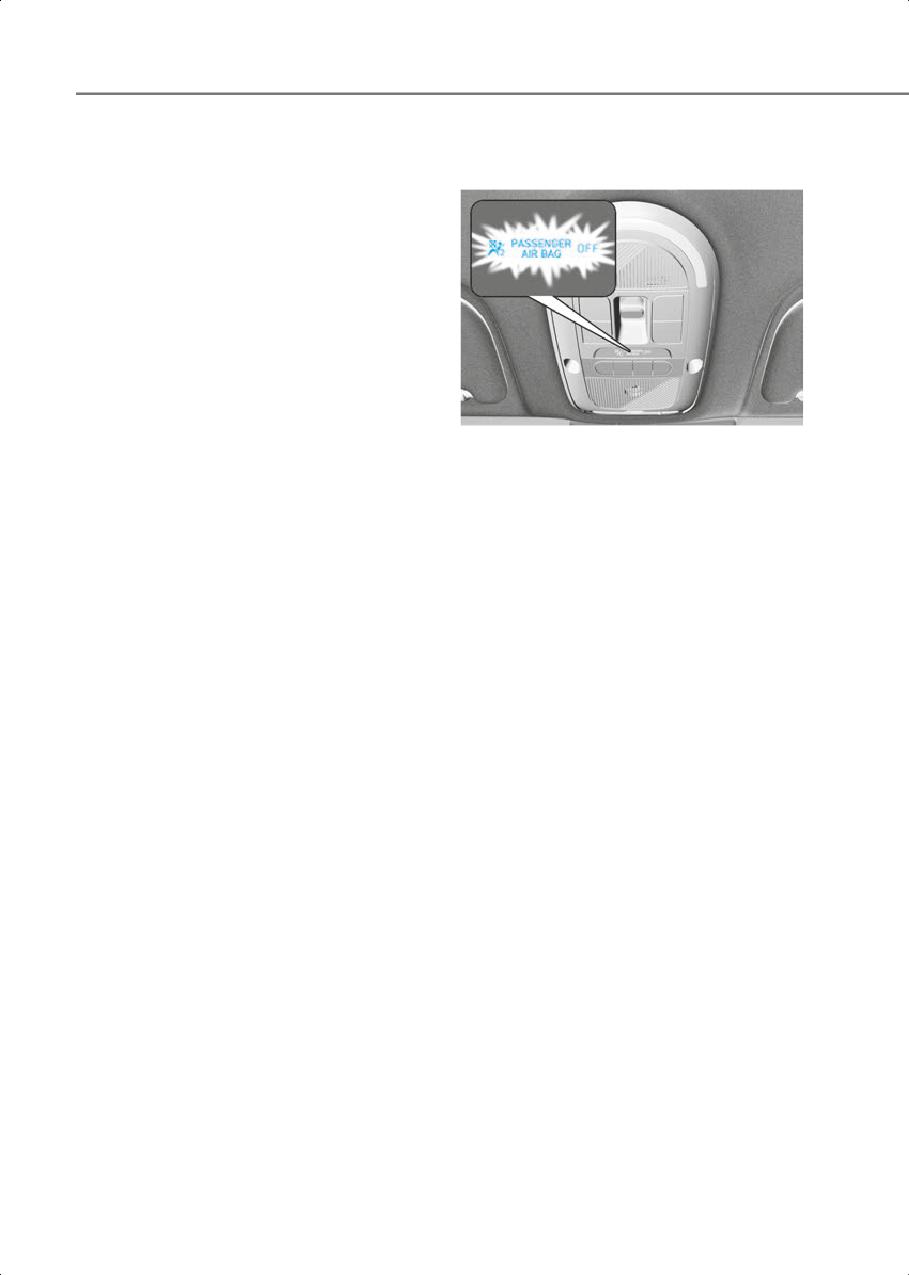
Seats & Safety System
Noise and smoke from inflating air
Occupant Classification
bag
System (OCS)
When the air bags inflate, they make a
loud noise and may produce smoke and
powder in the air inside of the vehicle.
This is normal and is a result of the
ignition of the air bag inflator. After the air
bag inflates, you may feel substantial
discomfort in breathing because of the
contact of your chest with both the seat
belt and the air bag, as well as from
breathing the smoke and powder. The
powder may aggravate asthma for some
people. If you experience breathing
ONE1031048
problems after an air bag deployment,
Your vehicle is equipped with an
seek medical attention immediately.
Occupant Classification System (OCS) in
Though the smoke and powder are
the front passenger’s seat.
nontoxic, they may cause irritation to the
skin, eyes, nose, throat, etc. If this is the
case, wash and rinse with cold water
Main components of the Occupant
immediately and seek medical attention if
Classification System
the symptoms persist.
• A detection device located within the
front passenger seat cushion.
• Electronic system to help determine
whether the passenger air bag systems
should be activated or deactivated.
• An indicator light located on the
overhead console which illuminates the
words “PASSENGER AIR BAG OFF”
indicating the front passenger air bag
system is deactivated.
• The overhead console air bag indicator
light is interconnected with the OCS.
The OCS is designed to help detect the
presence of a properly-seated front
passenger and determine if the
passenger’s front air bag should be
enabled (may inflate) or not.
The purpose is to help reduce the risk of
injury or death from an inflating air bag to
certain front passenger seat occupants,
such as children, by requiring the air bag
to be automatically turned OFF.
For example, if a child restraint of the type
specified in the regulations is on the seat,
the occupant classification sensor can
detect it and cause the air bag to turn
OFF.
3-48
3
Front passenger seat adult occupants
who are properly seated and wearing the
seat belt properly, should not cause the
passenger air bag to be automatically
turned OFF. For smaller adults it may turn
OFF, however, if the occupant does not
sit in the seat properly (for example, by
not sitting upright, by sitting on the edge
of the seat, or by otherwise being out of
position), this could cause the sensor to
turn the air bag OFF.
You will find the “PASSENGER AIR BAG
OFF” indicator on the overhead console
panel. This system detects the conditions
1-4 in the following table and activates or
deactivates the front passenger air bag
based on these conditions.
Always be sure that you and all vehicle
occupants are seated properly and
wearing the seat belt properly for the
most effective protection by the air bag
and the seat belt.
The OCS may not function properly if the
passenger takes actions which can affect
the classification system. These include:
• Failing to sit in an upright position.
• Leaning against the door or center
console.
• Sitting towards the sides of the front of
the seat.
• Putting their legs on the dashboard or
resting them on other locations which
reduce the passenger weight on the
front seat.
• Wearing the seat belt improperly.
• Reclining the seatback.
• Wearing thick clothes like ski wear or
hip protection wear.
• Putting an additional thick cushion on
the seat.
• Putting electrical devices (for example,
notebook, satellite radio) on the seat
with inverter charging.
3-49
Seats & Safety System
Condition and operation in the front passenger Occupant Classification System
Indicator/Warning light
Devices
Condition detected by the
“PASSENGER
occupant classification system
SRS warning
Front passenger
AIR BAG OFF”
light
air bag
indicator light
Adult *1
Off
Off
Activated
Infant *2 or child restraint system
On
Off
Deactivated
with 12 months old *3 *4
Unoccupied
On
Off
Deactivated
Malfunction in the system
Off
On
Activated
*1 The system judges a person of adult size as an adult. When a smaller adult sits in the front passenger seat, the
system may recognize him/her as a child depending on his/her physique and posture.
*2 Do not allow children to ride in the front passenger seat. When a larger child who has outgrown a child restraint
system sits in the front passenger seat, the system may recognize him/her as an adult depending upon his/her
physique or sitting position.
*3 Never install a child restraint system on the front passenger seat.
*4 The PASSENGER AIR BAG “OFF” indicator may turn on or off when a child above 12 months to 12 years old (with
or without child restraint system) sits in the front passenger seat. This is a normal condition.
3-50
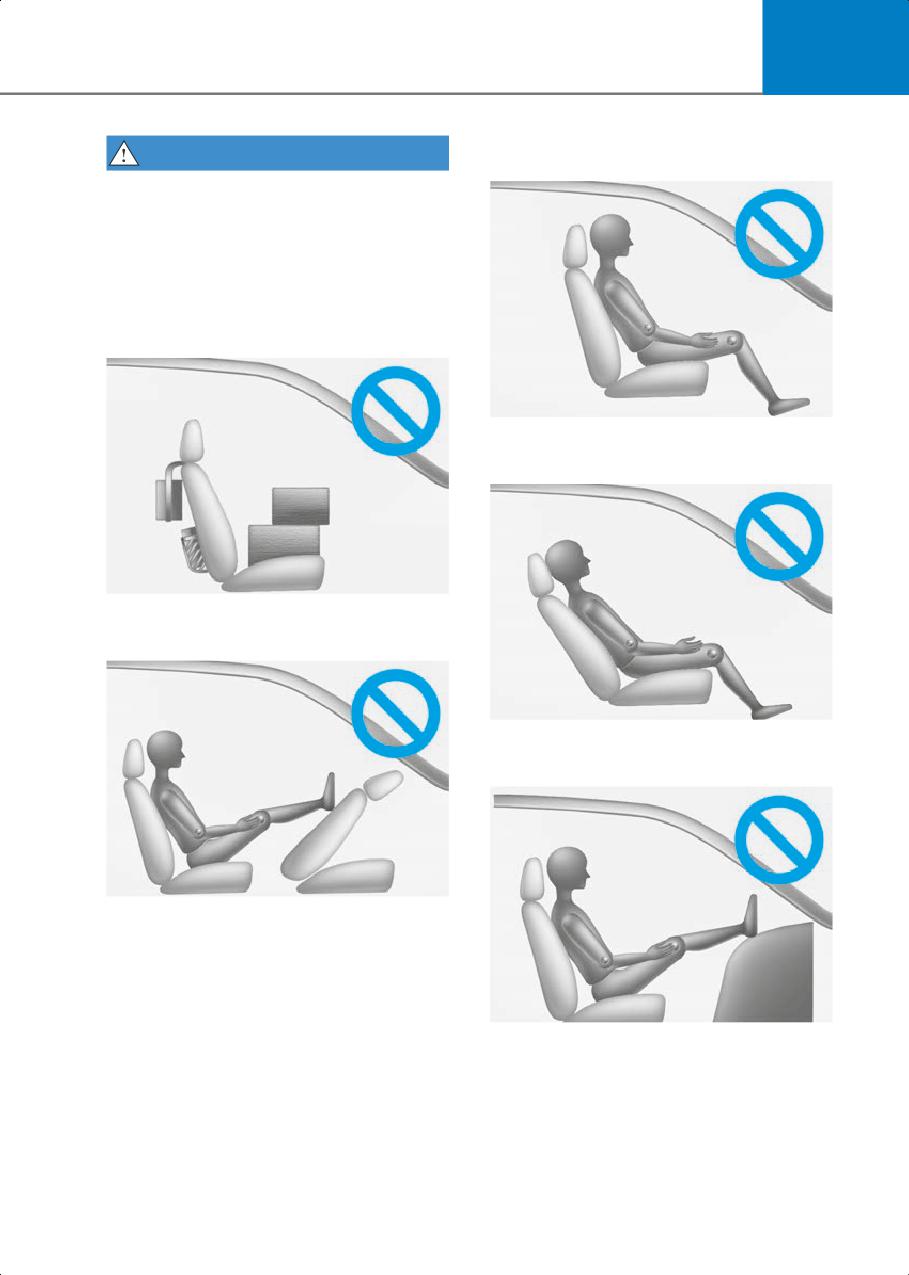
3
• NEVER sit with your hips shifted
WARNING
towards the front of the seat.
Riding in an improper position or placing
weight on the front passenger’s seat
when it is unoccupied by a passenger
adversely affects the OCS. To reduce the
risk of serious injury or death:
• NEVER put a heavy load in the front
seat or seatback pocket, or hang any
items on the front passenger seat.
OHI038155
• NEVER ride with the seatback reclined
when the vehicle is moving.
OHI038163
• NEVER place your feet on the front
passenger seatback.
OHI038157
• NEVER place your feet or legs on the
dashboard.
OHI038156
OHI039192N
3-51
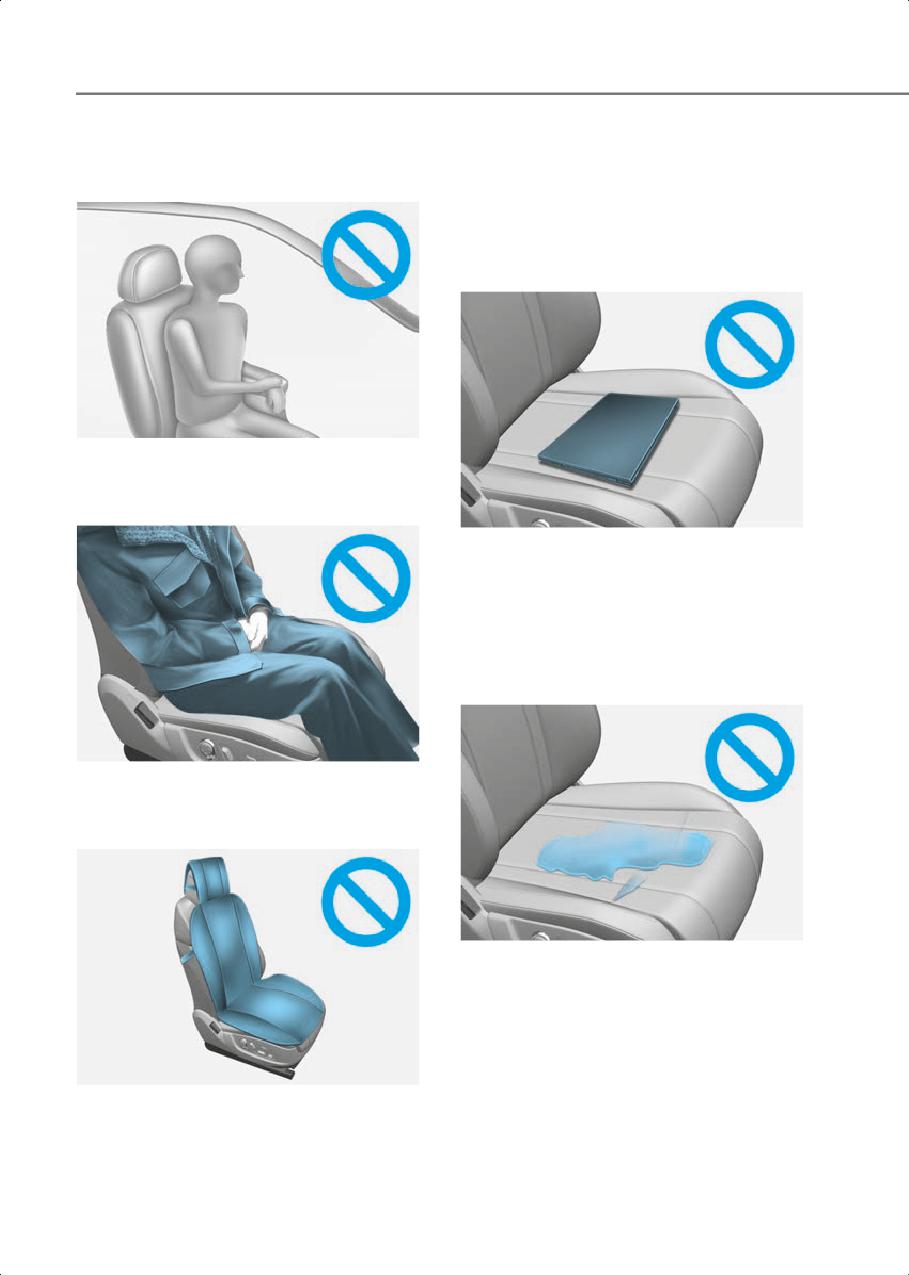
Seats & Safety System
• NEVER lean on the door or center
• Do not place electronic devices such as
console or sit on one side of the front
laptops, DVD player, or conductive
passenger seat.
materials such as water bottles on the
passenger seat.
• Do not use electronic devices such as
laptops and satellite radios which use
inverter chargers.
OHI038158
• Do not sit on the passenger seat
wearing heavily padded clothes such as
ski wear and hip protector.
OJX1039071
• If large quantity of liquid has been
spilled on the passenger seat, the air
bag warning light may illuminate or
malfunction.
Therefore, make sure the seat has been
completely dried before driving the
vehicle.
OJX1039069
• Do not use car seat accessories such as
thick blankets and cushions which
cover up the car seat surface.
OJX1039072
• Do not place sharp objects on the front
passenger seat. These may damage the
occupant detection system, if they
puncture the seat cushion.
• Do not place any items under the front
passenger seat.
OJX1039070
• When changing or replacing the seat or
seat cover, use original items only. The
OCS has been developed based on
using original HYUNDAI car seats only.
3-52
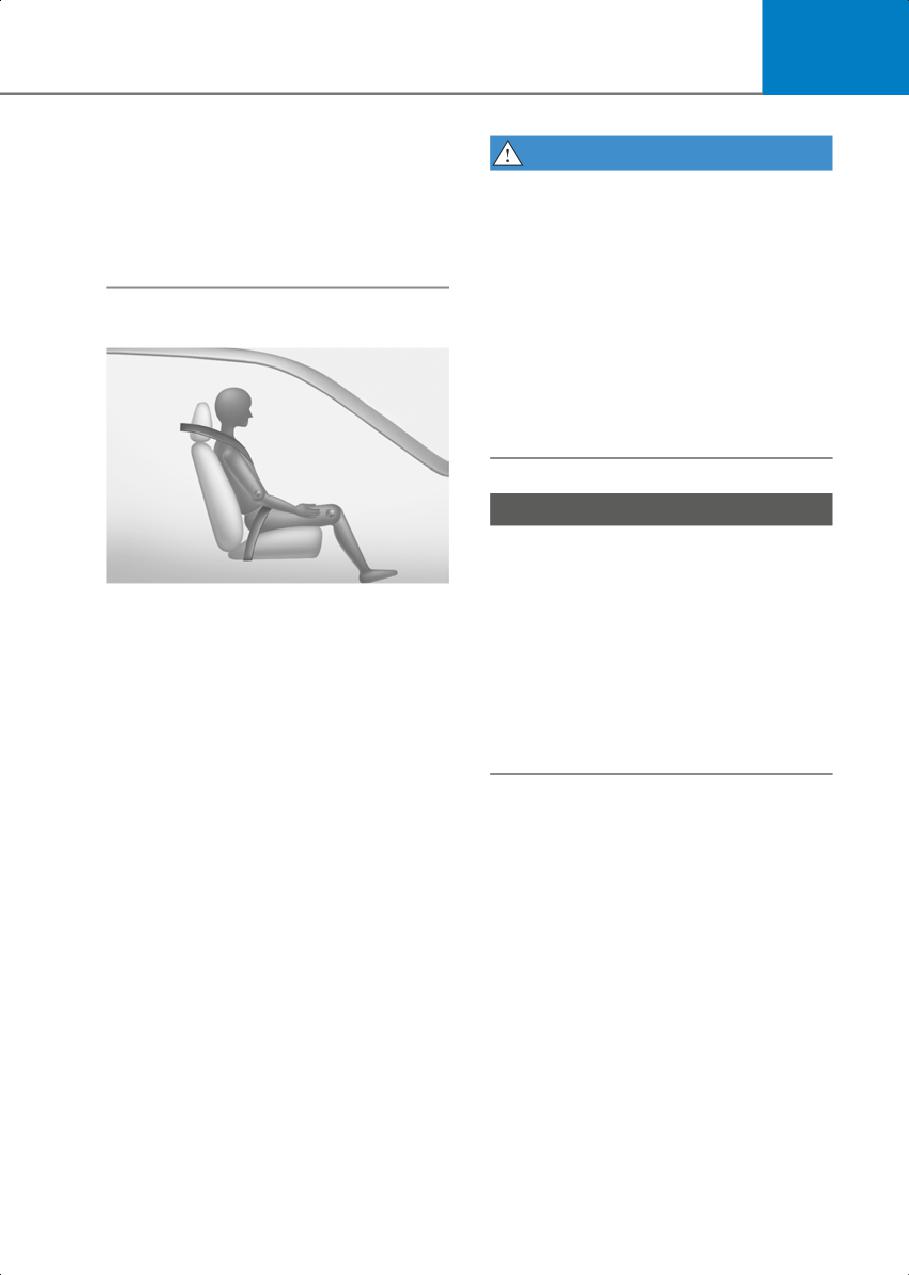
3
Altering or changing the authentic parts
WARNING
may result in system malfunction and
increase risk of injury when in collision.
NEVER allow an adult passenger to ride in
Any of the above could interfere with
the front passenger seat when the
the proper operation of the OCS sensor
“PASSENGER AIR BAG OFF” indicator is
thereby increasing the risk of an injury
illuminated. During a collision, the air bag
in an accident.
will not inflate if the indicator is
illuminated. Have your passenger
reposition themselves in the seat. If the
Proper seated position for OCS
“PASSENGER AIR BAG OFF” indicator
remains illuminated after the passenger
repositions themselves properly and the
vehicle is restarted, have the passenger
move to the rear seat because the air bag
will not inflate.
NOTICE
The “PASSENGER AIR BAG OFF” indicator
generally illuminates for approximately 4
OHI038118
seconds after the Start/Stop button is in
If the “PASSENGER AIR BAG OFF”
the ON or START position. But, if the
indicator is on when an adult is seated in
Start/Stop button is pressed to the ON or
the front passenger seat, place the
START position within 3 minutes after the
Start/Stop button in the OFF position and
vehicle is turned OFF, the indicator does
ask the passenger to sit properly (sitting
not illuminate. If the front passenger seat
upright with the seat back in an upright
is occupied, the OCS will then classify the
position, centered on the seat cushion
front passenger after several more
with their seat belt on, legs comfortably
seconds.
extended and their feet on the floor).
Restart the vehicle and have the person
remain in that position. This will allow the
system to detect the person and to enable
the passenger air bag. If the “PASSENGER
AIR BAG OFF” indicator is still on, ask the
passenger to move to the rear seat.
3-53
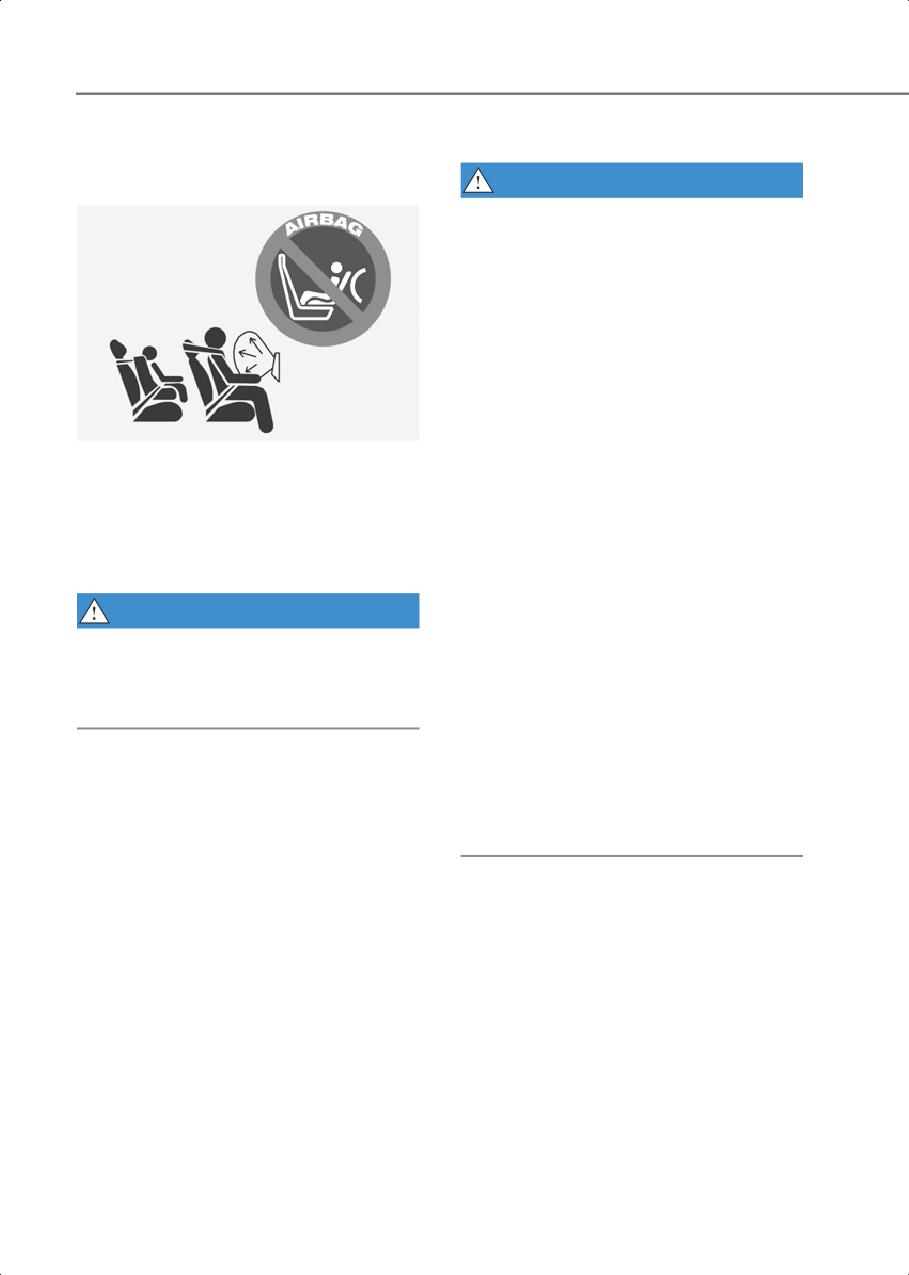
Seats & Safety System
Do not install a Child Restraint
Air bag collision sensors
System on the Front Passenger’s
Seat
WARNING
To reduce the risk of an air bag deploying
unexpectedly and causing serious injury
or death:
•
Do not hit or allow any objects to
impact the locations where air bags or
sensors are installed.
•
Do not perform maintenance on or
around the air bag sensors. If the
location or angle of the sensors is
altered, the air bags may deploy when
they should not or may not deploy
OHI039193N
when they should.
Even though your vehicle is equipped
•
Installing bumper guards with
with the OCS, never install a child
non-genuine Hyundai or
restraint in the front passenger’s seat. An
non-equivalent parts may adversely
inflating air bag can forcefully strike a
affect the collision and airbag
child or child restraint resulting in serious
deployment performance.
or fatal injury.
To ensure correct function of the airbag
WARNING
system, have the bumper replaced with
genuine Hyundai part or the equivalent
NEVER use a rearward facing Child
(of the genuine part) specified for your
Restraint on a seat protected by an
vehicle.
ACTIVE AIRBAG in front of it, DEATH or
SERIOUS INJURY to the CHILD can occur.
•
Press the Start/Stop button to the OFF
or ACC position and wait for 3 minutes
when the vehicle is being towed to
prevent inadvertent air bag
Why didn’t my air bag go off in
deployment.
a collision?
•
Have all air bag repairs conducted by an
There are certain types of accidents in
authorized HYUNDAI dealer.
which the air bag would not be expected
to provide additional protection. These
include rear impacts, second or third
collisions in multiple impact accidents, as
well as low speed impacts. Damage to the
vehicle indicates a collision energy
absorption, and is not an indicator of
whether or not an air bag should have
inflated.
3-54
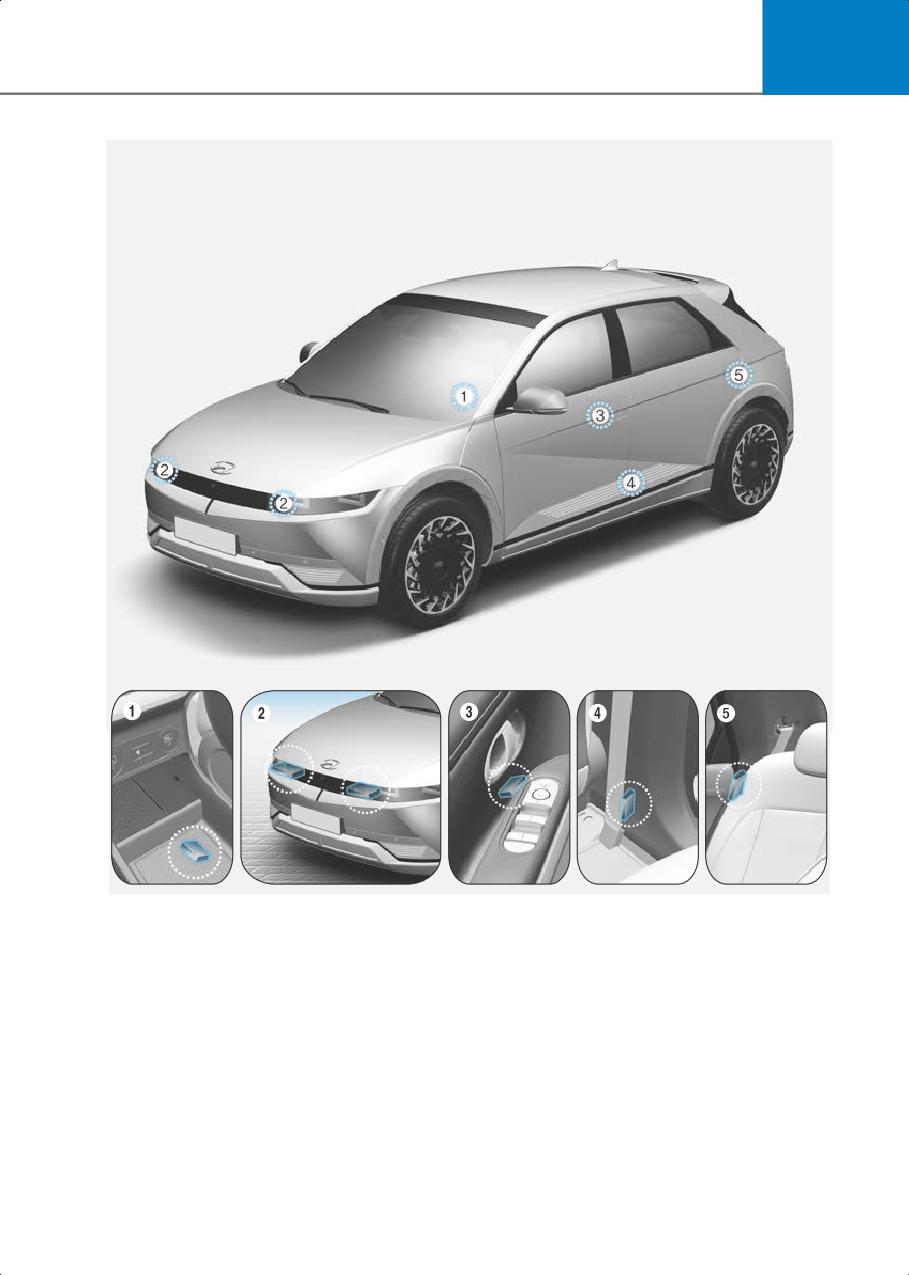
3
Table_3-69
(1) SRS control module / Rollover sensor
(2) Front impact sensor
(3) Side impact sensor (Pressure)
(4) Side impact sensor (Acceleration)
(5) Side impact sensor (Acceleration)
3-55
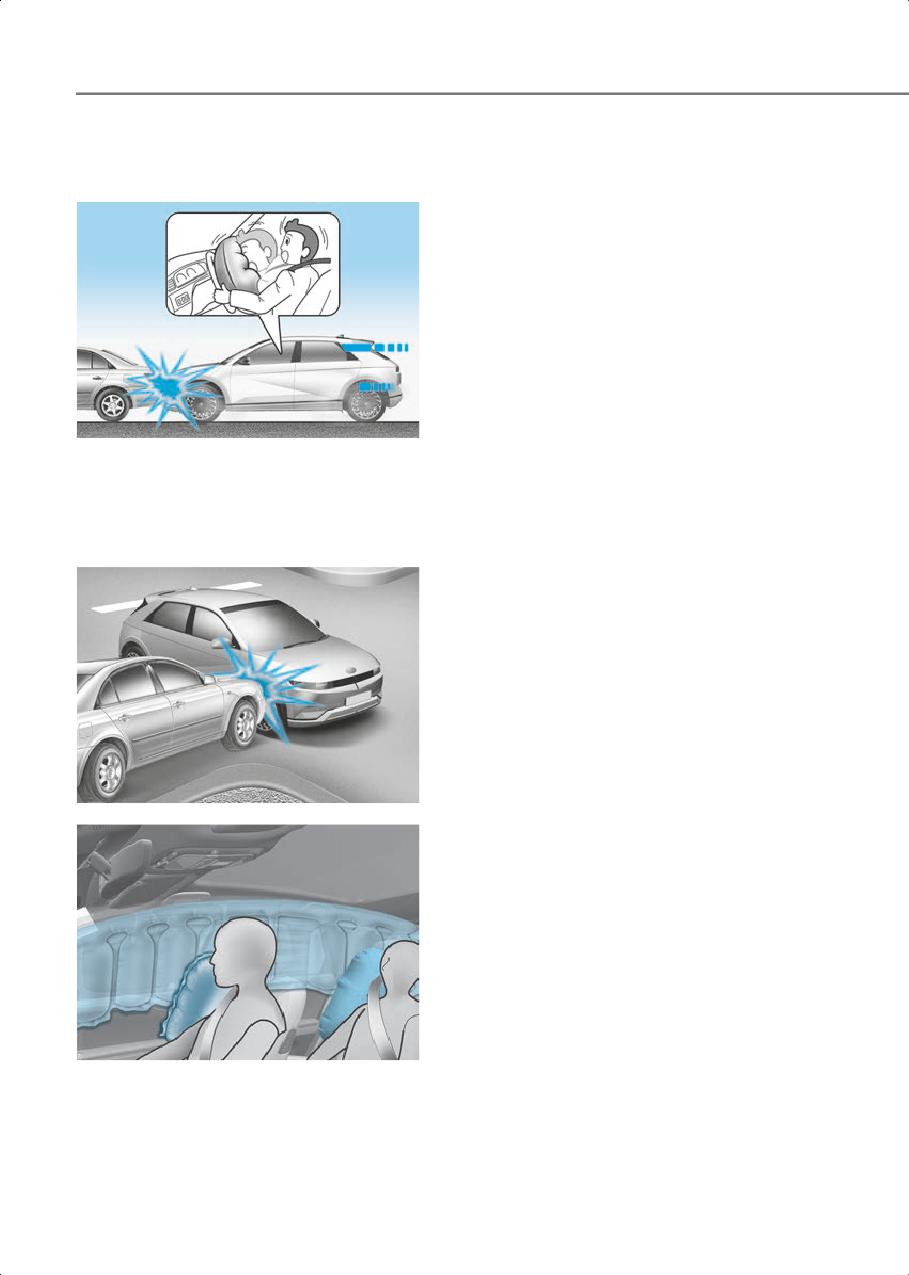
Seats & Safety System
Air bag inflation conditions
Although the driver’s and front
passenger’s air bags are designed to
Front air bags
inflate in frontal collisions, they also may
inflate in other types of collisions if the
front impact sensors detect a sufficient
impact. Side and curtain air bags are
designed to inflate in side impact
collisions, but they may inflate in other
collisions if the side impact sensors
detect a sufficient impact.
Also, the side and curtain air bags are
designed to inflate when a rollover is
detected by a rollover sensor (if equipped
with rollover sensor).
ONE1031063
If the vehicle chassis is impacted by
Front air bags are designed to inflate in a
bumps or objects on unimproved roads,
frontal collision depending on the
the air bags may deploy. Drive carefully
severity of impact of the front collision.
on unimproved roads or on surfaces not
designed for vehicle traffic to prevent
Side and curtain air bags
unintended air bag deployment.
ONE1031066K
ONE1033054N
Side and curtain air bags are designed to
inflate when an impact is detected by side
collision sensors depending on the
severity of impact resulting from a side
impact collision.
3-56
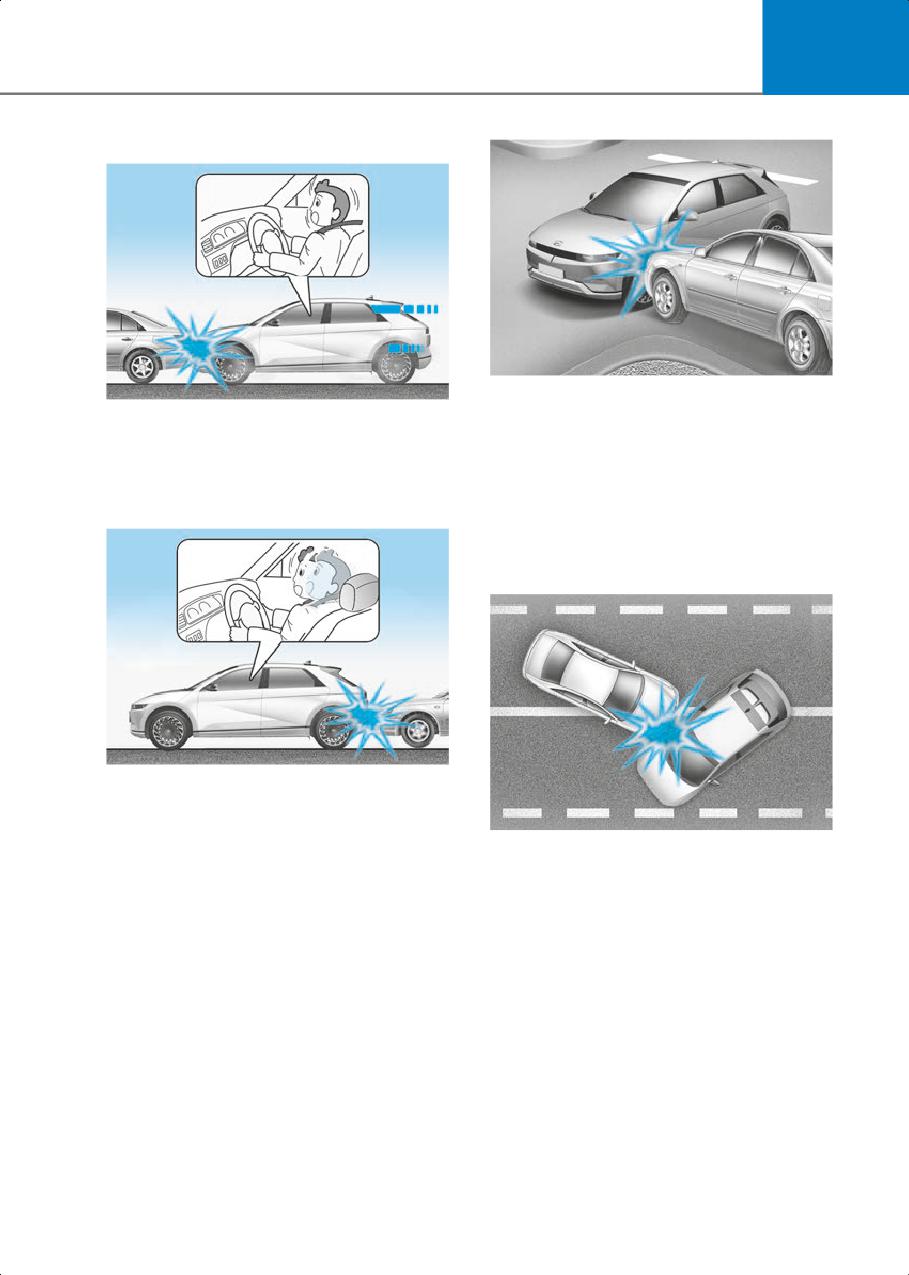
3
Air bag non-inflation conditions
ONE1031067K
ONE1031064
Front air bags may not inflate in side
In certain low-speed collisions the air
impact collisions, because occupants
bags may not deploy. The air bags are
move in the direction of the collision, and
designed not to deploy in such cases
thus in side impacts, front air bag
because they may not provide benefits
deployment would not provide additional
beyond the protection of the seat belts.
occupant protection.
However, side and curtain air bags may
inflate depending on the severity of
impact.
ONE1031065
Front air bags are not designed to inflate
in rear collisions, because occupants are
moved backward by the force of the
ONE1031068
impact. In this case, inflated air bags
In an angled collision, the force of impact
would not provide any additional benefit.
may direct the occupants in a direction
where the air bags would not be able to
provide any additional benefit, and thus
the sensors may not deploy any air bags.
3-57
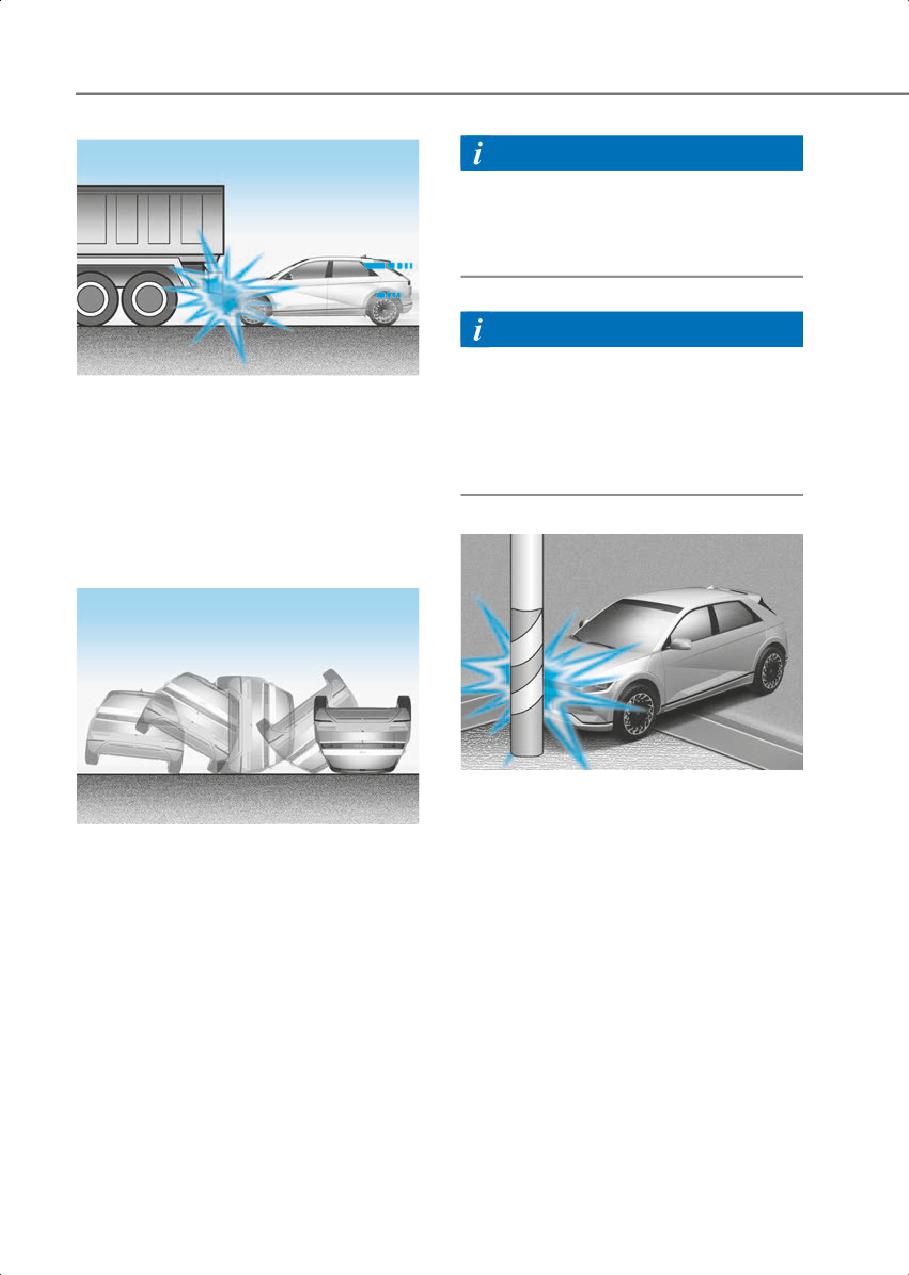
Seats & Safety System
Information
With rollover sensor
The side and curtain air bags may inflate
in a rollover situation, when it is detected
by the rollover sensor.
Information
Without rollover sensor
ONE1031069
The side and/or curtain air bags may
Just before impact, drivers often brake
inflate when the vehicle is rolled over by a
heavily. Such heavy braking lowers the
side impact collision, if the vehicle is
front portion of the vehicle causing it to
equipped with side and/or curtain air
“ride” under a vehicle with a higher
bags.
ground clearance. Air bags may not
inflate in this “underride” situation
because deceleration forces that are
detected by sensors may be significantly
reduced by such “underride” collisions.
ONE1031071K
Air bags may not inflate if the vehicle
collides with objects such as utility poles
ONE1031070
or trees, where the point of impact is
Front air bags may not inflate in rollover
concentrated and the collision energy is
accidents because front air bag
absorbed by the vehicle structure.
deployment would not provide additional
occupant protection.
3-58
3
SRS Care
Additional Safety Precautions
The SRS is virtually maintenance-free and
Passengers should not move out of or
there are no parts you can safely service
change seats while the vehicle is
by yourself. If the SRS air bag warning
moving. A passenger who is not wearing
light does not illuminate when the
a seat belt during a crash or emergency
Start/Stop button is in the ON position, or
stop can be thrown against the inside of
continuously remains on, have the
the vehicle, against other occupants, or
system be immediately inspected by an
be ejected from the vehicle.
authorized HYUNDAI dealer.
Do not use any accessories on seat belts.
We recommend any work on the SRS
Devices claiming to improve occupant
system, such as removing, installing,
comfort or reposition the seat belt can
repairing, or any work on the steering
reduce the protection provided by the
wheel, the front passenger’s panel, front
seat belt and increase the chance of
seats and roof rails be performed by an
serious injury in a crash.
authorized HYUNDAI dealer. Improper
Do not modify the front seats.
handling of the SRS system may result in
Modification of the front seats could
serious personal injury.
interfere with the operation of the
supplemental restraint system sensing
WARNING
components or side air bags.
To reduce the risk of serious injury or
Do not place items under the front seats.
death take the following precautions:
Placing items under the front seats could
• Do not attempt to modify or disconnect
interfere with the operation of the
the SRS components or wiring,
supplemental restraint system sensing
including the addition of any kind of
components and wiring harnesses.
badges to the pad covers or
Do not cause impact to the doors.
modifications to the body structure.
Impact to the doors when the Start/Stop
• Do not place objects over or near the air
button is in the ON or START position may
bag modules on the steering wheel,
cause the air bags to inflate.
instrument panel, and the front
Modifications to accommodate
passenger’s panel above the glove box.
disabilities. If you require modification to
• Clean the air bag pad covers with a soft
your vehicle to accommodate a disability,
cloth moistened with plain water.
contact the HYUNDAI Customer Connect
Solvents or cleaners could adversely
Center at 800-633-5151.
affect the air bag covers and proper
deployment of the system.
Adding equipment to or modifying
• Have the inflated air bags be replaced
your air bag equipped vehicle
by an authorized HYUNDAI dealer.
If you modify your vehicle by changing
• If components of the air bag system
your vehicle’s frame, bumper system,
must be discarded, or if the vehicle
front end or side sheet metal or ride
must be scrapped, certain safety
height, this may affect the operation of
precautions must be observed. Consult
your vehicle’s air bag system.
an authorized HYUNDAI dealer for the
necessary information. Failure to follow
these precautions could increase the
risk of personal injury.
3-59
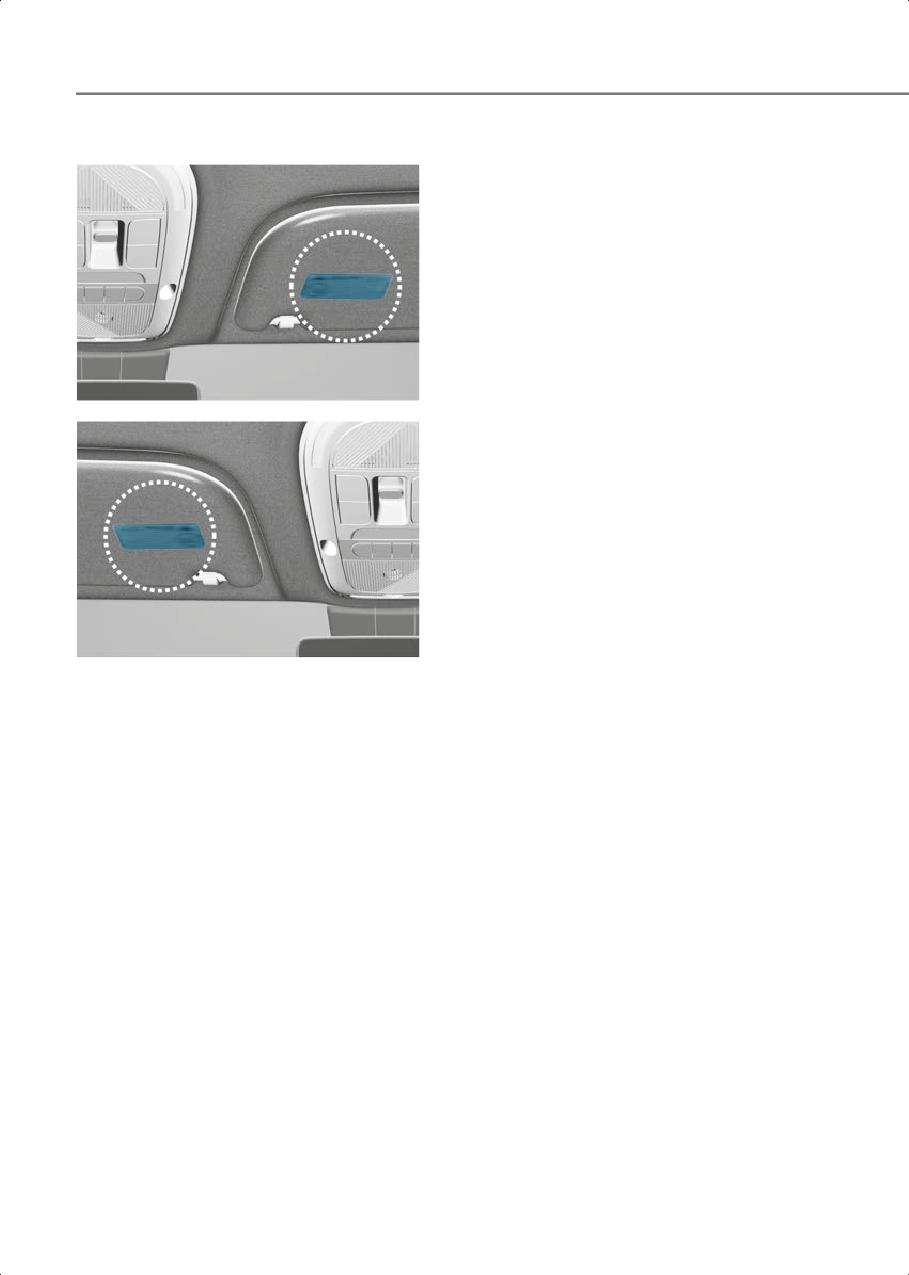
Seats & Safety System
Air Bag Warning Labels
ONE1031072
ONE1031072R
Air bag warning labels, required by the
U.S. National Highway Traffic Safety
Administration (NHTSA), are attached to
alert the driver and passengers of
potential risks of the air bag system. Be
sure to read all of the information about
the air bags that are installed on your
vehicle in this Owners Manual.
3-60
4. Instrument Cluster
Instrument Cluster
4-2
Instrument Cluster Control
4-3
Gauges and Meters
4-3
Power/Charge Gauge
4-3
State of Charge (SOC) Gauge for High Voltage Battery
4-4
Gear Shift Indicator
4-6
Warning and Indicator Lights
4-6
Cluster Display Messages
4-15
Cluster Display
4-24
Cluster Display Control
4-24
4
View Modes
4-24
Vehicle Settings (infotainment System)
4-28
Setting Your Vehicle
4-29
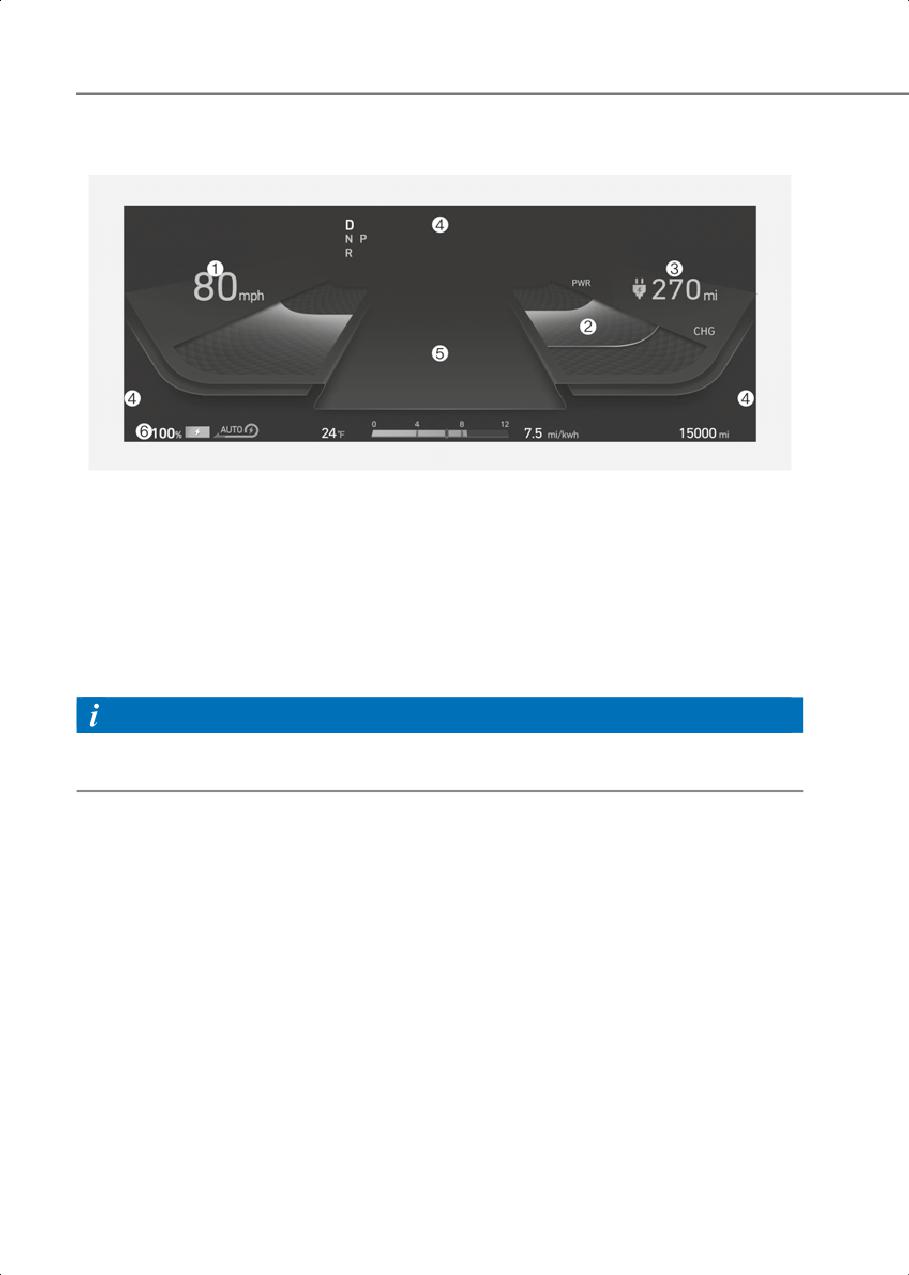
Instrument Cluster
Instrument Cluster
ONE1041021N
The actual cluster in the vehicle may differ from the illustration.
For more information, refer to “Gauges and Meters” section in this chapter.
(1) Speedometer
(2) Power/Charge gauge
(3) Distance to empty
(4) Warning indicator light
(5) Cluster display
(6) Battery SOC (State of Charge) gauge
Information
• SNOW/NORMAL/ECO/SPORT mode by pressing the drive mode button will change
the main theme of the cluster
4-2
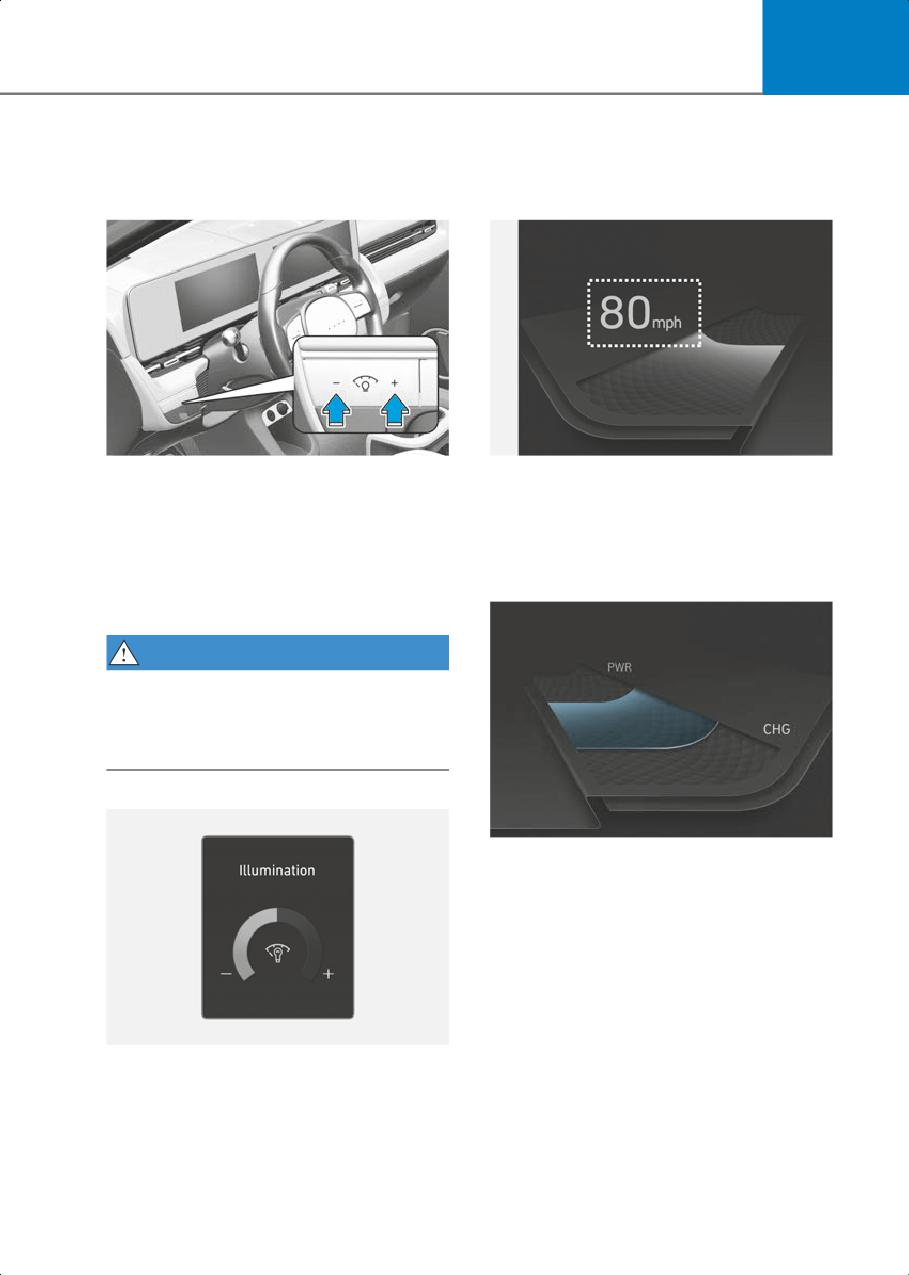
4
Instrument Cluster Control
Gauges and Meters
Instrument panel illumination
Speedometer
ONE1041055N
ONE1041013E
When the vehicle’s parking lights or
The speedometer indicates the speed of
headlights are on, press the illumination
the vehicle and is calibrated in miles per
control switch to adjust the brightness of
hour (MPH).
the instrument panel illumination.
When pressing the illumination control
Power/Charge Gauge
switch, the interior switch illumination
intensity is also adjusted.
WARNING
Never adjust the instrument cluster while
driving. This could result in loss of control
and lead to an accident that may cause
death, serious injury, or vehicle damage.
ONE1Q011050
The Power/Charge Gauge shows the
energy consumption rate of the vehicle
and the charge/discharge status of the
regenerative brakes.
• POWER :
It shows the energy consumption rate
of the vehicle when driving uphill or
accelerating. The more electric energy
ONE1041056N
is used, the higher the gauge level.
• The brightness of the instrument panel
illumination is displayed.
• If the brightness reaches the maximum
or minimum level, a chime will sound.
4-3
Instrument Cluster
• CHARGE :
It shows the charging status of the
battery when it is being charged by the
regenerative brakes (decelerating or
driving on a downhill road). The more
electric energy is charged, the lower
the gauge level.
State of Charge (SOC) Gauge
for High Voltage Battery
ONE1Q011011
When the remaining battery is lower than
10 % on the SOC gauge, the warning light
(
) turns ON to alert you of the battery
level.
When the warning light (
) turns ON,
the vehicle can drive an additional 18 ~ 25
miles (30 ~ 40 km) depending on the
driving speed, heater/air conditioner,
weather, driving style, and other factors.
ONE1Q011003
Charging is required.
• The SOC gauge shows the charging
status of the high voltage battery.
NOTICE
• The low percentage number on the
The output is limited as the remaining
indicator indicates that there is not
battery is low.
enough energy in the high voltage
When the Power Down Indicator Light is
battery. 100% indicates that the driving
on, the vehicle may be limited to a certain
battery is fully charged.
speed, it may be difficult to climb hills, or
• When driving on highways or
the vehicle may be pushed back, so
motorways, make sure to check in
charge it immediately.
advance if the driving battery is
charged enough.
4-4
4
Outside temperature gauge
Odometer
ONE1041014N
ONE1041016N
This gauge indicates the current outside
The odometer indicates the total distance
air temperatures by 1°F (1°C).
that the vehicle has been driven and
should be used to determine when
Note that the temperature indicated on
periodic maintenance should be
the instrument cluster may not change as
performed.
quickly as the outside temperature (there
may be a slight delay before the
temperature changes.)
Distance to empty
You can change the temperature unit
from the Settings menu in the
infotainment system screen.
Select:
• General Settings > Unit > Temperature
Unit > °C/°F
Both the temperature unit on the cluster
display and climate control screen will
change.
Information
ONE1Q011049N
The infotainment system may change
• The distance to empty is the estimated
after software updates. For more
distance the vehicle can be driven with
information, refer to the user’s manual
the remaining electric energy.
provided in the infotainment system and
• The distance to empty varies depend
the quick reference guide.
on which drive mode is selected among
ECO/NORMAL/SPORT mode.
For more detail information, refer to
‘Distance to Empty’ in chapter 1.
4-5
Instrument Cluster
Regenerative braking level indicator
Information
• If the vehicle is not on level ground or
the battery power has been
interrupted, the distance to empty
function may not operate correctly.
• The distance to empty may differ from
the actual driving distance as it is an
estimate of the available driving
distance.
• The distance to empty may vary
significantly based on driving
ONE1061036
conditions, driving habits, and
condition of the vehicle.
The regenerative brake indicates the level
of the regenerative braking that you set.
And it also indicates Smart regenerative
system’s operation status.
Gear Shift Indicator
For more details, refer to “Regenerative
Braking System” in chapter 6.
Warning and Indicator Lights
Information
Make sure that all warning lights are OFF
after starting the vehicle. If any light is still
ON, this indicates a situation that needs
attention.
ONE1041015
The indicator displays which gear is
selected.
Ready indicator
btn_WOSCE-200
This indicator illuminates:
When the vehicle is ready to be driven.
• ON : Normal driving is possible.
• OFF : Normal driving is not possible, or
a problem has occurred.
• Blinking : Emergency driving.
When the ready indicator goes OFF or
blinks, there is a problem with the system.
In this case, have your vehicle inspected
by an authorized HYUNDAI dealer.
4-6
4
Service warning light
NOTICE
• Do not accelerate or start the vehicle
suddenly when the power down
btn_WAEE-200
indicator light is ON.
• When the power is limited for the safety
This warning light illuminates:
of the high-powered parts of an electric
• When the Start/Stop button is in the ON
vehicle, the power down indicator light
position.
illuminates. Your vehicle may not be
- It illuminates for approximately 3
driven, or may roll back on a slope with
seconds and then goes off.
the indicator light ON due to the
• When there is a problem with related
limitation of vehicle power.
parts of the electric vehicle control
system, such as sensors, etc.
Charging connector indicator light
When the warning light illuminates while
(green)
driving, or does not go OFF after starting
the vehicle, have your vehicle inspected
by an authorized HYUNDAI dealer.
btn_WAEE-201
This warning light indicates the
Power down indicator light
connection status of the charging
connector. When the charging connector
is connected to the vehicle, the green
light illuminates for approximately 1
btn_WEA-300
minute.
This indicator light illuminates:
High voltage battery level warning
• When the Start/Stop button is in the ON
light
position.
- It illuminates for approximately 3
seconds and then goes off.
• When the power is limited for the safety
btn_WPSE-303
of the high-powered parts of an electric
This warning light illuminates:
vehicle. The power is limited for the
following reasons.(Unless both Service
• When the high voltage battery level is
Warning Light and Power Down
low.
Indicator Light illuminate at the same
• When the warning light turns ON,
time, it is not a failure.)
charge the battery immediately.
- The high voltage battery level is too
low or voltage is decreasing
Seat belt warning light
- The temperature of the high voltage
battery is too high or too low
- The temperature of the motor is high
btn_W-29
This warning light informs the driver that
the seat belt is not fastened.
For more details, refer to “Seat Belts”
section in chapter 3.
4-7
Instrument Cluster
Air bag warning light
Parking brake & brake fluid warning
light
btn_W7-147
WAE-205
This warning light illuminates:
This warning light illuminates:
• When you set the Start/Stop button to
• When you set the Start/Stop button in
the ON position.
the ON position.
- The air bag warning light illuminates
- It illuminates for approximately 3
for about 6 seconds and then turns
seconds.
off when all checks have been
- It remains on if the parking brake is
performed.
applied.
• The air bag warning light will remain
• When the parking brake is applied.
illuminated if there is a malfunction
• When the brake fluid level in the
with the Safety Restraint System (SRS)
reservoir is low.
air bag operation.
- If the warning light illuminates with
If this occurs, have the vehicle
the parking brake released, it
inspected by an authorized HYUNDAI
indicates the brake fluid level in the
dealer.
reservoir is low.
• When the regenerative brake does not
Regenerative brake warning light
operate.
If the brake fluid level in the reservoir is
WAE-204
low:
1. Drive carefully to the nearest safe
WAE-205
location and stop your vehicle.
2. With the motor stopped, check the
This warning light illuminates:
brake fluid level immediately and add
When the regenerative brake does not
fluid as required (For more details, refer
operate and the brake does not perform
to “Brake Fluid” section in chapter 9).
well. This causes the Brake Warning light
After adding brake fluid, check all brake
(red) and Regenerative Brake Warning
components for fluid leaks. If a brake
Light (yellow) to illuminate
fluid leak is found, or if the warning light
simultaneously.
remains on, or if the brakes do not
In this case, drive safely and have your
operate properly, do not drive the
vehicle inspected by an authorized
vehicle. Have the vehicle inspected by
HYUNDAI dealer.
an authorized HYUNDAI dealer.
The operation of the brake pedal may be
more difficult than normal and the
braking distance can increase.
4-8
4
Dual-diagonal braking system
Anti-lock Brake System (ABS)
warning light
Your vehicle is equipped with
dual-diagonal braking system. This
means you still have braking on two
wheels even if one of the dual systems
should fail.
btn_W-78
With only one of the dual systems
This warning light illuminates:
working, more than normal pedal travel
• When you set the Start/Stop button to
and greater pedal pressure is required to
the ON position.
stop the vehicle.
- The ABS warning light illuminates for
Also, the vehicle will not stop in as short a
about 3 seconds and then goes off.
distance with only a portion of the brake
system working.
• Whenever there is a malfunction with
the ABS.
If the brakes fail while you are driving,
shift to a lower gear for additional vehicle
Note that the hydraulic braking system
braking and stop the vehicle as soon as it
will still be operational even if there is a
is safe to do so.
malfunction with the ABS.
If this occurs, have the vehicle
WARNING
inspected by an authorized HYUNDAI
dealer.
Parking Brake & Brake Fluid warning light
Driving the vehicle with a warning light
ON is dangerous. If the Parking Brake &
Electronic Brake Force Distribution
Brake Fluid warning light illuminates with
(EBD) system warning light
the parking brake released, it indicates
that the brake fluid level is low.
If this occurs, have the vehicle inspected
btn_W-78
by an authorized HYUNDAI dealer.
WAE-205
When the ABS warning and Parking Brake
warning lights are on simultaneously, it
may indicate a problem with the
Electronic Brake Force Distribution
system.
If this occurs, have the vehicle inspected
by an authorized HYUNDAI dealer.
WARNING
Electronic Brake Force Distribution (EBD)
system warning light
When both ABS and Parking Brake &
Brake Fluid warning lights are on, the
brake system will not work normally and
you may experience an unexpected and
dangerous situation during sudden
braking.
4-9
Instrument Cluster
If this occurs, avoid high speed driving
Master warning light
and abrupt braking.
Have the vehicle inspected by an
authorized HYUNDAI dealer as soon as
possible.
btn_WAE-211
This warning light illuminates:
When there is a malfunction in operation
NOTICE
in any of the following systems:
Electronic Brake Force Distribution (EBD)
• Forward Collision-Avoidance Assist
system warning light
malfunction (if equipped)
When the ABS warning light is on or both
• Forward Collision-Avoidance Assist
ABS and Parking Brake & Brake Fluid
radar blocked (if equipped)
warning lights are on, the speedometer,
• Blind-Spot Collision Warning
odometer, or tripmeter may not work.
malfunction (if equipped)
Also, the MDPS warning light may
• Blind-Spot Collision Warning radar
illuminate and the steering effort may
blocked (if equipped)
increase or decrease.
• LED headlight malfunction (if
If this occurs, have the vehicle inspected
equipped)
by an authorized HYUNDAI dealer as soon
as possible.
• High Beam Assist malfunction (if
equipped)
• Smart Cruise Control malfunction (if
Motor Driven Power Steering
equipped)
(MDPS) warning light
• Smart Cruise Control radar blocked (if
equipped)
• Tire Pressure Monitoring System
(TPMS) malfunction
btn_WAE-206
To identify the details of the warning, look
This warning light illuminates:
at the cluster display.
• When you set the Start/Stop button to
the ON position.
- The motor driven power steering
warning light illuminates for about 3
seconds and then goes off.
• Whenever there is a malfunction with
the motor driven power steering.
If this occurs, have the vehicle
inspected by an authorized HYUNDAI
dealer.
4-10
4
Electronic Parking Brake (EPB)
This warning light remains ON after
warning light
blinking for approximately 60 seconds, or
repeatedly blinks ON and OFF in 3 second
intervals:
When there is a malfunction with the
btn_EPB
TPMS.
If this occurs, have the vehicle inspected
This warning light illuminates:
by an authorized HYUNDAI dealer as soon
• When you set the Start/Stop button to
as possible.
the ON position.
For more details, refer to “Tire Pressure
- The EPB warning light illuminates for
Monitoring System (TPMS)” section in
about 3 seconds and then goes off.
chapter 8.
• Whenever there is a malfunction with
EPB.
WARNING
If this occurs, have the vehicle
Safe Stopping
inspected by an authorized HYUNDAI
• The TPMS cannot alert you to severe
dealer.
and sudden tire damage caused by
external factors.
Information
• If you notice any vehicle instability,
The Electronic Parking Brake (EPB)
immediately take your foot off the
warning light may illuminate when the
accelerator pedal, apply the brakes
Electronic Stability Control (ESC)
gradually with light force, and slowly
indicator light comes on to indicate that
move to a safe position off the road.
ESC is not working properly. This does not
indicate malfunction of EPB.
Forward safety warning light
if equipped
Low tire pressure warning light
btn_WAE-209
btn_WTL-215
This warning light illuminates:
This warning light illuminates:
• When you set the Start/Stop button to
• When you set the Start/Stop button to
the ON position.
the ON position.
- The Forward Safety warning light
- The low tire pressure warning light
illuminates for approximately 3
illuminates for approximately 3
seconds and then goes off.
seconds and then goes off.
• Whenever there is a malfunction with
• When one or more of your tires are
Forward Collision-Avoidance Assist.
significantly underinflated. (The
location of the underinflated tires are
If this occurs, have the vehicle inspected
displayed on the instrument cluster.)
by an authorized HYUNDAI dealer.
For more details, refer to “Tire Pressure
For more details, refer to “Forward
Monitoring System (TPMS)” section in
Collision-Avoidance Assist (FCA)” section
chapter 8.
in chapter 7.
4-11
Instrument Cluster
Lane safety indicator light
LED headlight warning light
if equipped
if equipped
btn_WDN8C-200
btn_WTL-205
This indicator light illuminates:
This warning light illuminates:
• [Green] When Lane Keeping Assist
• When you set the Start/Stop button to
operating conditions are satisfied.
the ON position.
• [White] When Lane Keeping Assist
- The LED headlight warning light
operating conditions are not satisfied.
illuminates for approximately 3
seconds and then goes off.
• [Yellow] Whenever there is a
malfunction with Lane Keeping Assist.
• Whenever there is a malfunction with
the LED headlight.
If this occurs, have the vehicle
inspected by an authorized HYUNDAI
If this occurs, have the vehicle
dealer.
inspected by an authorized HYUNDAI
dealer.
For more details, refer to “Lane Keeping
Assist (LKA)” section in chapter 7.
This warning light blinks:
Whenever there is a malfunction with a
All Wheel Drive (AWD) warning light
LED headlight related part.
if equipped
If this occurs, have the vehicle inspected
by an authorized HYUNDAI dealer.
NOTICE
btn_WTL-216
Continuous driving with the LED
This warning light illuminates:
Headlight warning light on or blinking can
Whenever there is a malfunction with the
reduce LED headlight life.
AWD system.
If this occurs frequently, have the vehicle
inspected by an authorized HYUNDAI
dealer.
For more details, refer to “All Wheel Drive
(AWD)” section in chapter 6.
4-12
4
Icy road warning light
Electronic Stability Control (ESC)
if equipped
indicator light
btn_WPDE-201
btn_WAE-207
This warning light is to warn the driver the
This indicator light illuminates:
road may be icy.
• When you set the Start/Stop button to
When the temperature on the outside
the ON position.
temperature gauge is approximately
below 4°C (40°F), the Icy Road warning
- The Electronic Stability Control
light and Outside Temperature Gauge
indicator light illuminates for about 3
blinks and then illuminates. Also, the
seconds and then goes off.
warning chime sounds 1 time.
• Whenever there is a malfunction with
You can activate or deactivate Icy Road
ESC system.
Warning function from the Settings menu
If this occurs, have the vehicle
in the infotainment system screen.
inspected by an authorized HYUNDAI
Select:
dealer.
• Setup > Vehicle Settings > Cluster >
This indicator light blinks:
Content Selection > Icy Road Warning
While ESC is operating.
Information
For more details, refer to “Electronic
Stability Control (ESC)” section in chapter
• If the Icy Road warning light appears
6.
while driving, you should drive more
attentively and safely refraining from
over-speeding, rapid acceleration,
Electronic Stability Control (ESC)
sudden braking or sharp turning, etc.
OFF indicator light
• The infotainment system may change
after software updates. For more
information, refer to the user’s manual
provided in the infotainment system
btn_WAE-208
and the quick reference guide.
This indicator light illuminates:
• When you set the Start/Stop button to
the ON position.
- The ESC OFF indicator light
illuminates for approximately 3
seconds and then goes off.
• When you deactivate ESC system by
pressing the ESC OFF button.
For more details, refer to “Electronic
Stability Control (ESC)” section in chapter
6.
4-13
Instrument Cluster
Immobilizer indicator light
Turn signal indicator light
btn_KHW-10
btn_WAE-202
This indicator light illuminates for up to 30
This indicator light blinks:
seconds:
When you operate the turn signal
When the vehicle detects the smart key in
indicator stalk.
the vehicle with the Start/Stop button in
If any of the following occur, there may be
the ACC or ON position.
a malfunction with the turn signal system.
• Once the smart key is detected, you can
• The turn signal indicator light
start the vehicle.
illuminates but does not blink
• The indicator light goes off after
• The turn signal indicator light blinks
starting the vehicle.
rapidly
• The turn signal indicator light does not
This indicator light blinks for a few
illuminate at all
seconds:
If any of these conditions occur, have the
When the smart key is not in the vehicle.
vehicle inspected by an authorized
• If the smart key is not detected, you
HYUNDAI dealer.
cannot start the vehicle.
This indicator light illuminates for 2
High beam indicator light
seconds and goes off:
If the smart key is in the vehicle and the
Start/Stop button is ON, but the vehicle
btn_WKH-97
cannot detect the smart key.
If this occurs, have the vehicle inspected
This indicator light illuminates:
by an authorized HYUNDAI dealer.
• When the headlights are on and in the
high beam position
This indicator light blinks:
• When the turn signal lever is pulled into
Whenever there is a malfunction with the
the Flash-to-Pass position.
immobilizer system.
If this occurs, have the vehicle inspected
Light ON indicator light
by an authorized HYUNDAI dealer.
btn_WAE-203
This indicator light illuminates:
When the Parking lamps or headlights are
on.
4-14
4
High Beam Assist indicator light
Cluster Display Messages
if equipped
Shift to P
This message is displayed if you try to turn
btn_WKH-97K
off the vehicle without the gear in the P
(Park) position.
This indicator light illuminates:
If this occurs, the Start/Stop button turns
When the high-beam is on with the light
to the ACC position.
switch in the AUTO position.
• White : When High Beam Assist is ready
Low key battery
to operate.
This message is displayed if the battery of
• Green : When High Beam Assist is
the smart key is discharged while
operating.
changing the Start/Stop button to the
If your vehicle detects oncoming or
OFF position.
preceding vehicles, High Beam Assist will
switch the high beam to low beam
Press START button while turning
automatically.
wheel
For more details, refer to “High Beam
if equipped
Assist (HBA)” section in chapter 5.
This message is displayed if the steering
wheel does not unlock normally when the
AUTO HOLD indicator light
Start/Stop button is pressed.
You should press the Start/Stop button
while turning the steering wheel right and
left.
btn_WTL-207
This indicator light illuminates:
Press brake pedal to start vehicle
• [White] When you activate Auto Hold by
This message is displayed if the
pressing the AUTO HOLD switch.
Start/Stop button changes to the ACC
position twice by pressing the button
• [Green] When you stop the vehicle
repeatedly without depressing the brake
completely by depressing the brake
pedal.
pedal with Auto Hold activated.
You can start the vehicle by depressing
• [Yellow] Whenever there is a
the brake pedal and then pressing the
malfunction with the Auto Hold
Start/Stop button.
function.
If this occurs, have the vehicle
inspected by an authorized HYUNDAI
Key not in vehicle
dealer.
This message is displayed if the smart key
For more details, refer to “Electronic
is not in the vehicle when you leave the
Parking Brake (EPB)” section in chapter 6.
vehicle with the Start/Stop button in the
ON or Start position.
Always turn off the vehicle before leaving
your vehicle.
4-15
Instrument Cluster
Key not detected
Check smart key system
This message is displayed if the smart key
This message is displayed when there is a
is not detected when you press the
problem with the smart key system. Have
Start/Stop button.
the vehicle inspected by an authorized
HYUNDAI dealer.
Press START button again
Door, Hood, Liftgate open indicator
This message is displayed if you were
unable to start the vehicle when the
Start/Stop button was pressed.
If this occurs, attempt to start the vehicle
by pressing the Start/ Stop button again.
If the warning message appears each
time you press the Start/Stop button,
have the vehicle inspected by an
authorized HYUNDAI dealer.
Press START button with key
This message is displayed if you press the
ONE1041012
Start/Stop button while the warning
This warning is displayed if any door or
message “Key not detected” is displayed.
hood or liftgate is left open. The warning
will indicate which door is open in the
At this time, the immobilizer indicator
display.
light blinks.
CAUTION
Check BRAKE SWITCH fuse
Before driving the vehicle, you should
This message is displayed if the brake
confirm that the door/ hood/liftgate are
switch fuse is disconnected.
fully closed.
You need to replace the fuse with a new
one before starting the vehicle.
If that is not possible, you can start the
Low tire pressure
vehicle by pressing the Start/Stop button
for 10 seconds in the ACC position.
Shift to P to start vehicle
This message is displayed if you try to
start the vehicle in any other position
except P (Park).
Information
For your safety, have you start the vehicle
with the gear shifted to P (Park).
ONE1081021L
This warning message is displayed if the
tire pressure is low. The corresponding
tire on the vehicle will be illuminated.
4-16
4
For more details, refer to “Tire Pressure
Wiper
Monitoring System (TPMS)” section in
chapter 8.
Lights
ONE1041004L
This indicator displays which wiper speed
is selected using the wiper control.
You can activate or deactivate
ONE1041032L
Wiper/Lights display function from the
This indicator displays which exterior light
Settings menu in the infotainment system
is selected using the lighting control.
screen.
You can activate or deactivate
Select:
Wiper/Lights display function from the
• Setup > Vehicle Settings > Cluster >
Settings menu in the infotainment system
Content Selection > Wiper/Lights
screen.
Display
Select:
Information
• Setup > Vehicle Settings > Cluster >
Content Selection > Wiper/Lights
The infotainment system may change
Display
after software updates. For more
information, refer to the user’s manual
Information
provided in the infotainment system and
the quick reference guide.
The infotainment system may change
after software updates. For more
information, refer to the user’s manual
Low washer fluid
provided in the infotainment system and
the quick reference guide.
if equipped
This message is displayed if the washer
fluid level in the reservoir is nearly empty.
Have the washer fluid reservoir refilled.
Check headlight
if equipped
This message is displayed if the
headlights are not operating properly. A
lamp may need to be replaced.
Make sure to replace the burned out bulb
with a new one of the same wattage
rating.
4-17
Instrument Cluster
Check turn signal
Remaining time
if equipped
AC charge
This message is displayed if the turn
signal lamps are not operating properly. A
lamp may need to be replaced.
Make sure to replace the burned out bulb
with a new one of the same wattage
rating.
Check headlight LED
if equipped
This message is displayed if there is a
ONE1Q011058E
problem with the LED headlight. Have the
DC charge
vehicle inspected by an authorized
HYUNDAI dealer.
Shift to P to charge/Shift to P to start
charging
ONE1Q011059E
This message is displayed to notify the
remaining time to charge the battery to
the selected target battery charge level.
OOSEV040497L
This message is displayed if you connect
the charging cable without the gear in the
P (Park) position.
Shift to P (Park) before connecting the
charging cable.
4-18
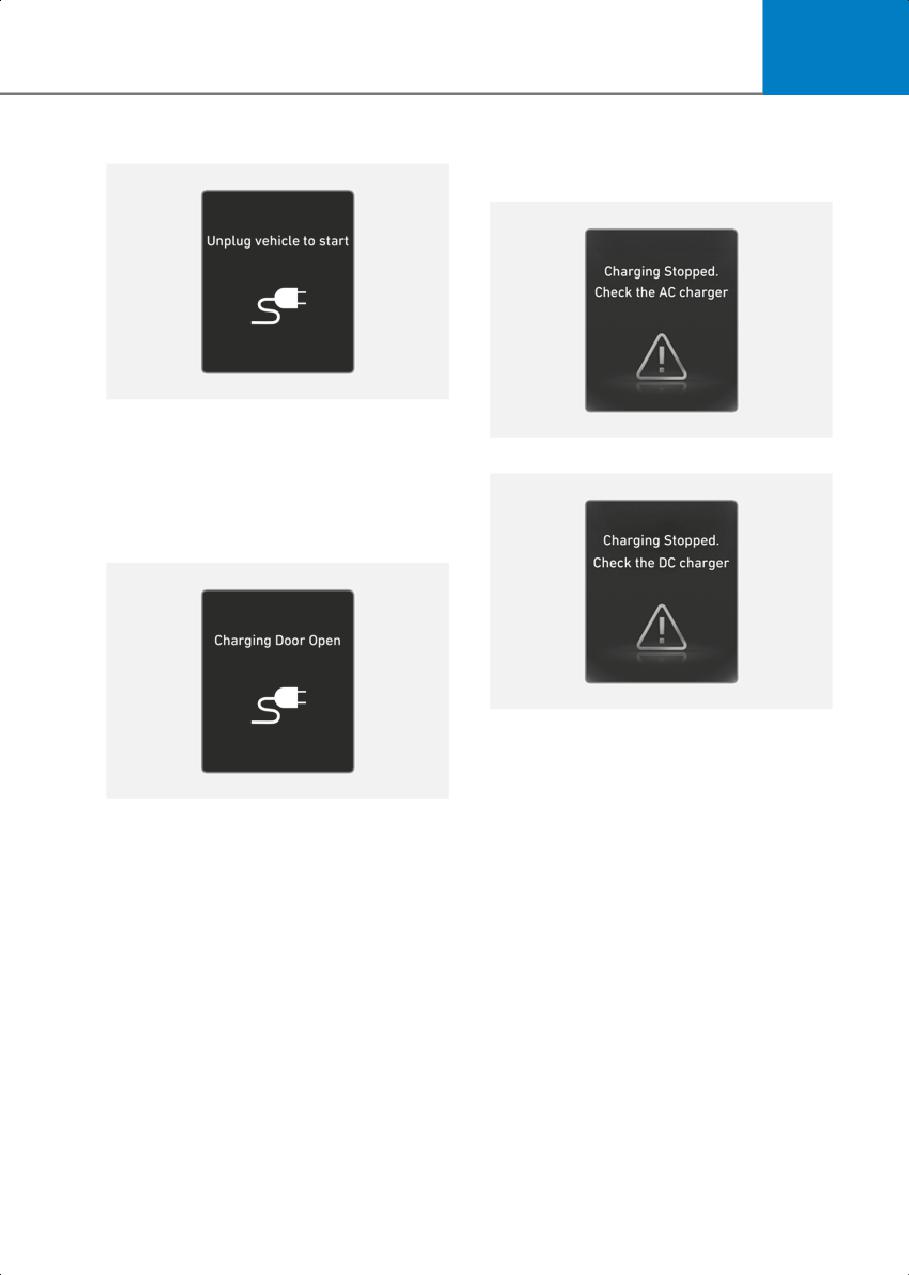
4
Unplug vehicle to start
Charging stopped. Check the AC/DC
charger
AC charge
OOSEV040498L
This message is displayed when you start
OOSEV040500L
the vehicle without unplugging the
DC charge
charging cable. Unplug the charging
cable, and then turn on the vehicle.
Charging door open
OOSEV040501L
• This warning message is displayed
when charging is stopped for the
reasons below:
OOSEV040499L
- There is a problem with the external
This message is displayed when the
AC charger or DC charger
vehicle is driven with the charging door
- The external AC charger stopped
opened. Close the charging door and then
charging
start driving.
- The charging cable is damaged
In this case, check whether there is any
problem with the external AC or DC
charger and charging cable.
If the same problem occurs when
charging the vehicle with a normally
operating AC charger or genuine
HYUNDAI portable charger, have your
vehicle inspected by an authorized
HYUNDAI dealer.
4-19
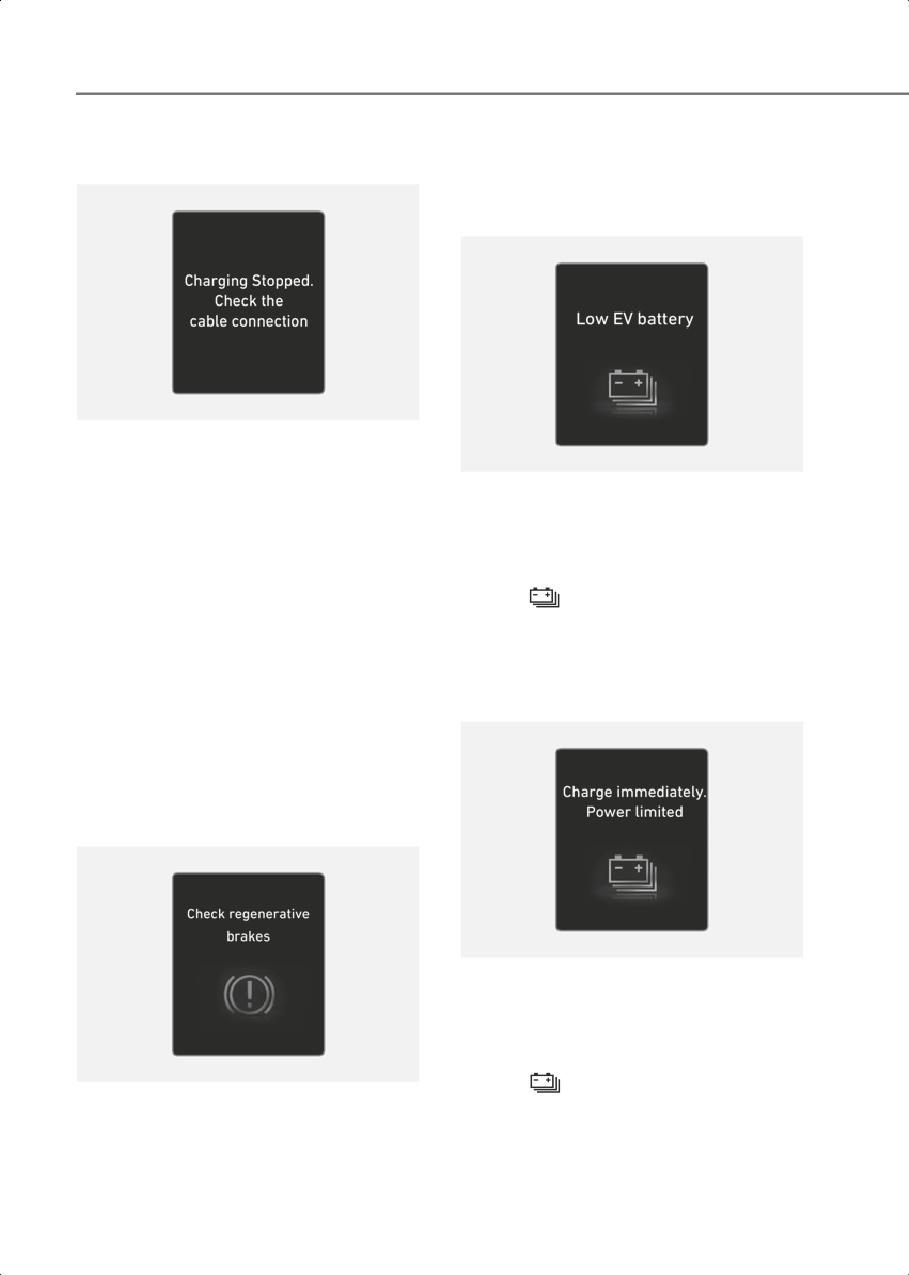
Instrument Cluster
Charging stopped. Check the cable
In this case, have the vehicle inspected by
connection
an authorized HYUNDAI dealer.
Low EV battery
OOSEV040502L
This warning message is displayed when
charging is stopped because the charging
OOSEV040505L
connector is not correctly connected to
When the high voltage battery level
the charging inlet
reaches below approximately 10 %, this
In this case, separate the charging
warning message is displayed.
connector and re-connect it and check
The warning light on the instrument
whether there is any problem (external
damage, foreign substances, etc.) with
cluster (
) will turn ON simultaneously.
the charging connector and charging
Charge the high voltage battery
inlet.
immediately.
If the same problem occurs when
charging the vehicle with a replaced
Charge immediately. Power limited
charging cable or genuine HYUNDAI
portable charger, have your vehicle
inspected by an authorized HYUNDAI
dealer.
Check regenerative brakes
OOSEV040506L
When the high voltage battery level
reaches below approximately 5 %, this
warning message is displayed.
The warning light on the instrument
OOSEV040503E
cluster (
) will turn on simultaneously.
These warning messages are displayed
The vehicle’s power will be reduced to
when the regenerative brake system does
minimize the energy consumption of the
not work properly.
high voltage battery. Charge the battery
immediately.
4-20
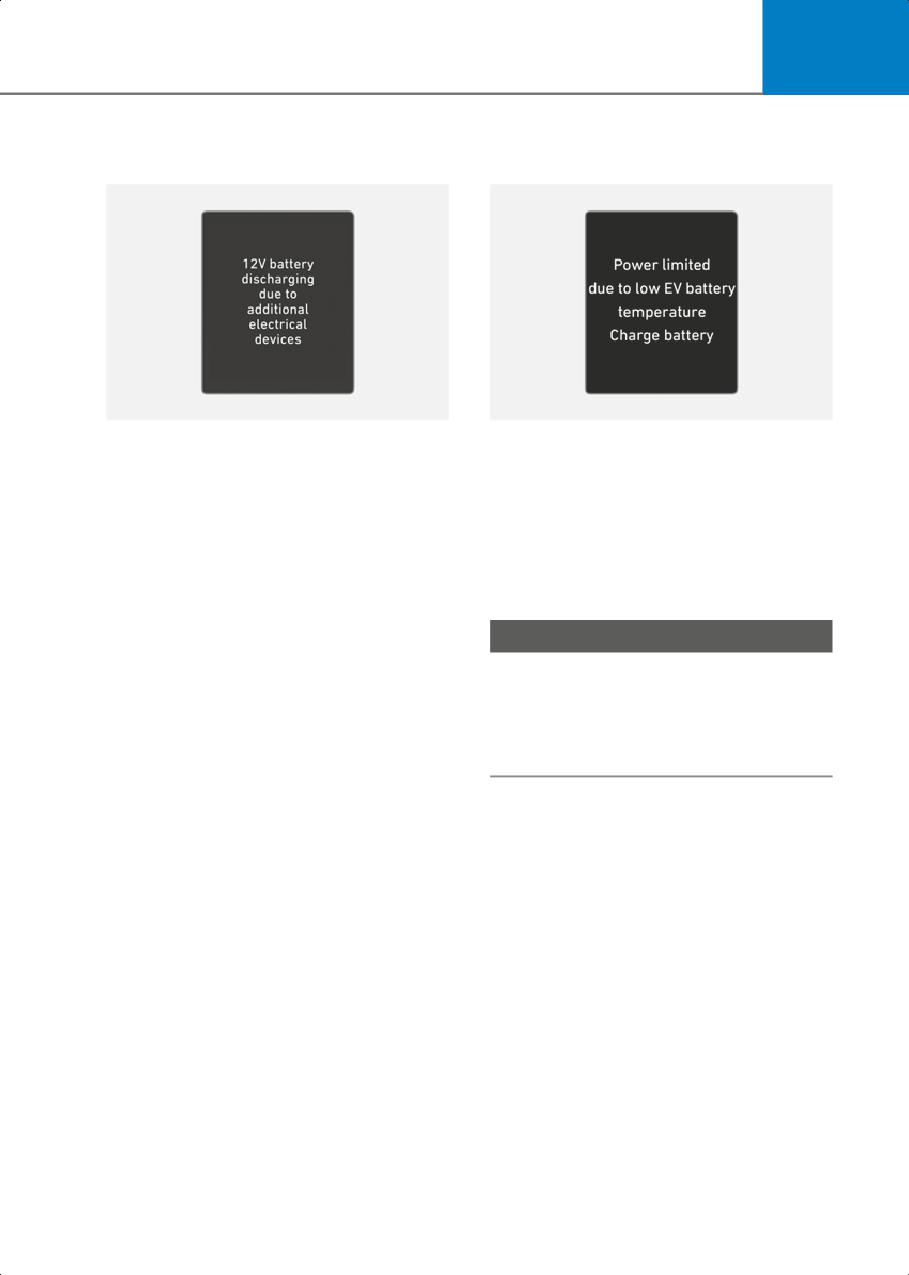
4
12V battery discharging due to
Power limited due to low EV battery
additional electrical devices
temperature. Charge battery
ONE1041054L
OOSEV040507L
This warning message is displayed when
Both warning messages are displayed to
a battery discharge due to excessive
protect electric vehicle system when
current is detected by mounting an
outside temperature is low. If the high
unauthorized electrical device such as a
voltage battery charging level is low and
black box.
parked outside in low temperature for a
long time, vehicle power could be limited.
Be careful as it may cause battery
discharge problems.
Charging the battery before driving helps
increase power.
If the warning message is not
disappeared after the external electrical
NOTICE
device is removed, have the vehicle
inspected by an authorized HYUNDAI
If these warning messages are still
dealer.
displayed even after the ambient
temperature has increased, have the
vehicle inspected by an authorized
HYUNDAI dealer.
4-21
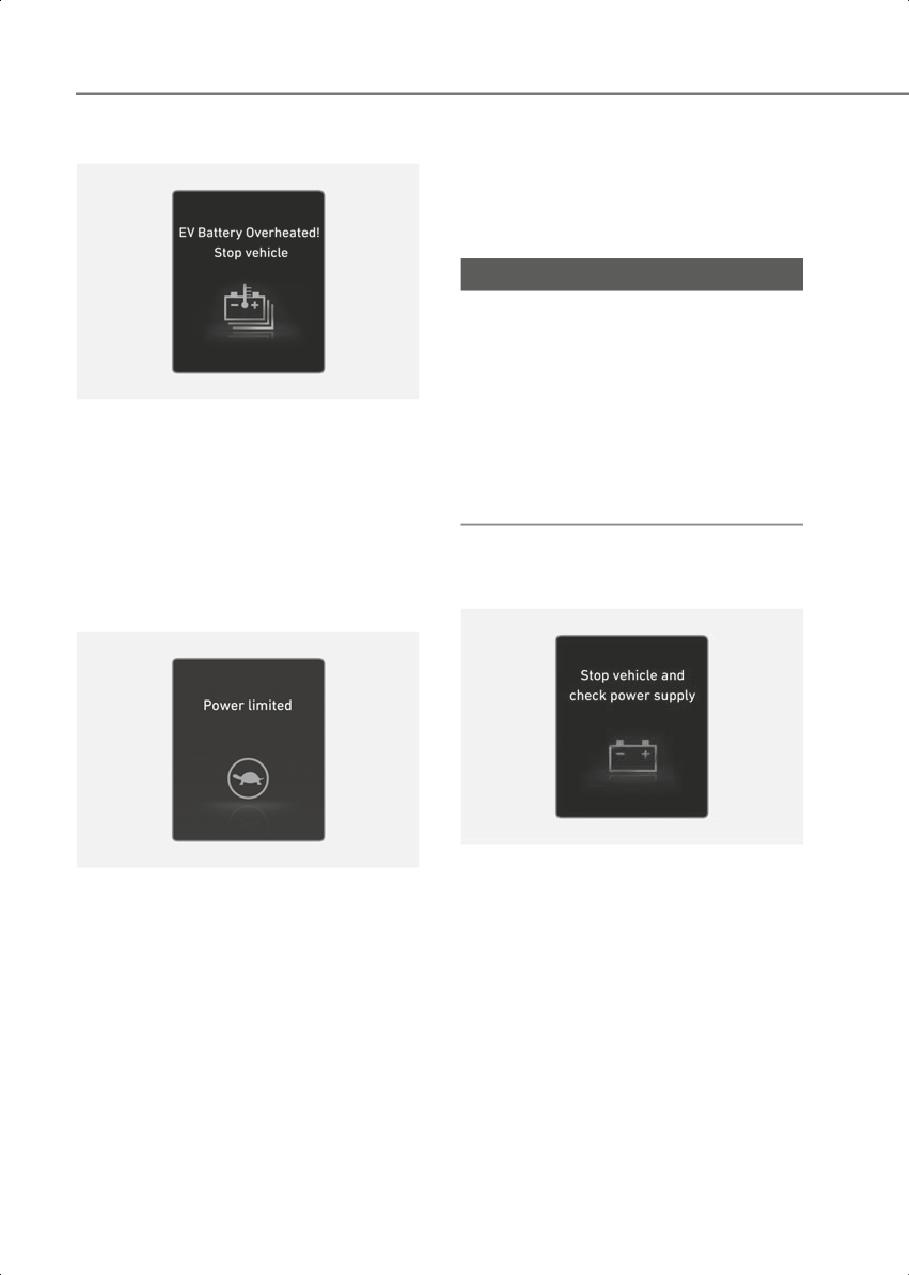
Instrument Cluster
EV battery overheated! Stop vehicle
- The high voltage battery level is too
low or voltage is decreasing
- The temperature of the high voltage
battery is too high or too low
- The temperature of the motor is high
NOTICE
• When this warning message is
displayed, do not accelerate or start the
vehicle suddenly.
• When the power is limited for the safety
OOSEV040509L
of the high-powered parts of an electric
This warning message is displayed to
vehicle, the warning message is
protect battery and electric vehicle
displayed. Your vehicle may not be
system when the high voltage battery
driven, or may roll back on a slope with
temperature is too high.
the warning message displayed due to
the limitation of vehicle power.
Turn off the Start/Stop button and stop
the vehicle so that the battery
temperature decreases.
Stop vehicle and check power
supply
Power limited
OOSEV040511L
ONE1Q011008L
This warning message is displayed when
This Indicator light illuminates:
a failure occurs in the power supply
system.
• When the Start/Stop button is in the ON
position.
In this case, park the vehicle in a safe
location and tow your vehicle to the
- It illuminates for approximately 3
nearest authorized HYUNDAI dealer and
seconds and then goes off.
have the vehicle inspected.
• When the power is limited for the safety
of the high-powered parts of an electric
vehicle. The power is limited for the
following reasons. (Unless both Service
Warning Light and Power Down
Indicator Light illuminate at the same
time, it is not a failure.)
4-22
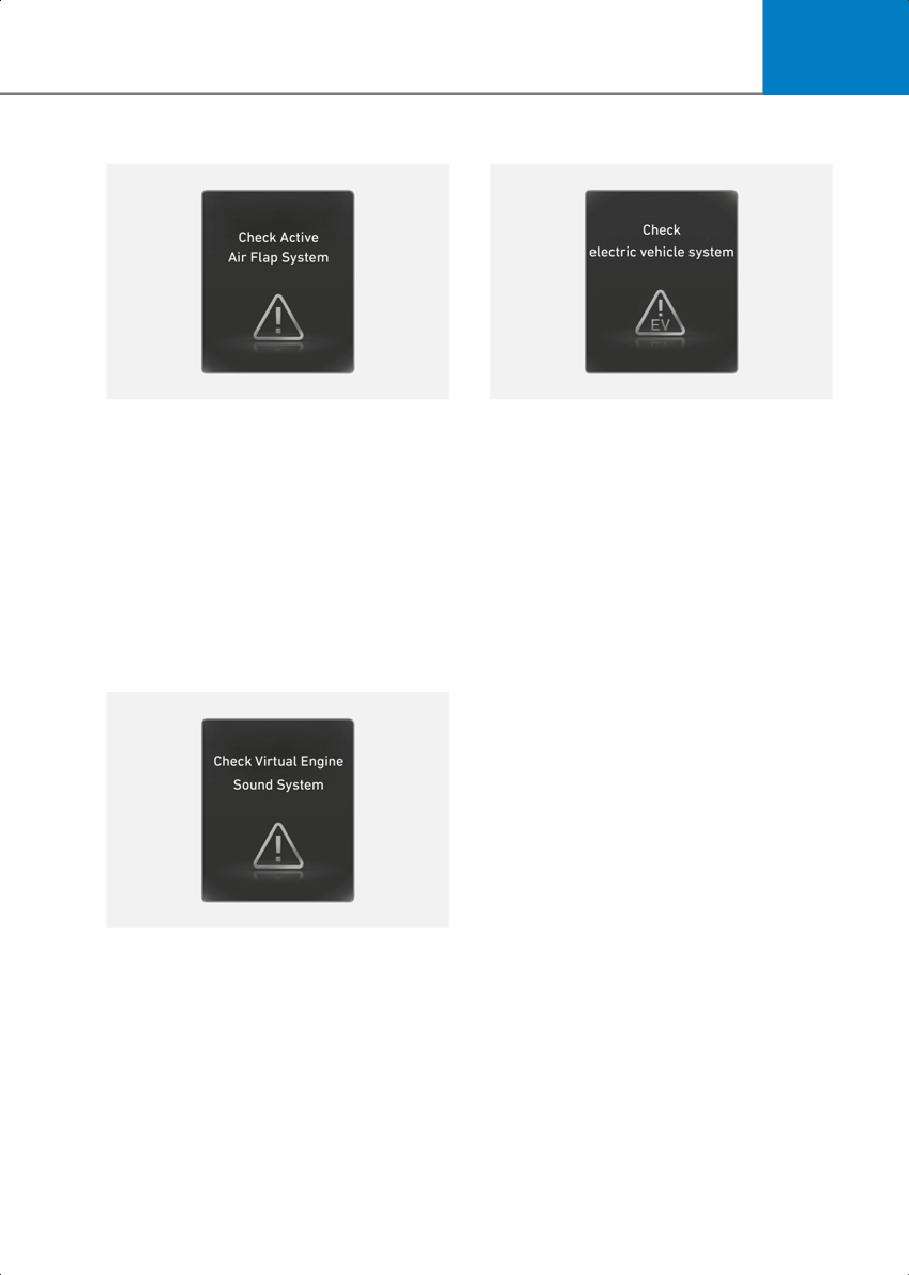
4
Check active air flap system
Check electric vehicle system
OOSEV040510L
OOSEV040513L
This warning message is displayed in the
This warning message is displayed when
following situations:
there is a problem with the electric
vehicle control system.
• There is a malfunction with the actuator
flap
Refrain from driving when the warning
message is displayed.
• There is a malfunction with the actuator
air flap controller
In this case, have the vehicle inspected by
an authorized HYUNDAI dealer.
• The air flap does not open
When all of the above conditions are
fixed, the warning will disappear.
Check virtual engine sound system
OOSEV040512L
This message is displayed when there is a
problem with the Virtual Engine Sound
System (VESS).
In this case, have the vehicle inspected by
an authorized HYUNDAI dealer.
4-23
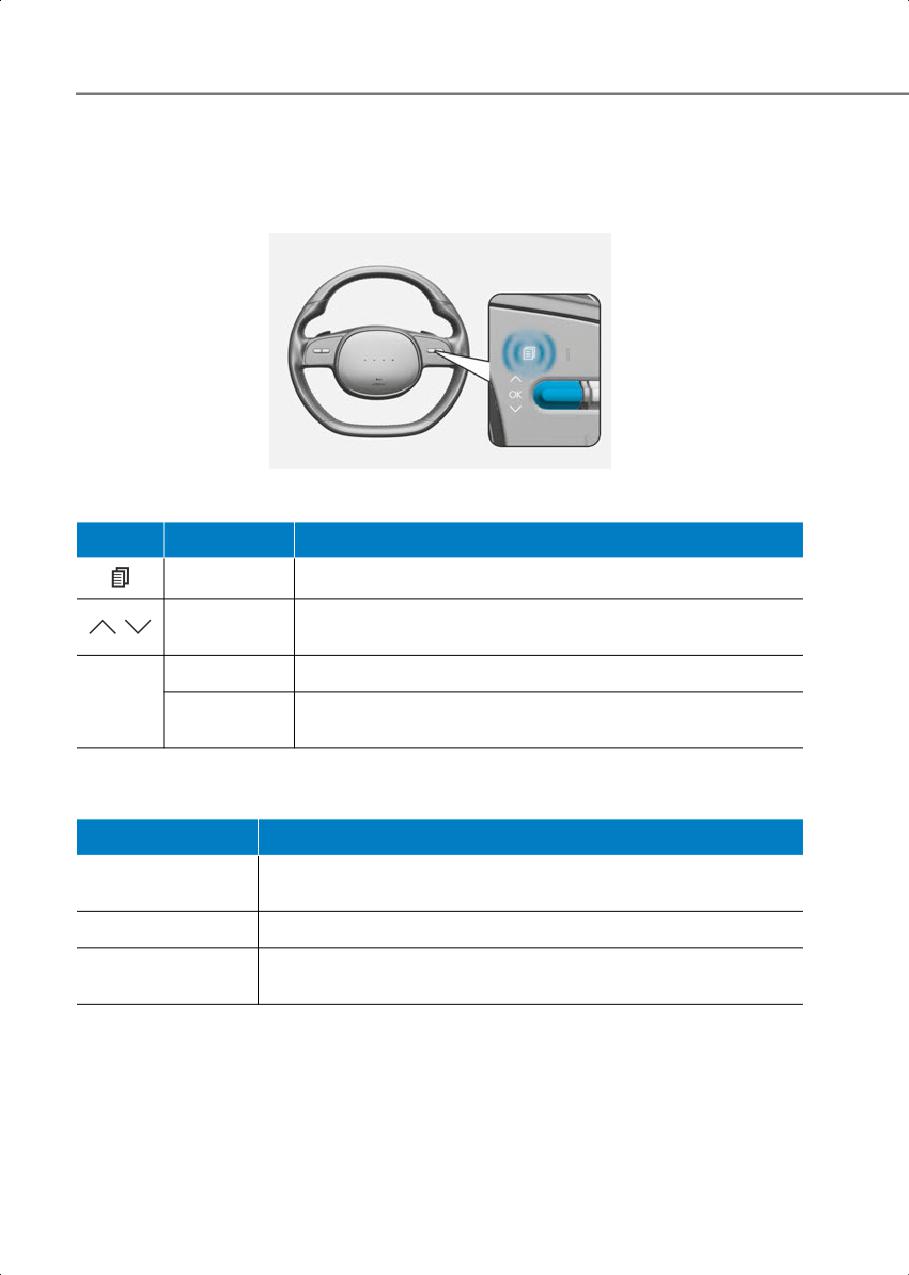
Instrument Cluster
Cluster Display
Cluster Display Control
ONE1041018
The cluster display modes can be changed by using the control switches.
Switch
Operation
Function
Press
MODE button for changing View modes
UP, DOWN switch for changing items in Utility view and Option
,
Press
menu
Press
SELECT/RESET switch for entering Option menu
OK
SELECT/RESET switch for retrieving assist information or
Press and hold
resetting the selected item
View Modes
View modes
Explanation
Driving Assist view displays the status of the vehicle’s Driver
Driving Assist
Assistance systems.
Turn by Turn
Turn By Turn view displays the state of the navigation.
Utility view displays driving information such as the trip distance,
Utility
electric energy economy and etc.
The information provided may differ depending on which features are applicable to
your vehicle.
4-24
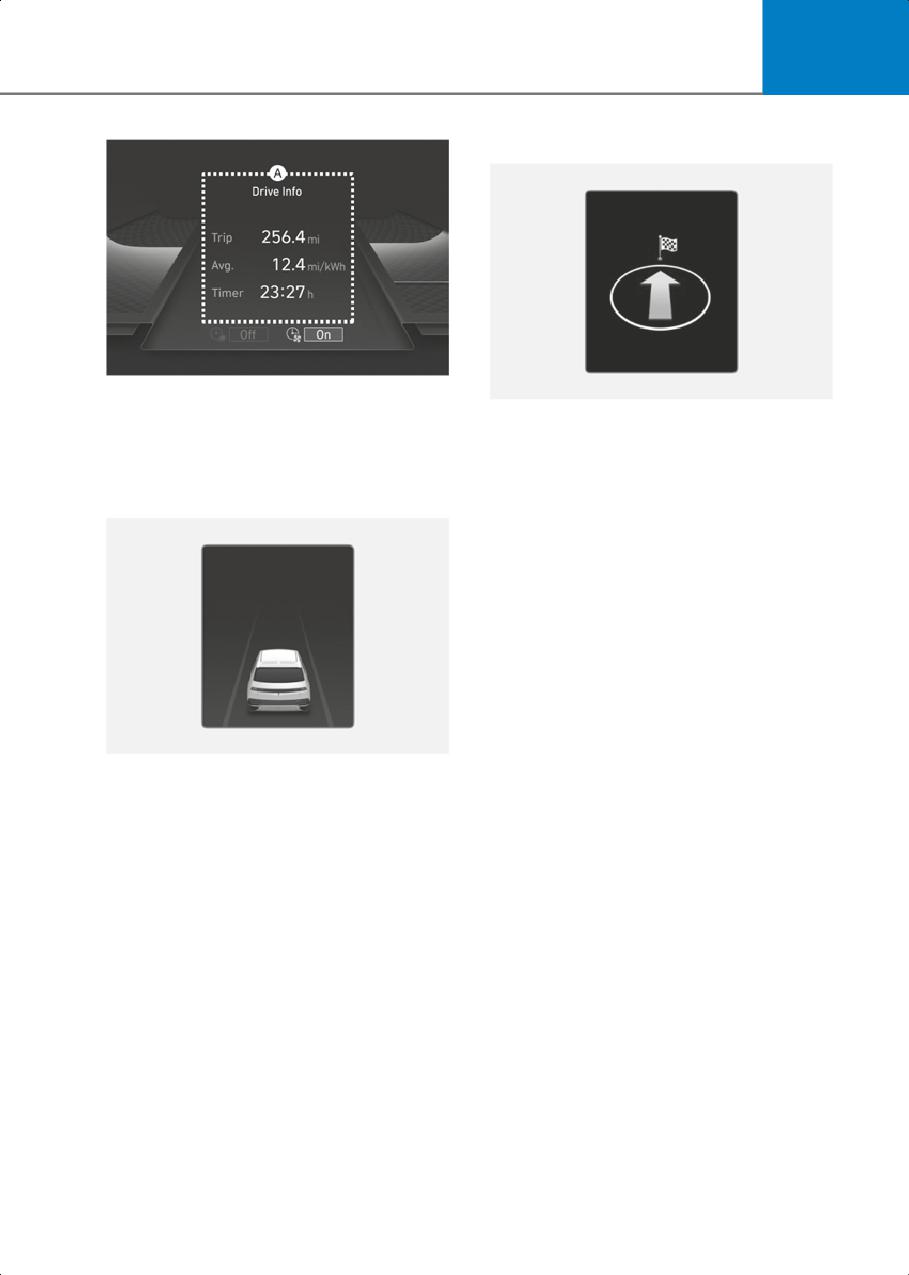
4
Turn By Turn (TBT) view
ONE1041019N
Driving Assist, Turn by Turn, Utility view
OIK040085L
modes are displayed in the center (A) of
Turn-by-turn navigation, distance/time to
the instrument cluster.
destination information is displayed when
Turn by Turn view is selected.
Driving Assist view
ONE1041006
The status of Manual Speed Limit Assist,
Smart Cruise Control, Lane Following
Assist, Highway Driving Assist, etc., is
displayed when Driving Assist view is
selected.
For more details, refer to each function
information section in chapter 7.
4-25
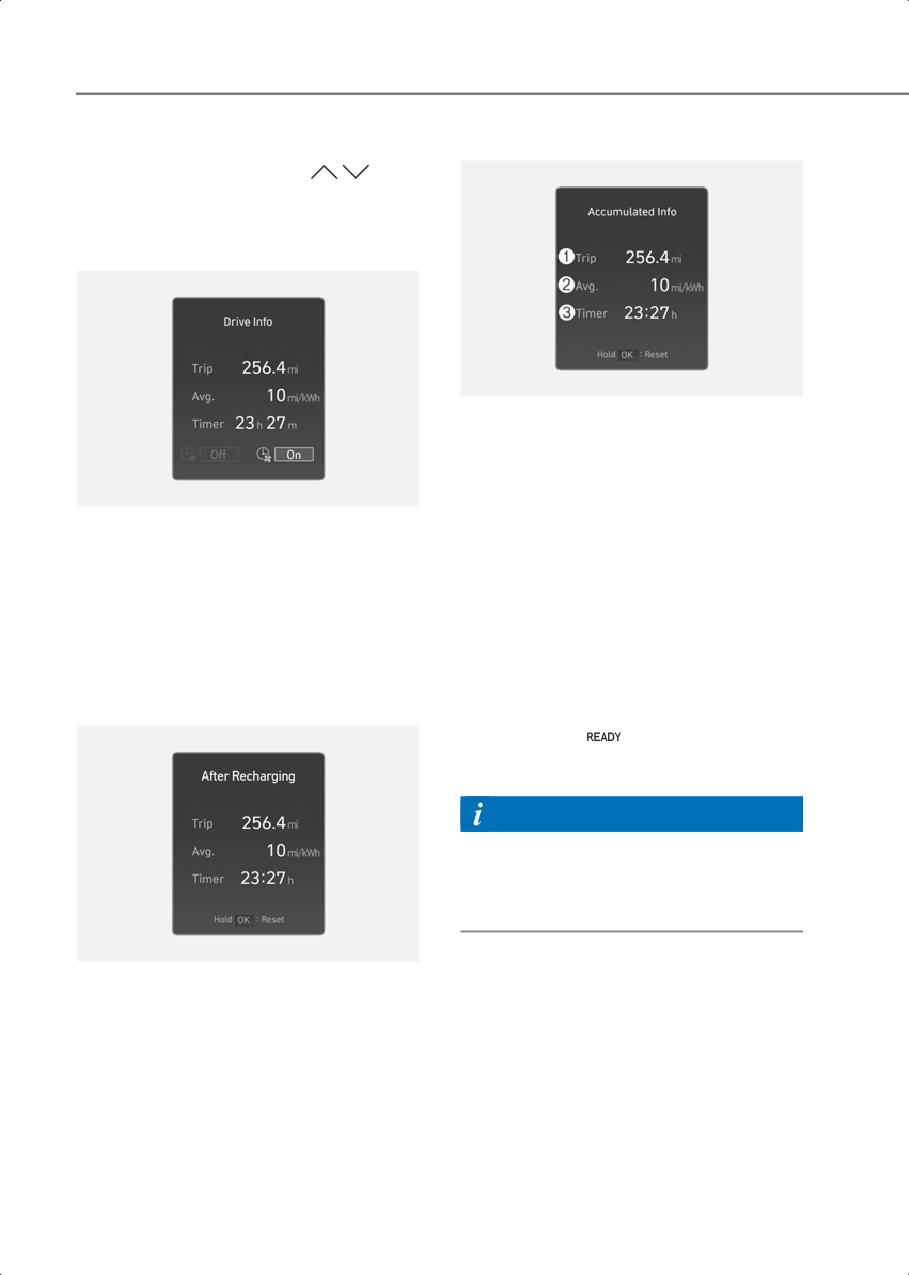
Instrument Cluster
Utility view
Accumulated info
In the Utility view, using the
,
(UP,
DOWN) switch, you may change through
items in the following order.
Drive info
ONE1041046N
This display shows the accumulated trip
distance (1), the average energy
consumption (2), and the total driving
time (3).
ONE1041047N
The information is accumulated starting
Trip distance, average electric energy
from the last reset.
economy and total driving time are
To manually reset the information, press
displayed.
and hold the OK button when viewing the
The driver’s door is opened after turning
Accumulated driving info. The trip
off the vehicle or the vehicle is turned on
distance, the average energy
after 3 minutes have passed, the Drive
consumption, and total driving time will
Info screen will reset.
reset simultaneously.
The accumulated driving information will
After Recharging
continue to be counted while the vehicle
is in the ready (
) mode (for example,
when the vehicle is in traffic or stopped at
a stop light).
Information
The vehicle must be driven for a minimum
of 0.19 miles (300 meters) since the last
ignition key cycle before the accumulated
driving information is recalculated.
ONE1041064N
Trip distance, total driving time and
average energy consumption after the
vehicle has been recharged are displayed.
To reset manually, press the OK button on
the steering wheel for more than 1 second
when ‘After recharging’ is displayed.
4-26
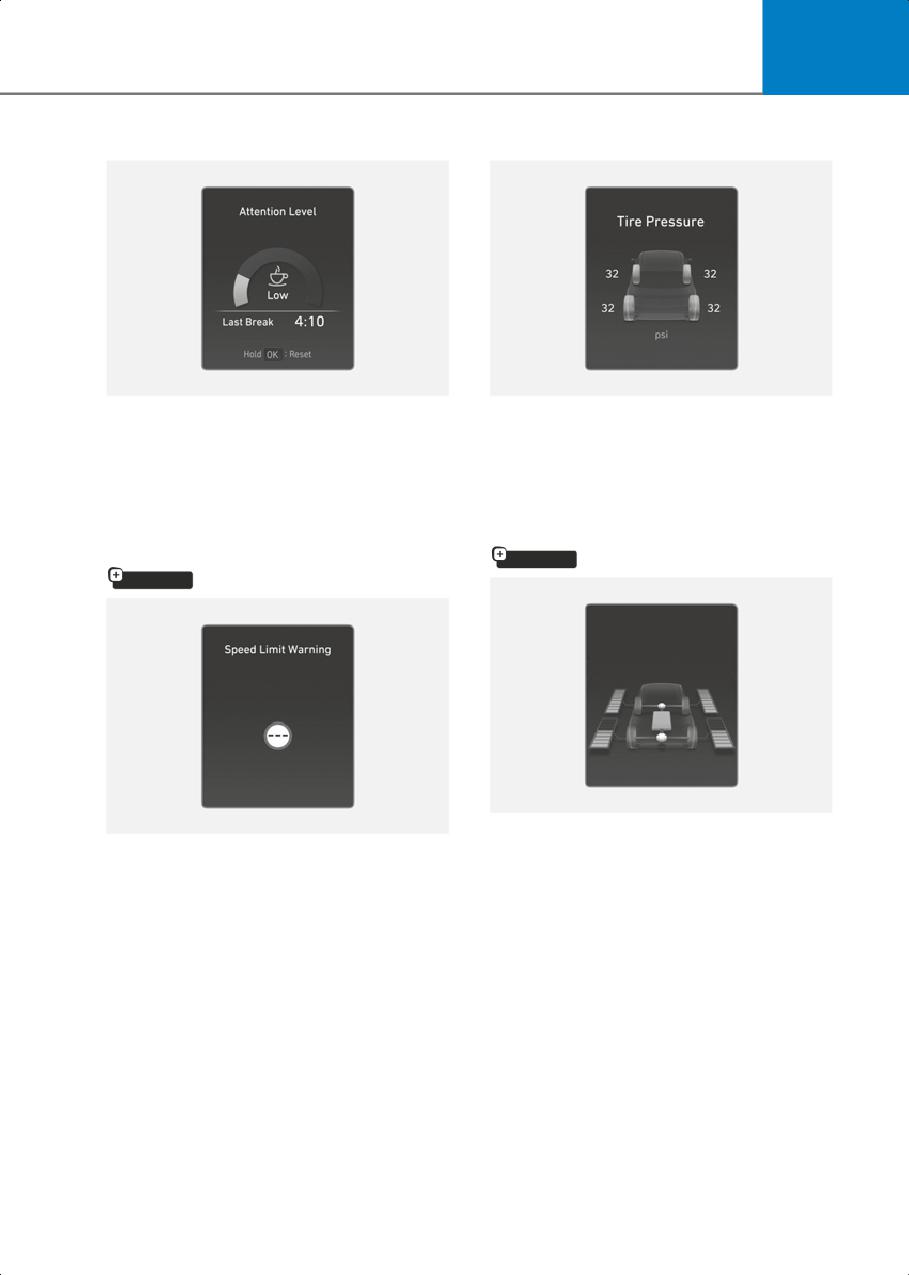
4
Attention level
Tire pressure
ONE1041059L
ONE1041010L
The driver’s attention level is shown
The tire pressure of each tire is displayed.
based on the driver’s driving pattern.
For more details, refer to “Tire Pressure
For more details, refer to “Driver
Monitoring System (TPMS)” section in
Attention Warning (DAW)” section in
chapter 8.
chapter 7.
Energy flow / Driving force distribution
Speed limit warning
if equipped
if equipped
ONE1041011
ONE1041038L
• The electric vehicle system informs the
The driver can monitor the information
drivers its energy flow in various
provided from Intelligent Speed Limit
operating modes.
Assist.
• The distribution status of the driving
For more details, refer to “Intelligent
power of the front and rear wheels are
Speed Limit Assist (ISLA)” section in
displayed when Auto AWD mode is
chapter 7.
activated.
For more details, refer to “All Wheel Drive
(AWD)” section in chapter 6.
4-27