Hyundai Santa Fe (2006 year). Manual - part 738
MANUAL TRANSAXLE SYSTEM
MTA -9
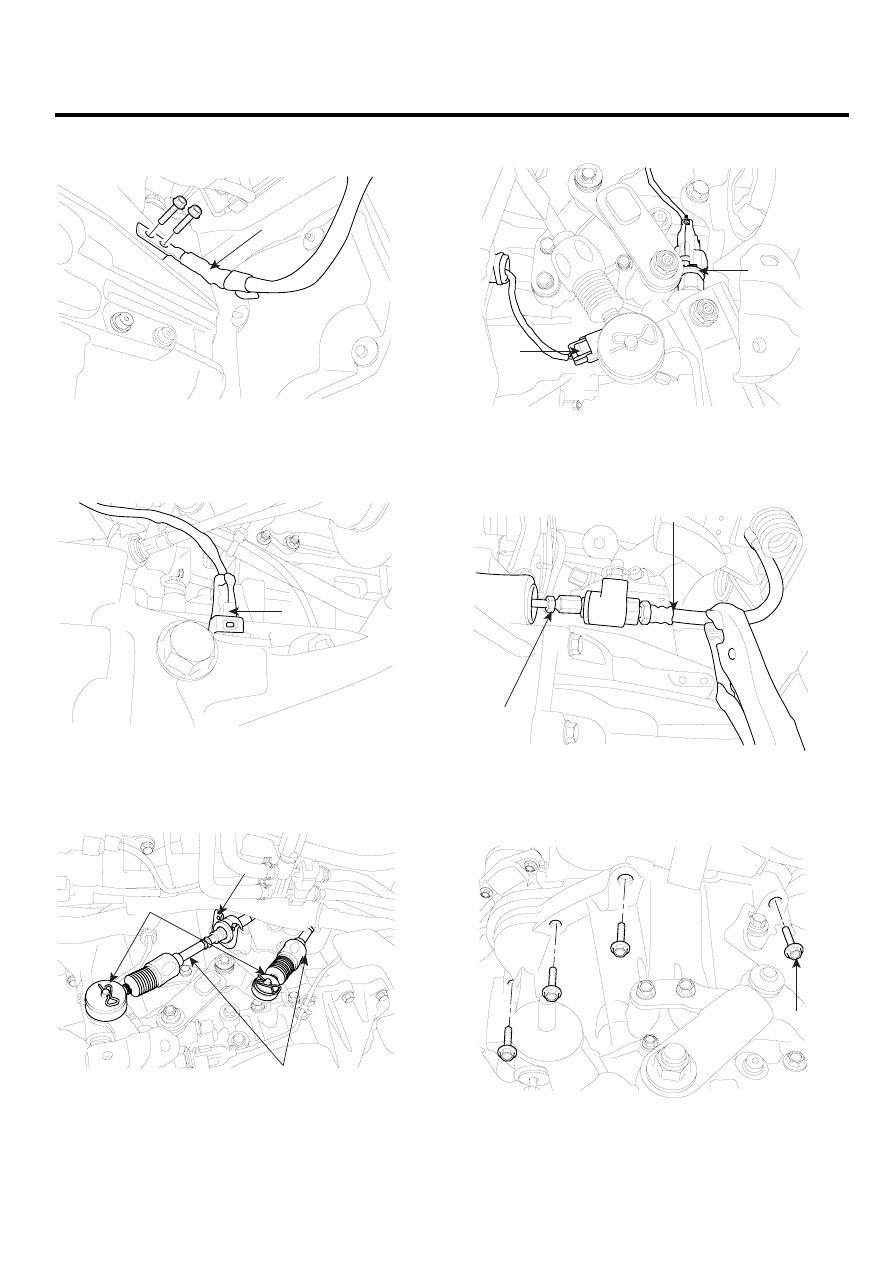
7.
Remove the ground wire (A) from the transaxle case.
A
SCMMT6006D
8.
Remove the vehicle speed sensor connector (A).
A
SCMMT6007D
9.
Remove the control cable assemblies(A) by removing
the snap pins(B) and clips(C).
A
B
C
SCMMT6008D
10. Disconnect the "N" (A) and the "R" (B) position switch.
A
B
SCMMT6009D
11. Remove C.S.C (Concentric Slave Cylinder) tube(A)
which is being clamped by loosening the nut(B).
A
B
SCMMT6010D
12. Remove the four mounting bolts(A) of upper part of
the transaxle.
A
SCMMT6011D