Hyundai Santa Fe (2006 year). Manual - part 138
AUDIO SYSTEM
BE -13
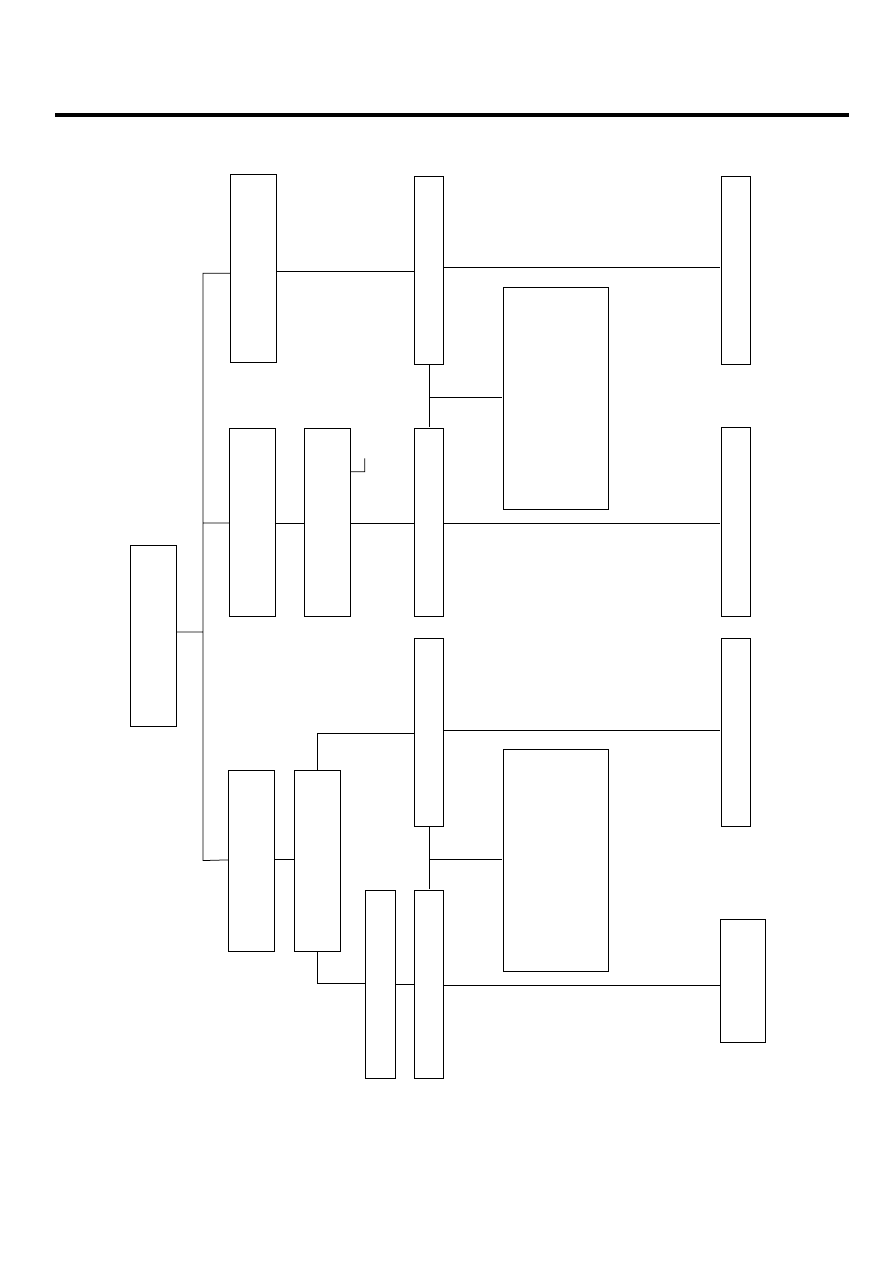
CHART 3
Cassette player
Dead
Check inside tape
door for obstruction
Remove obstruction
Play test tape
Play test tape
INFORM CUSTOMER
1. To use good quality tape.
2. Don't put anything inside
tape door except tape
3. Don't use C-120 type tape
Replace radio unit
Remove unit
for repair
Play test tape
Inspect by using test tape
INFORM CUSTOMER
1. To use good quality tape.
2. To clean tape head and
capstan at intervals of no
more than 100 hours
Replace radio unit
Replace radio unit
Clean tape head and
capstan
Low sound or poor
sound quality
Will not accept
or eject tape
Use a cotton swab dipped
in isopropyl alcohol (refer
to owner's manual)
Not O.K.
O.K.
O.K.
Not O.K.
O.K.
Not O.K.
Not O.K.
Not O.K.
ETBF001E