Hyundai Santa Fe (2006 year). Manual - part 117


  Index      Hyundai     Hyundai Santa Fe - service repair manual 2006 year


Search            


Content   ..  115  116  117  118   ..


Hyundai Santa Fe (2006 year). Manual - part 117


EXTERIOR

BD -51

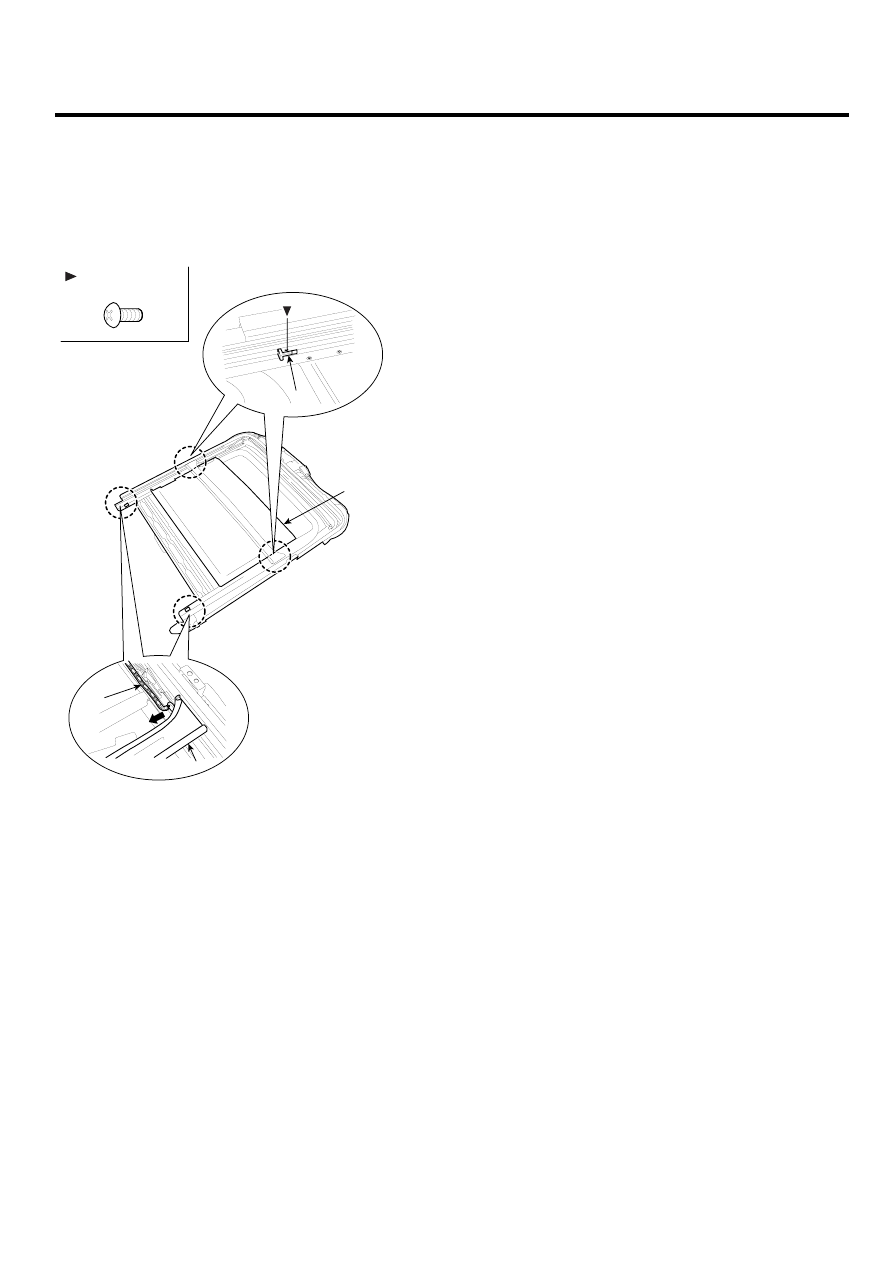
SUNSHADE AND DRIP RAIL REPLACEMENT

1.

Remove the sunroof assembly. (See page BD- 49)

2.

Remove the drip link (A) and sunshade stopper (B).

3.

Remove the sunshade (C) and drip rail (D).

C

: Screw Locations, 1

B

A

D

ESBF171D

4.

Installation is the reverse of removal.

BD -52

BODY (INTERIOR AND EXTERIOR)

ADJUSTMENT

EC9DFFD3

ON-VEHICLE INSPECTION

INSPECT SUNROOF GLASS ALIGNMENT

1.

Start the engine and check the operating time of the
sunroof (A).

Operating time: Approx. 5 secs.

A

ESKE007B

2.

Check for abnormal noise or bending during opera-
tion.

3.

With the sunroof fully closed, check for water leakage.

4.

The roof panel (A) should be even with the glass (B)
weatherstrip (C), to within the standard value "E" all
the way around. If not, make the following adjustment.

Standard value "E"
Front edge : 0 ~ 1.4mm
Rear edge : 0 ~ 1.4mm

C

B

A

SCMBD6190L

5.

If the position is not as specified, lightly loosen the
glass adjusting screw (A) to adjust the glass height
and tighten it.

Tightening torque :
2.0 ~ 3.9N.m (0.2 ~ 0.4kgf.m, 1.4 ~ 2.9 lbf.ft)

A

A

KSBF170C

6.

Check for overlap between the sunroof weatherstrip
(A) and the roof panel (B).

Standard value: 0.3mm

B

A

SCMBD6518L

EXTERIOR

BD -53

HOW TO INITIALIZE MOTOR

1.

Check that the glass has been installed.
-

Finished height adjustment.

2.

Push the up switch. (Keep on pushing the switch)
-

the slide moved 5mm forward after 15 seconds.

- Before moving the slide -

- After moving the slide -

ESBF171M

3.

After moving the slide 5mm forward, turn OFF the
switch and push the UP switch (Keeping on pushing
the switch with continuous operation)
-

If the operation above is normal condition, the
sunroof once and closes.

4.

When the sunroof is closed completely, turn OFF the
UP switch initialize the motor completely.

WHEN TO INITIALIZE THE MOTOR

1.

First operation the vehicle after manufacture it.

2.

Initial value is erased or damaged because of short
power electric discharge during operation.

3.

After using the manual handle.

OPERATING THE SUNROOF EMERGENCY HANDLE

1.

Use the sunroof emergency handle to close and open
the sunroof manually for the following case only.
-

To close the sunroof before driving a vehicle in a
rainy day or on the highway if the sunroof cannot
be closed due to failure of the sunroof motor or
controller.

2.

Operating method
-

Remove the overhead console

-

Push the emergency handle up into the hexago-
nal drive (A) of the sunroof motor. You must push
hard enough to disengage the motor clutch; oth-
erwise the emergency handle will slip due to in-
complete fit in the motor.

-

Carefully turn the emergency handle clockwise to
close the sunroof.

-

After closing the sunroof, wiggle the handle back
and forth as you remove the tool from the motor,
to ensure the motor clutch reengages.

-

A 5mm hex socket may be used in place of the
emergency handle, with a” Speeder” type
handle.

CAUTION

Do not use power tools to operate the sunroof.
Damaged to the components may occur.

A

KSBF171N

BD -54

BODY (INTERIOR AND EXTERIOR)

MIRROR

REPLACEMENT

E9EDEB42

OUTSIDE REAR VIEW MIRROR REPLACEMENT

NOTE

-

When prying with a flat-tipped screwdriver, wrap
it with protective tape, and apply protective tape
around the related parts, to prevent damaged.

-

Put on gloves to protect your hands.

1.

Remove the quadrant inner cover (A).

A

SCMBD6027D

2.

After disconnecting the connector (A), remove the out-
side rear view mirror (B).

B

A

: Nut Locations, 3

6.4~10.8 N.m
(0.7~1.1 Kgf.m,
4.7~8.0 lbf.ft)

SCMBD6095L

3.

Installation is the reverse of removal.

INSIDE REAR VIEW MIRROR REPLACEMENT

1.

Push the inside rear view mirror base (A) down to
remove to inside rear view mirror assembly (B).

Spring

A

B

A

LSIE080D

2.

Installation is the reverse of removal.


Content   ..  115  116  117  118   ..