Hyundai Santa Fe (2006 year). Manual - part 107
EXTERIOR
BD -11
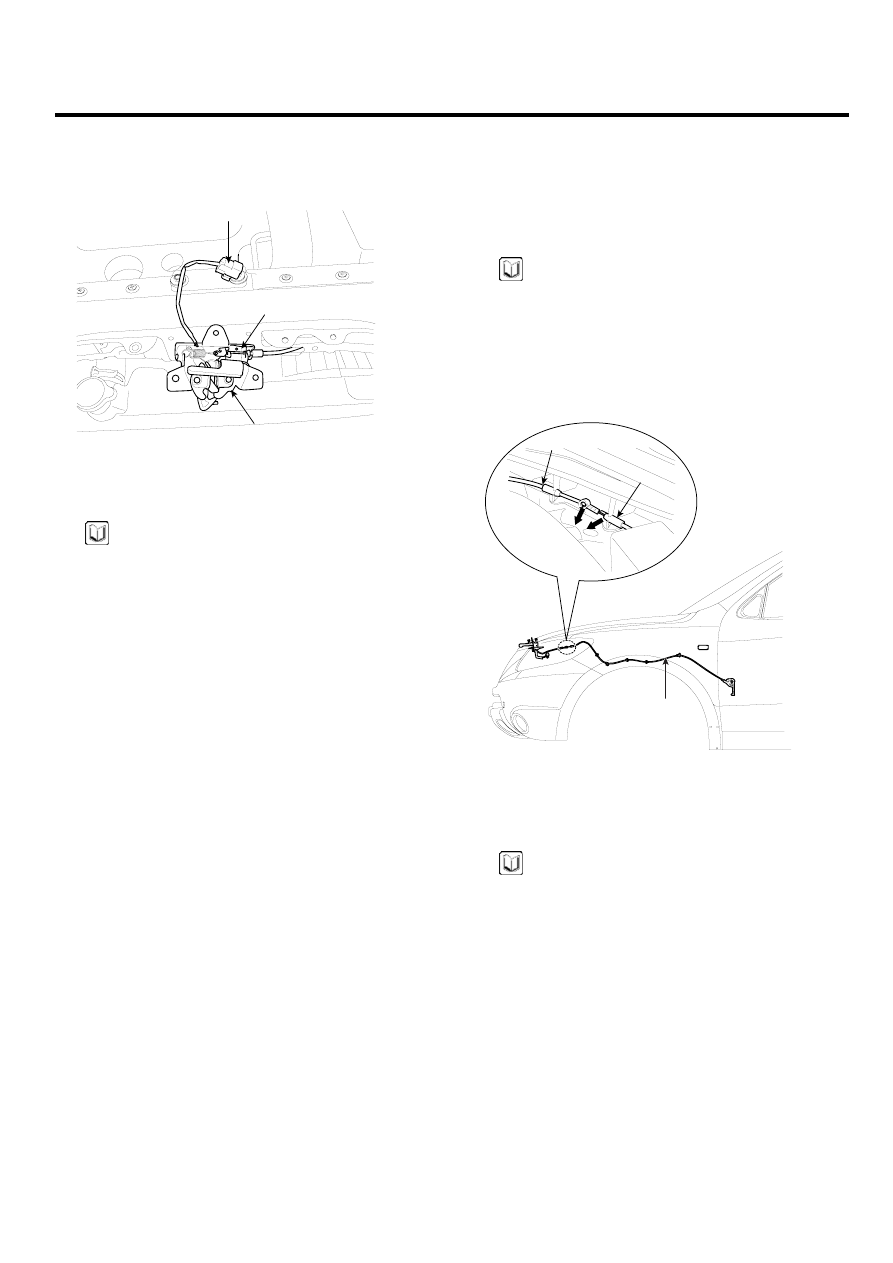
6.
Disconnect the connector (C).
7.
Remove the release cable (A).
C
A
B
SCMBD6011D
8.
Installation is the reverse of removal.
NOTE
-
Make sure the hood latch cable is connected
properly.
-
Make sure the hood locks securely.
HOOD LATCH CABLE REPLACEMENT
1.
Remove the following items.
-
Hood latch. (See page BD- 10)
-
Hood release handle. (See page BD- 9)
-
Wheel guard. (See page BD- 43)
NOTE
-
Take care not to bend the cable.
2.
Disconnect the hood latch cable (A) and release cable
(B).
3.
Remove the hood latch cable (C).
C
B
A
SCMBD6054D
4.
Installation is the reverse of removal.
NOTE
-
Make sure the hood latch is connected properly.
-
Replace any damaged clips.