Honda CR-V (2022 year). Manual in english - page 17
 

  Index      Manuals     Honda CR-V (2022 year). Manual in english


Search            copyright infringement  


Content      ..     15      16      17      18     ..


Honda CR-V (2022 year). Manual in english - page 17


269

uu

Interior Convenience Items

u

Storage Items

Continued

Co
ntrols

Storage Items

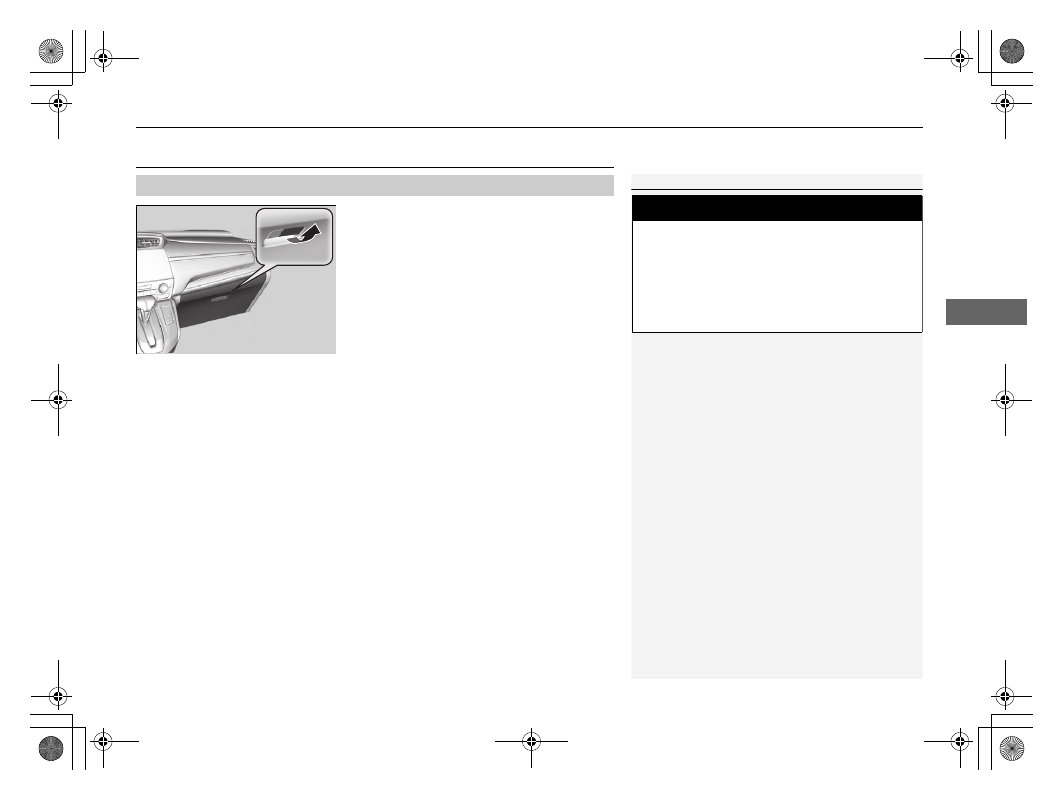
Pull the handle to open the glove box.

Glove Box

1

Glove Box

3

WARNING

An open glove box can cause serious injury 
to your passenger in a crash, even if the 
passenger is wearing the seat belt.

Always keep the glove box closed while 
driving.

270

uu

Interior Convenience Items

u

Storage Items

Co
ntrols

To open, pull the knob. You can change the 
position of the tray by sliding it forward or 
back.

Removing the tray

1.

Slide the tray back.

2.

Lift the edge of the tray up slightly, then 
pull it out.

Centre Console Box

Knob

Tray

271

uu

Interior Convenience Items

u

Storage Items

Continued

Co
ntrols

Storing the tray:
Line the tray up with the slots located at the 
rear section of the console box, and then push 
it down all the way until it is in the locked 
position.

Slot

272

uu

Interior Convenience Items

u

Storage Items

Co
ntrols

When putting the floor lid in the 
bottom position

This is convenient when storing a tall item.

1.

Pull the strap to open the luggage floor lid.

2.

Pull the strap upwards to lift the floor lid.

3.

Pull the floor lid towards you until it 
disengages from the support rods.

4.

Push the far end of the floor lid down to the 
bottom under the support rod, then lower 
the other end.

Luggage Storage Area

Models without third row seat

Support Rod

273

uu

Interior Convenience Items

u

Storage Items

Continued

Co
ntrols

When putting the floor lid in the upper 
position

By pushing the third row seat forward and 
putting the floor lid in the upper position, you 
can store bulkier items in the luggage area.

1.

Folding down the third row seat.

2

Folding Down the Third Row Seat


P. 258

2.

Pull the strap to open the luggage floor lid.

3.

Pull the floor lid towards you until it 
disengages from the support rods.

4.

Put the floor lid in the upper position, then 
slide it to the end.

Strap

Models with third row seat

274

uu

Interior Convenience Items

u

Storage Items

Co
ntrols

Pull up the luggage area lower floor lid.

Luggage Floor Box

Models with third row seat

Luggage Floor Box

Continued

275

uu

Interior Convenience Items

u

Storage Items

Co
ntrols

Front seat beverage holders

Are located in the console between the front 
seats.

Front door side beverage holders

Are located on the both of front door side 
pockets.

Second row seat beverage holders

Fold the armrest down to use the second row 
seat beverage holders.

Beverage Holders

1

Beverage Holders

NOTICE

Spilled liquids can damage the upholstery, carpeting, 
and electrical components in the interior.

Be careful when you are using the beverage holders. 
Hot liquid can scald you.

Models without third row seat

276

uu

Interior Convenience Items

u

Storage Items

Co
ntrols

Rear door side beverage holders

Are located on the both of rear door side 
pockets.

Third row seat beverage holders

Pull up the beverage holder to use it.
You can adjust the beverage holder angle 
depending on size of the beverage.

Models with third row seat

Beverage holder

Models with third row seat

Continued

277

uu

Interior Convenience Items

u

Storage Items

Co
ntrols

There are coat hooks on the rear left and right 
grab handles. Pull it down to use it.

There are coat hooks on the left and right 
door pillars.

Coat Hook

1

Coat Hook

The coat hooks are not designed for large or heavy 
items.

uu

Interior Convenience Items

u

Storage Items

278

Co
ntrols

The tie-down anchors on the luggage area 
floor can be used to install a net for securing 
items.

The luggage hooks on both sides of the 
luggage area can be used to hang light items.

Tie-down Anchors

*

1

Tie-down Anchors

*

Do not let anyone access items in the luggage area 
while driving. Loose items can cause injury if you have 
to brake hard.

Anchors

Anchors

Luggage Hooks

*

1

Luggage Hooks

*

NOTICE

Do not hang a large object or an object that weighs 
more than 3 kg on the luggage hooks. Hanging 
heavy or large objects may damage the hooks.

Hook

* Not available on all models

Continued

279

uu

Interior Convenience Items

u

Storage Items

Co
ntrols

To open the sunglasses holder, press and 
release the indent. To close, press it again until 
it latches.

You can store eyeglasses and other small 
items in this holder.

Conversation mirror

*

The sunglasses holder comes with a mirror. 
Open the sunglasses holder fully, then push it 
back to the first detent.

You can use the mirror to view the rear seats.

Sunglasses Holder

1

Sunglasses Holder

Keep the holder closed while driving except when 
accessing stored items.

Press

* Not available on all models

uu

Interior Convenience Items

u

Storage Items

280

Co
ntrols

The luggage area cover can be used to 
conceal items in the luggage area and protect 
them from direct sunlight.

To extend:

Lift up on the handle at the centre edge of the 
cover to unhook each end, then pull the cover 
rearward and clip the mounting rods in the 
hooks at both sides of the tailgate opening.

Luggage Area Cover

*

1

Luggage Area Cover

*

Do not let anyone access items in the luggage area 
while driving. Loose items can cause injury if you have 
to brake hard.

Do not stack objects higher than the top of the seat 
in the luggage area. They could block your view and 
be thrown about the vehicle during a sudden stop.

To prevent luggage area cover damage:

Do not place items on the luggage area cover.

Do not put weight on the luggage area cover.

Be sure that each mounting rod sets in its respective 
retention groove when you retract the rear luggage 
cover. If they are not set in the grooves, the rods may 
rattle as they contact the surrounding surfaces.

Handle

Mounting Rod

Hook

* Not available on all models

281

uu

Interior Convenience Items

u

Storage Items

Co
ntrols

To retract:

Slip the rods out of the hooks, then slowly roll 
it back until it is completely retracted.

To remove:

Push either end of the housing inward, then 
lift it out of its position.

Mounting Rod

Hook

282

uu

Interior Convenience Items

u

Other Interior Convenience Items

Co
ntrols

Other Interior Convenience Items

The accessory power sockets can be used when the ignition switch must be in 
ACCESSORY 

(

q

 or ON 

(

w

*1

.

Centre console box

Slide the tray back and open the cover to use 
it.

*1: Models with the keyless access system have an 

ENGINE START/STOP

 button instead of an 

ignition switch.

Accessory Power Sockets

1

Accessory Power Sockets

NOTICE

Do not insert an automotive type cigarette lighter 
element. This can overheat the accessory power 
socket.

The accessory power socket is designed to supply 
power for 12-volt DC accessories that are rated 180 
watts (15 amps) or less.

To prevent battery drain, only use the accessory 
power socket with the engine is running.

When the accessory power socket is not in use, close 
the cover to prevent any small foreign objects from 
getting into the accessory power socket.

283

uu

Interior Convenience Items

u

Other Interior Convenience Items

Continued

Co
ntrols

Luggage area

Open the cover to use it.

Models without third row seat

Models with third row seat

uu

Interior Convenience Items

u

Other Interior Convenience Items

284

Co
ntrols

To use the wireless charger, the power mode must be in ACCESSORY or ON.
Charge any devices compatible with Qi wireless charging on the area indicated by 
the 

 mark as follows:

1.

To turn the system on and off, press and 
hold the 

 (power) button.

u

When the system is activated, the green 
indicator light comes on.

2.

Place the device you want to charge on the 
charging area.

u

The system will automatically start 
charging the device, and the amber 
indicator light will come on.

u

Make sure that the device is compatible 
with the system, and placed with the 
chargeable side in the centre of the 
charging area.

3.

When charging is completed, the green 
indicator light will come on.

u

Depending on the device, the amber 
indicator light will stay on.

Wireless Charger

*

1

Wireless Charger

*

This system consumes a lot of power. Do not use the 
system for a long time when the engine is not 
running. This may weaken the battery, making it 
difficult to start the engine.

When using the wireless charger, check the user’s 
manual that came with the compatible device you 
want to charge.

“Qi” and 

 marks are the registered trademarks 

owned by Wireless Power Consortium (WPC).

3

WARNING

Metal objects between the charge pad and 
the device to be charged will get hot and 
can burn you.

Always remove foreign objects from the 
charge pad before charging the device.

Be sure the surface is clear of dust and 
other debris before charging.

Do not spill liquids (i. e. water, drinks, 
etc.) on the charger and the device.

Do not use oil, grease, alcohol, benzine or 
thinner for cleaning the charge pad.

Do not cover the system with towels, 
clothing, or other objects while charging 
etc.

Avoid spraying aerosols which may come 
in contact with the charge pad surface.

Amber Indicator

Charging Area

 (Power) Button

Green Indicator

* Not available on all models


Content      ..     15      16      17      18     ..