Geely FC. Manual part - 19


  Главная      Geely     Geely FC. Workshop Manual year 2008


поиск по сайту            


содержание   ..  13  14  15  16  17  18  19  20  ..


Geely FC. Manual part - 19


Coolant

Replacement

1. Discharge engine coolant.

Warning: when the temperature of engine and radiator is high, do not remove radiator cap to

avoid being scalded, because coolant and steam will spurt under high pressure.

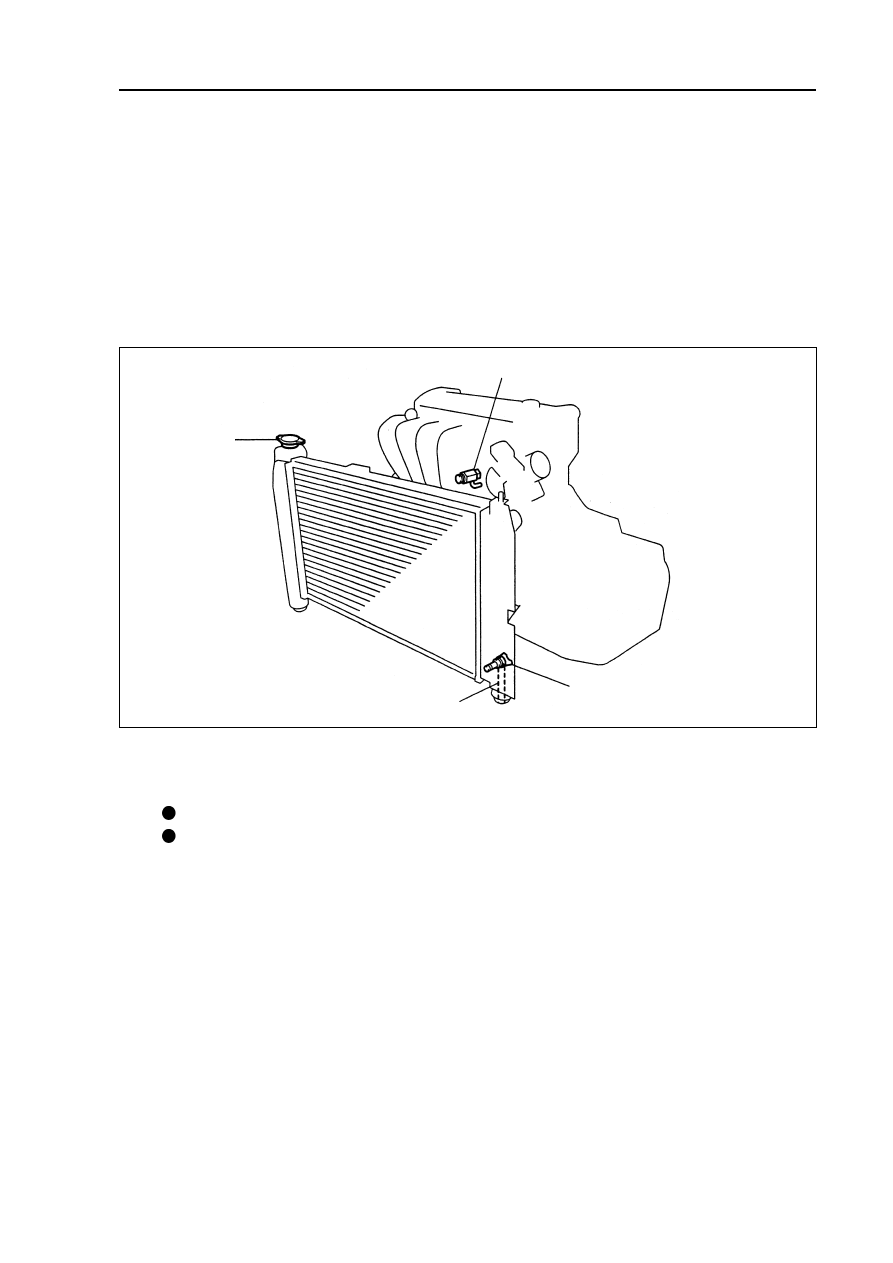
(a) Remove radiator cap.

(b) Open radiator drain valve and engine drain valve.

Cooling  - Coolant

2. Refill engine coolant.

(a) Lock 2 drain valves and pour coolant into radiator until it is full.

Hints:

Press radiator water inlet hose and outlet hose with hands several times.

If coolant level is too low, please refill coolant again.

(b) Screw down radiator cap.

(c) Pour coolant into expansion tank until the level is up to “FULL” mark line.

(d) Run engine with vehicle warning up until thermostat valve is opened.

Hint:During vehicle warning up, press radiator water inlet hose and outlet hose with hands

several times.

(e) Engine flames out until coolant temperature falls to “cold”. Then open radiator cap and check coolant

level.

(f) If coolant level is too low, please perform the above steps again.

(g) If coolant level is not too low, please adjust expansion tank coolant level.

3. Check there is leakage with coolant.

(a) Refill engine coolant to radiator, and install radiator cap tester.

(b) Pressurize radiator to 118kPa, and check there is leakage.

73

Engine drain valve

Radiator drain valve

Radiator cap

Drain pipe

Lubrication

Lubricating system

On-vehicle inspection

1. Check oil level.

During engine warming up and after it flames out for 5 minutes, check oil level, and the level should

be between two marks on oil dipstick at the moment.If oil level is too low, check there is leakage, and

refill oil up to upper mark on oil dipstick.

Note: oil level should not be above upper mark on oil

dipstick.

2. Check oil quality.

(a) Check there is deterioration, water penetration, color

change or thinning with oil.

(b) If oil quality becomes poor, please replace with new oil.

Hint: oil grades:  API, SH, SJ, SG grade oil or ILSAC

multigrade oil. Recommended viscosity is

shown as below.

The temperature increases from left to right.

3. Remove oil pressure alerter assembly.

(a) Uncouple oil pressure alerter joint.

(b) Install oil pressure alerter with special tool.

4. Install oil pressure gauge.

Install oil pressure gauge.

5. Warm up vehicle.

6. Check oil pressure.

Oil pressure:

7. Install oil pressure alerter.

(a) Coat adhesive on 2

nd

 or 3

rd

 circle thread of oil pressure

alerter.

Adhesive: anaerobic pipe thread sealing adhesive

1545 (Kesaixin 1545).

(b) Install oil pressure alerter with special tool.

Torque: 

m

(c) Connect oil pressure alerter joint.

8. Start engine and check there is leakage.

Lubrication  - lubricating system

Recommended viscosity (SAE)

Oil pressure alerter

Oil pressure gauge

Adhesive

74

Temperature range in forecasting next

oil replacement

Oil filter assembly

Replacement

Warning:

Long-term or repeat contacting mineral oil will cause decomposing of natural fat on skin, which

will result in dry and sensitive skin and skin rankling. Used oil has potential harm and may cause

carcinoma cutis.

When replacing engine oil, always wear protective clothes and gloves to avoid waste oil

penetrating, and reduce the frequency and time of skin contacting waster oil, and clean with

soapy water or clean water not with gasoline, thinner or solvent if skin contacts waste oil.

To protect environment, waste oil and oil filter must be abandoned at named place.

1. Remove engine right bottom shield.

2. Discharge engine oil.

3. Remove oil filter assembly [4G18-1012100].

Remove oil filter with special tool.

4. Install oil filter assembly.

(a) Check and clean oil filter junction plane.

(b) Coat oil seal of new oil filter with clean oil.

(c) Tighten oil filter with hands to the extent that oil seal

just touches fixing base.

(d) Tighten oil filter for another 3/4 circle with special tool.

5. Install oil drain plug [4G18-1009101].

Clean oil drain plug, and install it back after replacing oil drain plug gasket.

Torque:  

6. Refill engine oil.

7. Check there is oil leakage.

Lubrication  -  Oil filter assembly

Special tool

75

Special tool

3/4 circle

Lubrication  -  Oil pump assembly

Oil pump assembly

Replacement

1. Remove timing chain assembly (see Page 45).

2. Remove oil pump assembly [4G18-1011100].

Remove 5 bolts, oil pump and oil pump gasket.

3. Install oil pump assembly.

(a) Install new gasket on cylinder body.

(b) Align the guide groove of oil pump drive rotor with the key

on crankshaft, and slide the oil pump in.

(c) Install oil pump with 5 bolts.

Torque: 

76


содержание   ..  13  14  15  16  17  18  19  20  ..