Ford F-150 (2024 year). Manual in english - page 5
 

  Index      Manuals     Ford F-150 (2024 year). Manual in english


Search            copyright infringement  


Content      ..     3      4      5      6     ..


Ford F-150 (2024 year). Manual in english - page 5


SWITCHING THE REAR
INTERIOR LAMPS ON AND OFF

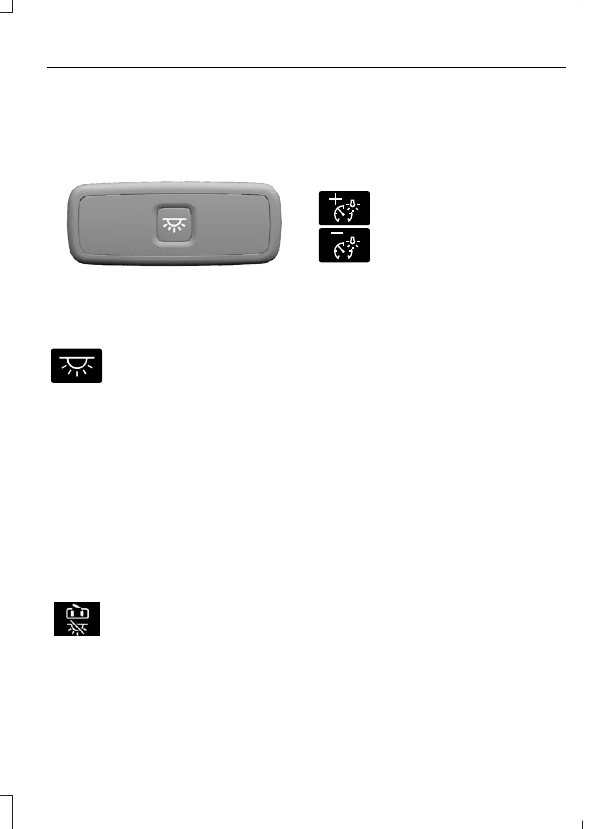
E281231

The rear interior lamps may be above the
rear seat or above the rear windows.

E259649

Press to switch the lamps on or
off.

Note:

If you switch the rear lamps on

through the overhead console, you cannot
switch them off with the rear lamp switch.

INTERIOR LAMP FUNCTION

WHAT IS THE INTERIOR LAMP
FUNCTION

The interior lamp function switches the
courtesy and door lamps on or off.

SWITCHING THE INTERIOR LAMP
FUNCTION ON AND OFF

Press to switch the interior lamp
function on and off.

Note:

The indicator lamp illuminates amber

when the door function is off.

ADJUSTING THE INSTRUMENT
PANEL LIGHTING
BRIGHTNESS

The instrument lighting dimmer buttons
are on the lighting control.

E291299

E296433

Repeatedly press one of the
buttons to adjust the brightness.

AMBIENT LIGHTING

 (IF EQUIPPED)

SWITCHING AMBIENT LIGHTING
ON AND OFF

1.

Press 

Settings

 on the touchscreen.

2. Press 

Vehicle Settings

.

3. Press 

Ambient Light

.

4. Switch 

Ambient Light

 on or off.

ADJUSTING AMBIENT LIGHTING

Drag the slider left or right.

INTERIOR LIGHTING –
TROUBLESHOOTING

INTERIOR LIGHTING –
FREQUENTLY ASKED QUESTIONS

Why do my courtesy lamps or
interior lamps turn off when I have
them switched on when I switch
my vehicle off?

The battery saver turns the courtesy
lamps and interior lamps off after a
short period of time after you switch
your vehicle off.

157

Interior Lighting

OPENING AND CLOSING THE
WINDOWS

WARNING: 

Do not leave children

or pets unattended in your vehicle and
do not let children play with the power
windows. Failure to follow this
instruction could result in personal injury
or death.

WARNING: 

When closing the

power windows, verify that they are free
of obstructions and make sure children
and pets are not in the proximity of the
window openings. Failure to follow this
instruction could result in personal injury
or death.

WARNING: 

If an obstruction is

detected, release the switch and reverse
the window immediately. Failure to
follow this instruction could result in
personal injury or death.

WARNING: 

Do not leave a key or

remote control unattended in the vehicle.
Children or pets could operate the power
windows and could become trapped in
a closing window. Failure to follow this
instruction could result in personal injury
or death.

Press the window control switch
to open the window.  Lift the
window control switch to close

the window.

Note:

The power windows operate with the

ignition on, and for several minutes after you
switch the ignition off or until you open a
front door.

To reduce wind noise or pulsing noise when
one window is open, slightly open the
opposite window.

One-Touch Open

 (If Equipped)

Fully press the window control switch and
release it.  Press again or lift it to stop the
window.

One-Touch Close

 (If Equipped)

Fully lift the window control switch and
release it.  Press again or lift it to stop the
window.

Resetting One-Touch Close

Carry out all steps within 30 seconds of
starting the sequence.

1.

Close the window.

2. Press and hold the window control

switch until the window is fully open.
Keep the window control switch
pressed for a few seconds.

3. Lift and hold the window control switch

until the window is fully closed. Keep
the window control switch held for a
few seconds.

4. Press and hold the window control

switch until the window is fully open.
Keep the window control switch
pressed for a few seconds.

5. Lift and hold the window control switch

until the window is fully closed. Keep
the window control switch held for a
few seconds.

Note:

Repeat the procedure if the window

does not close when you use one-touch.

Accessory Delay

The window switches remain operational
for several minutes when you switch the
ignition off or until you open either front
door.

158

Windows

GLOBAL OPENING

WHAT IS GLOBAL OPENING

You can use the remote control to open
the windows with the ignition off.

USING GLOBAL OPENING

1.

Press and release the unlock button on
the remote control.

2. Press and hold the unlock button on

the remote control.

3. Release the button when the windows

start to open.

Press the lock or the unlock button on the
remote control to stop global opening.

Note:

You can use global opening for a

short period of time when you unlock your
vehicle using the remote control.

SWITCHING GLOBAL OPENING ON
AND OFF

1.

Press 

Settings

 on the touchscreen.

2. Press 

Vehicle Settings

.

3. Press 

Windows

.

4. Switch 

Remote Open

 on or off.

WINDOW BOUNCE-BACK

WHAT IS WINDOW BOUNCE-BACK

The window stops and reverses if it detects
an obstruction when closing.

OVERRIDING WINDOW BOUNCE-
BACK

WARNING: 

If you override

bounce-back, the window does not
reverse if it detects an obstacle. Take
care when closing the windows to avoid
personal injury or damage to your
vehicle.

1.

Close the window until it reaches the
point of resistance and let it reverse.

2. Lift and hold the window control switch

within two seconds to override
bounce-back and close the window.
Bounce-back is now disabled and you
can close the window manually.

Note:

The window goes past the point of

resistance and you can fully close it.

Note:

If the window does not close, have

your vehicle checked as soon as possible.

LOCKING THE REAR WINDOW
CONTROLS - CREW CAB/
SUPERCAB

WARNING: 

When children and pets

are in the rear seat, use the power
window lockout button to prevent
accidental operation of the power
windows.

Press the window control switch
to lock or unlock the rear window
controls.  It illuminates when you

lock the rear window controls.

159

Windows

OPENING AND CLOSING THE
SLIDING WINDOWS

 (IF EQUIPPED)

WARNING: 

Do not leave children

or pets unattended in your vehicle and
do not let children play with the power
windows. Failure to follow this
instruction could result in personal injury
or death.

WARNING: 

When closing the

power windows, verify that they are free
of obstructions and make sure children
and pets are not in the proximity of the
window openings. Failure to follow this
instruction could result in personal injury
or death.

WARNING: 

If an obstruction is

detected, release the switch and reverse
the window immediately. Failure to
follow this instruction could result in
personal injury or death.

WARNING: 

Do not leave a key or

remote control unattended in the vehicle.
Children or pets could operate the power
windows and could become trapped in
a closing window. Failure to follow this
instruction could result in personal injury
or death.

E311430

The sliding rear window control switch is
on the overhead console.

Press and hold the sliding rear window
control switch to open the rear window.
Pull and hold the sliding rear window
control switch to close the rear window.

160

Windows

INTERIOR MIRROR
PRECAUTIONS

WARNING: 

Do not adjust the

mirrors when your vehicle is moving. This
could result in the loss of control of your
vehicle, serious personal injury or death.

Note:

Do not clean the mirror housing or

glass with harsh abrasives, fuel or other
petroleum-based cleaning products.

MANUALLY DIMMING THE
INTERIOR MIRROR

Pull the tab below the mirror toward you
to reduce glare at night.

AUTO-DIMMING INTERIOR
MIRROR

 (IF EQUIPPED)

WHAT IS THE AUTO-DIMMING
INTERIOR MIRROR

The mirror dims to reduce the effect of
bright light from behind. It returns to
normal when the bright light from behind
is no longer present or if you shift into
reverse (R).

AUTO-DIMMING INTERIOR
MIRROR LIMITATIONS

Do not block the sensors on the front and
back of the mirror.

Note:

A rear center passenger or raised rear

center head restraint could prevent light
from reaching the sensor.

161

Interior Mirror

ADJUSTING THE EXTERIOR
MIRRORS

WARNING: 

Do not adjust the

mirrors when your vehicle is moving. This
could result in the loss of control of your
vehicle, serious personal injury or death.

E311081

Power fold.

A

Window lock.

B

Adjustment control.

C

Right-hand mirror.

D

Left-hand mirror.

E

To adjust the mirrors, switch your vehicle
on and place the ignition in accessory or
start.

1.

Select the mirror you want to adjust.
The control light turns on.

2. Use the adjustment control to adjust

the position of the mirror.

3. Press the mirror control again. The

control light turns off.

FOLDING THE EXTERIOR
MIRRORS - VEHICLES WITH:
MANUAL FOLDING MIRRORS

Push the mirror toward the door window
glass.

Make sure that you fully engage the mirror
in its support when returning it to its
original position.

FOLDING THE EXTERIOR
MIRRORS - VEHICLES WITH:
POWER FOLDING MIRRORS

The exterior mirrors fold when you lock
your vehicle and unfold when you unlock
your vehicle.

Note:

This feature requires you to switch

the exterior mirrors auto fold on.

For tight parking conditions,
press the control switch to fold
the mirrors.

Press the control switch again to unfold
the mirrors.

Note:

Do not stop the mirrors midway

through their movement. Wait until the
mirrors stop moving and press the control
again.

The left-hand and right-hand mirrors move
at different rates.  For example, one mirror
may stop while the other one continues to
move.  This is normal.

If you press the control switch to fold the
mirrors with auto fold on, the mirrors do
not unfold when you unlock your vehicle.

Note:

The power folding mirrors operate

with the vehicle on, and for several minutes
after you switch the vehicle off.

162

Exterior Mirrors

Note:

 If you fold and unfold the mirrors

several times within one minute, the power
fold function may turn off to protect the
motors from overheating.  Wait
approximately three minutes with your
vehicle running, and up to 10 minutes with
your vehicle off, for the system to reset and
operate as normal.

Switching Auto fold On and Off

1.

From the settings menu, press Vehicle.
See 

Center Display

 (page 630).

2. Press Mirrors.

3. Switch Autofold on or off.

Loose Mirror

If your power folding mirrors are manually
folded, they may not work properly even
after you reposition them. You need to
reset them if:

The mirrors vibrate when you drive.

The mirrors feel loose.

The mirrors do not stay in the folded or
unfolded position.

One of the mirrors is not in its normal
driving position.

To reset the mirrors perform the following
steps:

1.

Fold or retract both mirrors manually.

2. Using the power folding/power

telescoping mirror control switch,
operate the mirrors until you hear an
audible click.

3. Operate the power folding or power

telescoping mirrors an additional 3 to
4 times to synchronize the mirrors.

EXTENDING THE EXTERIOR
MIRRORS

This optional feature lets you extend the
mirror approximately 3 in (75 mm). It is
useful when towing a trailer. You can
manually pull out or push in the mirrors to
various positions.

Power Telescoping Mirrors

 (If

Equipped)

This feature allows you to position both
mirrors at the same time.

E218902

A. Extend.
B. Retract.

To adjust the mirrors, switch your vehicle
on and place the ignition in accessory or
start.

1.

Press and release the control switch.

2. Press the adjustment control to

position the mirrors.

3. Press the left arrow to extend the

mirrors. Press the right arrow to retract
the mirrors.

163

Exterior Mirrors

Note:

Moving the mirrors 10 or more times

within one minute, or repeated folding and
unfolding of the mirrors when holding the
control down during full travel, could disable
the system to protect the motors from
overheating. Wait approximately three
minutes with the vehicle running, and up to
10 minutes with the vehicle off, for the
system to reset and for function to return to
normal.

AUTO-DIMMING EXTERIOR
MIRROR

 (IF EQUIPPED)

WHAT IS THE AUTO-DIMMING
EXTERIOR MIRROR

The driver exterior mirror dims when the
interior auto-dimming mirror turns on.

164

Exterior Mirrors

OPENING AND CLOSING THE
SUNSHADE

WARNING: 

Do not leave a key or

remote control unattended in the vehicle.
Children or pets could operate the
sunshade and get caught in a closing
sunshade. Failure to follow this
instruction could result in personal injury.

WARNING: 

Do not leave children

or pets unattended in your vehicle and
do not let children play with the
sunshade. Failure to follow this
instruction could result in personal injury.

The controls are on the overhead console.

Opening the Sunshade

E312249

Press and release the switch to
activate the one-touch open
feature. To stop movement,

press the switch a second time. The
sunshade also opens when you open the
moonroof.

Note:

The sunshade stops short of its fully

opened position for the comfort of rear
passengers. To fully open the sunshade,
press the switch again.

Closing the Sunshade

WARNING: 

When closing the

sunshade, verify that it is free of
obstructions and make sure children and
pets are not in the proximity of the
sunshade. Failure to follow this
instruction could result in personal injury.

WARNING: 

If an obstruction is

detected, press the switch a second time
and reverse the sunshade immediately.
Failure to follow this instruction could
result in personal injury.

E312250

Press and release the switch to
activate the one-touch close
feature. To stop movement,

press the switch a second time.

Note:

If fully open, the sunshade stops after

covering the rear glass panel. Press and
release again to fully close the sunshade.

Note:

If the moonroof is either in the open

or vent position and the sunshade is in the
mid-open position, press and release the
switch to close the moonroof first and then
the sunshade.

OPENING AND CLOSING THE
MOONROOF

WARNING: 

Do not leave children

or pets unattended in your vehicle and
do not let children play with the
moonroof. Failure to follow this
instruction could result in personal injury
or death.

WARNING: 

Do not leave a key or

remote control unattended in the vehicle.
Children or pets could operate the
moonroof and could become trapped in
a closing moonroof. Failure to follow this
instruction could result in personal injury
or death.

The controls are on the overhead console.

165

Moonroof

 (If Equipped)

Opening the Moonroof

E312251

Press and release the switch to
activate the one-touch open
feature. To stop movement,

press the switch a second time.

Note:

The moonroof stops short of the fully

opened position to reduce wind noise or
rumbling that may happen with the
moonroof fully open.

Press and release the switch again to fully
open the moonroof.

Closing the Moonroof

WARNING: 

When closing the

moonroof, verify that it is free of
obstructions and make sure children and
pets are not in the proximity of the
moonroof. Failure to follow this
instruction could result in personal injury
or death.

WARNING: 

If an obstruction is

detected, release the switch and reverse
the moonroof immediately. Failure to
follow this instruction could result in
personal injury or death.

E312252

Press and release the switch to
activate the one-touch close
feature, from either the open or

vent positions. To stop movement, press
the switch a second time.

VENTING THE MOONROOF

WARNING: 

Do not leave children

unattended in your vehicle and do not
let them play with the moonroof. Failure
to follow this instruction could result in
personal injury.

The moonroof controls are on the
overhead console.

E312252

With the moonroof in the closed
position, press and release the
switch to vent the moonroof. To

close the moonroof from the vent position,
press and release the switch again.

MOONROOF BOUNCE-BACK

WHAT IS MOONROOF BOUNCE-
BACK

The moonroof stops and reverses some
distance if it detects an obstacle when
closing.

OVERRIDING MOONROOF
BOUNCE-BACK

Press and hold the close switch within two
seconds after the moonroof comes to a
stop.

166

Moonroof

 (If Equipped)

INSTRUMENT CLUSTER OVERVIEW

E410419

Tachometer.

A

Engine coolant temperature gauge.

B

Configurable gauges. Oil pressure, transmission oil temperature, turbo boost,
vacuum/boost, battery voltage, air charge temperature or engine oil
temperature.

C

Fuel gauge.

D

Speedometer.

E

Odometer.

F

Compass.

G

TACHOMETER

Indicates the engine speed.

SPEEDOMETER

Indicates the vehicle speed.

FUEL GAUGE

WHAT IS THE FUEL GAUGE

Indicates approximately how much fuel is
in the fuel tank.

167

Instrument Cluster

FUEL GAUGE LIMITATIONS

The fuel gauge may not provide an
accurate reading when your vehicle is on
an incline.

LOCATING THE FUEL FILLER
DOOR

The arrow adjacent to the fuel pump
symbol indicates on which side of your
vehicle the fuel filler door is located.

WHAT IS THE LOW FUEL
REMINDER

A low fuel level reminder displays and
sounds when the distance to empty
reaches 50 mi (80 km), 25 mi (40 km),
10 mi (20 km) and 0 mi (0 km).

Note:

The low fuel reminder can appear at

different fuel gauge positions depending on
fuel economy conditions. This variation is
normal.

WHAT IS DISTANCE TO EMPTY

Indicates the approximate distance your
vehicle can travel on the fuel remaining in
the tank. Changes in driving pattern can
cause the value to not only decrease but
also increase or stay constant for periods
of time.

ENGINE COOLANT
TEMPERATURE GAUGE

Indicates the engine coolant temperature.

ENGINE OIL PRESSURE GAUGE

Indicates the engine oil pressure.

Note:

This is a configurable gauge.

TRANSMISSION FLUID
TEMPERATURE GAUGE

Indicates the transmission fluid
temperature.

Special operating conditions can cause
higher than normal operating
temperatures.  See 

General Maintenance

Information

 (page 658).

Note:

This is a configurable gauge.

TURBO BOOST GAUGE

Indicates the amount of manifold air
pressure in the engine.

Note:

This is a configurable gauge.

WHAT ARE THE INSTRUMENT
CLUSTER WARNING LAMPS

Warning lamps alert you to a vehicle
condition that could become serious.
Some lamps illuminate when you start
your vehicle to make sure they work.  If any
lamps remain on after starting your vehicle,
refer to the respective system warning
lamp for further information.

INSTRUMENT CLUSTER
WARNING LAMPS

Anti-Lock Brake System

E67020

If it illuminates when you are
driving, this indicates a concern.
Your vehicle continues to have

normal braking without the anti-lock brake
system function.  Have your vehicle
checked as soon as possible.

168

Instrument Cluster

Battery

E67021

It illuminates when you switch
the ignition on.

If it illuminates when the engine

is running, this indicates your vehicle
requires service.  Have your vehicle
checked as soon as possible.

Brake System

E270480

E67024

It illuminates when you apply the
parking brake and the ignition is
on.  If it illuminates when your
vehicle is moving, make sure the
parking brake is released.  If the
parking brake is released, this

indicates low brake fluid level or the brake
system requires service.  Have your vehicle
checked as soon as possible.

Note:

Indicators may vary depending on

region.

Door Ajar

It illuminates when you switch
the ignition on and remains on if
any door is open.

Electric Parking Brake

E146190

It illuminates or flashes when the
electric parking brake requires
service.

Engine Coolant Temperature

E103308

If it illuminates, safely stop your
vehicle and switch the vehicle
off.

Fasten Seatbelt

E71880

It illuminates and a tone sounds
until you fasten the seatbelts.

Hood Ajar

E296055

It illuminates when the ignition
is on and the hood is not
completely closed.

Low Fuel Level

It illuminates when the fuel level
is low.

Low Tire Pressure

E139232

It illuminates when your tire
pressure is low. If illuminated,
check your tire pressure as soon

as possible. If it begins to flash at any time,
have the system checked as soon as
possible.

Low Washer Fluid Level

E132353

It illuminates when the washer
fluid is low.

Oil Pressure

E67022

It illuminates when the engine
oil pressure is low.

WARNING: 

If it illuminates when

you are driving do not continue your
journey, even if the oil level is correct.
Have your vehicle checked.

Powertrain Malfunction, Reduced
Power, Electronic Throttle Control,
Check 4X4

Illuminates when the powertrain
or four-wheel drive require
service. Have the system

checked as soon as possible.

169

Instrument Cluster

Malfunction Indicator Lamp

E67028

It illuminates when the ignition
is on and the engine is off, this is
normal. If it illuminates when the

engine is on this indicates the emission
control system requires service. If it flashes,
have your vehicle checked immediately.
See 

Emission Law

 (page 738).  See

Starting and Stopping the Engine –
Warning Lamps

 (page 243).

Stop Safely

 (If Equipped)

E332963

Illuminates if an electrical
component requires service or a
failure that causes your vehicle

to shut down or enter into a limited
operating mode.

Tailgate Ajar

E311338

It illuminates when the ignition
is on and the tailgate is not
completely closed.

WHAT ARE THE INSTRUMENT
CLUSTER INDICATORS

Indicators notify you of various features
that are active on your vehicle.

INSTRUMENT CLUSTER
INDICATORS

Adaptive Cruise Control

E144524

See 

Adaptive Cruise Control

(page 341).

Automatic High Beam

E146105

See 

Automatic High Beam

Control Indicators

 (page 153).

Auto Hold Active

E323448

See 

Auto Hold

 (page 304).

Auto Hold Unavailable

E323449

See 

Auto Hold

 (page 304).

Auto-Start-Stop

E121377

See 

Auto-Start-Stop

 (page

249).

Blind Spot Monitor

E151262

See 

Blind Spot Information

System

 (page 388).

BlueCruise

E297977

See 

BlueCruise

 (page 356).

Cruise Control

E332905

See 

Cruise Control

 (page 339).

Electronic Locking Differential

E325779

See 

Electronic Locking

Differential

 (page 283).

170

Instrument Cluster

Four-Wheel Drive

E181778

E181781

E181779

E181780

See 

Four-Wheel Drive

 (page

273).

Note:

Some indicators appear different

depending on vehicle options.

Front Airbag

E67017

See 

Airbags

 (page 74).

Front Fog Lamp

See 

Using the Front Fog

Lamps

 (page 149).

High Beam

E67019

See 

Using the High Beam

Headlamps

 (page 146).

Hill Descent

E163171

See 

Hill Descent Control

 (page

318).

Lamps On

E71341

See 

Exterior Lighting Control

(page 146).

Ready to Drive

E224090

See 

Hybrid Electric Vehicle

Information

 (page 247).

Reverse Brake Assist

E293490

See 

Reverse Brake Assist

(page 296).

Stability Control and Traction
Control

E138639

E130458

See 

Traction Control

 (page

306).  See 

Stability Control

(page 308).

Turn Signal Lamps

E67018

See 

Using the Turn Signal

Lamps

 (page 148).

Tow Haul

E246592

See 

Towing a Trailer

 (page 424).

171

Instrument Cluster

USING THE INSTRUMENT
CLUSTER DISPLAY CONTROLS

WARNING: 

Driving while distracted

can result in loss of vehicle control, crash
and injury. We strongly recommend that
you use extreme caution when using any
device that may take your focus off the
road. Your primary responsibility is the
safe operation of your vehicle. We
recommend against the use of any
hand-held device while driving and
encourage the use of voice-operated
systems when possible. Make sure you
are aware of all applicable local laws
that may affect the use of electronic
devices while driving.

The controls are on the steering wheel.

E309379

Back button.

A

OK button.

B

Menu button.

C

Back Button

Press to go back or to exit a menu.

OK

 Button

Press to make a selection.

Menu Button

Press to display the submenus.

Scroll Buttons

Press the up or down buttons to scroll
through the menu items.

Status Indicator

E204495

Menu items with a check box
indicates a feature's status. A
check in the box indicates the

feature is on, and unchecked indicates the
feature is off.

INSTRUMENT CLUSTER
DISPLAY MAIN MENU -
VEHICLES WITH: 12 INCH
SCREEN, EXCLUDING:
RAPTOR

Depending on your vehicle options, some
menu items can appear different or not at
all.

Note:

For your safety, some features are

speed-dependent and could be unavailable
when your vehicle is above a certain speed.

Menu Item

MyView

Trip/Fuel

Truck Info

Towing

Navigation

Phone

Audio

Settings

172

Instrument Cluster Display

INSTRUMENT CLUSTER
DISPLAY MAIN MENU -
RAPTOR

Depending on your vehicle options, some
menu items can appear differently or not
at all.

Note:

For your safety, some features are

speed dependent and could be unavailable
when your vehicle is above a certain speed.

Menu Item

MyView

Trip/Fuel

Raptor Info

Towing

Navigation

Phone

Audio

Settings

HUD Menu

CUSTOMIZING THE
INSTRUMENT CLUSTER
DISPLAY

Adding Screens Using MyView

1.

Using the information display controls
on the steering wheel, select 

MyView

.

2. Select 

Configure MyView

.

3. Select a screen.

4. Press the 

OK

 button.

Note:

The number of screens you can add

is limited. If the selected screen does not
appear you must deselect screens from the
MyView menu.

Adding Screens Using Select
Screens

1.

Select 

Select Screens

.

2. Use the controls on the steering wheel

to highlight a screen to add.

3. Press the 

OK

 button.

Note:

The number of screens you can add

is limited. If the selected screen does not
appear you must deselect screens from the
Select Screens menu.

Configuring Gauges

1.

Select 

Settings

.

2. Select 

Configure Gauges

.

3. Select to swap or change left-hand

side and right-hand side gauges.

EV COACH - 3.5L, HYBRID
ELECTRIC VEHICLE (HEV)

EV coach can help you get the most out of
your vehicle's electric driving capabilities.

Note:

EV coach is a selectable screen.  See

Customizing the Instrument Cluster
Display

 (page 173).

When you are accelerating or maintaining
speed you see a blue or white solid bar
indicating vehicle power. You may also see
a blue rectangular box which shows the
power level at which the engine turns on.

When the power level is within the box,
the color of the bar is blue. This means
you are in electric operation and the
engine is off.

When the power level is outside of the
box, the color of the bar is white. This
means you are in hybrid operation with
a combination of the electric motor
and the engine providing vehicle power.

173

Instrument Cluster Display

When you are decelerating with either your
foot off the accelerator pedal or on the
brake pedal, a green or white solid bar
displays indicating the power being used
to slow down your vehicle. You may also
see a green rectangular box which shows
the amount of power that can be
recaptured by the regenerative braking
system and returned to the high voltage
battery.

When the power level is within the box,
the color of the bar is green. This
means that the regenerative braking
system is being used to efficiently slow
your vehicle down and return the
maximum percentage of energy to the
high voltage battery.

When the power level is outside of the
box, the color of the bar is white. This
means both the regenerative braking
system and conventional braking
system are being used.

BRAKE COACH - 3.5L, HYBRID
ELECTRIC VEHICLE (HEV)

The brake coach appears after the vehicle
has come to a stop. It coaches you to brake
in a manner that maximizes the amount
of energy returned through the
regenerative braking system.

The percent displayed indicates the
regenerative braking efficiency, with 100%
representing the maximum amount of
energy recovery.

Note:

While regenerative braking works in

all drive modes, brake coach display may
not be available in all drive modes.

You can switch brake coach on or off in the
settings menu on your touchscreen.

1.

Press 

Settings

.

2. Press 

Instrument Cluster

.

3. Switch 

Brake Coach

 on or off.

TRIP SUMMARY

Displays the trip summary when you switch
off your vehicle. The values are cumulative
since you last started your vehicle.

174

Instrument Cluster Display

CHANGING THE LANGUAGE

1.

Press 

Settings

 on the touchscreen.

2. Press 

General

.

3. Press 

Language

.

4. Select a language.

CHANGING THE
MEASUREMENT UNIT

1.

Press 

Settings

 on the touchscreen.

2. Press 

General

.

3. Press 

Measurement Units

.

4. Select a measurement unit.

CHANGING THE
TEMPERATURE UNIT

1.

Press 

Settings

 on the touchscreen.

2. Press 

General

.

3. Press 

Temperature Units

.

4. Select a temperature unit.

CHANGING THE TIRE
PRESSURE UNIT

1.

Press 

Settings

 on the touchscreen.

2. Press 

General

.

3. Press 

Tire Pressure Units

.

4. Select a pressure unit.

175

Personalized Settings

ACCESSING THE TRIP
COMPUTER - VEHICLES WITH:
8 INCH SCREEN/12 INCH
SCREEN

1.

Using the instrument cluster display
controls on the steering wheel, select
Trip/Fuel.

2. Select This Trip, Trip 1 or Trip 2.

RESETTING THE TRIP
COMPUTER - VEHICLES WITH:
8 INCH SCREEN/12 INCH
SCREEN

1.

Select 

Trip/Fuel

.

2. Select 

Trip 1

 or 

Trip 2

.

3. Press and hold the 

OK

 button for a few

seconds.

Note:

This Trip resets every time you start

your vehicle.

176

Trip Computer

WHAT IS THE HEAD UP
DISPLAY

The system displays information on the
windshield in your field of vision, allowing
you to keep your eyes on the road. You can
select which information the system
displays.

SWITCHING THE HEAD UP
DISPLAY ON AND OFF

1.

Using the steering wheel controls
select head up display menu in the
instrument cluster display.

2. Switch 

Head-Up Display (HUD)

 on or

off.

Note:

The system remembers the last

setting when you start your vehicle.

HEAD UP DISPLAY SETTINGS

Using the instrument cluster display
controls on the steering wheel, select HUD.

Note:

If 

HUD On

 is unchecked, other

options of the system are hidden.

You can adjust the following settings in the
HUD menu:

Brightness.

Vertical position.

Image rotation.

Content.

Drive mode layout.

Note:

The head up display image brightness

automatically adjusts to the brightness of
the ambient environment. You have the
ability to adjust the brightness to your
preference.

Note:

In some instances, sunlight can cause

some reflections in and around the head up
display image.

Note:

When you save a memory preset

position, your current HUD settings are also
saved to that memory preset position. See

Memory Function

 (page 210).

HEAD UP DISPLAY
INDICATORS

You can select any of the following layouts
from the drive mode layout option under
the HUD menu:

Automatic.

Normal.

Tow/Haul.

Off-Road.

Baja view.

For vehicles with Baja view only.

Note:

When automatic layout option is

selected the contents are displayed based
on the current drive mode.

177

Head Up Display

 (If Equipped)

Normal layout

E414083

Signaling and hazard indication.

A

Blind spot alert displayed either left or right side.

B

Information message display area.

C

Advanced driver assistance systems display area.

D

Traffic sign information display area.

E

Lane keeping assist display area

F

Time/Distance to empty.

G

Cruise control information display area.

H

Digital speedometer display area.

I

Navigation information display area.

J

Outside air temperature.

K

178

Head Up Display

 (If Equipped)

Towing layout

E414086

Signaling and hazard indication.

A

Gear information display area.

B

Navigation information display area.

C

Information message display area.

D

Advanced driver assistance systems display area.

E

Blind spot information display area.

F

Time.

G

Traffic sign information display area.

H

Digital speedometer display area.

I

Tachometer display area.

J

Note:

The blind spot message is shown

either on the left or right side only when the
respective turn signal is turned on.

179

Head Up Display

 (If Equipped)

Off-road layout

E414084

Signaling and hazard indication.

A

Off road information display area.

B

Information message display area.

C

Trail control display area.

D

Digital speedometer display area.

E

Tachometer display area.

F

Gear information display area.

G

180

Head Up Display

 (If Equipped)

Baja view layout - If Equipped

E414085

Signaling and hazard indication.

A

Gear information display area.

B

Information message display area.

C

Digital speedometer display area.

D

Power shift indicator display area.

E

Signaling and Traffic Indication

Displays turn signals and blind spot
information, if turn signals are active.

Navigation Display Area

Displays navigation next turn instructions.

Advanced Driver Assistance
Systems Display Area

Displays adaptive cruise control, lane
centering aid and lane keeping system
status and warnings.

Information Message Display Area

Displays system messages and
notifications including incoming phone
calls.

Advanced Driver Assistance
Systems Message Display Area

Displays advanced driver assistance
systems messages and image adjustment
prompts.

Speed Limit Display Area

Displays the speed limit information if it is
available in the map database or is
detected by the camera.

Speedometer Display Area

Displays the current vehicle speed and the
transmission gear selection.

181

Head Up Display

 (If Equipped)

Status Bar

Displays outside air temperature,
time/distance to empty. You can switch

off the status bar in the head up display
settings menu.

Note:

Distance to empty is only shown on

the normal layout during low fuel conditions.

HEAD UP DISPLAY – TROUBLESHOOTING

HEAD UP DISPLAY – INFORMATION MESSAGES

Action

Message

The system is malfunctioning or something

is obstructing the display. Make sure that

the head up display is free from obstruction.

If the message continues to appear, have

your vehicle checked as soon as possible.

Head Up Display System Fault See Manual

Using the steering wheel controls and

adjustment option under the head up

display menu in the instrument cluster

display, adjust the head up display image

position on the windshield and make sure

the image frame is fully visible

Head Up Display To Position Use the

Information Display

182

Head Up Display

 (If Equipped)

WHAT IS REMOTE START

The system allows you to remotely start
your vehicle and to adjust the interior
temperature according to the settings that
you chose.

REMOTE START
PRECAUTIONS

WARNING: 

Do not start the engine

in a closed garage or in other enclosed
areas. Exhaust fumes are toxic. Always
open the garage door before you start
the engine. Failure to follow this
instruction could result in personal injury
or death.

REMOTE START LIMITATIONS

Remote start does not work under the
following conditions:

The alarm horn is sounding.

The hood is open.

The transmission is not in park (P).

The ignition is on.

The battery voltage is below the
minimum operating voltage.

Remote start is not enabled.

Note:

Do not use remote start if the fuel

level is low.

ENABLING REMOTE START

1.

Press 

Settings

 on the touchscreen.

2. Press 

Vehicle

.

3. Press 

Remote Start Setup

.

4. Switch 

Remote Start

 on or off.

Note:

To remote start with FordPass, make

sure that the modem is enabled.  See

Connecting FordPass to the Modem

(page 615).

REMOTELY STARTING AND
STOPPING THE VEHICLE

Remotely Starting the Vehicle

E138623

Press the button on the remote
control.

E138625

Within three seconds, press the
button on the remote control.

Within three seconds, press the

button again.

Note:

You can also use FordPass to start

the vehicle.

Note:

The vehicle doors lock when you

successfully remote start your vehicle.

Note:

The turn signal lamps flash twice.

Note:

The parking lamps turn on when the

vehicle is running.

Note:

The horn sounds if the system fails

to start.

Note:

All other vehicle systems remain off

when you have remotely started the vehicle.

Note:

The vehicle remains secured when

you have remotely started the vehicle. A
valid key must be inside your vehicle to
switch the ignition on and drive your vehicle.

Remotely Stopping the Vehicle

E138625

Press the button on the remote
control.

183

Remote Start

 (If Equipped)

EXTENDING THE REMOTE
START DURATION

To extend the remote start duration during
remote start, do the following:

E138623

Press the button on the remote
control.

E138625

Within three seconds, press the
button on the remote control.

Within three seconds, press the

button again.

If the duration is set to 15 minutes, the
duration extends by another 15 minutes.
This provides a total of 30 minutes.

Note:

Remote start can only be extended

once.

Note:

A maximum of two remote starts, or

one remote start with an extension, are
allowed. To reset the restart procedure
switch the vehicle to on, then to off.

REMOTE START SETTINGS

1.

From the settings menu, press Vehicle.
See 

Center Display

 (page 630).

2. Press Remote Start Setup.

Switching Climate Control Auto
Mode On and Off

1.

Press Climate Control.

2. Press Auto or Last Setting.

Note:

If you switch the auto mode on, the

system attempts to heat or cool the interior
to 72°F (22°C). When you switch the vehicle
on, the climate control system returns to
the last used settings.

Note:

If you switch the last settings on, the

system remembers the last used settings.

Heated Seat Settings

1.

Press Seats.

2. Press Auto or Off.

Note:

If you switch the heated seat settings

on, the heated seats turn on during cold
weather.

Note:

You cannot adjust the heated seat

settings when you remotely start your
vehicle.

Heated Steering Wheel Settings

1.

Press Seats and Steering Wheel.

2. Press Auto or Off.

Note:

If you switch the heated steering

wheel settings on, the heated steering wheel
turns on during cold weather.

Note:

You cannot adjust the heated

steering wheel settings when you remotely
start your vehicle.

Remote Start Duration

1.

Press Duration.

2. Press the duration you prefer.

184

Remote Start

 (If Equipped)

IDENTIFYING THE CLIMATE
CONTROL UNIT

E377934

Depending on your vehicle options, the
controls could look different than what you
see here.

SWITCHING CLIMATE
CONTROL ON AND OFF

Press the button.

SWITCHING RECIRCULATED
AIR ON AND OFF

Press the button to recirculate
air currently in the passenger
compartment.

Note:

Recirculated air may turn off

automatically, or prevent you from switching
on in all air flow modes except MAX A/C to
reduce the risk of fogging. Recirculation may
also turn on and off automatically in various
air distribution control combinations to
improve heating or cooling efficiency.

SWITCHING AIR
CONDITIONING ON AND OFF

Press the button.

Note:

Under certain conditions, the air

conditioning compressor could continue to
operate after you switch air conditioning off.

Note:

To keep the system and its

components fully functional, switch air
conditioning on and let your vehicle idle at
least once per month for a minimum of two
minutes.

SWITCHING DEFROST ON AND
OFF

E265283

Press the button to activate the
selection screen.

Press the button on the
touchscreen to switch the
windshield air vents on.

E244097

Make sure that the instrument
panel air vents are switched off.

E244098

Make sure that the footwell air
vents are switched off.

SWITCHING MAXIMUM
DEFROST ON AND OFF

Press the button.

Air flows through the windshield air vents,
and the blower motor adjusts to the
highest speed.

You can also use this setting to defog and
clear the windshield of a thin covering of
ice.

Note:

To prevent window fogging, you

cannot select recirculated air when
maximum defrost is on.

Note:

The heated rear window also turns

on when you select maximum defrost.

185

Climate Control - Vehicles With: Automatic Temperature

Control

Note:

When maximum defrost is on, the air

conditioning compressor may continue to
operate even though you switch off the air
conditioning.

SWITCHING MAXIMUM
COOLING ON AND OFF

Press the button.

Note:

When you switch maximum cooling

off, air conditioning remains on.

SWITCHING THE HEATED
REAR WINDOW ON AND OFF

Press the button to clear the rear
window of thin ice and fog.  The
heated rear window turns off

after a short period of time.

Note:

Do not use harsh chemicals, razor

blades or other sharp objects to clean or
remove decals from the inside of the heated
rear window as this could cause damage to
the heated rear window grid lines not
covered by the vehicle Warranty.

SETTING THE BLOWER MOTOR
SPEED

E266187

E266186

Press up or down on the control
to select the blower motor
speed.

Note:

For Hybrid Electric Vehicle (HEV) and

Plug-In Hybrid Electric Vehicle (PHEV)
vehicles, the blower motor may run, and you
may feel airflow when the climate control
is off, to provide cooling to the battery.

SWITCHING THE HEATED
MIRRORS ON AND OFF

When you switch the heated rear window
on, the heated exterior mirrors turn on.
See 

Switching the Heated Rear Window

On and Off

 (page 191).

E266189

You can also turn on and off the
heated exterior mirrors using the
mirror defrost button.

Note:

Do not remove ice from the mirrors

with a scraper or adjust the mirror glass
when it is frozen in place.

Note:

Do not clean the mirror housing or

glass with harsh abrasives, fuel or other
petroleum-based cleaning products. The
vehicle warranty may not cover damage
caused to the mirror housing or glass.

Note:

The engine must be running or your

vehicle must be ready to drive to switch the
system on.

SETTING THE TEMPERATURE

E244115

Turn the control on the left-hand side of
the climate control to set the left-hand
temperature.

186

Climate Control - Vehicles With: Automatic Temperature

Control

Note:

This control also sets the right-hand

side temperature when you switch off dual
zone mode.

Turn the control on the right-hand side of
the climate control to set the right-hand
temperature.

DIRECTING THE FLOW OF AIR

Directing Air to the Windshield Air
Vents

E265283

Press the button to activate the
selection screen.

Press the button on the
touchscreen.

Directing Air to the Instrument
Panel Air Vents

E265283

Press the button to activate the
selection screen.

E244097

Press the button on the
touchscreen.

Directing Air to the Footwell Air
Vents

E265283

Press the button to activate the
selection screen.

E244098

Press the button on the
touchscreen.

AUTO MODE

SWITCHING AUTO MODE ON AND
OFF

Press the button to switch auto
mode on. Repeatedly press the
button to adjust auto mode.

Note:

When you switch auto mode on,

lights on the blower motor control do not
illuminate to indicate the blower motor
speed.

Adjust the blower motor control or air
distribution control to switch auto mode
off.

AUTO MODE INDICATORS

The indicators are on the Auto Mode
button.

Description

Auto Mode Indicator

Status

The blower motor speed is reduced. Use this setting to
minimize the amount of noise from the blower motor. This
setting increases the time taken to cool the interior.

One indicator illumin-
ated.

The blower motor speed is moderate.

Two indicators illumin-
ated.

The blower motor speed is increased. Use this setting to
reduce the time taken to cool the interior. This setting
increases the amount of noise from the blower motor.

Three indicators illumin-
ated.

187

Climate Control - Vehicles With: Automatic Temperature

Control

SWITCHING DUAL MODE ON AND
OFF

E265280

Press the button.

CLIMATE CONTROL HINTS

General Hints

Prolonged use of recirculated air may
cause the windows to fog up.

You may feel a small amount of air
from the footwell air vents regardless
of the air distribution setting.

To reduce humidity build-up inside your
vehicle, do not drive with the system
switched off or with recirculated air
always switched on.

Do not place objects under the front
seats as this may interfere with the
airflow to the rear seats.

Remove any snow, ice or leaves from
the air intake area at the base of the
windshield.

To improve the time to reach a
comfortable temperature in hot
weather, drive with the windows open
until you feel cold air through the air
vents.

Automatic Climate Control

Adjusting the settings when your
vehicle interior is extremely hot or cold
is not necessary. Automatic mode is
best recommended to maintain set
temperature.

The system adjusts to heat or cool the
interior to the temperature you select
as quickly as possible.

For the system to function efficiently,
the instrument panel and side air vents
should be fully open.

If you press 

AUTO

 during cold outside

temperatures, the system directs air
flow to the windshield and side window
air vents.In addition, the blower motor
may run at a slower speed until the
engine warms up.

If you press 

AUTO

 during hot

temperatures and the inside of the
vehicle is hot, the system uses
recirculated air to maximize interior
cooling. Blower motor speed may also
reduce until the air cools.

Quickly Heating the Interior

1.

Press 

AUTO

.

2. Adjust the temperature function to the

setting you prefer.

Recommended Settings for
Heating

1.

Press 

AUTO

.

2. Adjust the temperature function to the

setting you prefer. Use 72°F (22°C) as
a starting point, then adjust the setting
as necessary.

Quickly Cooling the Interior

1.

Press 

MAX A/C

.

2. Drive with the windows open for a short

period of time.

Recommended Settings for
Cooling

1.

Press 

AUTO

.

2. Adjust the temperature function to the

setting you prefer. Use 72°F (22°C) as
a starting point, then adjust the setting
as necessary.

Defogging the Side Windows in
Cold Weather

1.

Press and release defrost or maximum
defrost.

188

Climate Control - Vehicles With: Automatic Temperature

Control


Content      ..     3      4      5      6     ..