Ford Mustang (2022 year). Manual in english - page 16
 

  Index      Manuals     Ford Mustang (2022 year). Manual in english


Search            copyright infringement  


Content      ..     14      15      16      17     ..


Ford Mustang (2022 year). Manual in english - page 16


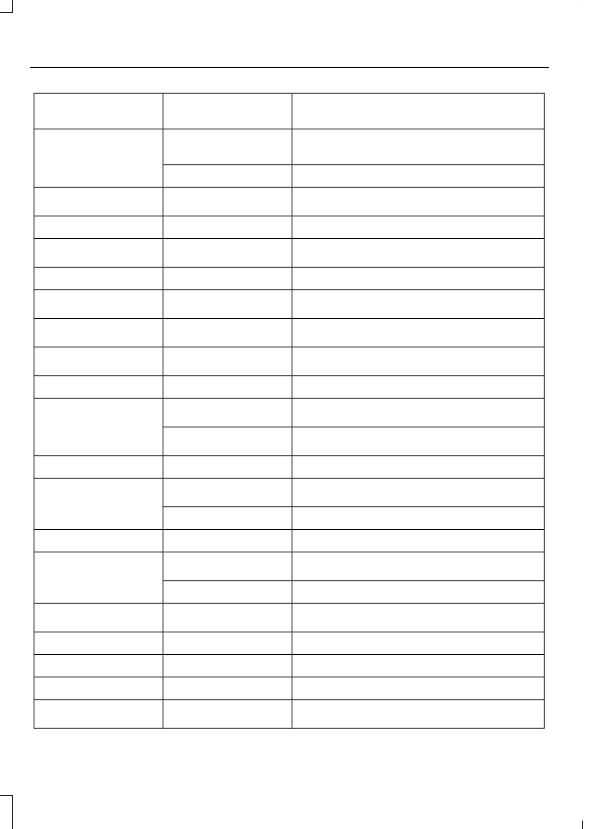
Protected Component

Fuse Rating

Fuse or Relay

Number

Right-hand high-intensity discharge head-
lamps (GT500).

20A

3

35

Not used (base).

Alternator sense.

10A

3

36

Not used.

37

Vehicle power 1.

20A

3

38

Not used.

39

Vehicle power 2.

20A

3

40

Fuel injectors.

15A

3

41

Vehicle power 3.

15A

3

42

Not used.

43

Vehicle power 4 (base).

15A

3

44

Vehicle power 4 (GT500).

30A

3

Not used.

45

Differential pump (Mach 1, GT500).

20A

2

46

Not used (base).

Not used.

47

Fuel pump #2 (GT500).

30A

2

48

Not used (base).

Fuel pump.

30A

2

49

Steering column lock relay.

50

Not used.

51

Horn relay.

52

Cigar lighter.

20A

2

53

250

Fuses

Protected Component

Fuse Rating

Fuse or Relay

Number

Auxiliary power point.

20A

2

54

Electronic fan 2 (base).

25A

2

55

Not used (GT500).

Not used.

56

Air conditioning clutch relay.

57

Not used.

58

Exhaust valves relay.

59

Powertrain control module.

5A

3

60

Not used.

61

Anti-lock brakes run/start switch.

5A

3

62

Not used.

63

Electronic power assist steering.

5A

3

64

Not used.

65

Blind spot information system.

5A

3

66

Rear view camera.
Rear window defroster relay coils.
Vehicle dynamics module.

Not used.

67

Headlamp leveling switch (base).

10A

3

68

Signature lighting (GT500).

10A

3

Cigar lighter relay.

69

Auxiliary power point relay.

Mass air flow sensor (base).

5A

3

74

Not used (GT500).

Rain sensor module (base).

5A

3

75

251

Fuses

Protected Component

Fuse Rating

Fuse or Relay

Number

Not used (GT500).

Rear window defroster relay.

76

Electronic cooling fan 2 relay (base).

77

Not used (GT500).

Run/start relay (base).

78

Not used (GT500).

Charge air cooler pump relay (GT500).

79

Not used (base).

Windshield wiper relay.

80

Starter motor solenoid relay.

81

Powertrain control module relay.

82

Cooling fan relay (GT500).

83

Not used (base).

Heated exterior mirrors.

10A

3

87

Not used.

88

Electronic fan 1 relay (base).

89

Not used (GT500).

Differential pump relay (Mach 1, GT500).

90

Not used (base).

Electronic fan 3 relay (base).

91

Not used (GT500).

Blower motor relay.

92

Fuel pump #2 relay (GT500).

93

252

Fuses

Protected Component

Fuse Rating

Fuse or Relay

Number

Not used (base).

Fuel pump relay.

94

J-case fuses.

M-case fuses.

Micro fuses.

Note:

Spare fuse amperage may vary.

Passenger Compartment Fuse
Panel

The fuse panel is in the right-hand side of
the passenger footwell behind a trim panel
and plastic key code card.

To remove the trim panel, lift it from the
rear retaining hooks, while pulling it toward
you and swinging it away from the side. To
reinstall it, line up the tabs with the grooves
on the panel, drop the panel back into
place, and then push it shut.

To reach the fuse panel, first remove the
key code card.

After replacing a fuse, return the key code
card to the original position. To reinstall
the trim panel, lineup the tabs with the
grooves on the panel, drop the panel back
into place, and then push it shut to reinstall
the trim panel.

253

Fuses

E174564

Protected Component

Fuse Rating

Fuse or Relay

Number

Not used.

1

Power windows.

10A

2

Electrochromic mirror.
Power door locks.

Power mirrors (base).

7.5A

3

Memory seats (base).

Not used (GT500).

Not used (spare).

20A

4

Not used.

5

Not used (spare).

10A

6

Not used (spare).

10A

7

254

Fuses

Protected Component

Fuse Rating

Fuse or Relay

Number

Telematic control unit - modem.

5A

8

Not used.

5A

9

Not used.

10

Not used.

11

Electronic control panel.

7.5A

12

Gateway module.
Gear shift module (GT500).

Steering column control module.

7.5A

13

Instrument cluster.

Not used.

15A

14

SYNC.

15A

15

Gauges.

Not used.

16

Headlamp leveling switch (base).

7.5A

17

Not used (GT500).

Not used.

7.5A

18

Not used.

5A

19

Intrusion sensor module.

5A

20

In-vehicle temperature and humidity
sensor.

5A

21

Auxiliary body module.

5A

22

Amplifier.

30A

23

Vehicle dynamics module.

30A

24

Ambient lighting module (base).

20A

25

Auxiliary body module.

Right-hand front-window motor (power
distribution module).

30A

26

Passenger door control unit.

Left-hand rear-window power (base).

30A

27

Not used (GT500).

255

Fuses

Protected Component

Fuse Rating

Fuse or Relay

Number

Right-hand rear-window power (base).

30A

28

Not used (GT500).

Gateway module (base).

15A

29

Not used (spare) (GT500).

Not used (spare)

5A

30

Remote keyless entry.

10A

31

Audio unit.

20A

32

Not used.

33

Run/start bus.

30A

34

Power distribution box run/start relay
(base).

5A

35

Not used (GT500).

Front camera (base).

15A

36

Not used (GT500).

Heated steering wheel module (base).

20A

37

Not used (GT500).

Note:

Spare fuse amperage may vary.

CHANGING A FUSE

Fuses

WARNING: 

Always replace a fuse

with one that has the specified
amperage rating. Using a fuse with a
higher amperage rating can cause severe
wire damage and could start a fire.

E217331

If electrical components in the vehicle are
not working, a fuse may have blown. Blown
fuses are identified by a broken wire within
the fuse. Check the appropriate fuses
before replacing any electrical
components.

256

Fuses

Fuse Types

E207206

Fuse Type

Callout

Micro 2

A

Micro 3

B

Maxi

C

Mini

D

M Case

E

J Case

F

J Case Low Profile

G

257

Fuses

GENERAL INFORMATION

Have your vehicle serviced regularly to help
maintain its roadworthiness and resale
value. There is a large network of
authorized dealers that are there to help
you with their professional servicing
expertise. We believe that their specially
trained technicians are best qualified to
service your vehicle properly and expertly.
They are supported by a wide range of
highly specialized tools developed
specifically for servicing your vehicle.

If your vehicle requires professional service,
an authorized dealer can provide the
necessary parts and service.  Check your
warranty information to find out which
parts and services are covered.

Use only recommended fuels, lubricants,
fluids and service parts conforming to
specifications.  Motorcraft® parts are
designed and built to provide the best
performance in your vehicle.

Precautions

Do not work on a hot engine.

Make sure that nothing gets caught in
moving parts.

Do not work on a vehicle with the
engine running in an enclosed space,
unless you are sure you have enough
ventilation.

Keep all open flames and other burning
material, such as cigarettes, away from
the battery and all fuel related parts.

Working with the Engine Off

1.

Set the parking brake and shift the
transmission to park (P), for automatic
transmission, or neutral (N), for manual
transmission.

2. Switch off the engine.

3. Block the wheels.

Working with the Engine On

WARNING: 

To reduce the risk of

vehicle damage and personal burn
injuries, do not start your engine with the
air cleaner removed and do not remove
it while the engine is running.

1.

Set the parking brake and shift the
transmission to park (P), for automatic
transmission, or neutral (N), for manual
transmission.

2. Block the wheels.

OPENING AND CLOSING THE
HOOD

Opening the Hood

E142457

1.

Inside the vehicle, pull the hood release
handle located under the left-hand
side of the instrument panel.

2. Slightly lift the hood.

258

Maintenance

E174561

3. Release the hood latch by pushing the

secondary release lever to your
left-hand side.

E256471

4. Open the hood.  Support the hood with

the strut.

Closing the Hood

1.

Remove the hood strut from the catch
and secure it correctly after use.

2. Lower the hood and allow it to drop

under its own weight for the last
8–12 in (20–30 cm).

Note:

Make sure that the hood is correctly

closed.

259

Maintenance

UNDER HOOD OVERVIEW - 2.3L ECOBOOST™

E174450

Battery (out of view).  See 

Changing the 12V Battery

 (page 272).

A

Engine oil dipstick.  See 

Engine Oil Dipstick

 (page 263).

B

Engine oil filler cap.  See 

Engine Oil Check

 (page 263).

C

Brake fluid reservoir.  See 

Brake Fluid Check

 (page 271).

D

Air filter assembly.  See 

Changing the Engine Air Filter

 (page 264).

E

Engine coolant reservoir.  See 

Engine Coolant Check

 (page 266).

F

Windshield washer fluid reservoir.  See 

Washer Fluid Check

 (page 276).

G

Power distribution box.  See 

Fuses

 (page 247).

H

Note:

Your vehicle may not have an engine

cover as shown.

260

Maintenance

UNDER HOOD OVERVIEW - 5.0L

E250052

Battery (out of view).  See 

Changing the 12V Battery

 (page 272).

A.

Engine oil filler cap.  See 

Engine Oil Check

 (page 263).

B.

Engine oil dipstick.  See 

Engine Oil Dipstick

 (page 263).

C.

Brake fluid reservoir.  See 

Brake Fluid Check

 (page 271).

D.

Air filter.  See 

Changing the Engine Air Filter

 (page 264).

E.

Engine coolant reservoir. See 

Engine Coolant Check

 (page 266).

F.

Washer system fluid reservoir.  See 

Washer Fluid Check

 (page 276).

G.

Engine compartment fuse box.  See 

Fuses

 (page 247).

H.

261

Maintenance

UNDER HOOD OVERVIEW - 5.0L, MACH 1

E296063

Battery (out of view). See 

Changing the 12V Battery

 (page 272).

A

Engine oil filler cap. See 

Engine Oil Check

 (page 263).

B

Engine oil dipstick. See 

Engine Oil Dipstick

 (page 263).

C

Brake fluid reservoir. See 

Brake Fluid Check

 (page 271).

D

Air filter assembly. See 

Changing the Engine Air Filter

 (page 264).

E

Engine coolant reservoir. See 

Engine Coolant Check

 (page 266).

F

Windshield washer reservoir. See 

Washer Fluid Check

 (page 276).

G

Power distribution box. See 

Changing a Fuse

 (page 256).

H

262

Maintenance

ENGINE OIL DIPSTICK

E270482

Minimum.

A

Nominal.

B

Maximum.

C

ENGINE OIL CHECK

1.

Make sure that your vehicle is on level
ground.

2. Check the oil level before starting the

engine, or switch the engine off after
warm up and wait 10 minutes for the
oil to drain into the oil pan.

3. Remove the dipstick and wipe it with

a clean, lint-free cloth.

4. Reinstall the dipstick and make sure it

is fully seated.

5. Remove the dipstick again to check the

oil level.

Note:

 If the oil level is between the

maximum and minimum marks, the oil level
is acceptable.  Do not add oil.

6. If the oil level is at the minimum mark,

immediately add oil.

7.

Reinstall the dipstick. Make sure it is
fully seated.

Note:

The oil consumption of new engines

reaches its normal level after approximately
3,000 mi (5,000 km).

Adding Engine Oil

WARNING: 

Do not add engine oil

when the engine is hot. Failure to follow
this instruction could result in personal
injury.

WARNING: 

Do not remove the filler

cap when the engine is running.

Do not use supplemental engine oil
additives because they are unnecessary
and could lead to engine damage that the
vehicle warranty may not cover.

1.

Clean the area surrounding the engine
oil filler cap before you remove it.

2. Remove the engine oil filler cap.

3. Add engine oil that meets our

specifications.  See 

Capacities and

Specifications

 (page 338).

4. Reinstall the engine oil filler cap. Turn

it clockwise until you feel a strong
resistance.

Note:

 Do not add oil further than the

maximum mark.  Oil levels above the
maximum mark may cause engine damage.

Note:

Immediately soak up any oil spillage

with an absorbent cloth.

Engine Oil Pressure Warning Lamp

WARNING: 

If it illuminates when

you are driving do not continue your
journey, even if the oil level is correct.
Have your vehicle checked.

It illuminates when you switch
the ignition on.

263

Maintenance

If it illuminates when the engine is running
this indicates a malfunction.  Stop your
vehicle as soon as it is safe to do so and
switch the engine off.  Check the engine oil
level.  If the oil level is sufficient, this
indicates a system malfunction.  Have your
vehicle checked as soon as possible.

OIL CHANGE INDICATOR
RESET

Use the information display controls on
the steering wheel to reset the oil change
indicator.

From the main menu scroll to:

Action and description

Message

Press the right arrow button,
then from this menu scroll
to the following message.

Settings

Press OK

Advanced
Settings

Press the right arrow button,
then from this menu scroll
to the following message.

Vehicle

Press the right arrow button,
then from this menu scroll
to the following message.

Oil Life

Press and hold the 

OK

button until the instrument
cluster displays the
following message.

Hold OK to
Reset

Reset Successful

When the oil change indic-
ator resets the instrument
cluster displays 100%.

Remaining Life

{00}%

Action and description

Message

If the instrument cluster
displays one of the following
messages, repeat the
process.

Not Reset

Reset Cancelled

CHANGING THE ENGINE AIR
FILTER - 5.0L, MACH 1

WARNING: 

To reduce the risk of

vehicle damage and personal burn
injuries, do not start your engine with the
air cleaner removed and do not remove
it while the engine is running.

See the scheduled maintenance
information for the appropriate intervals
for changing the air filter element.

When changing the air filter element, use
only the Motorcraft™ air filter element
listed. See the Motorcraft part numbers in
the Capacities and Specifications chapter.

E272660

264

Maintenance

E272661

1.

Remove the two sensor wire harness
retainers from the air box studs located
on the front side of the air box.

2. Remove the four studs that fasten the

upper air box housing to the lower air
box housing.

3. Separate the upper air box housing

from the lower air box housing.

4. Loosen the air filter clamp enough to

allow the filter to slip off the housing
easily.

5. Remove the air filter from the air filter

housing.

6. Wipe the newly-exposed air filter outlet

tube clamping area clean to remove
any dirt or debris.

7.

Install a new air filter, taking care not
to damage the air filter element. Align
the tab on the closed end of the filter
with the notch in the air filter housing.

8. Tighten the air filter clamp down.

Note:

Do not overtighten the clamp or studs

when reinstalling.

9. Reinstall the upper air box piece to the

lower air box piece. Tighten the 4 studs
down.

10.

Reinstall the two sensor wire harness
retainers to the mating air box studs.

CHANGING THE ENGINE AIR
FILTER - 2.3L ECOBOOST™/
5.0L

WARNING: 

To reduce the risk of

vehicle damage and personal burn
injuries, do not start your engine with the
air cleaner removed and do not remove
it while the engine is running.

Note:

 Failure to use the correct air filter

element may result in severe engine
damage.  Your warranty may not cover
these damages.

Only use the specified replacement air
filter.  See 

Motorcraft Parts

 (page 343).

For EcoBoost equipped vehicles: When
servicing the air cleaner, it is important that
no foreign material enter the air induction
system.  The engine and turbocharger are
susceptible to damage from even small
particles.

Change the air filter element at the proper
intervals. Refer to Scheduled Maintenance
Information.

E175951

1.

Release the two clamps that secure
the air filter housing cover.

2. Carefully lift the air filter housing cover.

3. Remove the air filter element from the

air filter housing.

265

Maintenance


Content      ..     14      15      16      17     ..