Dodge Grand Caravan (2020 year). Manual in english - page 4
 

  Index      Manuals     Dodge Grand Caravan (2020 year). Manual in english


Search            copyright infringement  


Content      ..     2      3      4      5     ..


Dodge Grand Caravan (2020 year). Manual in english - page 4


GETTING TO KNOW YOUR VEHICLE

55

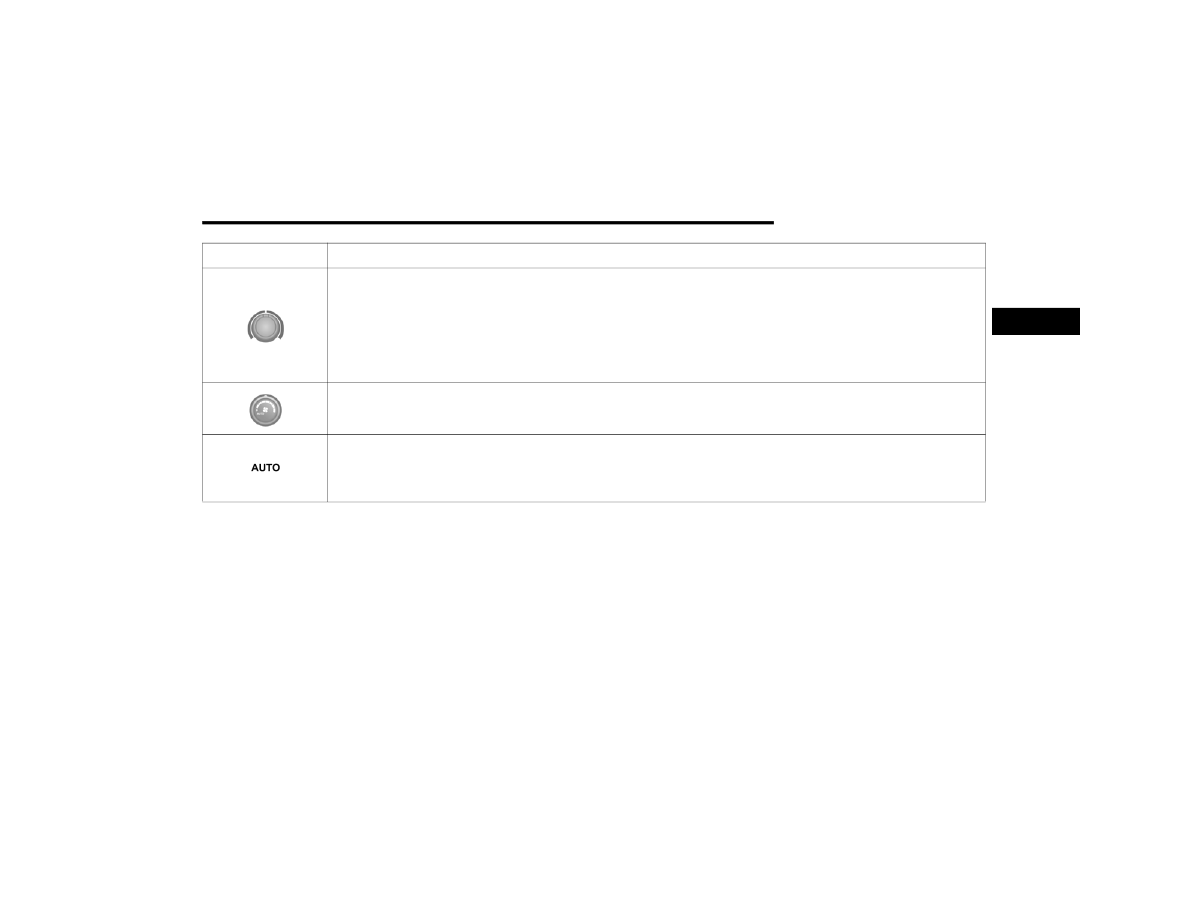
Rear Temperature Control Knob

To change the temperature in the rear of the vehicle, turn the Temperature Control Knob. Turn it to the right to raise the 

temperature, or turn it to the left to lower the temperature. The rear temperature settings are displayed in control head. 

When rear controls are locked by the front system, the Rear Temperature Lock symbol on the control head is illuminated and 

any rear overhead adjustments are ignored.

Push the Rear Temperature Lock button on the front ATC panel. This turns off the Rear Temperature Lock icon in the rear 

temperature knob.
Rear Blower Control Knob

The rear blower control can be manually set to off, or any fixed blower speed by rotating the Blower Control Knob in the rear 

of the vehicle. This allows the rear seat occupants to control the volume of air circulated in the rear of the vehicle.
Rear AUTO Mode

Rear AUTO is selected by adjusting the rear blower knob counterclockwise to AUTO. The ATC system will automatically achieve 

and maintain that comfort level. When the system is set up for your comfort level, it is not necessary to change the settings. 

You will experience the greatest efficiency by simply allowing the system to function automatically.

Icon

Description

2

56

GETTING TO KNOW YOUR VEHICLE


Climate Control Functions

A/C (Air Conditioning) 

The Air Conditioning (A/C) button allows the 

operator to manually activate or deactivate the 

air conditioning system. When the air 

conditioning system is turned on, cool 

dehumidified air will flow through the outlets 

into the cabin. For improved fuel economy, 

press the A/C button to turn off the air 

conditioning and manually adjust the blower 

and airflow mode settings. Also, make sure to 

select only Panel, Bi-Level, or Floor modes.

NOTE:

For Manual Climate Controls, if the system is 

in Mix, Floor or Defrost Mode, the A/C can be 

turned off, but the A/C system shall remain 

active to prevent fogging of the windows.

If fog or mist appears on the windshield or 

side glass, select Defrost mode, and increase 

blower speed if needed.

If your air conditioning performance seems 

lower than expected, check the front of the 

A/C condenser (located in front of the radi

-

ator), for an accumulation of dirt or insects. 

Clean with a gentle water spray from the front 

of the radiator and through the condenser.

MAX A/C
MAX A/C sets the control for maximum cooling 

performance.
Press and release to toggle between MAX A/C 

and the prior settings. The button illuminates 

when MAX A/C is on.
In MAX A/C, the blower level and mode position 

can be adjusted to desired user settings. 

Pressing other settings will cause the MAX A/C 

operation to switch to the selected setting and 

MAX A/C to exit.

Recirculation

In cold weather, use of Recirculation mode may 

lead to excessive window fogging. The Recircu

-

lation feature may be unavailable (button on 

the touchscreen greyed out) if conditions exist 

that could create fogging on the inside of the 

windshield.

On systems with Manual Climate Controls, if 

equipped, the Recirculation mode is not 

allowed in Defrost mode to improve window 

clearing operation. Recirculation is disabled 

automatically if this mode is selected. 

Attempting to use Recirculation while in this 

mode causes the LED in the control button to 

blink and then turns off.

Automatic Temperature Control (ATC) — If 

Equipped

Automatic Operation

1. Push the AUTO button on the faceplate, or 

the AUTO button on the touchscreen on the 

Automatic Temperature Control (ATC) 

Panel.

2. Next, adjust the temperature you would like 

the system to maintain by adjusting the 

driver and passenger temperature control 

buttons. Once the desired temperature is 

displayed, the system will achieve and 

automatically maintain that comfort level.

GETTING TO KNOW YOUR VEHICLE

57

3. When the system is set up for your comfort 

level, it is not necessary to change the 

settings. You will experience the greatest 

efficiency by simply allowing the system to 

function automatically.

NOTE:

It is not necessary to move the temperature 

settings for cold or hot vehicles. The system 

automatically adjusts the temperature, 

mode, and blower speed to provide comfort 

as quickly as possible.

The temperature can be displayed in U.S. or 

Metric units by selecting the U.S./Metric 

customer programmable feature. To provide 

you with maximum comfort in the Automatic 

mode during cold start-ups, the blower fan 

will remain on low until the engine warms up. 

The blower will increase in speed and transi

-

tion into AUTO mode.

Manual Operation Override

This system offers a full complement of manual 

override features. The AUTO symbol in the front 

ATC display will be turned off when the system 

is being used in the manual mode.

Operating Tips 

NOTE:

Refer to the chart at the end of this section for 

suggested control settings for various weather 

conditions.

Summer Operation

The engine cooling system must be protected 

with a high-quality antifreeze coolant to provide 

proper corrosion protection and to protect 

against engine overheating. OAT coolant 

(conforming to MS.90032) is recommended. 

Refer to “Fluids And Lubricants” in “Technical 

Specifications” for proper coolant selection.

Winter Operation

To ensure the best possible heater and 

defroster performance, make sure the engine 

cooling system is functioning properly and the 

proper amount, type, and concentration of 

coolant is used. Refer to “Fluids And 

Lubricants” in “Technical Specifications” for 

proper coolant selection. Use of the air Recircu

-

lation mode during Winter months is not 

recommended, because it may cause window 

fogging.

Vacation/Storage  

Before you store your vehicle, or keep it out of 

service (i.e., vacation) for two weeks or more, 

run the air conditioning system at idle for about 

five minutes, in fresh air with the blower setting 

on high. This will ensure adequate system 

lubrication to minimize the possibility of 

compressor damage when the system is started 

again.

2

58

GETTING TO KNOW YOUR VEHICLE


Window Fogging 

Vehicle windows tend to fog on the inside in 

mild, rainy, and/or humid weather. To clear the 

windows, select Defrost or Mix mode and 

increase the front blower speed. Do not use the 

Recirculation mode without A/C for long 

periods, as fogging may occur.

Outside Air Intake

Make sure the air intake, located directly in 

front of the windshield, is free of obstructions 

such as leaves. Leaves collected in the air 

intake may reduce airflow, and if they enter the 

plenum, they could plug the water drains. In 

winter months, make sure the air intake is clear 

of ice, slush, and snow.

A/C Air Filter  

The climate control system filters out dust and 

pollen from the air. Refer to an authorized 

dealer for filter replacement instructions.

Operating Tips Chart

CAUTION!

Failure to follow these cautions can cause 

damage to the heating elements:

Use care when washing the inside of the 

rear window. Do not use abrasive window 

cleaners on the interior surface of the 

window. Use a soft cloth and a mild 

washing solution, wiping parallel to the 

heating elements. Labels can be peeled off 

after soaking with warm water.

Do not use scrapers, sharp instruments, or 

abrasive window cleaners on the interior 

surface of the window.

Keep all objects a safe distance from the 

window.

WEATHER

CONTROL 

SETTINGS

Hot Weather And 

Vehicle Interior Is Very 

Hot

Set the mode control 

to  ,   on, and 

blower on high. Roll 

down the windows for 

a minute to flush out 

the hot air. Adjust the 

controls as needed to 

achieve comfort.

Warm Weather

Turn   on and set 

the mode control to 

the   position.

Cool Sunny

Operate in   

position.

Cool & Humid 

Conditions

Set the mode control 
to   and turn   on 

to keep windows 

clear.

Cold Weather

Set the mode control 

to the   position. If 

windshield fogging 

starts to occur, move 

the control to the   

position.

WEATHER

CONTROL 

SETTINGS

GETTING TO KNOW YOUR VEHICLE

59

WINDOWS 

Power Vent Windows — If Equipped 

The power vent window switch located on the 

driver's door trim panel allows the driver to 

operate the two vent windows from the driver's 

seat.

Power Vent Window Switch Open/Close

Power Windows

You can control either the front or rear windows 

using controls located on the driver's door trim 

panel.
The driver may lock out the rear power windows 

by pushing the bar control just below the power 

window controls.

The controls will operate only when the ignition 

switch is in the ON/RUN or ACC position and 

during power accessory delay.

Power Window Lockout Switch

Driver Power Window Switches

NOTE:

Power window controls will also remain active 

for up to 10 minutes after the ignition switch 

has been placed in the OFF position, depending 

upon the accessory delay setting. Opening a 

front door will cancel this feature.

There is a single control on the front 

passenger’s door trim panel which operates the 

passenger door window and a set of controls 

that lock and unlock all doors. The controls will 

operate only when the ignition switch is in the 

ON/RUN or ACC position and during power 

accessory delay.
Auto Up Feature With Anti-Pinch Protection — If 

Equipped
The front driver and front passenger controls 

may be equipped with an Auto Up feature. Lift 

the window switch fully upward to the second 

detent, release, and the window will go up 

automatically.
To stop the window from going all the way up 

during the Auto Up operation, push down on the 

control briefly.

2

60

GETTING TO KNOW YOUR VEHICLE


To close the window part way, lift the window 

control to the first detent and release when you 

want the window to stop.

NOTE:

If the window runs into any obstacle during 

auto-closure, it will reverse direction and 

then go back down. Remove the obstacle and 

use the window control again to close the 

window.

Any impact due to rough road conditions may 

trigger the auto reverse function unexpect

-

edly during auto-closure. If this happens, pull 

the control lightly to the first detent and hold 

to close window manually.

Auto Up Reset — If Equipped
To reactivate the Auto Up feature, perform the 

following steps after vehicle power is restored:

1. Pull the window control up to close the 

window completely and continue to hold 

the control up for an additional two 

seconds after the window is closed.

2. Push the window control down firmly to the 

second detent to open the window 

completely and continue to hold the control 

down for an additional two seconds after 

the window is fully open.

Sliding Side Door Power Window Control — If 

Equipped
Second row passengers may open and close 

the sliding door window by a single control on 

the door handle assembly.
The controls will operate only when the ignition 

switch is in the ON/RUN or ACC position and 

during power accessory delay.

NOTE:

The controls will not operate if the driver has 

activated the Power Window Lockout.

The sliding door windows do not open fully. 

They stop several inches above the window 

sill.

Sliding Door Power Window Control

Wind Buffeting
Wind buffeting can be described as the 

perception of pressure on the ears or a 

helicopter-type sound in the ears. Your vehicle 

may exhibit wind buffeting with the windows 

down, or the sunroof (if equipped) in certain 

open or partially open positions. This is a normal 

occurrence and can be minimized. If the rear 

windows are open and buffeting occurs, open 

the front and rear windows together to minimize 

the buffeting. If the buffeting occurs with the 

sunroof open, adjust the sunroof opening to 

minimize the buffeting.

WARNING!

There is no anti-pinch protection when the 

window is almost closed. To avoid personal 

injury be sure to clear your arms, hands, 

fingers and all objects from the window path 

before closing.

GETTING TO KNOW YOUR VEHICLE

61

HOOD    

Opening The Hood

To open the hood, two latches must be 

released.

1. Pull the hood release lever located on the 

instrument panel, below the steering 

column.

Hood Release Lever

2. Move to the front of the vehicle and look 

inside the center of the hood opening. 

Locate, then push the safety catch 

downward while raising the hood at the 

same time.

Safety Lever Location

Use the hood prop rod to secure the hood in the 

open position.

Hood Prop Rod

Closing The Hood

WARNING!

Be sure the hood is fully latched before driving 

your vehicle. If the hood is not fully latched, it 

could open when the vehicle is in motion and 

block your vision. Failure to follow this warning 

could result in serious injury or death.

CAUTION!

To prevent possible damage, do not slam the 

hood to close it. Lower hood to approximately 

12 inches (30 cm) and drop the hood to 

close. Make sure hood is fully closed for both 

latches. Never drive vehicle unless hood is 

fully closed, with both latches engaged.

2

62

GETTING TO KNOW YOUR VEHICLE


LIFTGATE

Opening

To Unlock/Enter The Liftgate
The liftgate may be released in several ways:

Overhead console liftgate button

Key fob

Outside handle

Push the liftgate button on the key fob twice 

within five seconds to release the liftgate.

Liftgate Handle

Closing

To Close The Liftgate
Grasp the liftgate closing handle and initiate 

lowering the liftgate. Release the handle when 

the liftgate takes over the closing effort.
The power liftgate may be closed by pushing the 

rear power liftgate switch, located in the upper 

left trim in the liftgate opening. Pushing once 

will only close the liftgate. This button cannot be 

used to open the liftgate.

Rear Power Liftgate Switch

Power Liftgate — If Equipped

The power liftgate may be opened or closed in 

several ways:

Overhead console liftgate button

Key fob

Outside handle (opens liftgate only)

Rear power liftgate switch

(when liftgate is open)

WARNING!

Driving with the liftgate open can allow 

poisonous exhaust gases into your vehicle. 

You and your passengers could be injured 

by these fumes. Keep the liftgate closed 

when you are operating the vehicle.

If you are required to drive with the liftgate 

open, make sure that all windows are 

closed, and the climate control blower 

switch is set at high speed. Do not use the 

recirculation mode.

GETTING TO KNOW YOUR VEHICLE

63

Using the above ways:

When the liftgate is fully closed, the liftgate 

will open

When the liftgate is fully open, the liftgate will 

close

When the liftgate is moving, the liftgate will 

reverse

Push the Power Liftgate button on the overhead 

console to open or close the liftgate.
Push the liftgate button on the key fob twice 

within five seconds to open or close the liftgate.

Overhead Console Power Switches

Cargo Area Features 

Cargo Area Storage

The liftgate sill plate has a raised line with the 

statement “Load To This Line”. This line 

indicates how far rearward cargo can be placed 

without interfering with liftgate closing.

Rear Cargo Area Loading Limit

NOTE:

With all rear seats stowed or removed, 4 x 8 foot 

sheets of building material will fit on the vehicle 

floor with the liftgate closed. The front seats 

must be moved slightly forward of the rearmost 

position.

LOAD LEVELING SYSTEM — IF EQUIPPED

The automatic load leveling system will provide 

a level-riding vehicle under most passenger and 

cargo loading conditions.
A hydraulic pump contained within the shock 

absorbers raises the rear of the vehicle to the 

correct height. It takes approximately 1 mile 

(1.6 km) of driving for the leveling to complete 

depending on road surface conditions.
If the leveled vehicle is not moved for approxi

-

mately 15 hours, the leveling system will bleed 

itself down. The vehicle must be driven to reset 

the system.

GARAGE DOOR OPENER — IF EQUIPPED    

HomeLink® replaces up to three remote 

controls (hand-held transmitters) that operate 

devices such as garage door openers, 

motorized gates, lighting or home security 

systems. The HomeLink® unit operates off your 

vehicle’s battery.

1 — Left Sliding Door
2 — Liftgate
3 — Right Sliding Door
4 — Sliding Door Power Off

2

64

GETTING TO KNOW YOUR VEHICLE


The HomeLink® buttons, located on either the 

overhead console, headliner or sunvisor, 

designate the three different HomeLink® 

channels. The HomeLink® indicator is located 

above the center button.

HomeLink® Buttons/Overhead Consoles

HomeLink® Buttons/Sunvisor/Headliner

NOTE:

HomeLink® is disabled when the vehicle 

security alarm is active.

Before You Begin Programming HomeLink®

Be sure that your vehicle is parked outside of 

the garage before you begin programming.
For more efficient programming and accurate 

transmission of the radio-frequency signal, it is 

recommended that a new battery be placed in 

the hand-held transmitter of the device that is 

being programmed to the HomeLink® system.
To erase the channels, place the ignition in the 

ON/RUN position and push and hold the two 

outside HomeLink® buttons (I and III) for up to 

20 seconds or until the red indicator flashes.

NOTE:

Erasing all channels should only be 

performed when programming HomeLink® 

for the first time. Do not erase channels when 

programming additional buttons.

If you have any problems, or require assis

-

tance, please call toll-free 1-800-355-3515 

or, on the Internet at 

HomeLink.com

 for infor

-

mation or assistance.

Programming A Rolling Code

For programming garage door openers that 

were manufactured after 1995:
These garage door openers can be identified by 

the “LEARN” or “TRAIN” button located where 

the hanging antenna is attached to the garage 

door opener. It is NOT the button that is 

normally used to open and close the door. The 

name and color of the button may vary by 

manufacturer.

Training The Garage Door Opener

1 — Door Opener
2 — Training Button

GETTING TO KNOW YOUR VEHICLE

65

1. Place the ignition in the ON/RUN position.

2. Place the hand-held transmitter 

1 to 3 inches (3 to 8 cm) away from the 

HomeLink® button you wish to program 

while keeping the HomeLink® indicator 

light in view.

3. Push and hold the HomeLink® button you 

want to program while you push and hold 

the hand-held transmitter button.

4. Continue to hold both buttons and observe 

the indicator light. The HomeLink® 

indicator will flash slowly and then rapidly 

after HomeLink® has received the 

frequency signal from the hand-held 

transmitter. Release both buttons after the 

indicator light changes from slow to rapid.

5. At the garage door opener (in the garage), 

locate the “LEARN” or “TRAINING” button. 

This can usually be found where the 

hanging antenna wire is attached to the 

garage door opener/device motor. Firmly 

push and release the “LEARN” or 

“TRAINING” button. On some garage door 

openers/devices there may be a light that 

blinks when the garage door opener/device 

is in the LEARN/TRAIN mode.

NOTE:

You have 30 seconds in which to initiate the 

next step after the LEARN button has been 

pushed.

6. Return to the vehicle and push the 

programmed HomeLink® button twice 

(holding the button for two seconds each 

time). If the garage door opener/device 

activates, programming is complete.

NOTE:

If the garage door opener/device does not 

activate, push the button a third time (for two 

seconds) to complete the training.

To program the remaining two HomeLink® 

buttons, repeat each step for each remain

-

ing button. DO NOT erase the channels.

Reprogramming A Single HomeLink® Button 

(Rolling Code)

To reprogram a channel that has been 

previously trained, follow these steps:

1. Place the ignition in the ON/RUN position.

2. Push and hold the desired HomeLink® 

button until the indicator light begins to 

flash after 20 seconds. Do not release the 

button.

3. Without releasing the button, proceed with 

“Programming A Rolling Code” step two and 

follow all remaining steps.

Programming A Non-Rolling Code

For programming garage door openers 

manufactured before 1995:

1. Place the ignition in the ON/RUN position.

NOTE:

For vehicles equipped with Keyless Enter-N-Go, 

place the ignition in the RUN position with the 

engine on. Make sure while programming 

HomeLink® with the engine on that your vehicle 

is outside of your garage, or that the garage 

door remains open at all times.

2. Place the hand-held transmitter 

1 to 3 inches (3 to 8 cm) away from the 

HomeLink® button you wish to program 

while keeping the HomeLink® indicator 

light in view.

2

66

GETTING TO KNOW YOUR VEHICLE


3. Push and hold the HomeLink® button you 

want to program while you push and hold 

the hand-held transmitter button.

4. Continue to hold both buttons and observe 

the indicator light. The HomeLink® 

indicator will flash slowly and then rapidly 

after HomeLink® has received the 

frequency signal from the hand-held 

transmitter. Release both buttons after the 

indicator light changes from slow to rapid.

5. Push and hold the programmed 

HomeLink® button and observe the 

indicator light.

If the indicator light stays on constantly, 

programming is complete and the garage 

door/device should activate when the 

HomeLink® button is pushed.

To program the two remaining 

HomeLink® buttons, repeat each step 

for each remaining button. DO NOT erase 

the channels.

Reprogramming A Single HomeLink® Button 

(Non-Rolling Code)

To reprogram a channel that has been 

previously trained, follow these steps:

1. Place the ignition in the ON/RUN position.

2. Push and hold the desired HomeLink® 

button until the indicator light begins to 

flash after 20 seconds. Do not release the 

button.

3. Without releasing the button, proceed with 

“Programming A Non-Rolling Code” step two 

and follow all remaining steps.

Canadian/Gate Operator Programming

For programming transmitters in 

Canada/United States that require the 

transmitter signals to “time-out” after several 

seconds of transmission:
Canadian radio frequency laws require 

transmitter signals to time-out (or quit) after 

several seconds of transmission, which may not 

be long enough for HomeLink® to pick up the 

signal during programming. Similar to this 

Canadian law, some U.S. gate operators are 

designed to time-out in the same manner.

It may be helpful to unplug the device during the 

cycling process to prevent possible overheating 

of the garage door or gate motor.

1. Place the ignition in the ON/RUN position.

2. Place the hand-held transmitter 

1 to 3 inches (3 to 8 cm) away from the 

HomeLink® button you wish to program 

while keeping the HomeLink® indicator 

light in view.

3. Continue to push and hold the HomeLink® 

button while you push and release (“cycle”) 

your hand-held transmitter every two 

seconds until HomeLink® has successfully 

accepted the frequency signal. The 

indicator light will flash slowly and then 

rapidly when fully trained.

4. Watch for the HomeLink® indicator to 

change flash rates. When it changes, it is 

programmed. It may take up to 30 seconds 

or longer in rare cases. The garage door 

may open and close while you are 

programming.

GETTING TO KNOW YOUR VEHICLE

67

5. Push and hold the programmed 

HomeLink® button and observe the 

indicator light.

NOTE:

If the indicator light stays on constantly, 

programming is complete and the garage 

door/device should activate when the 

HomeLink® button is pushed.

To program the two remaining 

HomeLink® buttons, repeat each step 

for each remaining button. DO NOT erase 

the channels.

If you unplugged the garage door 

opener/device for programming, plug it back in 

at this time.

Using HomeLink®

To operate, push and release the programmed 

HomeLink® button. Activation will now occur for 

the programmed device (i.e. garage door 

opener, gate operator, security system, entry 

door lock, home/office lighting, etc.) The 

hand-held transmitter of the device may also be 

used at any time.

Security

It is advised to erase all channels before you sell 

or turn in your vehicle.
To do this, push and hold the two outside 

buttons for 20 seconds until the red indicator 

flashes.

NOTE:

All channels will be erased. Individual channels 

cannot be erased.

The HomeLink® Universal Transceiver is 

disabled when the vehicle security alarm is 

active.

Troubleshooting Tips

If you are having trouble programming 

HomeLink®, here are some of the most 

common solutions:

Replace the battery in the garage door 

opener hand-held transmitter.

Push the LEARN button on the garage door 

opener to complete the training for a Rolling 

Code.

Did you unplug the device for programming 

and remember to plug it back in?

If you have any problems, or require assistance, 

please call toll-free 1-800-355-3515 or, on the 

Internet at 

HomeLink.com

 for information or 

assistance.

WARNING!

Vehicle exhaust contains carbon monoxide, 

a dangerous gas. Do not run your vehicle in 

the garage while programming the trans

-

ceiver. Exhaust gas can cause serious 

injury or death.

Your motorized door or gate will open and 

close while you are programming the 

universal transceiver. Do not program the 

transceiver if people, pets or other objects 

are in the path of the door or gate. Only use 

this transceiver with a garage door opener 

that has a “stop and reverse” feature as 

required by Federal safety standards. This 

includes most garage door opener models 

manufactured after 1982. Do not use a 

garage door opener without these safety 

features.

2

68

GETTING TO KNOW YOUR VEHICLE


General Information

The following regulatory statement applies to all 

Radio Frequency (RF) devices equipped in this 

vehicle:
This device complies with Part 15 of the FCC 

Rules and with Innovation, Science and 

Economic Development Canada license-exempt 

RSS standard(s). Operation is subject to the 

following two conditions:

1. This device may not cause harmful 

interference, and

2. This device must accept any interference 

received, including interference that may 

cause undesired operation.

Le présent appareil est conforme aux CNR 

d`Innovation, Science and Economic 

Development applicables aux appareils radio 

exempts de licence. L'exploitation est autorisée 

aux deux conditions suivantes:

1. l'appareil ne doit pas produire de 

brouillage, et

2. l'utilisateur de l'appareil doit accepter tout 

brouillage radioélectrique subi, même si le 

brouillage est susceptible d'en compro

-

mettre le fonctionnement.

La operación de este equipo está sujeta a las 

siguientes dos condiciones:

1. es posible que este equipo o dispositivo no 

cause interferencia perjudicial y

2. este equipo o dispositivo debe aceptar 

cualquier interferencia, incluyendo la que 

pueda causar su operación no deseada.

NOTE:

Changes or modifications not expressly 

approved by the party responsible for 

compliance could void the user’s authority to 

operate the equipment.

INTERNAL EQUIPMENT

Storage

Glove Compartments

The glove compartment is located on the 

passenger side of the instrument panel and 

features both an upper and lower storage area.

Upper And Lower Glove Compartments

To open the upper compartment, push in the 

release button located on the left side of the 

upper door. The door will automatically open.

Upper Compartment Release Button

To close the compartment door, push 

downward on the door's surface to latch the 

door closed.

GETTING TO KNOW YOUR VEHICLE

69

To open the lower compartment, pull the 

release handle.

Lower Compartment Release Handle

NOTE:

The lower compartment is equipped with a lock 

that is a part of the compartment handle.

Center Console Features 

There are two consoles available: Basic and 

Super.

Basic Console
The Basic Console consists of the following 

features:

The Basic Console profile allows vehicle 

occupants to easily pass through the first row 

to the second.

Four cupholders accept up to extra large size 

beverage cups or 20 oz (0.6 L) plastic bottles. 

Cupholders are dishwasher safe for cleaning.

The cupholders are removable to access a 

large storage bin.

The Basic Console is removable from the 

vehicle for additional floor space by removing 

the anchor cup plug and clip at the console 

base, sliding the console base forward while 

lifting slightly to clear the rear load floor hook.

To reinstall the Basic Console:

1. Position the console at a slight angle (front 

slightly higher than the rear).

2. Slide the console rearward into the floor 

bracket/hook.

3. Align the console until the front anchor cup 

plug hole is centered on the winch hole.

4. Reinstall the clip first and then while 

pushing downward on the console with 

slight pressure, reinstall the cover plug.

5. Pull up on the console to be sure it is firmly 

latched.

WARNING!

Do not operate this vehicle with a console 

compartment lid in the open position. Driving 

with the console compartment lid open may 

result in injury in a collision.

WARNING!

In an accident, serious injury could result if 

the removable floor console is not properly 

installed. Always be sure the removable floor 

console is fully latched.

2

70

GETTING TO KNOW YOUR VEHICLE


Super Console — If Equipped
The Super Console contains multiple storage 

areas: a front lower pass through, top forward 

bin, top rearward bin and rear pull out drawer.
The Super Console contains a pass through 

storage area accessible for both the driver and 

front passenger.

Super Console Pass Through

The Super Console tambour doors are opened 

by pushing down on the finger tabs and sliding 

the door. The front tambour door slides forward, 

the rear tambour door slides rearward.

Super Console

NOTE:

The front cupholder light ring and pass through 

lighting is controlled by a dimming switch 

located on the instrument panel, refer to 

“Interior Lights” in this chapter for further 

information.

Located in the back of the Super Console is a 

storage drawer and cupholders for the rear 

passengers.

Rear Drawer Storage

1 — Front Sliding Tambour Door
2 — Cupholder Light Ring
3 — Rear Sliding Tambour Door


Content      ..     2      3      4      5     ..