Dodge Grand Caravan (2020 year). Manual in english - page 2
 

  Index      Manuals     Dodge Grand Caravan (2020 year). Manual in english


Search            copyright infringement  


Content      ..      1      2      3      ..


Dodge Grand Caravan (2020 year). Manual in english - page 2


GETTING TO KNOW YOUR VEHICLE

23

(Continued)

6. Push the seat into the storage bin.

Seat In Storage Bin

7. Close the storage bin cover.

To Unstow Second Row Seats
To unstow the second row seat, proceed as 

follows:

1. Pull up on the storage bin latch to open the 

cover.

2. Pull up on the strap to lift the seat out of the 

storage bin and push the seat rearward to 

latch the seat anchors.

3. Lift the seatback to the full upright position.

4. Return the head restraint to its upright 

position, close the storage bin cover and 

slide the storage bin locking mechanism to 

the “unlocked” position.

WARNING!

In a collision, serious injury could result if the 

seat storage bin covers are not properly 

latched:

Do not drive the vehicle with the storage bin 

covers open.

Keep the storage bin covers closed and 

latched while the vehicle is in motion.

Do not use a storage bin latch as a tie 

down.

CAUTION!

The storage bin cover must be locked and 

flat to avoid damage from contact with the 

front seat tracks, which have minimal clear

-

ance to the cover.

Do not sit on the second row seat when it is 

in the stowed position with the seatback 

upright otherwise damage to the seat may 

occur.

WARNING!

 (Continued)

WARNING!

In a collision, you or others in your vehicle 

could be injured if seats are not properly 

latched to their floor attachments. Always 

be sure the seats are fully latched.

Sitting in a seat with the head restraint in its 

lowered position could result in serious 

injury or death in a collision. Always make 

sure the head restraints are in their upright 

positions when the seat is to be occupied.

2

24

GETTING TO KNOW YOUR VEHICLE


Stow 'n Go Seat — Folded And Latched Position
To tumble or stow the seat from the folded and 

latched position, proceed as follows:

1. Return the seatback to the upright 

position.

Raising The Seatback

2. Return the head restraint to the upright 

position.

Raising The Head Restraint

3. Pull up on the seatback recliner lever on the 

outboard side of the seat to fold head rest, 

seatback, and tumble the seat forward.

Easy Entry Second Row
The second row Stow 'n Go seats allow easy 

entry to the third row seat or rear cargo area.
Pull up on the seatback recliner lever on the 

outboard side of the seat.

Seatback Recliner Lever

The seat will automatically fold into position for 

easy entry into the third row.

WARNING!

In the event of a collision you could be injured 

if the seat is not fully latched.

GETTING TO KNOW YOUR VEHICLE

25

Second Row Bench Seat — If Equipped

While the bench seat does not stow in the floor, 

it is removable for added cargo space.

Second Row Bench Seat

Release levers are located on the rear leg 

assemblies, near the floor. To remove the seat, 

squeeze each release handle and rotate 

downwards to deploy the wheels. A lock 

indicator button pops up when the seat is 

unlocked. The seat assembly can now be 

removed from the vehicle and moved on its 

Easy Out Rollers.

Release Handles

To reinstall the seat, align the seat into the 

detent positions on the floor. Squeeze the 

release handle and rotate upward until the lock 

indicator button returns into the handle.

Manually Folding Third Row Seats — If 

Equipped

To manually fold the third row seats, proceed as 

follows:

1. Lower the center head restraint down to 

the seatback by pushing the button on the 

guide and pushing the head restraint 

down.

2. Lower the outboard head restraints by 

pulling on the release strap marked “1” 

located on the outboard side of the head 

restraint.

Head Restraint Release Strap “1”

WARNING!

If not properly latched, the seat could become 

loose. Personal injuries could result. After 

reinstalling these seats, be sure the red 

indicator button on the release handles 

return into the handles.

2

26

GETTING TO KNOW YOUR VEHICLE


3. Pull release strap marked “2” located on 

the rear of the seat to lower the seatback.

Release Strap “2”

4. Pull release strap marked “3” to release the 

anchors.

Release Strap “3”

5. Pull release strap marked “4” and tumble 

the seat rearward into the storage bin.

Release Strap “4”

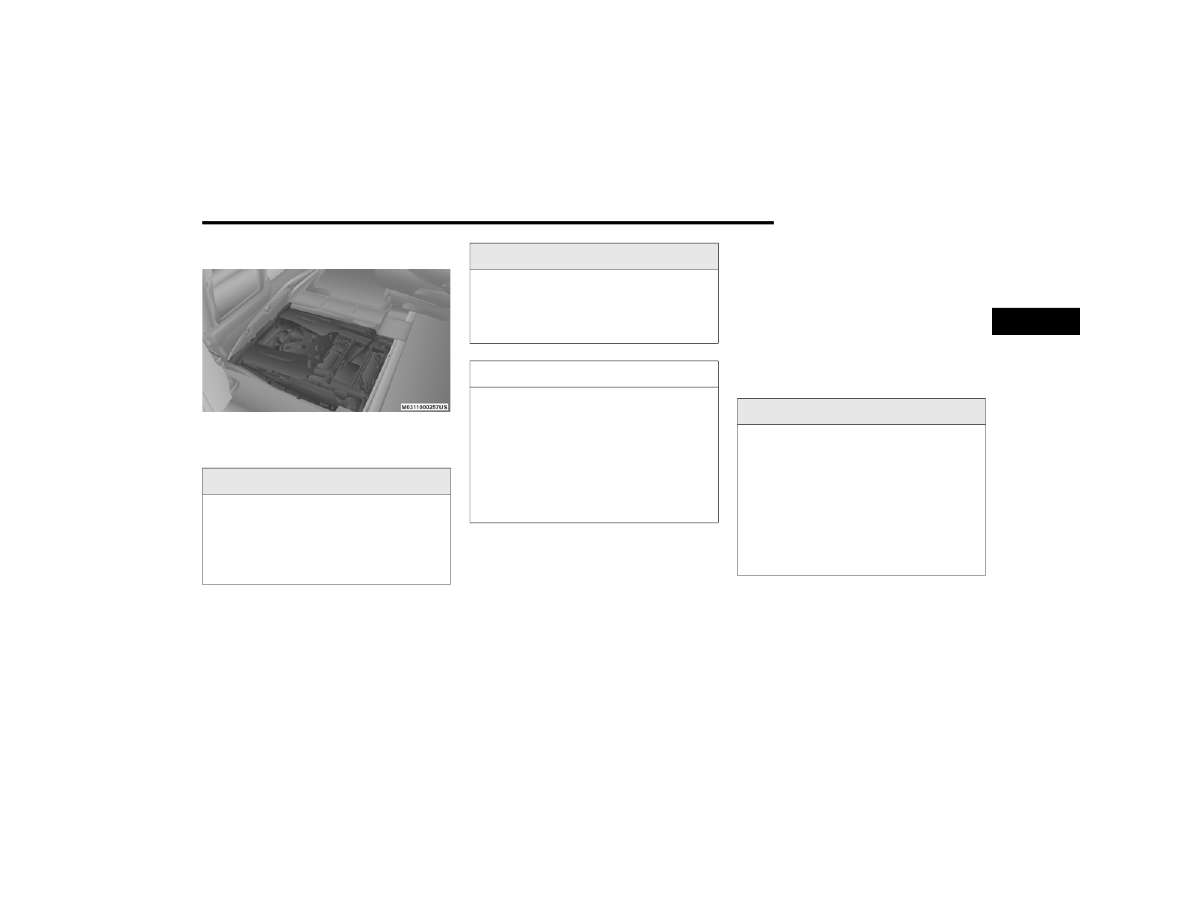
Stowed Third Row Seat

NOTE:

You may experience deformation in the seat 

cushion from the seat belt buckles if the seats 

are left folded for an extended period of time. 

This is normal and by simply opening the seats 

to the open position, over time the seat cushion 

will return to its normal shape.

To Unfold Third Row Seats
To unfold the third row seats, proceed as 

follows:

1. Pull up on the assist strap to lift the seat 

out of the storage bin and push the seat 

forward until the anchors latch.

2. Pull release strap marked “2” to unlock the 

recliner.

3. Pulling strap “4” releases the seatback to 

return to its full upright position.

4. Raise the head restraint to its upright 

position.

GETTING TO KNOW YOUR VEHICLE

27

Tailgate Mode
To fold the third row seats into Tailgate Mode, 

proceed as follows:

1. Pull release strap “3”, then pull release 

strap “4” to rotate the entire seat 

rearward.

2. To restore the seat to its upright position, lift 

up on the seatback and push forward until 

the anchors latch.

Power Seats — If Equipped

Some models may be equipped with eight-way 

power seats for the driver and front passenger. 

The power seat switches are located on the 

outboard side of the seat. The switches control 

the movement of the seat cushion and the 

seatback.

Driver Power Seat Switch

WARNING!

In a collision, you or others in your vehicle 

could be injured if seats are not properly 

latched to their floor attachments. Always 

be sure the seats are fully latched.

Sitting in a seat with the head restraint in its 

lowered position could result in serious 

injury or death in a collision. Always make 

sure the head restraints are in their upright 

positions when the seat is to be occupied.

WARNING!

To avoid serious injury or death, never 

operate the vehicle with occupants in the 

third row seat while in the tailgate mode.

1 — Seat Switch
2 — Seatback Switch

WARNING!

Adjusting a seat while driving may be 

dangerous. Moving a seat while driving 

could result in loss of control which could 

cause a collision and serious injury or 

death.

Seats should be adjusted before fastening 

the seat belts and while the vehicle is 

parked. Serious injury or death could result 

from a poorly adjusted seat belt.

Do not ride with the seatback reclined so 

that the shoulder belt is no longer resting 

against your chest. In a collision you could 

slide under the seat belt, which could result 

in serious injury or death.

CAUTION!

Do not place any article under a power seat 

or impede its ability to move as it may cause 

damage to the seat controls. Seat travel may 

become limited if movement is stopped by an 

obstruction in the seat's path.

2

28

GETTING TO KNOW YOUR VEHICLE


Adjusting The Seat Forward Or Rearward

The seat can be adjusted both forward and 

rearward. Push the seat switch forward or 

rearward. The seat will move in the direction of 

the switch. Release the switch when the desired 

position has been reached.

Adjusting The Seat Up Or Down 

The height of the seats can be adjusted up or 

down. Pull upward or push downward on the 

rear of seat switch, the seat will move in the 

direction of the switch. Release the switch when 

the desired position has been reached.

Tilting The Seat Up Or Down

The angle of the seat cushion can be adjusted 

in two directions. Pull upward or push 

downward on the front of the seat switch, the 

front of the seat cushion will move in the 

direction of the switch. Release the switch when 

the desired position has been reached.

Reclining The Seatback

The angle of the seatback can be adjusted 

forward or rearward. Push the seatback switch 

forward or rearward, the seat will move in the 

direction of the switch. Release the switch when 

the desired position is reached.

Power Lumbar — If Equipped

Vehicles equipped with power driver or 

passenger seats may also be equipped with 

power lumbar. The power lumbar switch is 

located on the outboard side of the power seat. 

Push the switch forward to increase the lumbar 

support. Push the switch rearward to decrease 

the lumbar support.

Power Lumbar Switch

Heated Seats — If Equipped

On some models, the front seats may be 

equipped with heaters located in the seat 

cushions and seat backs.

WARNING!

Adjusting a seat while driving may be 

dangerous. Moving a seat while driving 

could result in loss of control which could 

cause a collision and serious injury or 

death.

Seats should be adjusted before fastening 

the seat belts and while the vehicle is 

parked. Serious injury or death could result 

from a poorly adjusted seat belt.

Do not ride with the seatback reclined so 

that the shoulder belt is no longer resting 

against your chest. In a collision you could 

slide under the seat belt, which could result 

in serious injury or death.

CAUTION!

Do not place any article under a power seat 

or impede its ability to move as it may cause 

damage to the seat controls. Seat travel may 

become limited if movement is stopped by an 

obstruction in the seat's path.

GETTING TO KNOW YOUR VEHICLE

29

Front Heated Seats

There are two heated seat switches that allow 

the driver and passenger to operate the seats 

independently. The controls for each heater are 

located on the switch bank below the climate 

controls.

You can choose from HI, LO or OFF heat 

settings. Amber indicator lights in each switch 

indicate the level of heat in use. Two indicator 

lights will illuminate for HI, one for LO and none 

for OFF.

Push the heated seat button   once to turn 

the HI setting on.

Push the heated seat button   a second 

time to turn the LO setting on.

Push the heated seat button   a third time 

to turn the heating elements off.

NOTE:

Once a heat setting is selected, heat will be felt 

within two to five minutes.

If the HI-level setting is selected, the system will 

automatically switch to LO-level after approxi

-

mately 60 minutes of continuous operation. At 

that time, the display will change from HI to LO, 

indicating the change. The LO-level setting will 

turn off automatically after approximately 

45 minutes.

Vehicles Equipped With Remote Start
On models that are equipped with remote start, 

the heated seats can be programmed to come 

on during a remote start.
This feature can be programmed through the 

instrument cluster display. Refer to “Instrument 

Cluster Display” in “Getting To Know Your 

Instrument Panel” for further information.

WARNING!

Persons who are unable to feel pain to the 

skin because of advanced age, chronic 

illness, diabetes, spinal cord injury, medica

-

tion, alcohol use, exhaustion or other phys

-

ical condition must exercise care when 

using the seat heater. It may cause burns 

even at low temperatures, especially if 

used for long periods of time.

Do not place anything on the seat or seat

-

back that insulates against heat, such as a 

blanket or cushion. This may cause the seat 

heater to overheat. Sitting in a seat that has 

been overheated could cause serious 

burns due to the increased surface 

temperature of the seat.

WARNING!

Persons who are unable to feel pain to the 

skin because of advanced age, chronic 

illness, diabetes, spinal cord injury, medica

-

tion, alcohol use, exhaustion or other phys

-

ical condition must exercise care when 

using the seat heater. It may cause burns 

even at low temperatures, especially if 

used for long periods of time.

Do not place anything on the seat or seat

-

back that insulates against heat, such as a 

blanket or cushion. This may cause the seat 

heater to overheat. Sitting in a seat that has 

been overheated could cause serious 

burns due to the increased surface 

temperature of the seat.

2

30

GETTING TO KNOW YOUR VEHICLE


Plastic Grocery Bag Retainer Hooks

Retainer hooks which will hold plastic grocery 

bag handles are built into the seatbacks of all 

rear seats and some front seats. The floor 

supports the partial weight of the bagged 

goods.

HEAD RESTRAINTS  

Head restraints are designed to reduce the risk 

of injury by restricting head movement in the 

event of a rear impact. Head restraints should 

be adjusted so that the top of the head restraint 

is located above the top of your ear.

Supplemental Active Head Restraints — 

Front Seats

Active Head Restraints are passive, deployable 

components, and vehicles with this equipment 

cannot be readily identified by any markings, 

only through visual inspection of the head 

restraint. The Active Head Restraints (AHR) will 

be split in two halves, with the front half being 

soft foam and trim, the back half being 

decorative plastic.
When AHRs deploy during a rear impact, the 

front half of the head restraint extends forward 

to reduce the gap between the back of the 

occupant’s head and the AHR. This system is 

design to reduce the risk of injury to the driver 

or front passenger in certain types of rear 

impacts. Refer to “Occupant Restraints” in 

“Safety” for further information.
To raise the head restraint, pull upward on the 

head restraint. To lower the head restraint, 

push the adjustment button, located at the 

base of the head restraint, and push downward 

on the head restraint.

Adjustment Button

For comfort, the Active Head Restraints can be 

tilted forward and rearward. To tilt the head 

restraint closer to the back of your head, pull 

forward on the bottom of the head restraint. 

Push rearward on the bottom of the head 

restraint to move the head restraint away from 

your head.

Active Head Restraint (Normal Position)

WARNING!

All occupants, including the driver, should 

not operate a vehicle or sit in a vehicle’s 

seat until the head restraints are placed in 

their proper positions in order to minimize 

the risk of neck injury in the event of a 

crash.

Head restraints should never be adjusted 

while the vehicle is in motion. Driving a 

vehicle with the head restraints improperly 

adjusted or removed could cause serious 

injury or death in the event of a collision.

GETTING TO KNOW YOUR VEHICLE

31

(Continued)

Active Head Restraint (Tilted)

NOTE:

The head restraints should only be removed 

by qualified technicians, for service purposes 

only. If either of the head restraints require 

removal, see an authorized dealer.

In the event of deployment of an Active Head 

Restraint, refer to “Occupant Restraints/

Resetting Active Head Restraints (AHR)” in 

“Safety” for further information.

Head Restraints — Second Row Quad Seats

The head restraints on the second row quad 

seats are non-adjustable and non-removable. 

The head restraint will automatically fold 

forward when the seat release lever is pulled 

during the Stow n’ Go procedure. Refer to 

“Seats” in this chapter for further information.

WARNING!

ALL the head restraints MUST be rein

-

stalled in the vehicle to properly protect the 

occupants.

All occupants, including the driver, should 

not operate a vehicle or sit in a vehicle’s 

seat until the head restraints are placed in 

their proper positions in order to minimize 

the risk of neck injury in the event of a 

collision.

Do not place items over the top of the 

Active Head Restraint, such as coats, seat 

covers or portable DVD players. These 

items may interfere with the operation of 

the Active Head Restraint in the event of a 

collision and could result in serious injury or 

death.

Active Head Restraints may be deployed if 

they are struck by an object such as a hand, 

foot or loose cargo. To avoid accidental 

deployment of the Active Head Restraint 

ensure that all cargo is secured, as loose 

cargo could contact the Active Head 

Restraint during sudden stops. Failure to 

follow this warning could cause personal 

injury if the Active Head Restraint is 

deployed.

WARNING!

 (Continued)

2

32

GETTING TO KNOW YOUR VEHICLE


Head Restraints — Second Row Bench

The second row bench seat is equipped with 

adjustable head restraints.
To raise the head restraint, pull upward on the 

head restraint. To lower the head restraint, 

push the adjustment button, located at the 

base of the head restraint, and push downward.

Adjustment Button

To remove the head restraint, raise it as far as it 

can go. Then, push the release button and the 

adjustment button at the base of each post 

while pulling the head restraint up. Seatback 

angle may need to be adjusted to fully remove 

the head restraint. To reinstall the head 

restraint, put the head restraint posts into the 

holes and push downward. Then, adjust the 

head restraint to the appropriate height.

NOTE:

For child restraint tethering, refer to “Occupant 

Restraint Systems” in “Safety” for further 

information.

Head Restraints — Third Row

The outboard head restraints can be manually 

folded forward for improved rearward visibility. 

They are non-removable. Pull the release strap 

to fold them forward.

Head Restraint Release Strap “1”

NOTE:

The head restraints must be raised manually 

when occupying the third row.

Do not fold if there are passengers seated in 

the third row seats.

1 — Release Button
2 — Adjustment Button

WARNING!

A loose head restraint thrown forward in a 

collision or hard stop could cause serious 

injury or death to occupants of the vehicle. 

Always securely stow removed head 

restraints in a location outside the occu

-

pant compartment.

ALL the head restraints MUST be rein

-

stalled in the vehicle to properly protect the 

occupants. Follow the re-installation 

instructions above prior to operating the 

vehicle or occupying a seat.

GETTING TO KNOW YOUR VEHICLE

33

The head restraint in the center position can be 

raised and lowered for tether routing or height 

adjustment. Refer to “Occupant Restraint 

Systems” in “Safety” for further information.

NOTE:

To remove the center head restraint, raise it as 

far as it can go. Then, push both the release 

button and the adjustment button at the base of 

each post while pulling the head restraint up. To 

reinstall the head restraint, put the head 

restraint posts into the holes and push 

downward. Then, using the adjustment button, 

adjust the head restraint to the appropriate 

height.

Adjustment Button

Refer to “Occupant Restraints” in “Safety” for 

further information.

STEERING WHEEL   

Tilt/Telescoping Steering Column  

This feature allows you to tilt the steering 

column upward or downward. It also allows you 

to lengthen or shorten the steering column. The 

tilt/telescoping lever is located below the 

steering wheel at the end of the steering 

column.

Tilt/Telescoping Lever

To unlock the steering column, push the lever 

downward (toward the floor). To tilt the steering 

column, move the steering wheel upward or 

downward as desired. To lengthen or shorten 

the steering column, pull the steering wheel 

outward or push it inward as desired. To lock 

the steering column in position, push the lever 

upward until fully engaged.

WARNING!

Do not adjust the steering column while 

driving. Adjusting the steering column while 

driving or driving with the steering column 

unlocked, could cause the driver to lose 

control of the vehicle. Failure to follow this 

warning may result in serious injury or death.

2

34

GETTING TO KNOW YOUR VEHICLE


(Continued)

Heated Steering Wheel — If Equipped

The steering wheel contains a heating element 

that helps warm your hands in cold weather. 

The heated steering wheel has only one 

temperature setting. Once the heated steering 

wheel has been turned on it can operate for an 

average of 80 minutes before automatically 

shutting off. This time may vary depending on 

the temperature of the environment. 

The heated steering wheel can shut off early or 

may not turn on when the steering wheel is 

already warm.
The heated steering wheel control button is 

located on the center of the instrument panel 

below the climate controls.

Push the heated steering wheel button   

once to turn the heating element on.

Push the heated steering wheel button   a 

second time to turn the heating element off.

NOTE:

The engine must be running for the heated 

steering wheel to operate.

Vehicles Equipped With Remote Start
On models that are equipped with remote start, 

the heated steering wheel can be programed to 

come on during a remote start. Refer to 

“Instrument Cluster Display” in

“Getting To Know Your Instrument Panel” for 

further information.

MIRRORS    

Automatic Dimming Mirror — If Equipped 

The mirror head can be adjusted up, down, left, 

and right for various drivers. The mirror should 

be adjusted to center on the view through the 

rear window.
This mirror automatically adjusts for headlight 

glare from vehicles behind you.

NOTE:

The Automatic Dimming feature is disabled 

when the vehicle is in REVERSE to improve rear 

view viewing.

WARNING!

Persons who are unable to feel pain to the 

skin because of advanced age, chronic 

illness, diabetes, spinal cord injury, medica

-

tion, alcohol use, exhaustion, or other phys

-

ical conditions must exercise care when 

using the steering wheel heater. It may 

cause burns even at low temperatures, 

especially if used for long periods.

Do not place anything on the steering wheel 

that insulates against heat, such as a 

blanket or steering wheel covers of any type 

and material. This may cause the steering 

wheel heater to overheat.

WARNING!

 (Continued)

GETTING TO KNOW YOUR VEHICLE

35

The Automatic Dimming feature can be turned 

on or off through the touchscreen.

Press the mirror dimmer button once to turn 

the feature on.

Press the mirror dimmer button a second 

time to turn the feature off.

Automatic Dimming Mirror

Automatic Dimming Mirror With Rear View 

Camera Display — If Equipped 

A single ball joint mirror is provided in the 

vehicle. It is a twist on mirror that has a fixed 

position at the windshield. The mirror installs on 

the windshield button with a counterclockwise 

rotation and requires no tools for mounting. The 

mirror head can be adjusted up, down, left, and 

right for various drivers. The mirror should be 

adjusted to center on the view through the rear 

window.
This mirror automatically adjusts for headlight 

glare from vehicles behind you.
When the vehicle is placed into reverse gear, a 

video display illuminates to display the image 

generated by the rear view camera located on 

the liftgate handle. The auto dimming feature is 

also disabled to improve rear view viewing.

Automatic Dimming Mirror With Rear View Camera

Outside Mirrors 

To receive maximum benefit, adjust the outside 

mirror(s) to center on the adjacent lane of traffic 

with a slight overlap of the view obtained on the 

inside mirror.

CAUTION!

To avoid damage to the mirror during 

cleaning, never spray any cleaning solution 

directly onto the mirror. Apply the solution 

onto a clean cloth and wipe the mirror clean.

WARNING!

Vehicles and other objects seen in an outside 

convex mirror will look smaller and farther 

away than they really are. Relying too much 

on side convex mirrors could cause you to 

collide with another vehicle or other object. 

Use your inside mirror when judging the size 

or distance of a vehicle seen in a side convex 

mirror.

2

36

GETTING TO KNOW YOUR VEHICLE


Interior Observation Mirror

The convex interior observation mirror provides 

the driver and front seat passenger a wide field 

of view to conveniently view passengers sitting 

in the rear passenger seats. To use the interior 

observation mirror, push on the raised bars on 

the compartment door and release (the door 

will swing downward), then raise the door until it 

is almost closed and release. The door will latch 

in position to use the interior observation 

mirror.

NOTE:

From the “observation mirror” position, the door 

can only be closed.

To return to the full open position, the door must 

first be closed and then opened by pushing the 

latch again to release.

Observation Mirror

Power Mirrors — If Equipped 

The power mirror controls are located on the 

driver-side door trim panel.

Power Mirror Controls

The power mirror controls consist of mirror 

select buttons and a four-way mirror control 

switch. To adjust a mirror, push either the L 

(left) or R (right) to select the mirror that you 

want to adjust.

NOTE:

A light in the selected button will illuminate 

indicating the mirror is activated and can be 

adjusted.

Using the mirror control switch, push on any of 

the four arrows for the direction that you want 

the mirror to move.

Outside Mirrors Folding Feature

All outside mirrors are hinged and may be 

moved either forward or rearward to resist 

damage. The hinges have three detent 

positions:

Full forward position

Full rearward position

Normal position

GETTING TO KNOW YOUR VEHICLE

37

Heated Mirrors — If Equipped  

These mirrors are heated to melt frost 

or ice. This feature will be activated 

whenever you turn on the rear window 

defroster (if equipped). Refer to “Climate 

Controls” in this chapter for further information.

Illuminated Vanity Mirrors — If Equipped 

An illuminated vanity mirror is located on the 

sun visor. To use the mirror, rotate the sun visor 

down and swing the mirror cover upward. The 

lights turn on automatically. Closing the mirror 

cover turns off the lights.

Lift Mirror Cover

EXTERIOR LIGHTS           

Headlight Switch

The headlight switch is located on the left side 

of the instrument panel. The switch controls the 

operation of the headlights, parking lights, 

instrument panel lights, interior lights and the 

fog lights (if equipped).

Headlight Switch

Rotate the headlight switch clockwise to the 

first detent for parking light and instrument 

panel light operation. Rotate the headlight 

switch to the second detent for headlight, 

parking light and instrument panel operation.

Multifunction Lever 

The multifunction lever is located on the left 

side of the steering column.

Multifunction Lever

The multifunction lever controls the:

Turn Signals

Headlight Beams Low/High

Flash-To-Pass

Front and Rear Wipers/Washer Functions

2

38

GETTING TO KNOW YOUR VEHICLE


Daytime Running Lights (DRLs) — If 

Equipped  

The headlights on your vehicle will illuminate 

when the engine is started and the 

transmission is in any gear except PARK. This 

provides a constant "lights on" condition until 

the ignition is placed in the OFF position. The 

lights illuminate at less than half of normal 

intensity. If the parking brake is applied, the 

Daytime Running Lights (DRLs) will turn off. 

Also, if a turn signal is activated, the DRL lamp 

on the same side of the vehicle may turn off for 

the duration of the turn signal activation. Once 

the turn signal is no longer active, the DRL lamp 

will illuminate.

High/Low Beam Switch 

Push the multifunction lever toward the 

instrument panel to switch the headlights to 

high beams. Pulling the multifunction lever 

back toward the steering wheel will return the 

lights to low beams.

Flash-To-Pass  

You can signal another vehicle with your 

headlights by lightly pulling the multifunction 

lever toward you. This will cause the high beam 

headlights to turn on, and remain on, until the 

lever is released.

Automatic Headlights 

This system automatically turns the headlights 

on or off according to ambient light levels. To 

turn the system on, rotate the headlight switch 

counterclockwise to the AUTO position. When 

the system is on, the headlight time delay 

feature is also on. This means the headlights 

will stay on for up to 90 seconds after you place 

the ignition into the OFF position. The headlight 

time delay can be programmed to 0, 30, 60, or 

90 seconds. Refer to “Headlight Delay” in this 

section for further information.
To turn the automatic system off, move the 

headlight switch out of the AUTO position.

NOTE:

The engine must be running before the 

headlights will come on in the automatic mode.

Headlights On With Wipers — If Equipped

When your headlights are in the AUTO mode 

and the engine is running, the headlights will 

automatically turn on when the wiper system is 

also turned on. Headlights on when windshield 

wipers are on may be found on vehicles 

equipped with an automatic headlight system.

NOTE:

The Headlights with Wipers feature can be 

turned on or off through the instrument cluster 

display. Refer to “Instrument Cluster Display” in 

“Getting To Know Your Instrument Panel” for 

further information.

Headlight Delay — If Equipped

This feature provides the safety of headlight 

illumination for up to 90 seconds after exiting 

your vehicle.
To activate the delay feature, place the ignition 

in the OFF position while the headlights are still 

on. Then turn off the headlights within 45 

seconds. The 90 second delay interval begins 

when the headlight switch is turned off. If the 

headlights or parking lights are turned back on 

or the ignition switch is placed in the ON 

position, the delay will be cancelled.


Content      ..      1      2      3      ..