Dodge Caliber (2012 year). Manual - part 12


  Index      Dodge     Dodge Caliber (2012 year) - manual in english


Search            copyright infringement  


Content      ..     10      11      12      13     ..


Dodge Caliber (2012 year). Manual - part 12


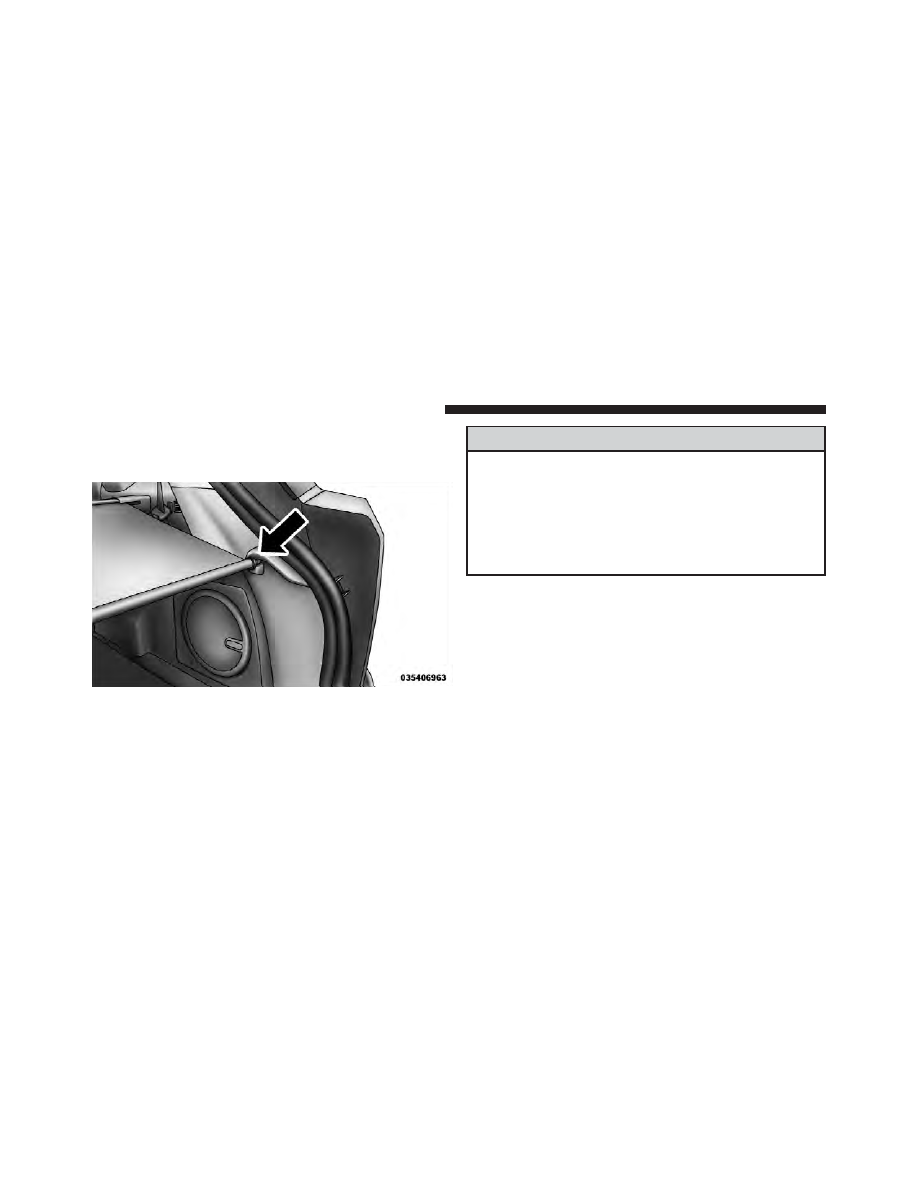
Using the handle, pull the cover toward you and guide
the rear cover posts into the guides located on both sides
of the rear trim panel.

WARNING!

In a collision a cargo cover loose in the vehicle could
cause injury. It could fly around in a sudden stop and
strike someone in the vehicle. Do not store the cargo
cover on the cargo floor or in the passenger compart-
ment. Remove the cover from the vehicle when taken
from its mounting. Do not store in the vehicle.

Cargo Cover Guides

188

UNDERSTANDING THE FEATURES OF YOUR VEHICLE

Removable Load Floor

The cargo area contains a removable load floor.

Cargo Tie-Down Loops

There are two D-rings installed in the cargo area for
securing cargo.

WARNING!

• Cargo tie-down loops are not safe anchors for a

child seat tether strap. In a sudden stop or collision
a loop could pull loose and allow the child seat to
come loose. A child could be badly injured. Use
only the anchors provided for child seat tethers.

• The weight and position of cargo and passengers

can change the vehicle center of gravity and ve-
hicle handling. To avoid loss of control resulting
in personal injury, follow these guidelines for
loading your vehicle:

• Always place cargo evenly on the cargo floor. Put

heavier objects as low and as far forward as
possible.

(Continued)

Rear Cargo Area

3

UNDERSTANDING THE FEATURES OF YOUR VEHICLE

189

WARNING! (Continued)

• Place as much cargo as possible in front of the rear

axle. Too much weight or improperly placed
weight over or behind the rear axle can cause the
rear of the vehicle to sway.

• Do not pile luggage or cargo higher than the top of

the seatback. This could impair visibility or be-
come a dangerous projectile in a sudden stop or
collision.

• To help protect against personal injury, passengers

should not be seated in the rear cargo area. The
rear cargo space is intended for load carrying
purposes only, not for passengers, who should sit
in seats and use seat belts.

Fold Down Speakers — If Equipped

When the liftgate is open, the speakers can swing down
off the trim panel to face rearward, for tailgating and
other activities.

REAR WINDOW FEATURES

Rear Window Wiper/Washer

The rear wiper/washer is controlled by a rotary switch
located on the center portion of the control lever. The
control lever is located on the right side of the steering
column.

Fold-Down Speakers

190

UNDERSTANDING THE FEATURES OF YOUR VEHICLE

Rotate the center portion of the lever upward to the
first detent position for rear wiper operation.

NOTE:

The rear wiper operates in an intermittent mode

only.

Rotate the center portion of the lever past the first
detent to activate the rear washer. The washer
pump and the wiper will continue to operate as

long as the switch is held (for a maximum of 10 seconds).
Upon release, the wiper will continue to cycle two times
before returning to the set position.

If the rear wiper is operating when the ignition is turned
OFF, the wiper will automatically return to the “park”
position if power accessory delay is active. Power acces-
sory delay can be cancelled by opening the door, if this
happens the rear wiper will stop at its current position
and will not go to “park”.

Rear Window Defroster

The rear window defroster button is located on the
bottom right-side of the blower control knob.

Press this button to turn on the rear window defroster
and the heated outside mirrors (if equipped). An indica-
tor in the button will illuminate when the rear window

Rear Wiper/Washer Control

3

UNDERSTANDING THE FEATURES OF YOUR VEHICLE

191

defroster is on. The rear window defroster automatically
turns off after approximately 10 minutes. For an addi-
tional five minutes of operation, press the button a
second time.

NOTE:

To prevent excessive battery drain, use the rear

window defroster only when the engine is operating.

CAUTION!

Failure to follow these cautions can cause damage to
the heating elements:
• Use care when washing the inside of the rear

window. Do not use abrasive window cleaners on
the interior surface of the window. Use a soft cloth
and a mild washing solution, wiping parallel to
the heating elements. Labels can be peeled off
after soaking with warm water.

(Continued)

CAUTION! (Continued)

• Do not use scrapers, sharp instruments, or abra-

sive window cleaners on the interior surface of the
window.

• Keep all objects a safe distance from the window.

CHILL ZONE

BEVERAGE COOLER STORAGE

COMPARTMENT — IF EQUIPPED

The glove compartment is located on the passenger side
of the vehicle. The large glove compartment door swings
downward and features two levels of storage. The upper
bin functions as the Chill Zone

威 cooled beverage storage

compartment (for vehicles equipped with air condition-
ing) for storing up to four 20 oz (1 L) bottles or cans.
When desired, cool air enters the Chill Zone

威 to keep the

contents cool, depending on ambient temperature and
A/C settings.

192

UNDERSTANDING THE FEATURES OF YOUR VEHICLE

NOTE:

The use of the Chill Zone

威 is for nonperishable

beverages only.

Inside the Chill Zone

威 is a vent which, when opened,

allows either air conditioned or fresh air to flow into the

Chill Zone

威 compartment. Depending on ambient tem-

perature and A/C setting, the compartment can keep
beverages cool.

Vehicles without air conditioning can use that space for
storage. The lower bin holds the Owner’s Manual and
other important documents.

Glove Compartment and Chill Zone

Positioning Slide Control

3

UNDERSTANDING THE FEATURES OF YOUR VEHICLE

193

UNDERSTANDING YOUR INSTRUMENT PANEL

CONTENTS

䡵 Instrument Panel Features . . . . . . . . . . . . . . . 198
䡵 Instrument Cluster — Base . . . . . . . . . . . . . . . 199
䡵 Instrument Cluster — Premium . . . . . . . . . . . 200
䡵 Instrument Cluster Descriptions . . . . . . . . . . . 201
䡵 Electronic Vehicle Information Center (EVIC) —

If Equipped . . . . . . . . . . . . . . . . . . . . . . . . . . 215

▫ Oil Change Required — If Equipped . . . . . . 217
▫ EVIC Functions . . . . . . . . . . . . . . . . . . . . . 218
▫ Compass/Temperature/Audio . . . . . . . . . . . 218

▫ Average Fuel Economy . . . . . . . . . . . . . . . . 219
▫ Distance To Empty (DTE) . . . . . . . . . . . . . . 219
▫ Elapsed Time . . . . . . . . . . . . . . . . . . . . . . . 219
▫ Tire Pressure Monitor (TPM) . . . . . . . . . . . . 219
▫ Personal Settings (Customer-Programmable

Features) . . . . . . . . . . . . . . . . . . . . . . . . . . 220

䡵 Media Center 230 (REQ) — AM/FM Stereo

Radio And 6–Disc CD/DVD Changer
(MP3/WMA AUX Jack) . . . . . . . . . . . . . . . . . . 225

▫ Operating Instructions - Radio Mode . . . . . . 226

4

▫ Operation Instructions - (Disc Mode For CD

And MP3/WMA Audio Play, DVD-Video) . . . 234

▫ Notes On Playing MP3/WMA Files . . . . . . . 236
▫ List Button (Disc Mode For MP3/

WMA Play) . . . . . . . . . . . . . . . . . . . . . . . . 238

▫ Info Button (Disc Mode For MP3/WMA

Play) . . . . . . . . . . . . . . . . . . . . . . . . . . . . . 239

▫ Uconnect™ Multimedia (Satellite Radio) — If

Equipped . . . . . . . . . . . . . . . . . . . . . . . . . . 241

䡵 Media Center 730N/430/430N (RHR/RER/

RBZ/RHB) CD/DVD/HDD/NAV — If
Equipped . . . . . . . . . . . . . . . . . . . . . . . . . . . . 245

▫ Operating Instructions (Voice Command

System) — If Equipped . . . . . . . . . . . . . . . . 245

▫ Operating Instructions (Uconnect™ Phone)

— If Equipped . . . . . . . . . . . . . . . . . . . . . . 245

䡵 Media Center 130 (Sales Code RES) . . . . . . . . . 246

▫ Operating Instructions — Radio Mode . . . . . 246
▫ Operation Instructions — CD Mode For CD

And MP3 Audio Play . . . . . . . . . . . . . . . . . 249

▫ Notes On Playing MP3 Files . . . . . . . . . . . . 251
▫ Operation Instructions - Auxiliary Mode . . . . 254

䡵 Media Center 130 With Satellite Radio (Sales

Code RES+RSC) . . . . . . . . . . . . . . . . . . . . . . . 254

▫ Operating Instructions — Radio Mode . . . . . 255
▫ Operation Instructions — CD Mode For CD

And MP3 Audio Play . . . . . . . . . . . . . . . . . 260

▫ Notes On Playing MP3 Files . . . . . . . . . . . . 262
▫ List Button (CD Mode For MP3 Play) . . . . . . 265
▫ Info Button (CD Mode For MP3 Play) . . . . . . 265

196

UNDERSTANDING YOUR INSTRUMENT PANEL

▫ Uconnect™ Multimedia (Satellite Radio) — If

Equipped . . . . . . . . . . . . . . . . . . . . . . . . . . 266

䡵 iPod威/USB/MP3 Control — If Equipped . . . . . 270

▫ Connecting The iPod威 Or External USB

Device . . . . . . . . . . . . . . . . . . . . . . . . . . . . 271

▫ Using This Feature . . . . . . . . . . . . . . . . . . . 272
▫ Controlling The iPod威 Or External USB

Device Using Radio Buttons . . . . . . . . . . . . . 272

▫ Play Mode . . . . . . . . . . . . . . . . . . . . . . . . . 272
▫ List Or Browse Mode . . . . . . . . . . . . . . . . . 274
▫ Bluetooth Streaming Audio (BTSA) . . . . . . . . 276

䡵 Steering Wheel Audio Controls —

If Equipped . . . . . . . . . . . . . . . . . . . . . . . . . . 277

▫ Radio Operation . . . . . . . . . . . . . . . . . . . . . 278
▫ CD Player . . . . . . . . . . . . . . . . . . . . . . . . . 278

䡵 CD/DVD Disc Maintenance . . . . . . . . . . . . . . 279
䡵 Radio Operation And Mobile Phones . . . . . . . 279
䡵 Climate Controls . . . . . . . . . . . . . . . . . . . . . . 280

▫ Manual Heating And Air Conditioning . . . . . 280
▫ Automatic Temperature Control (ATC) — If

Equipped . . . . . . . . . . . . . . . . . . . . . . . . . . 284

▫ Operating Tips . . . . . . . . . . . . . . . . . . . . . . 290

4

UNDERSTANDING YOUR INSTRUMENT PANEL

197

INSTRUMENT PANEL FEATURES

1 — Air Outlet

5 — Lower Glove Compartment/Beverage Cooler –

If Equipped

9 — ESC OFF Switch – If Equipped

2 — Instrument Cluster

6 — Climate Controls

10 — Storage Bins

3 — Radio

7 — Heated Seat Switches – If Equipped

11 — Power Outlet

4 — Passenger Airbag

8 — Hazard Warning Flasher

198

UNDERSTANDING YOUR INSTRUMENT PANEL

INSTRUMENT CLUSTER — BASE

4

UNDERSTANDING YOUR INSTRUMENT PANEL

199

INSTRUMENT CLUSTER — PREMIUM

200

UNDERSTANDING YOUR INSTRUMENT PANEL

INSTRUMENT CLUSTER DESCRIPTIONS

1. Temperature Gauge
The temperature gauge shows engine coolant tempera-
ture. Any reading within the normal range indicates that
the engine cooling system is operating satisfactorily.

The gauge pointer will likely indicate a higher tempera-
ture when driving in hot weather, up mountain grades,
or when towing a trailer. It should not be allowed to
exceed the upper limits of the normal operating range.

CAUTION!

Driving with a hot engine cooling system could
damage your vehicle. If the temperature gauge reads
“H” pull over and stop the vehicle. Idle the vehicle
with the air conditioner turned off until the pointer
drops back into the normal range. If the pointer
remains on the “H” and you hear continuous chimes,
turn the engine off immediately and call an autho-
rized dealership for service.

4

UNDERSTANDING YOUR INSTRUMENT PANEL

201

WARNING!

A hot engine cooling system is dangerous. You or
others could be badly burned by steam or boiling
coolant. You may want to call an authorized dealer-
ship for service if your vehicle overheats. If you
decide to look under the hood yourself, see “Main-
taining Your Vehicle”. Follow the warnings under the
Cooling System Pressure Cap paragraph.

2. Fuel Door Reminder

This indicates that the fuel filler door is located
on the left side of the vehicle.

3. Fuel Gauge
When the ignition switch is in the ON/RUN position, the
pointer will show the level of fuel remaining in the fuel
tank.

4. Speedometer
The Speedometer shows the vehicle speed in miles per
hour and/or kilometers per hour (mph/kph).

5. Low Fuel Light

When the fuel level reaches approximately 2.0 gal
(7.8 L) this light will turn on, and remain on until
fuel is added.

6. Charging System Light

This light shows the status of the electrical charg-
ing system. The light should come on when the

ignition switch is first turned to ON/RUN and remain on
briefly as a bulb check. If the light stays on or comes on
while driving, turn off some of the vehicle’s non-essential
electrical devices or increase engine speed (if at idle). If
the charging system light remains on, it means that the
vehicle is experiencing a problem with the charging
system. Obtain SERVICE IMMEDIATELY. See an autho-
rized dealer.

202

UNDERSTANDING YOUR INSTRUMENT PANEL

If jump starting is required, refer to “Jump Starting
Procedures” in “What To Do In Emergencies”.

7. Air Bag Warning Light

This light will turn on for four to eight seconds
as a bulb check when the ignition switch is first
turned to ON/RUN. If the light is either not on
during starting, stays on, or turns on while

driving, have the system inspected at an authorized
dealer as soon as possible. Refer to “Occupant Restraints”
in “Things To Know Before Starting Your Vehicle” for
further information.

8. Seat Belt Reminder Light

When the ignition switch is first turned to ON/
RUN, this light will turn on for four to eight
seconds as a bulb check. During the bulb check, if

the driver’s seat belt is unbuckled, a chime will sound.
After the bulb check or when driving, if the driver’s seat
belt remains unbuckled, the Seat Belt Reminder Light

will illuminate and the chime will sound. Refer to
“Occupant Restraints” in “Things To Know Before Start-
ing Your Vehicle” for further information.

9. Oil Pressure Warning Light

This light indicates low engine oil pressure. The
light should turn on momentarily when the engine

is started. If the light turns on while driving, stop the
vehicle and shut off the engine as soon as possible. A
chime will sound for four minutes when this light turns
on.

Do not operate the vehicle until the cause is corrected.
This light does not indicate how much oil is in the engine.
The engine oil level must be checked under the hood.

10. Engine Temperature Warning Light

This light warns of an overheated engine condi-
tion. As engine coolant temperatures rise and the
gauge approaches , this indicator will illuminate

and a single chime will sound after reaching a set

4

UNDERSTANDING YOUR INSTRUMENT PANEL

203


Content      ..     10      11      12      13     ..