Dodge Ram Truck 1500-2500-3500. Manual - part 222
LINKAGE
REMOVAL
CAUTION: The hydraulic linkage has a quick dis-
connect at the slave cylinder. This fitting should
never be disconnected or tampered with. Once the
hydraulic line is connected to the slave cylinder, it
should never be disconnected.
1. Raise and support vehicle.
2. Remove heat sheild over hydraulic line.
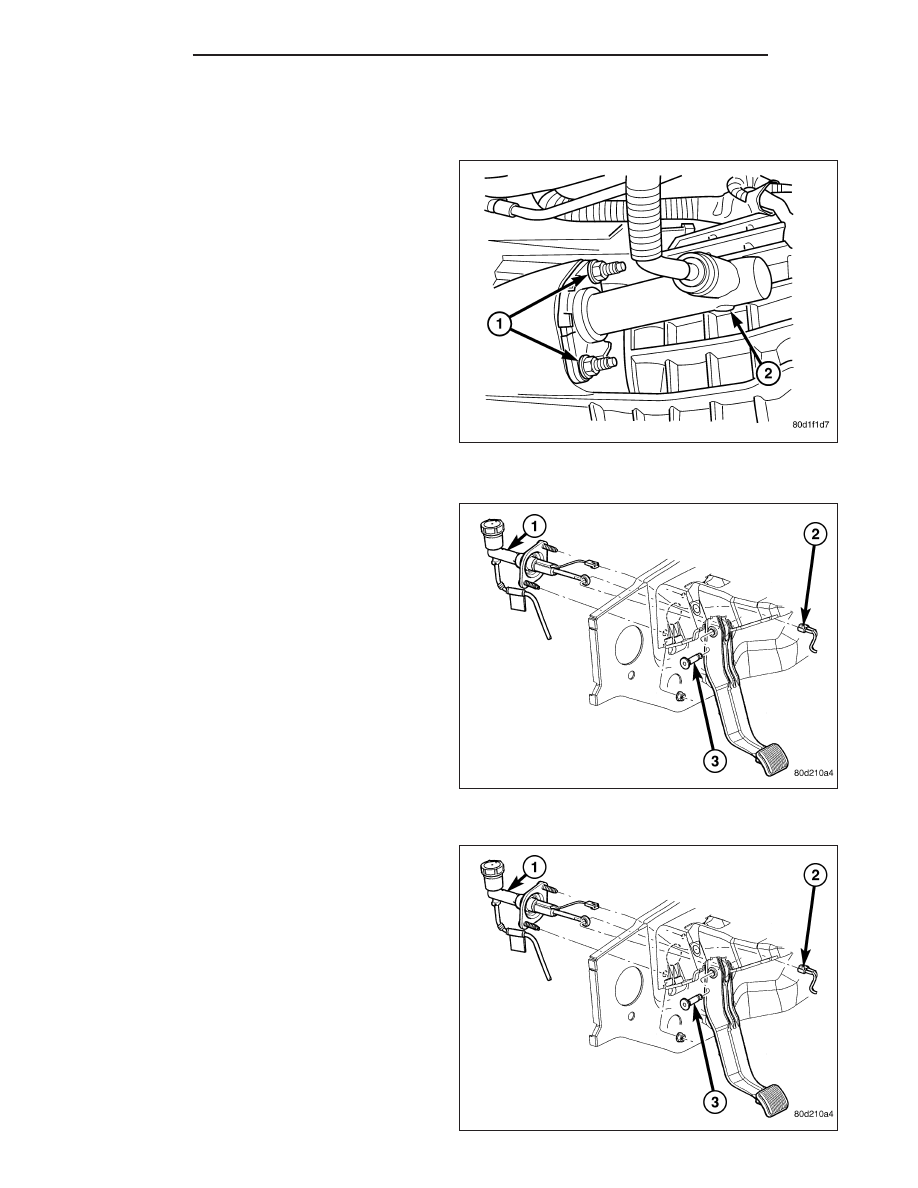
3. Remove slave cylinder (2) nuts (1) on clutch hous-
ing.
4. Remove slave cylinder from clutch housing.
5. Remove plastic clip securing the hydraulic line to
the dash panel from the lower dash panel flange.
6. Remove plastic clip securing hydraulic line to the
dash panel from the upper dash panel stud.
7. Lower vehicle.
8. Disconnect clutch pedal interlock switch connector
(2).
9. Remove clutch master cylinder (1) rod pin (3).
10. Verify that cap on clutch master cylinder reservoir
is tight. This will avoid spillage during removal.
11. Remove clutch master cylinder nuts holding the to
the dash panel.
12. Remove clutch cylinders, reservoir and connecting
lines from vehicle.
INSTALLATION
1. Position cylinders and connecting line in vehicle
engine compartment. Position clutch hydraulic line
against the dash panel and behind all engine
hoses and wiring.
2. Apply a light coating of grease to the inside diam-
eter of the master cylinder push rod eye.
3. Install clutch master cylinder (1) on dash panel and
tighten clutch master cylinder nuts to 28 N·m (21 ft.
lbs.).
4. Install clutch master cylinder push rod pin (3).
5. Connect clutch pedal position interlock switch con-
nector (2).
6. Install plastic clip securing hydraulic line to the
dash panel into the lower dash panel flange.
6 - 20
CLUTCH
DR/DH