Dodge Durango (DN). Manual - part 197
(4) Disconnect the flexible demister duct hose from
the demister duct adapter on the top of the heater-
A/C housing.
(5) Remove the demister duct hose from the demis-
ter duct tee near the underside of the instrument
panel top cover.
(6) Reverse the removal procedures to install.
Tighten the hose mounting screw to 2.2 N·m (20 in.
lbs.).
DEMISTER DUCTS AND OUTLETS
(1) Remove the instrument panel top cover from
the instrument panel. Refer to Instrument Panel Top
Cover in the Removal and Installation section of
Group 8E - Instrument Panel Systems for the proce-
dures.
(2) Remove the screws (two - left side, three - right
side) that secure the demister ducts to the instru-
ment panel top cover (Fig. 46).
(3) Using a trim stick or another suitable wide
flat-bladed tool, gently pry between the end of the
demister duct and the demister outlet flange to
release the duct from the outlet.
(4) Remove the demister ducts and the tee from
the instrument panel top cover.
(5) Squeeze the demister outlet flange from the
underside of the instrument panel top cover and
push it out through the top.
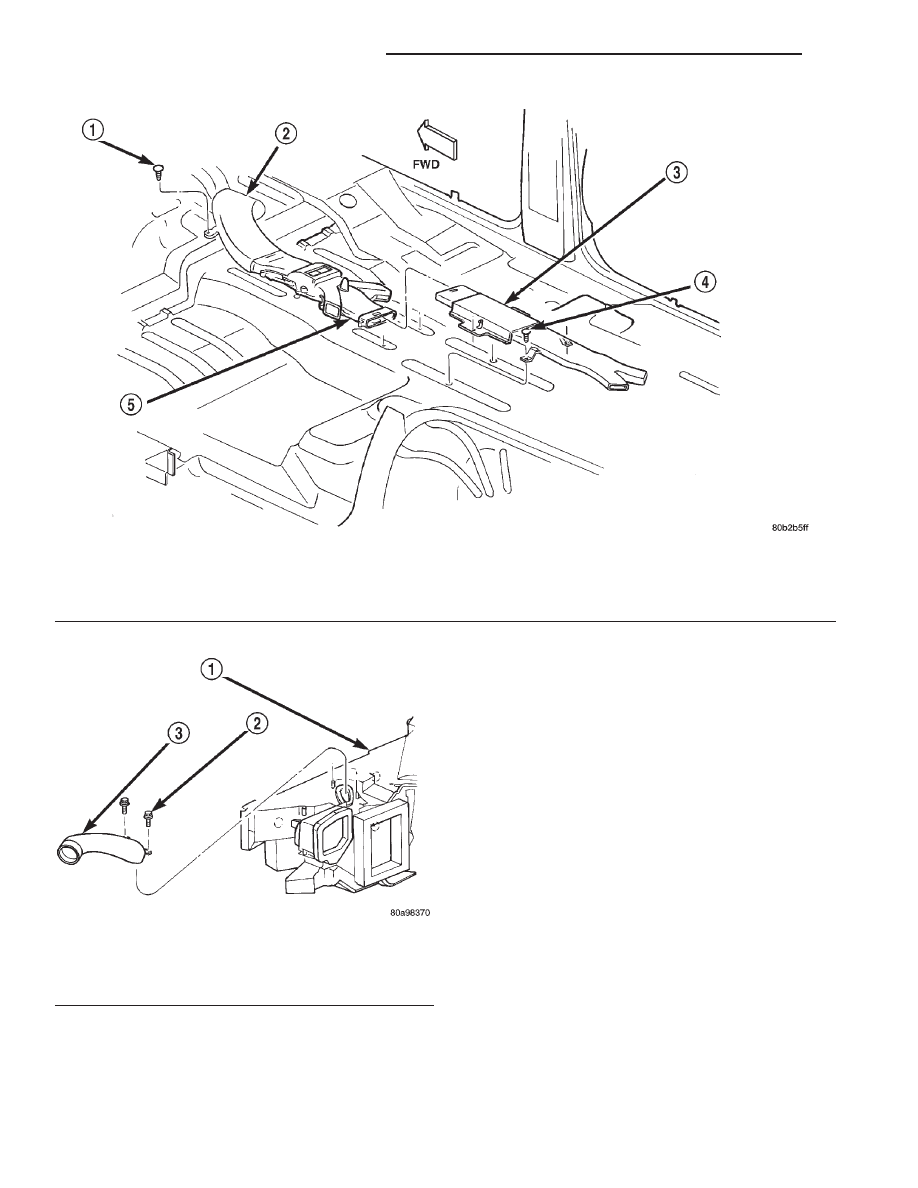
Fig. 44 Rear Seat Floor Ducts Remove/Install - Bucket Seat
1 – RETAINER
2 – FRONT TUNNEL DUCT
3 – REAR SEAT FLOOR DUCT
4 – RETAINER
5 – CENTER SEAT FLOOR DUCT
Fig. 45 Demister Duct Adapter Remove/Install
1 – HEATER-A/C HOUSING
2 – SCREW
3 – ADAPTER
24 - 46
HEATING AND AIR CONDITIONING
DN
REMOVAL AND INSTALLATION (Continued)