Dodge Durango (DN). Manual - part 198
INSTALLATION
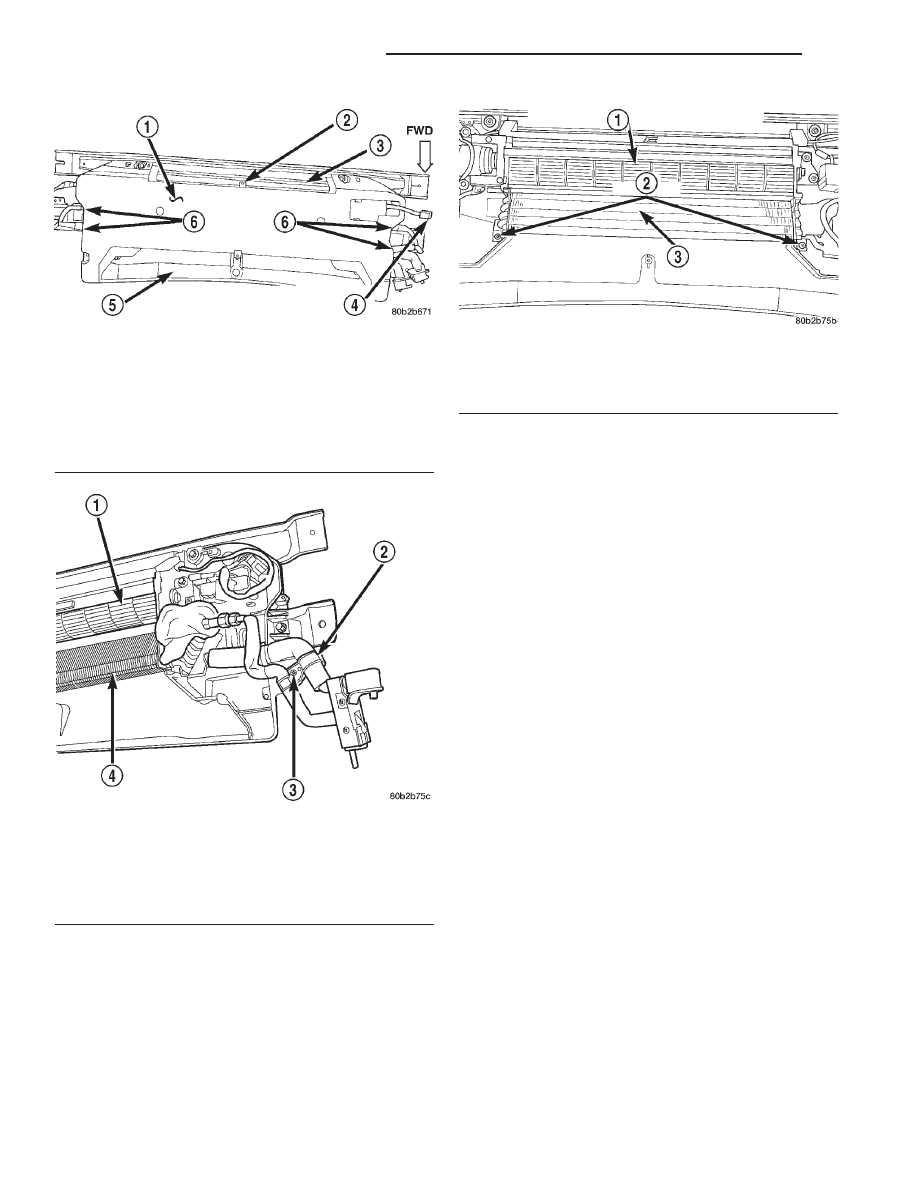
(1) Position the rear evaporator coil to the rear
overhead A/C unit and secure with two mounting
screws. Tighten the mounting screws to 2.2 N·m (20
in. lbs.).
(2) Install the rear overhead A/C refrigerant tube
and block fitting retaining strap to the right side of
the upper housing cover and secure with a screw.
Tighten the mounting screws to 2.2 N·m (20 in. lbs.).
(3) Feed the rear blower motor switch wire har-
ness and connector through the hole in the right end
of the rear overhead A/C unit lower housing cover
while positioning the cover to the unit.
(4) Be certain that the lower housing cover snap
retainer near the center of the outlet side (rear) of
the rear overhead A/C unit is engaged.
(5) Install the nine screws that secure the lower
housing cover to the rear overhead A/C unit. Tighten
the mounting screws to 2.2 N·m (20 in. lbs.).
(6) Connect the B-pillar drain hoses to the wye fit-
tings on each side of the rear overhead A/C unit.
(7) Remove the tape or plugs from block fittings at
the top of the B-pillar refrigerant line unit, and from
the fittings on the rear overhead A/C unit. Install the
B-pillar refrigerant line block fittings over the two
studs on the rear overhead A/C unit and secure the
connections with the mounting nuts. Tighten the
mounting nuts to 11.3 N·m (100 in. lbs.).
(8) Reinstall the headliner in the passenger com-
partment of the vehicle. Refer to Group 23 - Body for
the procedures.
(9) Connect the battery negative cable.
(10) Evacuate the refrigerant system. See Refriger-
ant System Evacuate in the Service Procedures sec-
tion of this group.
(11) Charge the refrigerant system. See Refriger-
ant System Charge in the Service Procedures section
of this group.
NOTE: If the rear evaporator coil and expansion
valve unit is replaced, add 30 milliliters (1 fluid
ounce) of refrigerant oil to the refrigerant system.
Use only refrigerant oil of the type recommended
for the compressor in the vehicle.
Fig. 53 Rear Overhead A/C Unit Lower Housing
Cover Remove/Install
1 – REAR OVERHEAD A/C UNIT LOWER HOUSING COVER
2 – SNAP RETAINER
3 – OUTLET SIDE
4 – BLOWER MOTOR SWITCH WIRE HARNESS CONNECTOR
5 – INLET SIDE
6 – DRAIN HOSES
Fig. 54 Rear A/C Tube Retaining Strap Remove/
Install
1 – BLOWER WHEEL
2 – RETAINING STRAP
3 – SCREW
4 – EVAPORATOR COIL
Fig. 55 Rear Evaporator Coil Remove/Install
1 – BLOWER WHEEL AND HOUSING
2 – SCREWS
3 – EVAPORATOR COIL
24 - 50
HEATING AND AIR CONDITIONING
DN
REMOVAL AND INSTALLATION (Continued)