Citroën Berlingo Van (2022 year). Manual in english - page 4
 

  Index      Manuals     Citroën Berlingo Van (2022 year). Manual in english


Search            copyright infringement  


Content      ..     2      3      4      5     ..


Citroën Berlingo Van (2022 year). Manual in english - page 4


50

Ease of use and comfort

General 

recommendations for the 

seats

For safety reasons, seat adjustments 

must only be made when the vehicle is 

stationary.

Folding or unfolding the seat backrests 

must only be done with the vehicle 

stationary.

Before moving the seat backwards, 

ensure that there is no person or object 

that might prevent the full travel of the seat.

There is a risk of trapping or pinching 

passengers if present in the rear seats or of 

jamming the seat if large objects are placed 

on the floor behind the seat.

Do not place hard or heavy objects on 

the backrests forming a table. They could 

become dangerous projectiles in the event of 

sudden braking or a collision.

–  Do not remove a head restraint without 

stowing it; secure it to a support inside the 

vehicle.

–  Check that the seat belts remain accessible 

to the passenger and easy to fasten.

–  Passengers must never take their seat 

without adjusting and fastening their seat belt.

–  In row 3, be careful not to leave your feet 

under the row 2 seat while it is being tilted.

–  When a row 3 seat is in the fully folded 

position, ensure that the strap is correctly 

hooked to the Top Tether fixing of the row 2 

backrest: risk of unexpected tipping of the 

seat.

Before carrying out the manoeuvres, 

check that nothing and no one is 

obstructing the moving elements and their 

locking.

To avoid sudden folding, take care to hold the 

backrest and support it until it is horizontal.

Never

 put your hand underneath the seat 

cushion to guide the seat downwards or 

upwards, you could get your fingers trapped. 

Place your hand on the grip/strap (depending 

on equipment) at the top of the seat cushion.

Please note: an incorrectly latched 

backrest compromises the safety of 

passengers in the event of sudden braking or 

an impact.

The contents of the boot may be thrown 

forward - risk of severe injury!

Front seats

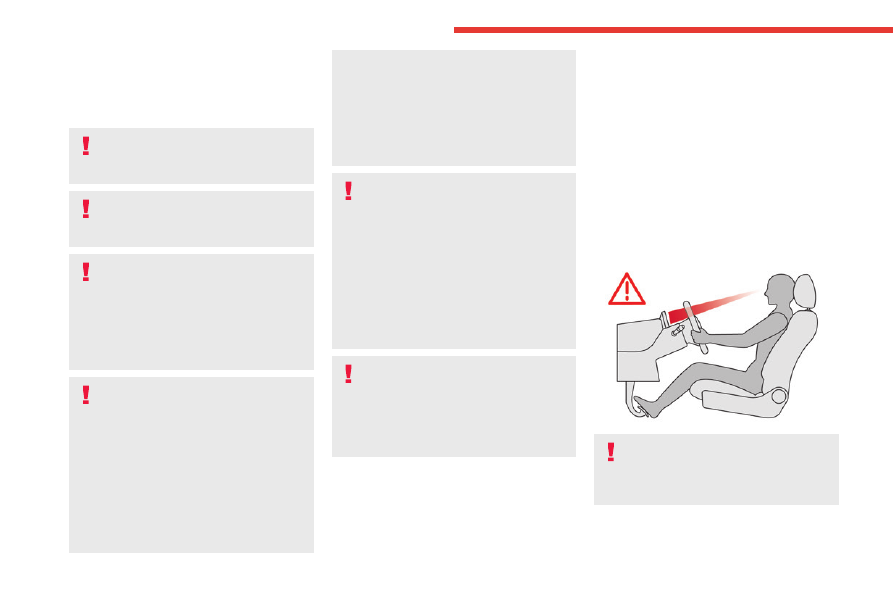
Correct driving position

Before taking to the road and to make the most 

of the ergonomic layout of the instruments and 

controls, carry out these adjustments in the 

following order:

–  head restraint height.

–  seat backrest angle.

–  seat cushion height.

–  longitudinal seat position.

–  steering wheel height and reach.

–  rear view mirror and door mirrors.


Once these adjustments have been 

made, check that the instrument panel 

can be viewed correctly from your driving 

position.

-------------------------------------------------------------------------------------------------------------------------------------------------------------

51

Ease of use and comfort

3

Adjustments

Longitudinal


►  Raise the control and slide the seat forwards 

or backwards.

Height

(driver only)


►  If fitted to the vehicle, pull the control 

upwards to raise or push it downwards to lower, 

as many times as necessary to obtain the 

position required.

For more information on the 

Seat belts

refer to the corresponding section.

Tilting the backrest


►  Push the control backwards then use your 

weight and your legs to adjust the backrest.

Lumbar

(driver only)


►  Turn the knob to obtain the desired level of 

lumbar support.

Armrest


►  To put the armrest in the vertical position, 

raise it until it locks into place.

►  Lower the armrest to return it to the position 

for use.

The armrest can be removed from the passenger 

seat.

Removing the armrest

►  Raise the armrest into the vertical position.


►  Push the armrest shaft towards the backrest.

►  While holding it in this position, rotate the 

armrest towards the rear.

►  Pull the armrest to detach it from the 

backrest.

Refitting the armrest


-------------------------------------------------------------------------------------------------------------------------------------------------------------

52

Ease of use and comfort


►  Slot the armrest into the backrest, ensuring 

that you align the bayonet lugs with the holes.

►  Push the armrest shaft towards the backrest.

►  While holding it in this position, rotate the 

armrest towards the front. The armrest is once 

again secured onto the backrest.

Storage compartment under 

the seat


►  Lift the passenger’s seat cushion to access 

the storage compartment.

Retractable position


►  If the centre console inconveniences you, 

remove the passenger's seat armrest.

►  Push the control rearwards fully to tilt and 

guide the assembly.

This position allows you to transport long loads 

inside the vehicle with the doors closed.

When retracted, the maximum permitted weight 

on the backrest is 50 kg.

►  To reposition the seat cushion, raise the 

backrest until it locks in the raised position.

Heated seat control


►  Approximately 30 seconds after starting the 

engine, press the control.

It can be activated when the outside temperature 

is below 20°C.

The temperature is controlled automatically.

Pressing again interrupts operation.

If you press the control while the engine 

is not running, the request will be 

memorised for approximately 2 minutes. 


With the two-seat front bench seat, the driver's 

seat control switches the heating on or off for the 

bench seat’s outer seat.

Do not use the function when the seat 

is not occupied.

Reduce the heating intensity as soon as 

possible.

When the seat and passenger compartment 

have reached a satisfactory temperature, 

-------------------------------------------------------------------------------------------------------------------------------------------------------------

53

Ease of use and comfort

3

switch the function off; reducing electrical 

consumption in turn decreases energy 

consumption.

Prolonged use of heated seats is not 

recommended for people with sensitive 

skin.

There is a risk of burns for people whose 

perception of heat is impaired (e.g. illness, 

taking medication).

To keep the heated pad intact and to prevent 

a short circuit:

–  Do not place heavy or sharp objects on the 

seat.

–  Do not kneel or stand on the seat.

–  Do not spill liquids onto the seat.

–  Never use the heating function if the seat 

is damp.

Steering wheel 

adjustment


► 

When stationary

, pull the control lever to 

release the steering wheel.

►  Adjust the height and reach.

►  Lower the control lever to lock the steering 

wheel.

As a safety precaution, these operations 

must only be carried out while the vehicle 

is stationary.

Mirrors

Door mirrors

Adjustment


►  Move control 

A

 or turn control 

C

 (depending 

on the version you have) to the right or to the left 

to select the corresponding mirror.

►  Move control 

B

 or

 C

 (depending on the 

version you have) in any of the four directions to 

adjust.

►  Return control 

or

 C 

(depending on the 

version you have) to its centre position.

As a safety measure, the mirrors should 

be adjusted to reduce the blind spots.

The objects observed are, in reality, closer 

than they appear.

Take this into account when assessing the 

distance of vehicles approaching from behind.

-------------------------------------------------------------------------------------------------------------------------------------------------------------

54

Ease of use and comfort

Manual folding

You can manually fold the mirrors (parking 

obstruction, narrow garage, etc.)

►  Turn the mirror towards the vehicle. 

Electric folding

Depending on equipment, the door mirrors can 

be folded electrically.

►  From the inside, with the 

ignition on, place control 

A

 in the 

central position.

►  Pull control 

A

 backwards.

►  Lock the vehicle from the outside.

If the mirrors are folded using control 

A

they will not unfold when the vehicle is 

unlocked.

Electric unfolding 

The door mirrors are unfolded electrically when 

the vehicle is unlocked using the remote control 

or key. Unless folding was selected with control 

A

, pull the control in the central position towards 

the rear again.

Folding/unfolding when locking/unlocking 

the vehicle can be deactivated. Contact a 

CITROËN dealer or a qualified workshop.

If necessary, the mirrors can be folded 

manually.

Heated mirrors


►  Press one of these buttons.

For more information on 

Rear screen 

demisting/de-icing

, refer to the 

corresponding section.

Interior rear view mirror

Equipped with an anti-dazzle system, which 

darkens the mirror glass and reduces the 

nuisance to the driver caused by the sun, 

headlamps of other vehicles, etc.

Manual model

Day/night position


►  Pull the lever to change to the anti-dazzle 

"night" position.

►  Push the lever to change to the normal "day" 

position.

Adjustment

►  Adjust the mirror to the normal "day" position.

Automatic "electrochrome" model

The electrochrome system uses a sensor that 

detects the level of exterior brightness and that 

coming from the rear of the vehicle, in order to 

automatically and gradually switch between day 

and night usage.

To ensure optimum visibility while 

manoeuvring, the mirror automatically 

brightens when reverse gear is engaged.

The system is deactivated if the load in the 

boot exceeds the height of the load space 

cover or if the load space cover has items 

placed on it.

Child-monitoring mirror


-------------------------------------------------------------------------------------------------------------------------------------------------------------

55

Ease of use and comfort

3

A child-monitoring mirror is installed above 

the interior rear view mirror. It allows the 

vehicle's rear passengers to be observed and 

facilitates discussion between the front and rear 

passengers without changing the mirror setting 

and without turning around. It can be folded 

easily to avoid dazzle.

2-seat front bench seat


Central seat

Table position


►  To lower the backrest, pull the tab on the 

lower edge of the seat.


The backrest of the central seat of the bench 

seat tilts to form a work table, creating a mobile 

office (for use while stationary).


The vehicle may also be fitted with a pivoting 

table.

►  To return the backrest to the sitting position, 

stow the table, then guide it until it locks.

Take care not to jam the tab under the seat 

cushion while moving the backrest.


Never use the table while the vehicle is 

being driven.

In the event of sudden braking or impact, any 

objects on the table might become dangerous 

projectiles that could cause injury.

Storage compartment under seats


►  Lift the central seat to access the storage 

compartment. This space can be secured by 

fitting a padlock (not supplied).

Each time you lock the seat in the sitting 

position, make sure that passengers 

have access to the seat belt end pieces and 

the associated straps.

-------------------------------------------------------------------------------------------------------------------------------------------------------------

56

Ease of use and comfort

Side seat

Retractable position


►  Pull the tongue on the top edge of the seat 

near the head restraint to tilt and guide the 

assembly.

It is placed in the floor of the front seat and thus 

forms a continuous flat floor with the loading 

space.

This position allows transporting long cargo 

inside the vehicle with the doors closed.

When retracted, the maximum weight on the 

backrest is 50 kg.

To replace the seat, lift the backrest until the seat 

locks into position on the floor.

Never

 put your hand underneath the seat 

cushion to guide the seat downwards or 

upwards, you could get your fingers trapped.

Always just use the strap.

Before carrying out these manoeuvres, check 

that nothing and nobody is obstructing the 

moving elements and their locking.

Folded position


►  Lift the yellow crank at the base of the seat to 

unlock and lift the assembly into folded position 

(seat raised against the backrest) until it locks.

This position allows the transport of high loads 

inside the cab.

To replace the seat, push on the yellow crank 

under the seat and lower the assembly until the 

seat locks into position on the floor.

Never

 put your hand underneath the seat 

cushion to guide the seat downwards or 

upwards, you could get your fingers trapped.

Place your hand on the front of the seat 

cushion.

Before carrying out these manipulations, 

check that nothing and nobody is obstructing 

the moving elements and their locking.

Rear bench seat (row 2)

For safety reasons, seat adjustments 

must only be made when the vehicle is 

stationary.

Folding the backrests

First steps:

►  lower the head restraints,

►  if necessary, move the front seats forward,

►  check that nothing or no person might 

interfere with the folding of the backrests 

(clothing, luggage, etc.),

►  check that the outer seat belts are lying flat 

on the backrests.

The folding of the backrest is 

accompanied by a slight lowering of the 

corresponding seat cushion.

When the backrest is released, the red 

indicator is visible in the release grips on the 

outer seats.


►  Turn the backrest release handle 

1

.

-------------------------------------------------------------------------------------------------------------------------------------------------------------

57

Ease of use and comfort

3

►  Guide the backrest down to the horizontal 

position.

Repositioning the backrests

First check that the outer seat belts are 

lying vertically flat alongside the backrest 

latching rings.

►  Put the backrest in the upright position and 

push it firmly to latch it home.

►  Check that the red indicator in the release 

grip 

1

 is no longer visible.

►  Ensure that the outer seat belts are not 

trapped during the manoeuvre.

Rear seats (row 2)


Folding the backrests

First steps:

►  lower the head restraints,

►  if necessary, move the front seats forward,

►  check that nothing or no person might 

interfere with the folding of the backrests 

(clothing, luggage, etc.),

►  check that the outer seat belts are lying flat 

on the backrests.

The folding of the backrest is 

accompanied by a slight lowering of the 

corresponding seat cushion.

When the backrest is released, the red 

indicator is visible in the release grips on the 

outer seats.

Outer seat (left-hand or right-hand)


►  Turn the backrest release handle 

1

.

►  Guide the backrest down to the horizontal 

position.

Central seat


►  Pull the backrest release tab 

1

.

►  Guide the backrest down to the horizontal 

position.

With the central seat, only the strap must 

be used.

Repositioning the backrests

Outer seat (left-hand or right-hand)

First check that the outer seat belts are 

lying vertically flat alongside the backrest 

latching rings.

►  Put the backrest in the upright position and 

push it firmly to latch it home.

►  Check that the red indicator on the release 

grips 

1

 of the outer seats is no longer visible.

►  Ensure that the outer seat belts are not 

trapped during the manoeuvre.

Check that the backrest of the upright 

central seat is correctly aligned with the 

backrests of the outer seats.

Central seat

►  Put the backrest in the upright position and 

push it firmly to latch it home.

►  Check that the central seat belt is not trapped 

during the manoeuvre.

Rear seats (row 3)


-------------------------------------------------------------------------------------------------------------------------------------------------------------

58

Ease of use and comfort

Access to row 3


►  Using the row 2 seat grip, fold the backrest.

►  To reposition it, tilt the backrest backwards 

until it locks into place.

Labels in row 3


While driving, it is prohibited to have a 

passenger seated next to a seat in the fully 

folded position.


If you want to load luggage onto the row 3 

backrests while in the table position, the row 2 

seats must also be folded down.

Longitudinal adjustment

XL


►  Raise the control and slide the seat forwards 

or backwards.

Table position

Placing the backrest in the table position

►  Lower the head restraint as far as it will go.


►  Operate control 

1

 to fold the backrest onto 

the seat cushion.

Repositioning the backrest

►  Unlock it by pulling control 

1

.

►  Return it to its initial position

►  Check that the assembly is anchored 

properly.

Fully folded position

XL

Placing the seat in the fully folded position

►  Place the backrest in the table position.


-------------------------------------------------------------------------------------------------------------------------------------------------------------

59

Ease of use and comfort

3


►  Lift the bar 

2

, located behind the seat, to 

release the feet of the seat from their anchorage 

in the floor.

►  Tilt the entire seat forwards.

►  Hook the strap 

3

 on the row 2 head restraint 

rod.

Returning the seat to the sitting position

►  Fold the entire seat backwards.

►  Check that the seat belt is not trapped during 

the manoeuvre.

Removing the seat

►  Lower the head restraint as far as it will go.

►  Place the seat in the fully folded position.


►  Pull on the strap 

3

 to open the seat 

anchorages.

►  While still holding the strap 

3

, lift the seat.

Refitting the seat

►  Pull on the strap 

3

 to open the seat 

anchorages.

►  While still holding the strap 

3

, place them in 

the anchorage points on the floor.

►  Release the strap 

3

.

►  Ensure that no object or feet are obstructing 

the rear anchorage points 

4

 and that the seat 

belt is correctly positioned and available.

►  Fold the seat backwards to fix its rear 

anchorage feet.

►  Use the control 

1

 to lift the backrest to its 

original position.

►  Raise the head restraint.

Head restraint height 

adjustment


►  To raise it, pull it upwards as far as possible 

(notch).

►  To remove it, press the lug 

A

 and pull it 

upwards.

►  To put it back in place, engage the head 

restraint rods in the openings keeping them in 

line with the seat backrest.

►  To lower it, press the lug 

A

 and push down on 

the head restraint at the same time.

The head restraint has a frame with 

notches which prevents it from lowering; 

this is a safety device in case of impact.

The adjustment is correct when the upper 

edge of the head restraint is level with the 

top of the head.

Never drive with the head restraints removed; 

they must be fitted and correctly adjusted.

-------------------------------------------------------------------------------------------------------------------------------------------------------------

60

Ease of use and comfort

Never drive with passengers seated at 

the rear when the head restraints are 

removed or not in the high position; the head 

restraints must be in place and in the high 

position.

For more information on the 

Seat belts

refer to the corresponding section.

Interior fittings

Mats

Fitting


When fitting it on the driver's side, only use the 

mountings present on the carpet.

The other mats are simply laid over the carpet.

Removing/refitting

►  To remove it on the driver's side, move 

the seat as far back as possible and give the 

fasteners a quarter turn.


►  To refit it, position the mat and replace the 

fasteners, giving them a quarter turn.

►  Check that the mat is secured correctly.

To avoid any risk of jamming the pedals:

–  Only use mats which are suited to the 

fixings already present in the vehicle; these 

fixings must be used.

–  Never fit one mat on top of another.

The use of mats not approved by CITROËN 

may interfere with access to the pedals and 

hinder the operation of the cruise control/

speed limiter.

The approved mats have two fasteners 

located underneath the seat.

Overhead storage unit


This compartment, located above the sun visors, 

can be used to store various objects.

Roof and roof storage


Overhead storage compartment and 

central storage compartment 


The overhead storage compartment 

(1)

 is 

located above the sun visors and can be used to 

store miscellaneous objects.

There is a storage space 

(2)

 located in the roof 

lining.

The maximum permitted load is 6 kg.

-------------------------------------------------------------------------------------------------------------------------------------------------------------

61

Ease of use and comfort

3

In the event of sharp deceleration, 

objects placed in the central storage 

compartment of the roof may be transformed 

into projectiles.

Rear storage compartment

This compartment is accessible from the rear 

seats and from the vehicle's boot.

It has a capacity of 60 litres and the maximum 

permitted load is 10 kg.


►  To open it from the rear seats, slide the rear 

storage compartment shutters.


►  To open it from the vehicle’s boot, place your 

thumb on the boot recess then pull the handle.

Open the rear storage compartment with 

care, to prevent any objects stored inside 

from falling out.

Light ambience

The light ambience settings are 

changed via 

the 

Driving

/

Vehicle

 touch screen menu.

Blind

Opening/Closing


►  Press and hold the button; the blind opens/

closes, stopping when the button is released.

If the blind becomes trapped while 

moving, reverse its movement. To do 

this, press the relevant control.

When pressing the button to open/close the 

blind, the driver must ensure that nothing and 

no one might interfere with its movement.

The driver must ensure that passengers use 

the blind correctly.

Pay particular attention to children when 

operating the blind.

12 V accessory socket(s)


►  Plug in a 12 V accessory (with a maximum 

rated power of 120 W) using a suitable adapter.

Observe the maximum power rating to 

avoid damaging the accessory.

The connection of an electrical device 

not approved by CITROËN, such as a 

USB charger, may adversely affect the 

operation of vehicle electrical systems, 

causing faults such as poor radio reception or 

interference with displays in the screens.

-------------------------------------------------------------------------------------------------------------------------------------------------------------

62

Ease of use and comfort

USB socket(s)


Socket 

1

 enables audio files sent to your audio 

system to be played through the vehicle's 

speakers.

When the USB socket is used, the 

portable device charges automatically.

While charging, a message is displayed if the 

power drawn by the portable device exceeds 

the current supplied by the vehicle.

For more information about how to use this 

equipment, refer to the sections describing 

the audio and telematics systems.

* Only on the Citroën Berlingo Van.

Socket 

1

 allows a 

smartphone to be 

connected by Android Auto

®

 or CarPlay

®

enabling certain smartphone applications to be 

used on the touch screen.

Sockets 

1

 and 

2

* allow a portable device to be 

connected in order to charge it.

For best results, use a cable made or approved 

by the device manufacturer.

These applications can be managed using the 

steering-mounted controls or the audio system 

controls.

220 V/50 Hz socket


AC 220V

50Hz

120W


It is located on the side of the central storage 

compartment.

This socket (max. power: 150 W) operates with 

the engine running, and with the Stop & Start 

system in STOP mode.

►  Lift the protective cover.

►  Check that the green indicator lamp is on.

►  Connect your multimedia or other electrical 

device (telephone charger, laptop computer, 

CD-DVD player, bottle warmer, etc.).

In the event of a malfunction, the 

green indicator lamp flashes.

Have the socket checked by a CITROËN dealer 

or a qualified workshop.

Connect only one device at a time to the 

socket (do not use extension leads or 

multi-socket adapters).

Connect only devices with class II insulation 

(shown on the device).

Do not use metal-cased devices (e.g. electric 

shaver, etc.).

As a safety measure, if power 

consumption is high and power is 

required by the vehicle's electrical system 

(due to severe weather conditions, electrical 

overload, etc.), power to the socket may be 

cut off, in which case the green indicator lamp 

goes off.

Wireless smartphone 

charger


-------------------------------------------------------------------------------------------------------------------------------------------------------------

63

Ease of use and comfort

3


This system allows wireless charging of a 

portable device such as a smartphone, using the 

magnetic induction principle, in accordance with 

the Qi 1.1 standard.

The portable device to be charged must be 

compatible with the Qi standard, either by design 

or by using a compatible holder or shell.

A mat can also be used provided that it is 

approved by the Manufacturer.

The charging area is identified by the Qi symbol.

The charger works with the engine running and 

with the Stop & Start system in STOP mode.

Charging is managed by the smartphone.

With the Keyless Entry and Start system, the 

charger’s operation may be briefly disrupted 

when a door is opened or the ignition is switched 

off.

Charging

►  With the charging area clear, place a device 

in its centre.


When the portable device is detected, the 

charger’s indicator lamp lights up green. It 

remains lit for the whole time that the battery is 

being charged.

The system is not designed to charge 

multiple devices simultaneously.

Do not leave metal objects (e.g. coins, 

keys, vehicle remote control) in the 

charging area while a device is being charged 

- Risk of overheating or interrupting the 

charging!

When using applications for a long time 

in combination with wireless charging, 

some smartphones may switch to thermal 

safety and cause some functions to stop.

Checking operation

The state of the indicator lamp allows the 

operation of the charger to be monitored.

State of the 

indicator lamp

Meaning

Off

Engine switched off.

No compatible devices 

detected.

Charging complete.

Fixed green

Compatible portable 

device detected.

Charging.

State of the 

indicator lamp

Meaning

Flashing orange

Foreign object detected in 

the charging zone.

Portable device not well 

centred in the charging 

zone.

Fixed orange

Malfunction of the 

portable device's battery 

meter.

Device battery 

temperature too high.

Charger malfunction.


If the indicator lamp is fixed orange:

–  remove the device, then place it back in the 

centre of the charging zone.

or

–  remove the device and try again in a quarter 

of an hour.

If the problem persists, have the system checked 

by a CITROËN dealer or a qualified workshop.

Floor boxes (Petrol or 

Diesel)


-------------------------------------------------------------------------------------------------------------------------------------------------------------

64

Ease of use and comfort


There are two boxes located under the rear 

passenger footwells.

►  To open them, slide your fingers into the 

notch and lift the cover.

Aircraft style tables


►  To put the table back in place, pull it upwards.

As a safety precaution, the aircraft style table 

unhooks itself if excessive pressure is applied.

►  To store the table, pull it downwards.

Do not place hard or heavy objects on 

the table. Such objects could become 

projectiles in the event of sudden 

deceleration.

Side blinds


They are fitted to the windows of the sliding side 

doors (depending on version).


►  To raise or lower the blind, pull it by the tab.

To avoid damaging the blind:

–  Guide it slowly, using the tab, while 

raising or lowering it.

–  Make sure the tab is securely fastened 

before opening the door.

High load retaining net


This net, hooked onto the upper mountings and 

the lower rings or lugs, enables the use of the full 

loading volume, up to the roof:

–  Behind the front seats (row 1) when the rear 

seats are folded.

–  Behind the rear seats (row 2).

When positioning the net, check that the 

strap loops are visible from the boot; this 

will make slackening or tightening them 

easier.

Remove the luggage cover shelf or roller 

(depending on version).

-------------------------------------------------------------------------------------------------------------------------------------------------------------

65

Ease of use and comfort

3

Installation behind row 1


►  Open the covers on the upper mountings 

1

.

►  Unroll the high load retaining net.

►  Position one end of the net's metal bar in the 

corresponding upper mounting 

1

, then do the 

same with the other end.

►  Fully extend the straps.


►  Wind each strap around bar 

3

 located under 

the front seat cushion (row 1), then secure each 

spring hook to the ring on the corresponding 

strap.

►  Fold down the rear seats.

►  Tighten the straps without raising the bench 

seat.

►  Check that the net is hooked and tightened 

correctly.

Installation behind row 2


►  Fold or remove the luggage cover.

►  Open the covers on the upper mountings 

2

.

►  Unroll the high load retaining net.

►  Position one end of the net's metal bar in the 

corresponding upper mounting 

2

, then do the 

same with the other end.

►  Attach the hook on each of the net's straps 

to the corresponding stowing ring 

4

 (located on 

the floor).

►  Tighten the straps.

►  Check that the net is hooked and tightened 

correctly.

Never use the ISOFIX ring, which is for 

fixing the strap of a child seat with Top 

Tether.

Two-position luggage cover 

shelf (removable)

M

M


It can be installed in two different positions: high 

and low.

It consists of two sections which can be folded 

back on each other.

►  To fold it from the boot, grasp it and fold it 

back on itself up to the rear seats. From the 

-------------------------------------------------------------------------------------------------------------------------------------------------------------


Content      ..     2      3      4      5     ..