Citroen Jumper Dag (2008 year). Instruction - part 4
5
1
3
ER
G
O
N
O
MI
C
S
A
N
D
C
O
MF
O
R
T
Ventilation
Comfort value adjustment ring
The graduation ranges between:
-
increasing of the interior ambient air
temperature HI (High) which heats to a
maximum graduation of 32,
-
cooling of the interior ambient air
temperature LO (Low) which cools to a
graduation of 16.
increase (+) or reduce (-) the force of the
interior air flow.
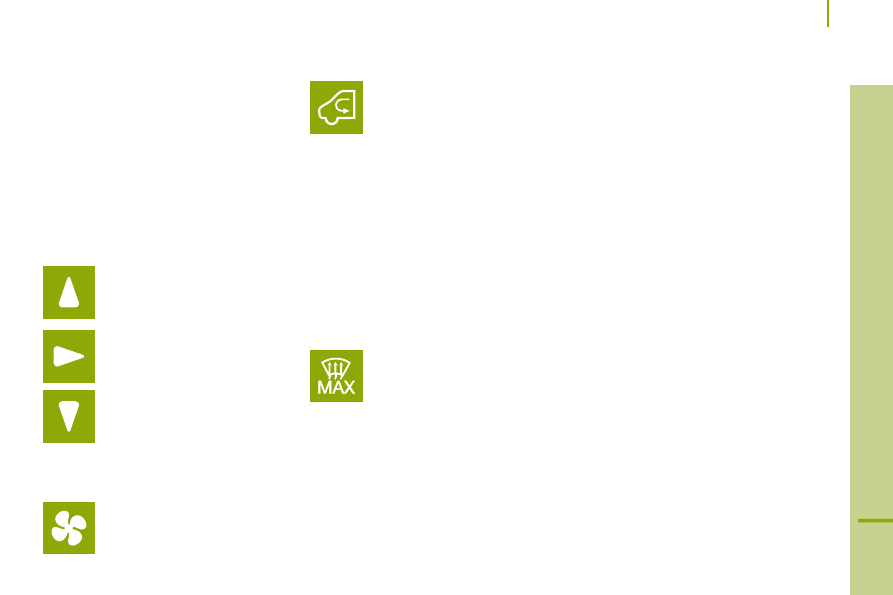
Air distribution
Pressing lights the diode on the buttons
which distribute the air flow towards:
the windscreen and front side
window vents (demisting/de-icing
of the windows),
the central and side vents (chest
and face),
the vents in the front and rear
areas (feet).
The combination of buttons permits
improvement of air distribution.
Air flow
Successive presses of this button
Intake of exterior air/
recirculation of interior air
When the diode is lit, the air
recirculates inside the passenger
compartment to prevent the entry of exterior
odours and smoke. This position should be
temporary.
When the ambient air comfort level has been
reached, pressing the button switches the
diode off and reopens the exterior air intake.
Pressing the AUTO button also restores
the intake of exterior air. Returning to this
position permits renewal of the air in the
passenger compartment and demisting.
Pressing the AUTO button again restores
the FULL AUTO function.
Rapid demisting/de-icing
Pressing this control permits
rapid clearing of the windows.
The diode is lit.
The system manages the air conditioning,
the flow and intake of air, the de-icing of
the rear screen and provides optimum
distribution of the air to the windscreen and
front side windows.
If your vehicle is fitted with additional
heating, please switch it off to guarantee
rapid and effective demisting/de-icing.