Chrysler Stratus Convertible. Manual - part 191
CAUTION: When installing the retaining clip on the
brake pedal pin a NEW retaining clip must be used
to ensure the retention of the vacuum booster push
rod.
(7) Install a new retaining clip (Fig. 50) on the
brake pedal pin.
(8) Using Mopar Lubriplate or an equivalent,
lightly lubricate the surface of the brake pedal
striker where the plunger of the brake lamp switch
contacts it.
NOTE: Prior to installing the brake lamp switch into
its bracket, the plunger must be moved to its fully
extended position using the procedure in Step 9.
(9) Hold stop lamp switch firmly in one hand.
Using other hand, pull outward on the plunger of the
stop lamp switch until it has ratcheted out to its
fully extended position.
(10) Install the brake lamp switch in the brake
pedal bracket (Fig. 49). Install it using the following
procedure. Depress the brake pedal as far down as
possible. Then while holding brake pedal down, align
the index key on switch with slot in square hole of
mounting bracket. When switch is fully installed into
the bracket, rotate stop lamp switch in a clockwise
direction approximately 30 degrees until it is aligned
straight up and down (Fig. 51).
CAUTION: Do not use excessive force when pulling
back on brake pedal to adjust the brake lamp
switch. If to much force is used, damage to the
brake lamp switch or striker can result.
(11) Gently release/pull back the brake pedal until
it stops moving. This will cause the switch plunger to
ratchet back to its correctly adjusted position.
(12) Install the heat distribution duct.
(13) Install the two screws securing the bottom of
the knee bolster below the steering column in place
(Fig. 48).
(14) Connect the remote ground cable for the bat-
tery on the ground post located on left shock tower
(Fig. 46).
MASTER CYLINDER
REMOVE
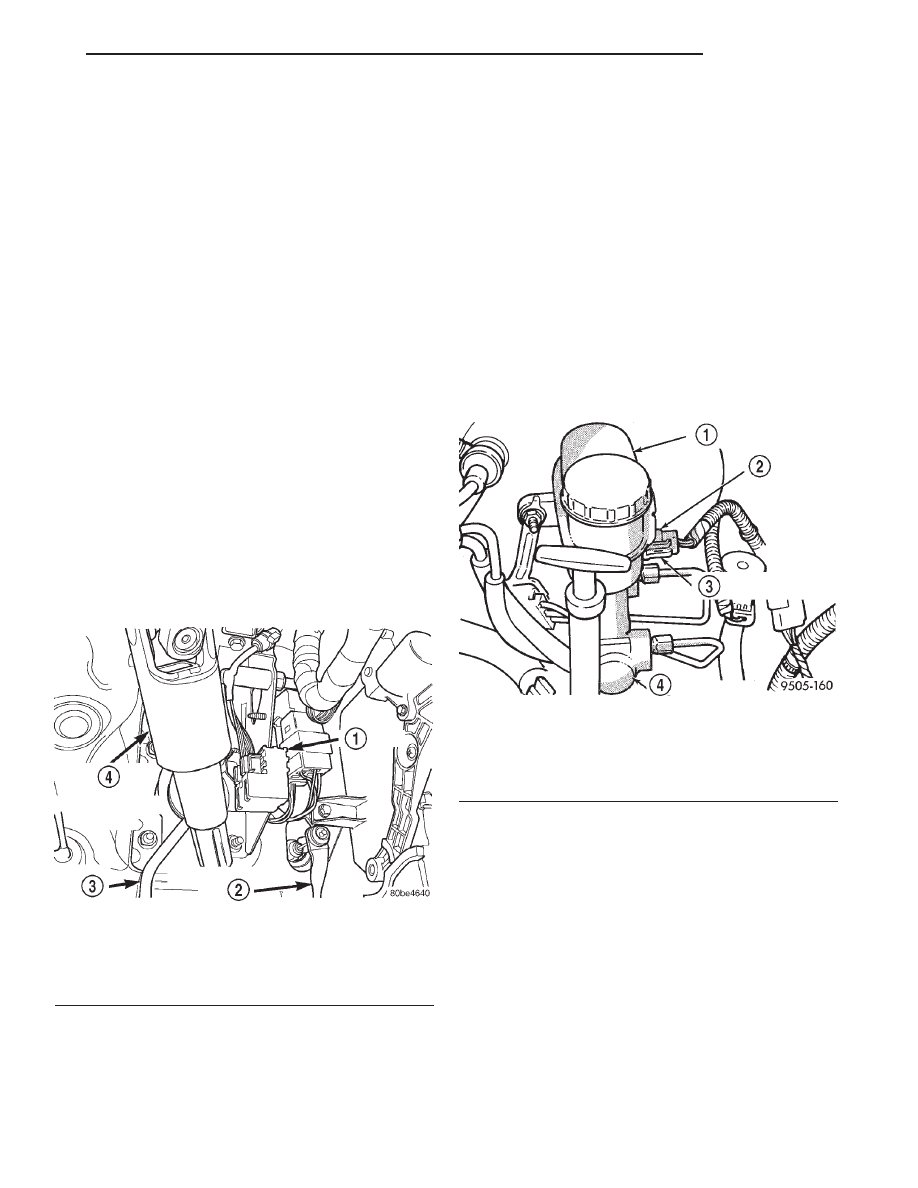
(1) Remove wiring harness connector from brake
fluid level sensor in master cylinder brake fluid res-
ervoir (Fig. 52).
(2) Disconnect the primary and secondary brake
tubes from the master cylinder outlet ports (Fig. 53)
(Fig. 54). Install plugs at all open brake tube outlets
on master cylinder assembly.
(3) Using Mopar, Brake Parts Cleaner or an equiv-
alent, clean the area where the master cylinder
attaches to the vacuum booster.
(4) Remove the 2 nuts (Fig. 55) attaching the mas-
ter cylinder to the vacuum booster.
CAUTION: When removing the routing clip and
brake tubes from the mounting stud, do not bend or
kink the chassis brake line tubes.
(5) Remove the routing clip and chassis brake
tubes (Fig. 55)(as an assembly) from the mounting
stud for the master cylinder.
Fig. 51 Brake Lamp Switch
1 – SWITCH
2 – ACCELERATOR PEDAL
3 – BRAKE PEDAL
4 – STEERING COLUMN INTERMEDIATE SHAFT
Fig. 52 Master Cylinder Fluid Level Sensor
1 – BRAKE FLUID RESERVOIR
2 – BRAKE FLUID LEVEL SENSOR
3 – WIRING HARNESS CONNECTOR
4 – MASTER CYLINDER
JX
BRAKES
5 - 27
REMOVAL AND INSTALLATION (Continued)