Chery S11 / Chery QQ. Manual - part 176
 

  Index      Chery     Chery S11 / Chery QQ - service repair manual


Search            


Content   ..  174  175  176  177   ..


Chery S11 / Chery QQ. Manual - part 176


  Chery    QQ    Maintenance Manual                                                    Body System 


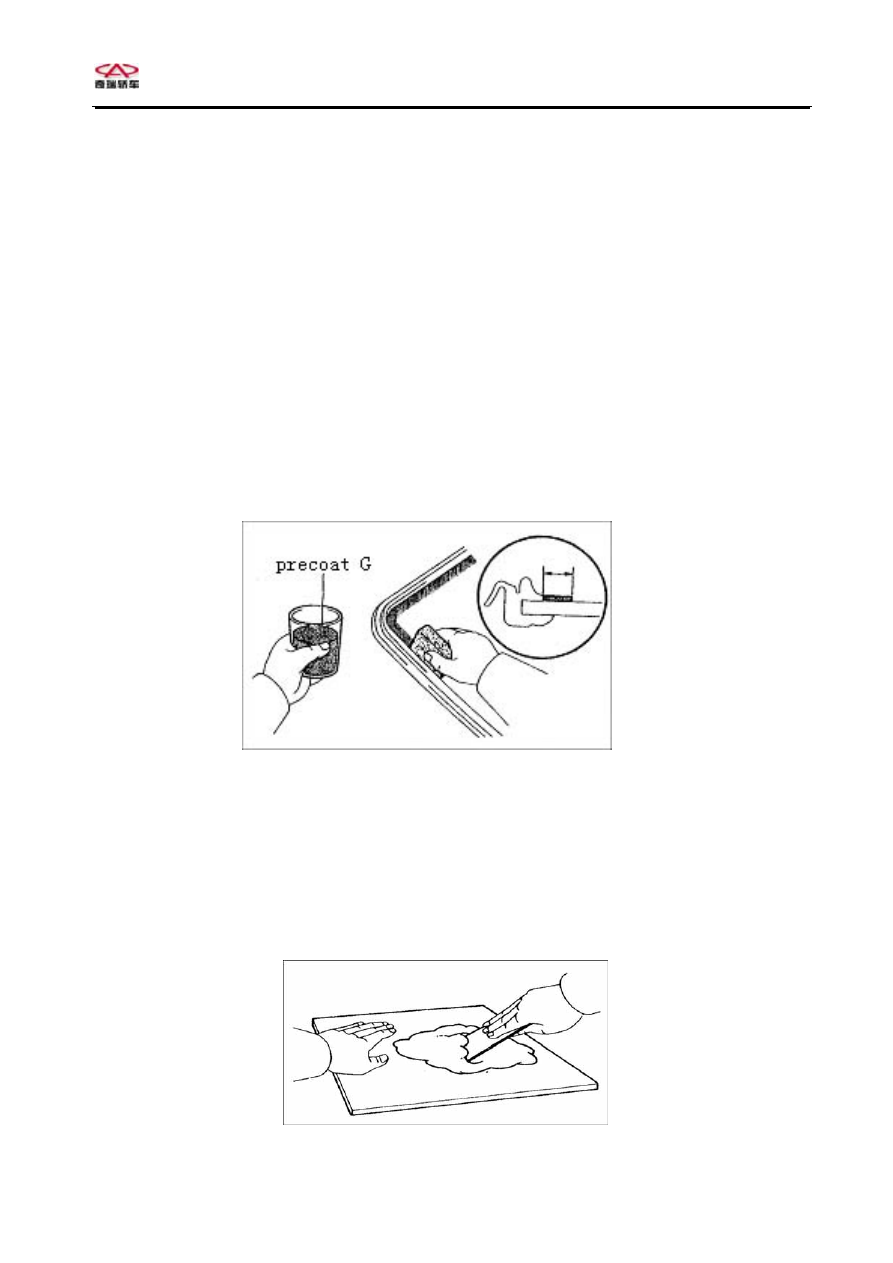
8 Smear a layer of base paint G on the surface of glass contact surface. 
Smear base paint G on the contact surface and glass edge with brush or sponge. 
Wipe it away with clean cloth after the base paint is dry. 
Caution: Dry the base paint for at least 3 minutes. 

Don’t smear on bonding agent. 
Do not keep the unsealed base paint for future use. 


9 Mix the bonding agent 

  Caution: Make sure that weather strip is installed properly during the period of bonding agent 

being suitable for use. 

You should complete to mix the bonding agent within 5 minutes. 
Clean glass plate and scraper thoroughly. 
Mix 500 g main bonding agent and 75 g hardener to the full with scraper on the plate glass or 

similar substitution. 


72


  Chery    QQ    Maintenance Manual                                                    Body System 

10 Smear bonding agent 
Cut off kettle tip and put bonding agent into kettle. 
Put kettle into fluid sealant gun. 
Smear bonding agent on the glass, shown as the illustration 


11Install glass 

Align glass with reference mark on vehicle body to install glass. Put in glass slightly and 

smear the bonding agent all around the glass. 

Cut off overflows bonding agent , clamp glass tightly until bonding agent hardens. 


12
Check any leakage, carry out the repair if necessary. 

Check to see if there is any leakage after hardening. 
Block up any leakage. 

 
13
Install rear window outside weather strip 

Install strip on body and tap by hand. 

 
14 Connect anti-frog guide connector. 


Chapter 8 Window Wiper 

8.1 Specification 
8.1.1 A Specification of fastener 

Application Specification 

Washer solvent box assembly bolt 

1.5–2 N/m 

73


  Chery    QQ    Maintenance Manual                                                    Body System 

Wiper arm assembly to spindle bolt 

10–12 N/m 

Wiper driving system module to wagon bolt 

3.5–4.5 N/m 

Wiper motor    assembly bolt 

9–12 N/m 

 
8.1.18 Specification of fastener
 

Application Specification 

Rear wiper assembly to spindle bolt 

10.0-11.0 N/m 

Rear wiper motor assembly bolt 

2.0-3.0 N/m 

Rear wiper motor assembly bolt 

1.0-2.0 N/m 

 
8.2 Maintenance guide
 
8.2.1 Remove front wiper assembly 

1、  Pull out weather strip. 
2、  Prize open inner door panel. 
3、Loosen set bolts, take out wiper arm. 
4、Loosen 10 set bolts to take out inner door panel. 
5、Prize open the driving link. 
6、Loosen 6 nuts on right and left of driving link , 

remove the driving link assembly. 

7、  Loosen 4 set bolts of wiper electric motor ,then take out the motor. 


8.2.2 Remove rear wiper assembly 

1、Loosen 8 bolts , take out inner door panel. 
2、Loosen 3 bolts , take out wiper electric motor. 


obile Co., Ltd 


74


  Chery    QQ    Maintenance Manual                                                    Body System 


8.2.3 Remove water injector 

1、Remove front bumper. 
2、Loosen 3 bolts, remove water. Injector. 


3、Loosen cable socket , remove front and rear water injector motor. 


8.2.4 Remove water injector 

Pull the fountain pipe upwards, separate the water pipe. 
 

8.2.5 The order of installation is just reversed to removal procedures. 


Chapter 9 Louver 

9.1 Maintenance guide 

75


Content   ..  174  175  176  177   ..