Chery Fora (Elara A520). Manual - part 22
 

  Index      Chery     Chery Fora (Elara A520) - service repair manual


Search            


Content   ..  20  21  22  23   ..


Chery Fora (Elara A520). Manual - part 22


Chery Service Manual for A520                Body Dimension and Accessories


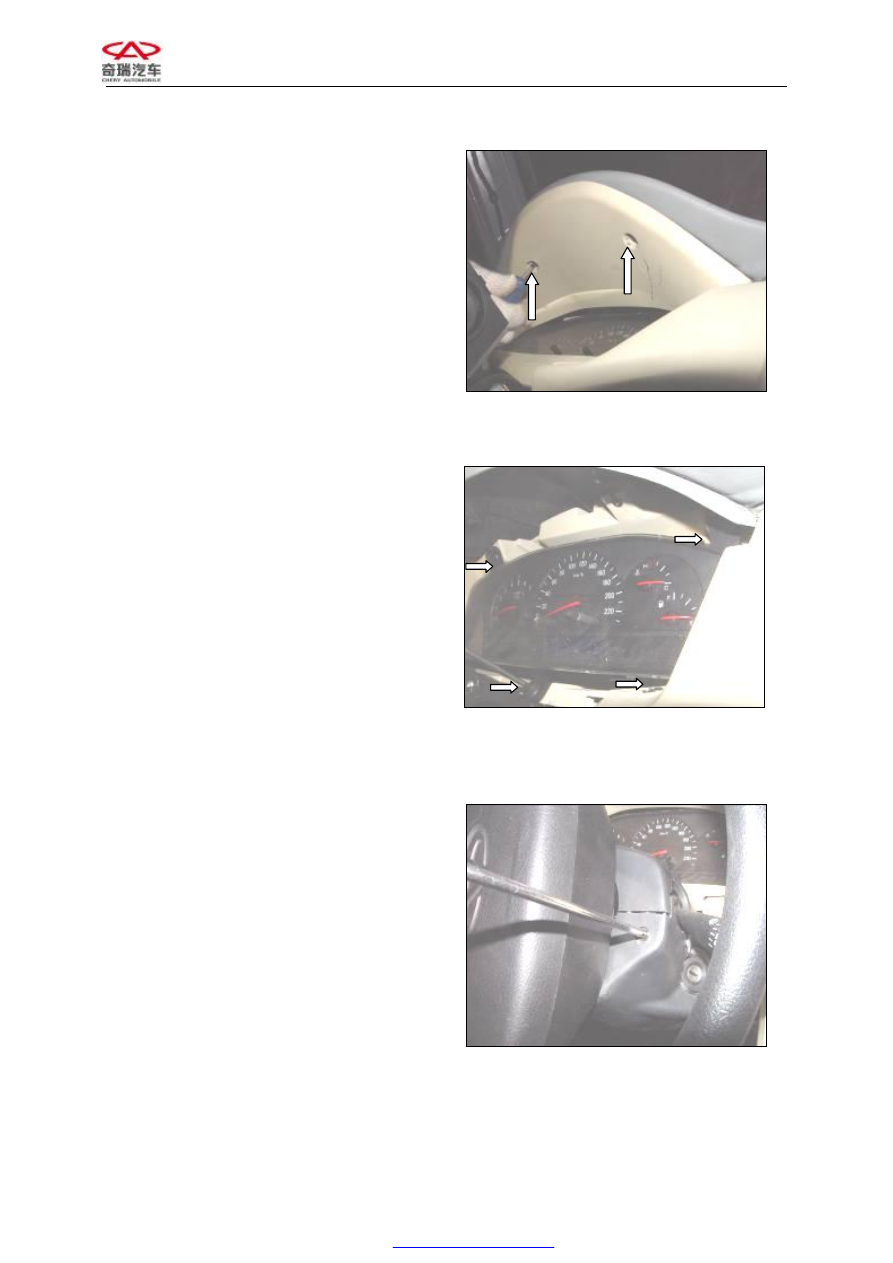
1.  Remove the instrument mask; 


Figure 117 

2. 

Remove  the  bolts  as  shown  to  remove 
the instrument; 

Note:  Clearing  method  for  the  instrument 
maintenance indicator lamp 

①  Turn off the ignition switch; 

②  Press  down  and  hold  the  Mode  switch, 

turn  on  the  ignition  switch,  and  release 
the Mode switch, touch the Mode switch 
and  the  Clock  switch  simultaneously  in 
30 seconds with a touch time less than 2 
seconds 

to 

clear 

the 

mileages 

maintenance identification. 


Figure 118 

3. 

Unscrew  the  fastening  screws  (each  at 
left  and  right)  to  remove  the  steering 
wheel cover; 


Figure 119 


Chery Service Manual for A520                Body Dimension and Accessories


4.  Unscrew  the  fastening  screw  to  remove 

the  steering  switch.  Remove  the  wiper 
switch with the same method; 


Figure 120 

5.  Unscrew  the  fastening  bolts  with  internal 

spline to remove the air bag assembly; 


Figure 121 

6.  Unplug  the  spiral  cable  connector; 

remove the steering wheel to take out the 
spiral cable; 


Figure 122 


Chery Service Manual for A520                Body Dimension and Accessories


7.  Remove  the  right  blanking  cover 
assembly; 


Figure 123 

8.  Remove  the  left  lower  trim  panel 

assembly of the instrument panel; 


Figure 124 

9.  Remove the glove box assembly; 


Figure 125 


Chery Service Manual for A520                Body Dimension and Accessories


10.  Remove the trim strip; 


Figure 126 

11.  Unscrew the fixing bolts; 


Figure 127 

12.  Remove  the  bezel  of  the  central  control 

panel; 


Figure 128 


Content   ..  20  21  22  23   ..