Chery B11. Manual - part 147
Chery Eastar Service Manual Body Dimension and Accessories
39
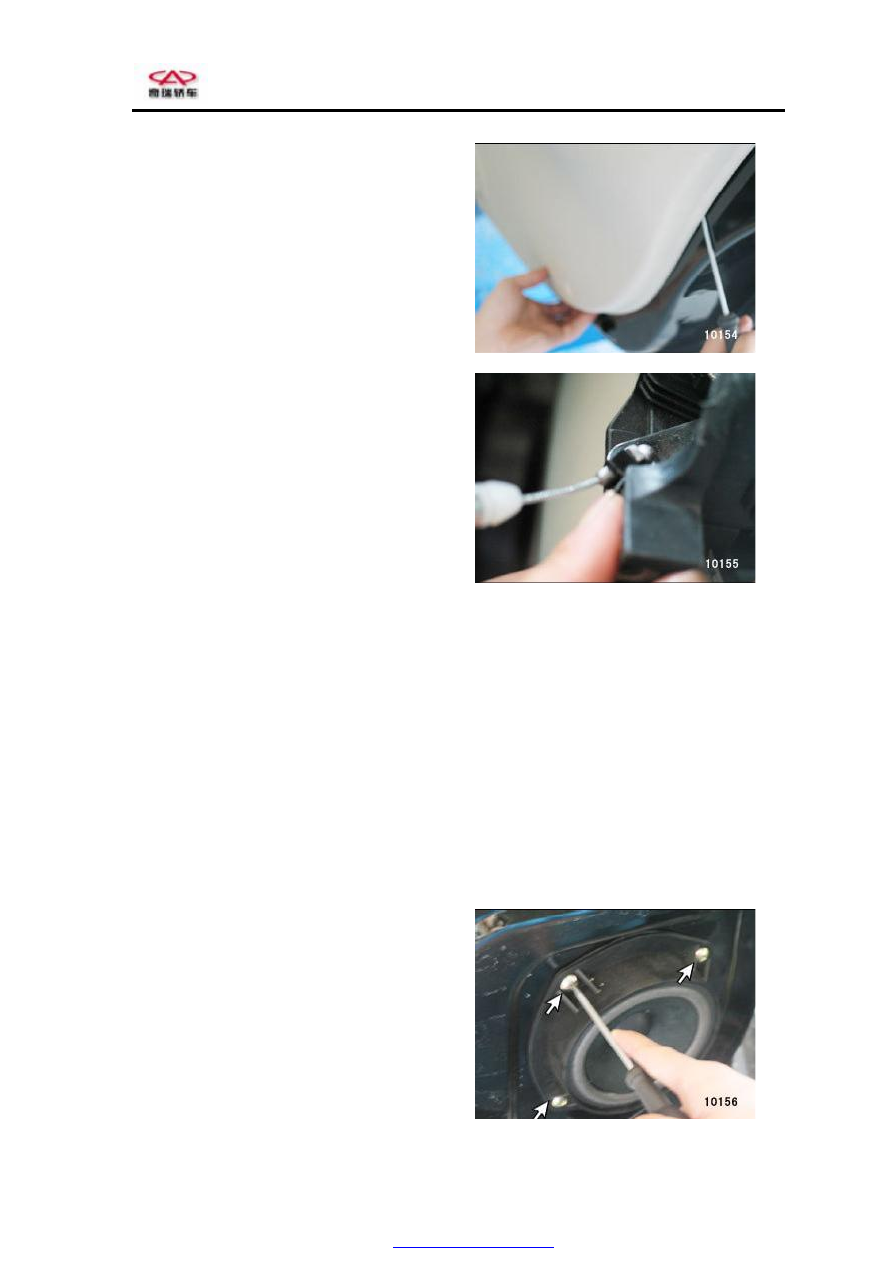
8. Raise the trim panel towards the exterior of
vehicle and pry it out with a screwdriver.
9. Detach the control cable on the inner handle,
and remove the trim panel.
Assemble in the reverse order of
disassembly.
Measures shall be taken to prevent the working area rinsed from being dirtied during disassembly and
assembly. It is very important to keep clean when conducting these operations.
Assembling requirements: The fit clearance between the door panel and door inner panel shall be
uniform, and the torque of fixing screw shall be 3±0.5Nm. The rinsing width of front/rear windshield
shall be between 15 to 17 mm. the width of primer between 13 to 15 mm. the width of adhesive
between 7 to 9 mm and its height 9 to 15 mm, without any adhesive leakage, overflow liquid and etc
after assembly. the clearance between the upper and lower of glass and that between the left side and
right side shall be identical and uniform to ensure that they match well with the adhesive strips around
them. And the glass shall be sealed well, and there is no any leakage and other defects after rain test.
Disassemble the Speaker Assy.
Unscrew the four fixing bolts, and remove the audio horn.
PDF created with pdfFactory Pro trial version