Chery B11. Manual - part 140
 

  Index      Chery     Chery B11 - service repair manual


Search            


Content   ..  138  139  140  141   ..


Chery B11. Manual - part 140


Chery Eastar Service Manual                    Body Dimension and Accessories 


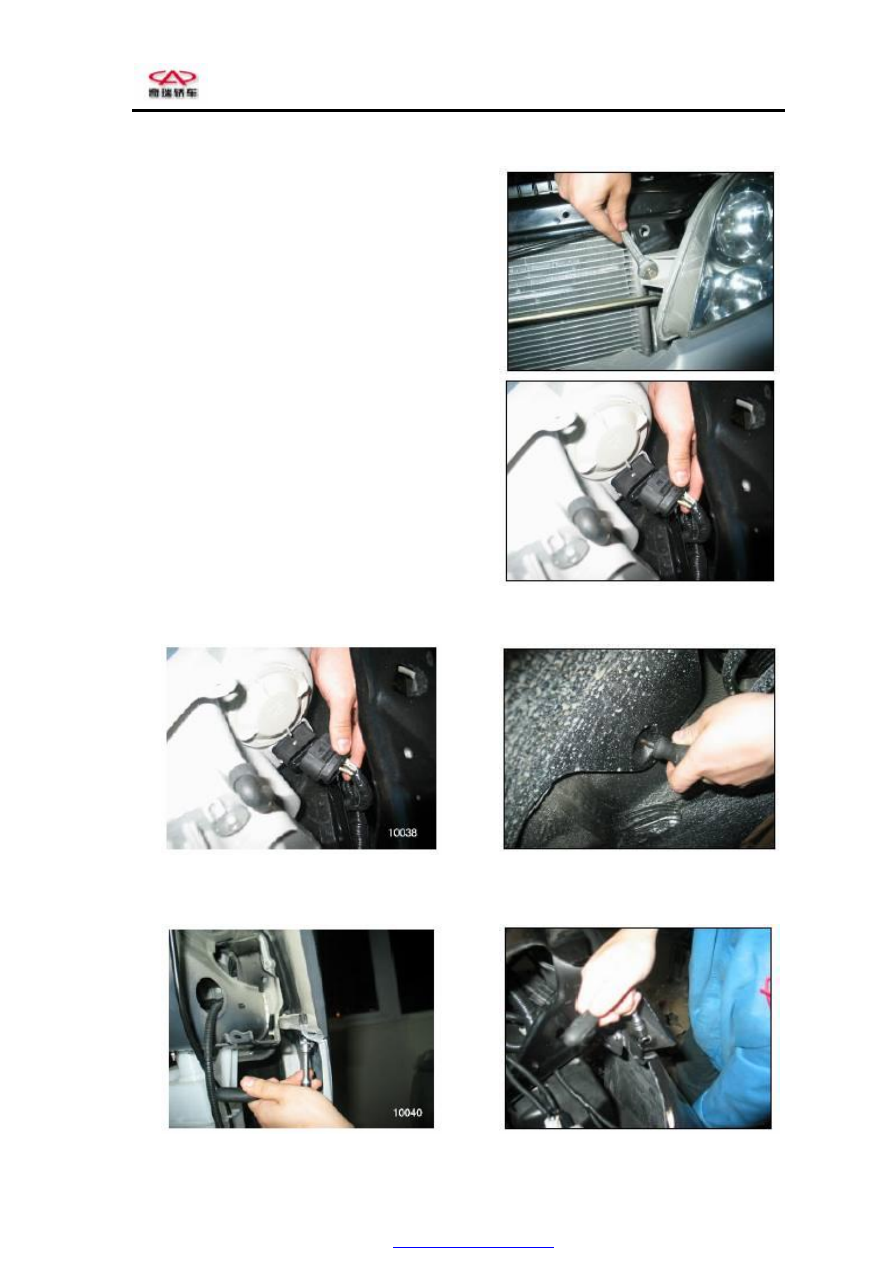
  Loosen the harness, and remove the Headlamp. 


2. 

Disassemble the lining of front fender 

  Remove  the  three  fixing  bolts  on  the  front  mud 

guard,  and  disassemble  the  mud  guard  (See 

Disassembly/Assembly of Blast Screen) 


  Loosen  the  eight  clip  screws  on  the  lining  of 

ender, and remove them. 


3. 

Disassemble the front bumper strip 

  Unscrew  the  four  fixing  screws  for  the  front 

bumper strip. 


PDF created with pdfFactory Pro trial version 

www.pdffactory.com

Chery Eastar Service Manual                    Body Dimension and Accessories 

10 


  Loosen  the  upper/lower  twelve  clip  screws,  and 

remove the clip. 


  Unfasten  the  left/right  harnesses,  and  remove  the 

front bumper strip. 


4. 

Disassemble the exterior moulding of door frame 

  Unscrew the six clip screws on the door frame trip, 

and remove the clip. 


  Pull out the panel strip outwards. 

5. 

Disassemble the fender. 

  Unscrew  the  eight  fixing  bolts  on  the  fender,  and 

remove the fender. 


PDF created with pdfFactory Pro trial version 

www.pdffactory.com

Chery Eastar Service Manual                    Body Dimension and Accessories 

11 


PDF created with pdfFactory Pro trial version 

www.pdffactory.com

Chery Eastar Service Manual                    Body Dimension and Accessories 

12 

Assemble in the reverse order of disassembly. Make sure of the fit clearance between 
the hood and front bumper during assembly. 

Disassembly of Fuel Tank


l. 

Disassemble the rear wheel mud guard. 

Unscrew the two fixing bolts, and remove the mud guard. 

2. 

Disassemble the lining of rear wheel fender. 

Unscrew the three clip screws on the lining of fender and remove the clip, and then unscrew one 

fixing screw to remove the lining. 


3. 

Open  the  fuel  tank  cap,  and  apply  a 

screwdriver  to  force  out  the  fixing  clip  of 

fuel filler pipe. 


4. 

Unscrew the fixing bolts of fueler. 


PDF created with pdfFactory Pro trial version 

www.pdffactory.com


Content   ..  138  139  140  141   ..