Kia Sorento (2024 year). Manual in english - page 5
 

  Index      Kia     Kia Sorento (2024 year). Manual in english


Search            copyright infringement  


Content      ..     3      4      5      6     ..


Kia Sorento (2024 year). Manual in english - page 5


55

4

4

Features of your vehicle

Panorama sunroof

5. Once again push and hold the sun

-

roof switch forward until the sunroof 
glass slides open and close. Do not 
release the switch until the operation 
is completed.

If you release the switch during oper

-

ation, start the procedure again from
step 2.

NOTICE

If the sunroof does not reset when the
vehicle battery is disconnected or dis

-

charged, or the sunroof fuse is blown,
the sunroof may not operate normally.

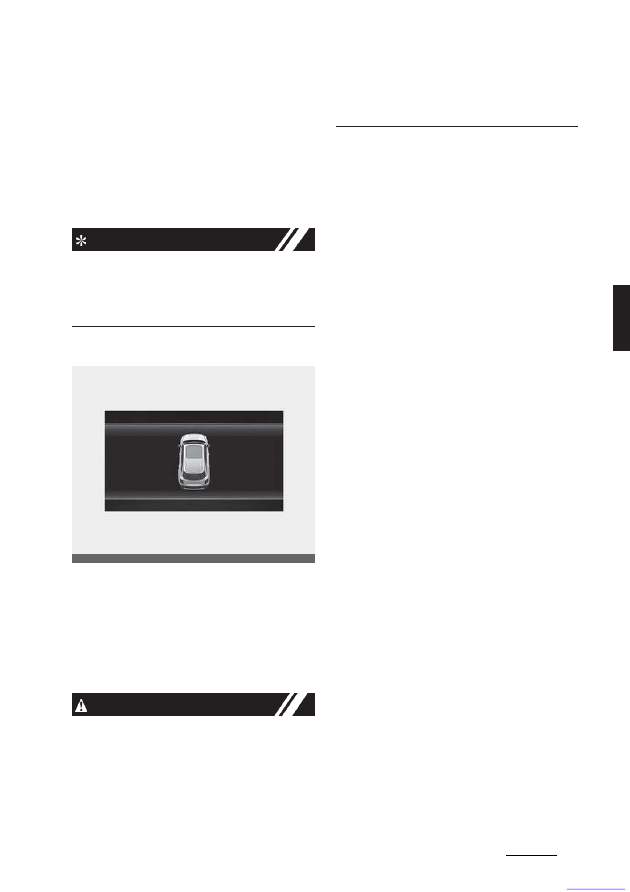
Sunroof open warning

If the driver turns off the engine when the
sunroof is not fully closed, the warn

-

ing

chime will sound for several seconds and
the sunroof open warning will appear on
the cluster LCD display.

Close the sunroof securely when leaving 
your vehicle.

CAUTION

Make sure the sunroof is closed fully 
when leaving your vehicle. If the sunroof 
is left open, rain or snow may wet the 
interior of the vehicle. Also, leaving the

sunroof open when the vehicle is unat

-

tended may invite theft.

OMQ4040131

CarManuals2.com

Features of your vehicle

56

4

Steering wheel

Steering wheel

The steering wheel of this vehicle is 
equipped with the Electric Power Steer

-

ing (EPS) system.

Electric power steering (EPS) 

Power steering uses the motor to assist 
you in steering the vehicle.

If the engine is off or if the power steer

-

ing system becomes inoperative, the 
vehicle may still be steered, but it will 
require increased steering effort.

The EPS is controlled by the power 
steering control unit which senses the 
steering wheel torque and vehicle speed 
to command the motor.

The steering effort becomes heavier as 
the vehicle's speed increases and 
becomes lighter as the vehicle's speed 
decreases for better control of the steer

-

ing wheel.

Should you notice any change in the 
effort required to steer during normal 
vehicle operation, have the system 
checked by an authorized Kia dealer.

NOTICE

The following symptoms may occur 
during normal vehicle operation:
• When the ENGINE START/STOP

but

-

ton is the ON position, the

steering wheel enters normal 
operation mode after diagnosing the
Electric Power Steering system (for
about 3 sec

-

onds).

• A click noise may be heard from the 

EPS relay after turning the ENGINE 
START/STOP button is turned to
the ON or OFF position.

• If the steering wheel is operated when 

the vehicle is not in motion or driven at
a low speed, you may hear some 
noise.

• If the Electric Power Steering system

does not operate normally, the warn

-

ing light will illuminate or blink on the
instrument cluster. If the power assis

-

tance of steering fails, you will need to
use more force to steer.

• Operating the steering wheel at lower 

temperatures may require more force 
and accompany noise. However, 
when the temperature increases, it 
returns to normal.

• Take your vehicle to an authorized Kia 

dealer and have the vehicle checked 
as soon as possible.

• When the charging system warning 

light comes on due to the low voltage 
(when the alternator or battery does 
not operate normally or malfunc

-

tions), 

the steering wheel may require 
increased steering effort.

• When jump starting the vehicle after 

battery discharge, the steering wheel 
may not function properly. It is a tem

-

porary situation due to low battery 
voltage, and upon stable battery 
charging, the steering wheel will func

-

tion normally again. Please move the 
steering wheel around to make sure 
the steering wheel is functioning 
properly before driving the vehicle.

CAUTION

When you continuously operate the 
steering wheel, the overcurrent protec

-

tion device is activated and it requires 
more force to operate the steering wheel.
However, this doesn't indicate a
malfunction, and it works for your safety 
and will return to normal after some time.

CarManuals2.com

57

4

4

Features of your vehicle

Steering wheel

CAUTION

If the Electric Power Steering (EPS) sys

-

tem does not work or an error occurs, the
warning light on the instrument panel
may be turned on or blink and it may
require more force to operate the steering
wheel. In this case, please hold the
steering wheel more tightly than usual
and operate with greater force. And then
immediately pull your vehicle over to a
safe place and have your vehi

-

cle

inspected by an authorized Kia dealer.

Tilt & telescopic steering wheel

A

tilt and telescopic steering wheel allows
you to adjust the steering wheel
before you drive. You can also raise it to
give your legs more room when you exit
and enter the vehicle.

The steering wheel should be positioned 
so that it is comfortable for you to drive, 
while permitting you to see the instru

-

ment panel warning lights and gauges.

W ARNING

Steering wheel adjustment
Never adjust the angle and height of the 
steering wheel while driving. You may 
lose steering control.

Adjusting steering wheel angle 
and height

1. To change the steering wheel angle, 

pull down the lock release lever (1).

2. Adjust the steering wheel to the 

desired angle (2) and height (3). 
Move the steering wheel, so it points
toward your chest, not toward your 
face. Make sure you can see the
instrument panel warning lights and 
gauges. After adjusting, pull up the 
lock.

3. Pull up the lock-release lever to lock 

the steering wheel in place.

Push the steering wheel both up and 
down to be certain it is locked in posi

-

tion.

4. Be sure to adjust the steering wheel to 

the desired position before driving.

NOTICE

After adjustment, sometimes the lock-
release lever may not lock the steering
wheel.

It is not a malfunction. This occurs when 
two gears engage. In this case, adjust 
the steering wheel again and then lock 
the steering wheel.

OMQ4A041028

CarManuals2.com

Features of your vehicle

58

4

Steering wheel

Heated steering wheel (if
equipped)

When the ignition switch or ENGINE 
START/STOP button is in the ON posi

-

tion, pressing the heated steering wheel 
button warms the steering wheel. The 
indicator on the button will illuminate.

To turn the heated steering wheel off, 
press the button once again. The indica

-

tor on the button will turn off.
• The heated steering wheel defaults to 

the OFF position whenever the igni

-

tion switch or ENGINE START/STOP 
button is in the ON position.

NOTICE

The heated steering wheel will turn off 
automatically approximately 30 min

-

utes after the heated steering wheel is 
turned on.

CAUTION

• Do not install any type of grip cover 

for the steering wheel, it may impair 
the function of the heated steering 
wheel system.

• When cleaning the heated steering 

wheel, do not use an organic solvent 
such as paint thinner, benzene, alco

-

hol and gasoline. Doing so may dam

-

age the surface of the steering wheel.

• If the surface of the steering wheel is

damaged by a sharp object, damage
to the heated steering wheel compo

-

nents could occur.

W ARNING

If the steering wheel becomes too warm, 
turn the system off. The heated steering 
wheel may cause burns even at low tem

-

peratures, especially if used for long 
periods of time.

Horn

To sound the horn, press the area indi

-

cated by the horn symbol on your steer

-

ing wheel (see illustration).

The horn will operate only when this area 
is pressed. Check the horn regularly to be
sure it operates properly.

CAUTION

Do not strike the horn severely to oper

-

ate it, or hit it with your fist. Do not press 
on the horn with a sharp-pointed object.

OMQ4A040029

OMQ4041030

CarManuals2.com

59

4

4

Features of your vehicle

Mirrors

Mirrors

This vehicle is equipped with inside and 
outside rear view mirrors to provide 
views of objects behind the vehicle.

Inside rear view mirror

Adjust the rear view mirror so that the 
center view through the rear window is 
seen. Make this adjustment before you 
start driving.

Do not place objects in the rear seat or 
cargo area which would interfere with 
your vision out the rear window.

W ARNING

Mirror adjustment
Do not adjust the rear view mirror while
the vehicle is moving. This could result in
loss of control.

NOTICE

Do not modify the inside mirror in any 
manner, including installing a wide mir

-

ror. Doing so could result in injury during 
an accident or deployment of the air bag.

CAUTION

Cleaning mirror
When cleaning the mirror, use a paper 
towel or similar material dampened with 
glass cleaner. Do not spray glass cleaner 
directly on the mirror. It may cause the 
liquid cleaner to enter the mirror hous

-

ing.

Day/night rear view mirror (if
equipped)

(A): Day, (B): Night
Make this adjustment before you start 
driving and while the day/night lever is 
in the day position (1).

Pull the day/night lever toward you (2) to 
reduce the glare from the headlamps of 
the vehicles behind you during night 
driving.

Remember that you lose some rear view 
clarity in the night position.

Electric Chromic Mirror (ECM) (if
equipped)

The electric rear view mirror automati

-

cally controls the glare from the head

-

lamps of the vehicles behind you in 
nighttime or low light driving conditions.

OMQ4AH040496

OMQ4AH040492

CarManuals2.com

Features of your vehicle

60

4

Mirrors

For Telematics button function:

1. Virtual assist button
2. Kia Connect (Voice local search) but

-

ton

3. Roadside assist button
The sensor mounted in the mirror
senses the light level around the vehicle, 
and automatically controls the head

-

lamp

glare from the vehicles behind you.

When the engine is running, the glare is 
automatically controlled by the sensor 
mounted in the rear view mirror.

Electrochromic mirror (ECM) with 
HomeLink

system (if equipped)

1. HomeLink Channel 1

2. HomeLink Channel 2

3. HomeLink Channel 3
4. Garage Door Opener Status Indicator: 

Closing or Closed

5. HomeLink Operation Indicator
6. Garage Door Opener Status Indicator: 

Opening or Opened

7. HomeLink User Interface Indicator

Your vehicle may be equipped with a
Gentex Automatic-Dimming Mirror with
an Integrated HomeLink

Wireless Con

-

trol System.

During nighttime driving, this feature will
automatically detect and reduce rear

view mirror glare. The HomeLink

Uni

-

versal Transceiver allows you to activate 
your garage door(s), electric gate, home 
lighting, etc.

Automatic-Dimming Night Vision 
Safety™ (NVS

) Mirror (if

equipped)

The NVS

Mirror automatically reduces 

glare by monitoring light levels in the 
front and the rear of the vehicle. Any 
objects that obstructs the light sensor 
will degrade the automatic dimming 
control feature.

For more information regarding NVS

mirrors and other applications, please
refer to the Gentex website:

www.gentex.com

Your mirror will automatically dim upon
detecting glare from the vehicles travel

-

ing behind you.

The mirror defaults to the ON position
each time the vehicle is started.

Integrated HomeLink

Wireless 

Control System

The HomeLink

Wireless Control Sys

-

tem provides a convenient way to 
replace up to three handheld radio-fre

-

quency (RF) transmitters used to acti

-

vate compatible devices such as gate 
operators, garage door openers, entry 
door locks, security systems, and home 
lighting.

NOTICE

Considering the Home Security when the
vehicle is parked outside the garage, the
HomeLink will ONLY work when the 
ignition switch is in ACC position or ON 
position.

OMQ4AH040544

CarManuals2.com

61

4

4

Features of your vehicle

Mirrors

CAUTION

Before programming HomeLink to a
garage door opener or gate operator, 
make sure that people and objects are 
out of the way of the device to prevent 
potential harm or damage. When pro

-

gramming a garage door opener, it is 
advised to park outside of the garage.

Do not use HomeLink with any garage 
door opener that lacks safety stop and 
reverse features as required by U.S. fed

-

eral safety standards (this includes any 
garage door opener model manufac

-

tured before April 1, 1982). A garage
door that cannot detect an object signal

-

ing the door to stop and reverse - does 
not meet current U.S. federal safety 
standards. For more information, con

-

tact

HomeLink at

www.homelink.com,

or call

HomeLink customer support at 1- 800-
355-3515.

It is also recommended that a new bat

-

tery be replaced in the hand-held trans

-

mitter of the device being trained to 
HomeLink for quicker training and accu

-

rate transmission of the radio frequency.

1. Programming HomeLink

The following steps show how to pro

-

gram HomeLink. If you have any ques

-

tions or are having difficulty 
programming your HomeLink buttons, 
refer to the HomeLink website or call the 
HomeLink customer support toll-free 
number. Do this, before going back to 
the dealer who sold you the car.
• Visit the HomeLink website at: 

www.homelink.com.

Then at the top 

of the page, choose your vehicle 
make. Then watch the You Tube 
video, and/or access additional web

-

site information.

• If you choose to access the website

via your cell phone, scan the QR code.

• Or, call HomeLink customer support 

at 1-800-355-3515

(Please have the vehicle make/model 
AND the opener device make/model 
readily available.)

1) Programming Preparation

1. When programming a garage door 

opener, it is advised to park the vehi

-

cle outside of the garage.

2. It is recommended that a new battery 

be placed in the hand-held transmit

-

ter of the device being programmed 
to HomeLink for quicker training and 
accurate transmission of the radio-
frequency signal.

3. Place the ignition switch or ENGINE 

START/STOP button to the ACC 
(Accessory) position for program

-

ming of HomeLink.

OMQ4AH040545

CarManuals2.com

Features of your vehicle

62

4

Mirrors

2) Programming a New Home

-

Link

Button

1. Press and release the HomeLink but

-

ton (1), (2) or (3), you would like to 
program. The HomeLink indicator light
(7) will flash orange slowly (if not, 
perform the steps of "Erasing Home

-

Link Buttons" section, and start over).

2. Position the garage door opener 

remote 2 - 8 cm (1 - 3 inches) away 
from the HomeLink buttons.

3. While the HomeLink indicator light (7) 

is flashing orange, press and hold the 
hand-held remote button. Continue 
pressing the hand-held remote button 
until the HomeLink indicator light (7) 
light changes from orange to green. 
You may now release the hand-held 
remote button.

4. Wait until your garage door comes to 

a complete stop, regardless of posi

-

tion, before proceeding to the next 
steps.

5. Press and release the HomeLink but

-

ton you are programming and 
observe the indicator light.
• If the indicator light remains solid 

green, your device should operate 
when the HomeLink button is 
pressed. At this point, if your device 
operates, programming is com

-

plete.

• If the indicator light rapidly flashes 

green, firmly press, hold for two 
seconds and release the HomeLink 
button up to three times in a row 
slowly to complete the program

-

ming process. Do not press the 
HomeLink button rapidly. At this 
point if your device operates, pro

-

gramming is complete. If the device 
does not operate, continue with step
6.

6. At the garage door opener motor, 

(security gate motor, etc.) locate the 
"Learn", "Smart", "Set" or "Program" 
button. This can usually be found 
where the hanging antenna wire is 
attached to the motor-head unit (see 
the device's manual to identify this 
button). The name and color of the 
button may vary by manufacturer.

OMQ4AH040546

OMQ4AH040547

CarManuals2.com

63

4

4

Features of your vehicle

Mirrors

*A ladder and/or second person may 

simplify the following steps.

7. Firmly press and release the "Learn"

,"Smart", "Set" or "Program"" button. 
You now have up to 30 seconds in
which to complete the next step.

8. Return to the vehicle and firmly press, 

hold for two seconds and release, the 
HomeLink button up to three times in a
row slowly. Do not press the Home

-

Link button rapidly. As soon as you 
see the garage door start to move, 
stop pressing any buttons until a few 
seconds after the garage door has 
come to a complete stop, regardless 
of position. At this point programming 
is complete and your device should 
operate when the HomeLink button is 
pressed and released.

3) Two-W ay Communication Pro

-

gramming (For select garage door
openers)

If your garage door opener has the 'myQ'
logo on its side, your opener has Two-
Way Communication capability. 
HomeLink has the capability to establish 
Two-Way Communication with your 
garage door opener. HomeLink can 
receive and display "closing" or "open

-

ing" status messages from compatible

garage door openers. At any time, 
HomeLink can also recall and display the 
last recorded status communicated by 
the garage door opener to indicate your 
garage door being "closed" or "opened".

To check if your garage door opener is 
compatible with this feature, refer to 

www.homelink.com/compatible/Two-

way-Communication. If your garage door
opener has this functionality, AND the
Two-Way Communication indicators (4),
(6) in the mirror appear while the garage
door is opening/closing, then no further 
steps are needed. Two-Way 
Communication Programming is already 
complete. However, if your garage door 
opener has this functionality, AND the 
Two-Way Communication indicators (4),
(6) in the mirror DO NOT appear while 
the garage door is opening/closing, use 
the following instructions to enable this
functionality.
1. In your vehicle, press and hold the 

programmed HomeLink button for 2
seconds, then release. Confirm that 
the garage door is moving. AFTER it 
stops, you will have one minute to 
complete the following steps:

*A ladder and/or second person may 

simplify the following steps.

2. On your garage door opener in your 

garage, locate the "Learn" button 
(usually near where the hanging 
antenna wire is attached to the 
garage door opener). If there is diffi

-

culty locating this button, refer to the 
device's owner's manual.

3. Press and release the "Learn" button.
4. A light on your garage door opener 

may flash, and your Two-Way Com

-

munication indicators (4), (6) in your 
vehicle may flash, confirming comple

-

tion of the process.

ODL3A040504

CarManuals2.com

Features of your vehicle

64

4

Mirrors

5. Return to the vehicle and firmly press 

and release the programmed Home

-

Link button to activate your garage 
door. The Two-Way Communication 
indicators (4), (6) flash in orange 
when the door is moving. Do not make
any additional button presses until
AFTER the garage door has come to
a complete stop.

6. Your Two-Way Communication pro

-

gramming is now complete.

NOTICE

If your garage door opener has Two-
Way Communication functionality, it is 
possible for HomeLink to stop function

-

ing the garage door shortly after initial 
programming, if the Two-Way Commu

-

nication Programming wasn't properly 
completed. This usually happens after 
the first 10 times a programmed Home

-

Link button is pressed. If you experience 
this, completing the "Programming a
New HomeLink Button" and "Two-Way 
Communication Programming" will 
restore door operation.

4) Canadian Programming

Canadian radio-frequency laws require 
transmitter remote signals to "time-out" 
(or quit) after a couple seconds of trans

-

mission, which may not be long enough 
for HomeLink to pick up the signal during
programming.

If you live in Canada or you are having 
difficulties programming a gate operator 
or garage door opener by using the pro

-

gramming procedures, replace "Pro

-

gramming a New HomeLink Button" step
3 with the following:

While the HomeLink indicator light (7) is 
flashing orange, press and release 
("cycle") your device's hand-held remote

every two seconds until the HomeLink 
indicator light (7) changes from orange 
to green. You may now release the 
hand-held remote button. Then proceed 
with "Programming a New HomeLink 
Button" step 4.

2. Operating HomeLink

1) Operating HomeLink

1. Press and release the desired pro

-

grammed HomeLink button (1, 2 or 3).

NOTICE

The HomeLink indicator (7) should light 
green, solid or flashing, and your pro

-

grammed device should operate.

If your device does not operate, the 
HomeLink programming was not suc

-

cessful, and you'll need to reprogram the 
button.

2) Two-W ay Communication Dis

-

play Behavior

1. Press and release one of the pro

-

grammed HomeLink buttons (1, 2 or
3)

OMQ4AH040546

CarManuals2.com

65

4

4

Features of your vehicle

Mirrors

2. The indicator (4) and (6) operates as 

below, if your garage door opener has 
Two-Way Communication functional

-

ity.

• If the indicator (4) flashes in 

Orange, it indicates that the garage 
door is "Closing".

• The indicator (4) turns solid green 

once the garage door has closed.

• If the indicator (6) flashes in 

Orange, it indicates that the garage 
door is "Opening".

• The indicator (6) turns solid green 

once the garage door has fully 
opened.

• If the indicator (4) or (6) does not

turn to green, it indicates that the
last status of garage door was not

If you do not complete the re-program

-

ming of a new device to the button, it will
revert to the previously stored program

-

ming.

received properly. The HomeLink 
mirror tries to receive the last 
known status of the garage door 
for a few seconds.

3) Recalling Garage Door Status

HomeLink mirror with Two-Way Com

-

munication provides a way to view the 
last stored message from the garage 
door opener. In order to recall the last 
known status of the last activated device,
press the buttons "1 and 2" OR "2
and 3" simultaneously.
• If the indicator (4) appears solid 

Green, it indicates that the last acti

-

vated device was "closed" properly.

• If the indicator (6) appears solid 

Green, it indicates that the last acti

-

vated device was "open" properly.

3. Erasing HomeLink

Buttons

1) Erasing and Reprogramming a
Single HomeLink

Button:

1. Press and hold the desired HomeLink 

button you want to re-program. DO 
NOT release the button.

2. The HomeLink indicator light (7) will 

illuminate solid green. Release the 
button as soon as the HomeLink indi

-

cator light (7) begins to flash orange, 
usually about 20 seconds.

3. Proceed with the steps in the "Pro

-

gramming a New HomeLink Button" 
section.

NOTICE

OMQ4AH040549

OMQ4AH040548

CarManuals2.com

Features of your vehicle

66

4

Mirrors

2) The following instructions will
erase ALL HomeLink

program

-

ming from ALL buttons:

1. Press and hold the buttons (1) and (3)

simultaneously

2. The HomeLink indicator light (7) will

illuminate solid Orange for about 10
seconds

3. Release the buttons once the Home

-

Link indicator light (7) changes to 
Green and flashes rapidly

4. Now all three HomeLink buttons (1),

(2) and (3) are cleared of any pro

-

gramming

Information

HomeLink and the HomeLink House 
logo are registered trademarks of Gen

-

tex Corporation.

The myQ logo is a registered trademark 
of The Chamberlain Group, Inc

FCC (USA) and ISED (Canada)

This device complies with FCC rules part 
15 and Innovation, Science, and Eco

-

nomic Development Canada RSS-210. 
Operation is subject to the following two 
conditions: (1) This device may not cause 
harmful interference, and (2) This device 
must accept any interference that may 
be received including interference that

may cause undesired operation. WARN

-

ING: The transmitter has been tested
and complies with FCC and ISED rules. 
Changes or modifications not expressly 
approved by the party responsible for 
compliance could void the user's author

-

ity to operate the device.

This equipment complies with FCC and 
ISED radiation exposure limits set forth 
for an uncontrolled environment. End 
Users must follow the specific operating 
instructions for satisfying RF exposure 
compliance. This transmitter must be at 
least 20 cm from the user and must not 
be co-located or operating in conjunc

-

tion with any other antenna or transmit

-

ter.

OMQ4AH040550

CarManuals2.com

67

4

4

Features of your vehicle

Mirrors

HomeLink 5 Programing Flow Chart

ODL3A040518L

CarManuals2.com

Features of your vehicle

68

4

Mirrors

Outside rear view mirror

Your vehicle is equipped with both left-
hand and right-hand outside rear view 
mirrors.

Be sure to adjust the mirror angles 
before driving.

The mirrors can be adjusted remotely 
with the control levers or remote switch, 
depending on the type of mirror control 
installed. The mirror heads can be folded 
back to prevent damage during an auto

-

matic car wash or when passing through 
a narrow street.

NOTICE

Rear view mirrors
• The outside rear view mirror is con

-

vex. Objects seen in the mirror are 
closer than they appear.

• Use your interior rear view mirror or

direct observation to determine the
actual distance of following vehicles
when changing lanes.

CAUTION

Do not scrape ice off the mirror face; this 
may damage the surface of the glass. If 
ice should restrict the movement of the 
mirror, do not force the mirror for 
adjustment. To remove ice, use a deicer 
spray, or a sponge or soft cloth with 
warm water.

CAUTION

If the mirror is jammed with ice, do not 
adjust the mirror by force. Use an 
approved spray de-icer (not radiator 
antifreeze) to release the frozen mecha

-

nism or move the vehicle to a warm 
place and allow the ice to melt.

W ARNING

Do not adjust or fold the outside rear view
mirrors while the vehicle is moving. This
could result in loss of control, and an
accident which could cause DEATH, 
SERIOUS INJURY, or property
damage.

Adjusting the outside rear view 
mirrors

The electric remote control mirror switch 
allows you to adjust the position of the 
left and right outside rear view mirrors.

Adjusting the rear view mirrors:
1. Move the R or L switch (1) to select the 

right side mirror or the left side mirror.

2. Press a corresponding point on the 

mirror adjustment control (2) to posi

-

tion the selected mirror up, down, left 
or right.

CAUTION

• The mirrors stop moving when they 

reach the maximum adjusting angles, 
but the motor continues to operate 
while the switch is pressed. Do not 
press the switch longer than neces

-

sary, the motor may be damaged.

OMQ4AH040447

CarManuals2.com

69

4

4

Features of your vehicle

Mirrors

• Do not attempt to adjust the outside 

rear view mirror by hand. Doing so 
may damage the parts.

Folding the outside rear view mir

-

ror

Manual type (if equipped)

To fold the outside rear view mirror, 
grasp the housing of the mirror and then 
fold it toward the rear of the vehicle.

Electric type (if equipped)

The outside rear view mirror can be 
folded or unfolded by pressing the 
switch as below.

• To fold the outside rear view mirror 

depress the button.

• To unfold it, depress the button again.

CAUTION

The electric type outside rear view mir

-

ror operates even though the ignition 
switch or ENGINE START/STOP button
is in the LOCK or OFF position.
However, to prevent unnecessary
battery dis

-

charge, do not adjust the

mirrors longer than necessary while the
engine is not running.

CAUTION

In case it is an electric type outside rear
view mirror, don't fold it by hand. It could
cause motor failure.

Reverse parking aid function (if
equipped)

When you shift the gear to the R
(Reverse) position, the outside rear view 
mirror(s) will rotate downwards to aid with
driving in reverse.

The position of the outside rear view 
mirror switch (1) determines whether or 
not the mirrors will move:

Left/Right: When either the L (Left) or R
(Right) switch is selected, both outside 
rear view mirrors will move.

Neutral: When neither switch is selected, 
the outside rear view mirrors will not 
move.

OMQ4040031

OMQ4AH040448

OMQ4A040032

CarManuals2.com

Features of your vehicle

70

4

Mirrors

The outside rear view mirrors will auto

-

matically revert to their original positions if
any of the followings occur:
• The ignition switch or ENGINE START/ 

STOP button is placed to either the 
LOCK/OFF position or the ACC posi

-

tion.

• The gear is shifted to any position 

except R (Reverse).

• The remote control outside rear view 

mirror switch is not selected.

Auto reverse user settings

If you cannot secure enough visibility with
the angles provided as factory default
conditions, you can readjust and store the
angles of outside rear view mir

-

rors.

The factory default angles of the right
and left rear view mirrors might be set
differently to improve visibility.

1. Set the shift lever to P (Parking). Make 

sure that the vehicle is stopped and 
the mirrors are not working.

2. Position the lever to L (left) or R (right) 

depending on the mirror that you want
to adjust.

3. Step on the brake pedal and shift the 

shift lever to R (Reverse).

4. When the downward movement of the

rear view mirror is finished, adjust the
mirror to the desired angle by pressing
the switches,

▼ , ▲ ,

,

.

5. If you shift the shift lever to a position 

other than R (Reverse), or change the 
rear view mirror selector lever to the 
neutral position, and the automatic 
return of the mirror is finished, the 
adjusted angle will be automatically 
saved.

6. You can adjust the rear view mirror on 

the other side by following the same 
procedures (1-5).

How to reset auto reverse user 
settings

If you want to change the automatic 
control function of rear view mirrors to 
factory-default conditions, follow the 
steps below.

1. Shift the shift lever to P (Park). Make 

sure that the vehicle is stopped and 
the mirror is not working.

2. Choose the mirror to be adjusted by 

positioning the lever to L (left) or R
(right).

3. Step on the brake pedal and shift the 

shift lever to R (Reverse).

4. When the downward movement of the

rear view mirror is finished, press the
switch 

▲ to locate the mirror in the

position higher than before (P, N or
D).

(Adjust the mirror in the higher posi

-

tion compared to its position in the 
driving mode)

5. It is initialized when the shift lever is 

shifted to a position other than R
(Reverse), or the rear view mirror 
selector lever is changed to the neu

-

tral position. (Initialized position will be 
applied from next operation)

6. You can initialize settings for the mir

-

ror on the other side by following the
same procedures (1-5).

CAUTION

We recommend following the proce

-

dures in an orderly manner to change or 
initialize the auto reversing user settings.

If you move to the next step before com

-

pleting the previous one, the changed 
angle may not be changed or initializa

-

tion may not work properly

CarManuals2.com

71

4

4

Features of your vehicle

Instrument cluster

Instrument cluster

Conventional cluster (Type A)

Full LCD cluster (Type
B)

*The actual cluster in the vehicle may differ from the illustration.

1. Tachometer

2. Speedometer

3. Engine coolant temperature gauge

4. Fuel gauge

5. LCD display (including Trip computer)

6. Warning and indicator lights

OMQ4A040166

OMQ4040101

CarManuals2.com

Features of your vehicle

72

4

Instrument cluster

Full LCD cluster (if equipped)

The full LCD type cluster provides two themes.

Type A

Type A is the basic theme of the full LCD type cluster and provides different graphic 
styles depending on drive mode.

Type B (Dynamic)

Type B is set by the user and provides digital display. The background screen 
changes according to the weather and time.

• Weather: sunny, cloudy, rainy, or snowy (4 types)

Time: night, day, sunrise and sunset (4 types)

OMQ4040112

OMQ4040159

CarManuals2.com

73

4

4

Features of your vehicle

Instrument cluster

You can change the theme by selecting
"Vehicle

→Instrument Cluster Setting →

Theme Selection" on the menu.

NOTICE

The information is displayed after get

-

ting information from a weather infor

-

mation provider via GPS. Depending on 
conditions of GPS reception, the infor

-

mation may be different from the cur

-

rent weather in your area.

If no information is received via GPS 
(e.g., not subscribed to Kia Connect ser

-

vice), the weather and time will be dis

-

played as 'sunny' and 'night' on the 
cluster.

Adjusting instrument cluster illu

-

mination

The brightness of the instrument panel 
illumination is changed by pressing the 
illumination control button ("+" or "-") 
when the ignition switch or ENGINE 
START/STOP button is ON, or the tail 
lamps are turned on.

W ARNING

Never adjust the instrument cluster while
driving. This could result in loss of control
and lead to an accident that may

cause DEATH, SERIOUS
INJURY, or
property damage.
• If you hold the illumination control 

button ("+" or "-"), the brightness will 
be changed continuously.

• If the brightness reaches to the maxi

-

mum or minimum level, an alarm will
sound.

Gauges

The gauges display various information
such as the speed of the vehicle, and so
on.

Speedometer

OMQ4A041049

Type A

km/h

MPH, km/h

Type B

OMQ4A040558

OMQ4040156

OMQ4040156L

CarManuals2.com

Features of your vehicle

74

4

Instrument cluster

Type B

The tachometer indicates the approxi

-

mate number of engine revolutions per 
minute (rpm).

Use the tachometer to select the correct
shift points and to prevent lugging and/
or over-revving the engine.

CAUTION

Do not operate the engine within the 
tachometer's RED ZONE. This may
cause severe engine damage.

Engine coolant temperature 
gauge

Type A

Type B

This gauge indicates the temperature of 
the engine coolant when the ignition 
switch or ENGINE START/STOP button
is ON.

km/h

MPH

ODL3049155

OMQ4AH040164

The speedometer indicates the speed of 
the vehicle and is calibrated in kilome

-

ters per hour (km/h) and miles per hour 
(mph).

Tachometer

Type A

OMQ4A040157

ODL3049156

OMQ4040153

ODL3049157

CarManuals2.com

75

4

4

Features of your vehicle

Instrument cluster

CAUTION

If the gauge pointer moves beyond the 
normal range area toward the "H" posi

-

tion, it indicates overheating that may 
damage the engine.

Do not continue driving with an over

-

heated engine. If your vehicle overheats, 
refer to "If the engine overheats" on page
6-7.

W ARNING

Never remove the radiator cap when the 
engine is hot. The engine coolant is 
under pressure and could severely burn. 
Wait until the engine is cool before add

-

ing coolant to the reservoir.

Fuel gauge

Type A

Type B

This gauge indicates the approximate 
amount of fuel remaining in the fuel 
tank.

NOTICE

• The fuel tank capacity is given in 

"Recommended lubricants and capac

-

ities" on page 8-7.

• The fuel gauge is supplemented by a

low fuel warning light, which will illu

-

minate when the fuel tank is nearly 
empty.

• On inclines or curves, the fuel gauge 

pointer may fluctuate or the low fuel 
warning light may come on earlier 
than usual due to the movement of 
fuel in the tank.

W ARNING

Fuel gauge
Running out of fuel can expose vehicle 
occupants to danger.

You must stop and obtain additional fuel 
as soon as possible after the warning 
light comes on or when the gauge indi

-

cator comes close to the " E" level.

OMQ4040154

ODL3049158

CarManuals2.com

Features of your vehicle

76

4

Instrument cluster

CAUTION

Avoid driving with an extremely low fuel 
level. Running out of fuel could cause 
the engine to misfire, which could dam

-

age the catalytic converter.

NOTICE

The fuel display may not be accurate if 
the vehicle is on an incline.

Odometer

Type A

Type B

The odometer Indicates the total dis

-

tance that the vehicle has been driven 
and should be used to determine when

periodic maintenance should be per

-

formed.
• Odometer range: 0 ~ 1,599,999 km or 

999,999 miles.

Distance to empty

Type A

Type B

• The distance to empty is the esti

-

mated distance the vehicle can be 
driven with the remaining fuel.

- Distance range: 1 ~ 9,999 km or 1 ~

9,999 mi.

• If the estimated distance is below 1

mile (1 km), the trip computer will dis

-

play "---" as distance to empty.

• If the level of the remaining fuel is 

more than three-quarters, more than
0.8 gallons (3 liters) of fuel must be

OMQ4040113

OMQ4040114

OMQ4040115

OMQ4040116

CarManuals2.com

77

4

4

Features of your vehicle

Instrument cluster

refilled for the fuel gauge to change. In
other cases, more than 1.6 gallons (6
liters) of fuel must be refilled for the 
vehicle to change the fuel gauge.

NOTICE

• If the vehicle is not on level ground or 

the battery power has been inter

-

rupted, the distance to empty function 
may not operate correctly.

• The distance to empty may differ from

the actual driving distance as it is an
estimate of the available driving 
distance.

• The trip computer may not register 

additional fuel if less than 1.6 gallons 
(6 liters) of fuel are added to the vehi

-

cle.

• The fuel economy and distance to 

empty may vary significantly based 
on driving conditions, driving habits, 
and condition of the vehicle.

Outside temperature gauge

Type A

Type B

This gauge indicates the current outside 
air temperatures by 1

°C (1 °F).

• Temperature range: -40 °C ~ 60 °C (-

40

°F ~ 140 °F)

The outside temperature on the display 
may not change immediately like a gen

-

eral thermometer to prevent the driver 
from being inattentive.

To change the temperature unit (from

°C 

to

°F or from °F to °C)

The temperature unit can be changed
by using the "User Settings" mode of the 
LCD Display.

*For more details, refer to "User settings 

mode" on page 4-82.

Transmission shift indicator

Transmission shift indicator displays
gear information depending on your
vehicle's transmission type.

OMQ4040117

OMQ4040118

CarManuals2.com

Features of your vehicle

78

4

Instrument cluster

Automatic transmission shift indi

-

cator

Type A

Type B

This indicator displays which automatic
transmission gear is selected.
• Park: P
• Reverse:
R

Neutral:

N

Drive: D

Manual shift mode
• Shifting up: ▲2, ▲3, ▲4, ▲5,

▲ 6

• Shifting down: ▼1, ▼2, ▼3, ▼4,

▼ 5

Automatic transmission shift indi

-

cator in manual shift mode (if
equipped)

In the Manual shift mode, this indicator 
informs which gear is desired while driv

-

ing to save fuel.

Type A

Type B

• Shifting up: ▲2, ▲3, ▲4, ▲5, ▲6,

▲7,

▲ 8

• Shifting down: ▼1, ▼2, ▼3, ▼4,

▼5,

▼6, ▼7

For example

• ▲3: Indicates that shifting up to the 

3rd gear is desired (currently the shift 
position is in the 2nd or 1st gear).

• ▼3: Indicates that shifting down to 

the 3rd gear is desired (currently the

OMQ4040120

OMQ4040158

OMQ4040494L

OMQ4040493L

CarManuals2.com

79

4

4

Features of your vehicle

LCD display

shift position is in the 4th, 5th or 6th 
gear).

When the system is not working prop

-

erly, the indicator is not displayed.

Dual clutch transmission shift 
indicator (if equipped)

This indicator displays which shift posi

-

tion is selected.
• Park: P
• Reverse: 
R

Neutral: 

N
• Drive: D1, D2, D3, D4, D5, D6, D7,

D8

Shift indicator pop-up

The pop-up that indicates the current 
gear position is displayed in the cluster 
for about 2 seconds when shifting into 
other positions (P/R/N/D).

The shift indicator pop-up function can 
be activated or deactivated from the 
User Settings mode in the cluster LCD 
display.

LCD display

The LCD display modes can be
changed with the control buttons.

LCD Display Control

1.

: MODE button for changing

modes

2.

/

: MOVE switch for changing 

items

3. OK: SELECT/RESET button for

setting or resetting the selected item

OMQ4040519L

OMQ4041034

CarManuals2.com

Features of your vehicle

80

4

LCD display

LCD display modes

The LCD display provides 5 modes. You can switch modes by pressing the Mode but

-

ton.

The information provided may differ depending on which functions are applicable to 
your vehicle.

*: if equipped

NOTICE

Keep the engine running when configur

-

ing the display settings to prevent the 
battery from discharging.

Mode

Driving Assist

Trip Computer

Turn by Turn (TBT)

User Settings

Marster warning

Up/Down

Lane Keeping

Assist/

Smart Cruise Con

-

trol*/

Navigation-based

Smart Cruise Con

-

trol*/

Lane Following

Assist/

Highway Driving

Assist*

Fuel Economy

Route Guidance

Head-Up Display

Driver Assistance

The Master Warning mode
displays warning mes

-

sages related to the vehicle
when one or more systems
is not operating normally.

DAW

Accumulated Info

Destination Info

Lights

TPMS

Drive Info

Sound

Driving Force Dis

-

tribution

DRIVE MODE

Door

Driving Style

Convenience

Service Interval

Others

Reset

CarManuals2.com

81

4

4

Features of your vehicle

LCD display

Trip computer mode

The trip computer mode displays infor

-

mation related to vehicle driving param

-

eters including fuel economy, tripmeter 
information and timer.

*For more details, refer to "Trip informa

-

tion (trip computer)" on page 4-88.

Information mode

Turn By Turn (TBT) mode

This mode displays the state of the navi

-

gation.

Driving Assist mode

This mode displays the state of:

Lane Safety

• Smart Cruise Control
• Driver Attention Warning

This mode displays the state of:

Speedometer

• Engine temperature

Tire pressure

• AWD traction (if equipped)

Tire pressure status

This mode displays information related 
to Tire Pressure.

OMQ4A041139L

OMQ4040122

OMQ4050296L

OMQ4040126L

CarManuals2.com

Features of your vehicle

82

4

LCD display

* For more details, refer to "Tire Pressure

Monitoring System (TPMS)" on page 6-
9.

Master warning mode

This warning light informs the driver the 
following situations.
• LED headlamp malfunction

Lamp malfunction

• High Beam Assist malfunction (if 

equipped)

At this time, a Master Warning icon

(

) will appear beside the User Set

-

tings icon (

), on the LCD display. If

the warning situation is solved, the mas

-

ter warning light will be turned off and the
Master Warning icon will disappear.

User settings mode

In this mode, you can change the set

-

tings of the instrument cluster, doors,
lamps, etc.

1. Head-up display

2. Driver Assistance

3. Lights

4. Sound

5. Door

6. Convenience

7. Service Interval

8. Other

9. Reset
The information provided may differ 
depending on which functions are appli

-

cable to your vehicle.

OMQ4HQ010031L

OMQ4040129L

CarManuals2.com

83

4

4

Features of your vehicle

LCD display

1. Head-Up Display (if equipped)

CarManuals2.com

2. Driver Assistance

Items

Explanation

Enable Head-up display

If this item is checked, Head-Up Display will be activated.

Height

Adjust the height (1 ~ 20) of the HUD image on the HUD screen.

Rotation

Adjust the degree (-5 ~ +5) of the HUD rotation.

Brightness

Adjust the intensity (1 ~ 20) of the HUD brightness.

Content Selection

To select the content information on the HUD screen.

Items

Explanation

Speed Limit*

• Speed Limit Offset
• Speed Limit Assist/Speed Assist Warning/Off
To select the functions.

*For more details, refer to "Intelligent Speed Limit Assist (ISLA) (if

equipped)" on page 5-118.

Warning Timing

• Standard/Late
To select the warning timing

Warning Volume

• High/Medium/Low/Off
To select the warning volume

Haptic Warning

If this item is checked, the Haptic Warning will be activated.

Driver Attention Warning

• Leading Vehicle Departure Alert
To select the function.
• Inattentive Driving Warning
To select the function.

*For more details, refer to "Driver Attention Warning (DAW)" on page 5-

123.

Forward Safety

To adjust Forward Collision-Avoidance Assist.

Active Assist/Warning Only/Off

To select the functions.

*For more details, refer to "Forward Collision-Avoidance Assist (FCA)

(Sensor fusion) (if equipped)" on page 5-74.

Lane Safety

To adjust Lane Keeping Assist and Lane Following 

Assist

Lane Keeping Assist/Lane Departure

Warning/Off

To select the functions.

*For more details, refer to "Lane Keeping Assist (LKA)" on page 5-88

and "Lane Following Assist (LFA)" on page 5-155.

Features of your vehicle

84

CarManuals2.com

4

LCD display

*The information provided may differ depending on which systems are applicable to 

your vehicle.

3. Lights

*The information provided may differ depending on which functions are applicable to

your vehicle.

4. Door

Items

Explanation

Blind-Spot Safety

• Safe Exit Assist (SEA)
For more details, refer to refer to "Safe Exit Warning (SEW) (if
equipped)" on page 5-107 or "Safe Exit Assist (SEA) (if equipped)" on
page 5-110.
• Active Assist/Warning Only/Off
*For more details, refer to "Blind-Spot Collision-Avoidance Assist (BCA)

(if equipped)" on page 5-95.

Parking Safety

• Parking Distance Warning Auto On

Rear Cross-Traffic Safety

To Activate or deactivate Rear Cross-Traffic Collision-Avoidance Assist.

*For more details, refer to "Rear Cross-Traffic Collision-Avoidance Assist

(RCCA) (if equipped)" on page 5-165.

• Active Assist/Warning Only/Off
*For more details, refer to "Reverse Parking Collision-Avoidance Assist

(PCA) (if equipped)" on page 5-175.

Items

Explanation

Illumination

To adjust the instrument cluster illumination.

One Touch Turn Signal

• Off: The one touch turn signal function will be deactivated.
• 3, 5, 7 flashes: The turn signal indicator will blink 3, 5, or 7 times when

the turn signal lever is moved slightly.

*For more details, refer to "Lighting" on page 4-121.

Headlamp Delay

If this item is checked, the headlamp delay function will be activated.

High Beam Assist

If this item is checked, High Beam Assist will be activated.

Items

Explanation

Automatically

Lock

• Enable on shift (for Automatic transmission): All doors will be automatically

locked if the vehicle is shifted from the P (Park) position to the R (Reverse), N
(Neutral), or D (Drive) position. (With the Engine ON, it is activated.)

• Enable on speed (for Automatic transmission): All doors will be automatically

locked when the vehicle speed exceeds 15 km/h (9.3 mph)

• Off: The auto door unlock operation will be canceled.
*If the setting is changed while the vehicle is in motion, the changed setting may not

immediately operate.

85

4

4

Features of your vehicle

LCD display

*The information provided may differ depending on which systems are applicable to 

your vehicle.

5. Sound

CarManuals2.com

6. Convenience

Items

Explanation

Automatically

Unlock

• On shift to P (for Automatic transmission): All doors will be automatically

unlocked if the gear is shifted from R (Reverse), N (Neutral), or D (Drive position
to P (Park) position. (With the Engine ON, it is activated.)

• Vehicle Off: All doors will be automatically unlocked when the ignition key is

removed from the ignition switch or the ENGINE START/STOP button is set to
the OFF position.

• Off: The auto door unlock operation will be canceled.

2 Press Unlock

If this item is checked, the two press unlock will be activated. Press the door unlock
button once to unlock the driver's door, and press the button once more within 4
seconds to unlock the rest of the doors.

Power Liftgate

If this item is checked, Power Liftgate will be activated.

Power Liftgate

Speed

• Normal/Fast
To adjust the power liftgate speed.

Power Liftgate

Opening Height

• Level 1/Level 2/Level 3/Full Open/User Height Setting
To select the height.

*For more details, refer to .

Smart Liftgate

To activate or deactivate the Smart Liftgate.

*For more details, refer to "Smart Liftgate with Auto Open (if equipped)" on page 4-

37.

Items

Explanation

Welcome Sound

If this item is checked, the welcome sound function will be activated.

Items

Explanation

Seat Easy Access

• Off/Normal/Extended
To select the seat movement

Rear Occupant Alert

If this item is checked, the Rear Occupant Alert (ROA) display will be
activated.

Welcome Mirror/Light

• On Door Unlock/On Driver Approach
To select the welcome mirror/light function.

Wiper/Lights Display

If this item is checked, the wiper/lights display will be activated.

Auto Rear Wiper (in R)

If this item is checked, the Auto Rear Wiper will be activated when the
front wiper is On and the gear is selected in R (Reverse).

Icy Road Warning

If this item is checked, the icy road warning display will be activated.

Features of your vehicle

86

4

LCD display

*The information provided may differ depending on which functions are applicable to

your vehicle.

7. Service interval

NOTICE

To use the service interval menu, consult an authorized Kia dealer.

If the service interval is activated and the time and distance is adjusted, messages are 
displayed in the following situations each time the vehicle is turned on.
• Service in: Displayed to inform the driver the remaining mileage and days to ser

-

vice.

• Service required: Displayed when the mileage and days to service has been 

reached or passed.

If any of the following conditions occur, the mileage and number of days to service 
may be incorrect.
• The battery cable is disconnected.

The battery is discharged.

• The fuse switch is turned off.

8. Others

CarManuals2.com

Items

Explanation

Vehicle Auto-Shut Off

• 60 min/30 min: To set the vehicle auto-shut off timer
• Disable: The vehicle auto-shut off function will be canceled.
*For more details, refer to "Vehicle Auto Shut-off system (if equipped)"

on page 5-53.

Items

Explanation

Enable Service Interval

If this item is checked, the Service Interval function will be activated.

Adjust Interval

If the service interval menu is activated, you may adjust the time and
distance.

Reset

To reset the service interval function.

Items

Explanation

Fuel Economy Reset

• Off: The average fuel economy will not reset.
• After Ignition / After Refueling: The average fuel economy will reset

automatically after ignition/refueling.

Speedometer Unit

• km/h, mph
To select the Speedometer unit.


Content      ..     3      4      5      6     ..