Saturn Vue (2010 year). Manual - part 18
 

  Index      Saturn     Saturn Vue (2010 year) - manual in english


Search            copyright infringement  


Content      ..     16      17      18      19     ..


Saturn Vue (2010 year). Manual - part 18


Vehicle Care

10-13

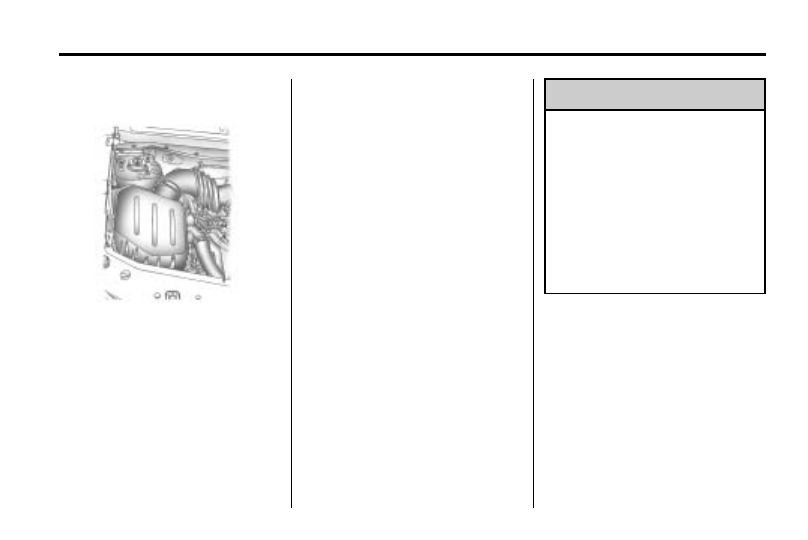
To inspect or replace the engine air
cleaner/filter, do the following:

1. Remove the clamp on the air

duct hose.

2. Disconnect the hose.

3. Remove the four bolts on the

side of the air cleaner assembly.

4. Turn the cover upward to

disengage the cover hinges.

5. Remove the air cleaner cover

assembly and air filter element.

6. Inspect or replace the air filter

element.

If the air filter element is dirty,
you should replace it. If it is only
dusty, it may be cleaned by
blowing compressed air through
it from the clean side.

Make sure you are away from
the engine compartment when
cleaning the air filter with
compressed air.

Wipe all dust from inside of the
housing and inspect the air
cleaner and air outlet duct for
cracks, cuts and deterioration.
The air outlet duct must be
replaced if damaged.

7. Reverse Steps 1 through 5 to

reinstall the engine air cleaner/
filter cover and air duct hose.

{

WARNING

Operating the engine with the air
cleaner/filter off can cause you or
others to be burned. The air
cleaner not only cleans the air; it
helps to stop flames if the engine
backfires. If it is not there and the
engine backfires, you could be
burned. Do not drive with it off,
and be careful working on the
engine with the air cleaner/
filter off.

Notice: If the air cleaner/filter is
off, dirt can easily get into the
engine, which could damage it.
Always have the air cleaner/filter
in place when you are driving.

-------------------------------------------------------------------------------------------------------------------------------------------------------------

10-14

Vehicle Care

Cooling System

When it is safe to lift the hood:

2.4L L4 Engine shown, 3.5L V6 and

3.6L V6 Engines similar

A. Electric Engine Fan

B. Coolant Surge Tank

C. Pressure Cap

{

WARNING

An electric engine cooling fan
under the hood can start up even
when the engine is not running
and can cause injury. Keep
hands, clothing, and tools away
from any underhood electric fan.

If the coolant inside the coolant
surge tank is hot, do not do anything
else until it cools down. The vehicle
should be parked on a level surface.

The coolant level should be
between the MIN and MAX lines.
If it is not, you may have a leak at
the radiator hoses, heater hoses,
radiator, water pump, or somewhere
else in the cooling system.

{

WARNING

Heater and radiator hoses, and
other engine parts, can be very
hot. Do not touch them. If you do,
you can be burned.

Do not run the engine if there is a
leak. If you run the engine, it
could lose all coolant. That could
cause an engine fire, and you
could be burned. Get any leak
fixed before you drive the vehicle.

If there seems to be no leak, with
the engine on, check to see if the
electric engine cooling fan is
running. If the engine is
overheating, the fan should be
running. If it is not, your vehicle
needs service. Turn off the engine.

-------------------------------------------------------------------------------------------------------------------------------------------------------------

Vehicle Care

10-15

Notice: Engine damage from
running the engine without
coolant is not covered by the
warranty.

Notice: Using coolant other than
DEX-COOL

®

can cause premature

engine, heater core, or radiator
corrosion. In addition, the
engine coolant could require
changing sooner, at 50 000 km
(30,000 miles) or 24 months,
whichever occurs first.
Any repairs would not be
covered by the vehicle warranty.
Always use DEX-COOL

®

(silicate-free) coolant in the
vehicle.

Engine Coolant

The cooling system in your vehicle
is filled with DEX-COOL

®

engine

coolant. This coolant is designed to
remain in your vehicle for five years
or 240 000 km (150,000 miles),
whichever occurs first, if you add
only DEX-COOL

®

extended life

coolant.

The following explains your cooling
system and how to add coolant
when it is low. If you have a problem
with engine overheating, see Engine
Overheating on page 10‑20
.

A 50/50 mixture of clean, drinkable
water and DEX-COOL

®

coolant will:

.

Give freezing protection down
to −37°C (−34°F).

.

Give boiling protection up to
129°C (265°F).

.

Protect against rust and
corrosion.

.

Help keep the proper engine
temperature.

.

Let the warning lights and gages
work as they should.

Notice: Using coolant other than
DEX‐COOL

®

can cause premature

engine, heater core, or radiator
corrosion. In addition, the engine
coolant may require changing
sooner, at the first maintenance
service after each 30,000 miles
(50 000 km) or 24 months,
whichever occurs first. Any
repairs would not be covered by
the vehicle warranty. Always use
DEX‐COOL

®

(silicate‐free) coolant

in the vehicle.

-------------------------------------------------------------------------------------------------------------------------------------------------------------

10-16

Vehicle Care

What to Use

Use a mixture of one-half clean,
drinkable water and one-half
DEX-COOL

®

coolant which will not

damage aluminum parts. If you use
this coolant mixture, you do not
need to add anything else.

{

WARNING

Adding only plain water to the
cooling system can be
dangerous. Plain water, or some
other liquid such as alcohol, can
boil before the proper coolant
mixture will. The vehicle's coolant
warning system is set for the
proper coolant mixture. With plain
water or the wrong mixture, the

(Continued)

WARNING (Continued)

engine could get too hot but you
would not get the overheat
warning. The engine could catch
fire and you or others could be
burned. Use a 50/50 mixture of
clean, drinkable water and
DEX-COOL

®

coolant.

Notice: If an improper coolant
mixture is used, the engine could
overheat and be badly damaged.
The repair cost would not be
covered by the vehicle warranty.
Too much water in the mixture
can freeze and crack the
engine, radiator, heater core,
and other parts.

If you have to add coolant more
than four times a year, have your
dealer/retailer check your cooling
system.

Notice: If extra inhibitors and/or
additives are used in the vehicle's
cooling system, the vehicle
could be damaged. Use only the
proper mixture of the engine
coolant listed in this manual
for the cooling system.
See Recommended Fluids and
Lubricants on page 11‑7 
for
more information.

-------------------------------------------------------------------------------------------------------------------------------------------------------------

Vehicle Care

10-17

Checking Coolant

The surge tank is located on the
driver side of the engine
compartment. See Engine
Compartment Overview on
page 10‑6 
for more information
on location.

{

WARNING

Turning the surge tank pressure
cap when the engine and radiator
are hot can allow steam and
scalding liquids to blow out and
burn you badly. Never turn the
surge tank pressure cap — even
a little — when the engine and
radiator are hot.

The vehicle must be on a level
surface. When your engine is cold,
the coolant level should be between
the MIN and MAX lines.

Adding Coolant

If you need more coolant, add the
proper DEX-COOL

®

coolant mixture

at the surge tank, but only when the
engine is cool. See below for
instructions on “How to Add Coolant
to the Coolant Surge Tank”.

{

WARNING

You can be burned if you spill
coolant on hot engine parts.
Coolant contains ethylene glycol,
and it will burn if the engine parts
are hot enough. Do not spill
coolant on a hot engine.

When replacing the pressure cap,
make sure it is hand-tight and
fully seated.

-------------------------------------------------------------------------------------------------------------------------------------------------------------

10-18

Vehicle Care

How to Add Coolant to the
Coolant Surge Tank

Notice: This vehicle has a
specific coolant fill procedure.
Failure to follow this procedure
could cause the engine to
overheat and be severely
damaged.

If you have not found a problem yet,
check to see if coolant is visible in
the surge tank. If coolant is visible
but the coolant level is not at
between the MIN and MAX lines,
add a 50/50 mixture of clean,
drinkable water and DEX-COOL

®

coolant at the coolant surge tank,
but be sure the cooling system,
including the coolant surge tank
pressure cap, is cool before you
do it. See Engine Coolant on
page 10‑15 
for more information.

{

WARNING

Steam and scalding liquids from a
hot cooling system can blow out
and burn you badly. They are
under pressure, and if you turn
the coolant surge tank pressure
cap — even a little — they can
come out at high speed. Never
turn the cap when the cooling
system, including the coolant
surge tank pressure cap, is hot.
Wait for the cooling system and
coolant surge tank pressure cap
to cool if you ever have to turn
the pressure cap.

{

WARNING

Adding only plain water to the
cooling system can be
dangerous. Plain water, or some
other liquid such as alcohol, can
boil before the proper coolant
mixture will. The vehicle's coolant
warning system is set for the
proper coolant mixture. With plain
water or the wrong mixture, the
engine could get too hot but you
would not get the overheat
warning. The engine could catch
fire and you or others could be
burned. Use a 50/50 mixture of
clean, drinkable water and
DEX-COOL

®

coolant.

Notice: In cold weather, water
can freeze and crack the engine,
radiator, heater core and other
parts. Use the recommended
coolant and the proper coolant
mixture.

-------------------------------------------------------------------------------------------------------------------------------------------------------------

Vehicle Care

10-19

{

WARNING

You can be burned if you spill
coolant on hot engine parts.
Coolant contains ethylene glycol
and it will burn if the engine parts
are hot enough. Do not spill
coolant on a hot engine.

1. You can remove the coolant

surge tank pressure cap when
the cooling system, including the
coolant surge tank pressure cap
and upper radiator hose, is no
longer hot.

Turn the pressure cap slowly
counterclockwise about
one-quarter of a turn. If you
hear a hiss, wait for that to stop.

This will allow any pressure still
left to be vented out the
discharge hose.

2. Then keep turning the pressure

cap slowly, and remove it.

3. Fill the coolant surge tank with

the proper DEX-COOL

®

coolant

mixture, to between the MIN and
MAX lines.

4. With the coolant surge tank

pressure cap off, start the
engine and let it run until you
can feel the upper radiator hose
getting hot. Watch out for the
engine cooling fan.

By this time, the coolant level
inside the coolant surge tank
may be lower. If the level is
lower, add more of the proper
DEX-COOL

®

coolant mixture to

the coolant surge tank until the
level reaches between the MIN
and MAX lines.

5. Then replace the pressure cap.

Be sure the pressure cap is
hand-tight.

Check the level in the surge tank
when the cooling system has
cooled down. If the coolant is not at
the proper level, repeat Steps 1
through 3 and reinstall the pressure
cap. If the coolant still is not at the
proper level when the system cools
down again, see your dealer/retailer.

-------------------------------------------------------------------------------------------------------------------------------------------------------------

10-20

Vehicle Care

Engine Overheating

There is a coolant temperature
warning light on your vehicle's
instrument panel. See Engine
Coolant Temperature Warning Light
on page 5‑21
.

If Steam Is Coming From
Your Engine

{

WARNING

Steam from an overheated engine
can cause serious injury, even if
the hood is opened just a little.
Stay away from the engine if
steam is seen or heard coming
from it. Just turn it off and get
everyone away from the vehicle

(Continued)

WARNING (Continued)

until it cools down. Wait until there
is no sign of steam or coolant
before opening the hood.

If driving continues when the
engine is overheated, the liquids
in it can catch fire. Someone
could get badly burned. Stop the
engine if it overheats, and get out
of the vehicle until the engine has
cooled.

Notice: Driving the vehicle when
there is no coolant in the coolant
overflow recovery bottle, can
badly damage the engine.
The costly repairs would not be
covered by the vehicle warranty.

If No Steam Is Coming From
The Engine

If there is an engine overheat
warning, but no steam can be seen
or heard, the problem may not be
too serious. Sometimes the engine
can get a little too hot when the
vehicle:

.

Climbs a long hill on a hot day.

.

Stops after high-speed driving.

.

Idles for long periods in traffic.

.

Tows a trailer.

If there is an overheat warning with
no sign of steam, try this for a
minute or so:

1. If there is an air conditioner and

it is on, turn it off.

2. Turn on the heater to full hot at

the highest fan speed and open
the windows as necessary.

3. Try to minimize engine load. If in

a traffic jam, shift to N (Neutral);
otherwise, shift to the highest
gear possible while driving.

-------------------------------------------------------------------------------------------------------------------------------------------------------------

Vehicle Care

10-21

If the overheat warning is no longer
on, the vehicle can be driven. Just
to be safe, drive slower for about
ten minutes. If the warning does not
come back on, drive normally.

If the warning continues and the
vehicle is not stopped, pull over,
stop, and park the vehicle
right away.

If there is still no sign of steam, idle
the engine for three minutes while
parked. If the warning continues,
turn off the engine and get everyone
out of the vehicle until it cools down.

The decision may be made to not lift
the hood but to get service help
right away.

Power Steering Fluid

See Engine Compartment Overview
on page 10‑6 
for reservoir location.

When to Check Power Steering
Fluid

Power steering fluid is used in all
vehicles with V6 engines. Vehicles
with the 4-cylinder engine have
electric power steering and does not
use power steering fluid.

It is not necessary to regularly
check power steering fluid unless
you suspect there is a leak in the
system or you hear an unusual
noise. A fluid loss in this system
could indicate a problem. Have the
system inspected and repaired.

How to Check Power Steering
Fluid

To check the power steering fluid,
do the following:

1. Turn the key off and let the

engine compartment cool down.

2. Remove engine oil fill cap.

3. Slide engine cover rearward and

lift to remove.

4. Wipe the cap and the top of the

reservoir clean.

5. Unscrew the cap and wipe the

dipstick with a clean rag.

6. Replace the cap and completely

tighten it.

7. Remove the cap again and look

at the fluid level on the dipstick.

The fluid level should be within the
area indicated on the dipstick when
the engine is cold.

-------------------------------------------------------------------------------------------------------------------------------------------------------------

10-22

Vehicle Care

What to Use

To determine what kind of fluid to
use, Recommended Fluids and
Lubricants on page 11‑7
.
Always use the proper fluid.

Notice: Use of the incorrect fluid
may damage the vehicle and the
damages may not be covered by
the vehicle's warranty. Always
use the correct fluid listed in
Recommended Fluids and
Lubricants on page 11‑7
.

Washer Fluid

What to Use

When you need windshield or rear
window washer fluid, be sure to
read the manufacturer's instructions
before use. If operating the vehicle
in an area where the temperature
can fall below freezing, use a fluid
that has sufficient protection against
freezing.

Adding Windshield Washer
Fluid

Open the cap with the washer
symbol on it. Add washer fluid
until the tank is full. See Engine
Compartment Overview on
page 10‑6 
for reservoir location.

Notice:

.

When using concentrated
washer fluid, follow the
manufacturer's instructions
for adding water.

.

Do not mix water with
ready-to-use washer fluid.
Water can cause the solution
to freeze and damage your
washer fluid tank and other
parts of the washer system.
Also, water does not clean as
well as washer fluid.

.

Fill the washer fluid tank
only three-quarters full when
it is very cold. This allows
for fluid expansion if
freezing occurs, which could
damage the tank if it is
completely full.

.

Do not use engine coolant
(antifreeze) in your
windshield washer. It can
damage the vehicle's
windshield washer system
and paint.

-------------------------------------------------------------------------------------------------------------------------------------------------------------

Vehicle Care

10-23

Brakes

This vehicle has disc brakes.
Disc brake pads have built-in wear
indicators that make a high-pitched
warning sound when the brake pads
are worn and new pads are needed.
The sound can come and go or be
heard all the time the vehicle is
moving, except when applying the
brake pedal firmly.

{

WARNING

The brake wear warning sound
means that soon the brakes will
not work well. That could lead to
an accident. When the brake
wear warning sound is heard,
have the vehicle serviced.

Notice: Continuing to drive with
worn-out brake pads could result
in costly brake repair.

Some driving conditions or climates
can cause a brake squeal when the
brakes are first applied or lightly
applied. This does not mean
something is wrong with the brakes.

Properly torqued wheel nuts are
necessary to help prevent brake
pulsation. When tires are rotated,
inspect brake pads for wear and
evenly tighten wheel nuts in the
proper sequence to torque
specifications in Capacities and
Specifications on page 12‑2
.

Brake linings should always be
replaced as complete axle sets.

Brake Pedal Travel

See your dealer/retailer if the brake
pedal does not return to normal
height, or if there is a rapid increase
in pedal travel. This could be a
sign that brake service might be
required.

Brake Adjustment

Every time the brakes are applied,
with or without the vehicle moving,
the brakes adjust for wear.

Replacing Brake System Parts

The braking system on a vehicle is
complex. Its many parts have to be
of top quality and work well together
if the vehicle is to have really good
braking. The vehicle was designed
and tested with top-quality brake
parts. When parts of the braking
system are replaced, be sure to get
new, approved replacement parts.
If this is not done, the brakes might
not work properly. For example,
installing disc brake pads that are
wrong for the vehicle, can change
the balance between the front and
rear brakes — for the worse.
The braking performance expected
can change in many other ways if
the wrong replacement brake parts
are installed.

-------------------------------------------------------------------------------------------------------------------------------------------------------------

10-24

Vehicle Care

Brake Fluid

The brake master cylinder reservoir
is filled with DOT 3 brake fluid as
indicated on the reservoir cap.
See Engine Compartment Overview
on page 10‑6 
for the location of the
reservoir.

There are only two reasons why the
brake fluid level in the reservoir
might go down:

.

The brake fluid level goes down

because of normal brake lining
wear. When new linings are
installed, the fluid level goes
back up.

.

A fluid leak in the brake
hydraulic system can also cause
a low fluid level. Have the brake
hydraulic system fixed, since a
leak means that sooner or later
the brakes will not work well.

Do not top off the brake fluid.
Adding fluid does not correct a leak.
If fluid is added when the linings are
worn, there will be too much fluid
when new brake linings are
installed. Add or remove brake fluid,
as necessary, only when work is
done on the brake hydraulic system.

{

WARNING

If too much brake fluid is added,
it can spill on the engine and
burn, if the engine is hot enough.
You or others could be burned,
and the vehicle could be
damaged. Add brake fluid only
when work is done on the brake
hydraulic system.

When the brake fluid falls to a low
level, the brake warning light comes
on. See Brake System Warning
Light on page 5‑18
.

What to Add

Use only new DOT 3 brake fluid
from a sealed container. See
Recommended Fluids and
Lubricants on page 11‑7
.

Always clean the brake fluid
reservoir cap and the area
around the cap before removing it.
This helps keep dirt from entering
the reservoir.

{

WARNING

With the wrong kind of fluid in the
brake hydraulic system, the
brakes might not work well.
This could cause a crash.
Always use the proper brake fluid.

-------------------------------------------------------------------------------------------------------------------------------------------------------------

Vehicle Care

10-25

Notice:

.

Using the wrong fluid can
badly damage brake
hydraulic system parts.
For example, just a few
drops of mineral-based oil,
such as engine oil, in the
brake hydraulic system can
damage brake hydraulic
system parts so badly that
they will have to be replaced.
Do not let someone put in
the wrong kind of fluid.

.

If brake fluid is spilled on

the vehicle's painted
surfaces, the paint finish can
be damaged. Be careful not
to spill brake fluid on the
vehicle. If you do, wash it off
immediately.

Battery

Refer to the replacement number
shown on the original battery label
when a new battery is needed.
See Engine Compartment Overview
on page 10‑6 
for battery location.

{

DANGER

Battery posts, terminals, and
related accessories contain lead
and lead compounds, chemicals
known to the State of California to
cause cancer and reproductive
harm. Wash hands after handling.

Vehicle Storage

{

WARNING

Batteries have acid that can burn
you and gas that can explode.
You can be badly hurt if you are
not careful. See Jump Starting on
page 10‑74 
for tips on working
around a battery without
getting hurt.

Infrequent Usage: Remove the
black, negative (−) cable from the
battery to keep the battery from
running down.

Extended Storage: Remove the
black, negative (−) cable from the
battery or use a battery trickle
charger.

-------------------------------------------------------------------------------------------------------------------------------------------------------------

10-26

Vehicle Care

All-Wheel Drive

It is recommended that the all-wheel
drive lubricants be checked and
filled by the dealer/retailer.

Transfer Case

When to Check and Change
Lubricant

Refer to the Maintenance Schedule
to determine how often to check the
lubricant and when to change it.
See Scheduled Maintenance on
page 11‑2
.

How to Check Lubricant

A. Fill Plug

B. Drain Plug

To get an accurate reading, the
vehicle should be on a level
surface.

If the level is below the bottom of
the filler plug hole, located on the
transfer case, you'll need to add
some lubricant. Add enough
lubricant to raise the level to the
bottom of the filler plug hole.

A fluid loss could indicate a
problem; check and have it
repaired, if needed.

What to Use

Refer to the Maintenance Schedule
to determine what kind of lubricant
to use. See Recommended Fluids
and Lubricants on page 11‑7
.

Carrier Assembly-Differential
(Rear Drive Module)

When to Check and Change
Lubricant

Refer to the Maintenance Schedule
to determine how often to check the
lubricant and when to change it.
See Scheduled Maintenance on
page 11‑2
.

-------------------------------------------------------------------------------------------------------------------------------------------------------------

Vehicle Care

10-27

How to Check Lubricant

AWD Differential Case

A. Fill Plug

B. Drain Plug

To get an accurate reading, the
vehicle should be on a level
surface.

If the level is below the bottom of
the filler plug hole, you'll need to
add some lubricant. Add enough
lubricant to raise the level to the
bottom of the filler plug hole.

A fluid loss could indicate a
problem; check and have it
repaired, if needed.

What to Use

Refer to the Maintenance Schedule
to determine what kind of lubricant
to use. See Recommended Fluids
and Lubricants on page 11‑7
.

Starter Switch Check

{

WARNING

When you are doing this
inspection, the vehicle could
move suddenly. If the vehicle
moves, you or others could be
injured.

1. Before starting this check,

be sure there is enough room
around the vehicle.

2. Firmly apply both the parking

brake and the regular brake.
See Parking Brake on
page 9‑39
.

Do not use the accelerator
pedal, and be ready to turn off
the engine immediately if it
starts.

3. Try to start the engine in each

gear. The vehicle should start
only in P (Park) or N (Neutral).
If the vehicle starts in any other
position, contact your dealer/
retailer for service.

-------------------------------------------------------------------------------------------------------------------------------------------------------------

10-28

Vehicle Care

Automatic Transmission
Shift Lock Control
System Check

{

WARNING

When you are doing this
inspection, the vehicle could
move suddenly. If the vehicle
moves, you or others could be
injured.

1. Before starting this check, be

sure there is enough room
around the vehicle. It should be
parked on a level surface.

2. Firmly apply the parking brake.

See Parking Brake on
page 9‑39
.

Be ready to apply the regular
brake immediately if the vehicle
begins to move.

3. With the engine off, turn the

ignition to ON/RUN, but do not
start the engine. Without
applying the regular brake, try to
move the shift lever out of
P (Park) with normal effort. If the
shift lever moves out of P (Park),
contact your dealer/retailer for
service.

Ignition Transmission
Lock Check

While parked, and with the parking
brake set, try to turn the ignition to
LOCK/OFF in each shift lever
position.

.

For automatic transmission
vehicles, the ignition should turn
to LOCK/OFF only when the
shift lever is in P (Park). The
ignition key should come out
only in LOCK/OFF.

.

For manual transmission
vehicles, the ignition key should
come out only in LOCK/OFF.

Contact your dealer/retailer if
service is required.

-------------------------------------------------------------------------------------------------------------------------------------------------------------


Content      ..     16      17      18      19     ..