Saturn Aura (2010 year). Manual - part 22
 

  Index      Saturn     Saturn Aura (2010 year) - manual in english


Search            copyright infringement  


Content      ..     20      21      22      23     ..


Saturn Aura (2010 year). Manual - part 22


16. If the flat tire was able

to inflate to the
recommended inflation
pressure, remove
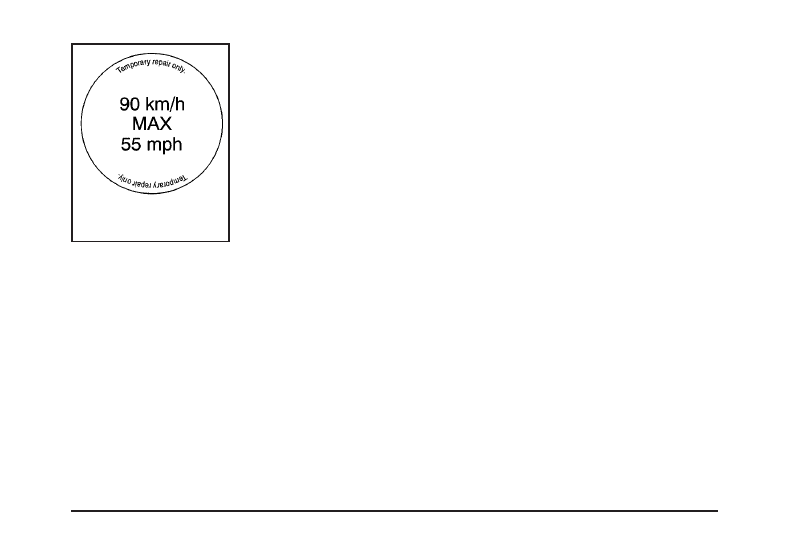
the maximum speed
label from the sealant
canister and place
it in a highly visible
location. The label is a
reminder not to
exceed 55 mph
(90 km/h) until the
damaged tire is
repaired or replaced.

17. Return the equipment to its original storage location

in the vehicle.

18. Immediately drive the vehicle 5 miles (8 km) to

distribute the sealant in the tire.

19. Stop at a safe location and check the tire pressure.

Refer to Steps 1 through 11 under “Using the Tire
Sealant and Compressor Kit without Sealant to
Inflate a Tire (Not Punctured).”

If the tire pressure has fallen more than 10 psi
(68 kPa) below the recommended inflation pressure,
stop driving the vehicle. The tire is too severely
damaged and the tire sealant cannot seal the tire.
See Roadside Assistance Program on page 8-6.

If the tire pressure has not dropped more than
10 psi (68 kPa) from the recommended inflation
pressure, inflate the tire to the recommended
inflation pressure.

20. Wipe off any sealant from the wheel, tire, and

vehicle.

21. Dispose of the used sealant canister and sealant/air

hose (F) assembly at a local dealer/retailer or in
accordance with local state codes and practices.

22. Replace it with a new canister available from your

dealer/retailer.

23. After temporarily sealing a tire using the tire sealant

and compressor kit, take the vehicle to an
authorized dealer/retailer within a 100 miles
(161 km) of driving to have the tire repaired or
replaced.

6-71

-------------------------------------------------------------------------------------------------------------------------------------------------------------

Using the Tire Sealant and Compressor
Kit without Sealant to Inflate a Tire
(Not Punctured)

To use the air compressor to inflate a tire with air only
and not sealant:

Always do a safety check first. See If a Tire Goes Flat
on page 6-66.

1. Remove the tire sealant and compressor kit from its

storage location. See Tire Sealant and Compressor
Kit Storage 
on page 6-74.

2. Unwrap the air only hose (E) and the

power plug (G).

3. Place the kit on the ground.

Make sure the tire valve stem is positioned close to
the ground so the hose will reach it.

4. Remove the tire valve stem cap from the flat tire by

turning it counterclockwise.

5. Attach the air only hose (E) onto the tire valve stem

by turning it clockwise until it is tight.

6. Plug the power plug (G) into the accessory power

outlet in the vehicle. Unplug all items from other
accessory power outlets. See Accessory Power
Outlet(s) 
on page 4-15.

If the vehicle has an accessory power outlet, do not
use the cigarette lighter.

If the vehicle only has a cigarette lighter, use the
cigarette lighter.

Do not pinch the power plug cord in the door or
window.

7. Start the vehicle. The vehicle must be running while

using the air compressor.

8. Turn the selector switch (B) counterclockwise to the

Air Only position.

9. Press the on/off (A) button to turn the

compressor on.

The compressor will inflate the tire with air only.

6-72

-------------------------------------------------------------------------------------------------------------------------------------------------------------

10. Inflate the tire to the recommended inflation

pressure using the pressure gage (D). The
recommended inflation pressure can be found
on the Tire and Loading Information label. See
Inflation - Tire Pressure on page 6-51.

The pressure gage (D) may read higher than the
actual tire pressure while the compressor is on. Turn
the compressor off to get an accurate reading.
The compressor may be turned on/off until
the correct pressure is reached.

11. Press the on/off button (A) to turn the tire sealant

and compressor kit off.

Be careful while handling the tire sealant and
compressor kit as it could be warm after usage.

12. Unplug the power plug (G) from the accessory

power outlet in the vehicle.

13. Disconnect the air only hose (E) from the tire valve

stem, by turning it counterclockwise, and replace
the tire valve stem cap.

14. Replace the air only hose (E) and the power

plug (G) and cord back in its original location.

15. Place the equipment in the original storage location

in the vehicle.

Removal and Installation of the Sealant
Canister

To remove the sealant canister:

1. Remove the plastic cover.

2. Unscrew the connector (B) from the canister (A).

3. Pull up on the canister (A) to remove it.

4. Replace with a new canister which is available from

your dealer/retailer.

5. Push the new canister into place.

6. Screw the connector (B) to the canister (A).

7. Slide the plastic cover back on.

6-73

-------------------------------------------------------------------------------------------------------------------------------------------------------------

Tire Sealant and Compressor Kit
Storage

The tire sealant and compressor kit is located in the
trunk.

1. Open the trunk. See Trunk on page 3-11.

2. Lift the cover.

3. Turn the retainer clockwise and remove the tire

sealant and compressor kit.

To store the tire sealant and compressor kit, reverse
the steps.

Changing a Flat Tire

If a tire goes flat, avoid further tire and wheel damage
by driving slowly to a level place. Turn on the hazard
warning flashers. See Hazard Warning Flashers
on page 4-3.

{

WARNING:

Changing a tire can be dangerous. The vehicle
can slip off the jack and roll over or fall on you or
other people. You and they could be badly injured
or even killed. Find a level place to change your
tire. To help prevent the vehicle from moving:

1. Set the parking brake firmly.

2. Put the shift lever in P (Park).

3. Turn off the engine and do not restart while

the vehicle is raised.

4. Do not allow passengers to remain in the

vehicle.

WARNING:

(Continued)

6-74

-------------------------------------------------------------------------------------------------------------------------------------------------------------

WARNING:

(Continued)

To be even more certain the vehicle will not move,
you should put blocks at the front and rear of the
tire farthest away from the one being changed.
That would be the tire, on the other side, at the
opposite end of the vehicle.

When the vehicle has a flat tire (B), use the following
example as a guide to assist you in the placement
of wheel blocks (A).

A. Wheel Block

B. Flat Tire

The following information explains how to use the jack
and change a tire.

6-75

-------------------------------------------------------------------------------------------------------------------------------------------------------------

Removing the Spare Tire and Tools

The equipment you will need is located in the trunk.

1. Open the trunk. See Trunk on page 3-11.

2. Remove the spare tire cover.

3. Turn the wing nut counterclockwise and remove it.

Then remove the compact spare tire. See Compact
Spare Tire 
on page 6-88.

4. Remove the wing nut holding the jack in place.

5. Remove the extension bolt that is clipped to the

jack. You need this later to store the flat tire.

6. Remove the jack and wheel wrench from the trunk.

The tools you will be using include the wheel wrench (A)
and jack (B).

6-76

-------------------------------------------------------------------------------------------------------------------------------------------------------------

1. Turn the plastic wing nut counterclockwise to

loosen the wheel wrench.

2. Unhook the wheel wrench from the jack.

3. Extend the handle on the wheel wrench by pressing

the button and pulling on the end of the wrench.
You must do this before using the wheel wrench.

6-77

-------------------------------------------------------------------------------------------------------------------------------------------------------------

Removing the Flat Tire and
Installing the Spare Tire

1. Do a safety check before proceeding. See Changing

a Flat Tire on page 6-74.

2. If the vehicle has a wheel cover or hubcap that has

plastic wheel nut caps, loosen the plastic nut caps.
You might need to use the wheel wrench to
loosen them. Do not pry off wheel covers or center
caps that have plastic wheel nut caps.

3. Remove the wheel cover or center cap from the

wheel to locate the wheel nuts.

If the vehicle has a wheel cover or hubcap without
plastic wheel nut caps, gently pry on the edge
of the plastic wheel trim to remove it from the wheel
to locate the wheel nuts.

4. Use the wrench to loosen all the wheel nuts. Do not

remove them yet.

6-78

-------------------------------------------------------------------------------------------------------------------------------------------------------------

5. Position the lift head at the jack location nearest the

flat tire. Make sure all of the jack lift head is
touching the jacking flange under the body. Do not
place the jack under a body panel.

6. Put the compact spare tire near the flat tire.

{

WARNING:

Getting under a vehicle when it is jacked up is
dangerous. If the vehicle slips off the jack, you
could be badly injured or killed. Never get under a
vehicle when it is supported only by a jack.

{

WARNING:

Raising your vehicle with the jack improperly
positioned can damage the vehicle and even
make the vehicle fall. To help avoid personal injury
and vehicle damage, be sure to fit the jack lift
head into the proper location before raising the
vehicle.

6-79

-------------------------------------------------------------------------------------------------------------------------------------------------------------

7. Raise the vehicle by turning the wrench clockwise.

Raise the vehicle far enough off the ground so
there is enough room for the compact spare tire
to fit.

8. Remove all of the

wheel nuts.

9. Remove the flat tire.

6-80

-------------------------------------------------------------------------------------------------------------------------------------------------------------

{

WARNING:

Rust or dirt on a wheel, or on the parts to which it
is fastened, can make wheel nuts become loose
after time. The wheel could come off and cause
an accident. When changing a wheel, remove any
rust or dirt from places where the wheel attaches
to the vehicle. In an emergency, use a cloth or a
paper towel to do this; but be sure to use a
scraper or wire brush later, if needed, to get all the
rust or dirt off. See Changing a Flat Tire on
page 6-74
.

10. Remove any rust or dirt

from the wheel bolts,
mounting surfaces
and spare wheel.

11. Install the compact spare tire.

6-81

-------------------------------------------------------------------------------------------------------------------------------------------------------------

{

WARNING:

Never use oil or grease on bolts or nuts because
the nuts might come loose. The vehicle’s wheel
could fall off, causing a crash.

12. Put the wheel nuts back on with the rounded end

toward the wheel. Tighten each nut by hand or
with the wrench until the wheel is held against
the hub.

13. Lower the vehicle by turning the wrench

counterclockwise. Lower the jack completely.

6-82

-------------------------------------------------------------------------------------------------------------------------------------------------------------

{

WARNING:

Wheel nuts that are improperly or incorrectly
tightened can cause the wheels to become loose
or come off. The wheel nuts should be tightened
with a torque wrench to the proper torque
specification after replacing. Follow the torque
specification supplied by the aftermarket
manufacturer when using accessory locking wheel
nuts. See Capacities and Specifications on
page 6-105 
for original equipment wheel nut
torque specifications.

Notice: Improperly tightened wheel nuts can lead
to brake pulsation and rotor damage. To avoid
expensive brake repairs, evenly tighten the wheel
nuts in the proper sequence and to the proper
torque specification. See Capacities and
Specifications 
on page 6-105 for the wheel nut
torque specification.

14. Tighten the wheel nuts

firmly in a crisscross
sequence, as shown,
with the wheel wrench.

Notice: Wheel covers will not fit on your vehicle’s
compact spare. If you try to put a wheel cover
on the compact spare, the cover or the spare could
be damaged.

Do not try to put a wheel cover on your compact spare
tire. It will not fit. Store the wheel cover and wheel
nut caps in the trunk until you have the flat tire repaired
or replaced.

6-83

-------------------------------------------------------------------------------------------------------------------------------------------------------------

Storing a Flat or Spare Tire and
Tools

Storing a Flat Tire and Tools

{

WARNING:

Storing a jack, a tire, or other equipment in the
passenger compartment of the vehicle could
cause injury. In a sudden stop or collision, loose
equipment could strike someone. Store all these in
the proper place.

To store the flat tire and tools in the compact spare tire
compartment:

1. Open the trunk. See Trunk on page 3-11.

2. Remove the bolt extension (in the yellow sleeve)

from the jack and remove the center cap from the
wheel.

3. Collapse the wrench using the same button used to

extend it.

4. Attach the wrench to the jack by placing the tab on

the wrench into the hole on the side of the jack.
Then place the wrench handle over the tab on the
side of the jack.

6-84

-------------------------------------------------------------------------------------------------------------------------------------------------------------

5. Raise the jack to

the height shown
and lock the wrench
onto the jack.

6. Place the jack over the bolt (A) on the floor, making

sure it contacts the bolt. Thread the jack retainer
nut until it contacts the jack.

7. With the valve stem up, place the tire on the

compartment floor with the rear of the tire under the
trim panel. The tire may not lay completely flat.

8. Line up the bolt with the wheel center.

9. With the yellow cap in place to prevent the wheel

from being scratched, screw the bolt extension
onto the bolt through the wheel center hole.

10. Remove the yellow cap from the bolt extension.

11. Secure the tire and wheel with the larger wing nut.

6-85

-------------------------------------------------------------------------------------------------------------------------------------------------------------

A. Cover

B. Wing Nut

C. Extension

D. Flat Tire (valve stem up)

E. Nut

F. Jack

G. Bolt

The compact spare is for temporary use only. Replace
the compact spare tire with a full-size tire as soon
as you can. See Compact Spare Tire on page 6-88.

Storing the Spare Tire and Tools

{

WARNING:

Storing a jack, a tire, or other equipment in the
passenger compartment of the vehicle could
cause injury. In a sudden stop or collision, loose
equipment could strike someone. Store all these in
the proper place.

6-86

-------------------------------------------------------------------------------------------------------------------------------------------------------------


Content      ..     20      21      22      23     ..