Tractors X60 Series. Manual - part 40
 

  Index      Tractors     Tractors X60 Series - service repair manual 2012 year


Search            


Content   ..  38  39  40  41   ..


Tractors X60 Series. Manual - part 40


159

Tyres, Wheels, Ballasting

6

Wheel track adjusting for 4WD axle

Wheel disc pointing inwards

Wheel disc pointing outwards

A

E

B

F

C

G

D

H

Tyres

A

B

C

D

E

F

G

H

440/65R24 (122 A8)

1627

1740

1795

1886

1908

1999

2054

2167

480/65R24 (127 A8)

1627

1740

1795

1886

1908

1999

2054

2167

12.4R24 (119 A8)

1640

1753

1808

1873

1921

1986

2041

2154

13.6R24 (121 A8)

1627

1740

1795

1886

1908

1999

2054

2167

14.9R24 (126 A8)

1627

1740

1795

1886

1908

1999

2054

2167

420/70R24 (130 A8)

1627

1740

1795

1886

1908

1999

2054

2167

380/70R24 (125 A8)

1627

1740

1795

1886

1908

1999

2054

2167

11.2R24 (114 A8)

1640

1753

1808

1873

1921

1986

2041

2154

320/70R24 (116 A8)

1640

1753

1808

1873

1921

1986

2041

2154

380/85R24

1627

1740

1795

1886

1908

1999

2054

2167

Interflange 1887 mm - Wheel tracks for 4WD front axle - mm -

160

Tyres, Wheels, Ballasting

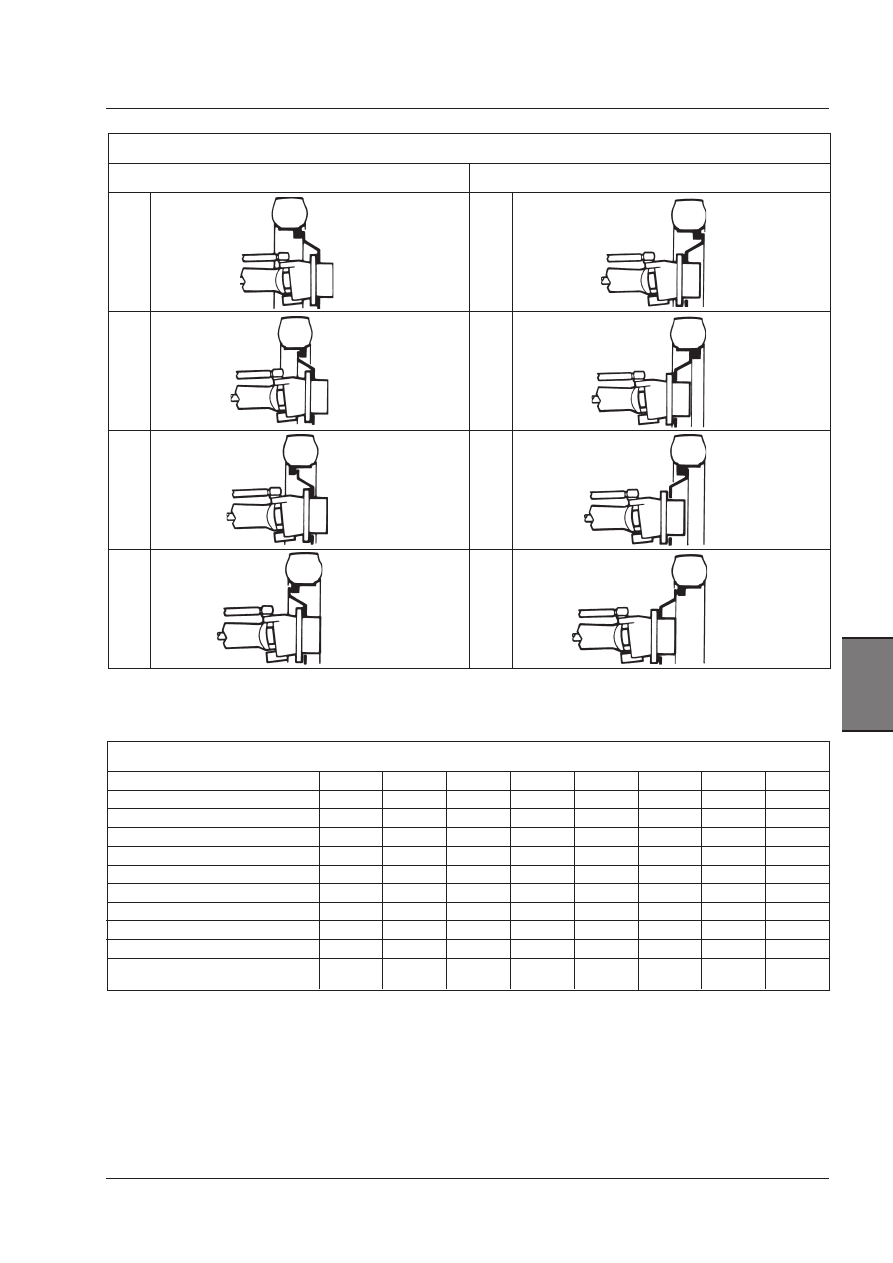
Rear track width adjustment

The  rear  track  width  can  be  adjusted  by  changing  the
position of the rim fixing points or the central wheel discs,
as shown in the table below.

Torque the nuts and bolts that fix the rim to the disc to
240 Nm (1) and those that fix the disc to the wheel hub
to 320 Nm (2). Always check tyre pressure.

Certain track widths cannot be obtained with some tyre
types (see table).

Adjusting rear track widths - Rim and disc position

Wheel disc pointing inwards

Wheel disc pointing outwards

A

E

B

F

C

G

D

H

WARNING:  When  you  lift  up  the  tractor  to 
adjust the wheel tracks, follow the directions 
for lifting in the Safety Notes section.

WARNING:  Maximum attention must be used 
when dismounting the rear wheels: because 
of their weight, a suitable hoist must be used 
to remove and handle the wheels.

IMPORTANT: After removing and fitting the wheels back 
again, it is important to check the torques of all bolts by 
means of a torque wrench at the following intervals:
- First check after 10 work hours.
- Second check after 50 work hours.
- Third check and further checks every 500 work hours.

161

Tyres, Wheels, Ballasting

6

NOTE: If the tractor is not going to be used for a long 
period of time, support it on raised blocks to remove the 
load from the tyres.

WARNING: When jacking up the tractor, pay 
attention  that  its  weight  is  correctly  distri-
buted  and  securely  wedge  the  wheels  on 
the ground. Tighten all nuts and bolts to the 
required torque.

WARNING: Always use a hoist or other suita-
ble lifting equipment to handle, mount and 
dismount wheels.

  Tyres 

H

  540/65R38 (142A8) 

1620 

1720 

1820 

1920 

2020

  16.9R30 (137 A8) 

1515 

1628 

1712 

1915 

1825 

2028

   540/65R34 (140 A8) 

1620 

1720 

1820 

1920 

2020

  600/65R34 (145 A8) 

1624 

1720 

1820 

1924 

2024

  13.6R38 (128 A8) 

1420 

1520 

1620 

1720 

1820 

1920 

2020

  18.4R30 (142 A8) 

1628 

1712 

1915 

1825 

2028

  16.9R34 (139 A8) 

1520 

1620 

1720 

1820 

1920 

2020

  18.4R34 (144 A8) 

1520 

1620 

1720 

1820 

1920 

2020

  520/70R34 (148 A8) 

1620 

1720 

1820 

1920 

2020

  16.9R38 (141 A8) 

1620 

1720 

1820 

1920 

2020

  480/70R34 (143 A8) 

1620 

1720 

1820 

1920 

2020 

  480/70R30 (141 A8) 

1515 

1628 

1712 

1915 

1825 

2028

  480/70R38 (145 A8) 

1620 

1720 

1820 

1920 

2020

  420/85R38 

1620 

1720 

1820 

1920 

2020

Wheel tracks for rear axle - mm -

162

Tyres, Wheels, Ballasting

Front ballast (if equipped)

 [4.2.h]

Do not hitch to the three point linkage any implements
that weighs more than indicated. If the implement weight
or the operating conditions (slope) might destabilise the
tractor, cast iron plates can be added to the front end.

Front end weights can be mounted on the front of the
tractor  with  a  weight  frame.    The  weights  and  weight
frame are available from your Dealer.

The weight frame can accomodate a max. of 7 or 9 ballast
weights. Each ballast weights 45 kg (100 Lbs) and the
frame weights about 100 kg.

IMPORTANT: The total tractor weight with full equipment 
and ballast weight must never be more than the maximum 
allowed operating weight. See Maximum Allowed Operat-
ing Weights in this manual. Comply with tyre capacities 
and any possible legal limitations.

The ballasts must be mounted on the weight frame one
at a time using suitable support aids.
Insert the threaded rod (19) into the hole in the weights.
Install the washer and the retainer nut (2).
Tighten the nut.

Central ballast with front tow hook
(option)

Mount the central ballast first, then the three side ballasts
on both sides.
Insert the threaded rod into the hole in the weights.
Install the washer and the retainer nut (2).
Tighten the nut.

NOTE: Check the check screw in the tow hook pin for 
correct mounting.

WARNING: Due to the great weight of each bal-

last, manual lifting of front and rear ballast 

weights could be dangerous for your safety.

Use exclusively a hook or suitable equipment 

to lift front and rear ballast weights.

- Always use suitable personal safety devices 
(safety gloves and shoes) when applying or 
removing ballast.


Content   ..  38  39  40  41   ..