Tractors X60 Series. Manual - part 16
 

  Index      Tractors     Tractors X60 Series - service repair manual 2012 year


Search            


Content   ..  14  15  16  17   ..


Tractors X60 Series. Manual - part 16


65

Instruments and Programming

4

Display MENU

The menu system for the cluster is operated by using the three buttons on the left-hand panel.

UP

DOWN

MENU

The menu system is divided into 2 parts:

1-Operating menu
Accessed by using the UP/DOWN arrows when the key is on.

2-Accessories Menu
Is shown automatically when the key is turned to the Accessory position.

1.1 Operating menu

When the ignition is on, either with or without the engine running the Working Menu can be cycled through by using the
UP and DOWN buttons.

After key-on the cluster will always default to the PTO/hours screen. As soon as Engine speed goes above 500 RPM for
more than 2 seconds, the display will show the last selected working menu option before previous key off.

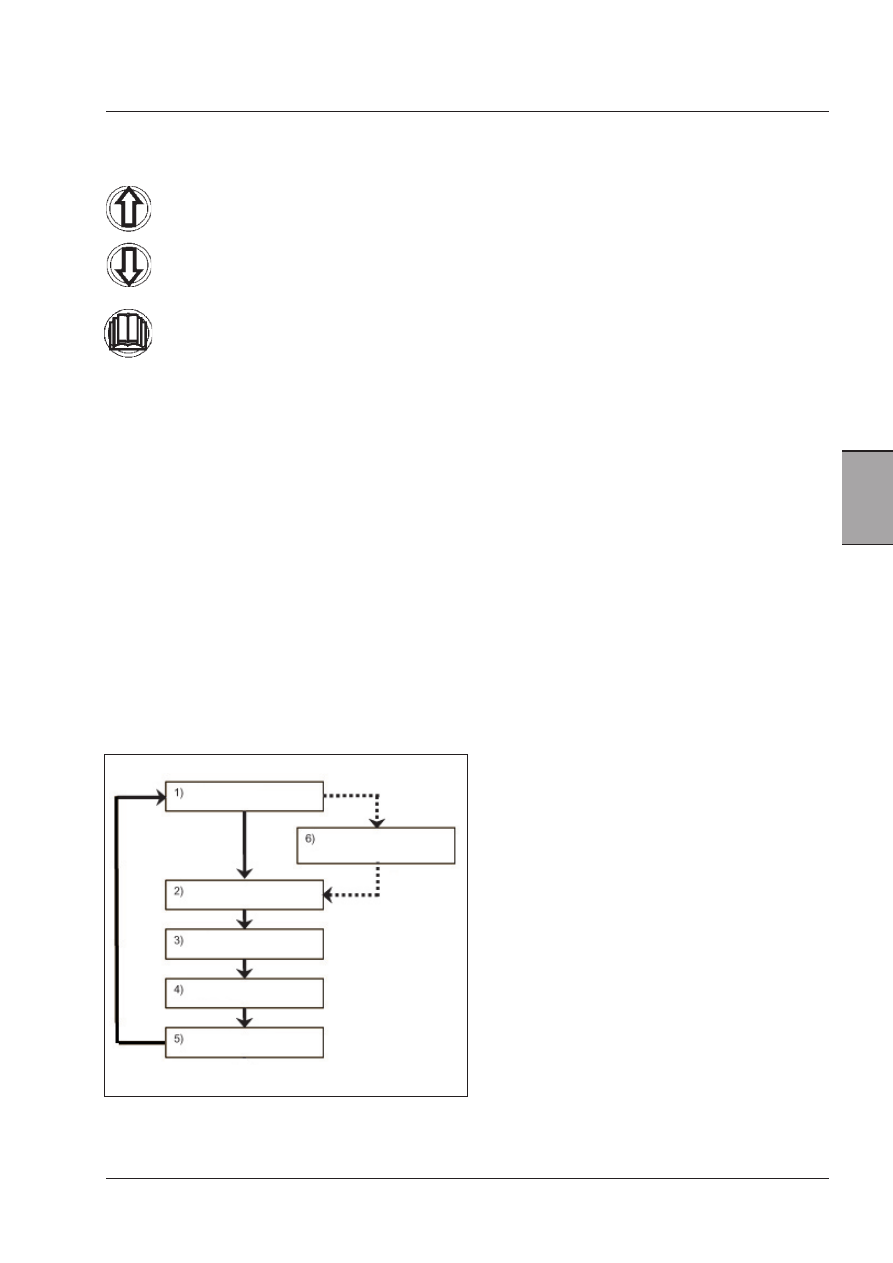
The diagram below shows the menu path when using the DOWN button, if UP is pushed the direction is reversed.

NOTE: Count of worked area is active only if the engine is running and implement width is set on a value different from “0”.

1) Power take-off / hours

2) Worked area

3) Distance

4) Calibration

5) Work timer

6) Vehicle errors - if active

66

Instruments and Programming

1.1.1  PTO/Hour Display 

The screen shows:

Time - 13:24
Total hours accumulated by the tractor - 1262.3
PTO mode currently selected - 540 Rear
PTO RPM - 0

The arrow indicates the PTO menu is active.

Use:

The following combination of screens can be displayed:

While inside the PTO  menu (as indicated by the arrow
on the right-hand side), the operator may use the MENU
button to scroll the values of front and rear PTO speed.

These screenshots are self-configured according to the
PTO type present and to the selected PTO.

The screenshots display the rear PTO speed of 540, 540E
and 1000.

Rear Power Take-Off

Front Power Take-Off

Rear power take-off overspeed

- 540/540E: When the PTO shaft revolves faster than 630 RPM, the yellow PTO lamp on the instrument lights up and the
buzzer sounds.

- 1000: When the PTO shaft revolves faster than 1170 RPM, the yellow PTO lamp on the instrument lights up and the
buzzer sounds.

Reduce the engine rated speed to reduce the rear PTO shaft speed.

Front power take-off overspeed

-1000: The front PTO speed value and the front PTO symbol blink on the display.

Reduce the engine rated speed to reduce the front PTO shaft speed.

67

Instruments and Programming

4

This display will be configured as follows:

1 - Rear/front PTO selected
The selected PTO display indicates that the LCD is showing whether the front or rear PTO was engaged.
The MENU button displays one of these indications.

2 - Arrow indicating the PTO/hour menu is selected.
The arrow indicates that in this moment the functions of the PTO/hours menu are selected for display.
By means of the UP and DOWN buttons the operator can scroll the different MENU options and the arrow indicates which
view has been selected.

3 - PTO instantaneous speed - RPM
Indicates the actual speed of the engaged PTO. If the PTO is not engaged, the display shows "0". If when the PTO is dis-
engaged a value different from "0" is shown, that means a dragging effect is present. Ask your Dealer's workshop for help.

4 - PTO speed selected
The “PTO speed selected” display indicates 540 or 540E or 1000 (or 1000E, if applicable) according to tractor configuration
and to the PTO speed that is selected by the speed selector lever.

Front Pto
- Ignition key ON. The front PTO can be displayed in the lower area of the left-hand LCD (select PTO display by the up/
down arrows and press the MENU button). The display shows the front PTO speed, as calculated from engine speed rate
with gear engaged in the factory setting. If the front PTO is not active, the display reads 0. If the front PTO is engaged,
the value of the rev speed rate is shown on the LCD screen.
When the key is switched to OFF, the front PTO view is cancelled, and when the key is switched to ON, the procedure
starts again at the first start of the front PTO.

WORK HOURS
The display shows the actual hours worked by the tractor. The count is only active when the engine is running. The value
displayed ranges from 0.0 to 9999.9. When the maximum value is reached, the displayed value ranges from 10000 to
60000. When 60000 is reached, the count will stop.

Rear Power Take-Off

 [4.2.d]

According to the PTO on board, the display will show the following:

1

2

4

3

68

Instruments and Programming

1.1.2  Area worked

If the down button is pushed the Area Worked menu is selected:

The screen shows:

Time - 13:24
Area units selected - Acres
Area worked - 28.3 Acres
PTO mode currently selected - 1000 Rear
PTO RPM - 0

The arrow indicates the Area menu is selected. If the counter is operating, this arrow
will flash when the menu is selected. Each time the menu is selected, the counter
will display "AUTO" or "Man" (MANUAL) 2 seconds long before displaying the relative
value. The operator is thus informed about the settings actually active. (See selection)

Use:
- The first screenshot shows the area worked in the units preset in the accessory menu. The units are Acres or Hectares.
- One decimal place will be shown until the amount of units reaches 9999.9, at this point the counter will show 10000+.
If 99999 is exceeded the counter will reset.
- Counter can work in two different modes. Mode selection is available into accessory menu (see Auto Function Settings):

Manual Mode: when activated by the operator, the counter counts every time the tractors is moving (if 
implement width has been previously defined) until the operator stops it.
Auto Mode: if implement width has been previously defined, the counter starts and stops to count auto-
matically when the tractor is moving and either the hitch is down or the Remote implement switch is on.


Auto and Manual mode will increment the same counter value.

Counter Activation:
- Pushing the MENU button for <2 secs starts/stops the area counter (only for Manual mode)
- Pushing the MENU button for >2 secs when counter is visualized and not active resets the counter.
- If pushed for longer than 2 seconds when active the counter will stop (only for Manual mode).
- If the UP or DOWN arrows are pressed to change the menu function selected when the counter is active, it will continue
to count.

- To turn the distance counter off after exiting the menu the operator will have to go back into this screen and press the
menu button (only for Manual mode).
- If active at key-off the unit will start again counting at key-on (only for Manual mode).

Notes:
1) Only Area worked function will be activated in manual
2) To count the area worked, the implement width has to be previously defined (Accessories Menu 4).


Content   ..  14  15  16  17   ..