Snowmobile Polaris DEEP SNOW (2005 year). Manual - part 59
CHASSIS
12.7
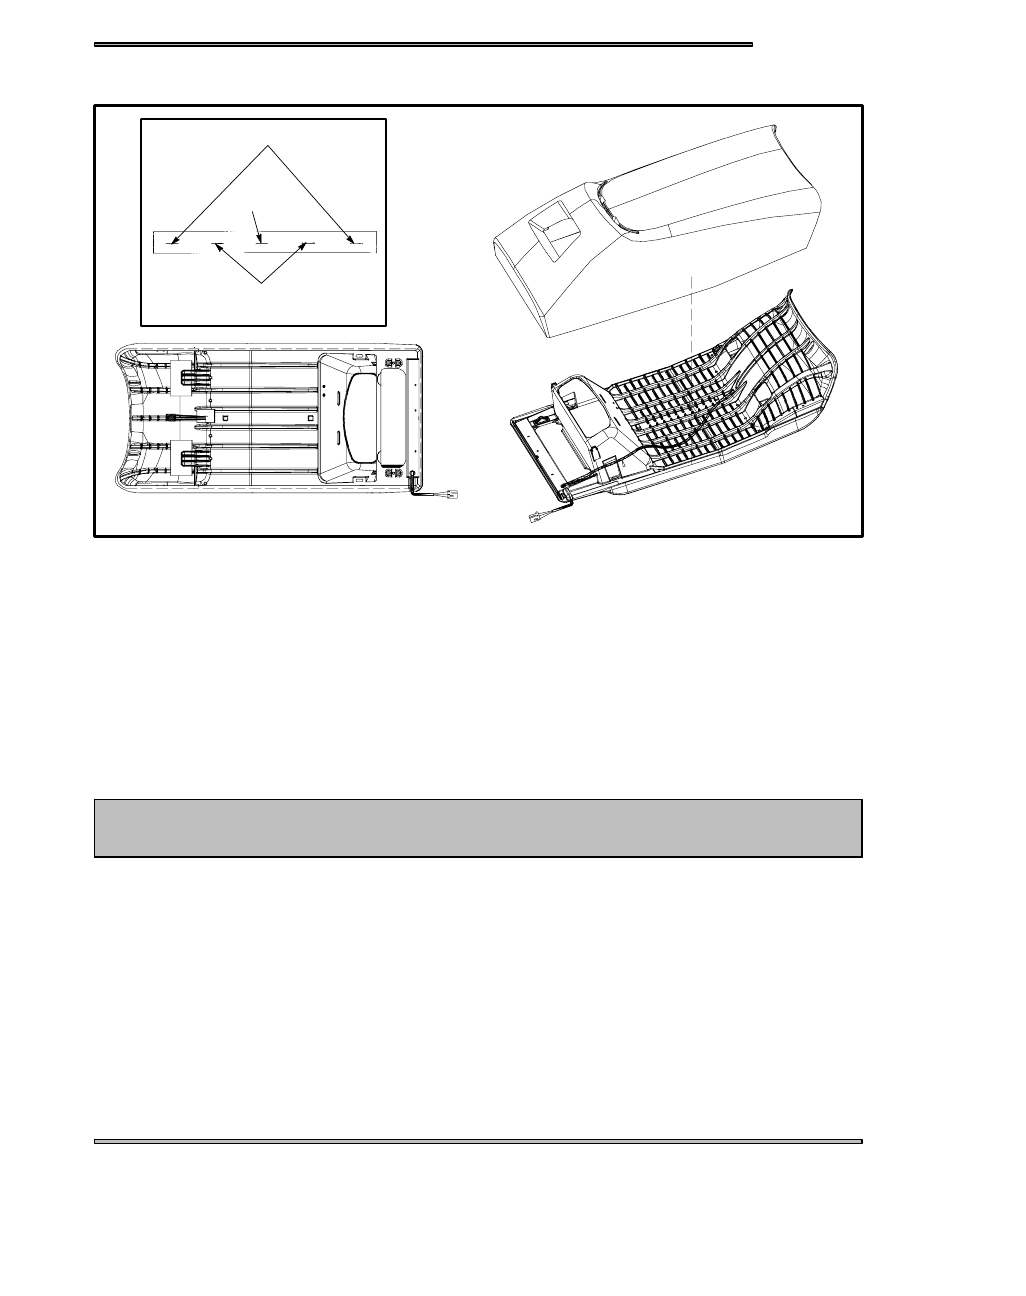
SEAT COVER
Staple Sequence
(1)
(2)
(3)
SEAT REMOVAL
1. Remove the seat assembly by removing the 2 bolts that hold the rear of the seat onto the chassis. Install in reverse order and
make sure that the tabs in the front of the seat are lined up correctly.
SEAT COVER REMOVAL
1. Remove seat
2. Remove the covering by removing the staples that hold it on.
3. Remove the seat foam if replacing the tail light assembly see page 12.8.
4. Place the seat foam on the seat base.
5. Drape the new cover over the seat foam.
6. Turn the assembly over and begin upholstering by lining up the seat cover vinyl side flaps with the indented square location
indicators located on the plastic seat base.
Apply staples in the stapling channel only. If you apply staples outside the channel, you will dam-
age the fuel tank reservoir in the seat base. If this happens you will have to replace the entire seat
assembly.
CAUTION
7. Using a staple fun, tack each side of the vinyl cover in place using two staples (1). If cover has a “Polaris” emblem carefully
align emblem with the bottom edge of the seat. This will help ensure that the cover is positioned properly.
8. Align the two sewn seams located at the rear of the seat cover with the two back corners of the seat base.
9. Pull the vinyl tight and tack the seat cover to the plastic seat base in each corner. Use two or three staples per corner.
10. Now that the cover is positioned, and tacked to the plastic seat base in for places, turn the assembly over an inspect it. If the seat
cover seems to fit correctly and everything looks straight, including the tool compartment flap, continue.
11. Staple the remainder of the unattached seat cover to the plastic seat base. Always staple between two existing staples and
follow this procedure until the seat cover is completely stapled to the seat base see the staple sequence above.
12. Turn the seat cushion assembly over and inspect for wrinkles or imperfections. If imperfections are visible, remove the staples
in the affected area and staple correctly.
13. Trim excess vinyl from the bottom around the back of the seat area only after a satisfactory fit is obtained.