Snowmobile Polaris DEEP SNOW (2005 year). Manual - part 22
FUEL DELIVERY
4.13
MIKUNI TM CARBURETOR SERVICE
Wear eye protection when using compressed air or cleaning solvents. Review all fuel system warn-
ings found on page 4.1 before proceeding.
CAUTION
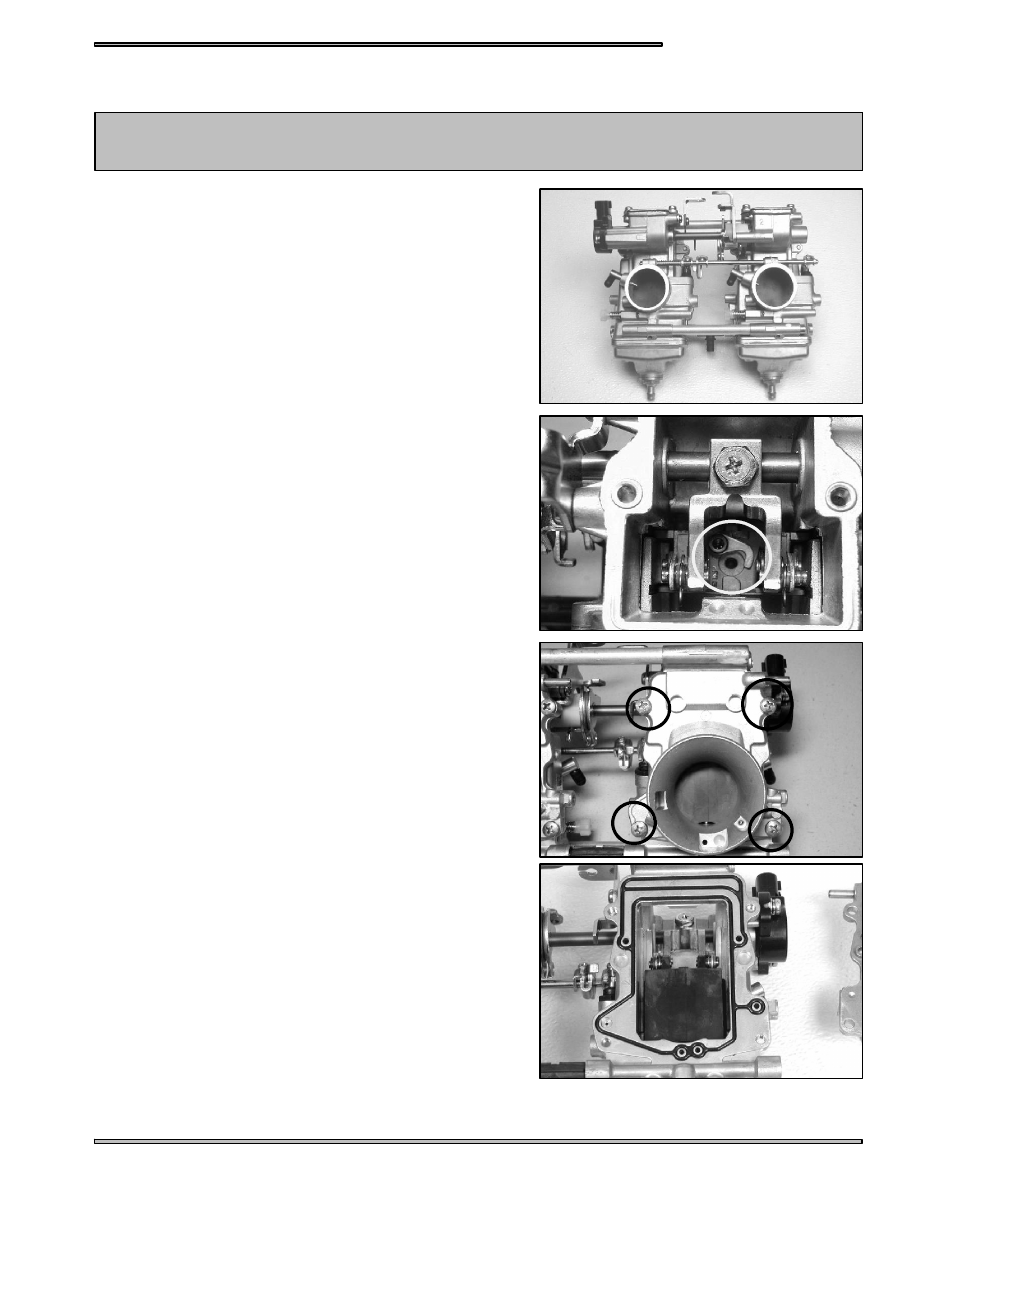
DISASSEMBLY
1. Remove the carburetor from the engine before disassembling.
Clean the outside of the carburetor thoroughly with solvent. Do
not use compressed air to dry at this time. The float chamber
could become pressurized resulting in damage to the floats or
inlet needle and seat.
2. Remove the top caps.
3. Rotate the needle keeper far enough to remove the needle and
c--clip assembly from the slide.
4. Remove the four screws on the funnel face.
5. Turn throttle shaft so slide opens all the way. You may have to
turn out slide stop screw for the slide to move farther up the
body.
6. With slide fully open, pull funnel out from the bottom first.
7. Check for wear on the face of the slides, and also check the
needle for wear.