SINUMERIK 840D sl. Basesoftware and operating software. Manual (2019) - page 8

Technologies and cycles
18.11 Measuring cycles and measurement functions
MD51786 $MNS_J_MEA_T_PROBE_MEASURE_DIST
Measuring path to calibrate the probe
or for measurements with stationary
spindle.
= 10
Default value
General cycle setting data when measuring with rotating spindle
SD54670 $SNS_MEA_CM_MAX_PERI_SPEED[0]
Maximum permissible peripheral
speed of the tool to be measured.
= 100
Default value
SD54671 $SNS_MEA_CM_MAX_REVOLUTIONS[0]
Maximum permissible tool speed of the
tool to be measured. The speed is au-
tomatically reduced when exceeded.
= 1000
Default value
SD54672 $SNS_MEA_CM_MAX_FEEDRATE[0]
Maximum permissible feedrate to
probe the tool to be measured at the
probe.
= 20
Default value
SD54673 SNS_MEA_CM_MIN_FEEDRATE[0]
Minimum feedrate for the first probing
of the tool to be measured at the probe.
This avoids excessively small fee-
drates for large tool radii.
= 1
Default value
SD54674 $SNS_MEA_CM_SPIND_ROT_DIR[0]
Spindle direction of rotation to measure
tools.
= 4
Spindle rotation the same as M4 (default value)
Note
If the spindle is already rotating when the measuring cycle is called, this direction of rotation
remains independent of the setting of this data.
SD54675 $SNS_MEA_CM_FEEDFACTOR_1[0]
Feedrate factor 1
= 10
Default value
= 0
Only single probing with the feedrate calculated by the cycle. However, as a minimum, the
value from SD54673[0] $SNS_MEA_CM_MIN_FEEDRATE.
>= 1
First probing with feedrate. However, as a minimum with the value from
SD54673[0] $SNS_MEA_CM_MIN_FEEDRATE)
SD54675[0] $SNS_MEA_CM_FEEDFACTOR_1
SINUMERIK Operate
Commissioning Manual, 12/2019, 6FC5397-1DP40-6BA3
485

Technologies and cycles
18.11 Measuring cycles and measurement functions
SD54676 $SNS_MEA_CM_FEEDFACTOR_2[0]
Feedrate factor 2
= 0
Second probing with the feedrate calculated by the measuring cycle. This is only effective for
SD54673[0] $SNS_MEA_CM_FEEDFACTOR_1 > 0, default value
>= 1
Second probing with the calculated feedrate from SD54673[0] $SNS_MEA_CM_MIN_FEE-
DRATE feedrate factor 2.
Third probing with the calculated feedrate.
Note
Feedrate factor 2 should be less than feedrate factor 1.
SD54677 $SNS_MEA_CM_MEASURING_ACCURACY[0]
Specified measuring accuracy.
The value of this parameter always
refers to the last probing of the tool at
the probe!
= 0.005
Default value
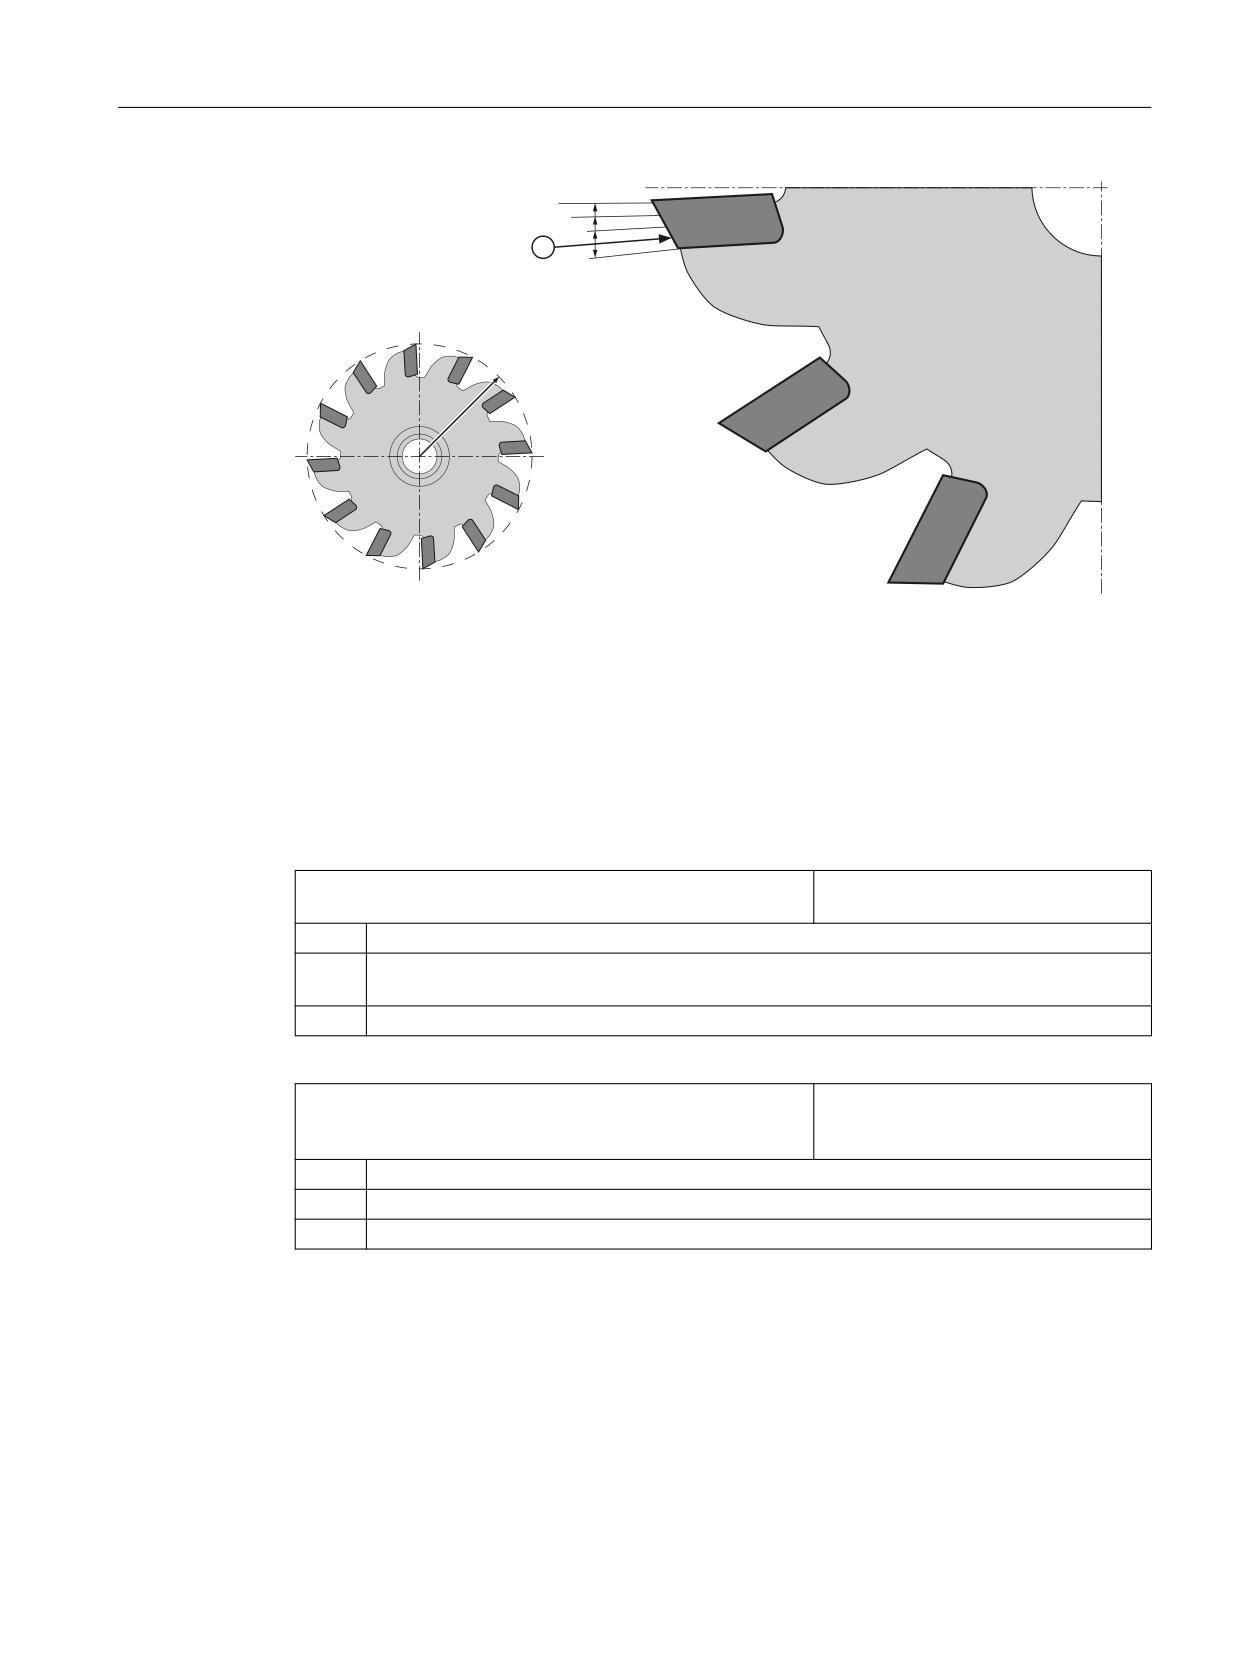
SD54692 $SNS_MEA_T_CIRCULAR_ARC_DIST
Arc distance for the single cutting edge
measurement of the radius.
= 0.25 *)
Default value
SD54693 $SNS_MEA_T_MAX_STEPS
Maximum number of probe contacts for
single cutting edge measurement of the
radius.
= 10 *)
Default value
*)
If the value = 0, then the "highest point on the longest cutting edge" is not sought, but the measured
value of the contact with the rotating spindle taken.
SINUMERIK Operate
486
Commissioning Manual, 12/2019, 6FC5397-1DP40-6BA3
Technologies and cycles
18.11 Measuring cycles and measurement functions
EQ
E
E
E
U
r
Effective radius of the tool
b
Arc distance = SD54692
n
Maximum number of probe contacts = SD54693
① 1st measuring point.
Figure 18-18
Single cutting edge measurement
General cycle setting data for correction using the correction tables when forming measurements with
rotating spindle.
SD54691 $SNS_MEA_T_PROBE_OFFSET
Activate the measuring result compen-
sation
= 0
No data, default value
= 1
Correction in the cycle. This is only effective if SD54689 $SNS_MEA_T_PROBE_MANUFAC-
TURER>0.
= 2
Correction using user-defined correction table
SD54689 $SNS_MEA_T_PROBE_MANUFACTURER
Activates pre-configured compensa-
tion tables for several tool probe mod-
els (customer-specific)
= 0
No data, default value
= 1
TT130 (Heidenhain)
= 2
TS27R (Renishaw)
SINUMERIK Operate
Commissioning Manual, 12/2019, 6FC5397-1DP40-6BA3
487

Technologies and cycles
18.11 Measuring cycles and measurement functions
18.11.3.3
Measuring tools at the turning machines
Measuring feedrate for tool measurement in turning operation
SD55628 $SCS_MEA_TP_FEED_MEASURE
Calibrate measuring feedrate for tool
probe and measure tool with station-
ary spindle.
= 300
Default value
Note
Measuring feedrate for tool measuring
All measuring cycles use the value saved in SD54636 or SD54651 as the measuring feedrate
after the tool probe has been calibrated. A different measuring feedrate can be assigned for
each calibration field [n].
When calibrating the probe, either the measuring feedrate from SD55628 is used, or the
measuring feedrate can be overwritten in the input screen when calibrating. To do this,
SD54762 $SNS_MEA_FUNCTION_MASK_TOOL bit 4 must be set to 1.
General cycle machine/setting data for measuring path/feedrate
SD42950 $SC_TOOL_LENGTH_TYP
Assignment of the tool length offset
independent of tool type.
= 0
Measuring turning tools, type 5xx (default value)
= 2
Measuring turning tools, type 5xx, drilling and milling tools, type 1xx, 2xx
MD51786 $MNS_J_MEA_T_PROBE_MEASURE_DIST
Measuring path to calibrate the
probe or for measurements with sta-
tionary spindle.
= 10
Default value
SD55628 $SCS_MEA_TP_FEED_MEASURE
Feedrate for the calibration of a tool
probe with stationary spindle.
= 300
Default value
Calibrating tool probes
Use the following general cycle machine data to set the access level as of which the "Calibrate
probe" softkey is displayed. This requires that the automatic tool measurement is enabled using
the setting data SD54782 (bit 2 = 1).
MD51070 $MNS_ACCESS_CAL_TOOL_PROBE
Calibrate tool probe access level.
= 7
Access rights: Access level 7 (keyswitch 0)
SINUMERIK Operate
488
Commissioning Manual, 12/2019, 6FC5397-1DP40-6BA3

Technologies and cycles
18.11 Measuring cycles and measurement functions
= 4
Read access rights: Access level 4 (keyswitch 3), default value
= 3
Write access: Access level 3 (user)
18.11.3.4
Measuring without electronic probe in JOG
Measure workpiece
For manual measuring functions in the JOG operating mode, for which a rotating spindle is
required, the following applies:
● The channel state must be reset at the instant in time that the measured value is transferred.
● The spindle can be moved or positioned either using the T,S,M menu or using the bits in
DB3x.DBB30.
● The following preconditions apply when using the DB3x.DBB30 technology functions with
fixed speed:
Setting the machine data
MD10709 $MN_PROG_SD_POWERON_INIT_TAB [0] = 0
Setting data to be initialized
MD35035 $MA_SPIND_FUNCTION_MASK
Bit 4 = 0
Spindle functions
Bit 5 = 1
SD43200 $SA_SPIND_S
Speed setting value
Note
The entry in SD43200 $SA_SPIND_S is kept at power on.
With these settings, the spindle velocity for manual operation, which is set in SD41200
$SN_JOG_SPIND_SET_VELO, is no longer effective.
18.11.4
Measuring in the AUTOMATIC mode
Requirement
Software option
In order to use the "Measuring in AUTOMATIC" function, you require the software
option: "Measuring cycles"
You have already made the settings from Chapter "Measuring cycles and measurement
functions, general (Page 472)".
SINUMERIK Operate
Commissioning Manual, 12/2019, 6FC5397-1DP40-6BA3
489

Technologies and cycles
18.11 Measuring cycles and measurement functions
Workpiece measurement
Sequence in milling technology:
1. The probe has been selected in the tool list as type 7xx (probe).
2. The probe has been inserted in the tool spindle.
3. The probe is activated in the actual NC channel.
Sequence in turning technology:
1. Tool type 580 (3D probe, turning) is selected.
2. Tool is activated in the actual NC channel.
Tool measurement
To measure tools, an appropriate probe must be located in the machine space so that this can
be reliably and safely reached with a tool in the spindle.
The following tool types are supported with tool measurement:
● Milling technology: Tool types 1xx and 2xx
● Turning technology: Tool types 5xx, 1xx and 2xx
For the specified tool types, the tool lengths and the tool radii can be measured.
Channel-specific cycle setting data
Using the following channel-specific cycle setting data, you can adapt the workpiece and tool
measuring in the "Program" operating area to specific requirements. As a general rule, no
changes are required.
SD55613 $SCS_MEA_RESULT_DISPLAY
Selects the screen display of the measur-
ing result
= 0
No screen display of the measuring result (default value).
= 1
Screen display of the measuring result is displayed for 8 seconds.
= 3
The measuring cycle stops an internal machine data, the measuring result is statically dis-
played on the screen!
Continue with NC start, the measuring result screen is deselected.
= 4
The measuring result is only displayed on the screen for cycle alarms 61303, 61304, 61305,
61306.
Continue with NC start, the measuring result display on the screen is deselected.
SD55614 $SCS_MEA_RESULT_MRD
Setting of the program control of the measurement result dis-
play MRD
= 0
Switch off the measurement result display
= 1
Switch on the measurement result display
SINUMERIK Operate
490
Commissioning Manual, 12/2019, 6FC5397-1DP40-6BA3

Technologies and cycles
18.11 Measuring cycles and measurement functions
SD55623 $SCS_MEA_EMPIRIC_VALUE[n]
Empirical values
= 0
Default value
SD55618 $SCS_MEA_SIM_ENABLE
Measuring cycle simulation
= 0
When calling measuring cycles in conjunction with SINUMERIK Operate, ShopMill or Shop-
Turn simulation, the measuring cycles are skipped, default value.
= 1
Default setting:
When calling measuring cycles in conjunction with SINUMERIK Operate, ShopMill or Shop-
Turn simulation, the measuring cycles are run through. However, no corrections are performed
and there is no logging. There is no screen display of the measuring result.
Additional information
Additional information on SD55618 is provided in the
Programming Manual Measuring Cycles
Configuring input screens for measuring cycles in the program editor
Using the following setting data, you configure the display screen and the correction options
when making measurements in the AUTOMATIC mode:
● SD54760 $SNS_MEA_FUNCTION_MASK_PIECE measure workpiece: Measuring cycles
in the milling area, see Chapter "Measuring workpieces, general (Page 491)"
● SD54762 $SNS_MEA_FUNCTION_MASK_TOOL measure tool: Measuring cycles in the
milling area, see Chapter "Measuring tools at the milling machines (Page 495)"
Note
If you have created the prerequisites described in this chapter and you have set and checked
the machine/setting data, you can perform measurements at the machine with a workpiece or
tool probe in the AUTOMATIC mode!
If you wish to set up workpiece measurement on a turning machine, then additional settings are
required. Refer to Chapter "Measuring workpieces at the turning machines (Page 501)" for the
settings.
If you wish to set-up tool measurement using a tool probe, then you must also make additional
settings. Please refer to Chapters "Measuring tools at the turning machines (Page 502)" or
"Measuring tools at the milling machines (Page 495)" for the settings.
A description is provided in the following chapters as to which settings you can make in order
to adapt measuring to the specific requirements of your particular machine.
18.11.4.1
Measuring workpieces, general
Using the following general and channel-specific cycle setting data, you can appropriately
adapt workpiece measurement to the specific requirements in the "Program" operating area.
SINUMERIK Operate
Commissioning Manual, 12/2019, 6FC5397-1DP40-6BA3
491
Technologies and cycles
18.11 Measuring cycles and measurement functions
Requirement
You have already made the settings from the Chapter "Measuring cycles and measurement
functions, general (Page 472)".
Settings
General cycle setting data
SD54760 $SNS_MEA_FUNCTION_MASK_PIECE
Settings for the input screen, measuring
cycles in AUTOMATIC, workpiece meas-
urement.
Bit 1
Display select softkey 3D measurement
Bit 3
Enable probe calibration field to be selected
Bit 4
Select calibration input measuring feed 1)
Bit 6
Enable NP correction in the basis reference (SETFRAME) to be selected
Bit 7
Enable NP correction in channel-specific basic frame to be selected
Bit 8
Enable NP correction in global basic frame to be selected
Bit 9
Enable NP correction in adjustable frame to be selected
Bit 10
Enable NP correction coarse and fine to be selected
Bit 11
Select tool offset, geometry and wear
Bit 12
Select tool offset, not inverted and inverted
Bit 13
Select tool offset L1, R or L1, L2, L3 R
Bit 14
Select tool offset, zero offset (_TZL)
Bit 15
Select tool offset, dimensional difference monitoring (_TDIF)
Bit 16
Select workpiece measurement with spindle reversal
Bit 17
Selects align workpiece probe in the switching direction
Bit 18
Select number of measurements (_NMSP)
Bit 19
Select offset with mean value generation (_TMV) 1)
Bit 20
Select experience values (_EVNUM)
Bit 21
Select total setting-up offset
Bit 22
Select calibration to unknown or to known center point
Bit 24
Select calibration with/without position deviation
Bit 25
Select zero offset when measuring the angulation of the spindle
Bit 26
Selects tool offset, do not enable
Bit 27
Selects measure tolerance of the linear vector for kinematics, do not enable
Bit 28
Enable tool offset adjust length to be selected
Channel-specific cycle setting data
SD55630 $SCS_MEA_FEED_MEASURE
Measuring feedrate [mm/rev]
= 300
Measuring feedrate when calibrating the workpiece probe
SINUMERIK Operate
492
Commissioning Manual, 12/2019, 6FC5397-1DP40-6BA3

Technologies and cycles
18.11 Measuring cycles and measurement functions
Note
Measuring feedrate for workpiece measuring
All measuring cycles use the value saved in SD54611 $SNS_MEA_WP_FEED[n] as measuring
feedrate after the tool probe has been calibrated.
A different measuring feedrate can be assigned for each calibration field [n].
When calibrating the probe, either the measuring feedrate from SD55630
$SCS_MEA_FEED__MEASURE is used, or the measuring feedrate can be overwritten in the
input screen when calibrating. To do this, SD54760 MEA_FUNCTION_MASK_PIECE bit 4
must be set to 1.
SD55632 $SCS_MEA_FEED_RAPID_IN_PERCENT
Percentage reduction
= 50
Default value of the percentage reduction of the rapid traverse velocity for internal cycle
intermediate positioning without collision monitoring.
The setting of the channel-specific cycle setting data SD55600 SCS_MEA_COLLI-
SION_MONITORING must be = 0.
SD55634 $SCS_MEA_FEED_PLANE_VALUE
Feedrate of the intermediate positioning
in the working plane with active collision
monitoring.
= 1000
Default value
SD55636 $SCS_MEA_FEED_FEEDAX_VALUE
Feedrate of the intermediate positioning
in the infeed axis with active collision mon-
itoring.
= 1000
Default value
SD55638 $SCS_MEA_FEED_FAST_MEASURE
Fast measuring feedrate
= 900
Default value
SD55640 $SCS_MEA_FEED_CIRCLE
Feedrate with circle programming
= 1000
Default value
SINUMERIK Operate
Commissioning Manual, 12/2019, 6FC5397-1DP40-6BA3
493

Technologies and cycles
18.11 Measuring cycles and measurement functions
SD55642 $SCS_MEA_EDGE_SAVE_ANG
Safety angle when measuring a corner
(CYCLE961)
= 0
Degrees
This angle is added to the angle that the user entered between the workpiece reference edge and the 1st
axis of the active coordinate system in a positive direction, and refers to the corner measurement in the
automatic mode (CYCLE961).
The angle of the user specifications is designated "α0" in the parameterization screen corner
measurement. For compatibility programs, the designation is _STA1.
Notice:
For compatibility programs, $SCS_MEA_EDGE_SAVE_ANG should be set = 10.
18.11.4.2
Measuring workpieces at the milling machines
Measuring in the "Program" operating area can be adapted corresponding to the specific
requirements using the channel-specific cycle setting data.
Settings
SD55625 $SCS_MEA_AVERAGE_VALUE[n]
Number of mean values.
= 0
Default value
The following cycle setting data are written to by the measuring cycles with the "Calibrate
probe" measuring function. User parameterization is not necessary here. However, after the
probe has been calibrated, you can check these values and if required, evaluate the probe
quality, e.g. for position deviations, no values > 0.1 mm should be reached. Otherwise, the
probe must be mechanically readjusted.
The measuring feedrate at the time of calibration is used for all subsequent applications of the
measuring cycles.
Note
Observe the manufacturer's instructions for the probe.
SD54600 $SNS_MEA_WP_BALL_DIAM[n]
Effective diameter of the probe ball of the
workpiece probe.
SD54601 $SNS_MEA_WP_TRIG_MINUS_DIR_AX1[n]
Trigger point, minus direction,
1st measuring axis in the plane.
SD54602 $SNS_MEA_WP_TRIG_PLUS_DIR_AX1[n]
Trigger point, plus direction,
1st measuring axis in the plane.
SD54603 $SNS_MEA_WP_TRIG_MINUS_DIR_AX2[n]
Trigger point, minus direction,
2nd measuring axis in the plane.
SD54604 $SNS_MEA_WP_TRIG_PLUS_DIR_AX2[n]
Trigger point, plus direction,
2nd measuring axis in the plane.
SD54605 $SNS_MEA_WP_TRIG_MINUS_DIR_AX3[n]
Trigger point, minus direction,
3rd measuring axis in the tool direction.
SINUMERIK Operate
494
Commissioning Manual, 12/2019, 6FC5397-1DP40-6BA3

Technologies and cycles
18.11 Measuring cycles and measurement functions
SD54606 $SNS_MEA_WP_TRIG_PLUS_DIR_AX3[n]
Trigger point, plus direction,
3rd measuring axis opposite to the tool
direction. In the default case = 0.
SD54607 $SNS_MEA_WP_POS_DEV_AX1[n]
Position deviation,
1st measuring axis in the plane.
SD54608 $SNS_MEA_WP_POS_DEV_AX2[n]
Position deviation,
2nd measuring axis in the plane.
SD54609 $SNS_MEA_WP_STATUS_RT
Calibration status of the axis positions
SD54610 $SNS_MEA_WP_STATUS_GEN[n]
Calibration status
SD54611 $SNS_MEA_WP_FEED[n]
Measuring feedrate when calibrating
18.11.4.3
Measuring tools at the milling machines
Settings
SD54762 $SNS_MEA_FUNCTION_MASK_TOOL
Setting for the input screen, measuring
cycles in the automatic mode, tool meas-
urement
Bit 3
Setting for the input screen, measuring cycles in the automatic mode, tool measurement,
enable tool probe calibration data field to be selected
Bit 4
Select calibration input measuring feed (VMS) 1)
Bit 5
Select input feedrate and spindle speeds when probing
Bit 7
Select measurement in MCS and WCS
Bit 8
Select measurement, absolute and incremental
Bit 9
Select tool offset, geometry and wear
Bit 10
Select individual cutting edge measurement
Bit 11
Selects spindle reversal when calibrating in the plane
Bit 12
Select number of measurements (_NMSP)
Bit 13
Select experience values (_EVNUM)
1)
Input, measurement feedrate is valid for AUTOMATIC and JOG
SD55634 $SCS_MEA_FEED_PLANE_VALUE
Feedrate of the intermediate positioning
in the working plane with active collision
monitoring.
= 1000
Default value
SD55636 $SCS_MEA_FEED_FEEDAX_VALUE
Feedrate of the intermediate positioning
in the infeed axis with active collision mon-
itoring.
= 1000
Default value
SINUMERIK Operate
Commissioning Manual, 12/2019, 6FC5397-1DP40-6BA3
495

Technologies and cycles
18.11 Measuring cycles and measurement functions
Calibration data of the tool probe, referred to the machine coordinate system
Before calibration is started, the position of the tool probe in the machine coordinate system
(MCS) must be entered into the following general cycle setting data. In this case, the reference
point is the outer diameter or the tool length of the active tool in the spindle. If there is no tool
in the spindle, the reference points are the spindle center point and the tool reference point at
the spindle.
Note
Calibrate probe
If you have calibrated the tool probe in JOG mode, then the calibration data has already been
correctly entered in: SD54632 $SNS_MEA_TP_AX_DIR_AUTO_CAL[k]
You do not need to recalibrate the tool probe in the AUTOMATIC mode.
Index [k] stands for the number of the actual data field (probe number -1).
SD54625 $SNS_MEA_TP_TRIG_MINUS_DIR_AX1[k]
Trigger point of the 1st measuring axis in
the negative direction.
SD54626 $SNS_MEA_TP_TRIG_PLUS_DIR_AX1[k]
Trigger point of the 1st measuring axis in
the positive direction.
SD54627 $SNS_MEA_TP_TRIG_MINUS_DIR_AX2[k]
Trigger point of the 2nd measuring axis in
the negative direction.
SD54628 $SNS_MEA_TP_TRIG_PLUS_DIR_AX2[k]
Trigger point of the 2nd measuring axis in
the positive direction.
SD54629 $SNS_MEA_TP_TRIG_MINUS_DIR_AX3[k]
Trigger point of the 3rd measuring axis in
the negative direction.
SD54630 $SNS_MEA_TP_TRIG_PLUS_DIR_AX3[k]
Trigger point of the 3rd measuring axis in
the positive direction.
SD54631 $SNS_MEA_TP_EDGE_DISK_SIZE[k]
Tool probe, edge length / disk diameter.
SD54632 $SNS_MEA_TP_AX_DIR_AUTO_CAL[k]
Axes and directions for calibrating in AU-
TOMATIC mode.
SD54634 $SNS_MEA_TP_CAL_MEASURE_DEPTH[k]
Distance between the upper edge of the
tool probe and lower edge of the tool (cal-
ibration depth, measuring depth for mill-
ing radius).
SD54635 $SNS_MEA_TPW_STATUS_GEN[k]
Calibration status
SD54636 $SNS_MEA_TPW_FEED[k]
Measuring feedrate when calibrating
The general cycle setting data SD54632 $SNS_MEA_TP_AX_DIR_AUTO_CAL, is used to
define in which axes and directions it is possible to calibrate the tool probe.
Decimal place
ONES
1st axis
= 0
axis not possible
= 1
only minus direction
= 2
only plus direction
= 3
both directions
TENS
2nd axis
SINUMERIK Operate
496
Commissioning Manual, 12/2019, 6FC5397-1DP40-6BA3

Technologies and cycles
18.11 Measuring cycles and measurement functions
Decimal place
= 0
axis not possible
= 1
only minus direction
= 2
only plus direction
= 3
both directions
HUNDREDS
3rd axis
= 0
axis not possible
= 1
only minus direction
= 2
only plus direction
= 3
both directions
Example
If the general cycle machine data SD54632 $SNS_MEA_TP_AX_DIR_AUTO_CAL has the
value 123, the tool probe is calibrated as follows in the G17 plane:
● X in both directions
● Y only in plus direction
● Z only in minus direction
SD54633 $SNS_MEA_TP_TYPE[k]
Probe version
= 0
Compatibility (measuring cycles: cube, turning surface shows probe, milling surface shows
disk)
= 101
Disk in XY, working plane G17.
= 201
Disk in ZX, working plane G18.
= 301
Disk in YZ, working plane G19.
= 2
Probe
= 3
Cube
Calibration data of the tool probe referred to the workpiece coordinate system
Before calibration is started, the position of the tool probe in the workpiece coordinate system
(WCS) must be roughly entered into the following general cycle setting data. In this case, the
reference point is the outer diameter or the tool length of the active tool in the spindle. If there
is no tool in the spindle, the reference points are the spindle center point and the tool reference
point at the spindle.
Note
When measuring tools, ensure that the data of the adjustable work offset or the basic reference
always correspond to the data when calibrating (measuring in WCS!).
Always make measurements and calibrate with the same adjustable work offset.
SINUMERIK Operate
Commissioning Manual, 12/2019, 6FC5397-1DP40-6BA3
497

Technologies and cycles
18.11 Measuring cycles and measurement functions
SD54640 $SNS_MEA_TPW_TRIG_MINUS_DIR_AX1[k]
Trigger point of the 1st measuring axis
in the negative direction.
SD54641 $SNS_MEA_TPW_TRIG_PLUS_DIR_AX1[k]
Trigger point of the 1st measuring axis
in the positive direction.
SD54642 $SNS_MEA_TPW_TRIG_MINUS_DIR_AX2[k]
Trigger point of the 2nd measuring axis
in the negative direction.
SD54643 $SNS_MEA_TPW_TRIG_PLUS_DIR_AX2[k]
Trigger point of the 2nd measuring axis
in the positive direction.
SD54644 $SNS_MEA_TPW_TRIG_MINUS_DIR_AX3[k]
Trigger point of the 3rd measuring axis
in the negative direction.
SD54645 $SNS_MEA_TPW_TRIG_PLUS_DIR_AX3[k]
Trigger point of the 3rd measuring axis
in the positive direction.
SD54646 $SNS_MEA_TPW_EDGE_DISK_SIZE[k]
Tool probe, edge length / disk diameter.
SD54647 $SNS_MEA_TPW_AX_DIR_AUTO_CAL[k]
Automatic calibration of tool probe, en-
able axes/directions
SD54648 $SNS_MEA_TPW_TYPE[k]
Probe version
= 0
Compatibility (measuring cycles: cube, turning surface shows probe, milling surface shows
disk)
= 101
Disk in XY, working plane G17.
= 201
Disk in ZX, working plane G18.
= 301
Disk in YZ, working plane G19.
= 2
Probe
= 3
Cube
SD54649 $SNS_MEA_TPW_CAL_MEASURE_DEPTH[k]
Distance between the upper edge of
the tool probe and lower edge of the
tool (calibration depth, measuring
depth for milling radius).
SD54650 $SNS_MEA_TPW_STATUS_GEN[k]
Calibration status
SD54651 $SNS_MEA_TPW_FEED[k]
Measuring feedrate when calibrating
The following general cycle setting data SD54647 $SNS_MEA_TPW_AX_DIR_AUTO_CAL is
used to define in which axes and directions it is possible to calibrate a tool probe.
Decimal place
ONES
1st axis
= 0
axis not possible
= 1
only minus direction
= 2
only plus direction
= 3
both directions
TENS
2nd axis
= 0
axis not possible
= 1
only minus direction
= 2
only plus direction
= 3
both directions
HUNDREDS
3rd axis
= 0
axis not possible
= 1
only minus direction
SINUMERIK Operate
498
Commissioning Manual, 12/2019, 6FC5397-1DP40-6BA3

Technologies and cycles
18.11 Measuring cycles and measurement functions
Decimal place
= 2
only plus direction
= 3
both directions
Example
If the general cycle machine data SD54647 $SNS_MEA_TPW_AX_DIR_AUTO_CAL has the
value 123, the tool probe is calibrated as follows in the G17 plane:
● X in both directions
● Y only in plus direction
● Z only in minus direction
Monitoring when measuring with a rotating spindle
SD54670 $SNS_MEA_CM_MAX_PERI_SPEED[0]
Maximum permissible peripheral
speed of the tool to be measured.
= 100
Default value
SD54671 $SNS_MEA_CM_MAX_REVOLUTIONS[0]
Maximum permissible tool speed of the
tool to be measured. The speed is au-
tomatically reduced when exceeded.
= 1000
Default value
SD54672 $SNS_MEA_CM_MAX_FEEDRATE[0]
Maximum permissible feedrate to
probe the tool to be measured at the
probe.
= 20
Default value
SD54673 $SNS_MEA_CM_MIN_FEEDRATE[0]
Minimum feedrate for the first probing
of the tool to be measured at the probe.
This avoids excessively small fee-
drates for large tool radii.
= 1
Default value
SD54674 $SNS_MEA_CM_SPIND_ROT_DIR[0]
Spindle direction of rotation to measure
tools.
4 = M4
Default value
Note
If the spindle is already rotating when the measuring cycle is called, this direction of rotation
remains independent of the setting of this data.
SINUMERIK Operate
Commissioning Manual, 12/2019, 6FC5397-1DP40-6BA3
499

Technologies and cycles
18.11 Measuring cycles and measurement functions
SD54675 $SNS_MEA_CM_FEEDFACTOR_1[0]
Feedrate factor 1
= 10
Default value
= 0
Only single probing with the feedrate calculated by the cycle. However, as a minimum, the
value from SD54673[0] $SNS_MEA_CM_MIN_FEEDRATE.
= ≥1
First probing with feedrate. However, as a minimum with the value from
SD54673[0] $SNS_MEA_CM_MIN_FEEDRATE)
SD54675[0] $SNS_MEA_CM_FEEDFACTOR_1
SD54676 $SNS_MEA_CM_FEEDFACTOR_2[0]
Feedrate factor 2
= 0
Second probing with the feedrate calculated by the cycle. This is only effective for
SD54673 $SNS_MEA_CM_FEEDFACTOR_1[0] > 0, default value.
= ≥1
Second probing with the calculated feedrate from SD54673 $SNS_MEA_CM_MIN_FEE-
DRATE[0] feedrate factor 2.
Third probing with the calculated feedrate.
Note
Feedrate factor 2 should be less than feedrate factor 1.
SD54677 $SNS_MEA_CM_MEASURING_ACCURACY[0]
Specified measuring accuracy.
The value of this parameter always
refers to the last probing of the tool at
the probe.
= 0.005
Default value
Measurement with rotating spindle: Measured value correction using correction tables
SD54691 $SNS_MEA_T_PROBE_OFFSET
Activates the measuring result cor-
rection
= 0
No data, default value
= 1
Correction in the cycle. This is only effective if SD54690 $SNS_MEA_T_PROBE_MANUFAC-
TURER>0.
= 2
Correction using user-defined correction table
SD54689 $SNS_MEA_T_PROBE_MANUFACTURER
Activate pre-configured compensation
tables for several tool probe models
(customer-specific).
= 0
No data, default value
= 1
TT130 (Heidenhain)
= 2
TS27R (Renishaw)
SINUMERIK Operate
500
Commissioning Manual, 12/2019, 6FC5397-1DP40-6BA3

Technologies and cycles
18.11 Measuring cycles and measurement functions
Correction values for users
If the general cycle setting data SD54691 $SNS_MEA_T_PROBE_OFFSET= 2, the following
settings apply:
SD54695 to SD54700
Correction values for radius meas-
See the subsequent general cycle
urement.
setting data.
SD54705 to SD54710
Correction values for length meas-
See the subsequent general cycle
urement.
setting data.
SD54695 $SNS_MEA_RESULT_OFFSET_TAB_RAD1[n]
Radius measurement
SD54705 $SNS_MEA_RESULT_OFFSET_TAB_LEN1[n]
Length measurement
= 0
0
= 1
1st radius
= 2
2nd radius
= 3
3rd radius
= 4
4th radius
18.11.4.4
Measuring workpieces at the turning machines
General settings for turning
MD52740 $MNS_MEA_FUNCTION_MASK
Measuring cycles function screen
Bit 1
Workpiece measurement, measuring in the third geometry axis (Y, when turning
= 0
The measuring cycles do not support a third geometry axis (Y axis)!
=1
Setpoint input and parameterization (SETVAL, _TUL, _TLL, SZO) refer to the third geometry
axis (Y axis). The correction of the tool length or zero offset is however realized in the second
geometry axis (X axis, ordinate) active components (i.e. measure in Y and correct in X). The
correction target can be influenced using parameter _KNUM!
Bit 16
Measuring input, tool probe
Calibration data of the tool probe, referred to the machine coordinate system
Before calibration is started, the position of the tool probe in the machine coordinate system
(MCS) must be entered into the following general cycle setting data.
SD54615 $SNS_MEA_CAL_EDGE_BASE_AX1[n]
Calibration slot base referred to the 1st
measuring axis.
SD54617 $SNS_MEA_CAL_EDGE_PLUS_DIR_AX1[n]
Calibration slot edge in the positive direc-
tion of the 1st measuring axis.
SD54618 $SNS_MEA_CAL_EDGE_MINUS_DIR_AX1[n]
Calibration slot edge in the negative di-
rection of the 1st measuring axis.
SD54619 $SNS_MEA_CAL_EDGE_BASE_AX2[n]
Calibration slot base referred to the 2nd
measuring axis.
SD54620 $SNS_MEA_CAL_EDGE_UPPERE_AX2[n]
Upper calibration slot edge referred to the
2nd measuring axis.
SINUMERIK Operate
Commissioning Manual, 12/2019, 6FC5397-1DP40-6BA3
501

Technologies and cycles
18.11 Measuring cycles and measurement functions
SD54621 $SNS_MEA_CAL_EDGE_PLUS_DIR_AX2[n]
Calibration slot edge in the positive direc-
tion of the 2nd measuring axis.
SD54622 $SNS_MEA_CAL_EDGE_MINUS_DIR_AX2[n]
Calibration slot edge in the negative di-
rection of the 2nd measuring axis.
Note
For a standard lathe with axes X and Z (G18), axis Z is the 1st measuring axis and axis X is the
2nd measuring axis.
18.11.4.5
Measuring tools at the turning machines
Calibration data of the tool probe referred to the machine coordinate system
If you wish to calibrate the tool probe in the machine coordinate system, then the position of the
tool probe in the machine coordinate system must be entered into the following general cycle
setting data.
SD54625 $SNS_MEA_TP_TRIG_MINUS_DIR_AX1[k]
Trigger point in minus direction of the
1st measuring axis (for G18 Z).
SD54626 $SNS_MEA_TP_TRIG_PLUS_DIR_AX1[k]
Trigger point in plus direction of the
1st measuring axis (for G18 Z).
SD54627 $SNS_MEA_TP_TRIG_MINUS_DIR_AX2[k]
Trigger point in minus direction of the
2nd measuring axis (for G18 X).
SD54628 $SNS_MEA_TP_TRIG_PLUS_DIR_AX2[k]
Trigger point in plus direction of the
2nd measuring axis (for G18 X).
Calibration data of the tool probe referred to the workpiece coordinate system
If you wish to calibrate the tool probe in the workpiece coordinate system, then the position of
the tool probe in the workpiece coordinate system must be entered into the following general
cycle setting data. In this case, the reference point is the outer diameter or the tool length of the
active tool in the spindle.
Index [k] stands for the number of the actual data field (probe number -1).
SD54640 $SNS_MEA_TPW_TRIG_MINUS_DIR_AX1[k]
Trigger point in minus direction of the
1st measuring axis (for G18 Z).
SD54641 $SNS_MEA_TPW_TRIG_PLUS_DIR_AX1[k]
Trigger point in plus direction of the
1st measuring axis (for G18 Z).
SD54642 $SNS_MEA_TPW_TRIG_MINUS_DIR_AX2[k]
Trigger point in minus direction of the
2nd measuring axis (for G18 X).
SD54643 $SNS_MEA_TPW_TRIG_PLUS_DIR_AX2[k]
Trigger point in plus direction of the
2nd measuring axis (for G18 X).
SINUMERIK Operate
502
Commissioning Manual, 12/2019, 6FC5397-1DP40-6BA3

Technologies and cycles
18.11 Measuring cycles and measurement functions
Tool measurement using the "Orientable tool holder" or "Swivel tool" function
If the general cycle machine data MD52740 $MNS_MEA_FUNCTION_MASK, bit 16 = 1, then
the following setting applies:
MD51618 $MNS_MEA_CM_ROT_AX_POS_TOL
Tolerance parameter for rotary axis set-
tings
= 0.5
Default value
The real angular position of rotary axes can deviate from that programmed (exact stop fine
window) This deviation depends on the position control properties of the axis. The maximum
deviation that can be expected at a specific axis should be entered into the parameter. When
the tolerance is exceeded, Alarm 61442 is output - "Tool holder not parallel to the geometry
axes".
18.11.4.6
Simultaneous measurement on double spindles
Requirement
Software option
To use the "Simultaneous measurement", you require the software option: "Meas-
urement level 2"
Checking and setting the general machine data
MD51740 $MNS_MEA_FUNCTION_MASK
Measuring cycles function screen
Bit 14
Workpiece, simultaneous measurement function active
= 0
Simultaneous measurement function for double-spindle machine not active
= 1
Simultaneous measurement function for double-spindle machine active
MD18660 $MN_MM_NUM_SYNACT_GUD_REAL[0]
Number of configurable real-type GUD var-
iables
= 2
Minimum value
General cycle setting data
SD54740 $SNS_MEA_FUNCTION_MASK
Measuring cycles function screen
Bit 3 = 0
Do not take the calibrated radius of the workpiece probe over into the tool data
SD54760 $SNS_MEA_FUNCTION_MASK_PIECE
Setting for the input screen, measuring cy-
cles in automatic mode, workpiece meas-
urement.
Bit 3 = 1
Enable probe calibration data field to be selected
Bit 6 = 0
Enable selection of WO correction in the basis reference
SINUMERIK Operate
Commissioning Manual, 12/2019, 6FC5397-1DP40-6BA3
503

Technologies and cycles
18.11 Measuring cycles and measurement functions
Bit 7 = 0
Enable selection of WO correction in the channel-specific basic WO
Bit 8 = 0
Enable selection of WO correction in the global basic WO
Bit 9 = 0
Enable selection of WO correction in the work offset
Bit 26 = 0
Do not enable selection of the tool offset
Bit 28 = 1
Enable selection of adapt tool length
SD54780 $SNS_J_MEA_FUNCTION_MASK_PIECE
Setting for the workpiece measurement in
JOG input screen.
Bit 3 = 1
Enable probe calibration data field to be selected
Bit 28 = 1
Enable selection of adapt tool length
18.11.5
Logging
18.11.5.1
Logging the measuring, general
General logging can be performed without special settings:
● In the passive file system of the NC
● On the local drive of the CF card
If you want to use a logical drive for the logging, you require the Execution from External
Storage (EES) function.
Additional information
A detailed description of the EES function is provided in the
Function Manual Basic Functions.
General machine data
Logging can be controlled via the following machine data settings:
MD11420 $MN_LEN_PROTOCOL_FILE
File size for log files (KB)
≥ 20
recommended value
Increase the value of machine data MD11420 if larger log files have to be stored in the file
system of the NC.
MD11422 $MN_PROTOCOL_FILE_MODE
Setting the behavior of the WRITE com-
mand
Bit 0
Persistence behavior
= 0
time-delayed WRITE command (immediately persistent)
= 1
= fast WRITE command (time-delayed persistent)
SINUMERIK Operate
504
Commissioning Manual, 12/2019, 6FC5397-1DP40-6BA3

Technologies and cycles
18.11 Measuring cycles and measurement functions
Note
Set MD11422 bit 0 = 1 so that the program runtimes are not lengthened significantly.
18.11.5.2
Logging while measuring in the JOG mode
You can set the following setting data in the "Settings for Measurement Log" window for the
JOG mode.
Additional information
Additional information about the setting procedure is provided in the
Operating Manual Turning/Milling/Grinding.
Cycle channel setting data
SD55774 $SCS_J_MEA_PROTOCOL_FILE
Name and path for the log file for measuring in JOG
//NC:/WKS.DIR/TEMP.WPD/J_MEAPROT.TXT
Default setting
SD55740 $SCS_MEA_FUNCTION_MASK
Measuring cycles function screen, workpiece/tool
measurement
Bit 28
Select new log or continuos log for measuring standard log in JOG
= 0
New log (default value)
= 1
Continuous, i.e. always attach to the existing log
Bit 29
Select file format for measuring standard log in JOG
= 0
Text format (default value)
= 1
Tabular format
18.11.5.3
Logging while measuring in the AUTOMATIC mode
Cycle channel setting data
SD55730 $SCS_MEA_PROTOCOL_USER_EXT
File extension for user log
TXT
Default setting
SD55614 $SCS_MEA_RESULT_MRD
Setting of the program control of the measurement
result display MRD
= 0
Switch off the measurement result display
= 1
Switch on the measurement result display (default value)
SINUMERIK Operate
Commissioning Manual, 12/2019, 6FC5397-1DP40-6BA3
505

Technologies and cycles
18.11 Measuring cycles and measurement functions
Definition file: User GUD block
Data for user logs are generally logged from the S_PROTTXT[10] GUD array (PGUD).
If the data array is not sufficient, you can create a second array with the predefined name
S_USERTXT[n] in a separate GUD block (e.g. MGUD or UGUD):
DEF NCK STRING[200] S_USERTXT[n]
; n = number of field elements
Note
The logging operation checks whether the S_USERTXT array is available. If S_USERTXT is
available, the content of the array is logged. If S_USERTXT is not available, the content of the
S_PROTTXT array is logged.
18.11.5.4
Manufacturer and user cycle CUST_MEAPROT.SPF
Function
You can make individual adaptations to the log form and content in the CUST_MEAPROT cycle.
Procedure
1. Open the CUST_MEAPROT.SPF cycle file.
2. Select the program lines in the _MARK1 block.
3. Copy the contents from the _MARK1 block to the _MARK2 block.
4. Adapt the parameters individually in the _MARK2 block.
5. Save the changed cycle file.
The original default values are retained and can be activated/deactivated at any time
(setting of comment characters).
Parameter
In the CUST_MEAPROT cycle, all the possible parameter changes are described in detail in
the _MARK2_1 block.
You can adapt the following parameters:
Parameter
Default value
Input area
Characters per line
66
> 66 possible (1
Characters per column 2 to 4
14
Min. 12, max. 14
Workpiece counter
""
Identifier
Column space
" "
Blank string (≥ 2 * blanks)
Identifier for tolerance specifica-
"#"
1 character
tion
SINUMERIK Operate
506
Commissioning Manual, 12/2019, 6FC5397-1DP40-6BA3
Technologies and cycles
18.12 Compare cycles version
Parameter
Default value
Input area
Identifier for tolerance violation
"!"
1 character
Log header lines 5 to 7
""
Any text
1)
66 characters per line correspond to the screen width in the default setting. A log line is therefore
displayed completely on the screen. If logging is mainly performed in the file system of the NC, this
setting should be retained because of the better readability. If you perform logging mainly in external
files, you can increase the line width accordingly. In this case, the width of column 1 is increased
automatically (with the same width for columns 2, 3 and 4 and the same column space).
18.12
Compare cycles version
18.12.1
Display cycles version
If cycles have version details, you can display them in the version screen.
Precondition
The version details are included in the cycles files in the following form:
;VERSION: <Version> ;DATE: <YYYY-MM-DD>
SINUMERIK Operate
Commissioning Manual, 12/2019, 6FC5397-1DP40-6BA3
507
Technologies and cycles
18.12 Compare cycles version
Example:
;VERSION: 05.05.05.00 ;DATE: 2012-11-30
Procedure
1.
Select the "Diagnostics" operating area.
2.
Press the "Version" softkey.
It takes some time to call the version display. While the version data is
being determined a progress message box and the appropriate text are
displayed in the dialog line.
3.
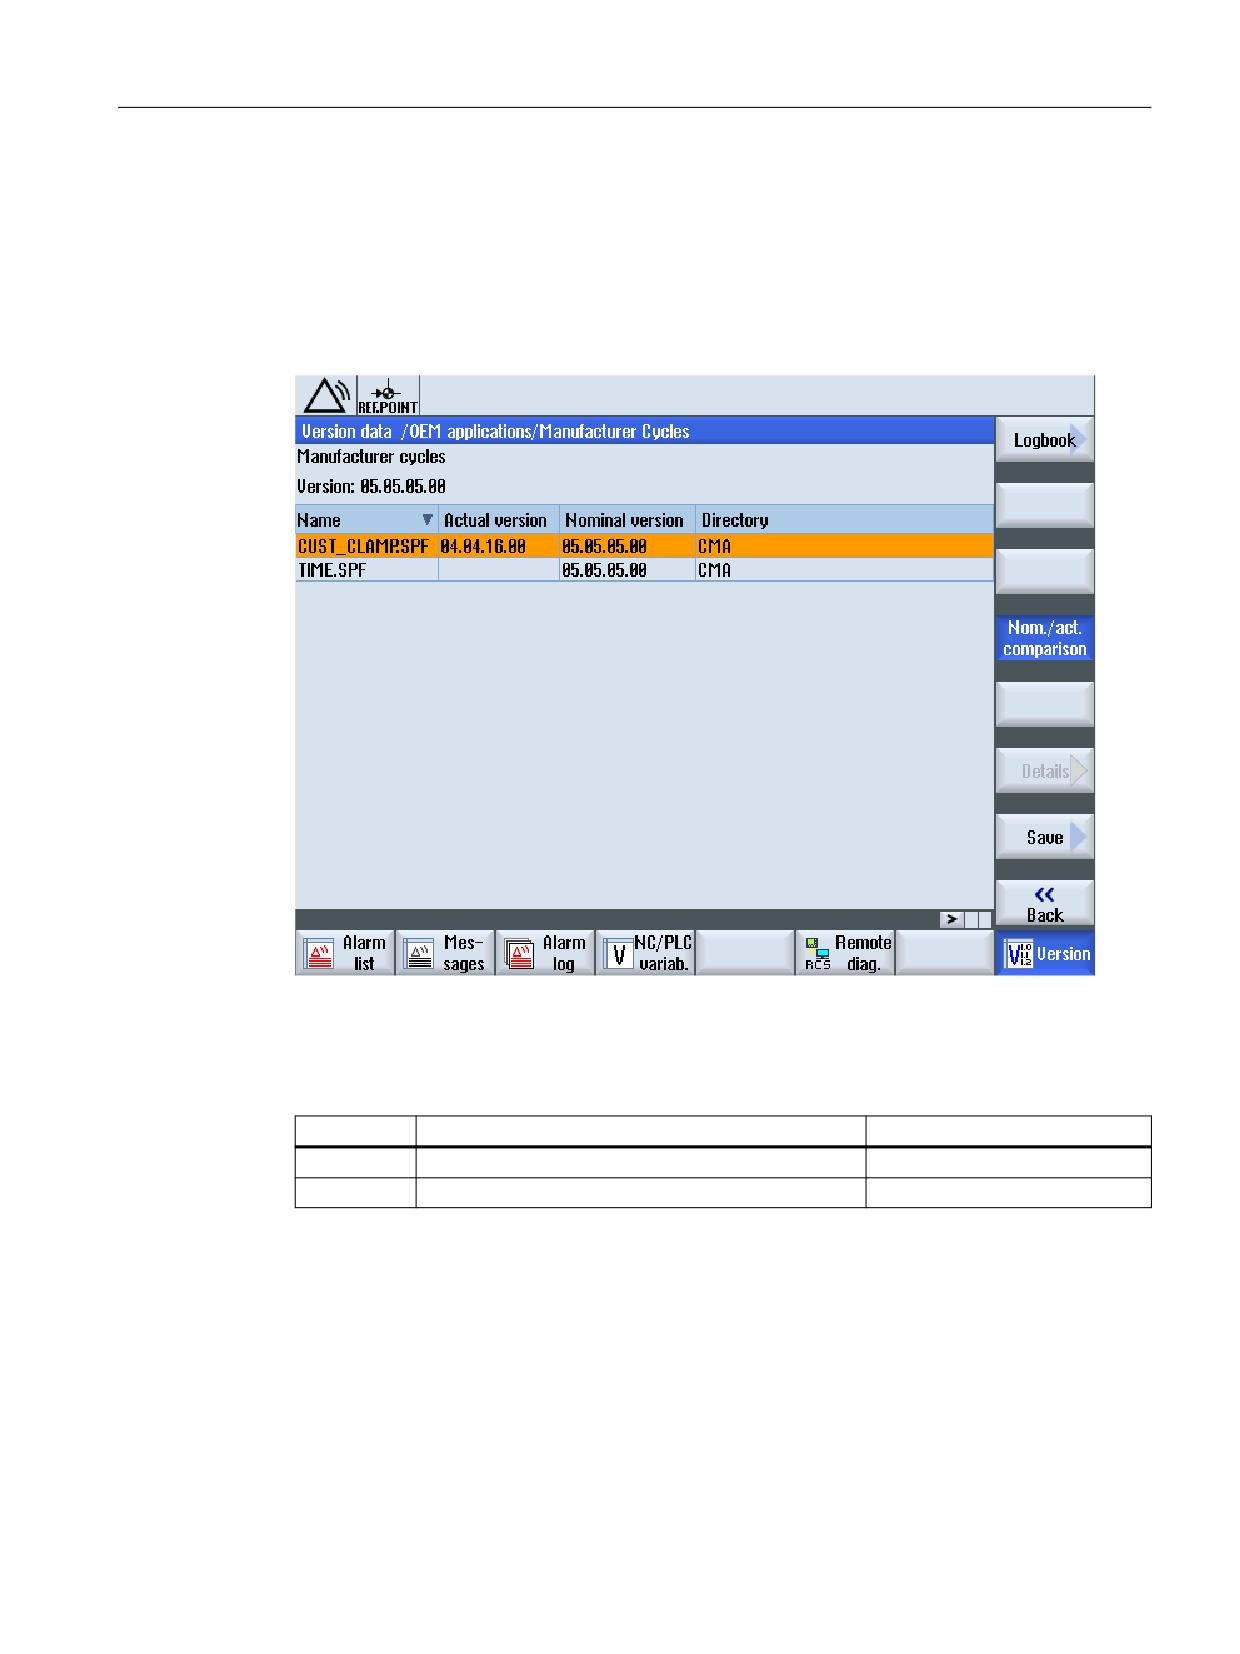
Select the "OEM applications /manufacturer cycles" areas and press the
"Details" softkey.
The "Manufacturer Cycles" window opens.
The "Planned-actual comparison" softkey is selected by default.
See also
Save information (Page 282)
Logbook (Page 285)
SINUMERIK Operate
508
Commissioning Manual, 12/2019, 6FC5397-1DP40-6BA3
Technologies and cycles
18.12 Compare cycles version
18.12.2
Specify cycles version
General
You have the possibility to compare a required cycles version with the existing cycles version
in the version view.
File overview
The following files are required:
Name
Path
Meaning
versions.xml
/siemens/sinumerik/hmi/data/version/oem/cma
Version file
versions.xml
/oem/
Version path file
Adapting the version file
The cycles version specification requires a manual adaptation of the version file.
1. Copy the "versions.xml" sample file from the following directory:
/siemens/sinumerik/hmi/data/version/oem/cma
2. Save the sample file in its own directory under /oem.
The standard directory for this purpose is /oem/sinumerik/hmi/data/version/oem/cma.
3. Open the file.
SINUMERIK Operate
Commissioning Manual, 12/2019, 6FC5397-1DP40-6BA3
509
Technologies and cycles
18.12 Compare cycles version
4. Enter the planned version for the cycles files in the <info> tag with "defaultFileVersion" and
the details for the complete version in the <Version> tag.
5. Close the file to save the changes.
Example:
<info defaultFileType=" *.spf *.cpf" defaultFileVersion="05.05.00.00"
linkname="CMA" linkpath="//NC/CMA.DIR" EffDirOrder="CUS CMA">
<Name>Manufacturer cycles</Name>
<Version>5.5.0.0</Version>
<Link>
<Name>CUS</Name>
<Path>//NC/CUS.DIR</Path>
</Link>
</info>
Adapting the version path file
If the version file is saved in the standard directory, and a current oem\versions.xml is available,
no changes are required. In all other cases, the path data can be manually changed:
1. Open the versions.xml file under /oem
2. Replace the standard path in the <Path> tag for the "Manufacturers Cycles" with your own
path for the version file.
3. Close the file to save the changes.
Standard:
<Component>
<Name>Manufacturer Cycles</Name>
<Path>/siemens/sinumerik/hmi/data/version/oem/cma</Path>
</Component>
Example:
<Component>
<Name>Manufacturer Cycles</Name>
<Path>/oem/sinumerik/hmi/data/version/oem/cma</Path>
</Component>
SINUMERIK Operate
510
Commissioning Manual, 12/2019, 6FC5397-1DP40-6BA3
Additional language
19
19.1
Installing additional languages
Additional languages
In addition to the already existing standard languages, additional user interface languages are
available on a separate DVD.
The integrated online help is either displayed in the relevant language of the country or in
English.
Refer to Section "Supported languages (Page 512)" to view the languages in which this
interface is available.
Requirement
Software option
You require the following software option in order to use this function:
"Additional languages"
● After the installation, approx. 256 MB memory must be available on the CompactFlash Card.
● Language extension software "hmi_sl_language_xxx_02.06.00.00.00y.arc".
xxx = language code, y = internal version ID
Is supplied on the language extension DVD.
Installing a language
Install the language the same as for a commissioning archive (ARC). For the procedure, please
refer to Section "Reading-in a start-up archive (Page 207)".
Note
Language extensions software of the previous version is compatible with the current operating
software.
SINUMERIK Operate
Commissioning Manual, 12/2019, 6FC5397-1DP40-6BA3
511
Additional language
19.3 Supported languages
19.2
Uninstalling languages
If you no longer require a language interface, then you can uninstall this.
Note
Standard languages and the currently active language for the operating software cannot be
uninstalled.
Procedure
1.
Select the "Startup" operating area.
2.
Press the "Change language" softkey.
The "Language selection" window opens. The language most recently
set is highlighted.
3.
Switch the cursor to the required language.
4.
Press the "Delete language" softkey.
The "Delete language" window opens.
5.
Press the "OK" softkey.
The operating software uninstalls the selected language.
19.3
Supported languages
Table 19-1
Supported languages
Language
Language code
Standard languages
Chinese simplified
chs
X
Chinese (traditional)
cht
Danish
dan
German
eng
X
English
eng
X
Finnish
fin
French
fra
X
Indonesian
ind
Italian
ita
X
Japanese
jpn
Korean
kor
Malay
msl
Dutch
nld
Polish
plk
SINUMERIK Operate
512
Commissioning Manual, 12/2019, 6FC5397-1DP40-6BA3

Additional language
19.3 Supported languages
Language
Language code
Standard languages
Portuguese
ptb
Romanian
rom
Russian
rus
Swedish
sve
Slovenian
slv
Slovakian
sky
Spanish
esp
X
Thai
tha
Czech
csy
Turkish
trk
Hungarian
hun
Vietnamese
vit
SINUMERIK Operate
Commissioning Manual, 12/2019, 6FC5397-1DP40-6BA3
513
Additional language
19.3 Supported languages
SINUMERIK Operate
514
Commissioning Manual, 12/2019, 6FC5397-1DP40-6BA3
SINUMERIK Operate on PCU/IPC
20
20.1
Link OEMFrame application
Integrating an OEM application
The following files should be adapted and created in order to integrate an OEMFrame
application into the operating software:
● Configuration file "systemconfiguration.ini"
The operating software is started and controlled from the system manager; the system
manager also controls the OEMFrame applications. The system manager is configured
using the "systemconfiguration.ini" configuration file.
● Configuring the start softkey
In order to start an OEMFrame application from the operating software, configure a softkey
on the expansion bar of the operating area.
● Configuration file "slamconfig.ini"
In order to configure the softkey position with text and/or symbol for the OEMFrame
application, generate the "slamconfig.ini" file.
● Save the language-dependent text for a softkey in the file mytext_<Ing>.ts.
"systemconfiguration.ini" file
In order to integrate an OEMFrame application into the operating software, copy the
"systemconfiguration.ini" configuration file and place it in one of the two directories:
<Installation path>/user/sinumerik/hmi/cfg
<Installation path>/oem/sinumerik/hmi/cfg
All of the processes to be managed by the system manager, as well as the applications that are
to be integrated as OEMFrame applications are in the [processes] section.
Value
Meaning
process
Symbolic name of the OEMFrame application. This is required to configure the
operating areas.
cmdline
Command line which is transferred to the "oemframe.exe" process when starting.
oemframe
For OEMFrame applications, always set to "true".
windowname
Window name of the OEMFrame application - determined with "findwindow.exe".
classname
Class name of the OEMFrame application - determined with "findwindow.exe".
deferred
true: OEMFrame application is not started when SINUMERIK Operate powers
up, but only when selected for the first time.
SINUMERIK Operate
Commissioning Manual, 12/2019, 6FC5397-1DP40-6BA3
515

SINUMERIK Operate on PCU/IPC
20.1 Link OEMFrame application
Value
Meaning
startupTime
The linked process starts as follows:
immediately: immediately (default)
afterServices: after all services have started
afterGuis: after all GUI components have started
If SINUMERIK Operate is shut down, the process goes in reverse:
immediately: immediately (default)
afterServices: after all services have shut down
afterGuis: after all GUI components have shut down
gimmekeys
Release mask for system configuration keys that are to be handled by the OEM-
Frame application. The parameterization is performed in the form of a bit mask.
disablekeys
Parameterization for the keyboard filter behavior. The parameterization is per-
formed in the form of a bit mask.
menuselectkey
The value is used for changing the key that calls the operating area menu (default
F10). The value is a logically ORed combination of the modifications (Microsoft
definition) Key_Shift, Key_Alt, Key_Ctrl, and the virtual key code.
timeout
Maximum duration for the search for the OEMFrame application in milliseconds. If
the OEMFrame application was not found within this time, it is not managed by the
System Manager.
Default setting in the "systemconfiguration.ini" file:
[miscellaneous]
startTimeoutDefault
shutdowntime
Maximum duration for downloading the OEMFrame application in milliseconds. If
the OEMFrame application was not found after this period of time, the process is
canceled.
Default setting in the "systemconfiguration.ini" file:
[miscellaneous]
shutdownTimeoutDefault
Bit mask "gimmekeys"
The bit mask for an OEMFrame application is set to the binary value 0xF by default. All of the
key combinations from F1 to F8 are fed to the OEMFrame application. The OEMFrame
application itself can handle a specific key/key combination by setting additional bits.
Otherwise, the system configuration will evaluate the key/key combination and it will not even
reach the OEMFrame application.
You can parameterize the bit mask "gimmekeys" as follows:
Bit
Keys
Meaning
0
F1 - F8
Horizontal softkeys (upper bar, HU)
1
Shift+F1 - Shift+F8
Vertical softkeys (right bar, VR)
2
Ctrl+F1 - Ctrl+F8
Horizontal softkeys (lower bar, HL)
3
Shift+Ctrl+F1 - Shift+Ctrl+F8
Vertical softkeys (left bar, VL)
4
F9
Recall
5
Shift+F9
ETC switchover
6
F10
Operating area menu
7
Shift+F10
M key
SINUMERIK Operate
516
Commissioning Manual, 12/2019, 6FC5397-1DP40-6BA3

SINUMERIK Operate on PCU/IPC
20.1 Link OEMFrame application
Bit
Keys
Meaning
8
F11
Channel switchover key
9
Shift+F11
M key (hard key)
10
F12
Info/help
11
Shift+F12
Custom key (hard key)
12
ESC
Alarm cancel
13
HOME
Window switchover key
14
END
PROGRAM (hard key)
15
PAGE UP
ALARM (hard key)
16
PAGE DOWN
TOOL OFFSET (hard key)
17
HOME (NUMPAD)
PROGRAM MANAGER (hard key)
18
F13 - F20
Extended, horizontal softkeys (upper bar, HU)
19
Shift+F13 - Shift+F20
Extended, vertical softkeys (right bar, VR) and right direct
keys HT8
20
Ctrl+F13 - Ctrl+F20
Extended, horizontal softkeys (lower bar, HL)
21
Shift+Ctrl+F13 - Shift+Ctrl+F20
Extended, vertical softkeys (left bar, VL) and left direct keys
HT8
Bit mask "disablekeys"
The bit mask for an OEMFrame application is set to the binary value 0x3FFFF by default. Thus,
all of the keyboard sequences are filtered out and not forwarded to the OEMFrame application.
If a bit is set to 0, the keyboard filter for the corresponding sequence is deactivated and the
OEMFrame application is able to receive the keyboard sequence.
If, for example, an OEMFrame application is to receive all of the softkeys of left and bottom
softkey bar, set the "disablekeys" bit mask to the binary value 0x300FF.
You can parameterize the bit mask "disablekeys" as follows:
Bit
Keys
Meaning
0 - 7
Reserved
8
(Shift)+Ctrl+F1
Lower and left-hand softkey bar (HL, VL)
9
(Shift)+Ctrl+F2
Lower and left-hand softkey bar (HL, VL)
10
(Shift)+Ctrl+F3
Lower and left-hand softkey bar (HL, VL)
11
(Shift)+Ctrl+F4
Lower and left-hand softkey bar (HL, VL)
12
(Shift)+Ctrl+F5
Lower and left-hand softkey bar (HL, VL)
13
(Shift)+Ctrl+F6
Lower and left-hand softkey bar (HL, VL)
14
(Shift)+Ctrl+F7
Lower and left-hand softkey bar (HL, VL)
15
(Shift)+Ctrl+F8
Lower and left-hand softkey bar (HL, VL)
16
Reserved
17
Reserved
Bit mask "disablekeyshigh"
It may be necessary to map key sequences because the operating system already responds to
Ctrl-F4 and Ctrl-F6 in certain situations.
SINUMERIK Operate
Commissioning Manual, 12/2019, 6FC5397-1DP40-6BA3
517

SINUMERIK Operate on PCU/IPC
20.1 Link OEMFrame application
You can parameterize the bit mask "disablekeyshigh" as follows:
Bit
Meaning
0 - 28
Reserved
29
Key sequences Ctrl-F1 to Ctrl-F8 can be mapped onto key sequences Ctrl-F13 to Ctrl-F20.
30 - 31
Reserved
Note
The "gimmekeys", "disablekeys" and "disablekeyshigh" bit masks can be specified both with a
decimal code (e.g. 31) and a hexadecimal code (e.g. 0x1F).
Examples
Note
Write error
Avoid write errors. Determine the entries for the sections "processes" and "areas" only with the
FindWindow program.
"notepad.exe" and "calc.exe"
In the following example, the two Windows applications "notepad.exe" and "calc.exe" are
configured as OEMFrame applications:
[processes]
PROC500=process:=notepadOEM, cmdline:="C:\\WINDOWS\\system32\
\notepad.exe", oemframe:=true, deferred:=true,
windowname:="Untitled - Notepad", classname:="Notepad"
PROC501=process:=calcOEM, cmdline:="C:\\WINDOWS\\system32\
\calc.exe", oemframe:=true, deferred:=true,
windowname:="Calculator", classname:="SciCalc"
[areas]
AREA500=name:=AreaNote, process:=notepadOEM
AREA501=name:=AreaCalc, process:=calcOEM
"keycatcher.exe"
The Windows application "keycatcher.exe" is integrated in the following example. In this case,
all four softkey bars and the Recall key will reach the Windows application. The keyboard filter
for the lower and the left-hand softkey bar is deactivated:
[processes]
SINUMERIK Operate
518
Commissioning Manual, 12/2019, 6FC5397-1DP40-6BA3

SINUMERIK Operate on PCU/IPC
20.1 Link OEMFrame application
PROC500= process:=keycatcherOEM, cmdline:="keycatcher.exe",
oemframe:=true, deferred:=true, windowname:="keycatcher",
classname:="QWidget", gimmekeys:=0x1F, disablekeys:=0x300FF
[areas]
AREA500=name:=AreaKeyCatcher, process:= keycatcherOEM
The Windows application "keycatcher.exe" is integrated in the following example. In this case,
all four softkey bars and the F10 key will reach the Windows application. Press Ctrl+F12 to
show the operating area menu when a Windows application is displaying (the system
configuration no longer evaluates F10):
[processes]
PROC500= process:=keycatcherOEM, cmdline:="keycatcher.exe",
oemframe:=true, deferred:=true, windowname:="keycatcher",
classname:="QWidget", gimmekeys:=0x4F, disablekeys:=0x300FF,
menuselectkey:=Key_Control|0x7B
[areas]
AREA500=name:=AreaKeyCatcher, process:= keycatcherOEM
The Windows application "keycatcher.exe" is integrated in the following example. In this case,
all four softkey bars are fed to the Windows application. Key sequences Ctrl-F1 to Ctrl-F8 can
be mapped onto key sequences Ctrl-F13 to Ctrl-F20:
[processes]
PROC500= process:=keycatcherOEM, cmdline:="keycatcher.exe",
oemframe:=true, deferred:=true, windowname:="keycatcher",
classname:="QWidget", gimmekeys:=0xF, disablekeys:=0x300FF
[areas]
AREA500=name:=AreaKeyCatcher, process:= keycatcherOEM
The [areas] section
The SINUMERIK Operate operating areas are configured in this section.
Value
Meaning
name
Symbolic name for the operating area
process
Name of the OEMFrame application according to section [processes]
panel
Name of the panel (header) to be used
Only "SlHdStdHeaderPanel" is currently available for OEMFrame applications.
plcid
ID to identify the operating area using the SINUMERIK Operate monitor
Only values in the range of 150 to 199 are permitted.
SINUMERIK Operate
Commissioning Manual, 12/2019, 6FC5397-1DP40-6BA3
519

SINUMERIK Operate on PCU/IPC
20.1 Link OEMFrame application
NOTICE
Basic components are overwritten
If you use numbers less than 500, then it is possible that Siemens basis components will be
overwritten. In the "processes" and "areas" sections, the number range 500 - 999 is
permissible.
Example
[areas]
AREA600= name:=AreaOEM, process:=notepadOEM
AREA601= name:=AreaCalc, process:=calcOEM, panel:=SlHdStdHeaderPanel
Note
Only OEMFrame applications are supported that use programming interfaces of
SINUMERIK Operate.
The [miscellaneous] section
You can make various settings in this section. Generally, only the start operating area is
changed.
Key
Value
startuparea
Name of the start operating area
Example
[miscellaneous]
startuparea = AreaOEM
Configuring the operating area menu
The operating area menu is intended for switching over the operating areas configured in the
"systemconfiguration.ini" configuration file. A softkey for selecting the appropriate operating
area is provided on the horizontal softkey bar for each operating area configured.
The operating area displays the names of the operating areas from the
"systemconfiguration.ini" configuration file as the text on the operating area softkeys. The
system automatically searches for a free softkey on the horizontal softkey bar for each
operating area.
SINUMERIK Operate
520
Commissioning Manual, 12/2019, 6FC5397-1DP40-6BA3

SINUMERIK Operate on PCU/IPC
20.1 Link OEMFrame application
Configuring additional settings
In order to configure the following settings you require the "slamconfig.ini" configuration file:
● Assigning a softkey position to a specific operating area.
● Creating a language-dependent text for the softkey.
● Displaying a symbol for the operating area on the softkey.
Creating the "slamconfig.ini" configuration file
Copy the "slamconfig.ini" and place the file in the same directory in which the
"systemconfiguration.ini" file is located:
<Installation path>/user/sinumerik/hmi/cfg
<Installation path>/oem/sinumerik/hmi/cfg
"slamconfig.ini" file
In the "slamconfig.ini" configuration file, for every operating area, you can create a section that
was configured in the "systemconfiguration.ini" file. The section must bear the configured name
of the appropriate operating area, e.g. AreaOEM.
Value
Meaning
TextId
Text ID for a foreign-language text which will be displayed as the softkey label.
TextContext
Context of the foreign-language text.
TextFile
Name of the text file which includes the context and the foreign-language text.
Graphic
Name of an image file which will be used as an icon for the softkey.
SoftkeyPositi
Fixed softkey position of the area softkey. In this case, softkey positions 1 to 8 are
on
located on the 1st horizontal bar and softkey positions 9 to 16 on the 2nd horizontal
bar, etc.
AccessLevel
Access level from which the softkey will be displayed. If this value is not specified,
the access level 7 (keyswitch position 0) is set.
Example
The softkey for the "AreaOEM" operating area with the following properties is configured in the
following example:
● The softkey displays the text which has been stored in the "mytext_<lng>.ts" text file under
the context "mycontext" with the "MY_AREA" TextID.
● The "mypicture.png" icon is displayed on the softkey.
● The softkey is located at position 7 in the operating area menu.
● The softkey with access level 5 (keyswitch position 2) is displayed.
[AreaOEM]
; Text-ID of a language dependent text
TextId = MY_AREA
; File name of the text file which contains the Text-ID
SINUMERIK Operate
Commissioning Manual, 12/2019, 6FC5397-1DP40-6BA3
521

SINUMERIK Operate on PCU/IPC
20.1 Link OEMFrame application
TextFile = mytext
; Context in the text file to which the Text-ID is assigned to
TextContext = mycontext
; File name of an icon shown on the area softkey
Picture = mypicture.png
; Position of the area softkey on area menu,
; If no position is specified, an empty position is searched
SoftkeyPosition = 7
; Access level of the area softkey
AccessLevel = 5
Note
Operating area position 7 is reserved for OEM users.
Labeling text for the softkey
Storage path:
<Installation path>/user/sinumerik/hmi/lng
<Installation path>/oem/sinumerik/hmi/lng
The XML identifiers have the following meanings:
Attribute
Description
context
Context within the text file.
Each file must have at least one context.
name
Name of the context.
message
Text translation.
There must be at least one message per context.
source
Text identifier.
translation
Translated text.
remark
Text comment (optional).
chars
Maximum possible length of the text in characters. If nothing is specified, the
text can have any length (optional).
lines
Maximum number of lines available for display. If nothing is specified, the
number of lines is unlimited (optional).
Structure of the language-dependent ts file that contains the labeling text for the softkey:
mytext_<lng>.ts
<?xml version="1.0" encoding="utf-8" standalone="yes"?>
<!DOCTYPE TS>
SINUMERIK Operate
522
Commissioning Manual, 12/2019, 6FC5397-1DP40-6BA3

SINUMERIK Operate on PCU/IPC
20.2 Parameterizing the OEMFrame application
mytext_<lng>.ts
<TS>
<context>
<name>mycontext</name>
<message>
<source>MY_AREA</source>
<translation>Text, which is displayed on the softkey</translation>
<remark>comment (optional)</remark>
<chars>20</chars>
<lines>2</lines>
</message>
</context>
</TS>
<lng> stands for the language code.
20.2
Parameterizing the OEMFrame application
File "oemframe.ini"
Using the "oemframe.ini" file, it is possible to further parameterize OEMFrame applications.
Create the file in the following directory:
<Installation path>/compat/oem
Create a separate section with the required parameters for each OEMFrame application. Name
the section according to the corresponding program file without a filename extension. Place the
name in square brackets.
Example
[notepad]
Parameter overview
The following parameters can be used for OEM applications:
Parameter
Meaning
Default value
WindowStyle_On
Defines properties to be as-
0
signed to the window
WindowStyte_Off
Defines properties that the win-
0
dow must not have
x
Horizontal starting coordinate of
0
the OEMFrame application (unit:
pixels)
y
Vertical starting coordinate of the
0
OEMFrame application (unit: pix-
els)
SINUMERIK Operate
Commissioning Manual, 12/2019, 6FC5397-1DP40-6BA3
523

SINUMERIK Operate on PCU/IPC
20.2 Parameterizing the OEMFrame application
Parameter
Meaning
Default value
Width
Width of the OEMFrame applica-
Desktop width
tion (unit: pixels)
Height
Height of the OEMFrame appli-
Desktop height
cation (unit: pixels)
nDelayInitComplete
Delays the feedback to the Sys-
0
tem Manager
fSearchOnlyForTaskWindow
States whether the window
1
specified in the "systemconfigu-
ration.ini" file belongs to the task
specified there
fRestoreTaskWindow
Defines the behavior when exit-
0
ing an application that was star-
ted from the OEMFrame applica-
tion
fKeepPlacement
Deactivates the size adaptation
0
fForceTaskFocus
Define which window of the
0
fSearchForPopUps
OEMFrame application will be
1
displayed when starting.
nInitShowMode
State in which the window of the
SW_SHOWMINNOACTIVE
OEMFrame application is dis-
played when the application is
started.
nShowMode
State in which the window of the
SW_SHOWNORMAL
OEMFrame application is dis-
played when it is shown.
nUnShowMode
State into which the window of
SW_SHOWMINNOACTIVE
the OEMFrame application is put
when it is hidden.
fWinForms
Must be set if the application is a
0
"Windows Forms Application"
nSwitchToTaskAfterTermination
Controls the behavior when the
-1
OEMFrame application is exited
fFindWindowWithWildcards
Used for wildcards (?, *) for the
0
attribute Windowname
WindowStyle_On/WindowStyle_Off
The appearance of a Windows application is defined with the aid of the Windows API
function SetWindowLong. When the SetWindowLong function is called, the appearance of
the application is controlled using an 8-byte word. 2 bytes of this word can be changed using
the WindowStyle_On and WindowStyle_Off parameters.
The WindowStyle_On parameter defines properties to be assigned to the window. The
WindowStyle_Off defines properties that the window must not have.
SINUMERIK Operate
524
Commissioning Manual, 12/2019, 6FC5397-1DP40-6BA3

SINUMERIK Operate on PCU/IPC
20.2 Parameterizing the OEMFrame application
The following control options are possible with WindowsStyle parameters (binary characteristic
values):
0000
0000
xxxx
xxxx
0000
0000
0000
0000
1010
Header
1000
Border
0100
Type of window frame on a dialog box
0010
Vertical scroll bar
0001
Horizontal scroll bar
1000
System menu
0100
Frame (Thickframe)
0010
Minimize box
0001
Maximize box
Assign binary characteristic values to the WindowStyle parameters as decimal numbers. It is
possible to do the conversion using the calculator in Windows, for example.
Example conversion
The properties of the system menu as well as the horizontal and vertical scroll bar should be
defined. According to the table, these are:
0000 0000 0011 1000 0000 0000 0000 0000 binary or
0038 0000 hexadecimal
1. Select Hex on the calculator.
2. Enter the digit string 00380000 (leading zeroes can be omitted).
3. Select Dec.
Result: 3670016
4. Assign the result to the parameter as a characteristic value.
Application examples
For the Windows application Notepad, the system menu as well as the horizontal and vertical
scroll bar should be activated:
[notepad]
WindowStyle_On = 3670016
No minimize box and no maximize box should be displayed for the Windows application
Notepad:
[notepad]
WindowStyle_Off = 196608
x/y
The parameters x and y define the starting coordinates of the window of the Windows
application to be linked, measured from an origin in the upper left corner of the screen. x is the
horizontal coordinate, y is the vertical coordinate pointing downward. The unit of measurement
is pixels.
SINUMERIK Operate
Commissioning Manual, 12/2019, 6FC5397-1DP40-6BA3
525
SINUMERIK Operate on PCU/IPC
20.2 Parameterizing the OEMFrame application
The available working area depends on the screen layout being used.
Width
This parameter defines the width of the window for the Windows application, measured in pixels
from the window origin according to parameter x.
Height
This parameter defines the height of the window for the Windows application, measured in
pixels from the window origin according to parameter y.
nDelayInitComplete
As soon as the window of a Windows application has been initiated, the information is sent to
the System Manager. The Windows application can then be selected using the System
Manager. This information can be delayed using the nDelayInitComplete parameter. The
unit is specified in milliseconds.
A delay is necessary, for example, if the Windows application must carry out other actions while
generating its window. If the window is activated too soon by the system manager, display
errors will occur in the Window.
Example
After creating its window, the Windows application "app.exe" reads additional status data from
a database. The window of the Windows application may only be displayed after all status data
has been read. This read operation should take approximately one second. The following
parameter assignment is possible:
[app]
nDelayInitComplete = 2000
fSearchOnlyForTaskWindow
This parameter specifies whether the window specified in the file "systemconfiguration.ini"
using ClassName/WindowName belongs to the task that is also specified there.
The following values can be used:
fSearchOnlyForTaskWindow
= 0
The window does not belong to the specified task.
= 1
The window belongs to the specified task.
When searching, not only are the windows of the task configured in "systemconfiguration.ini"
taken into account, but all of the windows that exist in the system at the time of the search.
Example
The Windows application comprises more than one process, e.g. a "startup.exe" and a
"user.exe". In the "systemconfiguration.ini" file, only "startup.exe" is entered, from which
"user.exe" is started. The application window belongs to "user.exe" and is therefore not found
when searching is restricted to the windows of "startup.exe".
SINUMERIK Operate
526
Commissioning Manual, 12/2019, 6FC5397-1DP40-6BA3
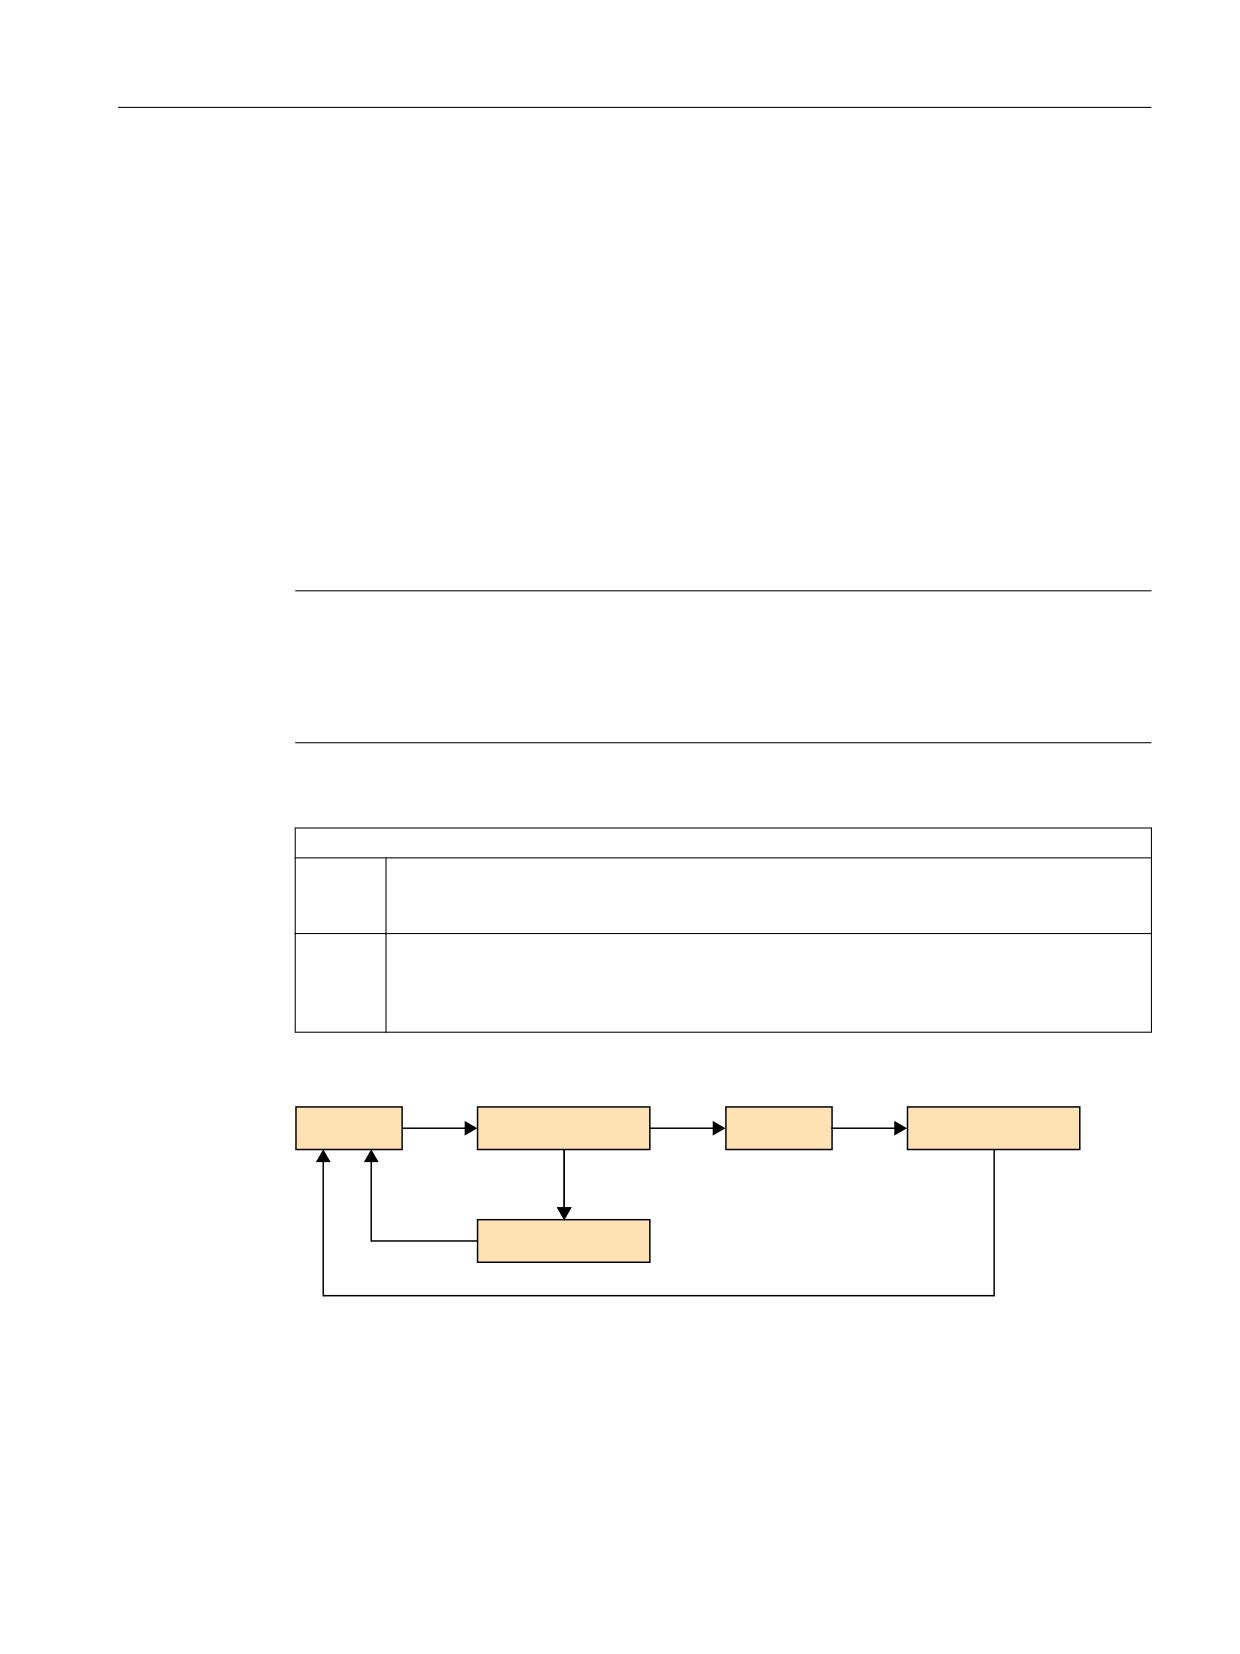
SINUMERIK Operate on PCU/IPC
20.2 Parameterizing the OEMFrame application
The following parameter assignment is possible:
[startup]
fSearchOnlyForTaskWindow = 0
fRestoreTaskWindow
This parameter defines the behavior when exiting a Windows application that was started from
the OEMFrame application as second task level.
When the OEMFrame application is deselected, the last window that was active
(ForegroundWindow) is saved by default. When reselecting the OEMFrame application, this
window is reactivated.
If another application was started from the OEMFrame application, then the active window
refers to the new Windows application.
Note
Incorrect displays
In many cases, the proxy application "oemframe.exe" cannot detect when the new Windows
application ends. Display errors can occur in the second task level. Activate a basic window for
the OEMFrame application.
The behavior can be influenced via the following values:
fRestoreTaskWindow
= 0
When selecting the OEMFrame application or starting a Windows application from the
OEMFrame application, the ForegroundWindow is activated. When ending the second
task level, the OEMFrame application is displayed.
= 1
When selecting the OEMFrame application or starting a Windows application from the
OEMFrame application, a basic window is activated before the ForegroundWindow is
activated. When ending the second task level, the basic window of the OEMFrame applica-
tion is always displayed.
Schematic
2(0)UDPH
2(0 DSSOLFDWLRQ
$SSOLFDWLRQ
)RUHJURXQG:LQGRZ
%DVLF ZLQGRZ
fForceTaskFocus/fSearchForPopUps
These two parameters define which window the OEMFrame application will activate after it has
been deselected and reselected again.
SINUMERIK Operate
Commissioning Manual, 12/2019, 6FC5397-1DP40-6BA3
527
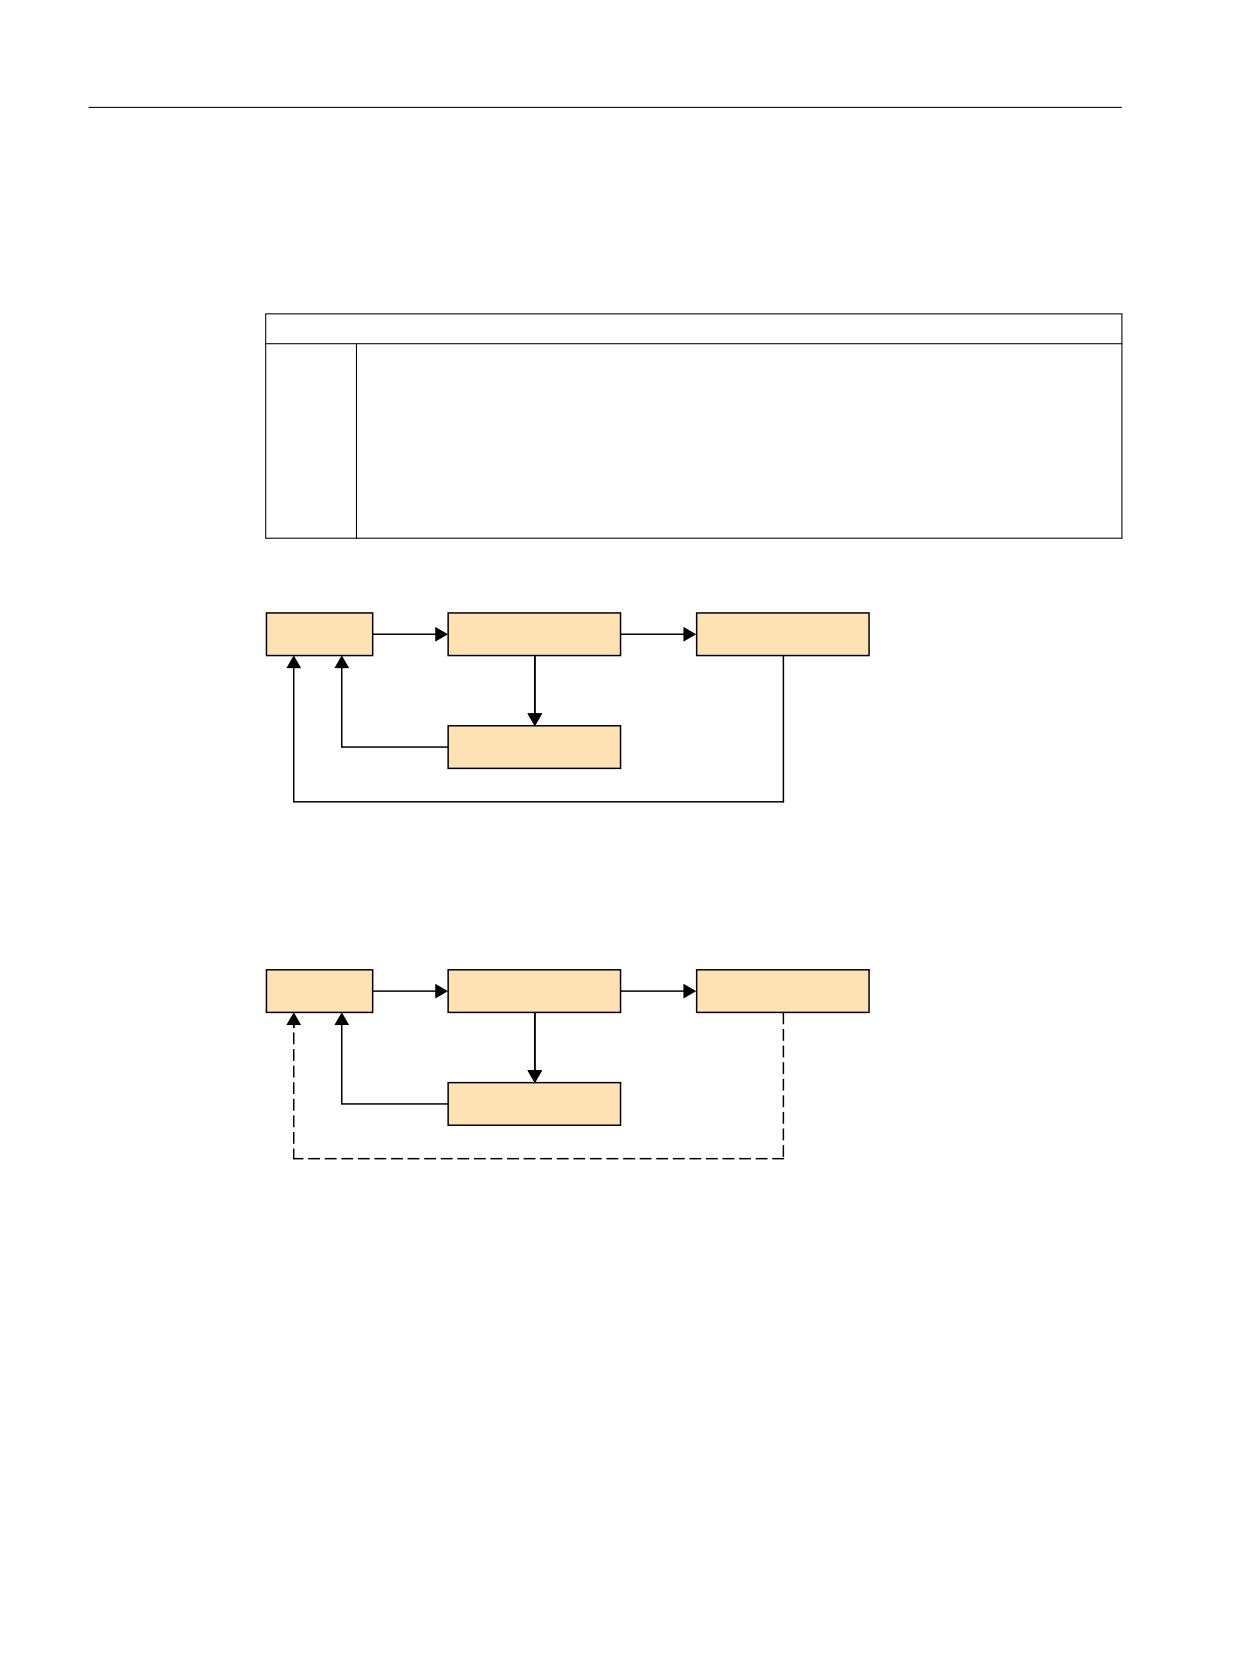
SINUMERIK Operate on PCU/IPC
20.2 Parameterizing the OEMFrame application
On switching from one operating area to another, the last active window ForegroundWindow
of the OEMFrame application is saved. When reselecting the application, the
ForegroundWindow window is then reactivated.
The behavior can be changed via the following values:
fForceTaskFocus and fSearchForPopUps
= 1
When the OEMFrame application is deselected, an active popup window is searched for
rather than the ForegroundWindow window.
Behavior of the search:
● If a popup window was found, it is displayed when the OEMFrame application is
reselected.
● If no popup window exists or was found, the basic window of the application is displayed
when the application is reselected.
Schema fForceTaskFocus/fSearchForPopUps with value 1
2(0)UDPH
2(0 DSSOLFDWLRQ
3RS8S:LQGRZ
%DVLF ZLQGRZ
With the following value change, only the basic window of the OEMFrame application is taken
into consideration when an application is selected or deselected. The basic window is specified
in ClassName/WindowName in the "systemconfiguration.ini" file:
Schema fForceTaskFocus with value 1 and fSearchForPopUps with value 0
2(0)UDPH
2(0 DSSOLFDWLRQ
)RUHJURXQG:LQGRZ
%DVLF ZLQGRZ
LUUHOHYDQW
fKeepPlacement
This parameter deactivates the resizing (zooming) for the basic window of the OEMFrame
application. By default, the application is zoomed to the screen size before it is displayed. In the
case of applications that do not allow their windows to be zoomed, the resizing can result in
display problems. In such cases, the zoom function must be deactivated.
Example
An application "fixres.exe" should be displayed in its programmed window size. The following
parameter assignment is required:
SINUMERIK Operate
528
Commissioning Manual, 12/2019, 6FC5397-1DP40-6BA3

SINUMERIK Operate on PCU/IPC
20.2 Parameterizing the OEMFrame application
[fixres]
fKeepPlacement = 1
fSearchForPopUps
= 0
No active pop-up window is searched for.
nInitShowMode/nShowMode/nUnShowMode
The three parameters define how the application window will be displayed when the application
is started, hidden, and shown.
The parameter nInitShowMode starts the application. The nShowMode parameter refers to
showing the application (area is activated). The parameter nUnShowMode hides the
application.
The following value range exists for the parameters nShowMode and nUnShowMode:
nShowMode and nUnShowMode
= 0
The application window is hidden (SW_HIDE).
= 1
The application window is displayed in its original form (position, size) and has the input
focus (SW_SHOWNORMAL, SW_NORMAL).
= 2
The application window is minimized and has the input focus
(SW_SHOWMINIMIZED).
= 3
The application window is maximized (SW_SHOWMAXIMIZED).
= 4
The application window is displayed without having the input focus
(SW_SHOWNOACTIVATE).
= 5
The application window is displayed and has the input focus (SW_SHOW).
= 6
The application window is minimized and loses the input focus (SW_MINIMIZE).
= 7
The application window is minimized without having the input focus
(SW_SHOWMINNOACTIVE).
= 8
The application window is displayed without having the input focus
(SW_SHOWNA).
= 9
The application window is displayed in its original form (position, size) (SW_RESTORE).
= 10
The application window is displayed in the same way as when the application was started
(SW_SHOWDEFAULT).
SINUMERIK Operate
Commissioning Manual, 12/2019, 6FC5397-1DP40-6BA3
529

SINUMERIK Operate on PCU/IPC
20.2 Parameterizing the OEMFrame application
Note
Display problems
The default settings function for most of the applications.
In exceptional cases, display problems can occur in applications with Borland-Delphi
development, i.e. shifted windows, etc.
Use the following parameters in this case:
nUnShowMode = 0
fKeepPlacement = 1
or
nInitShowMode = 1
fWinForms
Windows Forms parameters provide control elements to applications which also use Windows
default applications, e.g. dialog boxes, menus and buttons.
If the OEMFrame application is a Windows Forms application, then the following
parameterization is required:
[<app-name>]
fWinForms = 1
Note
Deactivated size adjustment
If the parameter fWinForms is not set, the OEMFrame application does not open to the
maximum size. The specified size adjustments (x, y, Width and Height) are deactivated.
nSwitchToTaskAfterTermination
This parameter controls the behavior when the OEMFrame application is exited. Normally in
this situation, the system manager displays the operating area switchover, which can be used
to switch over to another area.
The parameter nSwitchToTaskAfterTermination can be used to initiate an automatic
switch to the previously active area:
nSwitchToTaskAfterTermination
= -1
Display of the operating area switchover (default)
= -2
Switchover to the previously active area
Example
When the "closeapp.exe" Windows application is exited, a switch should be made to the
previous area. The following parameter assignment is required:
SINUMERIK Operate
530
Commissioning Manual, 12/2019, 6FC5397-1DP40-6BA3

SINUMERIK Operate on PCU/IPC
20.3 Creating OEM subdirectories
[closeapp]
nSwitchToTaskAfterTermination = -2
fFindWindowWithWildcards
With this parameter, a wildcard search can be activated for the attribute Windowname. In this
way it is possible to identify applications that do not have the same attribute window name at
every start, e.g. access level, time-of-day under window name, etc.:
fFindWindowWithWildcards
= 0
Wildcard search is switched off
= 1
Wildcard search is switched on
Wildcard:
?
One arbitrary character
*
Any number of characters
Example
An application is to be integrated that contains the start time in the attribute window name:
oemframe.ini
[MyQtTest]
fFindWindowWithWildcards = 1
systemconfiguration.ini
[processes]
PROC500=process:=ProcessOEM, cmdline:="C:\\Program Files(x86)\\Siemens\\
MotionControl\\oem\\sinumerik\\hmi\\appl\\MyQtTest.exe",oemframe:=true,
windowname:="MyQtTest - ??:??:??", classname:="QWidget",deferred:=true
[areas]
AREA500=name:=Test, process:=ProcessOEM
20.3
Creating OEM subdirectories
If you would like to integrate several OEM applications (user interface dialogs or OEM frame
applications), you can distribute them to their own OEM subdirectories. The advantage is the
clear assignment of the files to a particular OEM application. This is especially true for the
"systemconfiguration.ini" file as there is a risk of it being accidentally overwritten when copying,
which may hide other OEM applications.
Create OEM subdirectories with any directory name under /oem/sinumerik/hmi. These
subdirectories are communicated in the file "systemconfiguration.ini" in directory /oem/
sinumerik/hmi/cfg. Create the following syntax in section [oem_dirs]:
OEM_<Number>=<OEM subdirectory name>
SINUMERIK Operate
Commissioning Manual, 12/2019, 6FC5397-1DP40-6BA3
531
SINUMERIK Operate on PCU/IPC
20.4 FindWindow program application
Example
[oem_dirs]
OEM_1=oem_example
OEM_2=oem_new
Under the two subdirectories /oem/sinumerik/hmi/oem_example and /oem/sinumerik/hmi/
oem_new, create directories "appl", "cfg", "Ing", "hlp", etc. again as required.
20.4
FindWindow program application
You can use the FindWindow program to determine all the parameters in the
"systemconfiguration.ini" file that are relevant for integrating an OEMFrame application into
SINUMERIK Operate.
Requirement
For changes to become effective in SINUMERIK Operate through the FindWindow program,
you need access level 2 (Service).
Installation
FindWindow can be used on any PCU without being installed.
FindWindow (findwindow.exe) is located in the following directory:
C:\Program Files (x86)\Siemens\MotionControl\Common\FindWindow\
Application
1. Start the PCU.
2. Install the application to be integrated using OEMFrame.
3. Open the application.
4. Open the FindWindow program.
5. Left-click to drag the red cross to the title bar of the application in the FindWindow program.
6. Check the application parameters "FileName", "ClassName", etc.
7. Select the parameters "Gimmekey", "Disablekeys", etc. via the checkboxes as needed.
If the configuration file "systemconfiguration.ini" exists and you want to expand it:
8. Copy the entries to the clipboard by clicking on "Copy to Clipboard".
9. Open the existing configuration file and insert the parameters from the clipboard. To do
this, right-click on the position at which the parameters are to be inserted and then click on
"Insert".
10 Save the modified configuration file.
- OR -
If the configuration file "systemconfiguration.ini" does not exist and you want to create it:
SINUMERIK Operate
532
Commissioning Manual, 12/2019, 6FC5397-1DP40-6BA3
SINUMERIK Operate on PCU/IPC
20.6 Setting text legibility by means of font smoothing
8. Click on the "Create systemconfiguration.ini" button.
A new configuration file is simultaneously created in the directory for FindWindow. Any
existing configuration file will be overwritten.
9. Insert a copy of the new configuration file into the provided directory.
Note
If you include a 64-bit application, no parameter data is displayed under "FileName". In this
case, an information dialog opens, which allows you to manually select the application.
Note
Only use the 8.3 Notation for file names if problems occur without this parameterization.
20.5
Activating/deactivating window mode
By default, SINUMERIK Operate is displayed without window mode on PCU/IPC.
Activate the window mode for the operating software in the file "slguiconfig.ini".
Procedure
1. Copy the "slguiconfig.ini" file from the folder
/siemens/sinumerik/hmi/template/cfg.
2. Insert the copy into the folder
/oem/sinumerik/hmi/cfg or /user/sinumerik/hmi/cfg.
3. Open the file in the editor.
4. To activate or deactivate the window mode, make the following settings:
- Activate window mode:
In the section [WindowMode], ActivateWindowMode = true
- Deactivate window mode:
In the section [WindowMode], ActivateWindowMode = false
5. Restart SINUMERIK Operate.
When the system has finished booting, the operating software is displayed in the window
mode.
20.6
Setting text legibility by means of font smoothing
To ensure that particularly small TrueType fonts can be read more easily, the text display is
already optimized under Windows by default. The settings perform fine font smoothing of the
font and provide an improved display on the screen (Windows ClearType technology).
If you want to change the text legibility for SINUMERIK Operate, you can adjust the following
parameters via the "slstartup.ini" file.
SINUMERIK Operate
Commissioning Manual, 12/2019, 6FC5397-1DP40-6BA3
533
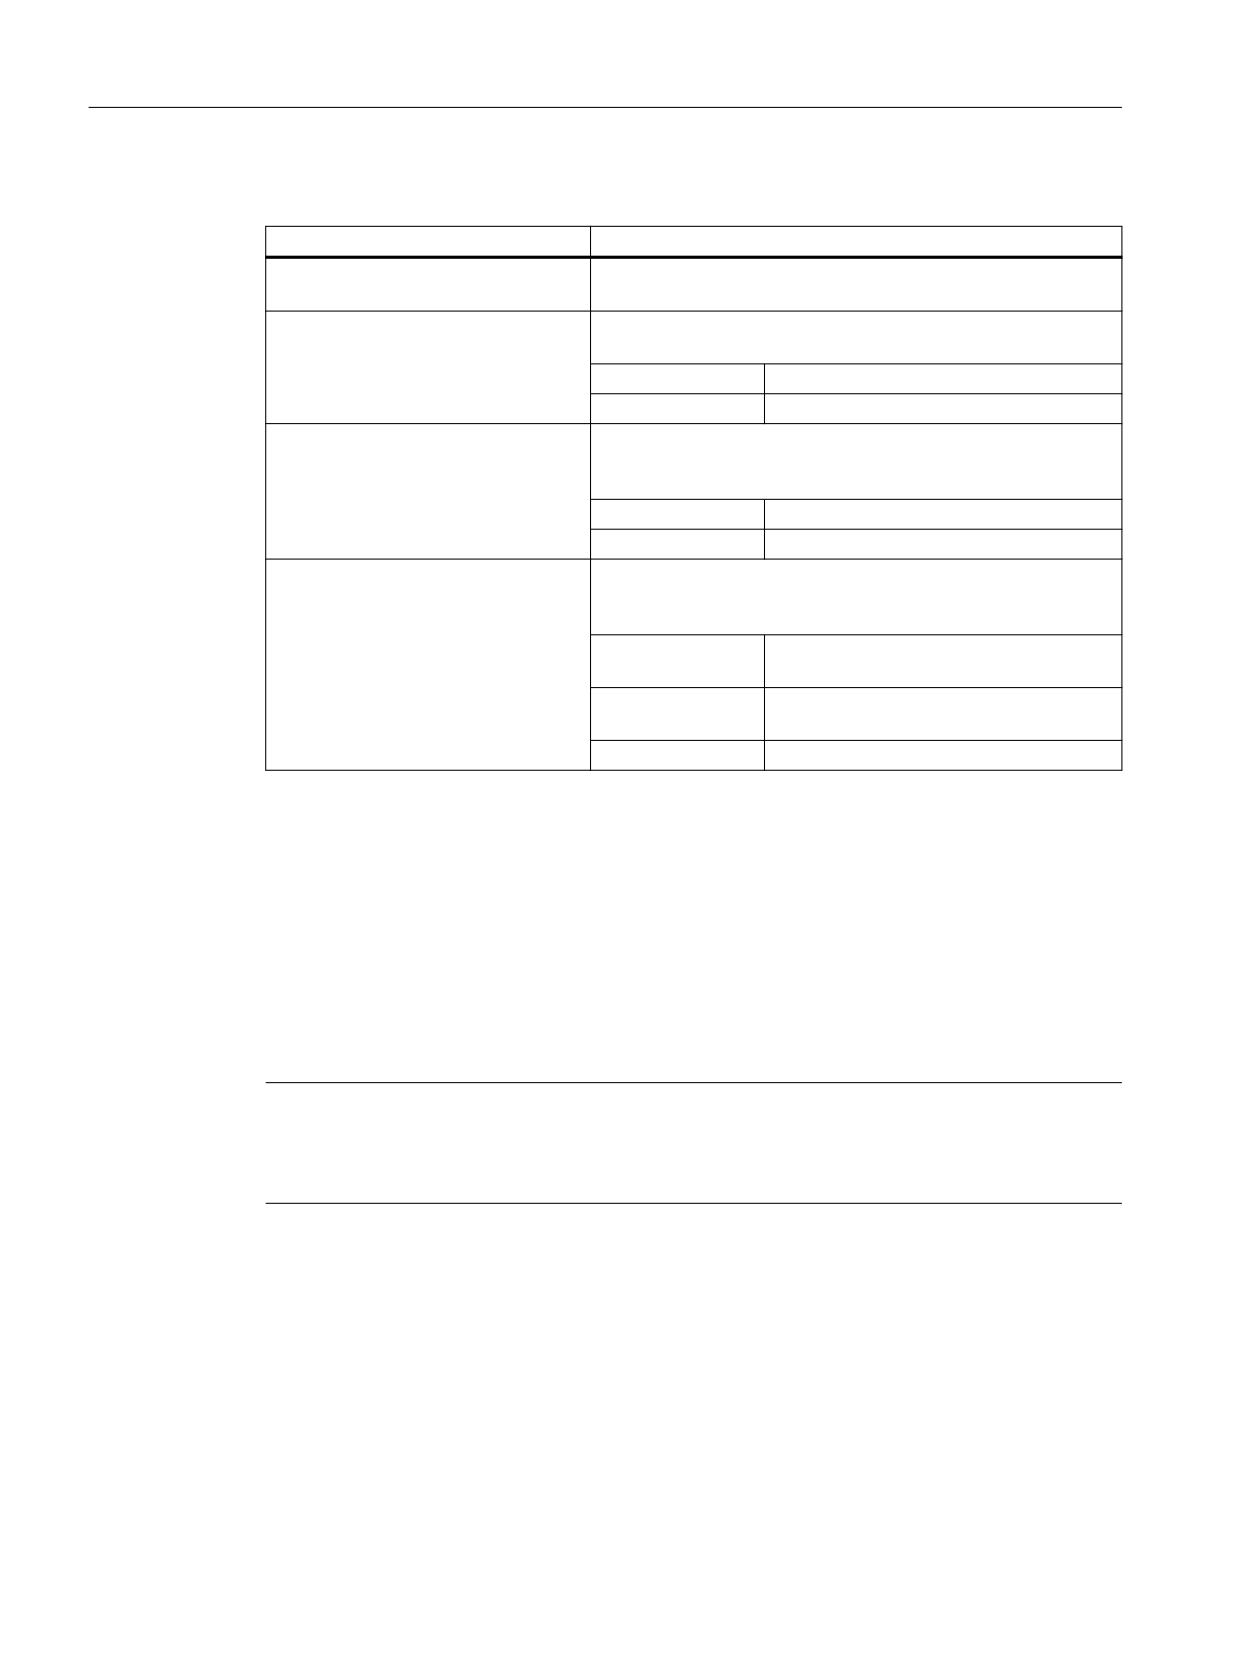
SINUMERIK Operate on PCU/IPC
20.6 Setting text legibility by means of font smoothing
Adapting the "startup.ini" file
Parameter
Description
[FontSmoothing]
Describes the section in which all of the parameters for setting
the text legibility are located
UseSystemSettings
Defines which system settings will be used for font smoothing
and optimizing the display
= true
Windows settings
= false
SINUMERIK Operate settings (default)
UseFontSmoothing
Activates font smoothing of the font type used in SINUMER-
IK Operate (only possible with
parameters UseSystemSettings switched off)
= true
Switch on font smoothing
= false
Switch off font smoothing (default)
UseFontSmoothingType
Activates the Windows display optimization ClearType (only
possible with switched off parameter UseSystemSettings
and switched on parameter UseFontSmoothing)
= 1
Only use font smoothing
FE_FONTSMOOTHINGSTANDARD
= 2
Use ClearType technology
FE_FONTSMOOTHINGCLEARTYPE
= 0
Switch off function (default)
Archive
The template of the file "slstartup.ini" for SINUMERIK Operate is stored in the following
directory:
<Installation path>/siemens/sinumerik/hmi/cfg/slstartup.ini
Copy the file to one of the following directories:
<Installation path>/user/sinumerik/hmi/cfg
<Installation path>/oem/sinumerik/hmi/cfg
Note
If you want to achieve a better overview of the changes you have made yourself, simply delete
the unchanged parameters from the file copy "slstartup.ini". The missing parameters continue
to be read by the directory /siemens/sinumerik/hmi/cfg from the template.
SINUMERIK Operate
534
Commissioning Manual, 12/2019, 6FC5397-1DP40-6BA3

SINUMERIK Operate on PCU/IPC
20.7 Using interactive or silent installation versions
20.7
Using interactive or silent installation versions
General Information
If you install SINUMERIK Operate using PC/PCU, then the execution is realized using an MSI
setup. The following installation versions are available, which you can use in the interactive or
silent mode using the appropriate Windows command line:
● SINUMERIK Operate complete installation
● SINUMERIK Operate base installation with auxiliary files
● SINUMERIK Operate base installation without auxiliary files
Execution
You control setup execution using command line arguments. The interactive mode /v allows
you to transfer parameter strings to setup.exe. If you wish to run setup without user interaction,
then you can extend the parameter string with the silent mode /qn.
Place the parameter string in inverted commas. If you use several parameters in the string,
separate these using spaces.
If you do not specify any arguments when calling setup.exe, then the complete installation is run
in the interactive mode.
Note
Do not put any spaces between /v and the parameter string.
Note
If you want a progress display in the silent mode, then instead of specifying /qn you can also
specify /qb!.
Interactive installation versions
setup.exe
Complete installation in the interactive mode
setup.exe /v"BASEONLY=1"
Base installation in the interactive mode with help
files
setup.exe /v"BASEONLY=1 HELPFILES=0"
Base installation in the interactive mode without
help files
SINUMERIK Operate
Commissioning Manual, 12/2019, 6FC5397-1DP40-6BA3
535
SINUMERIK Operate on PCU/IPC
20.8 Setting the IP address of the NCU
Silent installation versions
setup.exe /v"/qn"
Complete installation in the silent mode
setup.exe /s /v"/qn"
(/s suppresses all of the setup messages)
setup.exe /v"/qn BASEONLY=1"
Base installation in the silent mode with help files
setup.exe /s /v"/qn BASEONLY=1"
(/s suppresses all of the setup messages)
setup.exe /v"/
Base installation in the silent mode without help
qn BASEONLY=1 HELPFILES=0"
files
setup.exe /s /v"/
(/s suppresses all of the setup messages)
qn BASEONLY=1 HELPFILES=0"
Additional parameter assignments
Installation path
If you install the PC version of SINUMERIK Operate, then you can additionally specify the
installation path:
setup.exe /s /v"/qn INSTALLDIR=C:\Programme\testdir"
For spaces in the path:
setup.exe /s /v"/qn INSTALLDIR=\"C:\Program Files\testdir\""
Exit code
You can identify a successful installation or errors based on the exit code of the setup.exe call:
Exit code == 0
No error
Exit code <> 0
Error
Log file
During the installation you can generate a log file with /L:
setup.exe /s /v"/qb! /L*vx log.txt"
20.8
Setting the IP address of the NCU
From the user interface of the SINUMERIK Operate, you can set the IP address of the NCU with
which it should connect.
Procedure
1.
Select the "Start-up" operating area.
2.
Press the "HMI" softkey and the ">>" softkey.
SINUMERIK Operate
536
Commissioning Manual, 12/2019, 6FC5397-1DP40-6BA3
SINUMERIK Operate on PCU/IPC
20.9 SINUMERIK Operate exiting
Press the vertical softkey "NCU connection".
The "NCU Connection" window opens.
Enter the IP address of the NCU into the input field.
3.
Press the "OK" softkey to confirm the data.
20.9
SINUMERIK Operate exiting
Procedure
1.
Press the <MENU SELECT> key on the operator panel.
OR:
Activate the <M> symbol on the touch panel.
External keyboard: Press the <F10> key.
2.
Press the menu forward key.
External keyboard: Press the <Shift> + <F9> keys.
3.
Press the "EXIT" softkey.
External keyboard: Press <F8>
● on the PCU to terminate SINUMERIK Operate and the Windows
system.
● If you started SINUMERIK Operate operating software on the PCU
in the service mode, then only the operating software is exited.
● On the PC itself, only SINUMERIK Operate is exited.
SINUMERIK Operate
Commissioning Manual, 12/2019, 6FC5397-1DP40-6BA3
537
SINUMERIK Operate on PCU/IPC
20.9 SINUMERIK Operate exiting
SINUMERIK Operate
538
Commissioning Manual, 12/2019, 6FC5397-1DP40-6BA3
Handheld terminals
21
The mobile HT 8 and HT 10 handheld terminals combined the functions of an operator panel
and a machine control panel in one device. They therefore allow a machine to be completely
operated and monitored.
Additional information
Additional information on operating and commissioning the handheld terminal is provided in
the:
● Operating Manual Universal/Turning/Milling/Grinding
● Equipment Manual HT 8 Handheld Terminal
● Equipment Manual HT 10 Handheld Terminal
21.1
Configuring HT 8 traversing keys
The traversing keys of the HT 8 are not labeled as their type of action is not predefined. The
labeling of the traversing keys should adapt dynamically to the type of action of the keys. To
recognize the type of action of the traversing keys, they are shown within the display in the
vertical softkey area.
The menu of the traversing keys consists of two vertical rows each with eight keys so that up
to 16 texts can be configured. The top and bottom traversing key row remain empty and can be
assigned other functions.
The following data can be displayed:
● Machine axis name
● Alias name for machine axis
● Any language-dependent text
● Symbol
The following user-specific files are required. You can use the sample files as template:
File
Meaning
"sljkconfig.ini" configuration file
File in which the traversing keys are configured.
Text file "oem_sljk_xxx.ts"
File for labeling traversing keys in a foreign language, xxx =
language code
SINUMERIK Operate
Commissioning Manual, 12/2019, 6FC5397-1DP40-6BA3
539

Handheld terminals
21.1 Configuring HT 8 traversing keys
"sljkconfig.ini" configuration file
Entries
Meaning
[State_1]
Labeling type - changed via the PLC.
ParamText_x_y
Text of the traversing key that is made up of parameters.
Two-line labeling is possible, whereby max. five characters are possible per line.
x: Specifies the position of the key within the row (2 to 7).
y: Specifies the key row (1 or 2).
%m1
The machine axis name of the first axis is referenced and displayed as
text. The current active axis number is read out from data block DB10.
The name from the machine data is determined via this index.
%n
Defines the position in the text for the line break.
%a1
The alias axis name of the first axis is referenced and displayed as text.
The current active axis number is read out from data block DB10. The
name from the "oem_sljk_eng.ts" text file is determined via this index.
TextId_x_y
Text of the traversing key that is read from the text file (target language text).
Picture_x_y
File name of the icon to be displayed.
The files with the icons must be located in the following directories: /oem/sinumerik/
hmi/ico and
depending on the resolution, in subdirectories:
/ico640
/ico800
/ico1024
/ico1280
Procedure
1. Copy the "sljkconfig.ini" configuration file from the folder
/siemens/sinumerik/hmi/template/cfg
2. Place the copy into the folder /oem/sinumerik/hmi/cfg
or /user/sinumerik/hmi/cfg
3. Open the copy in the Editor and define the traversing key labeling.
Example of a "sljkconfig.ini" configuration file
12 axes are defined in the example, with text for softkey 1 and softkey 2, as well as an image
on softkey 3 and softkey 4.
[Settings]
FileType = INI
; A few examples for further configuration options
; Alias names of machine-axes (%a1, %a2, etc.), from oem_sljk_deu.ts
(example)
[State_1]
TextId_1_1 = OEM_JK_TEXT_1
SINUMERIK Operate
540
Commissioning Manual, 12/2019, 6FC5397-1DP40-6BA3

Handheld terminals
21.1 Configuring HT 8 traversing keys
TextId_1_2 = OEM_JK_TEXT_2
ParamText_2_1 = %a1%n-
ParamText_2_2 = %a1%n+
ParamText_3_1 = %a2%n-
ParamText_3_2 = %a2%n+
ParamText_4_1 = %a3%n-
ParamText_4_2 = %a3%n+
ParamText_5_1 = %a4%n-
ParamText_5_2 = %a4%n+
ParamText_6_1 = %a5%n-
ParamText_6_2 = %a5%n+
ParamText_7_1 = %a6%n-
ParamText_7_2 = %a6%n+
Picture_8_1 = AlarmCancel.png
Picture_8_2 = AlarmNCReset.png
"oem_sljk_eng.ts" text file
Entries
Meaning
name
Freely selectable name of the text context.
In the text file template, the name of the text context is "SIJkLabels" and stands for the
traversing key labeling (solution line jog key labels). This identifier is already stored in
the configuration file.
source
Traversing key identifier of the respective axis. This text ID is referenced in the "sljkcon-
fig.ini" configuration file with the "TextId_2_1".
The text IDs for the alias names (JK_AXISNAME_2 to JK_AXISNAME_7) must not be
changed.
translation
Input of the foreign language text for the axis specified in <source>.
Language code in file names "xxx"
Language
Language code
German
deu
English
eng
French
fra
Spanish
esp
Italian
ita
Chinese
chs
SINUMERIK Operate
Commissioning Manual, 12/2019, 6FC5397-1DP40-6BA3
541
Handheld terminals
21.1 Configuring HT 8 traversing keys
Procedure
1. You can copy the sample file "oem_sljk_deu.ts" from the following folder: /siemens/
sinumerik/hmi/template/lng.
2. Store or create the file in the /oem/sinumerik/hmi/lng or
/user/sinumerik/hmi/lng directory.
3. Assign the file a name, e.g. for German texts: "sljk_deu.ts".
If you wish to set-up the labeling for additional languages, a separate file must be created
for each language. Save the file with the appropriate language code in the file name. To do
this, use the language codes specified above.
4. Open the file and in the <message> and </message> area, define the labeling.
5. Restart the HMI.
In order that the labeling is displayed during the program runtime, the file must be converted
into a binary format. This conversion is only executed when the HMI powers up.
Example of a text file "sljk_deu.ts"
12 axes are defined in the example, with text for softkey 1 (SF1) and softkey 2 (SF2):
<?xml version="1.0" encoding="utf-8"?>
<!DOCTYPE TS>
<TS>
<context>
<name>SlJkLabels</name>
<!-- Alias names for machine axis (%a1, %a2, etc.) -->
<!-- Do not change the text ID (JK_AXISNAME_1, etc.) -->
<message>
<source>JK_AXISNAME_1</source>
<translation>X</translation>
</message>
<message>
<source>JK_AXISNAME_2</source>
<translation>Y</translation>
</message>
<message>
<source>JK_AXISNAME_3</source>
<translation>Z</translation>
</message>
<message>
<source>JK_AXISNAME_4</source>
<translation>A</translation>
</message>
<message>
<source>JK_AXISNAME_5</source>
<translation>B</translation>
SINUMERIK Operate
542
Commissioning Manual, 12/2019, 6FC5397-1DP40-6BA3
Handheld terminals
21.1 Configuring HT 8 traversing keys
</message>
<message>
<source>JK_AXISNAME_6</source>
<translation>C</translation>
</message>
<message>
<source>JK_AXISNAME_7</source>
<translation>U</translation>
</message>
<message>
<source>JK_AXISNAME_8</source>
<translation>V</translation>
</message>
<message>
<source>JK_AXISNAME_9</source>
<translation>W</translation>
</message>
<message>
<source>JK_AXISNAME_10</source>
<translation>UV1</translation>
</message>
<message>
<source>JK_AXISNAME_11</source>
<translation>UV2</translation>
</message>
<message>
<source>JK_AXISNAME_12</source>
<translation>UV3</translation>
</message>
<!-- User defined language dependent text (example) -->
<message>
<source>OEM_JK_TEXT_1</source>
<translation>SF1</translation>
</message>
<message>
<source>OEM_JK_TEXT_2</source>
<translation>SF2</translation>
</message>
</TS>
SINUMERIK Operate
Commissioning Manual, 12/2019, 6FC5397-1DP40-6BA3
543
Handheld terminals
21.3 Activating/deactivating the virtual keyboard
21.2
HT 10 traversing keys
If an HT 10 is connected to the system, you can automatically select the axes in the operating
software using checkboxes, and traverse them using the keys +/- or the handwheel.
Selecting an axis using the checkbox
To activate selection of the axis with the checkbox using Panels with touch function, set the
following channel-specific machine data:
MD52210 $MCS_FUNCTION_MASK_DISP
Function screen display
Bit 16
Selection of JOG axis via HMI
Note
A selection made at the HT 10 has no effect if you select an axis at the machine control, e.g. for
switching over between MCS and WCS.
21.3
Activating/deactivating the virtual keyboard
The virtual keyboard is configured in file "slguiconfig.ini".
Procedure
1. Copy the "slguiconfig.ini" file from the folder
/siemens/sinumerik/hmi/template/cfg.
2. Insert the copy into the folder:
/oem/sinumerik/hmi/cfg or /user/sinumerik/hmi/cfg.
3. Open the file in the editor.
4. To activate or deactivate the keyboard, make the following settings:
- Activating the virtual keyboard:
In the section [TouchPanel], EnableTouch = true
In the section [Keyboard], EnableVirtualKeyBoard = true
- Deactivating the virtual keyboard:
In the section [TouchPanel], EnableTouch = true
In the section [Keyboard], EnableVirtualKeyBoard = false
5. Double click in the input field to display the keyboard.
SINUMERIK Operate
544
Commissioning Manual, 12/2019, 6FC5397-1DP40-6BA3

Handheld terminals
21.4 Configuring user-specific key labeling
21.4
Configuring user-specific key labeling
Labeling of the keys on the handheld terminal
The texts of the CPF menu (CPF: Control Panel Function) for the HT 8 or HT 10 can be labeled
with your own texts in the particular language of the country.
The texts are created in the "slck_xxx.ts" file.
"xxx" = language code for the corresponding language-specific labeling.
You can create and edit this file using SINUMERIK Operate or also externally on a PC.
Note
If you wish to create or edit the file on a PC, use an editor that supports UTF-8 coding.
Language code in file names "xxx"
Language
Language code
German
deu
English
eng
French
fra
Spanish
esp
Italian
ita
Chinese
chs
Creating key labeling
Tag
Meaning
source
Designation for the user softkey. "SK_USERKEY1" to "SK_USERKEY16" are possi-
ble, whereby the names may not be changed.
comment
User-specific description of the key assignment.
translation
Text that should be shown on the key.
● A maximum of 10 characters are possible per line.
●
2-line labeling is possible, whereby the line break is set using "%n".
remark
Remark for key assignment.
chars
Number of characters. A maximum of 10 characters per line are possible.
lines
Number of lines. 2 lines are possible.
Procedure
1. You can copy the sample file "oem_slck_deu.ts" from the following folder: /siemens/
sinumerik/hmi/template/lng.
2. Store or create the file in the /oem/sinumerik/hmi/lng or
/user/sinumerik/hmi/lng directory.
SINUMERIK Operate
Commissioning Manual, 12/2019, 6FC5397-1DP40-6BA3
545
Handheld terminals
21.4 Configuring user-specific key labeling
3. Give the file a name, e.g. for German texts: "slck_deu.ts".
If you wish to create the key labeling for additional languages, then a separate file must be
created for each language. Save the file with the appropriate language code in the file name.
To do this, use the language codes specified above.
4. Open the file and in the <message> and </message> area, define the key labeling.
5. Restart the user interface.
In order that the key labeling is displayed during the program runtime, the file must be
converted into a binary format. This conversion is only performed when the user interface
runs up.
Example of a key label
<!DOCTYPE TS><TS>
<context>
<name>SlCkDialog</name
<message>
<source>SK_USERKEY1</source>
<comment></comment>
<translation>U1</translation>
<remark>User key 1</remark>
<chars>10</chars>
<lines>2</lines>
<languageIndependent>true</languageIndependent>
</message>
<message>
<source>SK_USERKEY2</source>
<comment></comment>
<translation>U2</translation>
<remark>User key 2</remark>
<chars>10</chars>
<lines>2</lines>
<languageIndependent>true</languageIndependent>
</message>
<message>
</message>
</context>
</TS>
SINUMERIK Operate
546
Commissioning Manual, 12/2019, 6FC5397-1DP40-6BA3
Handheld terminals
21.5 Configuring the function display at user-specific keys (U keys)
21.5
Configuring the function display at user-specific keys (U keys)
Function
Active functions can be displayed at the configurable user keys via the PLC. For instance, small
LEDs can be emulated on the softkeys.
You configure the function in the "slckcpf.ini" file.
Interface signals
The PLC bits are in the output image of the PLC-HT 8/HT 10 interface and are analogous to
those in the input image.
Signals to the MCP1 (or MCP2)
Interface PLC → HT 8/HT 10
Byte
Bit 7
Bit 6
Bit 5
Bit 4
Bit 3
Bit 2
Bit 1
Bit 0
AB n + 1
U4
U3
U2
U1
AB n + 4
U9
U10
U11
U12
U13
U14
U15
U16
AB n + 5
U8
U7
U6
U5
Adapt the display in the "slckcpf.ini" file
Section
Description
UserKeyLEDIcon
Name of the icon file.
Standard entry: led_green.png
OFF
Deactivates the icon display.
PRESSED
Displays the active functions by pressing
down the softkey.
UserKeyLEDIconAlignment
Specifies the position of the icon.
Standard position: AlignLeft | AlignTop
Horizontal and vertical alignments can be combined. The two
names are separated by the "|" character.
The following alignments are possible:
AlignLeft
Left
AlignRight
Right
AlignHCenter
Horizontal, center
AlignTop
Top
AlignBottom
Bottom
AlignVCenter
Vertical, center
UserKeyLEDMap
Specifies the start address of the output image.
Entries can be made in the following form: "DBx.DBBy", "ABx",
"MBx".
Default setting: The start address is determined using
DB7 MCP1Out (or MCP2Out).
SINUMERIK Operate
Commissioning Manual, 12/2019, 6FC5397-1DP40-6BA3
547

Handheld terminals
21.5 Configuring the function display at user-specific keys (U keys)
Section
Description
U1LED ... U16LED
The status bit address can be defined - different from the output
VarIncLED
image - using these entries.
Note: The offsets from the HT 8 or HT 10 output image, for one
SBLLED
or more softkeys, are not taken into consideration.
WCSLED
showVarIncLED
true
When the increment mode is active, the icon is also
displayed on the "[VAR]" softkey.
false
The icon is not displayed.
showSBLLED
true
When the SingleBlock mode is active, then the icon is
also displayed on the "Single Block" softkey.
false
The icon is not displayed.
showWCSLED
true
When the SingleBlock mode is active, then the icon is
also displayed on the "Single Block" softkey.
false
The icon is not displayed.
1. You can copy the sample file "slckcpf.ini" from the following folder: /siemens/sinumerik/hmi/
template/cfg
2. Store the file in the /oem/sinumerik/hmi/cfg or /user/sinumerik/hmi/cfg directory.
3. If you use your own icon, then locate it together with the corresponding resolution for HT 8
or HT 10 in the directory: e.g. /oem/sinumerik/hmi/ico/ico640 or /user/sinumerik/hmi/ico/
ico640.
4. Open the file and make the appropriate settings.
Sample file "slckcpf.ini"
Template for the configuration of the
; HT 8/HT 10 control panel function menu
;
; To activate the settings remove the
; commentary ';' at the beginning of the line
;; Display settings of the user key softkey leds
[UserKeyLED]
; Filename of the LED icon
;UserKeyLEDIcon = led_green.png
; Alignment of the LED icon
;UserKeyLEDIconAlignment= AlignLeft | AlignTop
; Use following led map start address instead of calculating
DB7.MCP1Out
;UserKeyLEDMap = AB0
SINUMERIK Operate
548
Commissioning Manual, 12/2019, 6FC5397-1DP40-6BA3
Handheld terminals
21.5 Configuring the function display at user-specific keys (U keys)
; Use the following settings to use this status bits instead of the
led map for a specific sk
;U1LED=/channel/parameter/R[U1,1]
;
;U16LED=/channel/parameter/R[U1,16]
;VarIncLED = DB11.DBX8.5
;SBLLED = DB21.DBX0.4
;WCSLED = DB19.DBX0.7
; Show a LED for the var inc sk
;showVarIncLED = true
; Show a LED for the var single block sk
;showSBLLED = true
; Show a LED for the var wcs/mcs sk
;showWCSLED = true
SINUMERIK Operate
Commissioning Manual, 12/2019, 6FC5397-1DP40-6BA3
549
Handheld terminals
21.5 Configuring the function display at user-specific keys (U keys)
SINUMERIK Operate
550
Commissioning Manual, 12/2019, 6FC5397-1DP40-6BA3
List of abbreviations/acronyms
A
Abbreviation
Description
ASCII
American Standard Code for Information Interchange:
American coding standard for the exchange of information
Mode group
Mode group
OPI
Operator Panel Interface
CNC
Computerized Numerical Control: Computerized numerical control
CEC
Cross Error Compensation: Sag compensation
CP
Communication Processor
DCP
Discovery and basic Configuration Protocol: ProfiNet protocol
DHCP
Dynamic Host Configuration Protocol
DIN
Deutsche Industrie Norm
DNS
Domain Name System
DIR
Directory: Directory
DRAM
Dynamic Random Access Memory
DRF
Differential Resolver Function: Differential resolver function (handwheel)
EES
Execution from External Storage
ERTEC
Enhanced Real Time Ethernet Controller
ESR
Extended stop and retract
ETC
ETC key ">"; Softkey bar extension in the same menu
FRAME
Data block (FRAME)
FIFO
First In - First Out: Method of storing/retrieving data in/from a memory.
GDIR
Global Directory: Global part program memory
GUD
Global User Data: Global user data
GUI
Graphical User Interface
MSD
Main Spindle Drive
HSC
High Speed Cutting: High-speed machining
ILC
Intelligent Load Control: Intelligent load adjustment
INC
Increment: Incremental dimension
INI
Initializing Data: Initializing data
IP
Internet Protocol
IPO
Interpolator
ISO
International Standard Organization
JOG
Jogging: Setup mode
LED
Light Emitting Diode: Light emitting diode
LLDP
Link Layer Discovery Protocol
LUD
Local User Data: Local user data
MAC
Media Access Control
MB
Megabyte
MD
Machine data
SINUMERIK Operate
Commissioning Manual, 12/2019, 6FC5397-1DP40-6BA3
551
List of abbreviations/acronyms
Abbreviation
Description
MDA
Manual Data Automatic: Manual input
MCS
Machine Coordinate System
MLFB
Maschinenlesbare Fabrikatbezeichnung
MPF
Main Program File: NC part program (main program)
MCP
Machine Control Panel: Machine control panel
NC
Numerical Control: Numerical control
NCK
Numerical Control Kernel: NC kernel with block preparation, traversing range, etc.
NCU
Numerical Control Unit: NCK hardware unit
NFS
Network File System
NTP
Network Time Protocol
ZO
Zero offset
OEM
Original Equipment Manufacturer
OID
Object Identifier: Information identifier
OP
Operator Panel
PCU
Programmable Control Unit
PI service
Program Invocation Services
PG
Programming device
PLC
Programmable Logic Control
RCS
Remote Control System
RFC
Request for Comments
REF
REFerence point approach function
REPOS
REPOSition function
ROV
Rapid Override: Input correction
RPA
R-Parameter Active: Memory area in NCK for R- NCK for R parameter numbers
SBL
Single Block: Single block
SD
Setting Data
SDB
System Data Block
SEA
Setting Data Active: Identifier (file type) for setting data
SK
Softkey
SMB
Server Message Block
SNMP
Simple Network Management Protocol
SPF
Sub Program File: Subroutines
SRAM
Static Random Access Memory: Static RAM (non-volatile)
SSH
Secure Shell: Network protocol
SW
Software
SYF
System Files: System files
TCU
Thin Client Unit
TEA
Testing Data Active: Identifier for machine data
TMA
Tool Magazine Active: Magazine data
TO
Tool Offset: Tool offset
TOA
Tool Offset Active: Identifier (file type) for tool offsets
UDP
User Datagram Protocol: Network protocol
UFR
User frame
SINUMERIK Operate
552
Commissioning Manual, 12/2019, 6FC5397-1DP40-6BA3

List of abbreviations/acronyms
Abbreviation
Description
VNC
Virtual Network Computing
FD
Feed Drive
WCS
Workpiece Coordinate System
TM
Tool management
SINUMERIK Operate
Commissioning Manual, 12/2019, 6FC5397-1DP40-6BA3
553